How to Electrocute yourself using
the Internet
Alex Roche
@alexHacked
Tom Scott being Electrocuted as part of a PayPal charity hack. (http://www.youtube.com/embed/j_74elSiI7E)
Matt, of SI Digital, being shocked.
What I'm going to be talking about
Internet of Things
Arduino
Johnny Five
BreakoutJS
- Kevin AshtonToday computers—and, therefore, the Internet—are almost wholly dependent on human beings for information ... The problem is, people have limited time, attention and accuracy—all of which means they are not very good at capturing data about things in the real world ... We're physical, and so is our environment ... Ideas and information are important, but things matter much more.
Yet today's information technology is so dependent on data originated by people that our computers know more about ideas than things. If we had computers that knew everything there was to know about things—using data they gathered without any help from us—we would be able to track and count everything.
Xively
Cloud Based Service
Users send JSON, XML or CSV to a RESTful API
Amalgamates data from around the world and stores it
Data is also accessible through AJAX requests
What can you use the internet of things for?
Monitoring an Environment
Moderating the temperature in your house
Making sure you're not being broken in to
Reacting to data from an Environment
Printing out the news every morning
Flashing a light when someone enters a room ...
... on the other side of the world
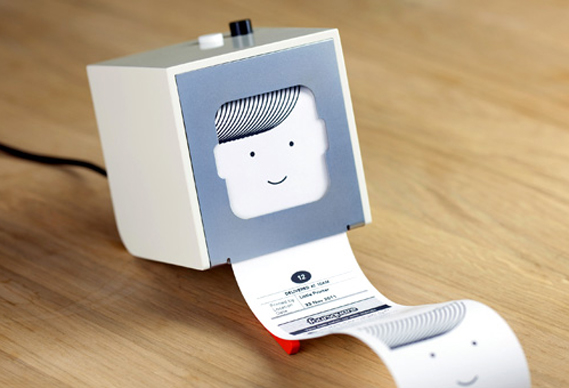
Berg's Little Printer
Philips Hue Lights

Make The Cosm
Pulls from Xively based on a user defined search term
Data is updated in real time
User can use the data provided to trigger sounds
Strava

Gathers data about your surrounding area
Transfers this data to a server which aggregates
Server reacts to the data you post
Arduino
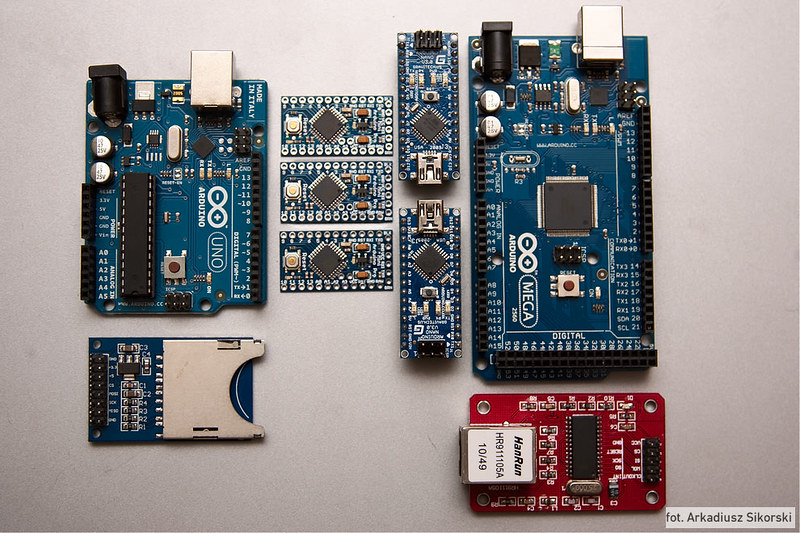
What is an Arduino?
Open Source
Microcontroller board with addressable GPIO pins
Various form factors depending on need
Communicates with electronics using GPIO pins
Guh-Pee-Oh What?
General Purpose Input and Output
Can be used to receive and transmit current to electronic components
Can also be used to pass messages to serial input
Are how the Microcontroller talks to the outside world
Pins on the Arduino
Normal pins which can be set high or low
Analogue and PWM Pins
Analogue pins which can read values between 0 and 1023
PWM Pins can be set to values between 0 and 255
warning
Windows Users
You will have to bypass windows security to install drivers for the Arduino.
Drivers are unsigned by Arduino
As such, you will need to disable Driver Signature Checking
S.H.I.E.L.D.S.
Not a comic law enforcement agency (in this case)
Add on to an Arduino which extends functionality
Can be stacked, but some care does need to be taken
S.H.I.E.L.D. Requirements
Plugs to the non-GPIO pins need to reach all shields.
Each shield will have outputs which need to be left unconnected to.
Outputs to the Arduino need to be unique.
Programming an Arduino
Breaks down in to two main types
Code that is compiled to C / C++ and uploaded to the microcontroller
Code that communicates with the board and issues commands
Breakout JS; What?
Javascript based framework
Can be ran in a web page
Needs Arduino to be connected to a computer
Needs a server to run on your computer
Resulting web page can be connected to from any device on the local network
Breakout JS; How?
Install the Firmata firmware
Open the file located in the Breakout zip in the firmware folder
Upload it to the board using any compatible IDE
Breakout JS; Installing the Server
Depends on which server you want to install; Java or Node
Using the Java Server
Unzip the folder relevant to your Operating System
MacOS, Linux, Windows x32 & x64
Run the resulting Executable
Using the Node Server
Install NodeJS
Navigate to the node_server folder in command line
Run “npm install” to install all dependencies
“node server.js” starts the server
What the API looks like
Classes for most things you would connect to an Arduino
Mixed in amongst normal Javascript and HTML
BO and JSUTILS namespacing
BO.I2CBase, BO.IOBoard, BO.IOBoardEvent, BO.PhysicalInputBase, BO.Pin, BO.PinEvent, BO.WSocketEvent, BO.WSocketWrapper, BO.custom.ID12RFIDReader, BO.custom.RFIDEvent, BO.filters.Convolution, BO.filters.FilterBase, BO.filters.Scaler, BO.filters.TriggerPoint, BO.generators.GeneratorBase, BO.generators.GeneratorEvent, BO.generators.Oscillator, BO.io.AccelerometerADXL345, BO.io.AccelerometerEvent, BO.io.AnalogAccelerometer, BO.io.BiColorLED, BO.io.BlinkM, BO.io.Button, BO.io.ButtonEvent, BO.io.CompassEvent, BO.io.CompassHMC6352, BO.io.DCMotor, BO.io.GyroEvent, BO.io.GyroITG3200, BO.io.LED, BO.io.MagnetometerEvent, BO.io.MagnetometerHMC5883, BO.io.PotEvent, BO.io.Potentiometer, BO.io.RGBLED, BO.io.Servo, BO.io.SoftPot, BO.io.SoftPotEvent, BO.io.Stepper, JSUTILS.Event, JSUTILS.EventDispatcher, JSUTILS.SignalScope, JSUTILS.Timer, JSUTILS.TimerEvent
Hello World Example
 var IOBoard = BO.IOBoard;
var IOBoardEvent = BO.IOBoardEvent;
var LED = BO.io.LED;
var Button = BO.io.Button;
var ButtonEvent = BO.io.ButtonEvent;
var host = window.location.hostname;
// if the file is opened locally, set the host to "localhost"
if (window.location.protocol.indexOf("file:") === 0) {
  host = "localhost";
}
var arduino = new IOBoard(host, 8887);
  arduino.addEventListener(IOBoardEvent.READY, onReady);

    function onReady(event) {
        // Remove the event listener because it is no longer needed
        arduino.removeEventListener(IOBoardEvent.READY, onReady);
        var led = new LED(arduino, arduino.getDigitalPin(11));
        button = new Button(arduino, arduino.getDigitalPin(2));
        button.addEventListener(ButtonEvent.PRESS, onPress);
        button.addEventListener(ButtonEvent.RELEASE, onRelease);
        $('#btnLeft').on('click', turnLedOff);
        $('#btnRight').on('click', turnLedOn);
    }
Hello World Example
function turnLedOn(evt) {
    // Turn the LED on
    led.on();
}

function turnLedOff(evt) {
    // Turn the LED off
    led.off();
}

function onPress(evt) {
  // get a reference to the button object that fired the event
  var btn = evt.target;
  $('#state').html("Button " + btn.pinNumber + " state: Pressed");
}

function onRelease(evt) {
  // get a reference to the button object that fired the event
  var btn = evt.target;
  $('#state').html("Button " + btn.pinNumber + " state: Released");
}
Connecting to the Internet with BreakoutJS
BreakoutJS runs in a web page
Treat it like any other Javascript Library
XMLHttpRequest() is something you can use
Or jQuery.ajax() if you prefer!
No extra shields needed to extend functionality
What would you use BreakoutJS for?
Large scale hacks which need monitoring
Systems which you can adjust over an internal network
Setting the colour of lights using a colour picker
Monitoring the heating and adjusting a thermostat
Deciding which person to administer an electrical shock to
Johnny Five

Johnny Five; What?
NodeJS based framework
Needs the Arduino connected to the computer running Johnny Five
Johnny Five; How?
Upload the "StandardFirmata" Arduino example to your Arduino
Install NodeJS
Pick a directory
npm install johnny-five What does the API look like?
Creating instances of hardware objects and passing initiation properties
var servo = new five.Servo(10);
servo.min(), servo.max(), servo.center(), move(deg), sweep(deg)
Hello World Example
var five = require("johnny-five"), button, led, litBool;
var board = new five.Board();
board.on("ready", function() {
//Once the board is ready and the callback fires, your code goes here!
  litBool = false;
  led = five.Led(13);
  button = new five.Button(8);

 button.on("down", function() {
    if(litBool == false){
    led.off();
	}else{
	led.on();
	}
	litBool = !litBool;
  });

 button.on("hold", function() {
    led.strobe();
  });
});
Connecting to the Internet with Johnny Five
Johnny Five is just a Node package
Treat it like any other Node Library
Connecting to API's is the same as you normally would with NodeJS
No extra shields needed either!
What would you use Johnny Five for?
Autonomously monitoring and adjusting
Inteligently regulating an aquarium
Building a little robot to intelligently avoid walls
Letting twitter decide who to administer a shock to
The Internet of Things is already here!
No concrete definition; make it your own
We can take part with (relative) ease
BreakoutJS : Watch and control your environment
Johnny Five : Control your environment with AI