Kickstart your hybrid app design with Onsen UI
Andreas Argelius
Feb 3, 2016
...or how you create an hybrid app for your IoT project
Andreas Argelius

Engineer originally from Sweden, recently moved to Japan to work with JavaScript development.
Interested in languages, both natural languages and those that a computer can understand.
An avid running currently recovering from a sprained ankle.
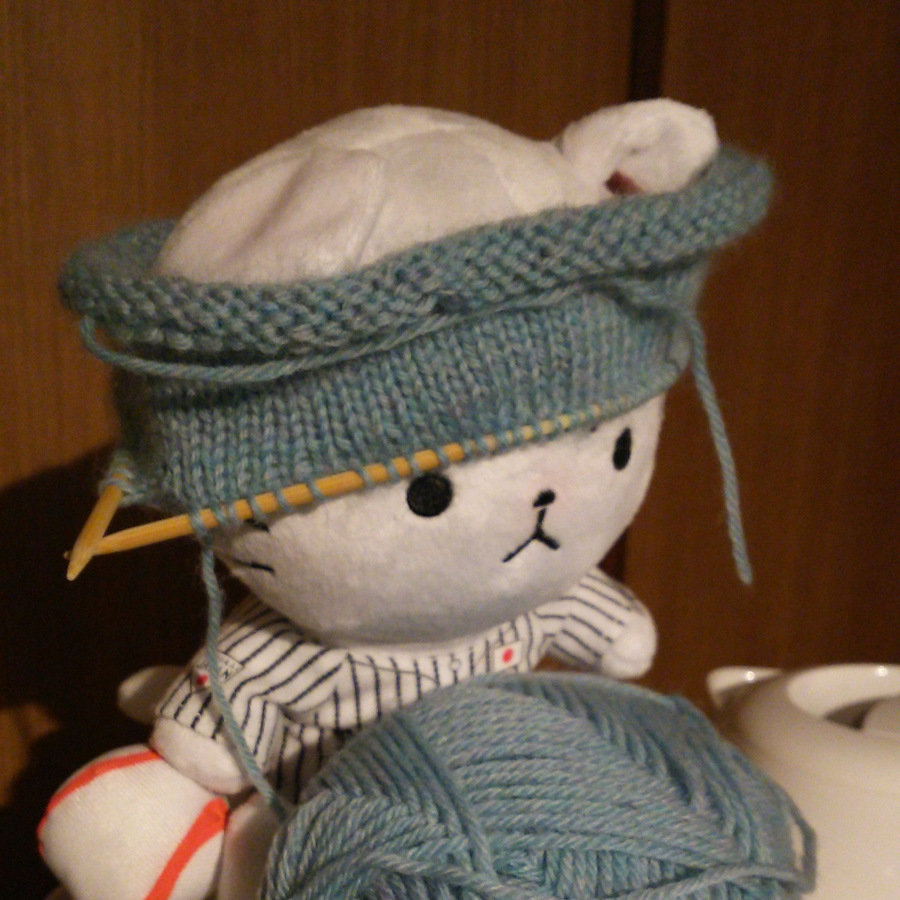
Recently started knitting. A great way to relax while creating something useful.
I help make a service called Monaca.
Monaca is ...
- ... a building and packaging service for hybrid mobile apps.
- ... a Cloud IDE optimized for hybrid app development.
- ... a backend for hybrid apps.
- ... a hybrid app debugger with live-reloading.
I also work on
A hybrid app UI component library
Please ☆✨ us!
Onsen UI
Why is it called Onsen UI?
- Onsen (温泉) is Japanese for "hot spring".
- Very popular vacation spot. Both among people and monkeys.
- Can also be translated to "spa".
- SPA is used as an abbreviation of "Single Page Application".
Currently working on Onsen UI 2.0
- Material Design
- Custom Elements
- Written in ES2015
Some of the features are:
Making apps with Onsen UI is easy
All the components are custom elements:
<!-- A simple switch -->
<ons-switch></ons-switch>

<!-- A material Design switch -->
<ons-switch modifier="material"></ons-switch>
<!-- Material input with floating label -->
<ons-input
modifier="material"
float
label="Username">
</ons-input>Onsen UI provides a bunch of useful elements
-
<ons-dialog>
-
<ons-carousel>
-
<ons-col> and <ons-row>
-
<ons-popover>
-
<ons-tabbar>
-
<ons-range>
- ...
- Over 50 elements!
A pure JavaScript + CSS framework
- Onsen UI 2.0 (as opposed to 1.x) is not dependent on another frontend framework.
- Integrates more or less easily with other frameworks.
- Provides Angular 1.x bindings.
- Angular 2.0 bindings are being developed and will be released soon.
- Also looking to support other frameworks like Vue.js and React.
- You can use Onsen UI 2.0 right now but be aware that there might be some troubles integrating it with some frameworks.
Creating an app
I want to create an app to keep track of the fish in my fish tank.
Let's use Onsen UI 2.0 to prototype a simple UI for the app.
Creating an app #1 - Add a page
<!--
  I start with an empty
  page using the <ons-page>
  element.
-->
<ons-page>
</ons-page>
The <ons-page> element is a container that serves as the root of our app.
Creating an app #2 - Add a toolbar
<!--
  I add a <ons-toolbar> to
  display a toolbar at the top.
-->
<ons-page>
  <ons-toolbar>
  </ons-toolbar>
</ons-page>
The <ons-toolbar> element adds a toolbar to the top of the app where we can put a title and buttons.
Creating an app #3 - Populate the toolbar
<!--
  Now we add some content to
  the toolbar.
-->
<ons-page>
  <ons-toolbar>
    <div class="left">
      <ons-toolbar-button>
        <ons-icon icon="md-menu">
      </ons-toolbar-button>
    </div>
    <div class="center">
      Fish tank
    </div>
    <div class="right">
      <ons-toolbar-button>
        <ons-icon icon="md-search">
      </ons-toolbar-button>
      <ons-toolbar-button>
        <ons-icon icon="md-more-vert">
      </ons-toolbar-button>
    </div>
  </ons-toolbar>
</ons-page>
Creating an app #4 - Adding tabs
<!--
  Let's add some tabs!
-->
<ons-page>
  <ons-toolbar>
    ...
  </ons-toolbar>
  <ons-tabbar>
    <ons-tab
      active
      label="Animals"
      page="animals.html">
    </ons-tab>
    <ons-tab
      label="Water"
      page="water.html">
    </ons-tab>
  </ons-tabbar>
</ons-page>
Creating an app #5 - Adding pages
<!--
  Creating pages for the tabs.
-->
<ons-template id="animals.html">
  <ons-list>
    <ons-list-header>
      Guppies
    </ons-list-header>
    <ons-list-item>
      <div class="list__item__center">
        <div class="list__item__center">
          <div class="list__item__title">
            Elsa
          </div>
          <div class="list__item__subtitle">
            Female
          </div>
        </div>
      </div>
    </ons-list-item>
    ...
  </ons-list>
</ons-template>
Creating an app #6 - Floating action button
<!--
  The <ons-fab> element creates
  a Material Design Floating
  action button.
-->
<ons-fab position="bottom right">
  <ons-icon icon="md-plus"></ons-icon>
</ons-fab>
There is also the
<ons-speed-dial> element which expands into a menu when clicked.
Now we have a Material Design App
But what about iOS?
Styles change automatically based on platform
- The same code is rendered differently whether it's running on iOS or Android.
- All we need to do is remove the <ons-fab> element and replace it with something that makes sense on iOS.
That's it!
We have now created a simple hybrid app without writing any CSS or JavaScript.
Let's make something that actually does something!
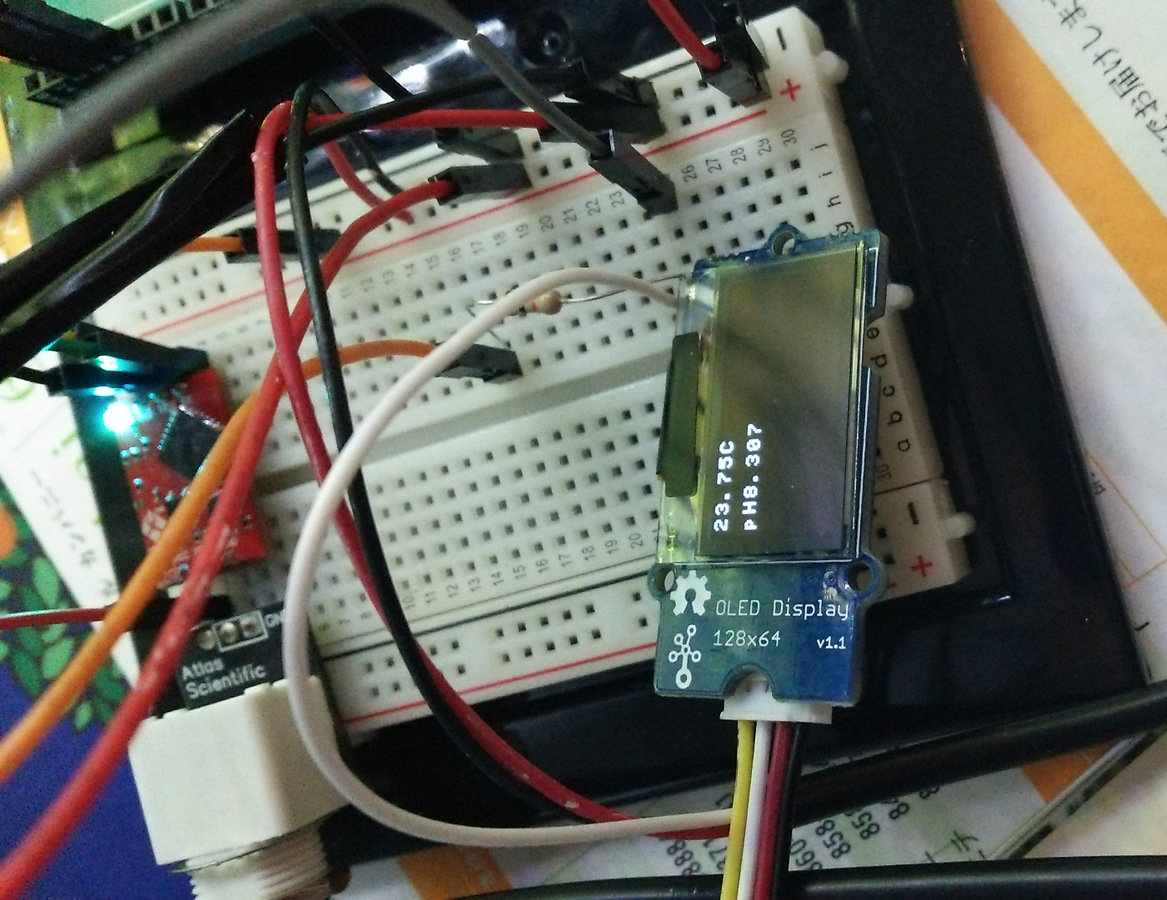
Fish Tank Monitor
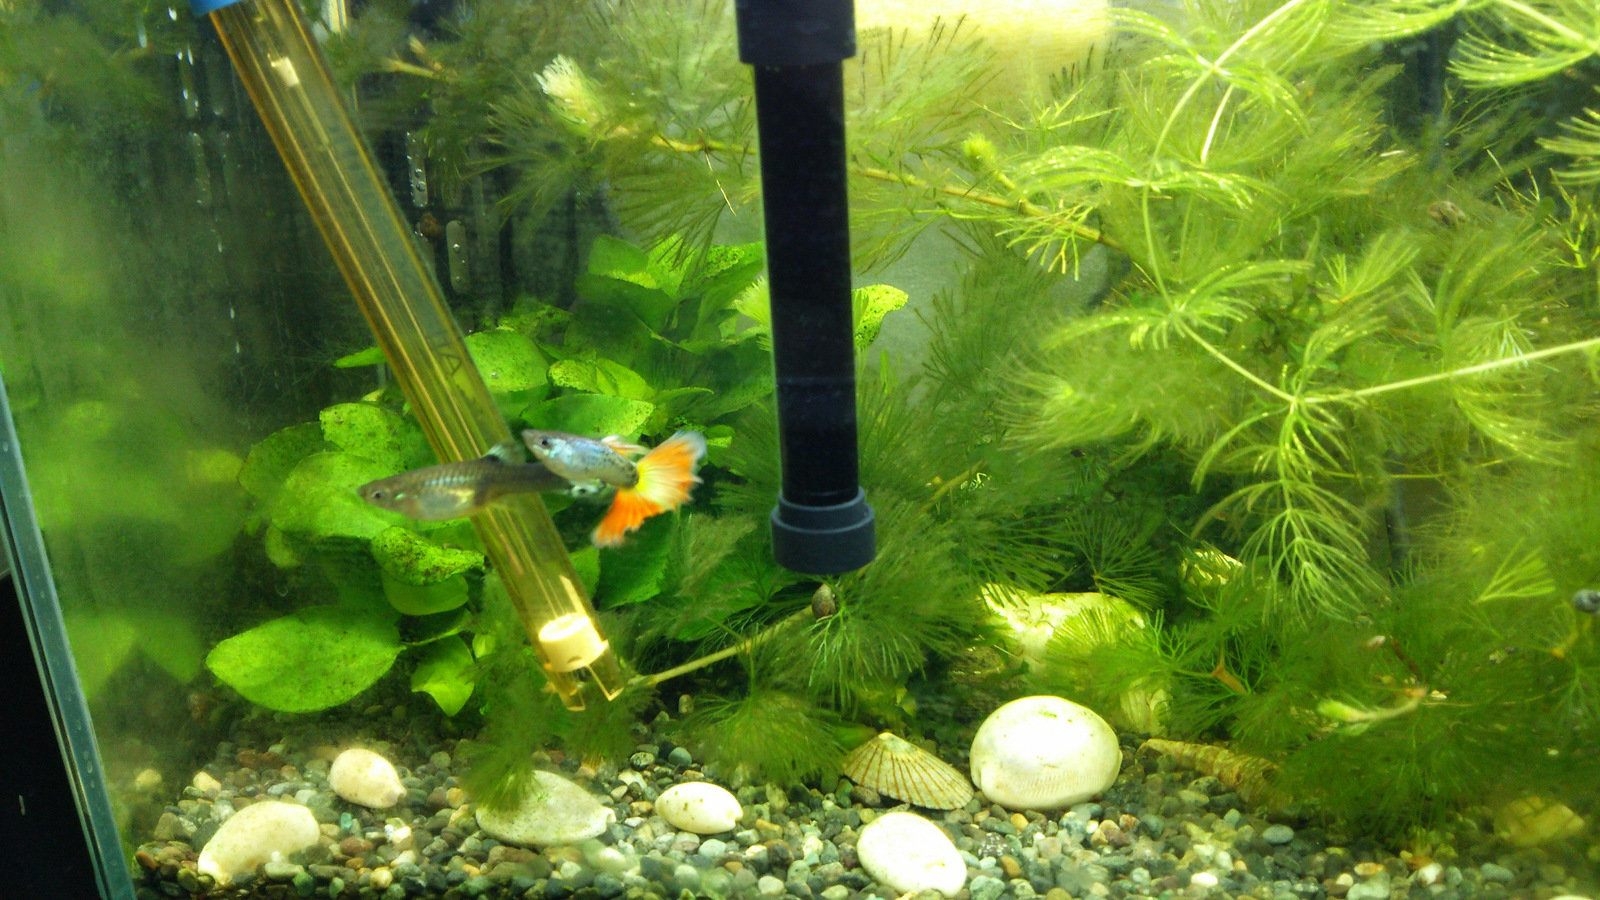
A personal Arduino project that I've been tinkering with.
It keeps track of the temperature, basicity (pH value) and the amount of dissolved oxygen in the water.
My wife thinks I worry too much about the well-being of our fish...
Sensor probes
pH probe
Dissolved oxygen probe
Anna
Olaf
IoT project
The Arduino project doesn't save the data anywhere. It's just displayed on a OLED screen.
It would be great if I would have access to the data anywhere!
The ESP8266 is a tiny WiFi module. What's better, it's programmable!
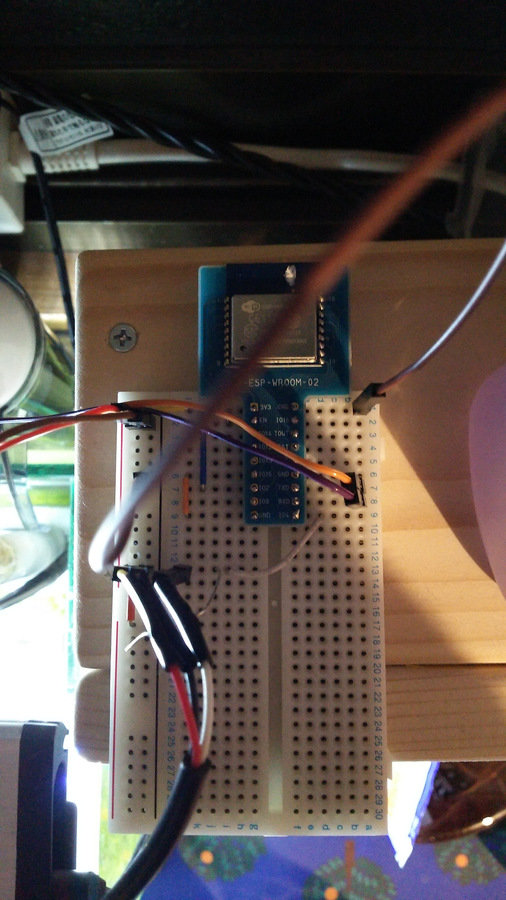
Prerequisites
- ESP-WROOM-02
- FTDI module
- 3.3V power supply
- Small breadboard
- Jumper cables
- Soldering iron
- Submergible temperature sensor (DS18B20)
- 4.7KΩ resistor
- Patience
To upload code to the ESP8266 GPIO0 must be grounded.
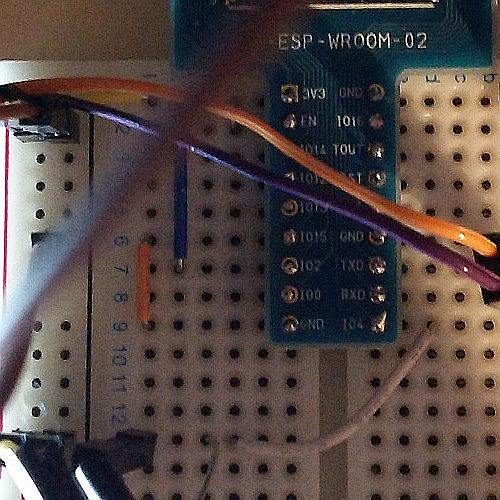
Connect a short jumper cable here. Must be removed when booting normally.
Program running on the ESP8266
A simple program that connects to my home WiFi network, reads data from the temperature sensor and transmits it to Firebase every five minutes.
#include <Arduino.h>

#include <OneWire.h>
#include <DallasTemperature.h>

#include <ESP8266WiFi.h>
#include <ESP8266WiFiMulti.h>
#include <ESP8266HTTPClient.h>

#define ONE_WIRE_BUS 4

OneWire oneWire(ONE_WIRE_BUS);

DallasTemperature sensors(&oneWire);
DeviceAddress thermometer;

ESP8266WiFiMulti WiFiMulti;

float fetchTemperature() {
  sensors.requestTemperatures();
  return sensors.getTempCByIndex(0);
}

void setup() {
  Serial.begin(115200);
  sensors.begin();

  if (sensors.getAddress(thermometer, 0)) {
    sensors.setResolution(thermometer, 12);
  }

  for(uint8_t t = 4; t > 0; t--) {
    Serial.printf("[SETUP] WAIT %d...\n", t);
    Serial.flush();
    delay(1000);
  }

  WiFiMulti.addAP("SSID", "PASSWORD");
}

void loop() {
  // Fetch temperature from sensor.
  float temperature = fetchTemperature();

  // Send data to Firebase.
  if((WiFiMulti.run() == WL_CONNECTED)) {
    HTTPClient http;

    http.begin("URL", 80, "/");

    String data = "{\"temperature\": " + String(temperature) + ", \"timestamp\": {\".sv\": \"timestamp\"}}";

    int httpCode = http.POST(data);

    if (httpCode) {
      if (httpCode == 200) {
        Serial.println("Data saved! :)");
        delay(1000 * 60 * 5);
      } else {
        Serial.println("Unable to save data to server: " + String(httpCode));
      }
    } else {
      Serial.println("No connection to server.");
    }
  }

  delay(1000);
}Vue.js
- Reactive front-end framework
- One-way data binding and no dirty checking.
- No routing, built-in Ajax functions. Leaves a lot of decisions to the developer.
- Uses the actual DOM as opposed to React's Virtual DOM.
A simple component
Vue.component('my-dialog', {
  template: `
    <ons-dialog>
      <ons-button
        @click="hide()">
        Hide
      </ons-button>
    </ons-dialog>
  `,
  methods: {
    show: function() {
      return this.$el.show();
    },
    hide: function() {
      return this.$el.hide();
    }
  },
  events: {
    'show-dialog': function() {
      return this.show();
    }
  }
});
Bootstrapping
new Vue({
  el: '#app',
  template: `
    <ons-page>
      <ons-toolbar>
        <div class="center">
          Vue.js sample
        </div>
      </ons-toolbar>

      <p>
        <ons-button
          @click="showDialog()">
          Click me!
        </ons-button>
      </p>
    </ons-page>

    <my-dialog></my-dialog>
  `,
  methods: {
    showDialog: function() {
      this.$broadcast('show-dialog');
    }
  }
});
Cordova app
- UI made using Onsen UI 2.0
- Logic is handled by the Vue.js framework