
@vueschool_io
vueschool.io
Vue 2
New Features and Migrating
3

🎤


Daniel Kelly
Lead Instructor @ Vue School
Full Stack developer (10 years)
Husband and Father
Workshop Overview
- Intro to Vue 3
- Benefits of Vue 3
- Improvements to Existing Features
- Removed Features
- New Features
- Composition API (overview)*
- Teleport
- State Driven CSS*
- Other CSS Enhancements
- Emits Declaration
- Suspense
- Changes in the Ecosystem
- Migration
* backported to Vue 2.7
Intro to Vue 3
👋
Pinia Experiment Begins
Nov, 2019

RFC Repo Created
Jan 14, 2019
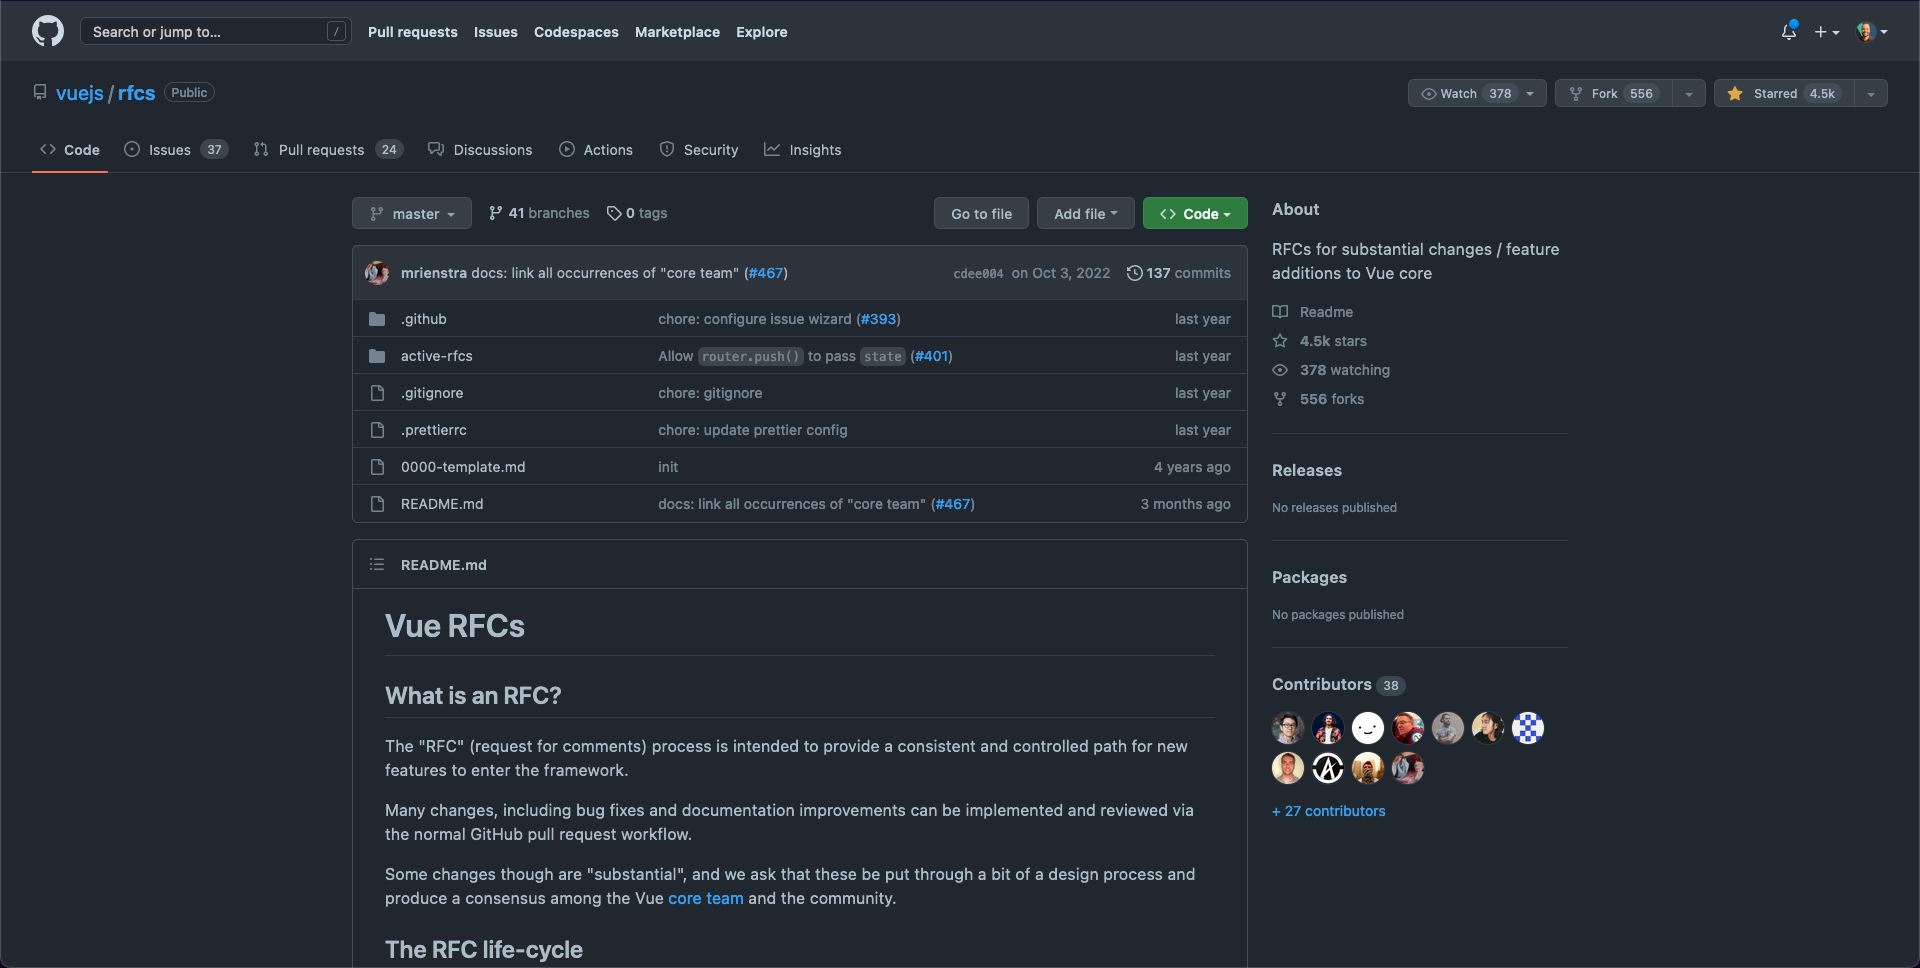
Vue 3 Codebase Goes Public
Jan 3, 2020
Vue 3 Soft Launch
(One Piece)
Sep 18, 2020

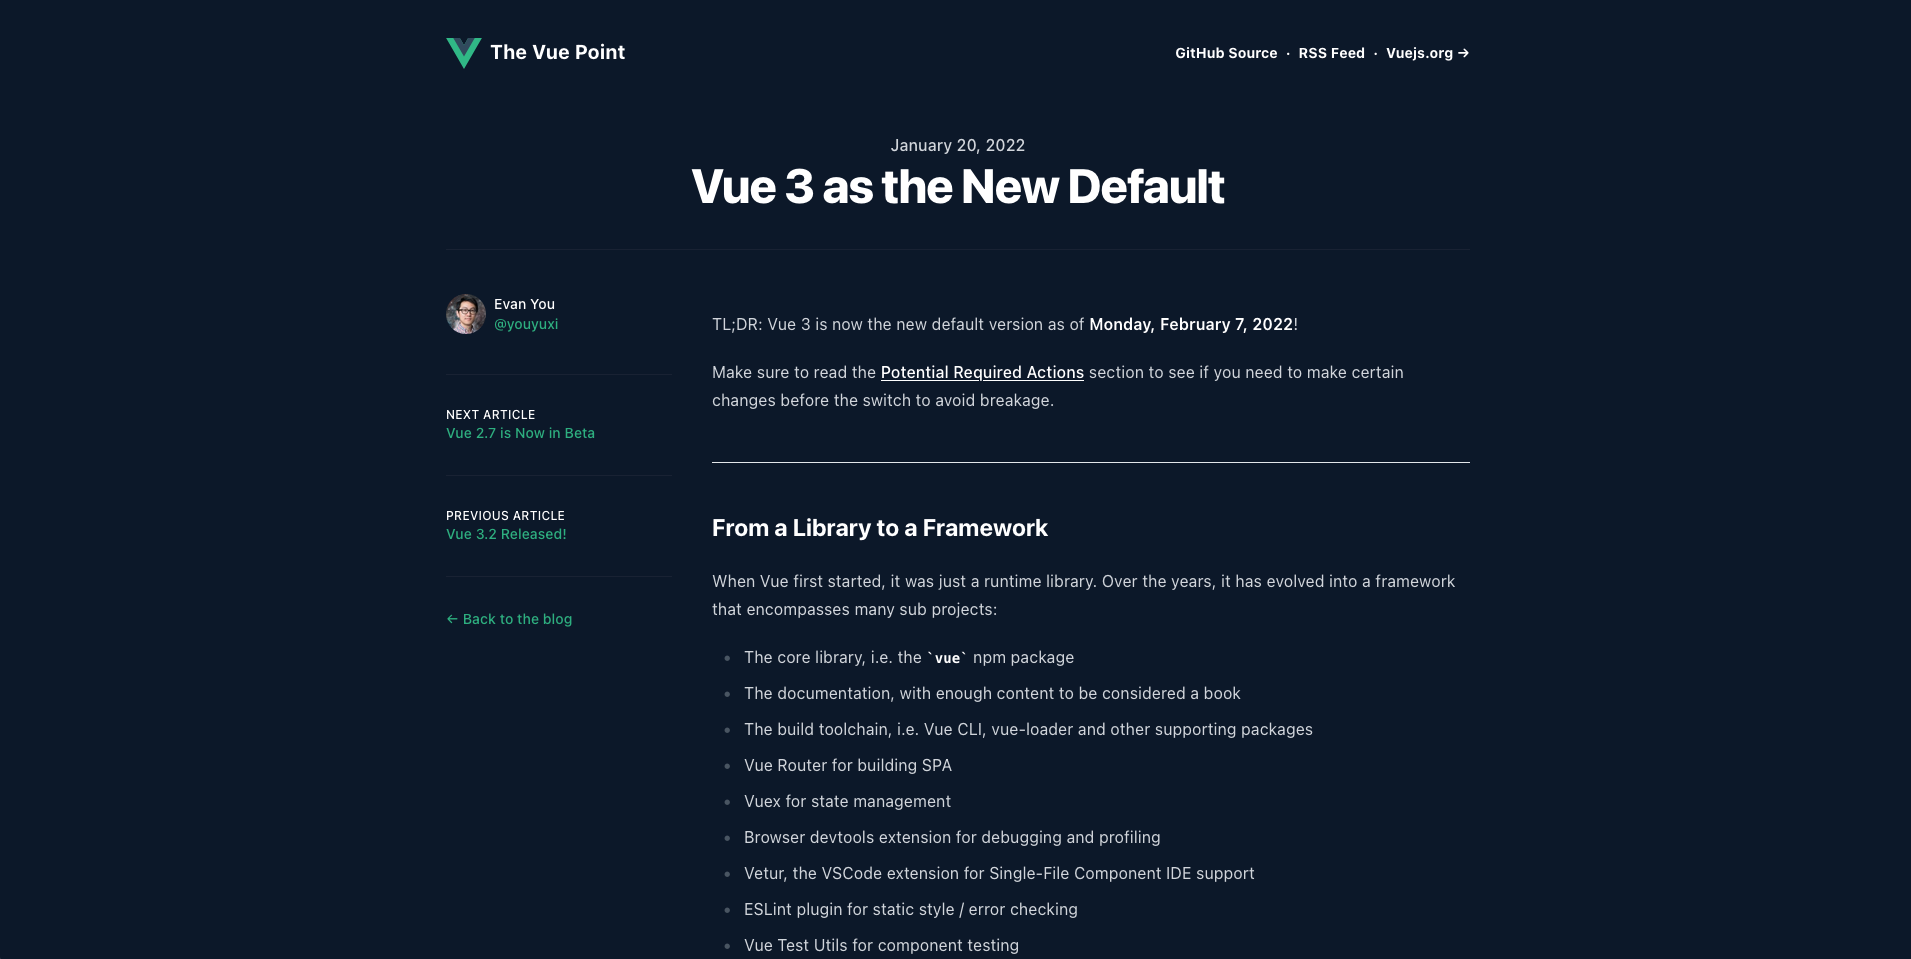
Vue 3 New Default
Jan 20, 2022

Evan Announced Dev on Vite.js
Jan 12, 2020
📣
Vue 3 Development Announced
Feb 2018
v3
Volar
<script setup>

more!
Why Vue 3?
Benefits and why upgrade
Smaller and Faster

- Initial render up to 55% faster
- Memory usage down 54%
- Updates up to 133% faster
- Unused features are tree-shakeable (like transitions, nextTick, etc)
Faster === better conversions
A one-second site speed improvement can increase mobile conversions by up to 27%.
===

Write More Maintainable Code
- Better logic re-use and organization with the Composition API *
- Type-safety with improved TypeScript Support
(TypeScript is fast becoming the norm for large scale JavaScript apps) - Other new features and API adjustments that make code more intuitive
* backported to Vue 2.7
More Maintainable Code is Good For Everyone!
✅ Stakeholders
Faster turn around times, less back and forth
✅ Site Visitors/Customers
Less bugs, more features faster
✅ Developers
Better DX, Iterate faster, spend less time debugging
Supported by the Latest and Greatest Libraries
- Some of the newest 3rd party plugins, frameworks, etc only support Vue 3
- ie. FormKit, Nuxt 3, Vuetify 3, etc

Much of the Same Syntax We Already Love ❤️
- Options API Still 100% Supported
- Single File Components
(script, template, style) - Declarative Template Syntax
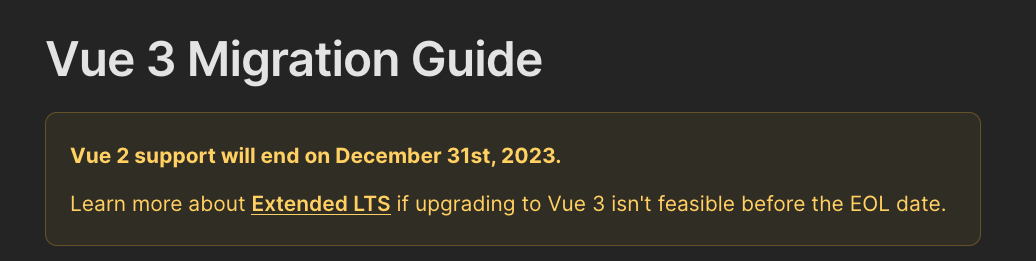
Vue 2 EOL is Dec 2023
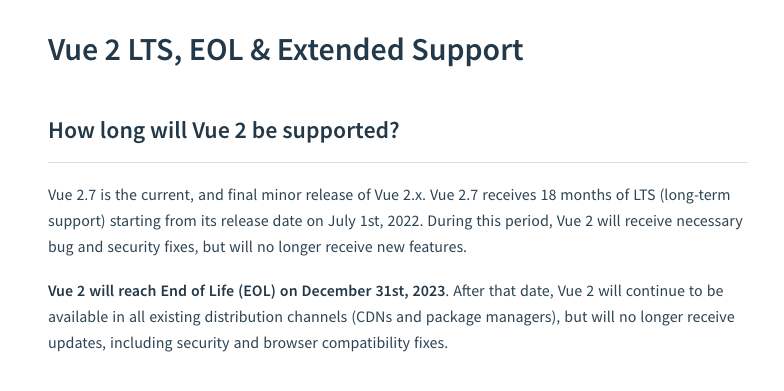
Improvements to Existing Features
Improvements to Existing Features
- Multiple v-models (and more!)
- No more reactivity caveats 🎉
- Fragments
- Comprehensive $attrs
Multiple v-models
// MyInput.vue
<template>
<input
  @input="$emit('input', $event.target.value)"
  :value="value"
/>
</template>
<script>
export default {
  props:{
    value: String
  }
}
</script>
Support v-model on a component by emitting input and accepting a value prop
v2
<MyInput v-model="name" />Multiple v-models
// MyInput.vue
<template>
<input
  @input="$emit('update:modelValue', $event.target.value)"
  :value="modelValue"
/>
</template>
<script>
export default {
  props:{
    modelValue: String
  }
}
</script>
Support v-model on a component by emitting update:modelValue and accepting a modelValue prop
v3
<MyInput v-model="name" />Multiple v-models
// MyInput.vue
<template>
<input
  @input="$emit('update:modelValue', $event.target.value)"
  :value="modelValue"
/>
<input
  @input="$emit('update:email', $event.target.value)"
  :value="title"
/>
  <input
  @input="$emit('update:password', $event.target.value)"
  :value="title"
/>
</template>
<script>
export default {
  props:{
    modelValue: String,
    email: String,
    password: String,
  }
}
</script>
Provide argument to v-model to specify any prop/update:[prop]
v3
<MyInput
  v-model="name"
  v-model:email="email"
  v-model:password="password"
/>
Multiple v-models
<MyComponent
  :title="pageTitle"
  @update:title="pageTitle = $event"
/>

<!-- Shortand for Above -->
<MyComponent :title.sync="pageTitle" />
Multiple v-models replace .sync
v2
Multiple v-models
<MyComponent
  :title="pageTitle"
  @update:title="pageTitle = $event"
/>

<!-- Shortand for Above -->
<MyComponent v-model:title="pageTitle" />
Multiple v-models replace .sync
v3
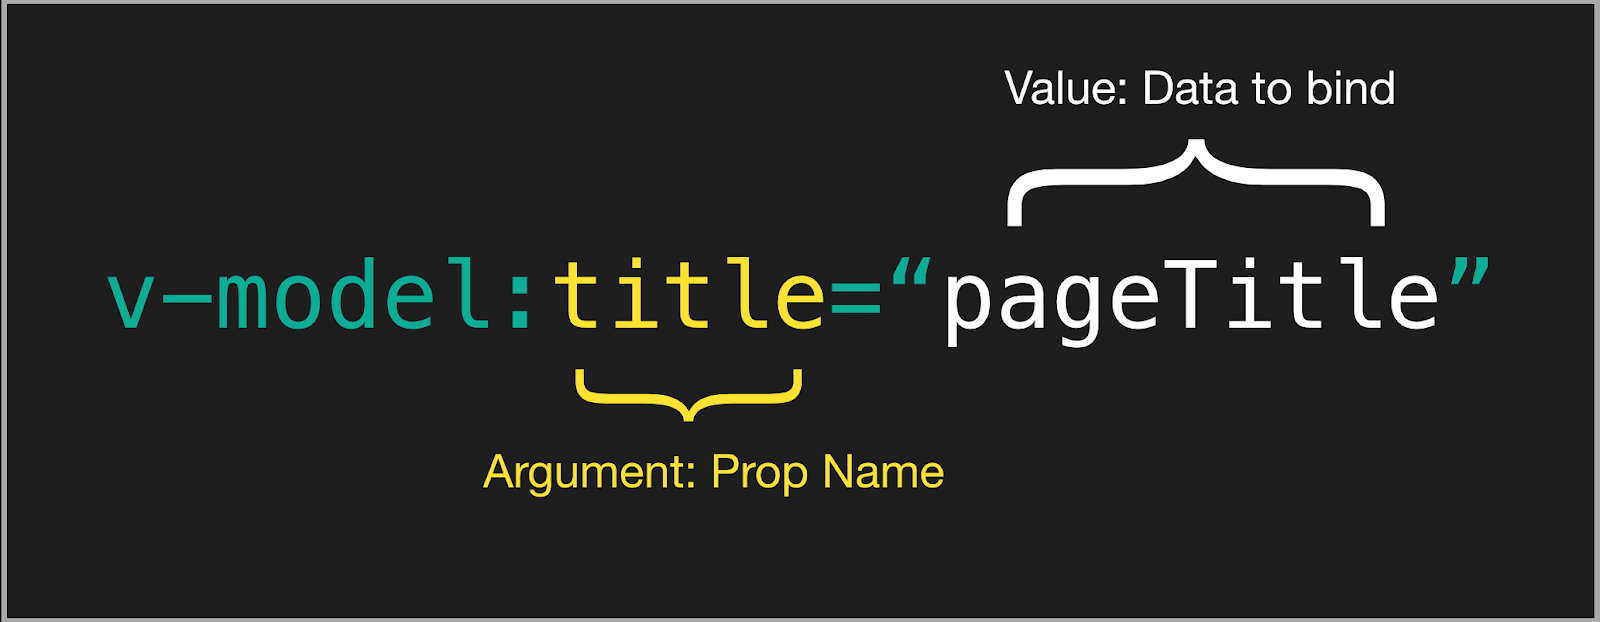
v-model anatomy
Custom v-model modifiers
<MyComponent v-model.capitalize="myText" />Vue 3 also allows us to create custom modifiers for v-model
Custom v-model modifiers
<!-- MyComponent.vue-->
<script>
export default {
  props: {
    //...
    modelModifiers: {
      default: () => ({})
    }
  },
  created() {
    console.log(this.modelModifiers) // { capitalize: true }
  }
  //...
}
</script>
Check for them on the modelModifiers prop. Added modifiers will be a boolean true
<MyComponent v-model.capitalize="myText" />Custom v-model modifiers
<!-- MyComponent.vue-->
<script>
export default {
  //...
  methods: {
    emitValue(e) {
      let value = e.target.value
      if (this.modelModifiers.capitalize) {
        value = value.charAt(0).toUpperCase() + value.slice(1)
      }
      this.$emit('update:modelValue', value)
    }
  }
}
</script>
Then you can alter the emitted value based on the modifier
No More Reactivity Caveats
Vue.set(this.frameworks, index, 'Vue')v2
this.frameworks[index] = "Vue"v3
No More Reactivity Caveats
Vue.set(this.framework, 'name', 'Vue')v2
this.framework.name = "Vue"v3
No More Reactivity Caveats
Vue.delete(this.framework, 'caveats')v2
delete this.framework.caveatsv3
No More Reactivity Caveats
Less Caveats === More Intuitive === Less Bugs
Fragments
aka. Multiple Root Elements
v2
<template>
  <div>...</div>
  <div>...</div>
</template>
❌
If you did this...
Fragments
aka. Multiple Root Elements
v2
<template>
  <div>...</div>
  <div>...</div>
</template>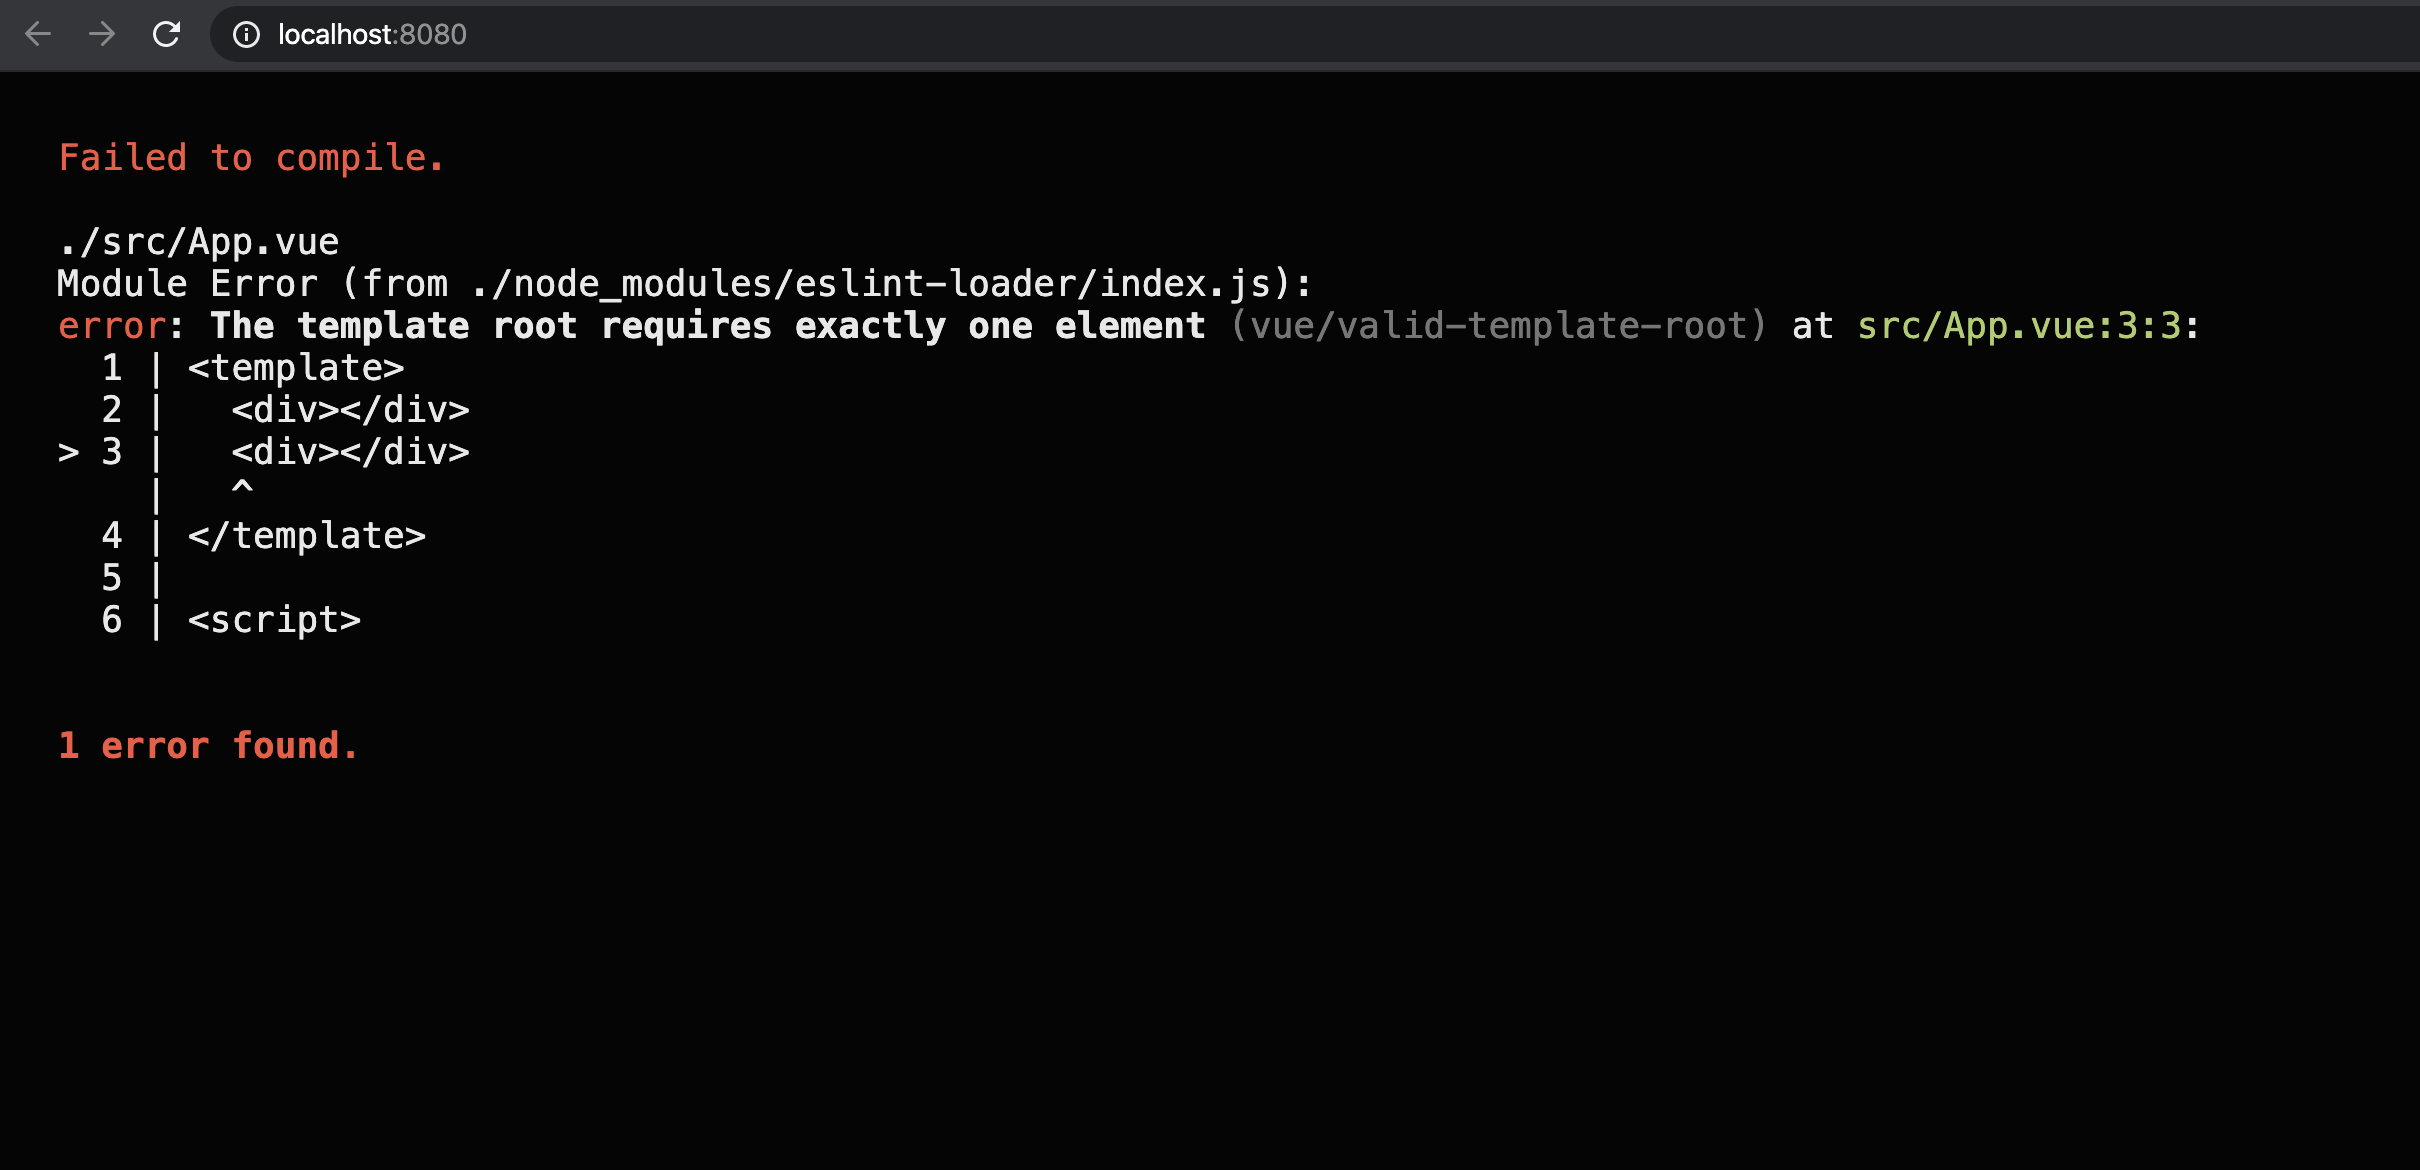
You'd get an error like this!
Fragments
aka. Multiple Root Elements
v2
<template>
<div>
  <div>...</div>
  <div>...</div>
</div>
</template>
And have to wrap everything with a div
(which sometimes causes styling issues)
Fragments
aka. Multiple Root Elements
v3
<template>
  <div>...</div>
  <div>...</div>
</template>
It's no problem! 🎉
Fragments
aka. Multiple Root Elements
v3
<template>
  <div>...</div>
  <div v-bind="$attrs">...</div>
</template>
And you can specify where to put the fall-through attributes
Comprehensive $attrs
v2
<template>
  <label>
    <input type="text" v-bind="$attrs" v-on="$listeners" />
  </label>
</template>
<script>
  export default {
    inheritAttrs: false
  }
</script>
Listeners separate from $attrs and if you wanted them to fall through you must remember to bind seperately
Comprehensive $attrs
v3
//MyInput.vue

<template>
  <label>
    <input type="text" v-bind="$attrs" />
  </label>
</template>
<script>
export default {
  inheritAttrs: false
}
</script>
Listeners combined with $attrs. Defined as functions prefixed with on
<MyInput id='my-input' @close="..."/>

$attrs === {
  id: 'my-input',
  onClose(){
    ...
  }
}
Comprehensive $attrs
v2
// MyInput.vue
<template>
  <label>
    <input type="text" v-bind="$attrs" />
  </label>
</template>
<script>
export default {
  inheritAttrs: false
}
</script>
Class and Style separate from $attrs
Given this component definition...
Comprehensive $attrs
v2
<MyInput id="my-id" class="my-class" />Class and Style separate from $attrs
And used like this...
<label class="my-class">
  <input type="text" id="my-id" />
</label>
Would render this HTML
Comprehensive $attrs
v3
<MyInput id="my-id" class="my-class" />Class and Style included with $attrs
And used like this...
<label>
  <input type="text" id="my-id" class="my-class" />
</label>
Would render this HTML
Questions?
🙋🏾♀️
Assignment # 1
👩💻👨🏽💻
⏰ 20 mins
❌ Removed Features
❌ Removed Features
- Functional Components
- Filters
- Keycode Modifiers
- $children
Functional Components
<template functional>
  <component
    :is="`h${props.level}`"
    v-bind="attrs"
    v-on="listeners"
  >
    <slot></slot>
  </component>
</template>

<script>
export default {
  props: ["level"],
};
</script>
v2
In v2, functional components provided a more performant alternative when component state was not needed
No $ prefix
Functional Components
<template>
  <component
    :is="`h${props.level}`"
    v-bind="$attrs"
  >
    <slot></slot>
  </component>
</template>

<script>
export default {
  props: ["level"],
};
</script>
v3
In v3, the performance difference for stateful components is negligible so functional SFC's are removed
$ prefix
No functional
keyword
Functional Components
<script>
// note that h is imported from vue
// instead of provided as an argument to the render function
// (another diff between v2 and v3)
import { h } from "vue";

// functional components is a render function
const DynamicHeading = (props, context) => {
  return h(`h${props.level}`, context.attrs, context.slots);
};

DynamicHeading.props = ["level"];

export default DynamicHeading;
</script>
v3
Or you can define functional components as plain functions
Filters
<template>
  <h1>Bank Account Balance</h1>
  <p>{{ accountBalance | currencyUSD }}</p>
</template>

<script>
  export default {
    //...
    filters: {
      currencyUSD(value) {
        return '$' + value
      }
    }
  }
</script>
v2
In v2, you could use filters to format data in the template
Custom syntax that involves:
- a learning curve
- and implementation costs
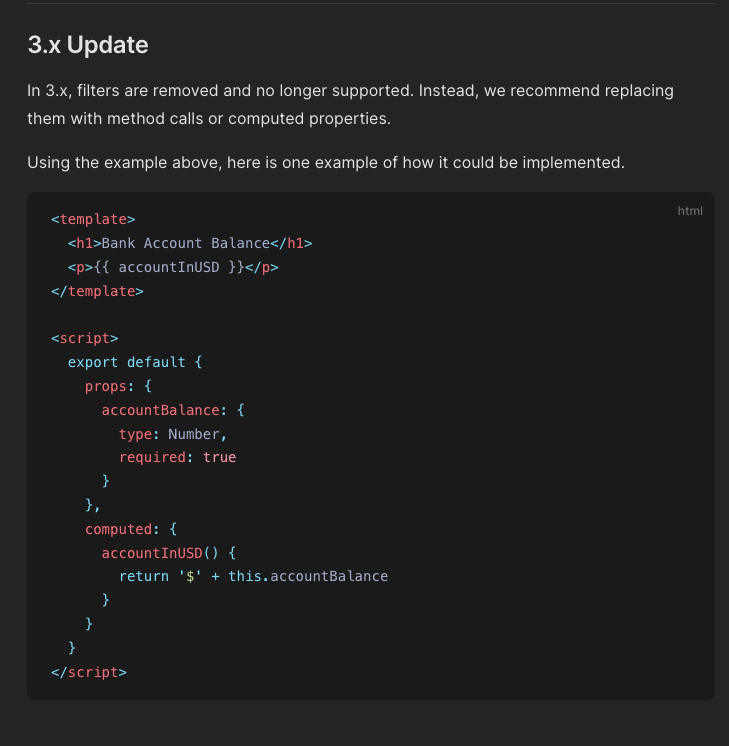
Filters
<template>
  <h1>Bank Account Balance</h1>
  <p>{{ accountInUSD }}</p>
</template>

<script>
  export default {
    //...
    computed: {
      accountInUSD() {
        return '$' + this.accountBalance
      }
    }
  }
</script>
v3
In v3, filters are removed. Just use a computed prop instead.
Global Filters
const app = createApp(App)

app.config.globalProperties.$filters = {
  currencyUSD(value) {
    return '$' + value
  }
}
v3
In v3, global filters can be replaced with globally defined methods
<template>
  <h1>Bank Account Balance</h1>
  <p>{{ $filters.currencyUSD(accountBalance) }}</p>
</template>
KeyCode Modifiers
v2
In Vue 2 you could use keycodes as modifiers for keyboard events
<!-- keycode 75 === 'k' -->
<input v-on:keyup.75="doThing" />
KeyCode Modifiers
v3
In Vue 3 you use the event's key value instead
<input v-on:keyup.k="doThing" />
<input v-on:keyup.k="doThing" />KeyCode Modifiers
v3
For multi-word key names you'll use the kebab case
<input v-on:keyup.arrow-down="doThing" />
KeyCode Modifiers
v3
The keys for some punctuation marks can just be included literally.
(This excludes ", ', /, =, >, and . You can check these on the event in your handler)
<input v-on:keyup.,="commaPress" />
KeyCode Modifiers
KeyboardEvent.keyCode is now deprecated in browsers and no longer recommended for use. Therefore Vue 3 removes them.
<input v-on:keyup.k="doThing" />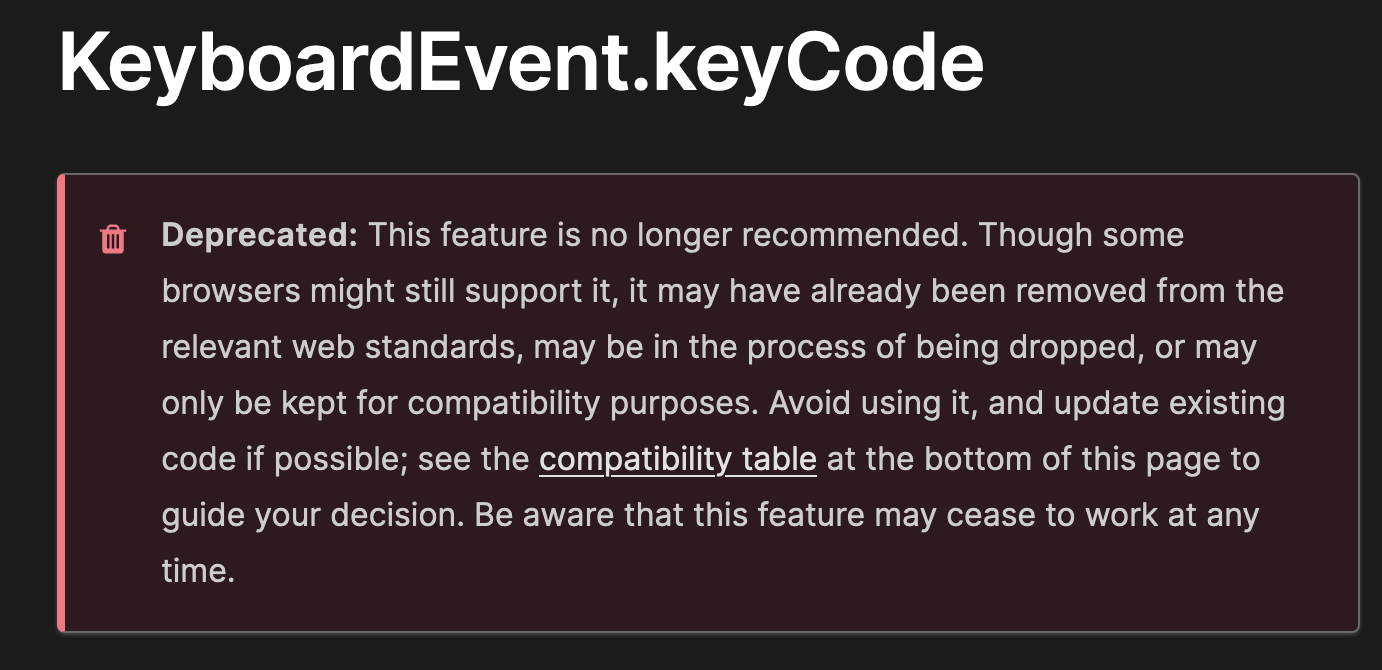
$children
v2
<template>
  <div>
    <my-button>Change logo</my-button>
  </div>
</template>

<script>
import MyButton from './MyButton'

export default {
  components: { MyButton },
  mounted() {
    console.log(this.$children[0]) // VueComponent (MyButton)
  }
}
</script>
In Vue 2, you could access all a components child components via $children
$children
v3
In Vue 3, $children no longer exists. If you need access to a component via the parent you can use a template ref instead
<template>
  <div>
    <my-button ref="button">Change logo</my-button>
  </div>
</template>

<script>
import MyButton from './MyButton'

export default {
  components: { MyButton },
  mounted() {
    console.log(this.$refs.button) // VueComponent (MyButton)
  }
}
</script>
Questions?
🙋🏾♀️
Assignment #2&3
👩💻👨🏽💻
⏰ 15 mins
Skip
10 Minute Break
☕️🙆
⏰ 10 mins
🎉 New Features
🎉 New Features
- Composition API *
- Teleport
- State Driven CSS *
- Other CSS Enhancements
- Emits Declaration
- Suspense
* backported to Vue 2.7
Composition API
Code Organization
Logic Reuse
Improved
TypeScript Support


Composition API

Full Workshop Dedicated to CAPI
Composition API
⚡️ Super Quick Overview
new Vue({
  data(){
    return {
      loading: false,
      count: 0,
      user: {}
    }
  },
  computed: {
    double () { return this.count * 2 },
    fullname () {/* ... */}
  },
  methods: {
    increment () { this.count++ },
    fetchUser () {/* ... */}
  }
})
import { ref, computed, watch } from 'vue'No longer passing options INTO Vue
Instead we're getting reactive functions OUT OF Vue
const loading = ref(false)
const count = ref(0)
const user = reactive({})
new Vue({
data(){
return {
loading: false,
count: 0,
user: {}
}
},
computed: {
double () { return this.count * 2 },
fullname () {/* ... */}
},
methods: {
increment () { this.count++ },
fetchUser () {/* ... */}
}
})Define reactive data with
ref
or
reactive
const double = computed(()=> count.value * 2)
const fullname = computed(()=>({ /* ... */ }))
new Vue({
data(){
return {
loading: false,
count: 0,
user: {}
}
},
computed: {
double () { return this.count * 2 },
fullname () {/* ... */}
},
methods: {
increment () { this.count++ },
fetchUser () {/* ... */}
}
})Define derived data with
computed
const increment = ()=> count.value++
function fetchUser(){ /* ... */ }
new Vue({
data(){
return {
loading: false,
count: 0,
user: {}
}
},
computed: {
double () { return this.count * 2 },
fullname () {/* ... */}
},
methods: {
increment () { this.count++ },
fetchUser () {/* ... */}
}
})Define methods as
functions
Composition API
Full Workshop Dedicated to CAPI
Teleport
- Allows us to keep markup inside a component but visually display it elsewhere in the DOM
- Great for modal overlays
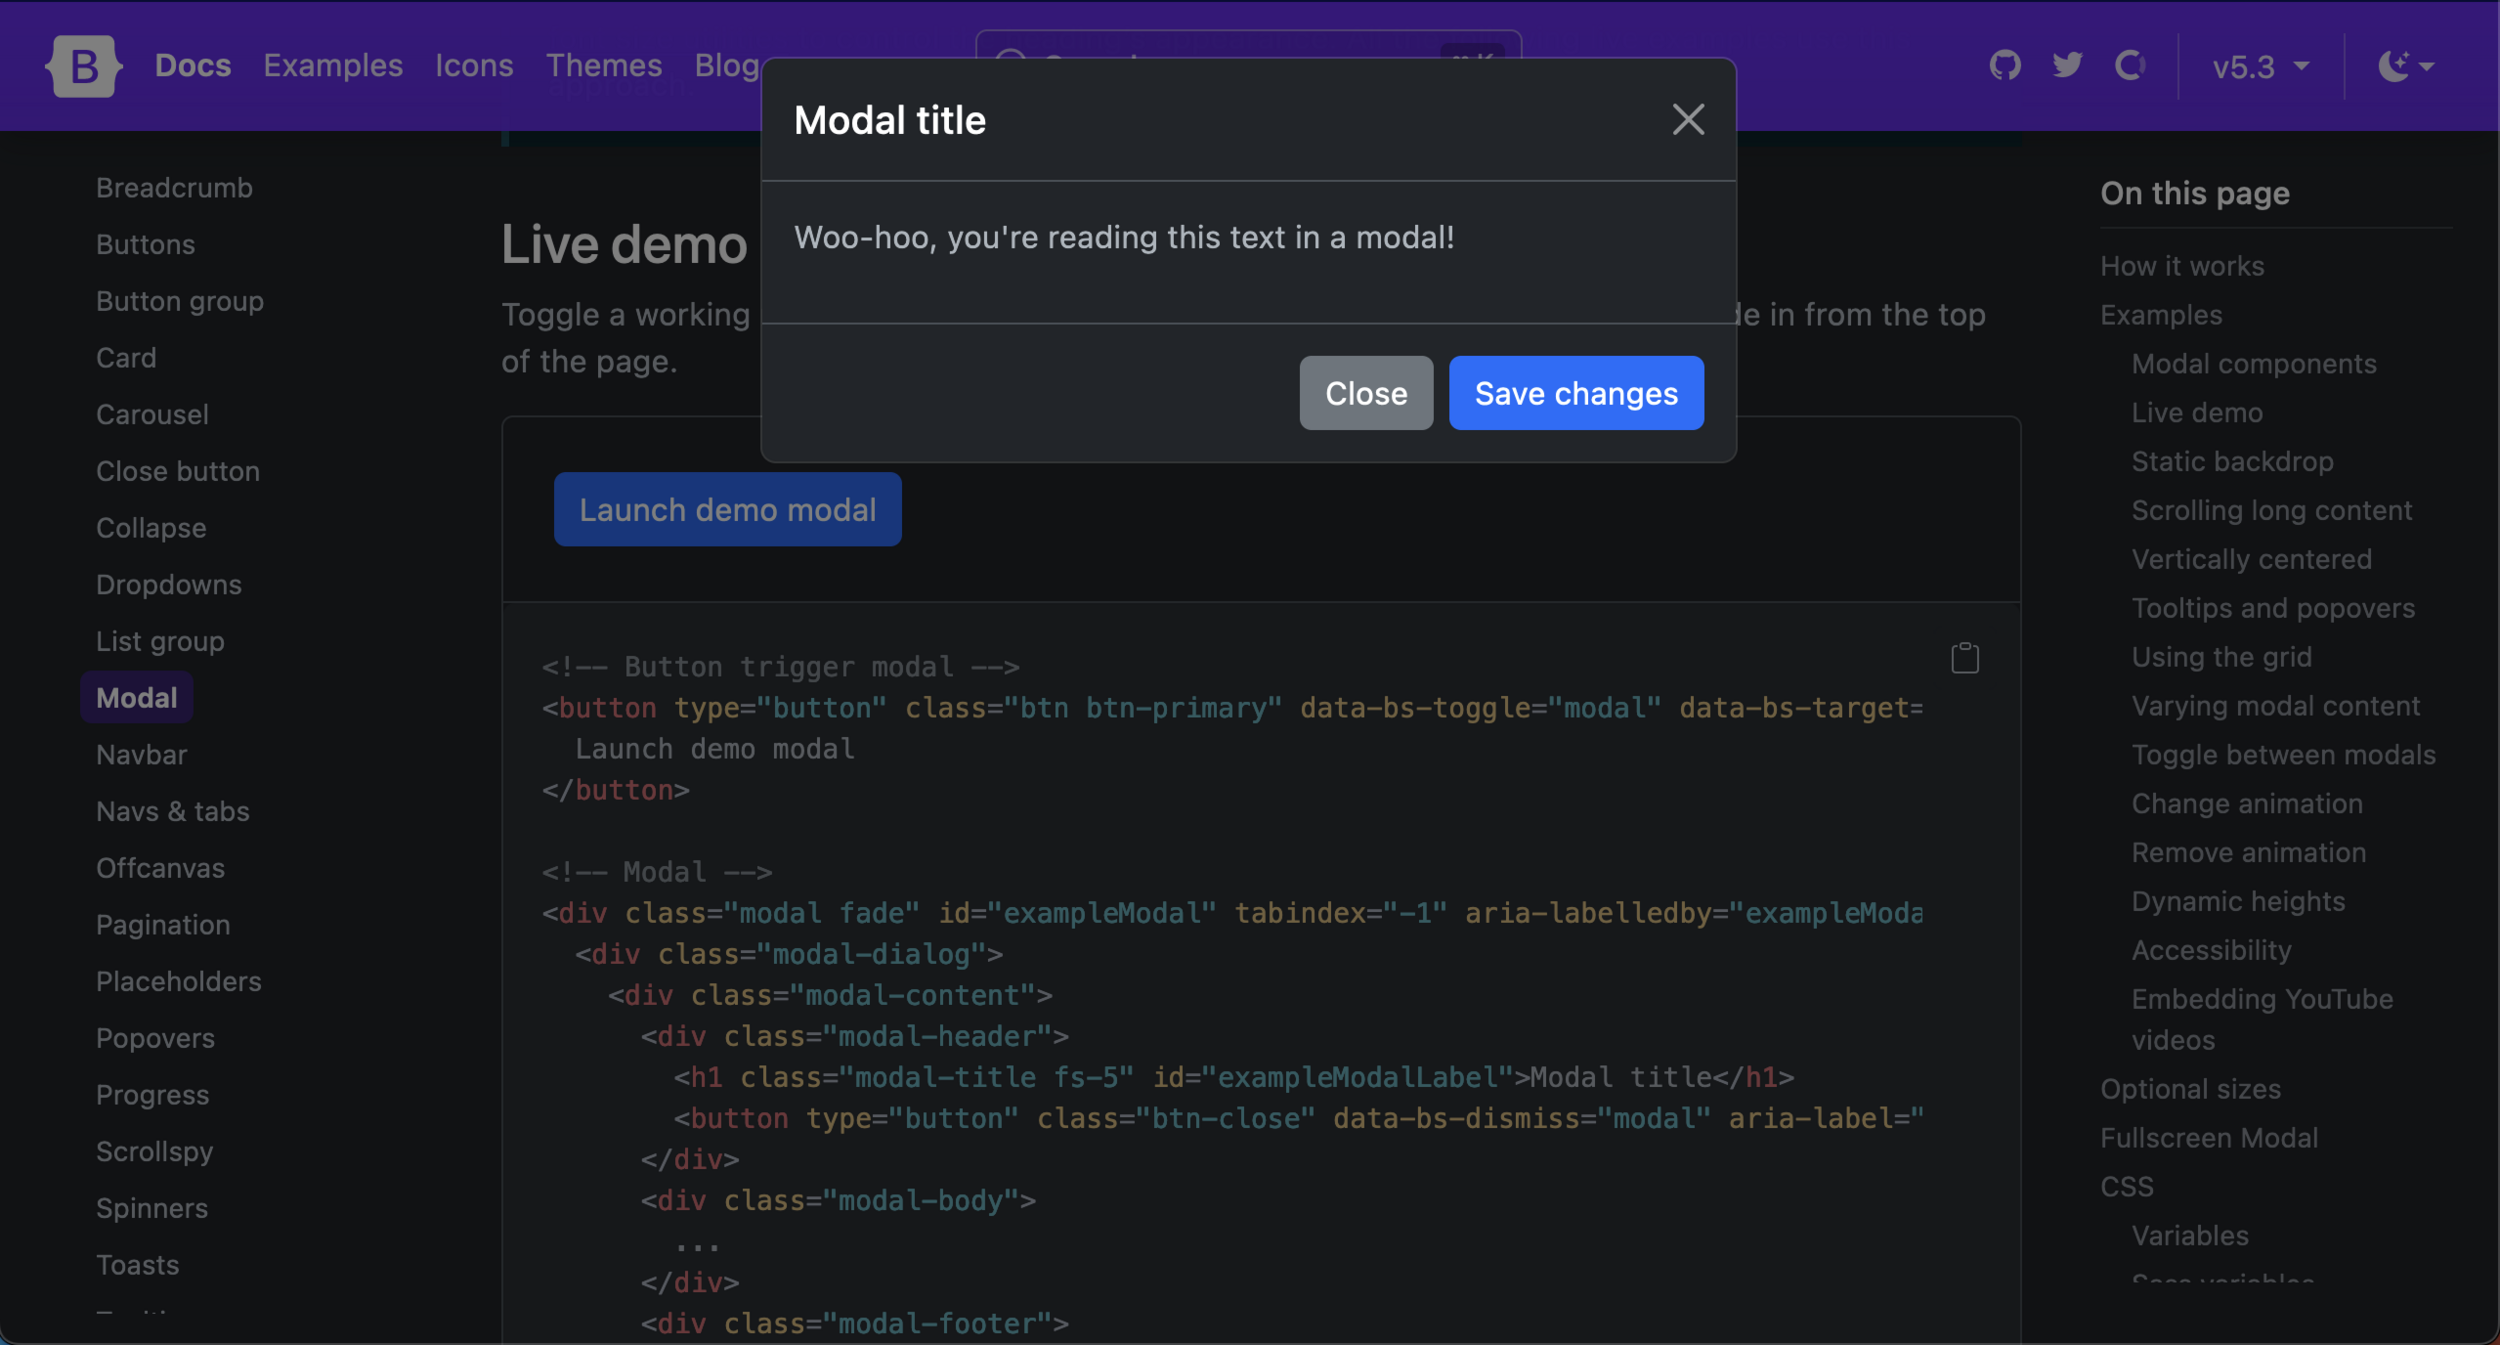
Teleport
Modal overlay without teleport usually relies on fixed positioning
<template>
  <button @click="open = true">Open Modal</button>

  <div v-if="open" class="modal">
    <slot></slot>
    <footer>
      <button @click="open = false">Close</button>
    </footer>
  </div>
</template>

<script>
  // ....
</script>

<style scoped>
.modal {
  @apply fixed;
}
</style>
- Position fixed only works if an ancestor doesn't include `transform`, `perspective`, or `filter`
- z-index issues
v2
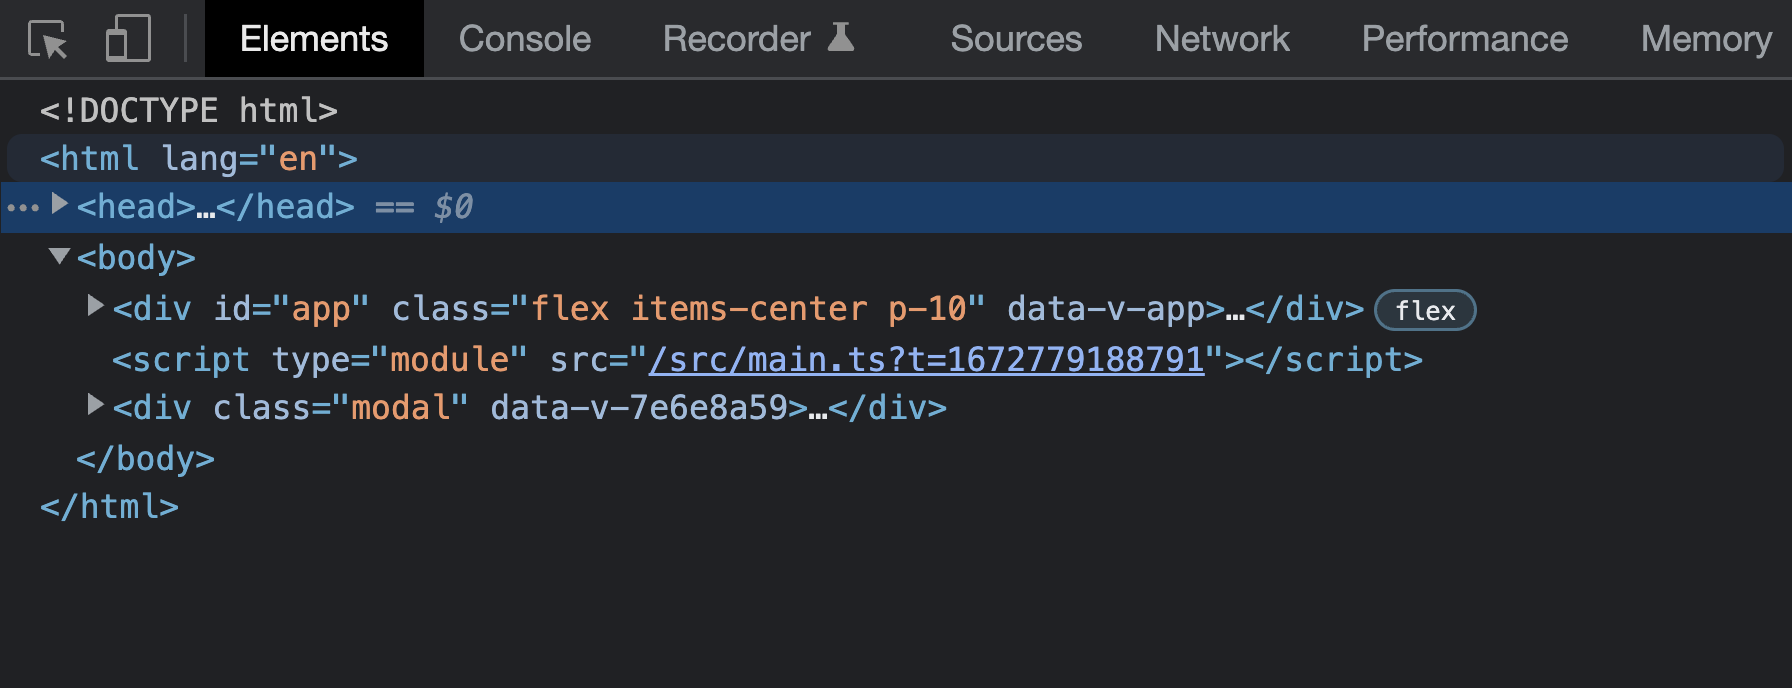
Teleport
Append markup to any arbitrary element no matter where the component lives
<template>
  <button @click="open = true">Open Modal</button>

  <Teleport to="body">
    <div v-if="open" class="modal">
      <slot></slot>
      <footer>
        <button @click="open = false">Close</button>
      </footer>
    </div>
  </Teleport>
</template>

<script>
  // ....
</script>

<style scoped>
.modal {
  @apply absolute;
}
</style>
v3
Teleport Tips
`to` prop takes a CSS selector or an actual DOM node
<template>
   <!-- string query selector-->
  <Teleport to="body">
    <!--or actual element-->
  <Teleport :to="body">
</template>

<script>
export default {
  data() {
    return {
      body: document.querySelector("body"),
    };
  },
};
</script>
Teleport Tips
can combine <Teleport> with <Transition>
<template>
   <Teleport :to="body">
    <Transition>
      <div v-if="open" class="modal">
        //...
      </div>
    </Transition>
  </Teleport>
</template>
<style scoped>
.v-enter-active,
.v-leave-active {
  transition: opacity 0.5s ease;
}

.v-enter-from,
.v-leave-to {
  opacity: 0;
}
</style>
Teleport Tips
Can have multiple teleports active at one time.
<Teleport to="#modals">
  <div>A</div>
</Teleport>
<Teleport to="#modals">
  <div>B</div>
</Teleport>
<div id="modals">
<div>A</div>
<div>B</div>
</div>
Teleport Tips
Can dynamically disable. Useful to conditionally display inside component
<Teleport :disabled="isMobile">
  ...
</Teleport>
Teleport Tips
The teleport `to` target must already exist in the DOM when the component using <Teleport> is mounted.
- Ideally, this is an element outside the Vue app.
- When targeting elements rendered by Vue, ensure it's mounted first
Questions?
🙋🏾♀️
Assignment #4
👩💻👨🏽💻
⏰ 25 mins
Lunch
🍔
⏰ 25 mins
Lunch Break
🍽️
⏰ 25 mins
State Driven CSS
and more!
State Driven CSS
In v2, inline styles were the only option for dynamic CSS rules
<template>
<div
  class="swatch"
  :style="{ backgroundColor: color }"
></div>
</template>
<script>
export default{
  data(){
    return {
      color: "red"
    }
  }
}
</script>
v2
State Driven CSS
Re-use would mean re-declaring the inline style
<template>
<div
  class="swatch"
  :style="{ backgroundColor: color }"
></div>

<div
  class="swatch"
  :style="{ backgroundColor: color }"
></div>
</template>
<script>
export default{
  data(){
    return {
      color: "red"
    }
  }
}
</script>
v2
State Driven CSS
In v3, you can bind CSS values directly in the style block
v3
<template>
<div>
  <div class="swatch"></div>
  <div class="swatch"></div>
</div>
</template>
<script>
export default{
  data(){
    return { color: "red" }
  }
}
</script>

<style scoped>
  .swatch{
    background-color: v-bind(color);
  }
</style>
State Driven CSS
Defines a hashed CSS custom property on the root component element
(or on each element if no root)
v3
<template>
<div>
  <div class="swatch"></div>
  <div class="swatch"></div>
</div>
</template>
<script>
export default{
  data(){
    return { color: "red" }
  }
}
</script>

<style scoped>
  .swatch{
    background-color: v-bind(color);
  }
</style>
State Driven CSS
Can use dot notation to target nested data (must use quotes)
v3
<template>
<div class="swatch"></div>
<div class="swatch"></div>
</template>
<script>
export default{
  data(){
    return {
      colors:{ primary: "red" }
    }
  }
}
</script>

<style scoped>
  .swatch{
    background-color: v-bind('color.primary');
  }
</style>
State Driven CSS
v-bind must the entire value
v3
<template>
<div class="swatch"></div>
<div class="swatch"></div>
</template>
<script>
export default{
  data(){
    return {
      colors:{ primary: "red" },
      width: 100
    }
  },
  computed:{
    widthInPixels(){ return this.width + 'px'}
  }
}
</script>

<style scoped>
  .swatch{
    background-color: v-bind('color.primary');
    width: v-bind(width)px; /* ❌ This won't work */
    width: v-bind(widthInPixels);
  }
</style>
Vue Specific CSS Selectors
v3
<style scoped>
/* Style child components */
.a :deep(.b) {}

/* Style slot content */
:slotted(div) {}

/* Quickly define a global rule */
:global(.red) {}
</style>

<style>
/* Same as :global in scoped tag above */
.red{}
</style>
Questions?
🙋🏾♀️
Assignment #5
👩💻👨🏽💻
⏰ 15 mins
Emits Option
Declare Component Events
Emits Option
Emits scattered throughout component
<!-- DataSender.vue -->
<template>
  <div>
    <button @click="sendData">Send Data</button>
  </div>
</template>

<script>
export default {
  methods: {
    sendData() {
      this.$emit('sending-start')

      // send data to API

      this.$emit('sending-complete')
    }
  }
}
</script>
v2
Emits Option
Declare all events with emits option
<!-- DataSender.vue -->
<template>
  <div>
    <button @click="sendData">Send Data</button>
  </div>
</template>

<script>
export default {
  emits:['sending-start', 'sending-complete'],
  methods: {
    sendData() {
      this.$emit('sending-start')

      // send data to API

      this.$emit('sending-complete')
    }
  }
}
</script>
v3
Emits Option
Benefits of Emit Option
- It documents component events in a single place
<script>
export default {
  emits:['sending-start', 'sending-complete'],
  //...
}
</script>
Important for devs and tooling
Emits Option
Benefits of Emit Option
- When using TypeScript events appear in intellisense results

Emits Option
Benefits of Emit Option
- Makes the removal of $listeners possible
- Why? because listeners for declared events are removed from the `$attrs`
- This also makes means no more .native
<MyButton @click.native="doThing" />Emits Option
Benefits of Emit Option
- Documents component events in a single place
- When using TypeScript events appear in intellisense results
- Listeners for declared events are removed from the `$attrs`
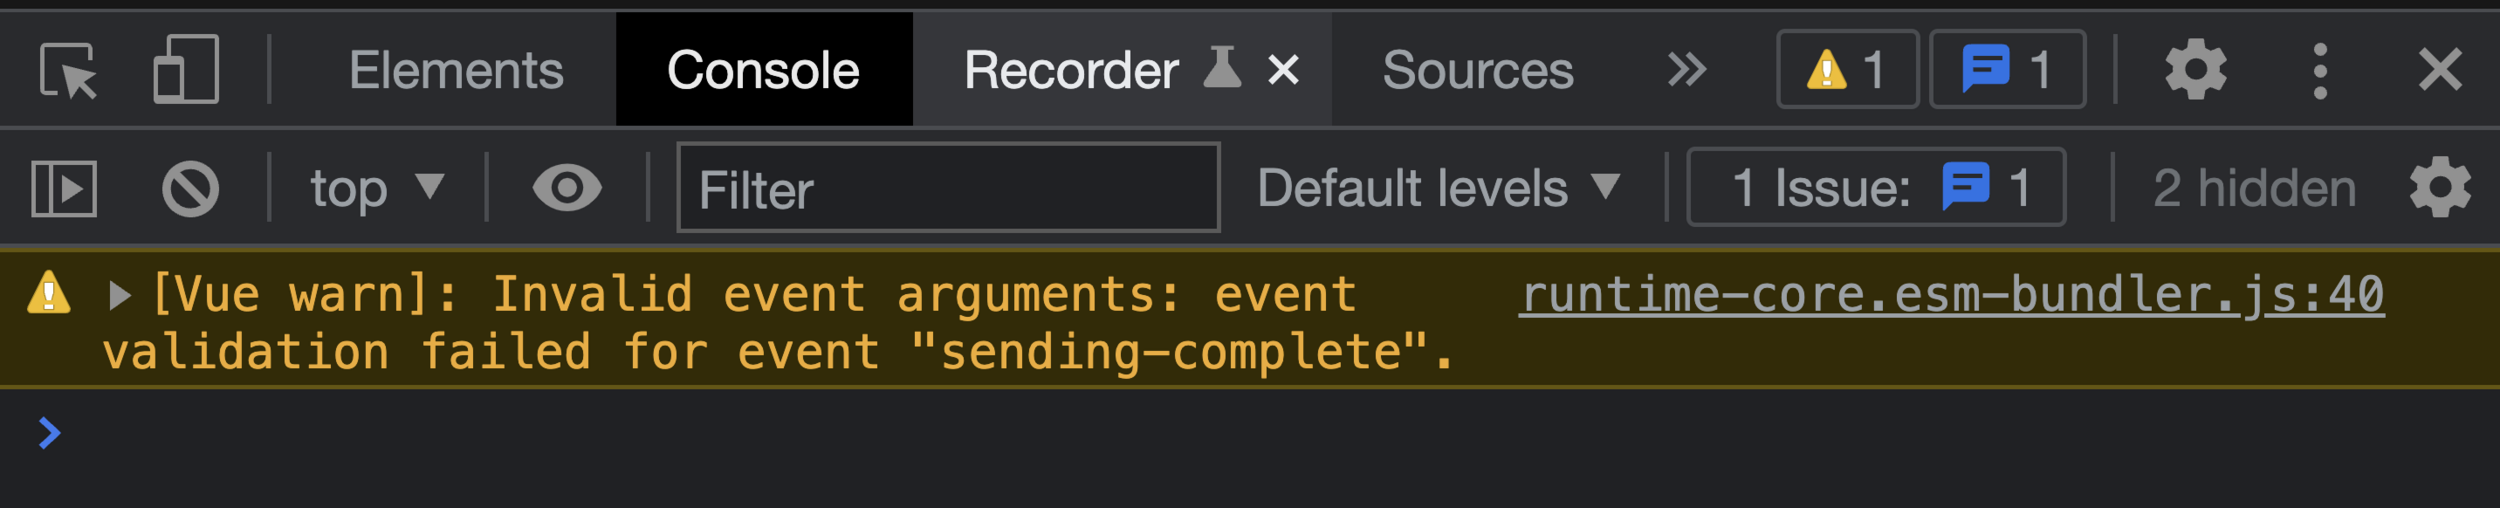
- Can validate emit payload
Emits Option
Validate event payload
<!-- DataSender.vue -->
<!--...-->
<script>
export default {
  // define as object to use validation
  emits:{
    // null is no validation
    'sending-start': null,

    // or provide function to validate
    // return truthy for valid, falsy for invalid
    'sending-complete'(payload){
      return !!(typeof payload.duration === 'number' && payload.response);
    }
  },
  methods: {
    sendData() {
      this.$emit('sending-start')

      // send data to API

      this.$emit('sending-complete', {
        duration: 2,
        // response: 'how are you'
      })
    }
  }
}
</script>
v3
Emits Option
Validate event payload with TypeScript
<script lang="ts">
import { defineComponent } from 'vue'

export default defineComponent({
  emits: {
    addBook(payload: { bookName: string }) {
      // perform runtime validation
      return payload.bookName.length > 0
    }
  },
  methods: {
    onSubmit() {
      this.$emit('addBook', {
        bookName: 123 // Type error!
      })

      this.$emit('non-declared-event') // Type error!
    }
  }
})
</script>
v3
Questions?
🙋🏾♀️
Assignment #6
👩💻👨🏽💻
⏰ 20 mins
Skip
Suspense
What is Suspense?
Admittedly a little difficult to understand if you've never heard of it before
Suspense
Orchestrate async dependencies
Without Suspense
With Suspense
With Suspense
(with more control at component level)


AKA - eliminate popcorn loading
Suspense
In Vue 2 you'd have local loading data in
the component
<!-- PostsList.vue -->
<script>
export default{
  data(){
    return {
      loading: true,
      posts: null
    }
  },
  async created(){
    const res = await fetch("https://myapi.com/posts")
    this.posts = await res.json()
    this.loading = false
  }
}
</script>
<template>
<div>
  <AppSpinner v-if="loading"/>
  <div v-else>...</div>
</div>
</template>
v2
Suspense
Somewhere higher in the higharchy would use the component and others like it
<!-- ParentComponent.vue -->
<template>
<div>
  <PostsList />
  <UsersList />
  <CommentsList />
</div>
</template>
v2
Suspense
Let's take the same component and
modify it for Vue 3
<!-- PostsList.vue -->
<script>
export default{
  data(){
    return {
      loading: true,
      posts: null
    }
  },
  async created(){
    const res = await fetch("https://myapi.com/posts")
    this.posts = await res.json()
    this.loading = false
  }
}
</script>
<template>
<div>
  <AppSpinner v-if="loading"/>
  <div v-else>...</div>
</div>
</template>
v2
Suspense
In Vue 3 you can get rid of all that loading state in the component
<!-- PostsList.vue -->
<script>
export default{
  data(){
    return {
      posts: null
    }
  },
  async created(){
    const res = await fetch("https://myapi.com/posts")
    this.posts = await res.json()
  }
}
</script>
<template>
<div>
  <div>...</div>
</div>
</template>
v3
Suspense
Then return an async setup function
instead
<!-- PostsList.vue -->
<script>
export default{
  async setup(){
    const res = await fetch("https://myapi.com/posts")
    const posts = await res.json()
    return { posts }
  },
}
</script>
<template>
<div>
  <div>...</div>
</div>
</template>
v3
Don't worry too much about how setup works right now
Suspense
With script setup you can use a top level await
<!-- PostsList.vue -->
<script setup>
const res = await fetch("https://myapi.com/posts")
const posts = await res.json()
</script>
<template>
<div>
  <div>...</div>
</div>
</template>
v3
Don't worry too much about how setup works right now
Suspense
Then in the parent you use suspense to show a
single loader once all promises have resolved
<!-- ParentComponent.vue -->
<template>
<div>
  <Suspense>
    <!-- Put all the async components
         inside the default slot -->
    <template #default>
      <PostsList />
      <UsersList />
      <CommentsList />
    </template>

    <!-- And your loader
         in the fallback slot -->
    <template #fallback>
      <AppSpinner/>
    </template>
  </Suspense>
</div>
</template>
v3
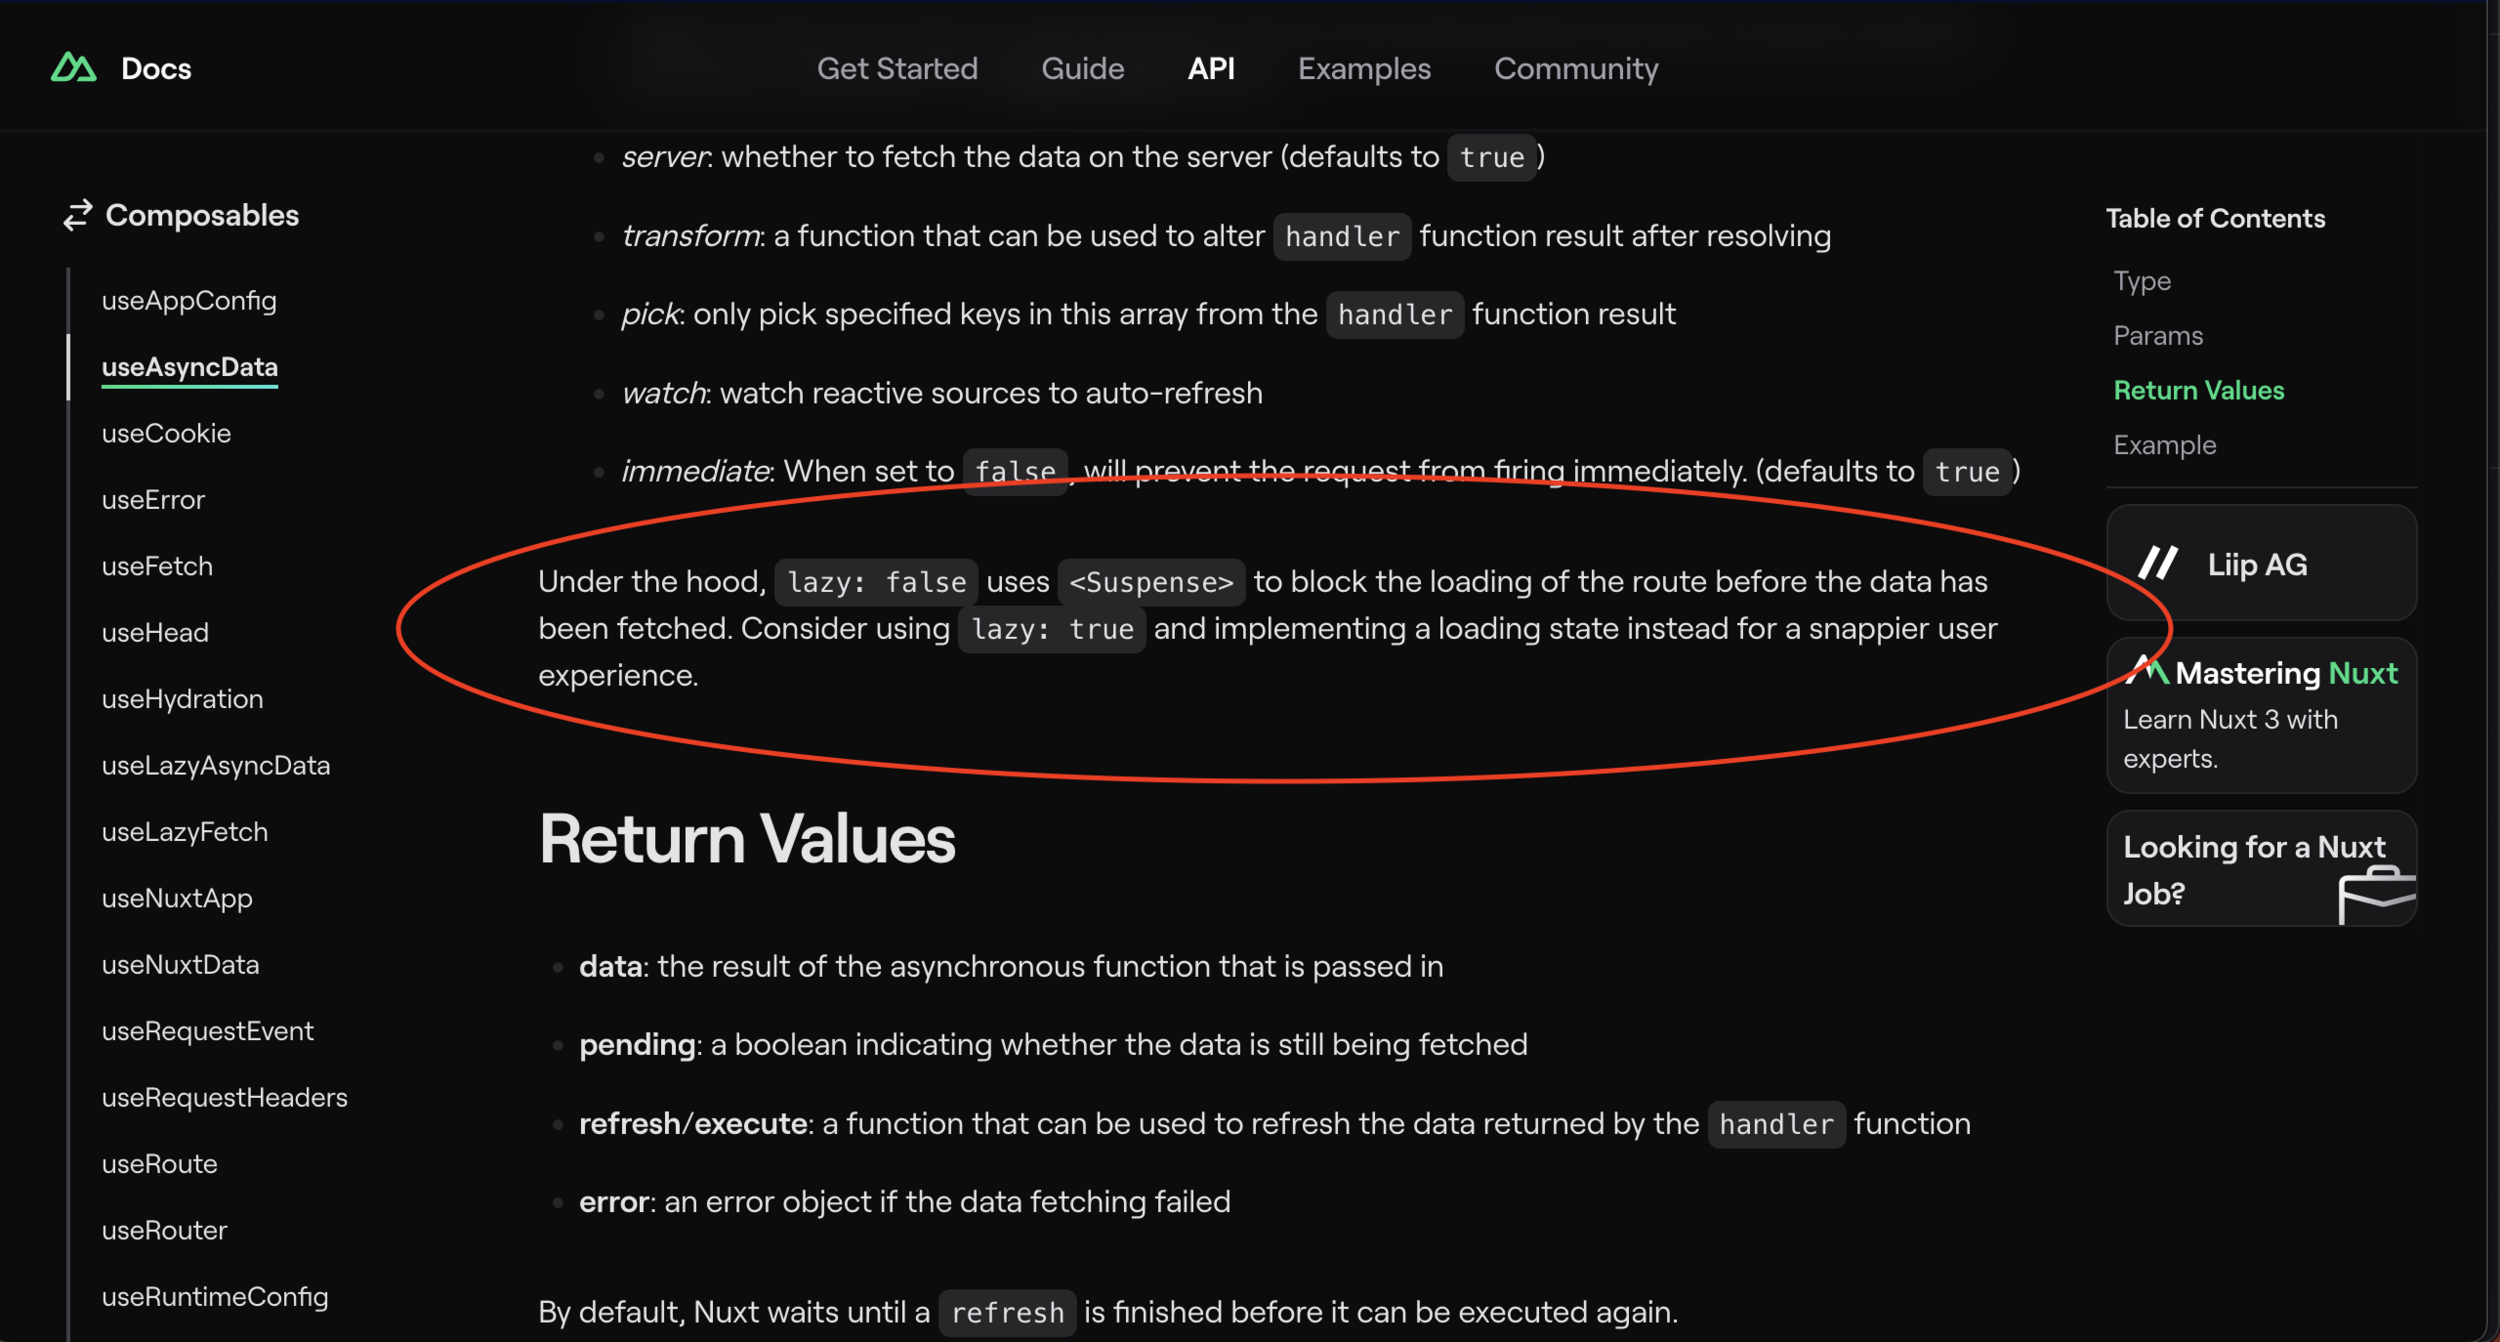
Suspense
Also works with asyncComponents
(different chunk from main js bundle)
<script>
import { defineAsyncComponent } from 'vue'

export default {
  components: {
    AdminPage: defineAsyncComponent(() =>
      import('./components/AdminPageComponent.vue')
    )
  }
}
</script>

<template>
  <Suspense>
    <template #default> <AdminPage /> </template>
    <template #fallback> <AppSpinner/> </template>
  </Suspense>
</template>
v3
Suspense
Total control by mixing async setup and local loading state
<!-- ParentComponent.vue -->
<template>
<div>
  <Suspense>

    <template #default>
      <!-- has async setup -->
      <PostsList />
      <!-- has async setup -->
      <UsersList />
      <!-- handles own loading state -->
      <CommentsList />
    </template>

    <template #fallback>
      <AppSpinner/>
    </template>
  </Suspense>
</div>
</template>
v3
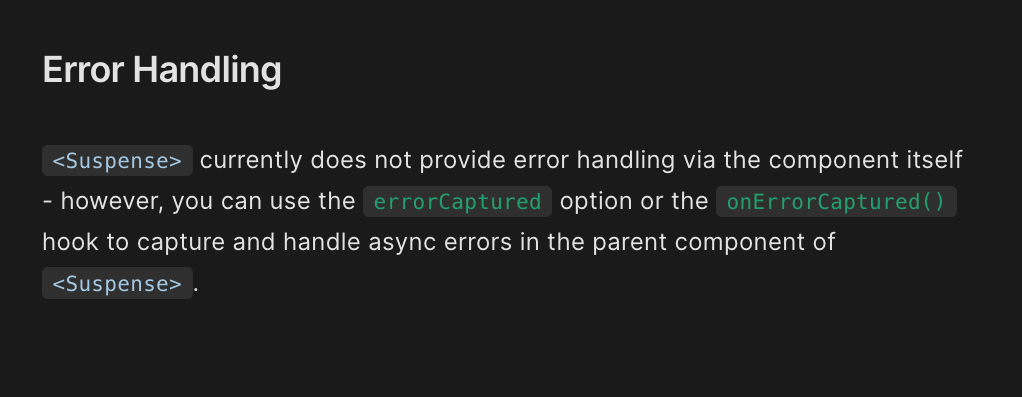
Suspense
Does it do error handling?
Suspense Recap
- Eliminates "Popcorn loading"
- Less boilerplate in components (no loading state)
- Handle loading state at top level
- Can still handle loading state in component if desired for total control
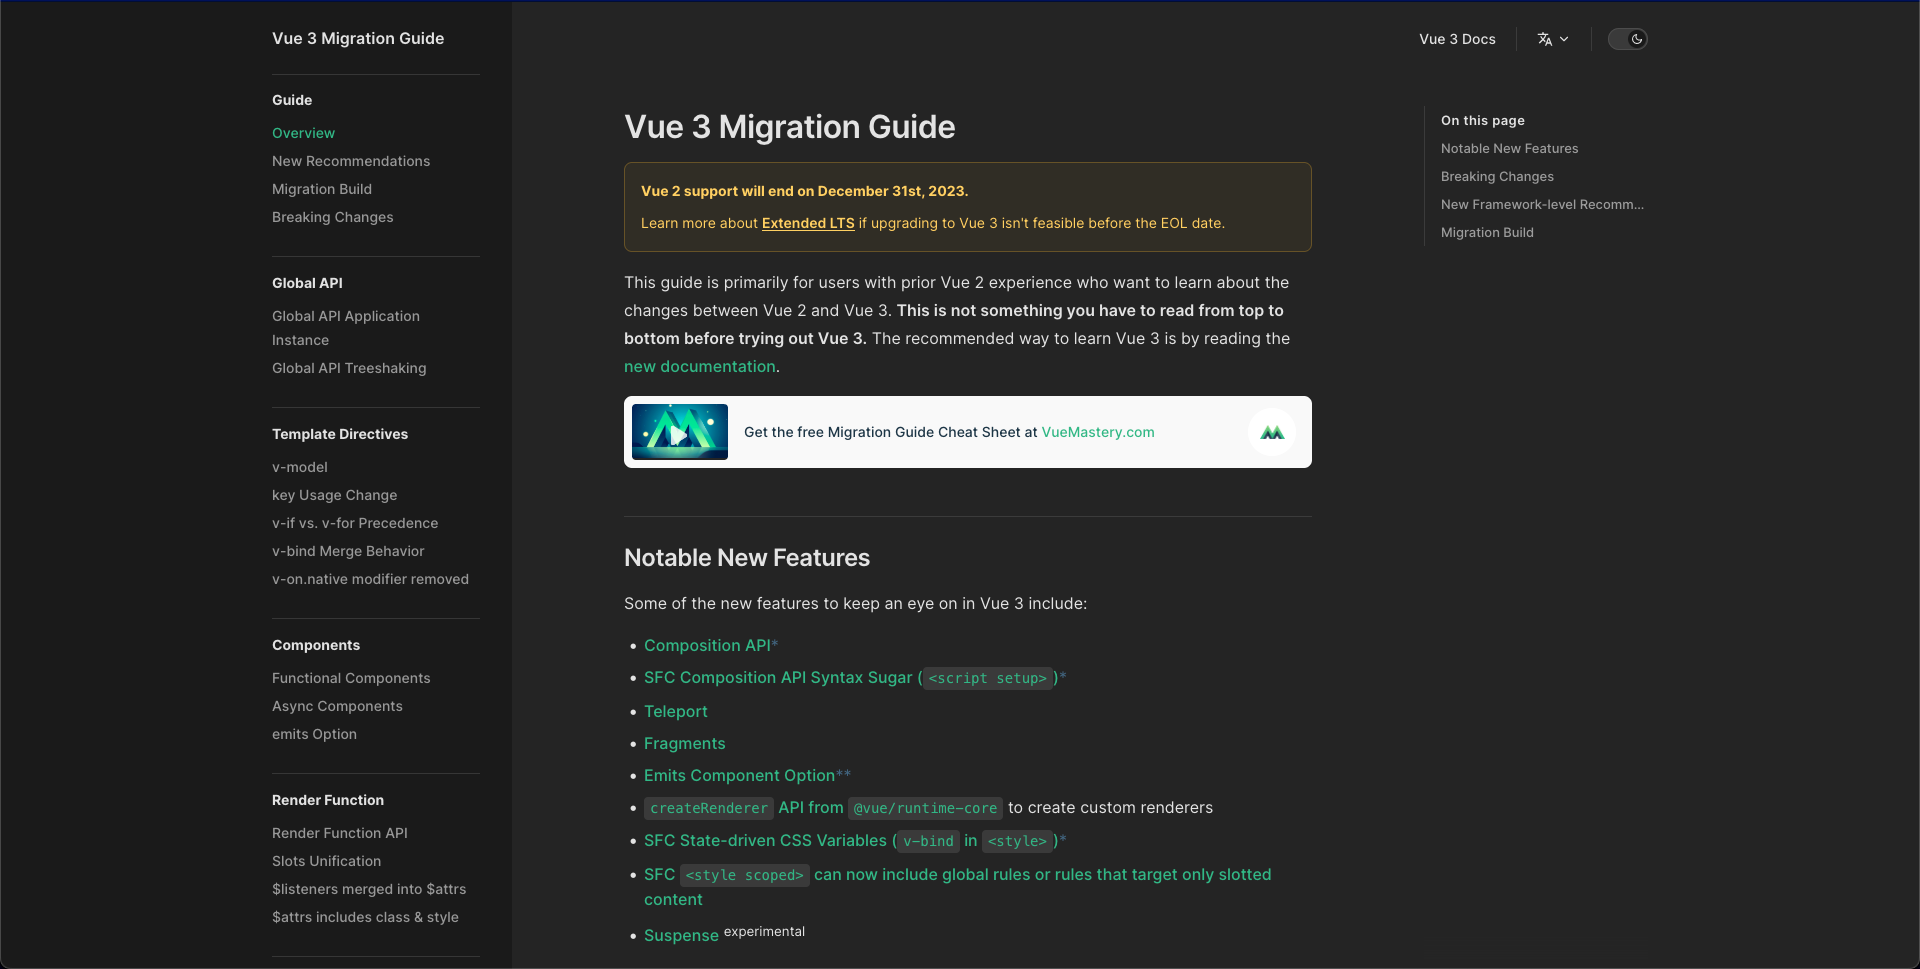
Suspense Word of Warning
Suspense is technically an experimental feature
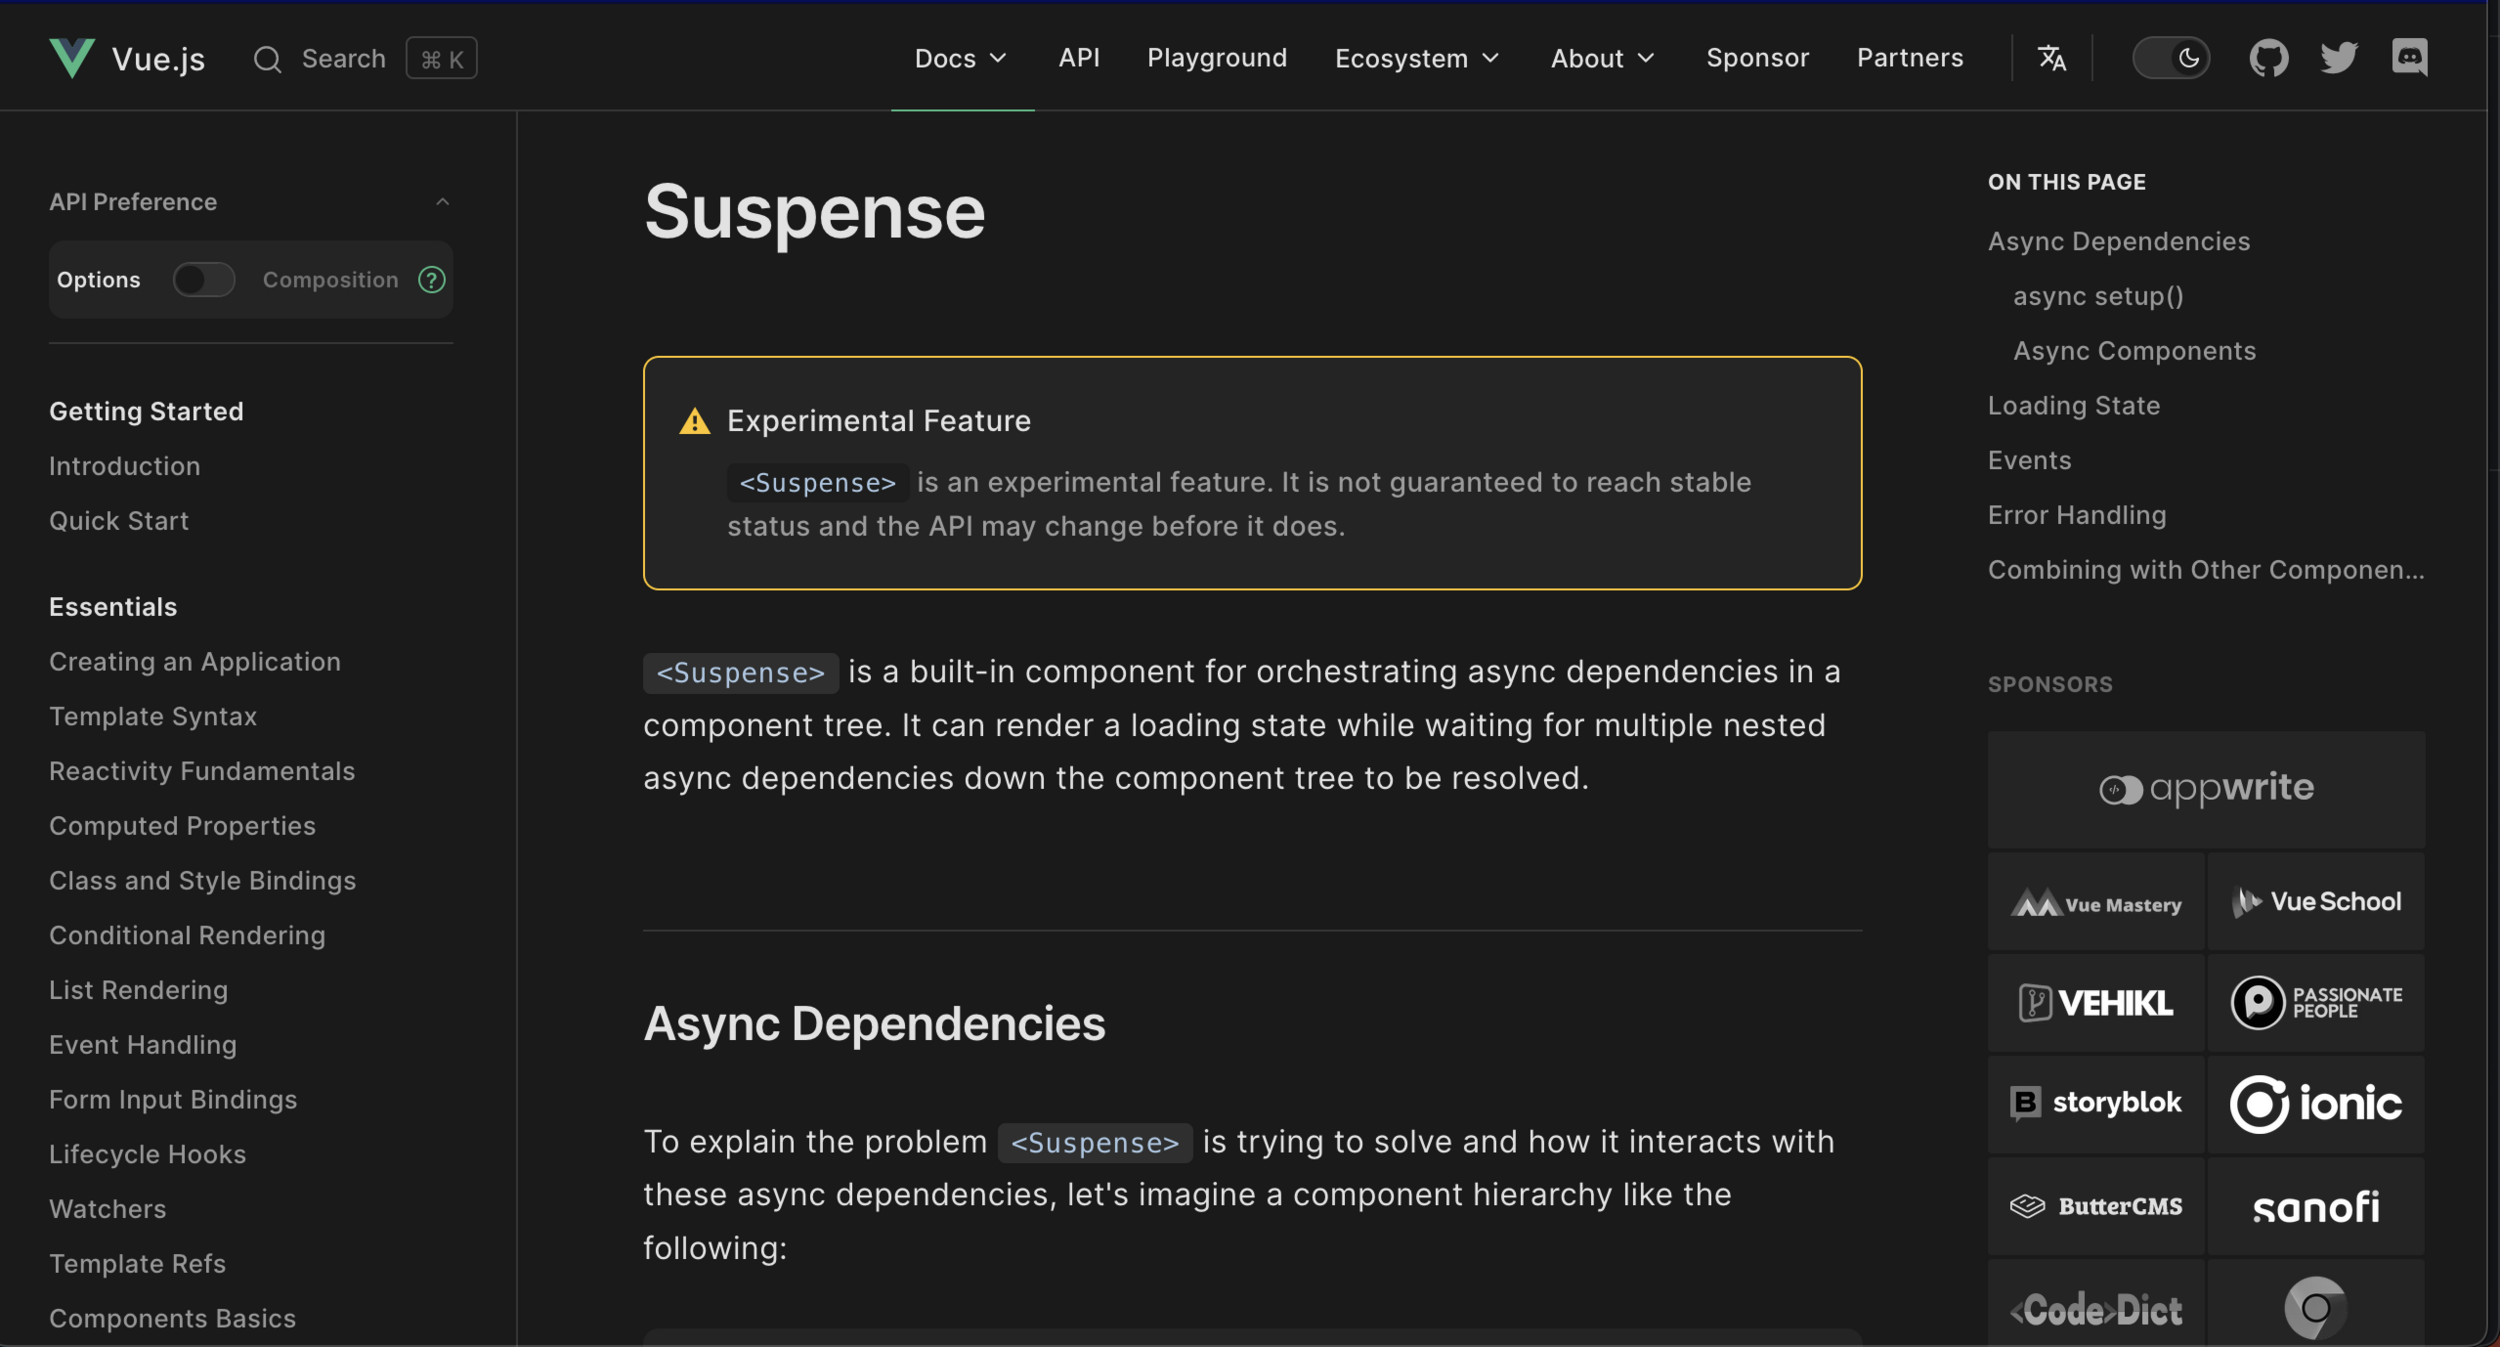
Suspense Word of Warning
But Nuxt 3 uses in production... so I wouldn't
worry about Vue.js core making breaking changes
Questions?
🙋🏾♀️
Assignment #7
👩💻👨🏽💻
⏰ 20 mins
5 Minute Break
☕️🙆
⏰ 5 mins
Migrate to Vue 3
Migrate to Vue 3
- All the great new features we've already talked about!
- Some improvements mean breaking changes that we haven't seen yet
How do I Migrate to V3?
How do I Migrate to V3?
The Official Migration guide provides:
- A list of breaking changes complete with examples of prior behavior, new behavior, and a strategy for migrating
Breaking Changes

Example of Filter

Notable Breaking Changes
Besides the breaking changes already seen throughout the workshop, there are a few more worthy of noting
🔖
Notable Breaking Changes
Async compnent syntax changed
<!-- Vue 2 -->
<script>
export default{
  components:{
    MyAsyncComponent: () => import('./MyAsyncComponent.vue')
  }
}
</script>

<!-- Vue 3 -->
<script>
import {defineAsyncComponent} from "vue"
export default{
  components:{
    MyAsyncComponent: defineAsyncComponent(
      () => import('./MyAsyncComponent.vue')
    )
  }
}
</script>
Watch on Arrays
<script>
export default{
  data(){
    return {
      food: ['Hamburger', 'Hotdog', 'Spaghetti', 'Taco']
    }
  },
  watch:{
    // Vue 2 - will fire when array replaced, order changed, item added, etc
    // Vue 3 - will only fire when array is replaced
    food(){
      console.log('food changed')
    },

    // Vue 3 - must provide for handler to fire on order changed, item added, etc
    food:{
      handler(){
        console.log('food changed')
      },
      deep: true
    }
  }
}
</script>
Notable Breaking Changes
Global API Treeshaking
<!-- Vue 2 -->
<script>
import Vue from 'vue'

Vue.nextTick(() => {
  // something DOM-related
})
</script>

<!-- Vue 3 -->
<script>
import { nextTick } from 'vue'

nextTick(() => {
  // something DOM-related
})
</script>
Notable Breaking Changes
Global API Treeshaking
<!-- Vue 2 -->
<script>
import Vue from 'vue'

Vue.nextTick(() => {
  // something DOM-related
})
</script>

<!-- Vue 3 -->
<script>
import { nextTick } from 'vue'

nextTick(() => {
  // something DOM-related
})
</script>
Notable Breaking Changes
Also Vue.version
<!-- Vue 2 -->
<script>
import Vue from 'vue'
console.log(Vue.version)
</script>

<!-- Vue 3 -->
<script>
import { version } from 'vue'
console.log(version)
</script>
Custom Directives Hooks
// Vue 2
Vue.directive('highlight', {
  bind(el, binding, vnode) {
    el.style.background = binding.value
  }
})

// Vue 3
const app = Vue.createApp({})

app.directive('highlight', {
  beforeMount(el, binding, vnode) {
    el.style.background = binding.value
  }
})
Notable Breaking Changes
custom directive hooks mirrors component lifecycle hooks
Custom Directives Hooks
Notable Breaking Changes
- created - new! This is called before the element's attributes or event listeners are applied.
- bind → beforeMount
- inserted → mounted
- beforeUpdate: new! This is called before the element itself is updated, much like the component lifecycle hooks.
- update → removed! There were too many similarities to
updated, so this is redundant. Please useupdatedinstead. - componentUpdated → updated
- beforeUnmount: new! Similar to component lifecycle hooks, this will be called right before an element is unmounted.
- unbind -> unmounted
Notable Breaking Changes
All breaking changes can be found at:
How do I Migrate to V3?
- A list of breaking changes complete with examples of prior behavior, new behavior, and a strategy for migrating
- A list of New Framework-level Recommendations
The Official Migration guide provides:
How do I Migrate to V3?
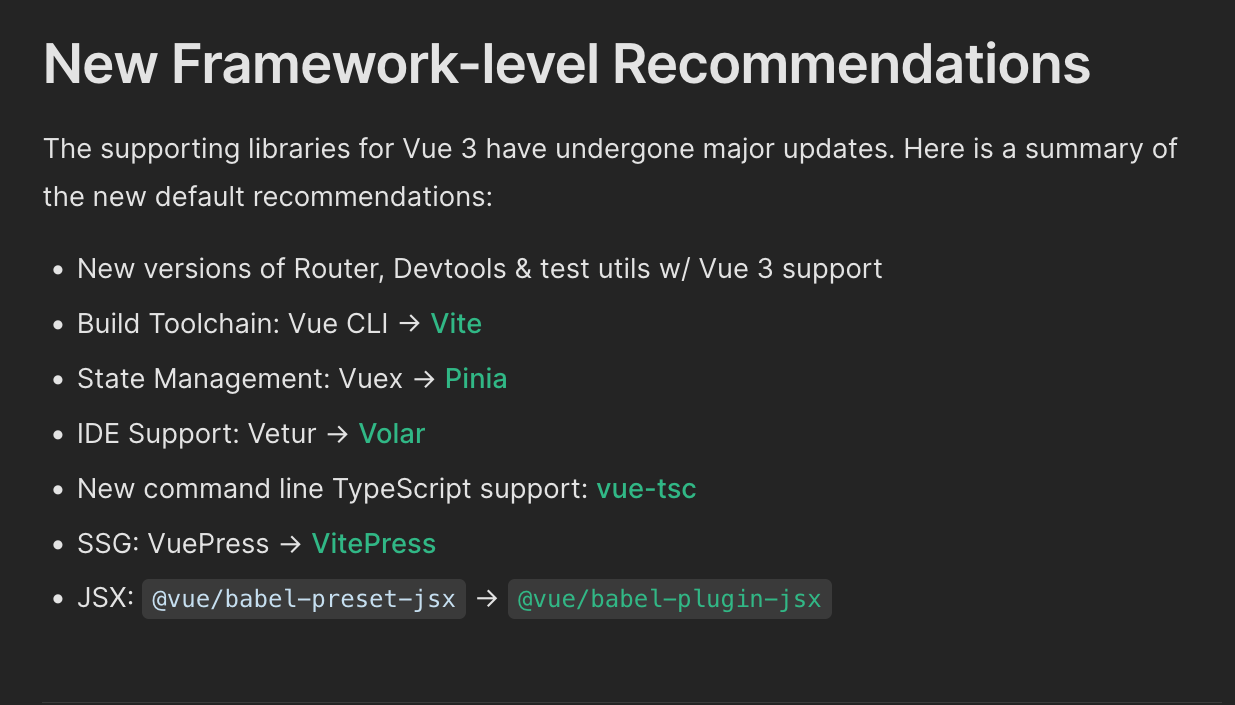
New Framework Level Recomendations
- Vue Core v2 ➡ v3
✅ Yes, this is the priority
🟥
🟨
🟨
🟥
-
Options ➡ Composition
➡️ Recommend using CAPI going forward as needed
- Vue CLI ➡ Vite
🏁 Sooner or later
- Vuex ➡ Pinia
🏁 Sooner or later
Difficulty
🟩 Easy
🟨 Medium
🟥 Hard
- Router, Devtools, test-utils
🟩
🟩
- Vetur ➡ Volar
✅ Yes for VS Code, super easy
Resource for Other Migrations
- Options ➡ Composition
- Fairly 1-to-1 Change
- Vue.js 3 Master Class
- Vue CLI ➡ Vite
- Vuex ➡ Pinia
How do I Migrate to V3?
- A list of breaking changes complete with examples of prior behavior, new behavior, and a strategy for migrating
- A list of New Framework-level Recommendations
- Migration build
The Official Migration guide provides:
What is the Migration Build?
- @vue/compat
- a build of Vue 3 that supports Vue 2 API's (mostly)
- Usage of features that have changed or been deprecated in Vue 3 will emit runtime warnings.
- Used for migrating from Vue 2 to Vue 3
Install Vue 3 and Migration Build
npm install vue@3.2.45
npm install @vue/compat
Step
1
Alias vue to @vue/compat
Step
2
// vue.config.js (vue-cli)
module.exports = {
  chainWebpack: config => {
    config.resolve.alias.set('vue', '@vue/compat')

    config.module
      .rule('vue')
      .use('vue-loader')
      .tap(options => {
        return {
          ...options,
          compilerOptions: {
            compatConfig: {
              MODE: 2
            }
          }
        }
      })
  }
}
Vue Docs also contains example configs for:
- Plain Webpack
- Vite
Vue CLI
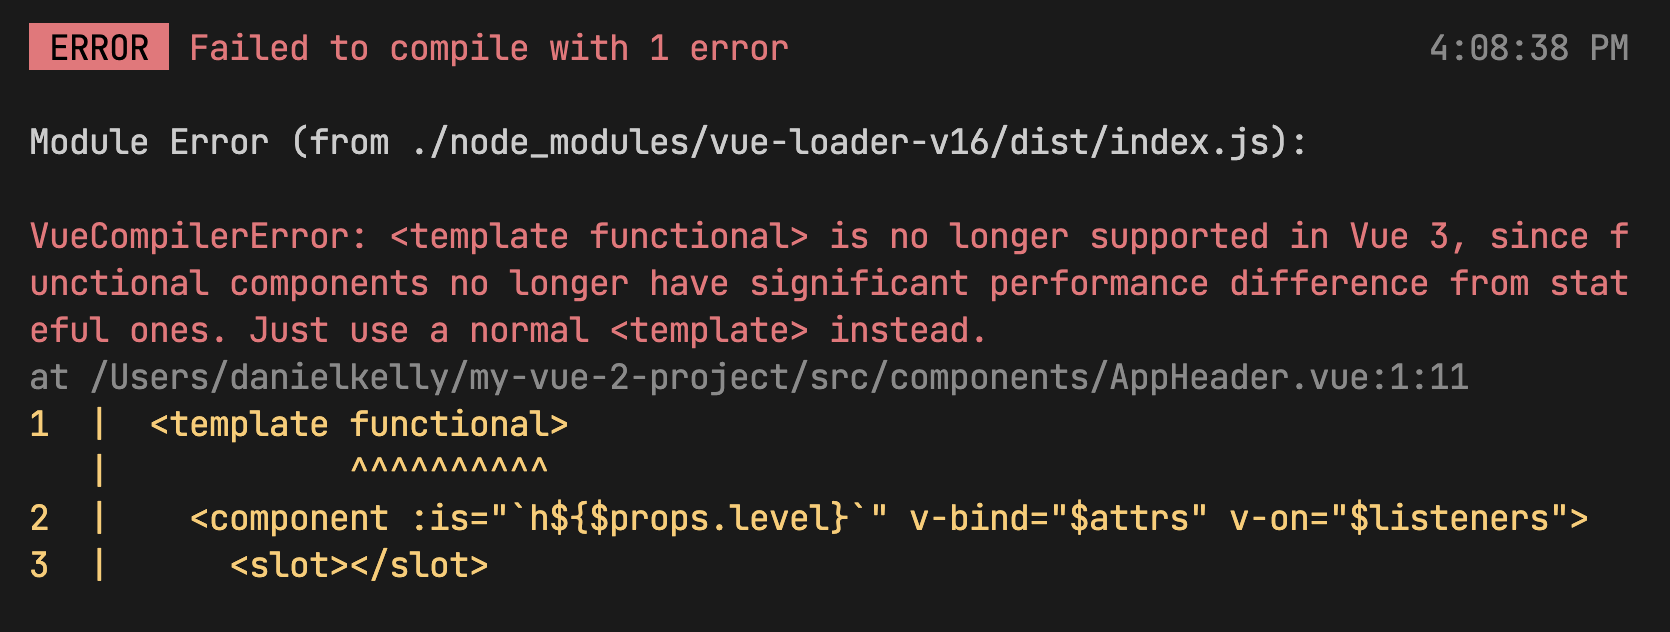
Handle compile time errors
Step
3
- Errors will display in the terminal when running `npm run serve`
- Is recommended to handle all compile time errors first
Handle compile time errors
Step
3
- Errors will display in the terminal when running `npm run serve`
- Is recommended to handle all compile time errors first
Set compiler to Vue 3 mode
Step
4
module.exports = {
  //...
  compilerOptions: {
    compatConfig: {
      MODE: 2,
      MODE: 3
    },
  },
}
Means the Vue compiler should expect all compiler level code to be written as per Vue 3 specification
Set compiler to Vue 3 mode
Step
4
module.exports = {
  //...
  compilerOptions: {
    compatConfig: {
      MODE: 2,
      MODE: 3
    },
  },
}
Means the Vue compiler should expect all compiler level code to be written as per Vue 3 specification
More on compatConfig in a minute!
Update dependencies like Vue Router and Vuex
Step
5
Official dependencies will have their own migration guides. Others may or may not. (This is where things can get a little dicey, but the ecosystem has definitely progressed)

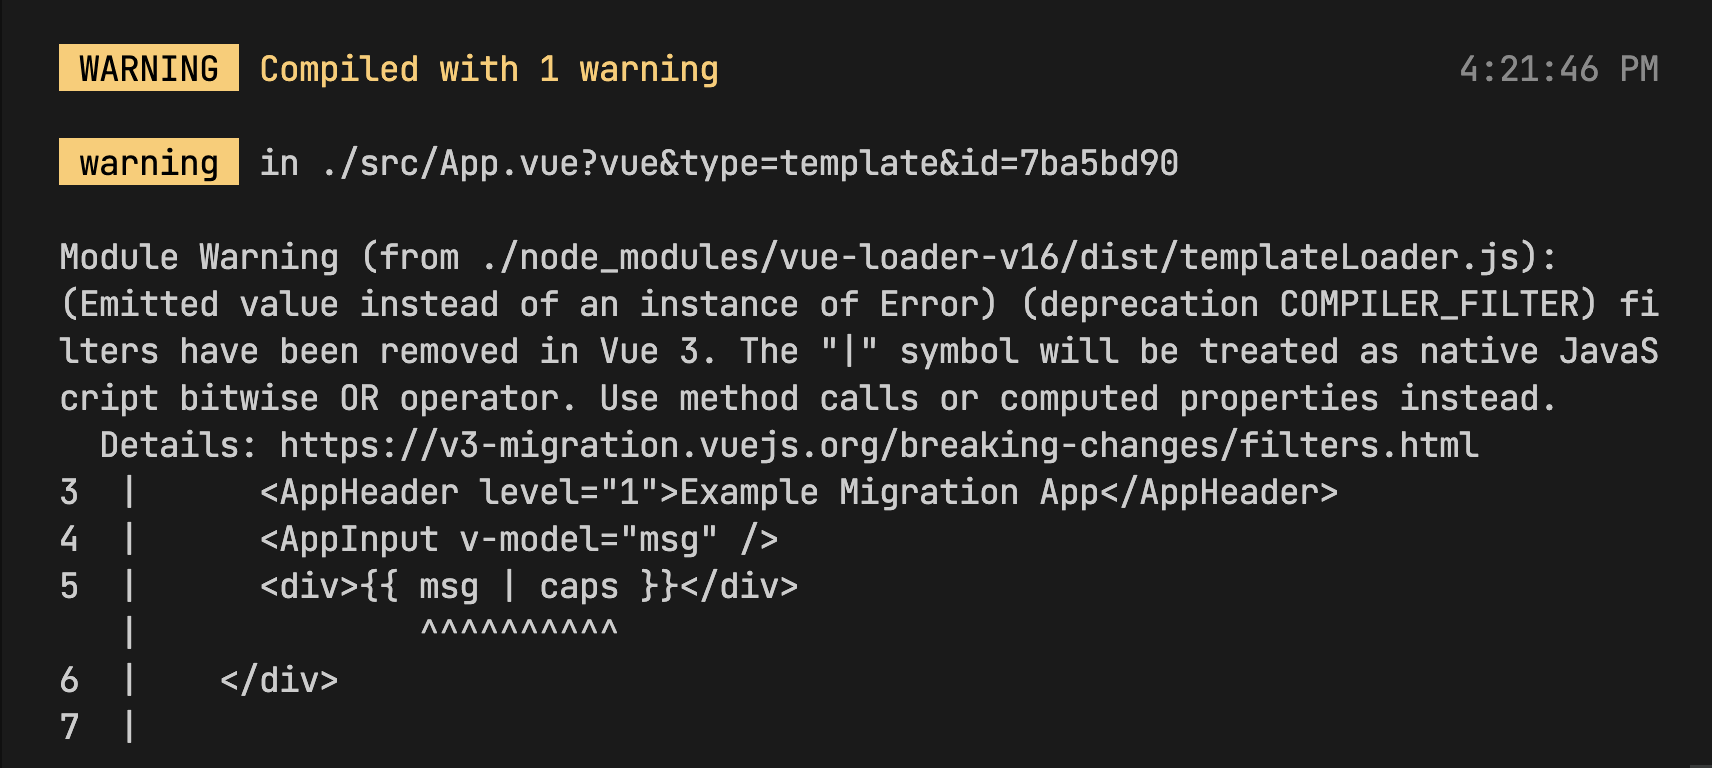
Run app and go through console warnings
Step
6

- Deprecations will show in console
- Can filter warnings in console to concentrate on one type of change at a time
IDs for warnings found here:
https://v3-migration.vuejs.org/migration-build.html#feature-reference
ID
Explanation
Link to docs
Run app and go through console warnings
Step
6
- Once you've handled all instances of a feature ID you can turn compatibility for it off
- All your tests involving that feature should now pass and be 100% compatible with Vue 3
// main.js
import { configureCompat } from 'vue'

// disable compat for certain features
configureCompat({
  COMPONENT_V_MODEL: false,
  FEATURE_ID_B: false
})
Run app and go through console warnings
Step
6
- you could also do the same config at the component level
- Use case for this? 🤷 Maybe you could migrate one component at a time as opposed to one feature ID at a time
export default {
  compatConfig: {
     COMPONENT_V_MODEL: false,
     FEATURE_ID_B: false
  }
  // ...
}
Run app and go through console warnings
Step
6
- Can deploy to production with partial migration (warnings still in console)
- Minimal performance hit
- HOWEVER, I recommend a git branch for complete migration and deploy all together

feature/vue-3-migration
and maybe a commit per feature ID?
Run app and go through console warnings
Step
6
- when all console warnings are gone you'll end up with a compatConfig that's disabled all applicable feature ID's
- but you'll have one feature ID left to handle: TRANSITION_CLASSES
configureCompat({
  COMPONENT_V_MODEL: false,
  GLOBAL_MOUNT_CONTAINER: false,
  GLOBAL_MOUNT: false,
  GLOBAL_SET: false,
  //...
})
Update transition class names (no console warning)
Step
7
- You can do a project-wide search in IDE for .*-enter and .*-leave CSS class names
- Replace with
- Replace with
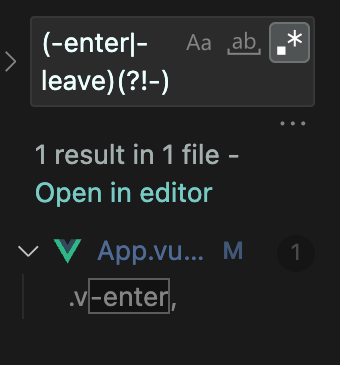
.v-enter.v-enter-from.v-leave.v-leave-fromUpdate transition class names (no console warning)
Step
7
- add TRANSITION_CLASSES to compatConfig
configureCompat({
  // ...
  TRANSITION_CLASSES: false
})
Update transition class names (no console warning)
Step
7
- once all the IDs have had compatibility turned off that's the equivalent of changing the compatConfig.mode to 3
configureCompat({
   MODE: 3
})
Switch to Vue 3 proper
Step
8
- uninstall @vue/compat
- remove any compat config
- remove alias of vue to @vue/compat
// package.json
"@vue/compat": "^3.1.0",
// vue.config.js
module.exports = {
  chainWebpack: (config) => {
    config.resolve.alias.set("vue", "@vue/compat");

    config.module
      .rule("vue")
      .use("vue-loader")
      .tap((options) => {
        return {
          ...options,
          compilerOptions: {
            compatConfig: {
              MODE: 3,
            },
          },
        };
      });
  },
};
import {
  createApp,
  configureCompat
} from "vue";

import App from "./App.vue";

configureCompat({
  COMPONENT_V_MODEL: false,
  GLOBAL_MOUNT_CONTAINER: false,
  GLOBAL_MOUNT: false,
  GLOBAL_SET: false,
  //...
})
1
2
3
Questions?
🙋🏾♀️
HOMEWORK!
👩💻👨🏽💻
Assignment #8
👩💻👨🏽💻
⏰ 30 mins
Do you accept this challenge? 💪
Questions?
🙋🏾♀️
General Q&A
❓
⏰ 15 minutes
Thank You!
🙏
See you tomorrow!
Vue 3 New Features
By Daniel Kelly


