Building real world apps in EmberJS
Filippos Vasilakis
Web Dev
What is EmberJS?
- Javascript front-end framework
- It's suppose to be a framework for "ambitious web applications"
- In reality it enforces some patterns to make our life easier
- MVC (MVVM specifically)
- (CoC) Convention over configuration
- (DRY) Don't repeat yourself
Now
- EmberJS/EmberData 2.5 (stable)
- 2500 addons
- Small but growing community
History
- SproutCore 1.0 by Charles Jolley
- SproutCore 2.0 on top of 1.0 was schedule, never made it
- AmberJS was a complete rewrite
- Renamed to EmberJS
Today
- Ember
- Router
- Routes
- Templates
- Controllers
- Components
- Helpers
- Ember-cli
-
ember-data
- Store
- Models
- Serializers
- Adapters
We will go through an Ember app and we will touch the following:
EmberJS Object Model
EmberJS adds some sugar on top of Javascript
- To define a new Ember class, call the extend() method on Ember.Object:
Person = Ember.Object.extend({
  say(thing) {
    alert(thing);
  }
});- To create a subclass from any existing class by calling its extend() method:
Developer = Person.extend({
  isDeveloper: true.
  say(thing) {
    return this._super(thing) + 'world';
  }
});- To create new instances of a class call the create() method:
var person = Person.create();
person.say('Hello'); // alerts " says: Hello"- To initialize an instance override init() (called automatically on create())
Person = Ember.Object.extend({
  init() {
    var name = this.get('name');
    alert(`${name}, reporting for duty!`);
  }
});- When accessing the properties of an object, use the get() and set() accessor methods:
var person = Person.create();
var name = person.get('name');
person.set('name', 'Tobias Fünke');
If you don't use those methods, computed properties won't recalculate, observers won't fire, and templates won't update
Our real App
A micro Twitter
It's the same app that Michael Hartl has build for the Rails tutorial
The API
Built in JSONAPI
| GET | /api/v1/session |
| POST | /api/v1/session |
| GET | /api/v1/users |
| POST | /api/v1/users |
| GET | /api/v1/users/:id |
| PUT | /api/v1/users/:id |
| DELETE | /api/v1/users/:id |
| GET | /api/v1/microposts |
| GET (feed) | /api/v1/microposts?feed_for_user_id=:id |
| POST | /api/v1/microposts |
| GET | /api/v1/microposts/:id |
| PUT | /api/v1/microposts/:id |
| DELETE | /api/v1/microposts/:id |
| GET | /api/v1/users/:user_id/followers |
| POST | /api/v1/users/:user_id/followers/:id |
| DELETE | /api/v1/users/:user_id/followers/:id |
| GET | /api/v1/users/:user_id/followings |
| POST | /api/v1/users/:user_id/followings/:id |
| DELETE | /api/v1/users/:user_id/followings/:id |
Let's start!
npm install -g ember-cli
npm install -g bower
ember new micro-twitter- minifys your code
- asset pipelining
- dependency management
- runtime configuration (environments)
- running tests from CLI
- automation!
Ember CLI
| ember | Prints out a list of available commands. |
| ember new <app-name> | Creates a directory called <app-name> and in it, generates an application structure. If git is available the directory will be initialized as a git repository and an initial commit will be created. Use --skip-git flag to disable this feature. |
| ember init | Generates an application structure in the current directory. |
| ember build | Builds the application into the dist/ directory (customize via the --output-path flag). Use the--environment flag to specify the build environment (defaults to development). Use the --watch flag to keep the process running and rebuilding when changes occur. |
| ember server | Starts the server. The default port is 4200. Use the --proxy flag to proxy all ajax requests to the given address. For example, ember server --proxy http://127.0.0.1:8080 will proxy all ajax requests to the server running at http://127.0.0.1:8080. Aliases: ember s, ember serve |
| ember generate <generator-name> <options> | Runs a specific generator. To see available generators, run ember help generate. Alias: ember g |
| ember destroy <generator-name> <options> | Removes code created by the generate command. If the code was generated with the --pod flag, you must use the same flag when running the destroy command. Alias: ember d |
| ember test | Run tests with Testem in CI mode. You can pass any options to Testem through a testem.json file. By default, Ember CLI will search for it under your project’s root. Alternatively, you can specify a config-file. Alias:ember t |
| ember install <addon-name> | Installs the given addon into your project and saves it to the package.json file. If provided, the command will run the addon’s default blueprint. |
Ember CLI
(taken from http://ember-cli.com/user-guide/)
| app/ | Contains your Ember application’s code. Javascript files in this directory are compiled through the ES6 module transpiler and concatenated into a file called <app-name>.js. See the table below for more details. |
| dist/ | Contains the distributable (optimized and self-contained) output of your application. Deploy this to your server! |
| public/ | This directory will be copied verbatim into the root of your built application. Use this for assets that don’t have a build step, such as images or fonts. |
| tests/ | Includes your app’s unit and integration tests, as well as various helpers to load and run the tests. |
| tmp/ | Temporary application build-step and debug output. |
| bower_components/ | Bower dependencies (both default and user-installed). |
| node_modules/ | npm dependencies (both default and user-installed). |
| vendor/ | Your external dependencies not installed with Bower or npm. |
| .jshintrc | JSHint configuration. |
| .gitignore | Git configuration for ignored files. |
| ember-cli-build.js | Contains the build specification for Broccoli. |
| bower.json | Bower configuration and dependency list. See Managing Dependencies. |
| package.json | npm configuration and dependency list. Mainly used to list the dependencies needed for asset compilation. |
Ember CLI folder structure
(taken from http://ember-cli.com/user-guide/)
| app/app.js | Your application’s entry point. This is the first executed module. |
| app/index.html | The only page of your single-page app! Includes dependencies, and kickstarts your Ember application. See app/index.html. |
| app/router.js | Your route configuration. The routes defined here correspond to routes in app/routes/. |
| app/styles/ | Contains your stylesheets, whether SASS, LESS, Stylus, Compass, or plain CSS (though only one type is allowed, see Asset Compilation). These are all compiled into <app-name>.css. |
| app/templates/ | Your HTMLBars templates. These are compiled to /dist/assets/<app-name>.js. The templates are named the same as their filename, minus the extension (i.e. templates/foo/bar.hbs -> foo/bar). |
|
app/controllers/app/models/, etc. |
Ember CLI app/ folder structure
(taken from http://ember-cli.com/user-guide/)
The first step is to define the basic 'routes' of our app
But let'se see what 'routes' are in EmberJS first..
Routing is the core of the whole framework
When we say Ember Routes we mean the URLs structure but also the UI structure.
(the directory structure of templates/routes/controllers follow the routing as well!)
# config/routes.rb
resources :artist do
  resources :albums do
    resources :album
  end
end
// config/router.js
App.Router.map(function() {
this.route('artist', { path: 'artists/:artist_id' }, function() {
this.route('albums', function() {
// since we passed a function, index is generated for us
this.route('album', { path: '/:album_id' });
});
});
});≠

At every level of nesting (including the top level), Ember automatically provides a route for the / path named index
Each template will be rendered into the {{outlet}} of its parent route's template.
Ember Routes
<header class="navbar navbar-fixed-top navbar-inverse">
<!-- html(bars) code -->
</header>
<div class="container">


  {{outlet}} <!-- The child(nested) template -->


  <footer class="footer">
   <!-- html(bars) code -->
  </footer>
</div>
<h1> Welcome to our wonderful website! </h1>Application Root Template
Index Template
This loads everytime when a suburl is accessed
This loads only when the root url is accessed (which happens to be the Application Template)
+
<header class="navbar navbar-fixed-top navbar-inverse">
<!-- html(bars) code -->
</header>
<div class="container">


  <h1> Welcome to our wonderful website! </h1>

  <footer class="footer">
   <!-- html(bars) code -->
  </footer>
</div>
http://localhost:4200/
Ember Routes
<header class="navbar navbar-fixed-top navbar-inverse">
<!-- html(bars) code -->
</header>
<div class="container">


  {{outlet}} <!-- The child(nested) template -->


  <footer class="footer">
   <!-- html(bars) code -->
  </footer>
</div>
Application Root Template
<h2> {{artistName}} </h2>

{{outlet}} <!-- index or albums/songs/bio template -->
Artist Root Template
This loads everytime when a suburl is accessed
+
This loads only when the root url of the Artist Route is accessed
<header class="navbar navbar-fixed-top navbar-inverse">
<!-- html(bars) code -->
</header>
<div class="container">


  <h2> Bob Dylan </h2>

  <p> This artist is well known for ....

  <footer class="footer">
   <!-- html(bars) code -->
  </footer>
</div>
<p> This artist is well know for .... </p>Artist Index Template
This loads only when the root url of the ArtistAlbums Route is accessed
+
http://localhost:4200/artists/bobdylan
Ember Routes
<header class="navbar navbar-fixed-top navbar-inverse">
<!-- html(bars) code -->
</header>
<div class="container">


  {{outlet}} <!-- The child(nested) template -->


  <footer class="footer">
   <!-- html(bars) code -->
  </footer>
</div>
Application Root Template
<h2> {{artistName}} </h2>

{{outlet}} <!-- albums/songs/bio template -->
Artist Root Template
This loads everytime when a suburl is accessed
+
This loads only when the root url of the Artist Route is accessed
<header class="navbar navbar-fixed-top navbar-inverse">
<!-- html(bars) code -->
</header>
<div class="container">


  <h2> Bob Dylan </h2>

    <ul>
      <li>Bob Dylan</li>
      <li>The Freewheelin' Bob Dylan</li>
      <li>The Times They Are a-Changin'</li>
    </ul>

  <footer class="footer">
   <!-- html(bars) code -->
  </footer>
</div>
<h3> Albums </h3>
<!-- albums html(bars) code -->
Albums Index Template
This loads only when the root url of the ArtistAlbums Route is accessed
+
http://localhost:4200/artists/bobdylan/albums
Ember Routes

Routes in Ember play a crucial role
Ember Routes
A route in Ember:
- Retrieves the models (a model could be anything)
- Initializes the controller and selects template to be shown
- A route has deliberate access to other routes and controllers using the controllerFor('route') and modelFor('route') functions
Ember Routes
Router Request Lifecycle
-
enter()
-
(private)
-
-
activate()
-
executed when entering the route
-
-
Model hooks
-
beforeModel(transition)
-
model(params)
-
afterModel(resolvedModel, transition)
-
-
setupController(controller, model)
-
renderTemplate(controller, model)
Usually model hooks and setupController() are used
Ember Routes
Route model hooks
- They are used to load route data.
- It could be anything:
- a request to the API using Ember Data
- a request to an API using regular JS
- a Javascript Object
- create a webRTC connection
- Ember will wait until the data finishes loading (until the promise is resolved) before continuing
- each hook has a different use case:
- beforeModel(transition)
- model(params)
- afterModel(model, transition)
Ember Routes
setupController(controller, model)
- It's the place to setup your controller(s)
- It doesn't block like model hooks, so some people use it to setup secondary models
- i.e. if a model takes too much time to load while the template can live without it, you can move it here
- It has been removed from Ember docs so I guess it's not best practice anymore :)
renderTemplate(controller, model)
- Helps you render a different template in the {{outlet}} of the parent template
- Usefull if you have multiple {{outlet}} in a template
Ember Controllers
A controller in Ember:
- Used to be a model decorator/proxy but now it's a model presenter
- It automatically gets the model by the default Ember Route (from setupController() as we will see later)
- In essence, it initializes all the components that the template includes while they act like a wrapping component themselves
- Ember community wants to eliminate controllers and move on to routable components
- IMHO this will not happen anytime soon and they will stay for the next 2 years
- they offer some good features that can't be found elsewhere in EmberJS stack (like query params)
Ember Templates
A template in Ember:
- Organize the layout of HTML in an application
- Htmlbars templates contain static HTML and dynamic content inside Handlebars expressions, which are invoked with double curly braces: {{}}
- A template is "rendered" by a route or in the lower level by a component
Ember Components
A component in Ember:
- They are isolated and the controller (or parent component) should inject anything that is needed
- In reallity components can have access to global state if we want to but it's a bad practice :)
- A component has it's own lifecycle and template that it renders
- Components must have at least one dash in their name
- While templates describe how a user interface looks, components control how the user interface behaves.
//app/config.js
import Ember from 'ember';
import config from './config/environment';

const Router = Ember.Router.extend({
  location: config.locationType
});

Router.map(function() {
  this.route('help');
  this.route('about');
  this.route('contact');

  this.route('sessions.new', {path: '/login'});
  this.route('users.new', {path: '/signup'});

  this.route('users', function() {
  });
  this.route('user', {path: '/users/:user_id'}, function() {
    this.route('edit');
    this.route('following');
    this.route('followers');
  });
});

export default Router;
Back to our micro-twitter app
Having ready the app/router.js, we have defined the basic specifications of our app
We nest 'edit', 'followings' and 'followers' routes under user to reuse 'user' route model
Back to our micro-twitter app
Implementing our first route/template
//app/templates/application.hbs
<header class="navbar navbar-fixed-top navbar-inverse">
  <div class="container">
    {{#link-to 'index' id='logo'}}sample app{{/link-to}}
    <nav>
      <ul class="nav navbar-nav pull-right">
        <li>{{link-to 'Home' 'application'}}</li>
        <li>{{link-to 'Help' 'help'}}</li>
      </ul>
    </nav>
  </div>
</header>
<div class="container">

  {{outlet}}

  <footer class="footer">
    <nav>
      <ul>
        <li>{{link-to 'About' 'about'}}</li>
        <li>{{link-to 'Contact' 'contact'}}</li>
      </ul>
    </nav>
  </footer>
</div>
Our basic Application Template
//app/templates/help.hbs
<h1>Help</h1>
<p>
  Do you need help? Open a gihub issue in the repository
  <a href="https://github.com/vasilakisfil/rails_tutorial_ember">
    <em>rails_tutorial_ember</em>
  </a>.
</p>
Back to our micro-twitter app
http://localhost:4200/help
//app/routes/help.js
import Ember from 'ember';

export default Ember.Route.extend({});
If your route is empty, you don't need to define it (ember does that automatically)
- User navigates to http://localhost:4200/help
- Ember fires the Route object
- Route retrieves the model (empty)
- Route sets up the (default) controller and renders the (default) template
Implementing our first route/template
Back to our micro-twitter app
Implementing our first route/template

Ember Templates
- Ember templates are quite powerful, utilizing htmlbars
{{#if isAtWork}}
  Ship that code!
{{else if isReading}}
  You can finish War and Peace eventually...
{{/if}}
{{#each people as |person|}}
Hello, {{person.name}}!
{{else}}
Sorry, nobody is here.
{{/each}}<div id="logo">
<img src={{logoUrl}} alt="Logo">
</div>Conditionals
Iterating lists
Binding attributes
{{input type="text" value=firstName disabled=entryNotAllowed size="50"}}Input helpers
<input type="text" value={{firstName}} disabled={{entryNotAllowed}} size="50">Personally I would like to see inputs like that
But that's not possible, yet.
After Ember 2.0 and htmlbars Templates are very powerful and they will never cause you a problem.
(before Ember 1.12 we had many issues though )
{{#link-to "photos.edit" 1}}First Photo Ever{{/link-to}}link-to helper
Ember Actions
Ember actions are events that are propagated from template to controller and then to the routes until one of them catches the event.

- Ember community tries to eliminate controllers completely
- But until this happens, you have to include ember-route-actions-helper addon if you want seamless bubbling (otherwise you might run into some edge cases in which you need to catch and re-send the action in the controller)
<h3><button {{action "toggleBody"}}>{{title}}</button></h3>
{{#if isShowingBody}}
  <p>{{{body}}}</p>
{{/if}}
export default Ember.Route.extend({
actions: {
toggleBody() {
this.toggleProperty('isShowingBody');
}
}
});- Action handlers can be defined in a Route, Controller or a Component
- It's a good idea to try to define them as high as possible in the hierarchy so that you can reuse them across multiple templates
- Data Down, Actions Up (DDAU) axiom is a good start
Ember Actions
Data Down, Actions Up (DDAU)
Simpler than what it seems
- You create an object in the Route and you inject it in the controller/template
- You (user) modify the object in the template
- You change the state of the object or of the app by sending an action up (with a copy of the modified data) and catch the action by an action handler (ideally in the route)
It's common sense that if you try to change the app's state from the low level (component) you will increase the complexity it in the long run leading into more bugs
But if the change is local (only inside a component) and not app-wide don't afraid to break the axiom :)
Always handle actions in the Route when the change is app-wide because routes have access to other routes,controllers and models!
//app/routes/session/new.js
import Ember from 'ember';

export default Ember.Route.extend({
  model() {
    return Ember.Object.create({
      identifier: null,
      password: null
    });
  }
});
Let's build the login form! (http://localhost:4200/login)
Back to our micro-twitter app...
We create the object to be passed down to controller automatically by setupController()
The route

//app/templates/sessions/new.hbs
<h1>Log in</h1>

<div class="row">
  <div class="col-md-6 col-md-offset-3">

    {{#if loginError}}
    <div id="error_explanation">
      <div class="alert alert-danger">
        Invalid email/password combination
      </div>
    </div>
    {{/if}}

    <form class="form-basic" role="form" {{action (route-action 'createSession' model) on='submit'}}>
      <label for="user_email">Email</label>
      {{input class="form-control" type="email" value=model.identifier size="50"}}

      <label for="user_password">Password</label> {{link-to '(forgot password)' 'users.new'}}
      {{input class="form-control" type="password" value=model.password size="50"}}

      <label class="checkbox inline" for="session_remember_me">
        {{input type="checkbox" name="session_remember_me" checked=isAdmin}}
        <span>Remember me on this computer</span>
      </label>

      <input type="submit" value="Log in" class="btn btn-primary">
    </form>
    <p>New user? {{link-to 'Sign up now!' 'users.new'}}</p>
  </div>
</div>
The template
Back to our micro-twitter app...
Building the login form! (http://localhost:4200/login)
//app/routes/session/new.js
import Ember from 'ember';

export default Ember.Route.extend({
  model() {
    return Ember.Object.create({
      identifier: null,
      password: null
    });
  },

  actions: {
    createSession(session) {
      var _this = this;
      //handle session creation
      Ember.$.ajax({
        url: 'http://localhost:3000/api/v1/session',
        type: 'POST',
        data: session.toJson(),
        contentType: 'application/json;charset=utf-8',
        dataType: 'json'
      }).then(
        function(response) {
          //handle the token etc
        },
        function(error) {
          _this.controllerFor('login').set('loginError', true);
      });
    },
  },
});
Back to our micro-twitter app...
We handle the action in the route
Building the login form! (http://localhost:4200/login)
Ember Addons
//app/routes/session/new.js
import Ember from 'ember';

export default Ember.Route.extend({
  model() {
    return Ember.Object.create({
      identifier: null,
      password: null
    });
  },

  actions: {
    createSession(session) {
      var _this = this;
      this.get('session').authenticate(
        'authenticator:devise',
        session.get('identifier'),
        session.get('password')
      ).catch((reason) => {
        _this.controllerFor('login').set(
          'errorMessage',
          reason.error || reason
        );
      });
    },
    destroySession() {
      this.get('session').invalidate();
    },
  },
});
Ember has 2500 addons
Usually you will always find an addon for every common problem
Here we use ember-simple-auth one of the most popular authentication addons for Ember
You can create an authenticator/authorizer for any API in no time
If you own the API, you can structure it in such a way to use an already implemented authenticator/authorizer
Here we use Devise authenticator
Implementing the user edit form
Back to our micro-twitter app...
But let's talk about Ember Data first that help us to sync data to our backend
Ember Data
It provides an ORM over the data, regadless the transfer medium that is used below (HTTP API, WebSockets, IndexDB etc)
//app/models/user.js
import Model from 'ember-data/model';
import attr from 'ember-data/attr';

export default Model.extend({
  name: attr('string'),
  email: attr('string'),
  password: attr('string'),
  updatedAt:  attr('date'),
  createdAt:  attr('date')
});
{
"data": {
"id": "1",
"type": "users",
"attributes": {
"name": "Example User",
"email": "example@embertutorial.org",
"created-at": "2016-05-26T02:57:38Z",
}
}
}{
"user": {
"id": 1,
"name": "Example User",
"email": "example@railstutorial.org",
"created_at": "2016-05-26T02:57:38Z"
}
}JSONAPI spec
regular JSON
Mapping to Ember Data
Ember Data

The serializer and adapter define the way EmberData will interact with the API
Since Ember 2.0, JSONAPI is the default
But regular (AMS) JSON is very popular as well
Creating your own serializer and adapter is easy which means any API can work with EmberData if you have right adapter/serializer
The serializer is responsible for the data(json) format
The adapter is responsible for the endpoints, headers and anything else not related the data itself
Ember Data
It provides an ORM over the data, regadless the transfer medium that is used below (HTTP API, WebSockets, IndexDB etc)
//app/models/user.js
import Model from 'ember-data/model';
import attr from 'ember-data/attr';

export default Model.extend({
  name: attr('string'),
  email: attr('string'),
  password: attr('string'),
  updatedAt:  attr('date'),
  createdAt:  attr('date')
});
var user = this.store.findRecord('user', 1); // => GET /users/1
var user = this.store.peekRecord('user', 1); // => no network request
var users = this.store.findAll('user'); // => GET /users
var users = this.store.peekAll('user'); // => no network request
// GET to /users?filter[name]=Peter
this.store.query('users', { filter: { name: 'Peter' } }).then(function(peters) {
// Do something with `peters`
});
//if you know that your filter is unique
//this picks up the only one resource from the collection (if there is any)
this.store.queryRecord('user', { filter: { email: 'tomster@example.com' } }).then(function(tomster) {
// do something with `tomster`
});
Querying records..
Ember Data
It provides an ORM over the data, regadless the transfer medium that is used below (HTTP API, WebSockets, IndexDB etc)
//app/models/user.js
import Model from 'ember-data/model';
import attr from 'ember-data/attr';

export default Model.extend({
  name: attr('string'),
  email: attr('string'),
  password: attr('string'),
  updatedAt:  attr('date'),
  createdAt:  attr('date')
});
var user = store.createRecord('user', {
name: 'Tom Dale',
email: 'tomdale@email.com',
password: '123123123'
});
user.save() //POST /users
store.findRecord('user', 1).then(function(user) {
user.get('name'); // => "Tom Dale"
user.set('updatedAt', new Date());
user.save(); // => PATCH to '/users/1'
});
store.findRecord('user', 2).then(function(user) {
user.destroyRecord(); // => DELETE to /users/2
});Creating, Updating and Deleting
Keep in mind that Ember Data is separate from Ember, which means you can even build you own ORM library if you want and work with that in your Ember app!
Implementing the user edit form
Back to our micro-twitter app...
//app/models/user.js
import Model from 'ember-data/model';
import attr from 'ember-data/attr';

export default Model.extend({
  name: attr('string'),
  email: attr('string'),
  password: attr('string'),
  updatedAt:  attr('date'),
  createdAt:  attr('date'),

  passwordConfirmation: null,

  valid() {
    if (!this.get('password')) { return true; }
    this.get('errors')._clear();
    if (this.get('password') === this.get('passwordConfirmation')) { return true;}
    this.get('errors')._add(
      'passwordConfirmation',
      'is not the same with the password'
    );
    return false;
  }
});
//app/routes/user.js
import Ember from 'ember';
export default Ember.Route.extend({
model(params) {
return this.store.findRecord('user', params.user_id);
}
});
//app/routes/user/edit.js
import Ember from 'ember';

export default Ember.Route.extend({
  model() {
    return this.modelFor('user');
  }
});
Remember our routes definition in app/router.js ?
Implementing the user edit form
Back to our micro-twitter app...
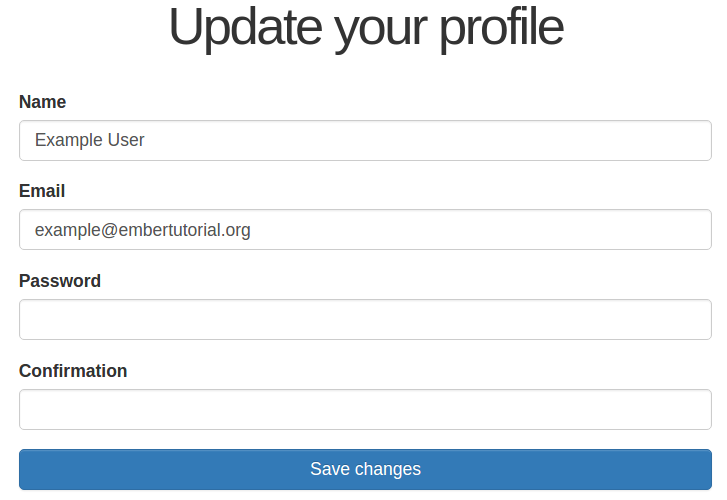
//app/templates/user/edit.hbs
<h1>Update your profile</h1>

<div class="row">
  <div class="col-md-6 col-md-offset-3">

    {{#if model.errors}}
      <div id="error_explanation">
        <div class="alert alert-danger">
          The form contains {{model.errors.length}} errors.
        </div>
        <ul>
          {{#each model.errors as |error|}}
            <li>{{error.attribute}} {{error.message}}</li>
          {{/each}}
        </ul>
      </div>
    {{/if}}

    <form class="form-basic" role="form" {{action (route-action 'updateUser' model) on='submit'}}>
      <label for="user_name">Name</label>
      {{input class="form-control" type="text" value=model.name size="50"}}

      <label for="user_email">Email</label>
      {{input class="form-control" type="text" value=model.email size="50"}}

      <label for="user_password">Password</label>
      {{input class="form-control" type="password" value=model.password size="50"}}

      <label for="user_password_confirmation">Confirmation</label>
      {{input class="form-control" type="password" value=model.passwordConfirmation size="50"}}

      <input type="submit" value="Save changes" class="btn btn-primary">
    </form>
  </div>
</div>
The template
Don't forget that this is rendered inside ApplicationTemplate
Implementing the user edit form
Back to our micro-twitter app...
//app/templates/user/edit.hbs
<h1>Update your profile</h1>

<div class="row">
  <div class="col-md-6 col-md-offset-3">

    {{resource-errors errors=model.errors}}

    <form class="form-basic" role="form" {{action (route-action 'updateUser' model) on='submit'}}>
      <label for="user_name">Name</label>
      {{input class="form-control" type="text" value=model.name size="50"}}

      <label for="user_email">Email</label>
      {{input class="form-control" type="text" value=model.email size="50"}}

      <label for="user_password">Password</label>
      {{input class="form-control" type="password" value=model.password size="50"}}

      <label for="user_password_confirmation">Confirmation</label>
      {{input class="form-control" type="password" value=model.passwordConfirmation size="50"}}

      <input type="submit" value="Save changes" class="btn btn-primary">
    </form>
  </div>
</div>
Moving the errors in a component
//app/templates/components/resource-errors.hbs
{{#if model}}
  <div id="error_explanation">
    <div class="alert alert-danger">
      The form contains {{model.length}} errors.
    </div>
    <ul>
      {{#each model as |error|}}
        <li>{{error.attribute}} {{error.message}}</li>
      {{/each}}
    </ul>
  </div>
{{/if}}Implementing the user edit form
Back to our micro-twitter app...

We need to format the text a bit
- errors -> error if only 1 error
- passwordConfirmation -> Password confirmation
We have 3 options:
- use the component class itself to define some computed properties
- use Ember helpers
- use another component in which we inject the necessary data
Implementing the user edit form
Back to our micro-twitter app...
//app/components/resource-errors.js
import Ember from 'ember';

export default Ember.Component.extend({
  errorsText: Ember.computed('model.length', function() {
      var inflector = new Ember.Inflector(Ember.Inflector.defaultRules);
      var word = 'error';

      if (this.get('model.length') > 1) {
        return inflector.pluralize(word);
      } else {
        return inflector.singularize(word);
      }
  }),
});
Using the component itself
//app/templates/components/resource-errors.hbs
{{#if model}}
  <div id="error_explanation">
    <div class="alert alert-danger">
      The form contains {{model.length}} {{errorsText}}.
    </div>
    <ul>
      {{#each model as |error|}}
        <li>{{error.attribute}} {{error.message}}</li>
      {{/each}}
    </ul>
  </div>
{{/if}}
You can think components class like a small controller
To humanize the list of attributes is tricky though: use Ember Helpers instead
Ember Helpers
//app/helpers/pluralize.js
import Ember from 'ember';

export function pluralize([word], {amount}) {
  var inflector = new Ember.Inflector(Ember.Inflector.defaultRules);

  if (amount > 1) {
    return inflector.pluralize(word);
  } else {
    return inflector.singularize(word);
  }
}

export default Ember.Helper.helper(pluralize);
Helpers are most useful for transforming raw values from models and components into a format more appropriate for your users
//app/helpers/humanize.js
import Ember from 'ember';

export function humanize([word]) {
  return word.decamelize().split('_').join(' ').capitalize();
}

export default Ember.Helper.helper(humanize);
Usually helpers are used when component is a bit too much
Helper names don't need to have a dash like components
Implementing the user edit form
Back to our micro-twitter app...
//app/templates/components/resource-errors.hbs
{{#if model}}
  <div id="error_explanation">
    <div class="alert alert-danger">
      The form contains {{model.length}} {{pluralize 'error' amount=model.length}}.
    </div>
    <ul>
      {{#each model as |error|}}
        <li>{{humanize error.attribute}} {{error.message}}</li>
      {{/each}}
    </ul>
  </div>
{{/if}}
The resource-errors template with the helpers
//app/templates/user/edit.hbs
<h1>Update your profile</h1>

<div class="row">
  <div class="col-md-6 col-md-offset-3">

    {{resource-errors errors=model.errors}}

    <form class="form-basic" role="form" {{action (route-action 'updateUser' model) on='submit'}}>
      <label for="user_name">Name</label>
      {{input class="form-control" type="text" value=model.name size="50"}}

      <label for="user_email">Email</label>
      {{input class="form-control" type="text" value=model.email size="50"}}

      <label for="user_password">Password</label>
      {{input class="form-control" type="password" value=model.password size="50"}}

      <label for="user_password_confirmation">Confirmation</label>
      {{input class="form-control" type="password" value=model.passwordConfirmation size="50"}}

      <input type="submit" value="Save changes" class="btn btn-primary">
    </form>
  </div>
</div>Implementing the user edit form
Back to our micro-twitter app...
Much nicer :)

Implementing the user edit form
Back to our micro-twitter app...
//app/routes/user.js
import Ember from 'ember';

export default Ember.Route.extend({
  model() {
    return this.modelFor('user');
  },

  actions: {
    updateUser(user) {
      var _this = this;
      if (!user.valid()) { return false; }

      user.save().then(function() { //PUT /api/v1/users/:id
        user.setProperties({
          'password': null,
          'passwordConfirmation': null
        });
        //notify the user that the profile has been saved
      });
    }
  }
});
The action handler
You can define the action in any parent route in the route hierarchy
Action will bubble until one of them handles it
Implementing the index page
Back to our micro-twitter app...

The models we need:
- A new micropost record
- The microposts feed
- User record
- User's followers count
- User's followings count
The API
Built in JSONAPI
| GET | /api/v1/session |
| POST | /api/v1/session |
| GET | /api/v1/users |
| POST | /api/v1/users |
| GET | /api/v1/users/:id |
| PUT | /api/v1/users/:id |
| DELETE | /api/v1/users/:id |
| GET | /api/v1/microposts |
| GET (feed) | /api/v1/microposts?feed_for_user_id=:id |
| POST | /api/v1/microposts |
| GET | /api/v1/microposts/:id |
| PUT | /api/v1/microposts/:id |
| DELETE | /api/v1/microposts/:id |
| GET | /api/v1/users/:user_id/followers |
| POST | /api/v1/users/:user_id/followers/:id |
| DELETE | /api/v1/users/:user_id/followers/:id |
| GET | /api/v1/users/:user_id/followings |
| POST | /api/v1/users/:user_id/followings/:id |
| DELETE | /api/v1/users/:user_id/followings/:id |
Restructuring our models
Back to our micro-twitter app...
//app/models/person.js
import Model from 'ember-data/model';
import attr from 'ember-data/attr';

export default Model.extend({
  email: attr('string'),
  name:  attr('string'),
  password:  attr('string'),

  created_at: attr('moment'),
  updated_at: attr('moment'),

  size: Ember.computed('meta', function() {
    return this.get('meta.total-count');
  })

/*
  //old style
  size: function() {
    return this.get('meta.total-count');
  }).property('meta')
*/
});
//app/models/user.js
import Person from './person';

export default Person.extend({
  passwordConfirmation: null,

  valid() {
    if (!this.get('password')) { return true; }
    this.get('errors')._clear();
    if (this.get('password') === this.get('passwordConfirmation')) { return true;}
    this.get('errors')._add(
      'passwordConfirmation',
      'is not the same with the password'
    );
    return false;
  }
});
//app/models/follower.js
import Person from './person';
export default Person.extend({
});
//app/models/following.js
import Person from './person';

export default Person.extend({
});
Implementing the index page
Back to our micro-twitter app...
import Ember from 'ember';

export default Ember.Route.extend({
  model() {
    if (this.get('session.isAuthenticated')) {
      return Ember.RSVP.hash({
        user: this.store.findRecord(
          'user', this.get('session.data.authenticated.id')
        ),
        userFollowing: this.store.query('following', {
          user_id: this.get('session.data.authenticated.id'),
          per_page: 1 //optimization, we only need the meta info
        }),
        userFollowers: this.store.query('follower', {
          user_id: this.get('session.data.authenticated.id'),
          per_page: 1 //optimization, we only need the meta info
        }),
        microposts: this.store.query('feed', {
          feed_for_user_id: this.get('session.data.authenticated.id')
        }),
        micropost: this.store.createRecord('micropost', {})
      });
    }
  }
});
Ember.RSVP.hash doesn't resolve until all promises have been resolved
Implementing the index page
Back to our micro-twitter app...
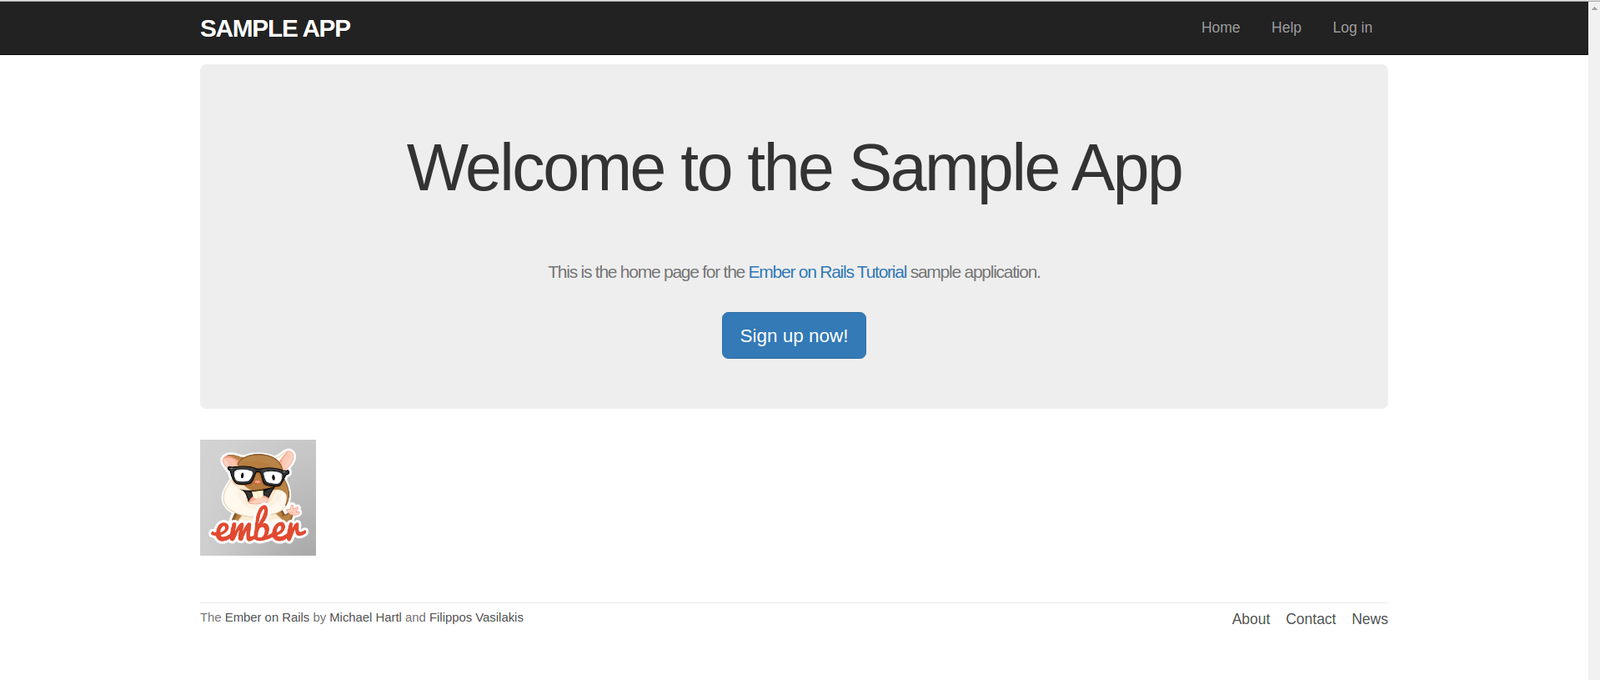
{{#if session.isAuthenticated}}
<div class="row">
  <aside class="col-md-4">
    {{user-profile user=model.user followingsCount=model.followings.size followersCount=model.followers.size}}

    {{new-micropost model=model.micropost createMicropost="createMicropost"}}
  </aside>
  <div class="col-md-8">
    {{microposts-index title="Micropost Feed" model=model.microposts}}
  </div>
</div>
{{else}}
  <div class="center jumbotron">
    <h1>Welcome to the Sample App</h1>

    <h2>
      This is the home page for the
      <a href="https://github.com/vasilakisfil/rails_tutorial_ember">Ember on Rails Tutorial</a>
      sample application.
    </h2>

    {{link-to "Sign up now!" 'users.new' class="btn btn-lg btn-primary"}}
  </div>

  <a href="http://emberjs.com/">
    <img src="https://pbs.twimg.com/profile_images/2326095089/3s1seyc0csl75btyw1vl.png" alt="Ember logo" class="ember-logo">
  </a>

{{/if}}
It's a good practice to break down our template in a number of components
Implementing the user-profile component
Back to our micro-twitter app...
//app/templates/components/user-profile.hbs

<section class="user_info">
  <h1>
    <!-- an ember addon for gravatar -->
    {{gravatar-image email=model.user.email alt=model.user.name size=80 class='gravatar'}}
    {{user.name}}
  </h1>
</section>

<section class="stats">
  <div class="stats">
    {{#link-to 'user.following' model.user}}
      <strong id="following" class="stat">
        {{followingsCount}}
      </strong>
      following
    {{/link-to}}

    {{#link-to 'user.followers' model.user}}
      <strong id="followers" class="stat">
        {{followersCount}}
      </strong>
      followers
    {{/link-to}}
  </div>
</section>Implementing the microposts-index component
Back to our micro-twitter app...
//app/templates/components/microposts-index.hbs
{{#if model.length}}
  <h3>{{title}}</h3>

  <ol class="microposts">
    {{#each model as |micropost|}}
      <li class={{micropost.id}}>
        {{gravatar-image email=micropost.user.email alt=micropost.user.name size=50 class='gravatar'}}

        <span class="user">{{link-to micropost.user.name 'user.index' micropost.user.id}}</span>
        <span class="content">
          {{micropost.content}}
          {{#if micropost.picture}}
            <img src={{micropost.pictureUrl}}>
          {{/if}}
        </span>
        <span class="timestamp">
          <!-- Ember addon that reports the datetime in "3 minutes ago"-style -->
          Posted about {{moment-from-now micropost.createdAt interval=10000}}.
        </span>
      </li>

    {{/each}}
  </ol>

  <!-- Ember addon for pagination -->
  {{page-numbers content=model numPagesToShow=4}}
{{/if}}
Implementing the new-micropost component
Back to our micro-twitter app...
//app/templates/components/new-micropost.hbs
<section class="micropost_form">
  <form class="form-basic" role="form" {{action (route-action 'createMicropost' model) on='submit'}}>
    <div class="field">
      {{textarea cols="80" value=model.content rows="4" placeholder="Compose new micropost..."}}
    </div>

    <input type="submit" class="btn btn-primary">
  </form>
</section>Implementing the index page
Back to our micro-twitter app...
{{#if session.isAuthenticated}}
<div class="row">
  <aside class="col-md-4">
    {{user-profile user=model.user followingsCount=model.followings.size followersCount=model.followers.size}}

    {{new-micropost model=model.micropost createMicropost="createMicropost"}}
  </aside>
  <div class="col-md-8">
    {{microposts-index title="Micropost Feed" model=model.microposts}}
  </div>
</div>
{{else}}
  <div class="center jumbotron">
    <h1>Welcome to the Sample App</h1>

    <h2>
      This is the home page for the
      <a href="https://github.com/vasilakisfil/rails_tutorial_ember">Ember on Rails Tutorial</a>
      sample application.
    </h2>

    {{link-to "Sign up now!" 'users.new' class="btn btn-lg btn-primary"}}
  </div>

  <a href="http://emberjs.com/">
    <img src="https://pbs.twimg.com/profile_images/2326095089/3s1seyc0csl75btyw1vl.png" alt="Ember logo" class="ember-logo">
  </a>

{{/if}}
It's a good practice to break down our template in a number of components
Implementing the index page
Back to our micro-twitter app...
import Ember from 'ember';

export default Ember.Route.extend({
  model() {
    if (this.get('session.isAuthenticated')) {
      return Ember.RSVP.hash({
        user: this.store.findRecord(
          'user', this.get('session.data.authenticated.id')
        ),
        userFollowing: this.store.query('following', {
          user_id: this.get('session.data.authenticated.id'),
          per_page: 1 //optimization, we only need the meta info
        }),
        userFollowers: this.store.query('follower', {
          user_id: this.get('session.data.authenticated.id'),
          per_page: 1 //optimization, we only need the meta info
        }),
        microposts: this.store.query('feed', {
          feed_for_user_id: this.get('session.data.authenticated.id')
        }),
        micropost: this.store.createRecord('micropost', {})
      });
    }
  },

  actions: {
    createMicropost(micropost) {
      var _this = this;
      //this.model() will run the model hook again!
      micropost.set('user', this.modelFor('index').user);
      micropost.save().then(function(/*micropost*/) {
        _this.refresh();
      });
    }
  }
});
We make the final touches to the model before saving it to the server
Once the HTTP request has finished (server has responded) we reload the model so that we see the new micropost in the feed
Implementing the index page
Back to our micro-twitter app...
import Ember from 'ember';

export default Ember.Route.extend({
  model() {
    if (this.get('session.isAuthenticated')) {
      return Ember.RSVP.hash({
        user: this.store.findRecord(
          'user', this.get('session.data.authenticated.id')
        ),
        userFollowing: this.store.query('following', {
          user_id: this.get('session.data.authenticated.id'),
          per_page: 1 //optimization, we only need the meta info
        }),
        userFollowers: this.store.query('follower', {
          user_id: this.get('session.data.authenticated.id'),
          per_page: 1 //optimization, we only need the meta info
        }),
        microposts: this.store.query('feed', {
          feed_for_user_id: this.get('session.data.authenticated.id')
        }),
        micropost: this.store.createRecord('micropost', {})
      });
    }
  },

  actions: {
    createMicropost(micropost) {
      var _this = this;
      //this.model() will run the model hook again!
      micropost.set('user', this.modelFor('index').user);
      micropost.save().then(function(micropost) {
        Ember.set(
          this.modelFor('index'),
          'micropost',
          this.store.createRecord('micropost', {})
        );
        _this.modelFor('index').microposts.unshiftObject(micropost._internalModel);
      });
    }
  }
});
Instead of running the model hook again, we can just push the new object in the feed array
Implementing the index page
Back to our micro-twitter app...


I could go on but I am pretty sure you are already tired of me :)
Summary
- Ember is a modern js web framework
- It provides a lot of utilities to fit your use case
- it has good conventions but allows you to be flexible as well
- EmberData is nice and it's not the only library for backend if you don't like it
- In my experience if you work on adapters/serializers a bit you can have a very good ORM on top of HTTP
- it lacks some features/consistency around associations though
Get started now!
- https://guides.emberjs.com
- https://github.com/vasilakisfil/rails_tutorial_ember/tree/feat/ember-2.6
- https://github.com/vasilakisfil/rails_tutorial_api/tree/JSONAPI
(slides contain sometimes slightly different code from the repo for the sake of simplicity)
If you have any question or need help ping me on twitter (https://twitter.com/vasilakisfil)
or comment in the talk page so that other users see it as well :)
Questions ?
Thanks!