Introduction and Setup of Jenkins

Setup: Installation, Configuration, Jenkins UI, Master Slave Architecture, Backup and Restore


Learning Outcome
6
Control default browser behavior using preventDefault()
5
Identify and use common mouse,keyboard,form and window events
4
Explain why addEventListener is preferred over onclick
3
Use addEventListener() and removeEventListener() correctly
2
Connect user actions to Javascript using event listeners
1
Explain what browser events are and why they exist
Core Concepts (Slide 6)
Step 1: Create an EC2 instance(Ubuntu)
-
Select Ubuntu as the operating system
-
Launch the EC2 instance successfully
-
Connect to the instance using the terminal
Step 2: Install Java (Prerequisite for Jenkins)
Jenkins is a Java-based application, so Java must be installed before Jenkins.
Run the following command:
sudo apt install fontconfig openjdk-21-jre
Configure Security Group (Important)
-
Edit the Inbound Rules of the security group
-
Add a Custom TCP rule
-
Set Port Range:
8080 -
Set Source:
0.0.0.0/0(Open to the internet)
This allows access to the Jenkins web interface through the browser.
Note for students:
Port 8080 is the default port used by Jenkins to access its dashboard.
This EC2 instance will act as the server where Jenkins will be installed.
Core Concepts (Slide 7)
After installation, verify Java:
This confirms that Java is installed and working correctly
Step 3: Prepare the System for Jenkins Installation
Before installing Jenkins, we need to:
-
Add Jenkins official GPG key
-
Add Jenkins package repository
This ensures Jenkins is installed from a trusted and official source.
java -version
Core Concepts (.....Slide N-3)
Step 4: Add Jenkins GPG Key
Run the following command:
This key verifies that Jenkins packages are authentic and not modified
Step 5: Add Jenkins Repository
Now add the Jenkins package source:
This step tells Linux where to download Jenkins from
sudo wget -O /etc/apt/keyrings/jenkins-keyring.asc \
https://pkg.jenkins.io/debian-stable/jenkins.io-2026.key
echo "deb [signed-by=/etc/apt/keyrings/jenkins-keyring.asc] \
https://pkg.jenkins.io/debian-stable binary/" | sudo tee \
/etc/apt/sources.list.d/jenkins.list > /dev/null
Core Concepts (.....Slide N-3)
Step 6: After adding the Jenkins repository, we now install Jenkins and make sure its service is running correctly on the system
- sudo apt update
Updates the system package list
- sudo systemctl status jenkins
Shows Jenkins service status
- sudo systemctl start jenkins
Starts the Jenkins service
- sudo systemctl enable jenkins
Enables Jenkins at system startup
- sudo apt install jenkins
Installs Jenkins on the system
>>sudo apt update
>>sudo apt install jenkins
>>sudo systemctl enable jenkins
sudo systemctl start jenkins
sudo systemctl status jenkins
Core Concepts (.....Slide N-3)
Step 7: Access Jenkins in Browser
Open the browser inside your virtual machine and visit:
http://YourIPAddress:8080/
This opens the Jenkins web interface
Step 8: Locate Initial Administrator Password
When Jenkins starts for the first time, it asks for an Administrator Password
The UI shows a file path:
/var/lib/jenkins/secrets/initialAdminPassword
Step 9: Retrieve Administrator Password
Run this command in the terminal:
cat /var/lib/jenkins/secrets/initialAdminPassword
This command displays the initial admin password
Step 10: Unlock Jenkins
-
Copy the password from the terminal
-
Paste it into the Jenkins UI
-
Click Continue
Core Concepts (.....Slide N-3)
Step 11: Create Jenkins User
Set up:
-
Username
-
Password
-
Email
This user will be used to log in to Jenkins
Step 12: Configure Jenkins URL
-
For personal or learning use, keep the default URL
-
In industry environments, DevOps/SRE teams usually customize this URL based on infrastructure needs
Click Save and Finish
Jenkins setup is now complete!
Jenkins UI
When we open Jenkins in a browser, the first screen we see is called the Jenkins Dashboard
The Jenkins dashboard is the main control panel of Jenkins
From here, we create jobs, run tasks and manage Jenkins settings
Jenkins UI
This dashboard is used to control & monitor everything that Jenkins does
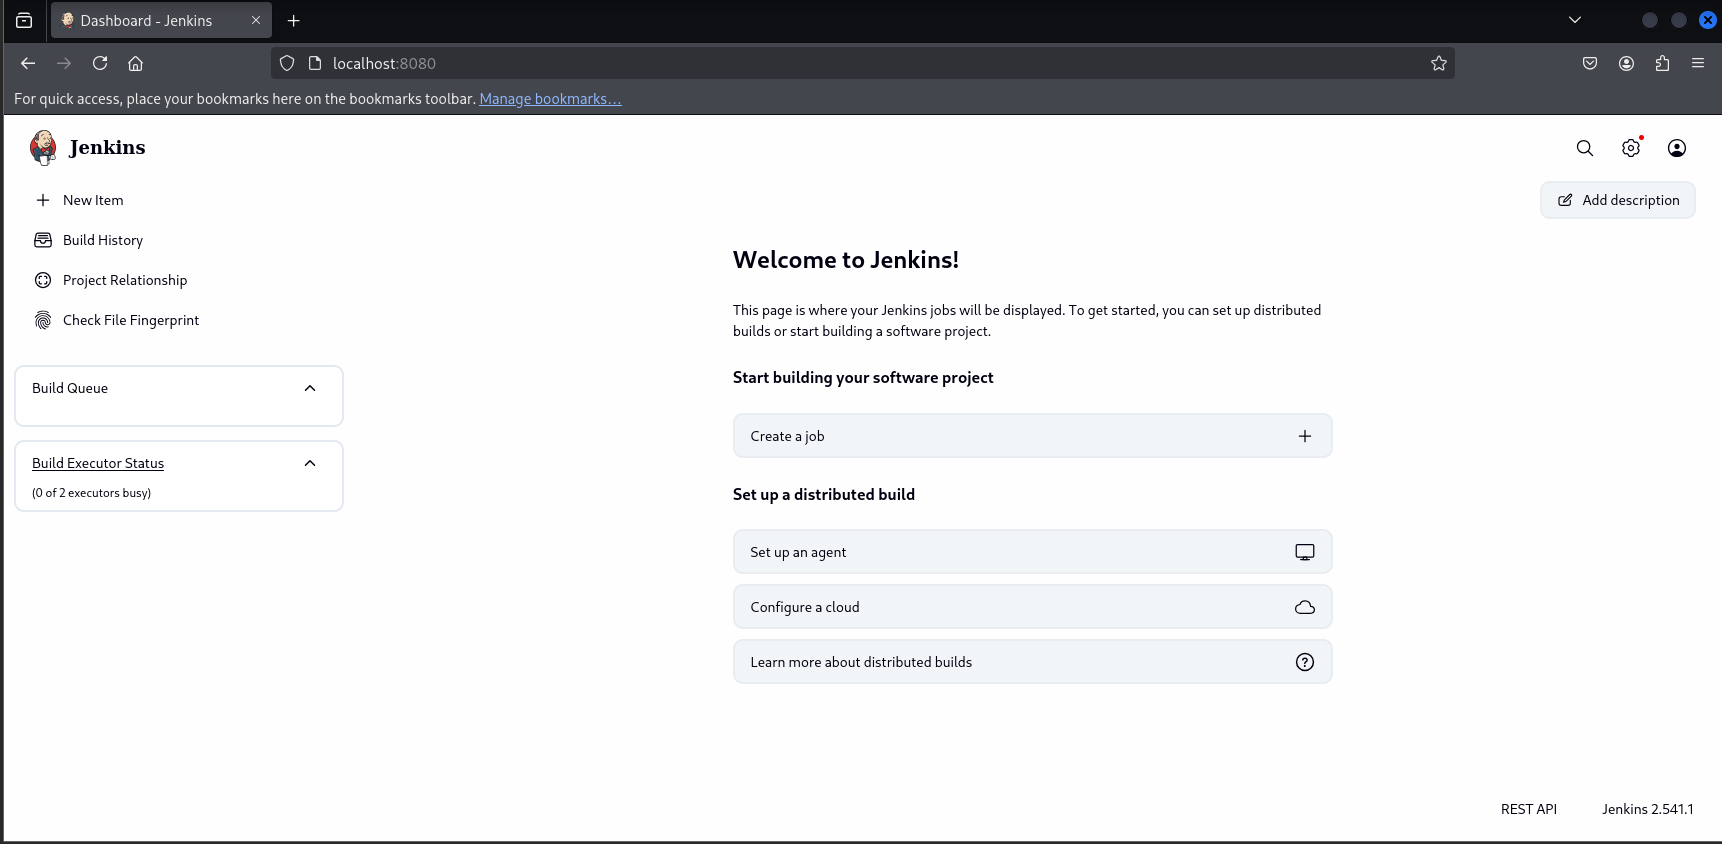
Jenkins Logo
Manage jenkins
New item
Build history
Jenkins UI
Section
Description
Dashboard
New Item
Build History
Manage Jenkins
Jenkins logo
The home page of Jenkins
Used for configuration and settings
Shows past job runs
Used to create a new job
Clicking it always brings you back to home
Understanding the Master–Slave (Controller–Agent) Architecture
Jenkins follows a Controller–Agent architecture where:
The Controller decides what work needs to be done
The Agent performs the actual work
Earlier called Master–Slave, now professionally called Controller–Agent
What is Jenkins Controller (Master) ?
The Jenkins Controller is the main system that manages Jenkins
It is the brain of Jenkins
The controller does not perform heavy tasks, it only manages and controls
Controller responsibilities:
- Stores jobs and pipelines
- Manages users and permissions
- Assigns jobs to agents
- Displays build results on the dashboard
What is Jenkins Agent (Slave) ?
The Jenkins Agent is a worker machine
It performs the actual execution work
Agent responsibilities:
- Runs builds
- Executes commands
- Performs testing and deployment
- Sends results back to the controller
HOW does Master–Slave (Controller–Agent) Architecture work ?
A developer writes and pushes code
The controller displays the result
The agent sends the result back
The agent runs the build, test or deployment
The controller selects an agent
The Jenkins Controller receives the request
HOW does Master–Slave (Controller–Agent) Architecture work ?
Architecture Flow:
Developer → Jenkins Controller → Jenkins Agent → Result
How does this architecture help in real companies?
Practical benefits:
- Multiple builds run in parallel
- Less load on the controller
- Faster and more reliable pipelines
- Easy to add more agents when workload increases
Industry usage:
One main controller server
Multiple agents for different environments (Linux, Windows, Docker & Cloud)
How does this architecture help in real companies?
In short:
WHY: To improve performance and scalability
WHAT: Controller manages, Agents execute
HOW: Controller assigns work, Agent completes it
Summary
5
Build strong branding
4
Use different marketing channels
3
Target the right audience
2
Create and communicate value
1
Understand customer needs
Quiz
Which platform is mainly used for professional networking and B2B marketing ?
A. Facebook
B. Instagram
C. LinkedIn
D. Snapchat

Quiz-Answer
Which platform is mainly used for professional networking and B2B marketing ?
A. Facebook
B. Instagram
C. LinkedIn
D. Snapchat