Creating Kubernetes Cluster on AWS EKS for OpsMate

Business Scenario
Manager:
We have successfully managed OpsMate deployments and configurations in Kubernetes. However, we need a production-ready Kubernetes environment on AWS to host our application reliably.


DevOps Engineer:
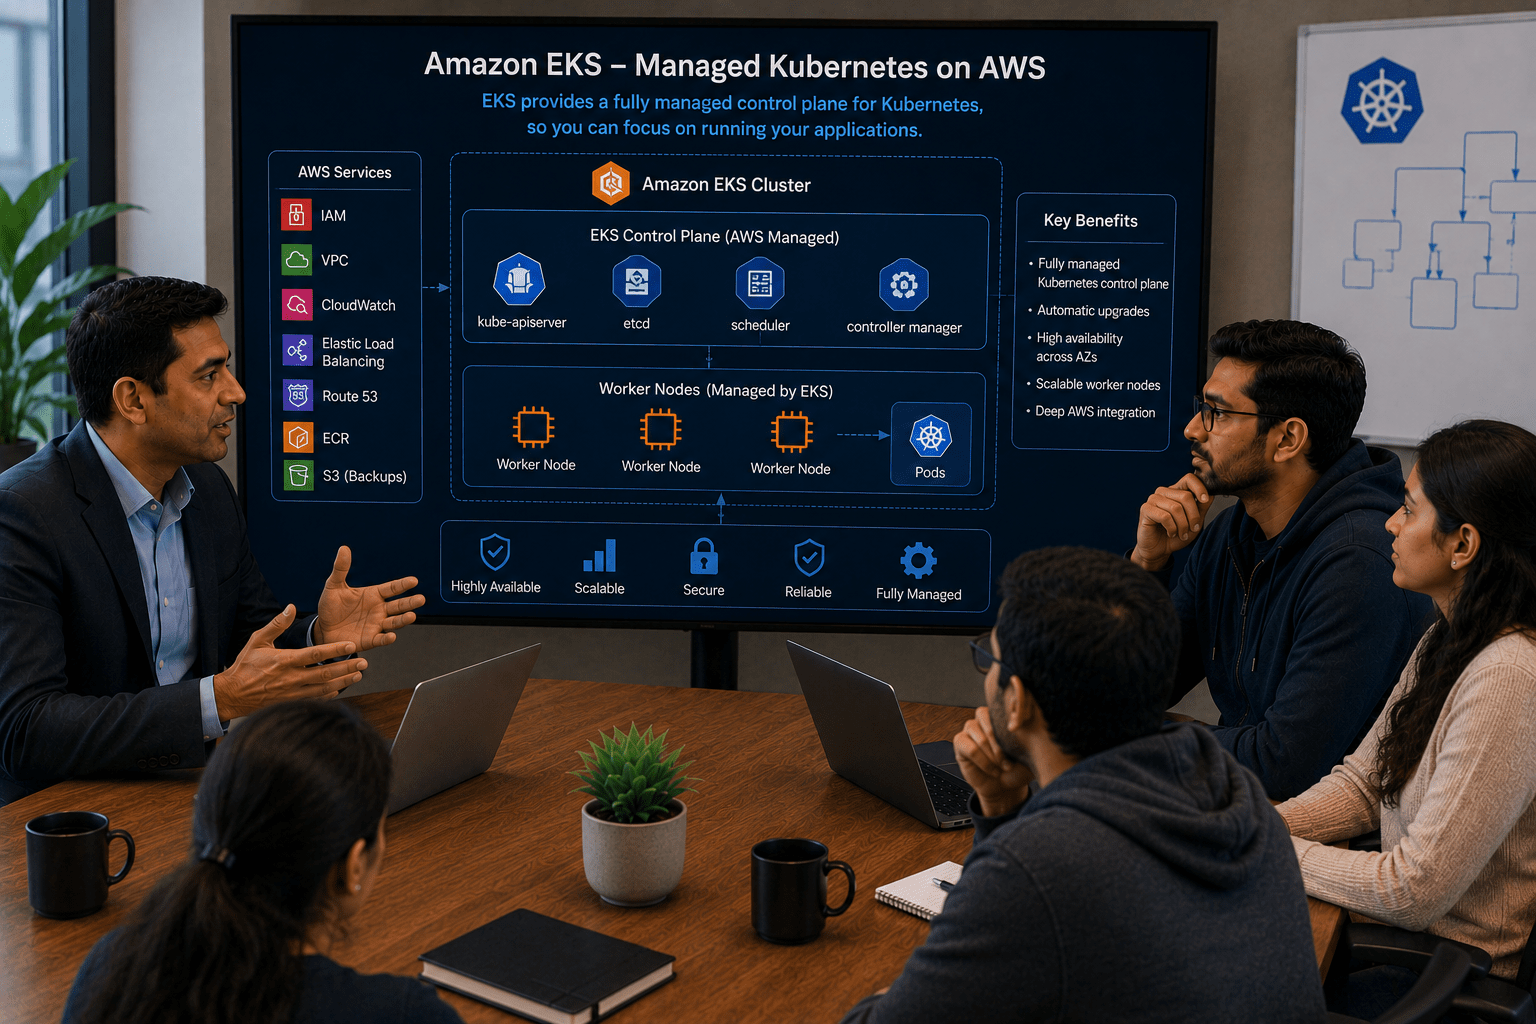
For that, we can create a Kubernetes cluster using Amazon EKS. EKS provides a fully managed Kubernetes control plane and simplifies cluster management.
Manager:
How will EKS benefit our deployment?
DevOps Engineer:
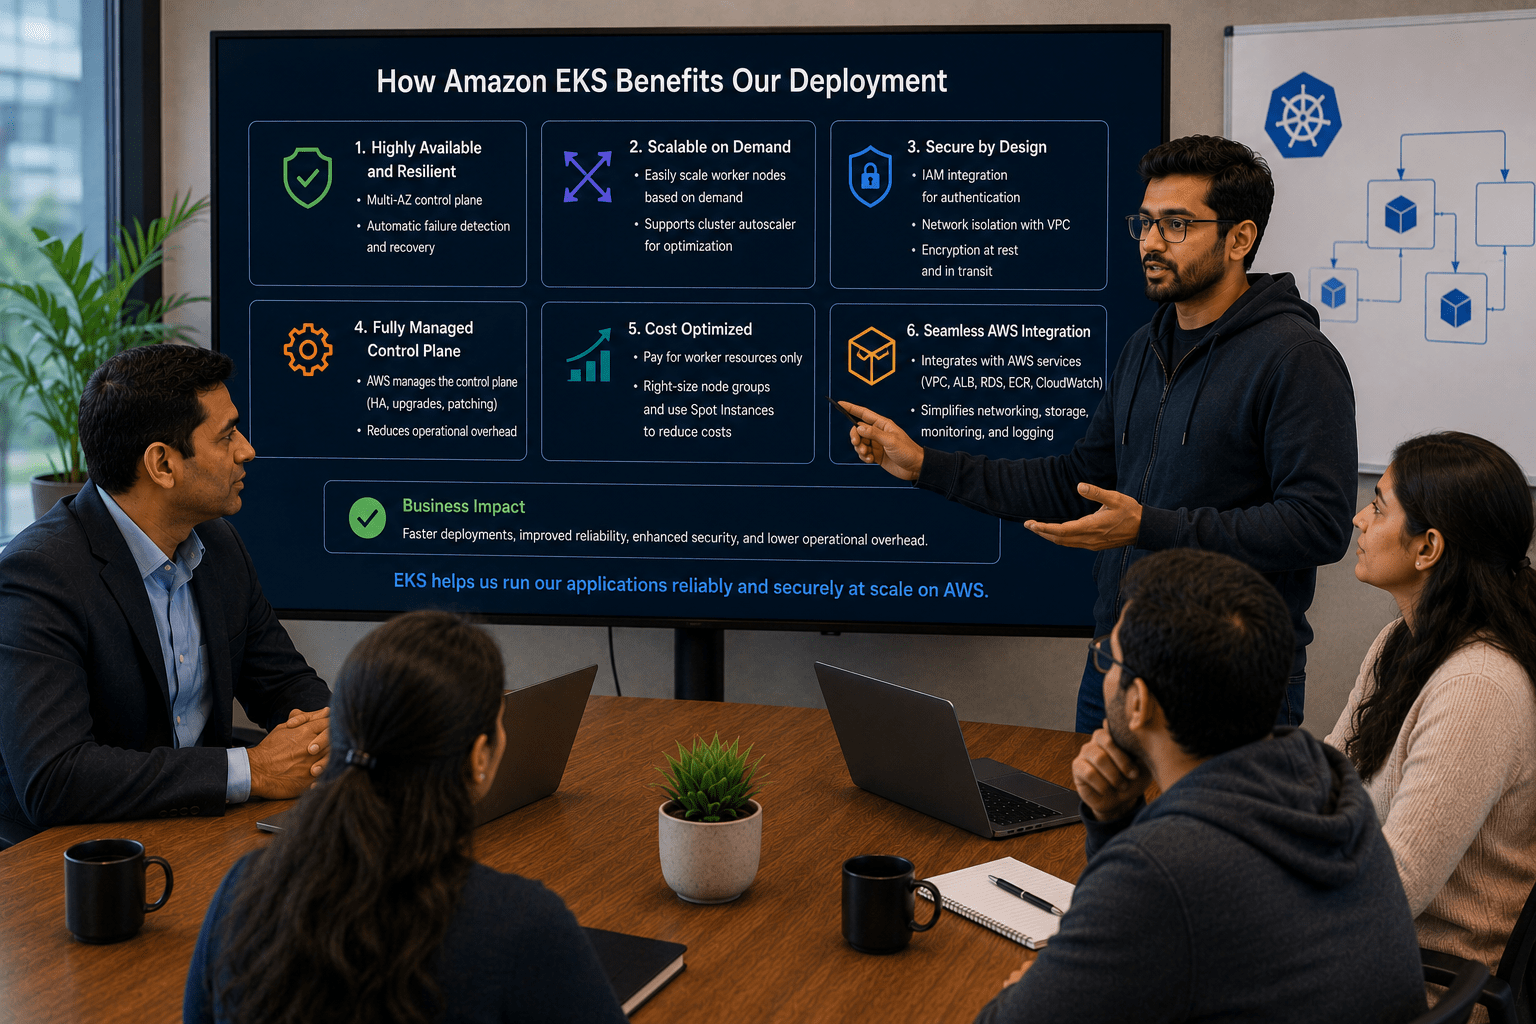
EKS offers high availability, scalability, security, and seamless integration with AWS services, making it ideal for running OpsMate in production.

Manager:
What will be our implementation plan?

DevOps Engineer:
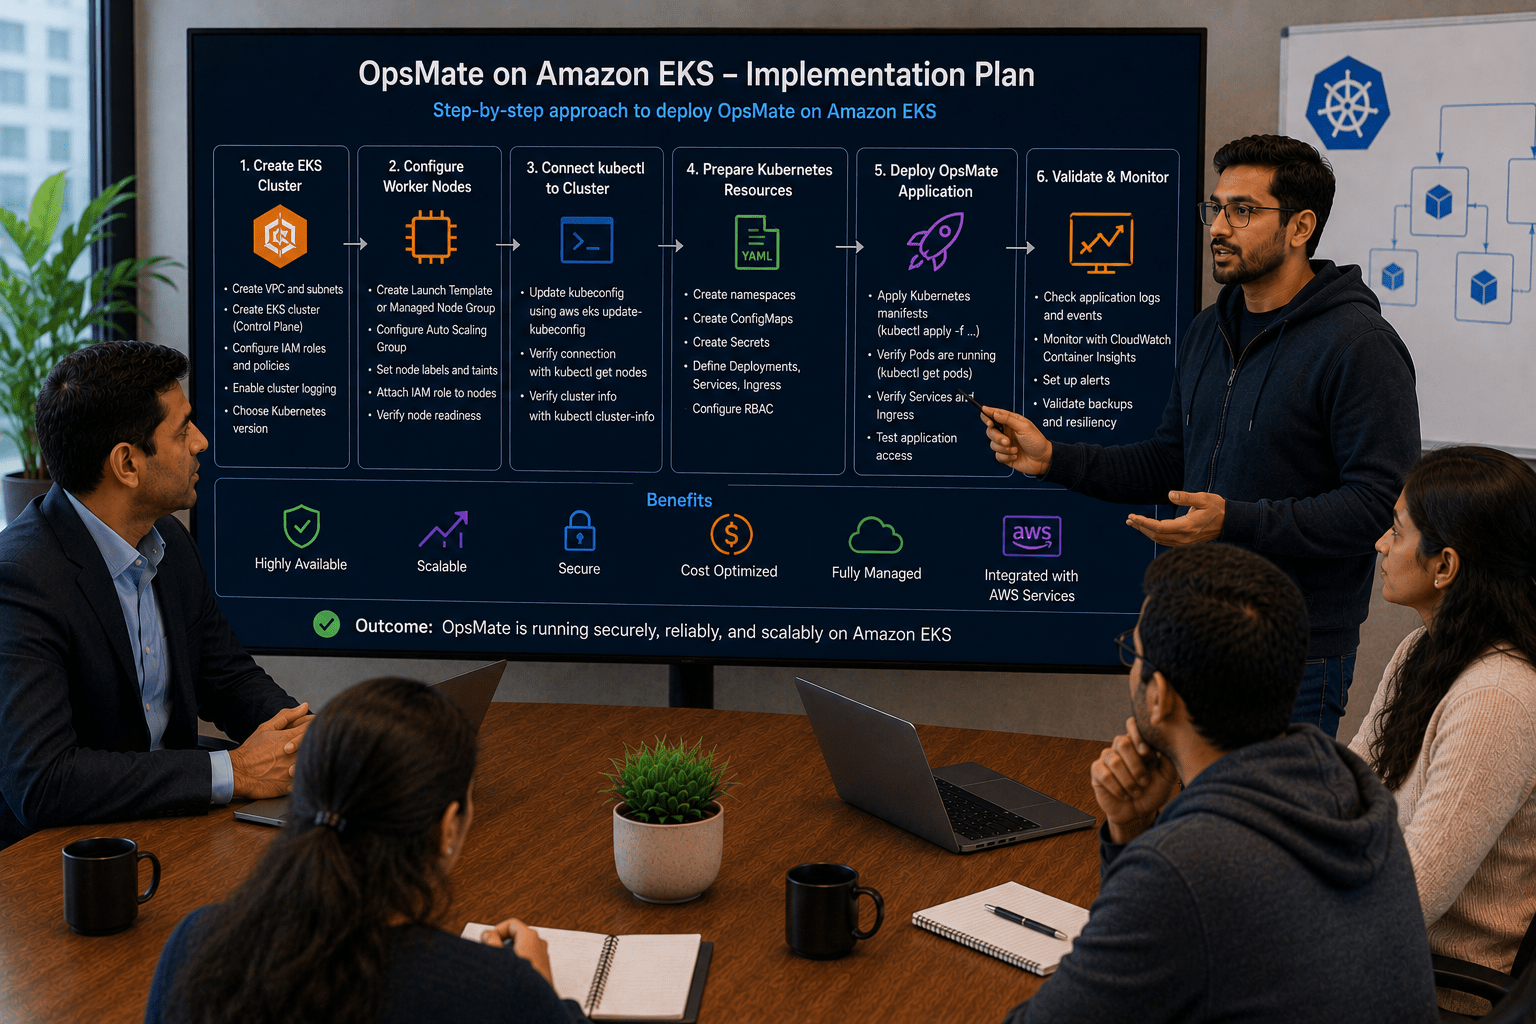
We will create an EKS cluster, configure worker nodes, connect kubectl to the cluster, and deploy the OpsMate application using Kubernetes manifests.
DevOps Engineer to Team:
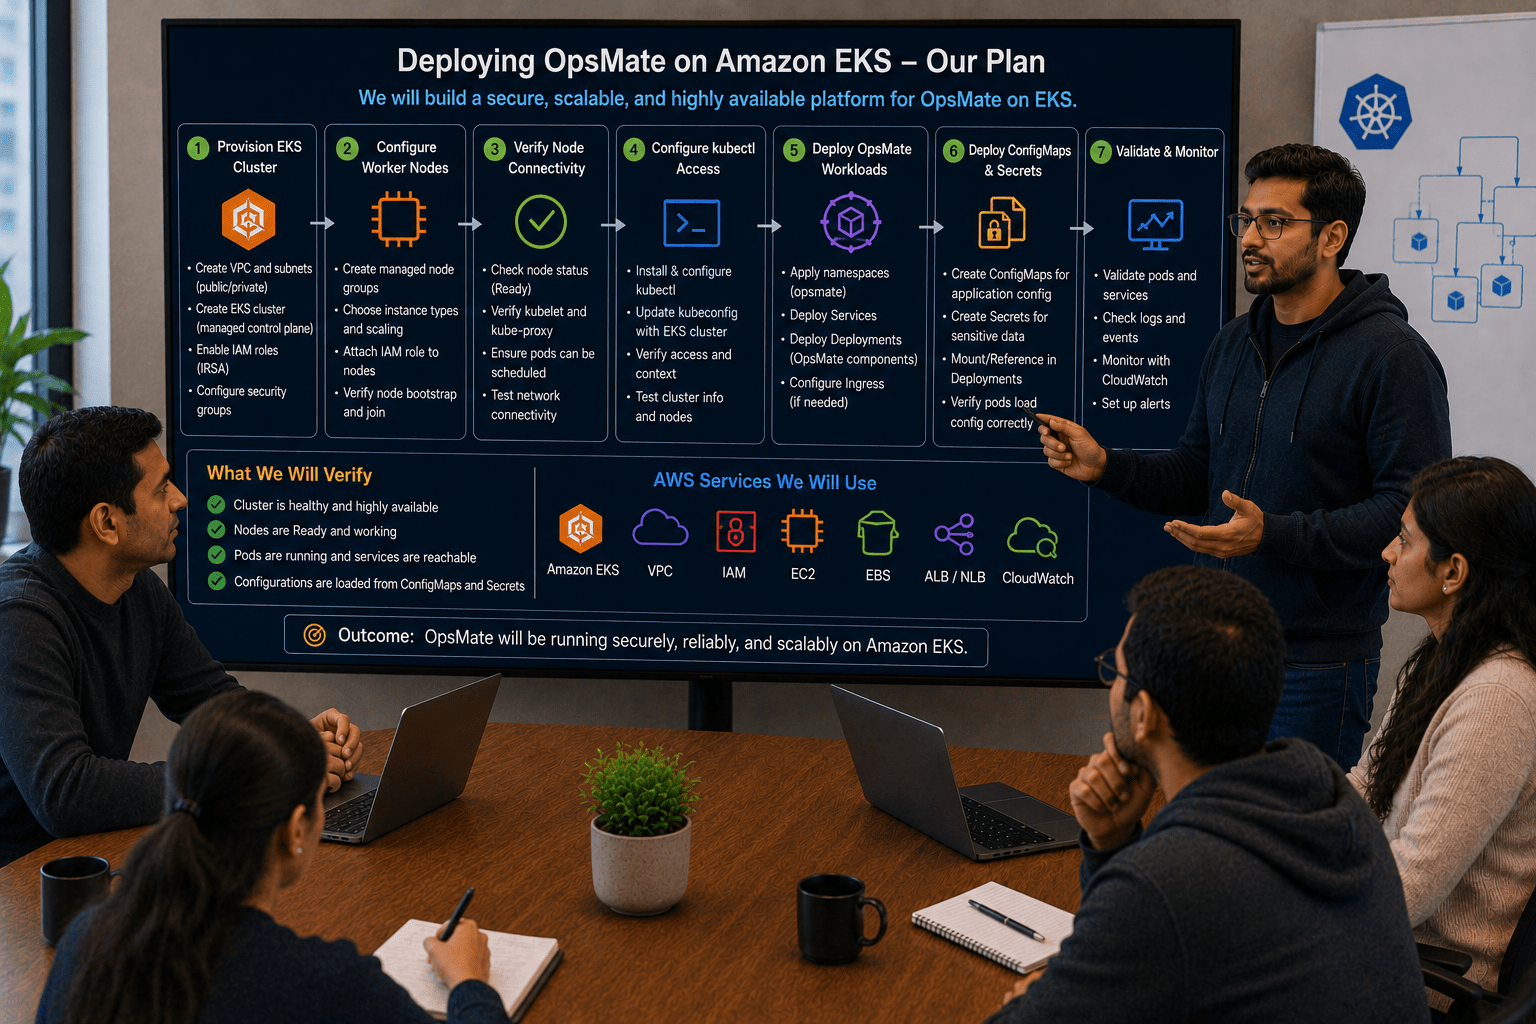
Team, we will provision an Amazon EKS cluster, verify node connectivity, configure kubectl access, and deploy OpsMate services, Deployments, ConfigMaps, and Secrets to the cluster.
Team:
Understood. We will create the AWS EKS cluster and deploy OpsMate on a scalable, secure, and production-ready Kubernetes platform.
Pre-Lab Preparation
-
AWS Account
-
IAM User with AdministratorAccess (for learning purposes)
-
Ubuntu EC2 Instance (t3.medium or higher)
-
AWS CLI installed
-
Internet connectivity
Task 1: Launch Ubuntu EC2 Instance
Login to AWS Console.
Navigate:
EC2 → Launch Instance
Configure Instance
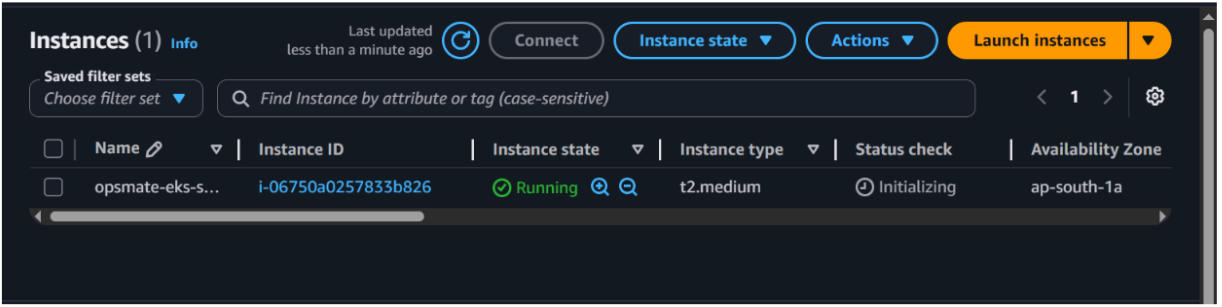
Name: Opsmate-eks-server

AMI: Ubuntu Server
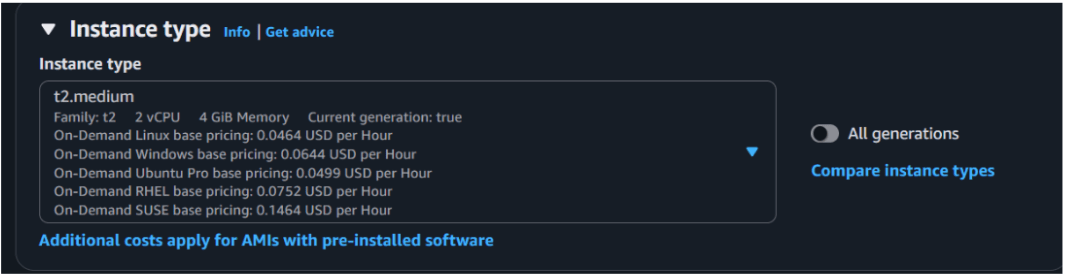
Instance Type: T3.medium
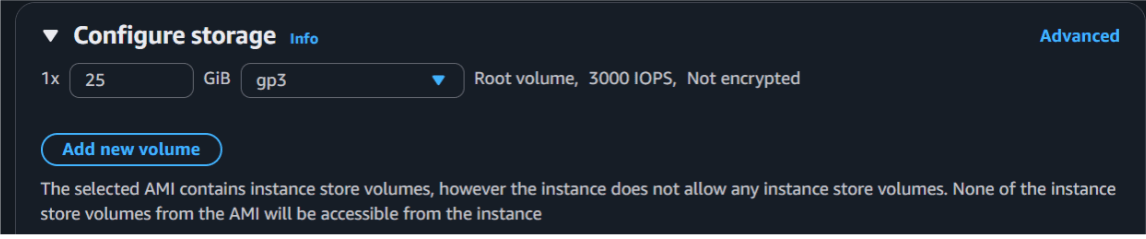
Storage: 25 GB
Security Group
Allow: SSH 22 , HTTP 80 , HTTP 443
Source: 0.0.0.0/0

Launch the instance
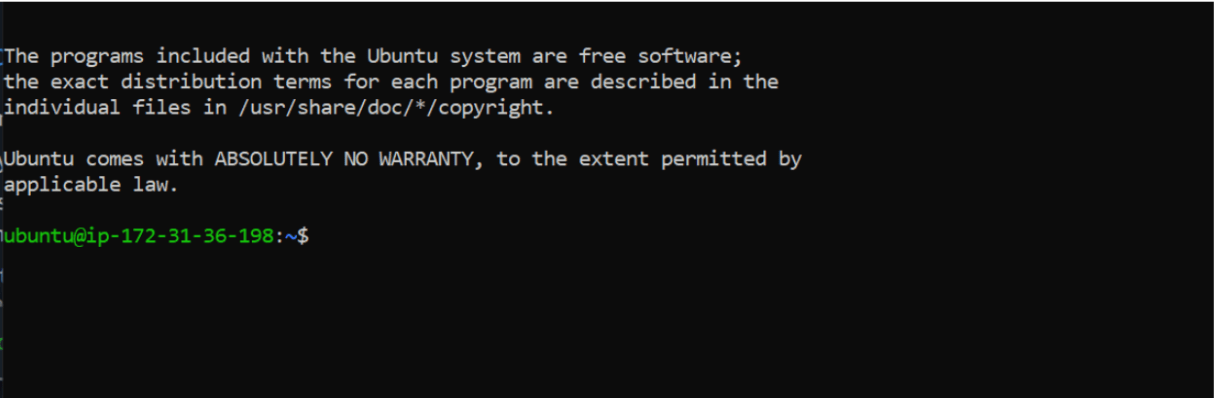
Connect to Instance
ssh -i opsmate-key.pem ubuntu@PUBLIC-IP
ssh -i "ops.pem" ubuntu@ec2-15-206-125-161.ap-south-1.compute.amazonaws.com
Task 2: Install AWS CLI
Verify AWS CLI: sudo apt update

sudo apt install awscli -y
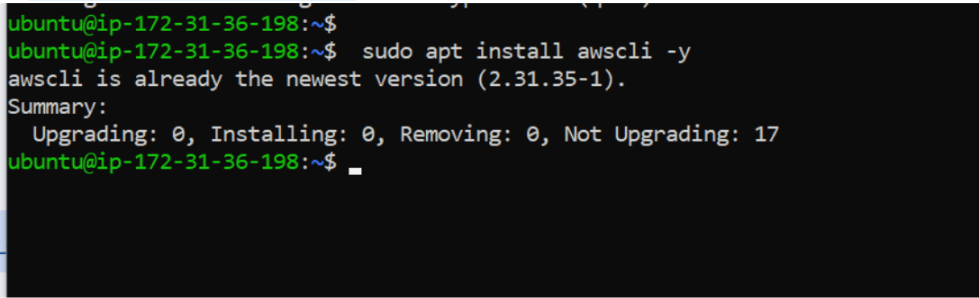
aws --version

Task 3 : Attach IAM role with admin Access
Create a iam role with admin access

Now lets attach the role to aws server
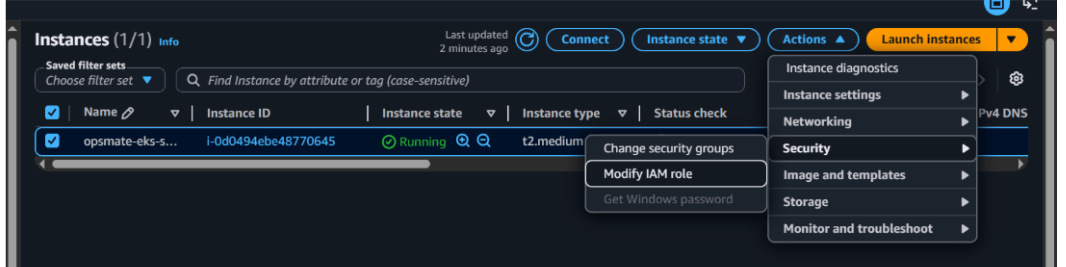
Now lets attach your role
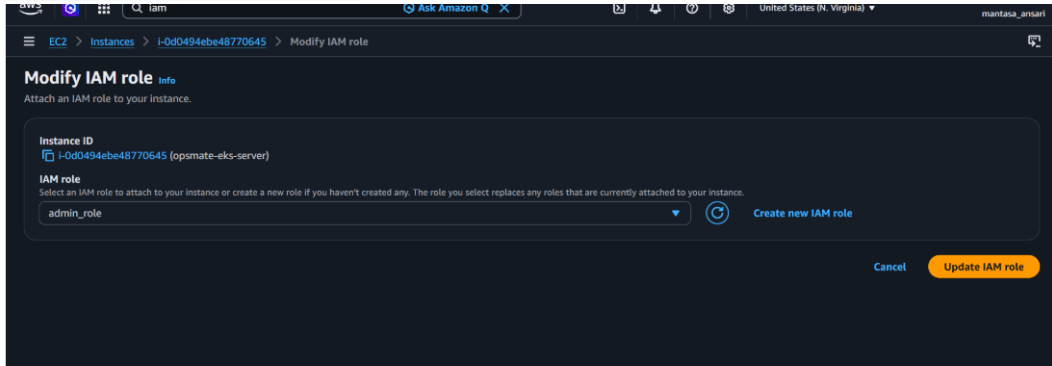
Now lets update it
Verify identity:
aws sts get-caller-identity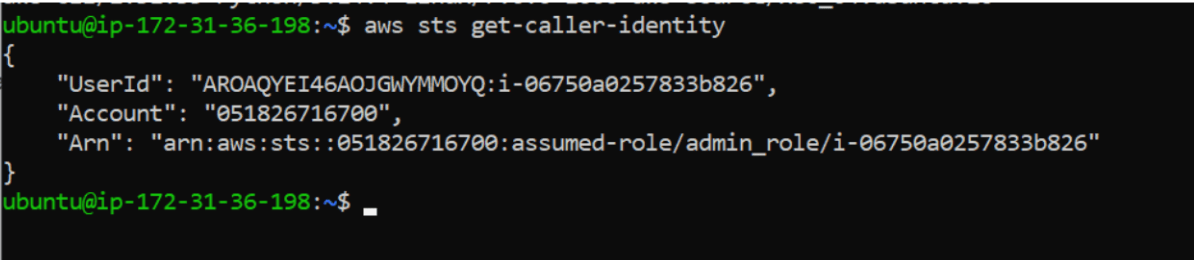
Task 4: Install kubectl
Download kubectl:
curl -LO "https://dl.k8s.io/release/$(curl -L -s
https://dl.k8s.io/release/stable.txt)/bin/linux/amd64/kubectl"
Make executable:
chmod +x kubectl

Move binary:
sudo mv kubectl /usr/local/bin/

Verify installation:
kubectl version --client

Task 5: Install eksctl
eksctl is the official CLI tool for creating EKS clusters.
Download:
curl --silent --location "https://github.com/weaveworks/eksctl/releases/
latest/download/eksctl_Linux_amd64.tar.gz" | tar xz -C /tmp
Move binary:
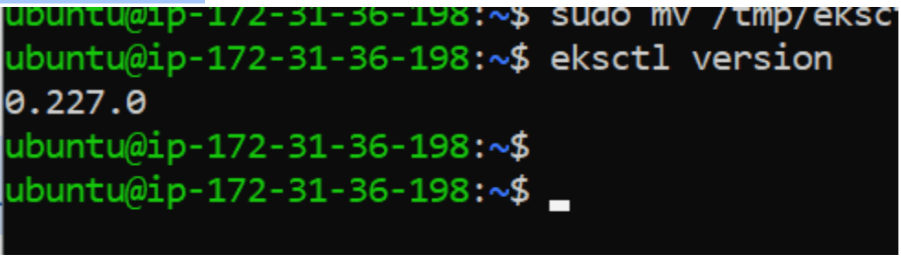
sudo mv /tmp/eksctl /usr/local/bin

Verify installation:
eksctl version
Task 6:Create OpsMate EKS Cluster
Create cluster:
eksctl create cluster \
--name opsmate-cluster \
--region us-east-1 \
--version 1.35 \
--nodegroup-name opsmate-workers \
--node-type t3.medium \
--nodes 2
--nodes-min 1 \
--nodes-max 4 \
--asg-access
What this command creates:
-
VPC
-
Subnets
-
Security Groups
-
EKS Control Plane
-
Managed Node Group
-
Worker Nodes
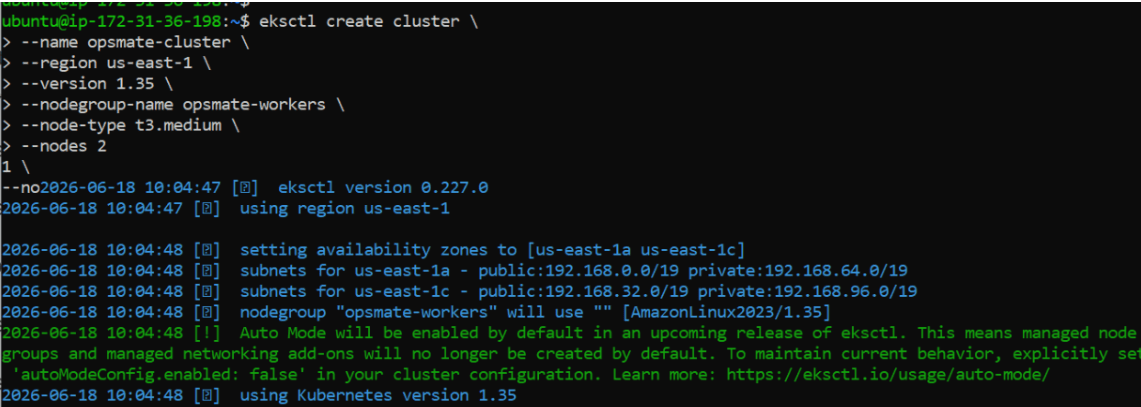
Cluster creation may take: 15 – 25 Minutes
Wait until the process completes successfully.

Task 7: Verify Cluster Creation
View EKS clusters:
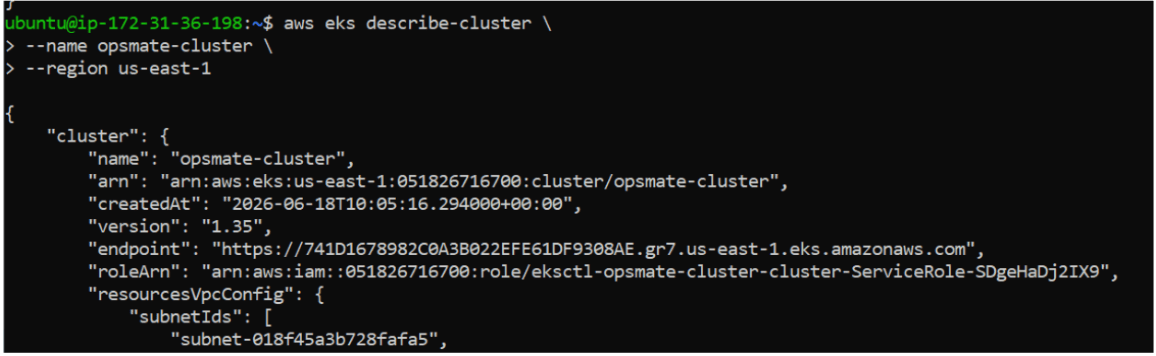
aws eks list-clustersDescribe cluster:
aws eks describe-cluster \
--name opsmate-cluster \
--region us-east-1
Task 8: Connect kubectl to EKS Cluster
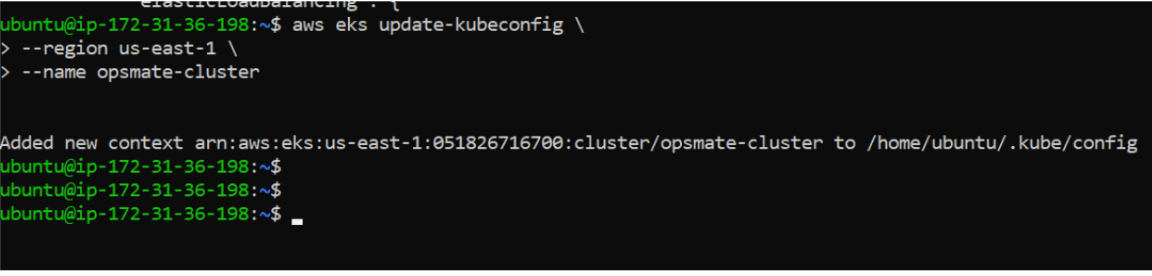
Update kubeconfig:
aws eks update-kubeconfig \
--region us-east-1 \
--name opsmate-cluster
Verify current context:
kubectl config current-context

View cluster information:
kubectl cluster-info

Task 9: Verify Worker Nodes
View nodes:
kubectl get nodes

View all nodes:
kubectl get nodes -o wide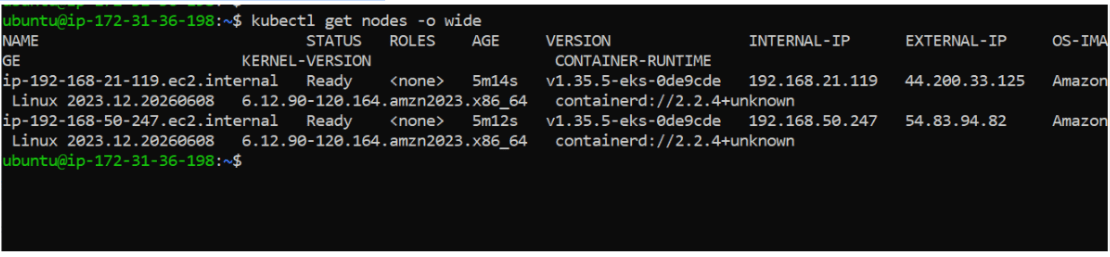
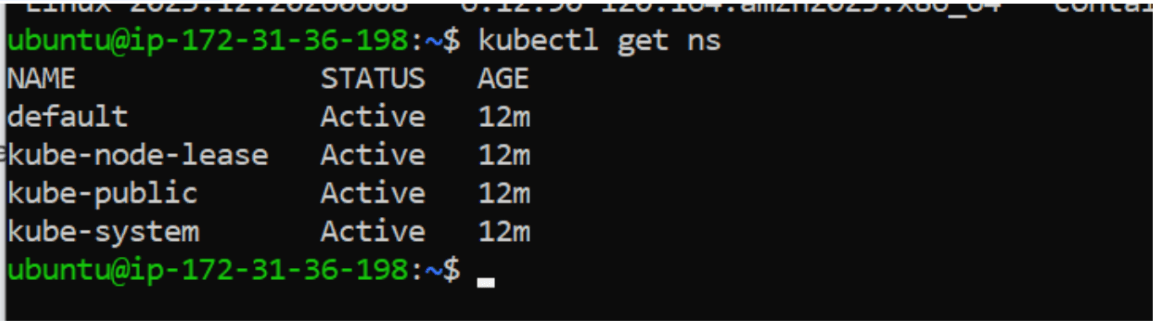
Check namespaces:
kubectl get ns
Task 10: Deploy Validation Application
Create deployment:
kubectl create deployment opsmate-nginx --image=nginx
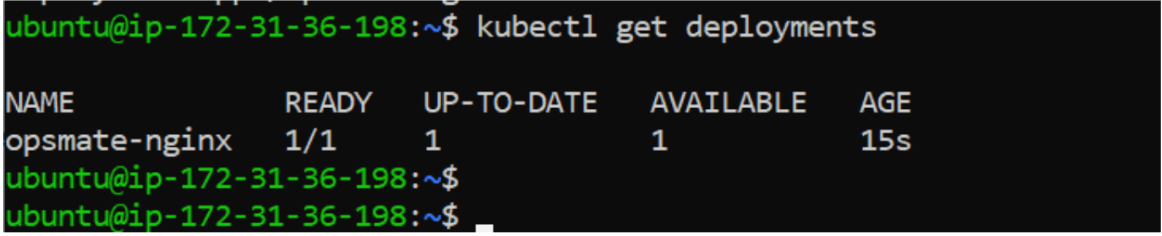
Verify deployment:
kubectl get deployments
Verify Pods:
kubectl get pods

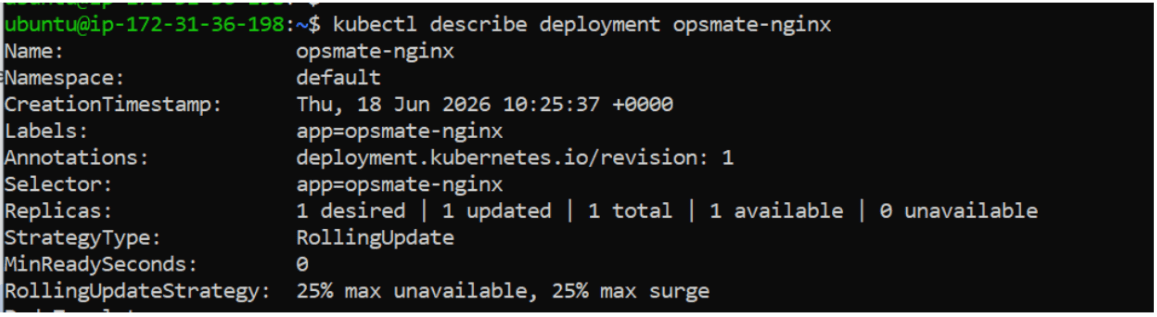
Describe deployment:
kubectl describe deployment opsmate-nginx
Task 11: Expose Application
Expose deployment:
kubectl expose deployment opsmate-nginx \
--port=80 \
--type=LoadBalancer

Verify Service:
kubectl get svc
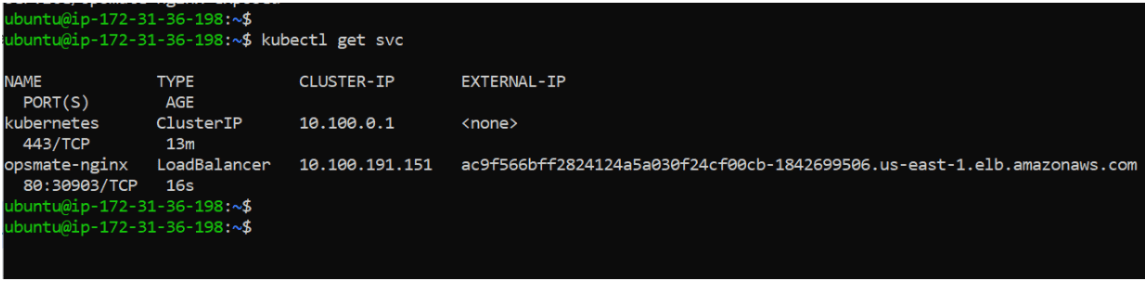
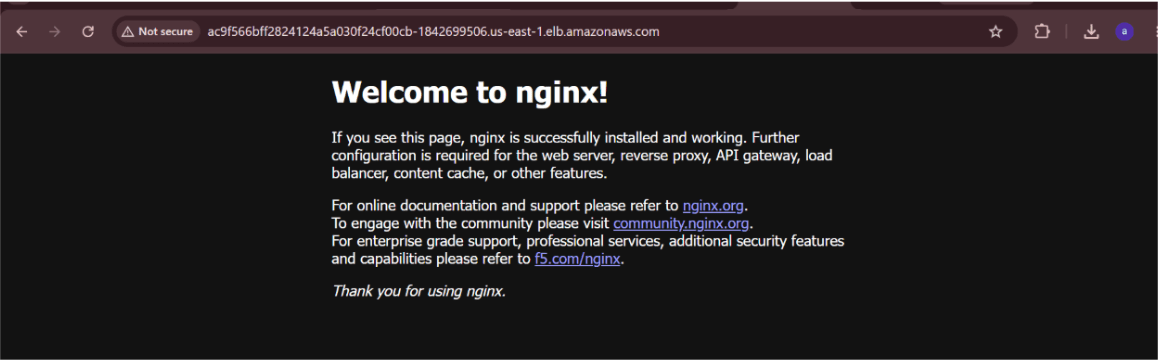
Open in browser: http://EXTERNAL-IP
You should see the Nginx welcome page
Cleanup Resources
Delete Service:
kubectl delete svc opsmate-nginx
Delete Deployment:
kubectl delete deployment opsmate-nginx

Great job!
-
Installed AWS CLI
-
Configured AWS credentials
-
Installed kubectl
-
Installed eksctl
-
Created Amazon EKS cluster
-
Connected kubectl to EKS
-
Verified worker nodes
-
Deployed validation workload
-
Exposed application using LoadBalancer Service
Checkpoint