BiteBox Project Onboarding

Business Scenario
The objective of this lab is to develop a dual login authentication system where both Users and Patients can log in using the same React Login page. Based on the selected login type, the application sends the credentials to the appropriate Spring Boot REST API and redirects the authenticated user to the Home page.

Introduction
Authentication is an essential feature of every web application. Different types of users often require different login mechanisms. In a Medicare Management System, both Users and Patients need to access the application using their own credentials.
In this lab, a single Login page is designed with two login options:
-
User Login
-
Patient Login
When the user selects the required login type, React automatically calls the corresponding Spring Boot Login API. After successful authentication, the user information is stored in Local Storage and the application navigates to the Home page.
Pre-Lab Preparation
-
Build a common Login page for multiple user roles.
-
Implement authentication using React and Spring Boot.
-
Use radio buttons for login type selection.
-
Send POST requests using Axios.
-
Store authenticated user information in Local Storage.
-
Navigate using React Router.
-
Integrate multiple backend APIs with a single frontend page.
Project Structure
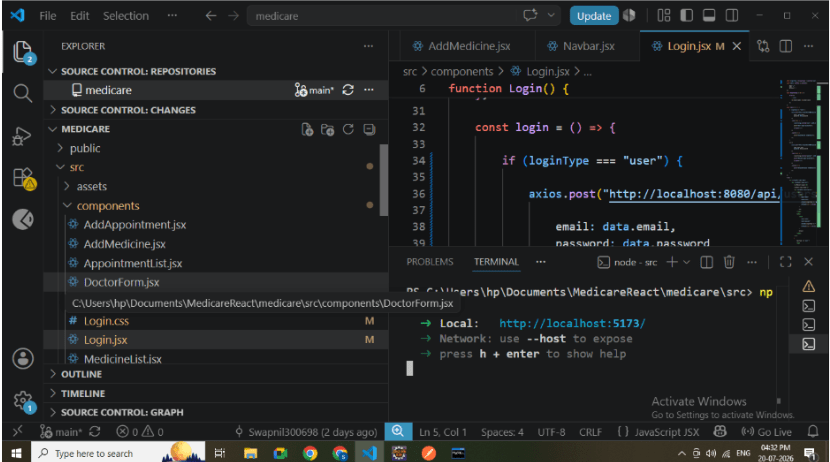
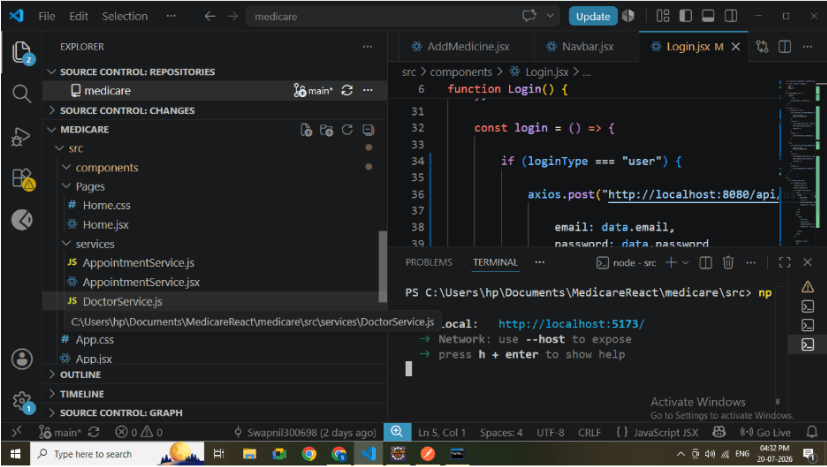
Frontend
src
│
├── components
│ Login.jsx
├── services
│ UserService.js
│ PatientService.js (optional)
│
└── App.jsx
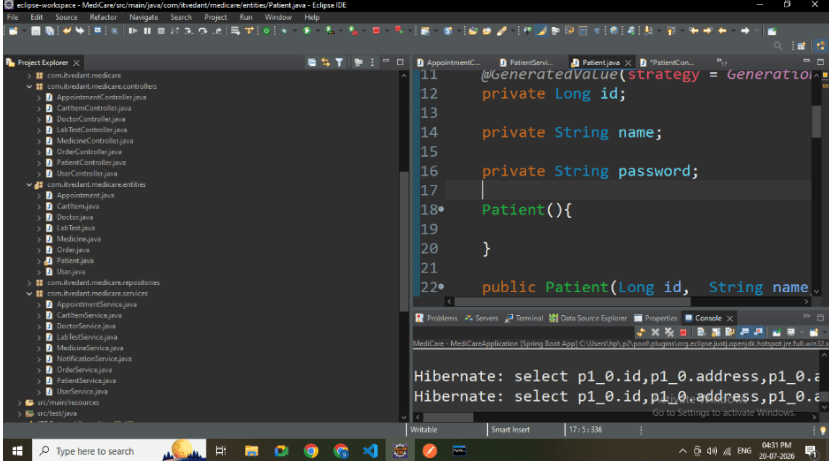
Backend
controller
UserController
PatientController
service
UserService
PatientService
repository
UserRepository
PatientRepository
1
Create User Login API
Create a POST API for User Login.
API
POST http://localhost:8080/api/users/login
Request Body
{
    "email":"rahul@gmail.com",
    "password":"1234"
}
Responsibilities:
-
Validate email.
-
Validate password.
-
Return User object.
User Login API
2
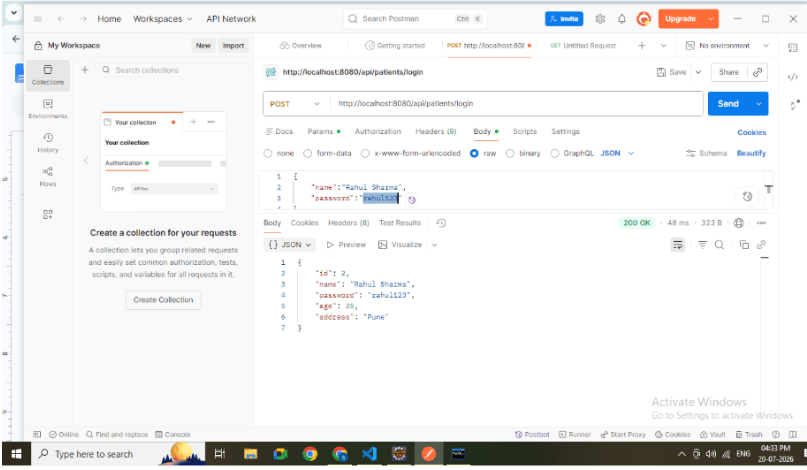
Create Patient Login API
Create another POST API for Patient Login.
API
POST http://localhost:8080/api/patients/login
Request Body
{
    "name":"Rahul",
    "password":"1234"
}
Responsibilities:
-
Validate patient name.
-
Validate password.
-
Return Patient object
3
Create Login Page
Develop Login.jsx.
Responsibilities:
-
Display login form.
-
Display User and Patient login options.
-
Accept credentials.
-
Call appropriate API.
-
Redirect after successful login.
4
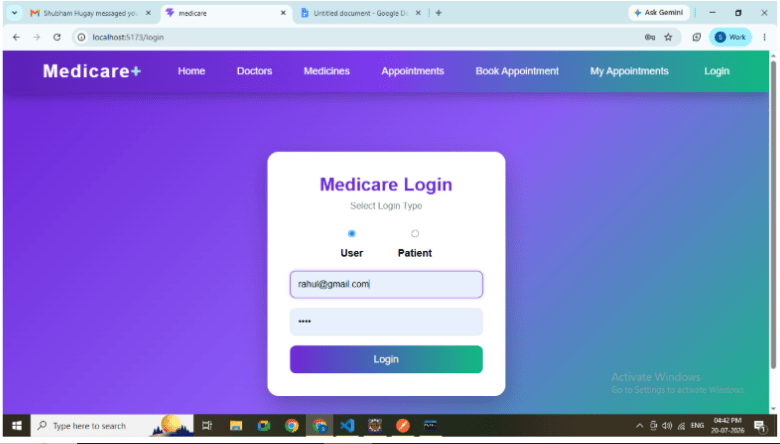
Create Login Type Selection
Add two radio buttons.
Options:
-
User Login
-
Patient Login
When the selected option changes:
-
User Login displays Email field.
-
Patient Login displays Name field.
Radio Button Selection
5
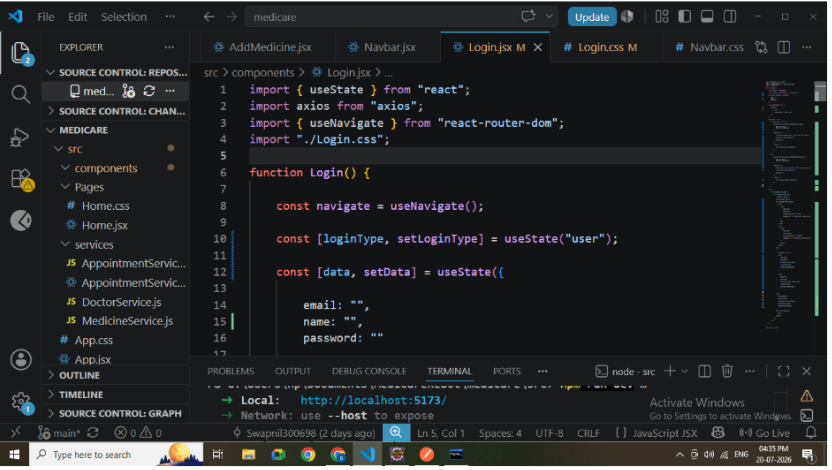
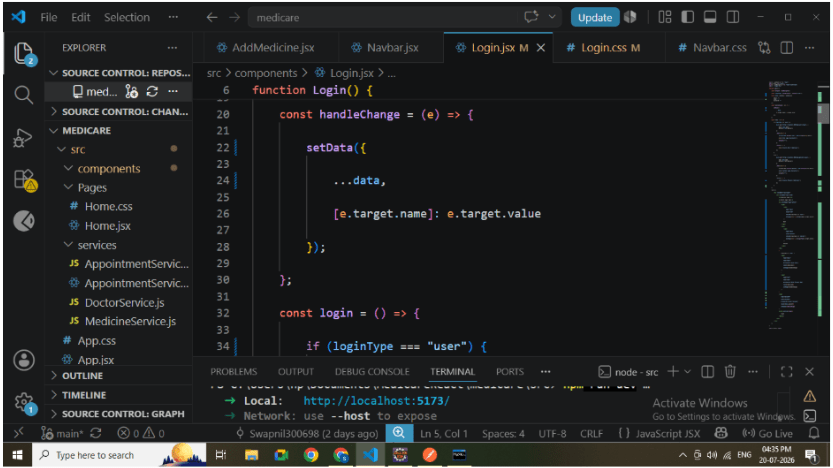
Handle User Input
Use useState to store:
-
Email
-
Patient Name
-
Password
-
Login Type
React updates state whenever the user enters data
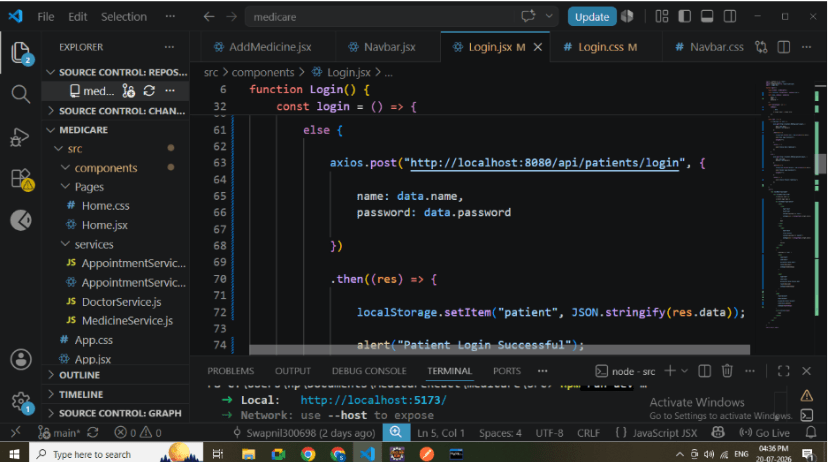
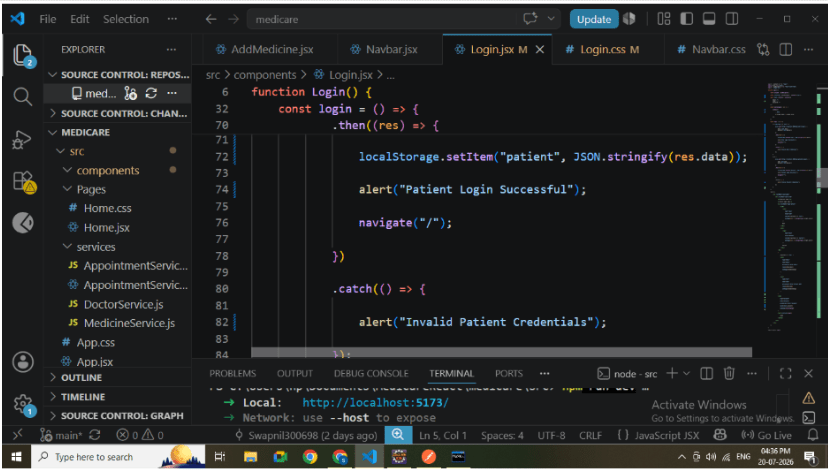
6
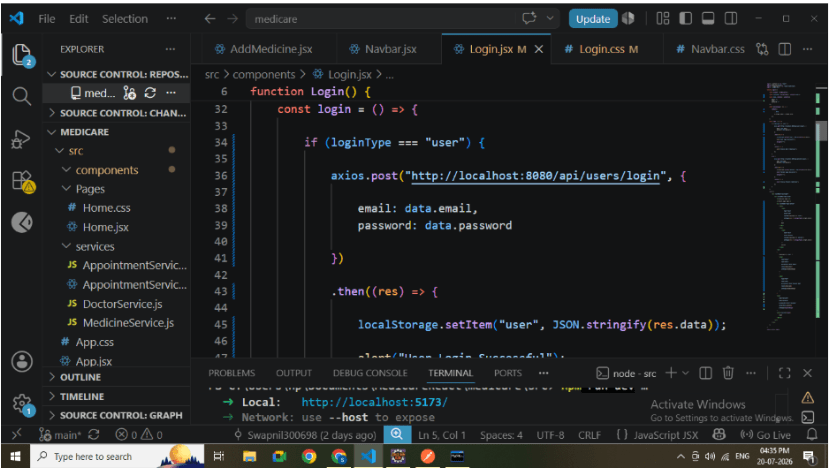
Implement Login Function
Create a common login function.
Logic:
If User Login is selected:
-
Call User Login API.
If Patient Login is selected:
-
Call Patient Login API.
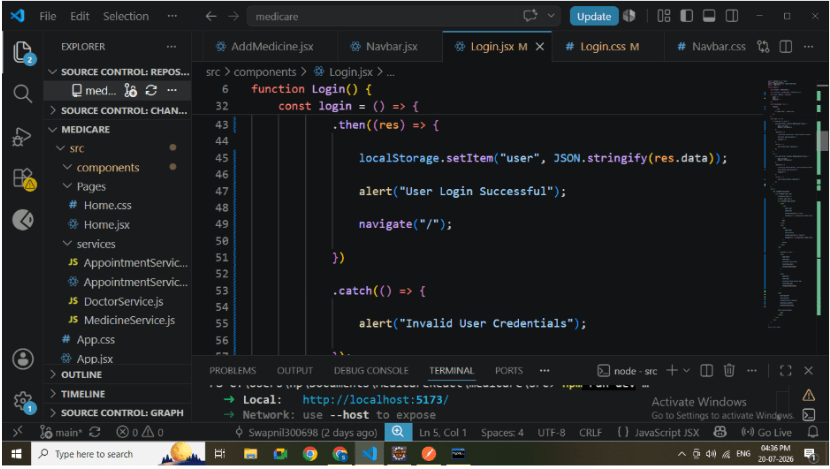
After successful login:
-
Store response in Local Storage.
-
Navigate to Home page.
Login Function
7
Store Login Information
Store authenticated data.
Example:
localStorage.setItem("user", JSON.stringify(response.data));or
localStorage.setItem("patient", JSON.stringify(response.data));8
Configure Routing
Add routing.
Routes: /login
Redirect authenticated users to the Home page.
React Router Configuration
9
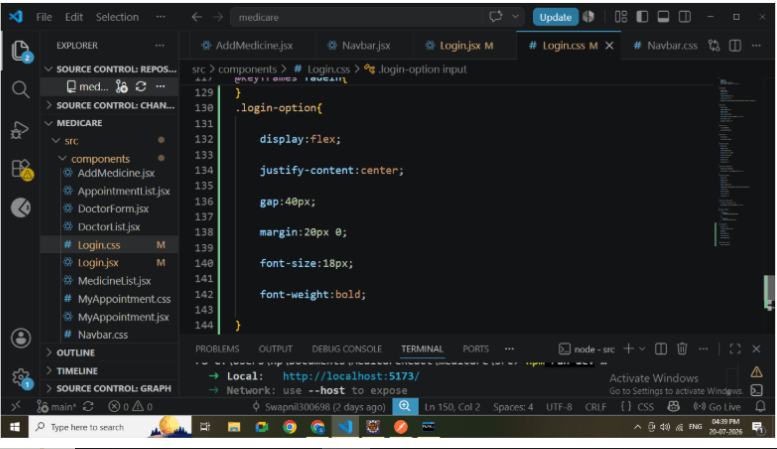
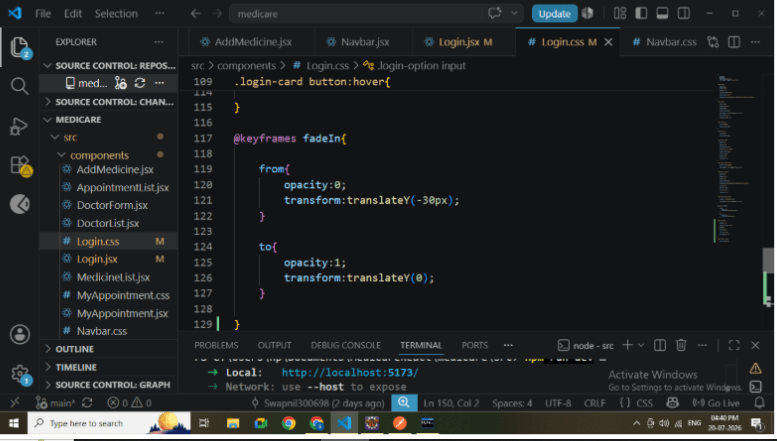
Design Login Page
Create Login.css.
Apply:
-
Gradient Background
-
Login Card
-
Rounded Corners
-
Shadow Effects
-
Hover Animation
-
Responsive Layout
-
Styled Buttons
10
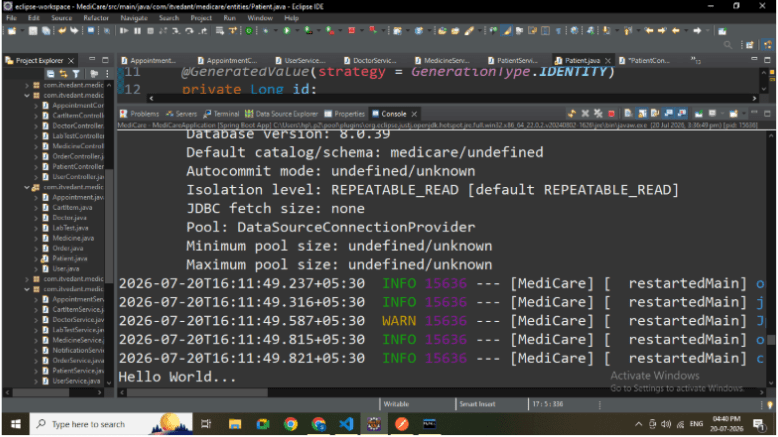
Run Spring Boot Application
Start the backend.
Verify:
-
APIs start successfully.
-
Database connection established.
-
Login endpoints accessible.
11
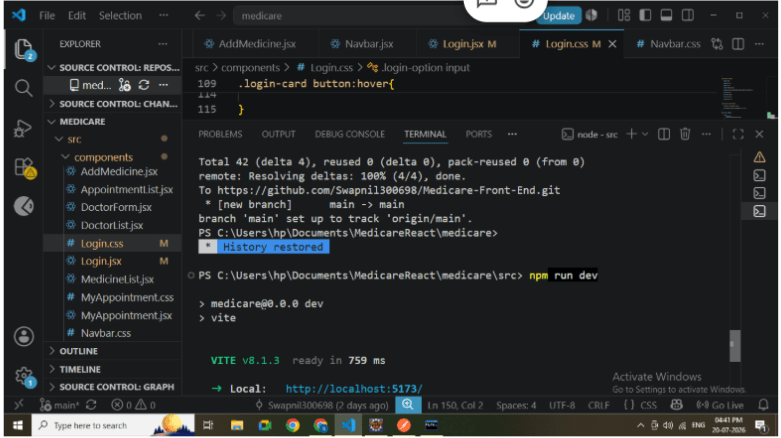
Run React Application
Run:
npm run devVerify:
-
Login page opens.
-
Radio buttons are visible.
-
Input fields change according to selected login type
12
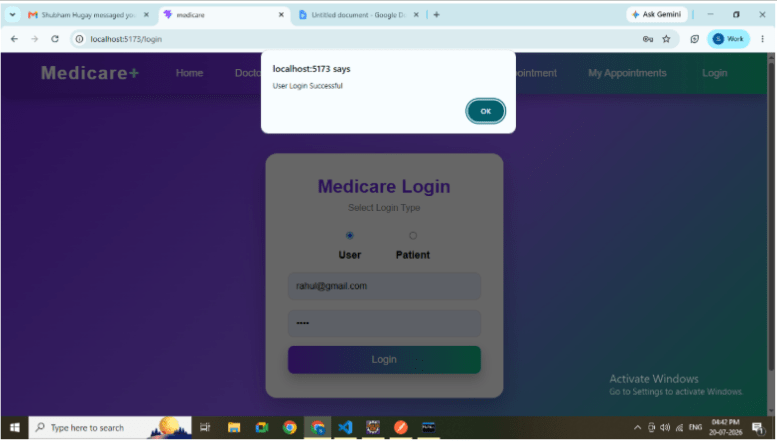
Test User Login
Select:
User Login
Enter:
Password
Click Login.
Verify:
-
User Login API executes.
-
Home page opens.
-
User information stored in Local Storage
13
Select:
Patient Login
Enter:
Patient Name
Password
Click Login.
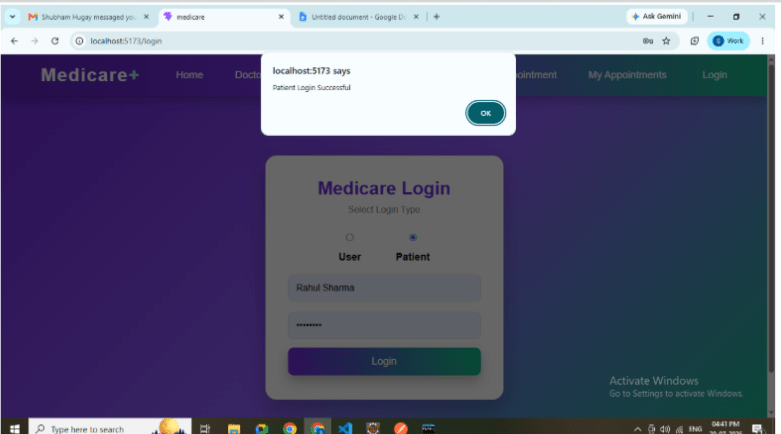
Verify:
-
Patient Login API executes.
-
Home page opens.
-
Patient information stored in Local Storage.
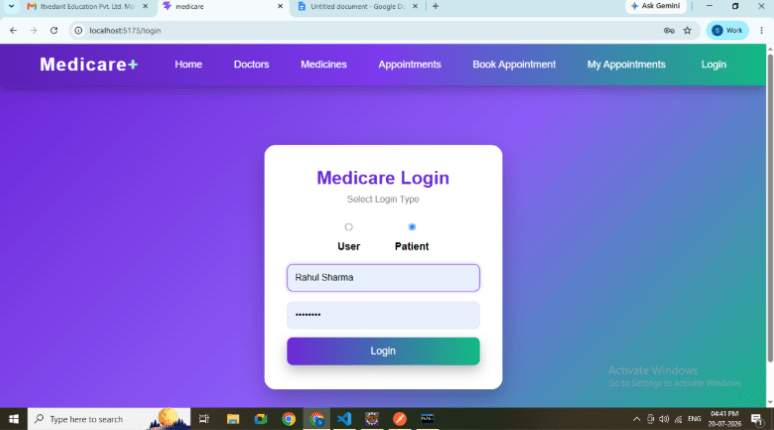
Test Patient Login
14
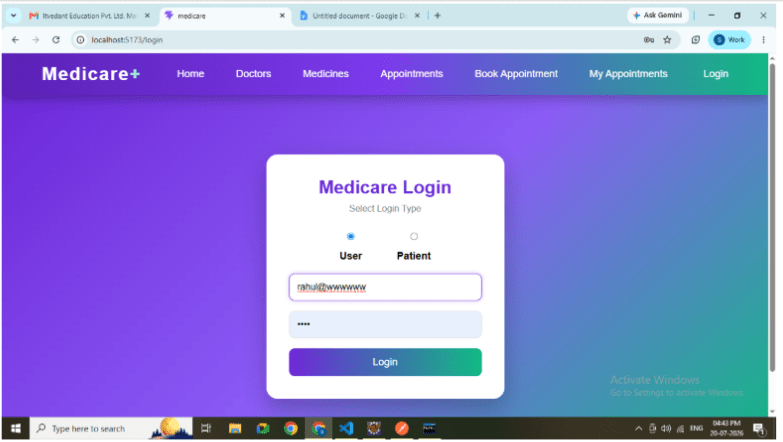
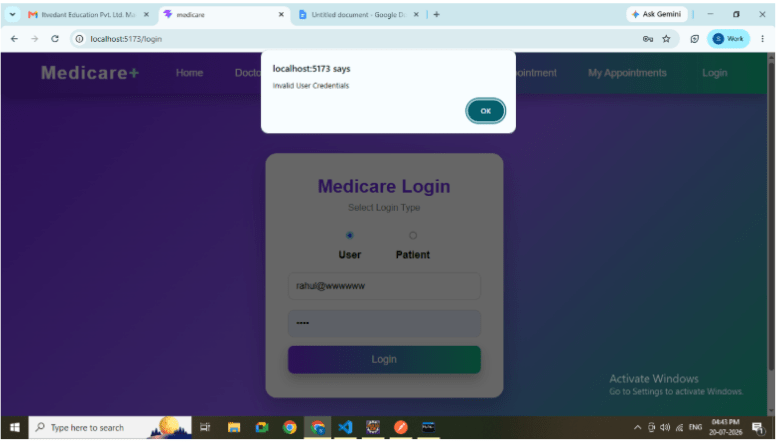
Test Invalid Credentials
Enter incorrect credentials.
Verify:
-
Error message displayed.
-
User remains on Login page.
-
No Local Storage data is created
APIs Used
User Login
POST
http://localhost:8080/api/users/login
Patient Login
POST
http://localhost:8080/api/patients/login
Great job!
- Developed a dual authentication system using React and Spring Boot.
- Implemented role-based login with secure REST API validation and Local Storage session management.
- Enabled seamless user authentication, redirection, and enterprise-style healthcare access control.
Checkpoint