Implementing Shopping Cart (Add to Cart & Remove from Cart) using React

Business Scenario
The objective of this lab is to develop a Shopping Cart module in React where users can add medicines to the cart, store them in Local Storage, view all selected medicines on the Cart page, and remove medicines from the cart without using any backend APIs.

Introduction
Shopping Cart is one of the most important features of every e-commerce application. It allows users to temporarily store selected products before proceeding to checkout.
In this lab, React Local Storage is used to simulate cart functionality. Whenever the user clicks the Add To Cart button, the selected medicine is stored inside Local Storage. The Cart page retrieves this data and displays all selected medicines. Users can also remove medicines from the cart.
This implementation demonstrates React state management, Local Storage handling, navigation using React Router, and dynamic UI rendering.
Pre-Lab Preparation
- Display medicines and manage the Shopping Cart using React.
- Store, retrieve, and remove cart items with Local Storage.
- Build a frontend shopping cart with seamless React page navigation.
Project Structure
src
│
├── components
│ MedicineList.jsx
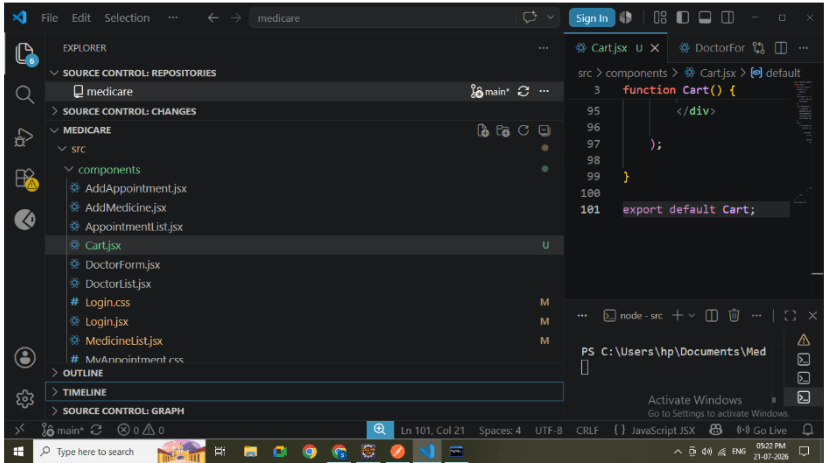
│ Cart.jsx
│ AddMedicine.jsx
│
├── services
│ MedicineService.js
│
├── App.jsx
│
└── App.css
System Workflow
Medicine List
│
Click Add To Cart
│
Display Selected Medicines
│
Remove Medicine
│
Update Local Storage
│
Refresh Cart
1
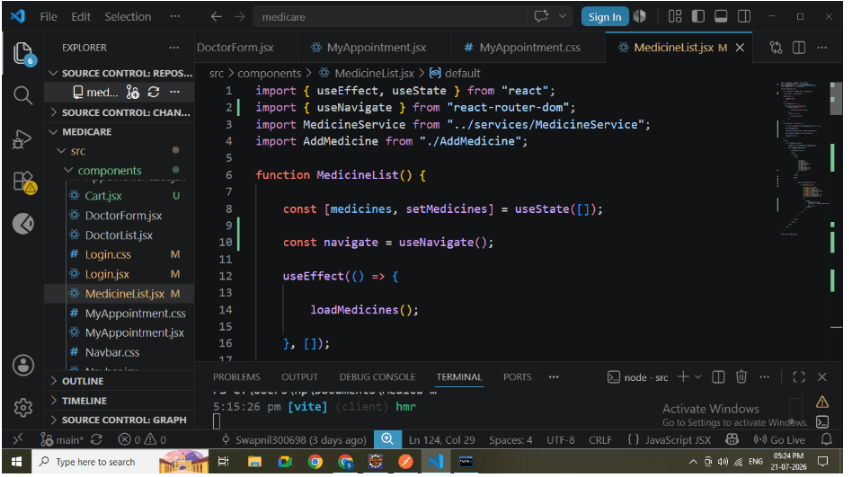
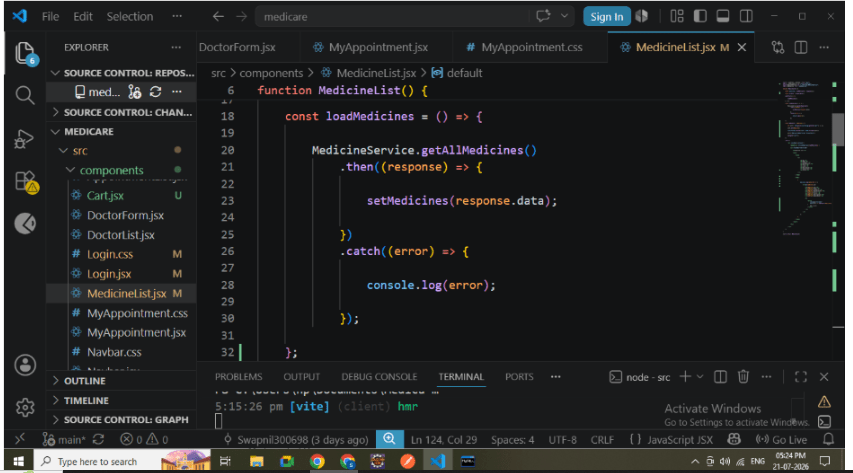
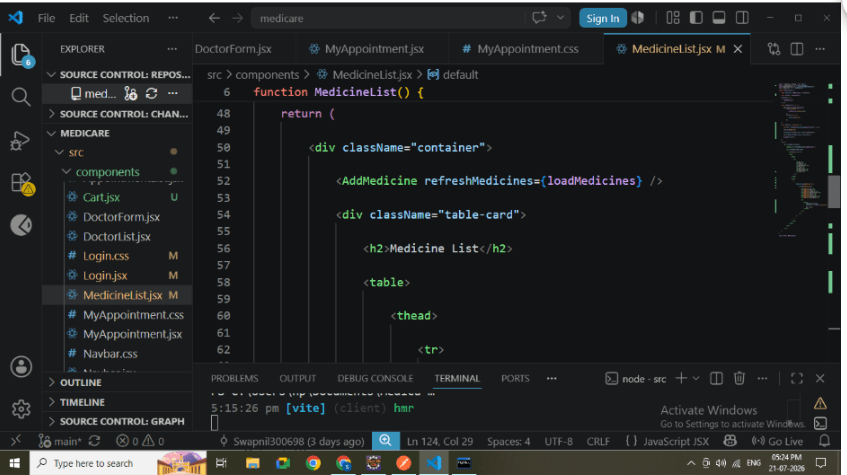
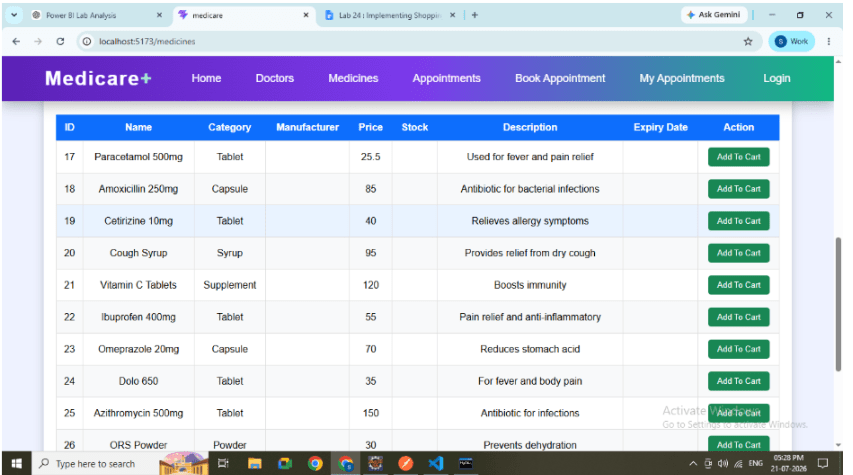
Display Medicine List
Create the Medicine List page.
Responsibilities:
-
Fetch medicines from backend.
-
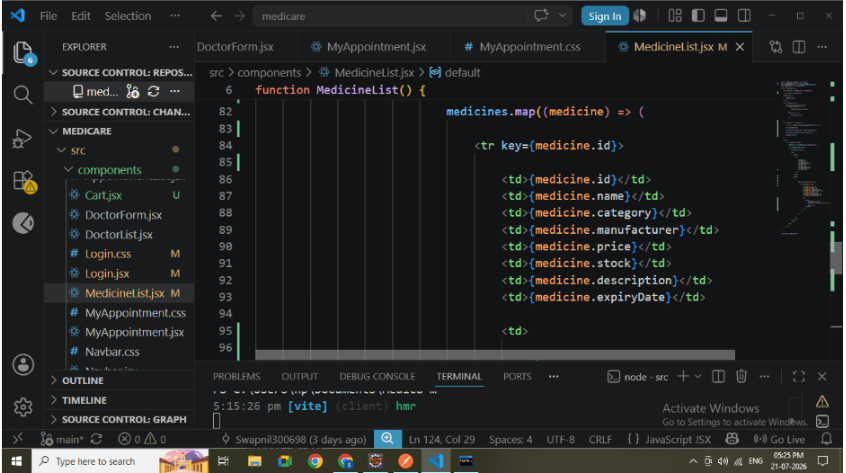
Display all medicine details.
-
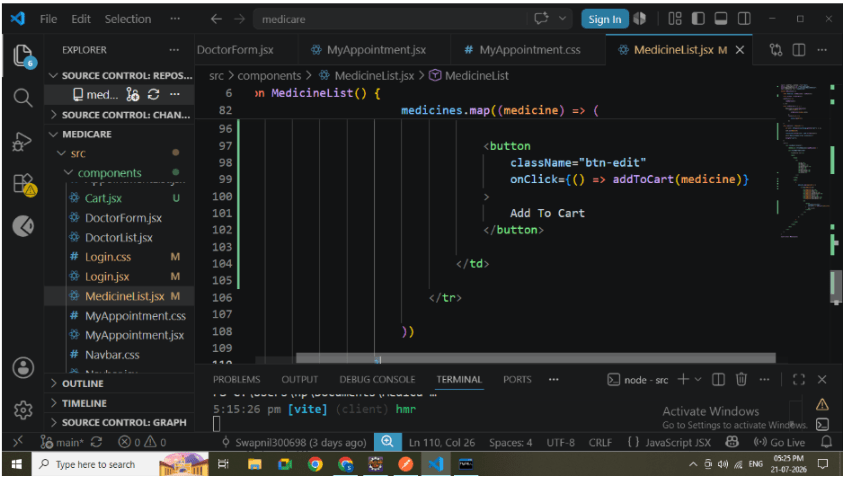
Show Add To Cart button.
Medicine details displayed:
-
Medicine Name
-
Category
-
Manufacturer
-
Price
-
Stock
-
Description
-
Expiry Date
2
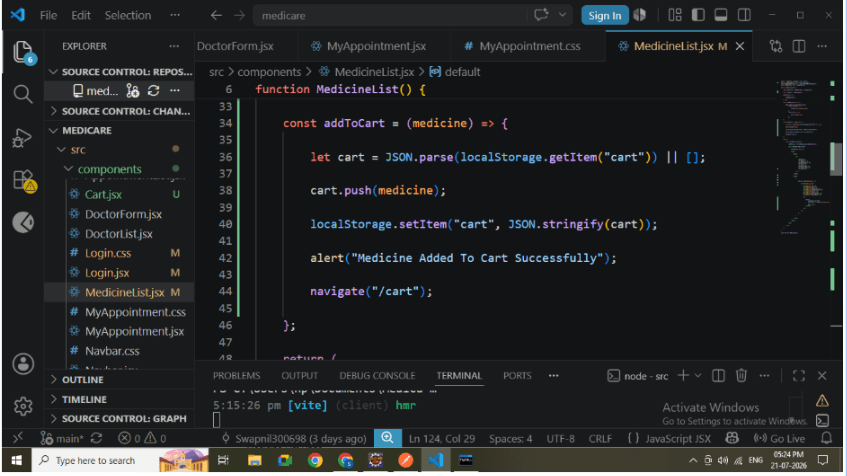
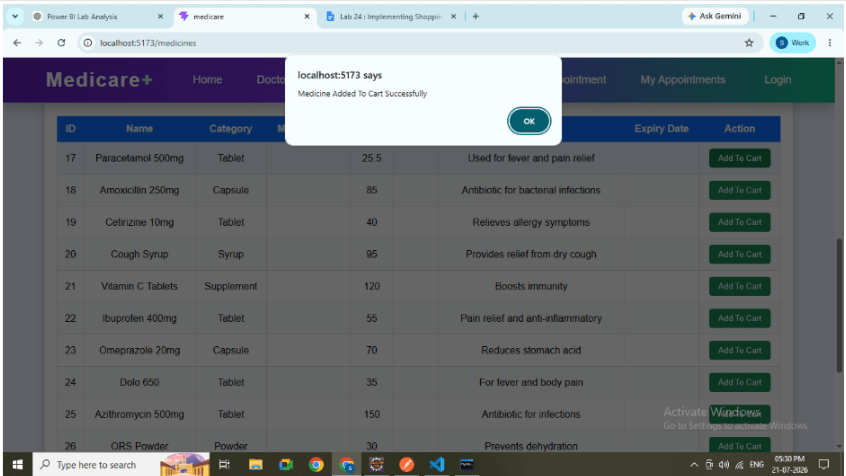
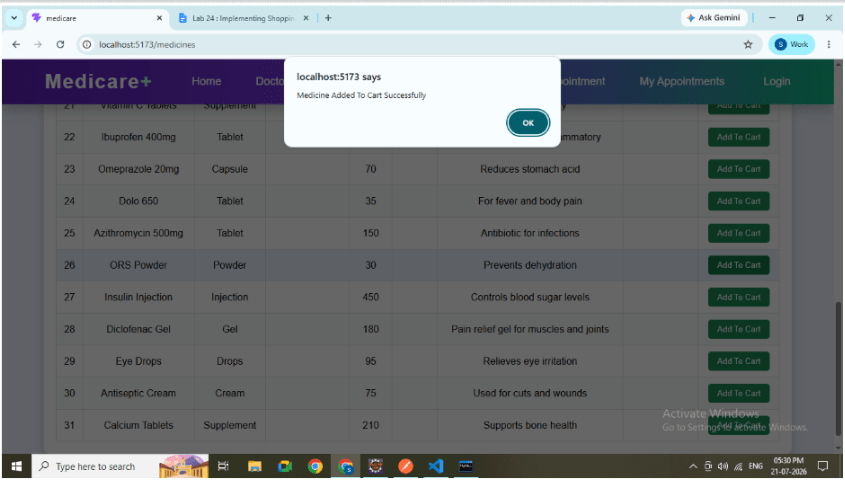
Implement Add To Cart
Create an Add To Cart button.
Responsibilities:
-
Read existing cart from Local Storage.
-
Add selected medicine.
-
Save updated cart.
-
Display success message.
-
Navigate to Cart page.
Flow:
User Click
↓
Medicine Object
↓
Local Storage
↓
Cart Page
Add To Cart Button
3
Store Data in Local Storage
Whenever a medicine is added:
-
Read existing Local Storage data.
-
Convert JSON into Array..
-
Insert new medicine.
-
Save updated array
4
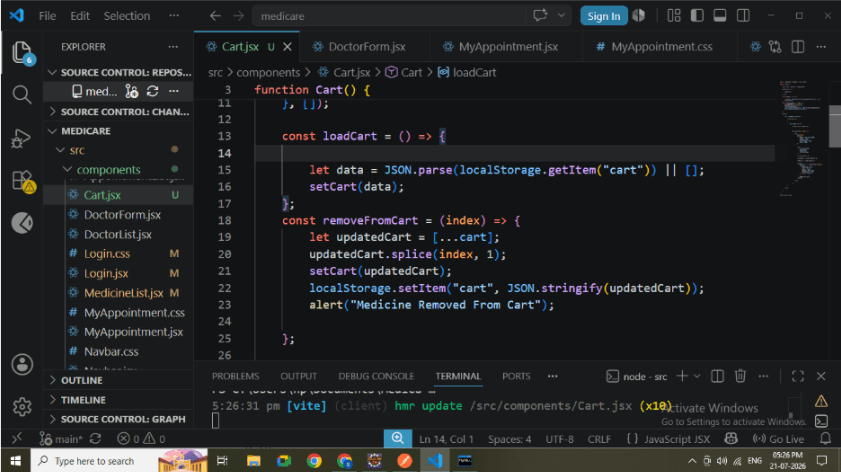
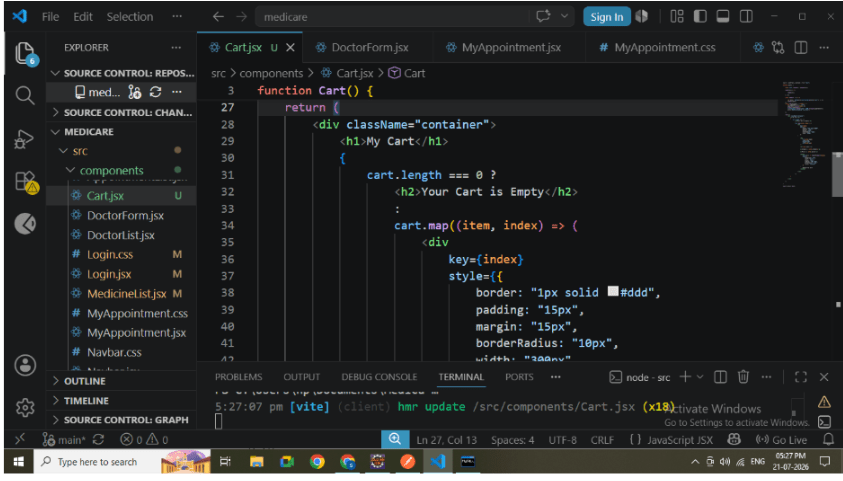
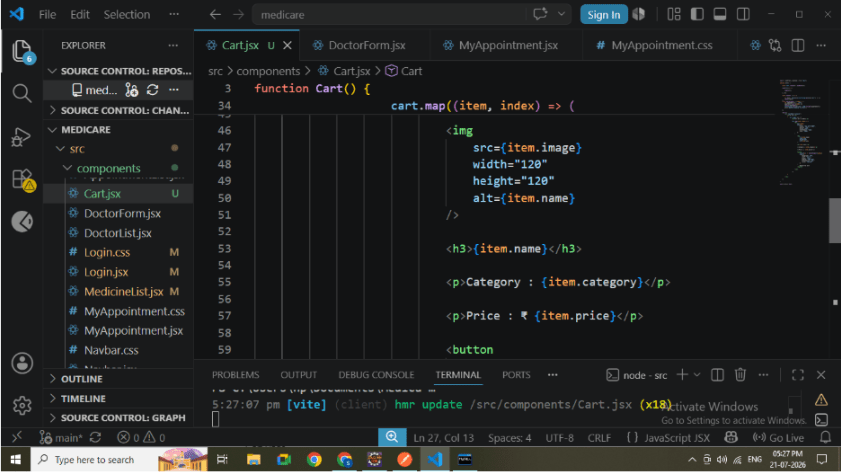
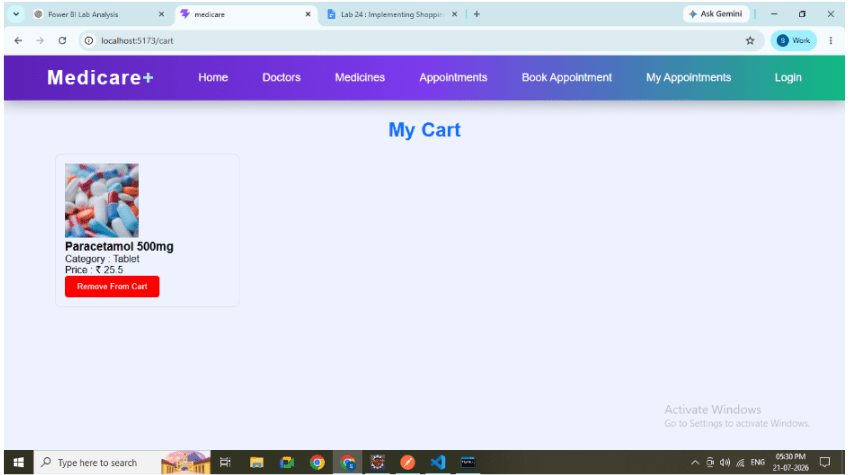
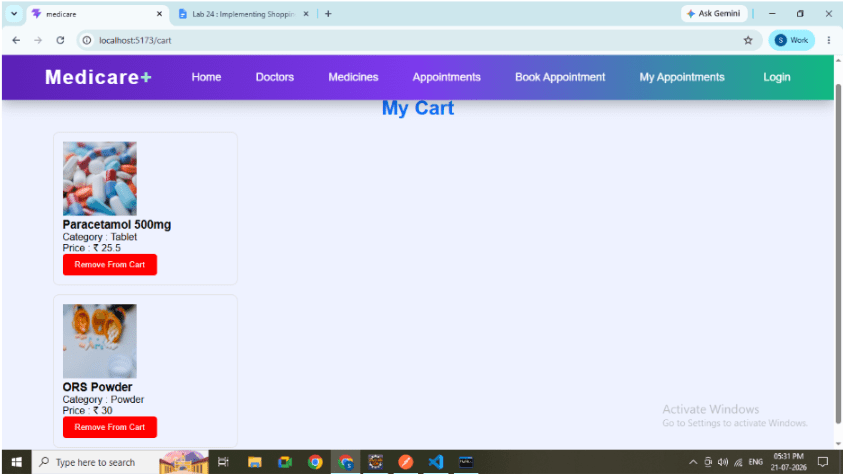
Create Cart Page
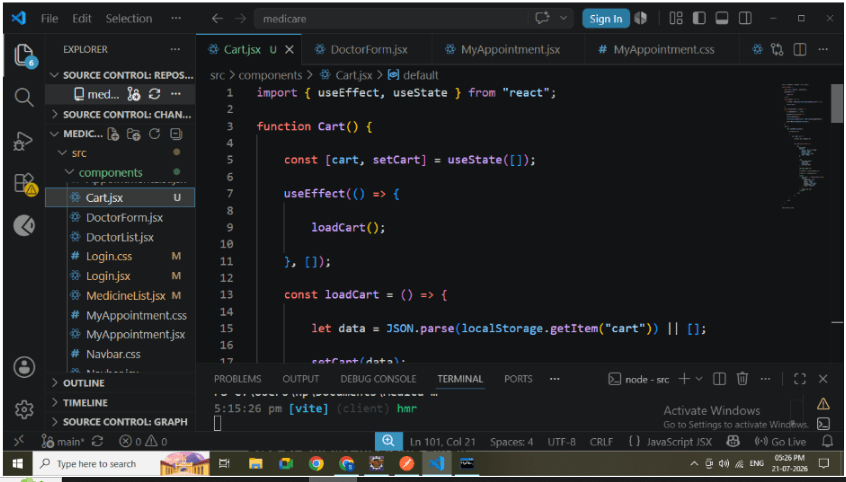
Create Cart.jsx.
Responsibilities:
-
Read Local Storage.
-
Display selected medicines.
-
Show medicine image.
-
Show medicine name.
-
Show medicine category.
-
Show medicine price.
5
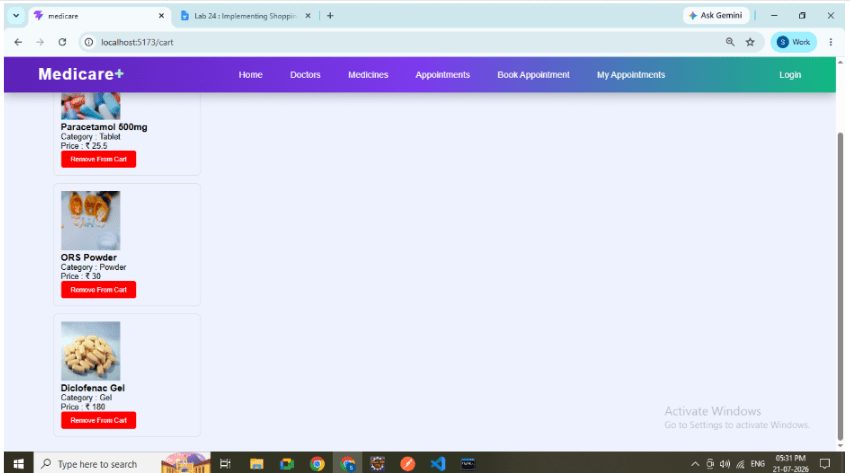
Display Medicine Cards
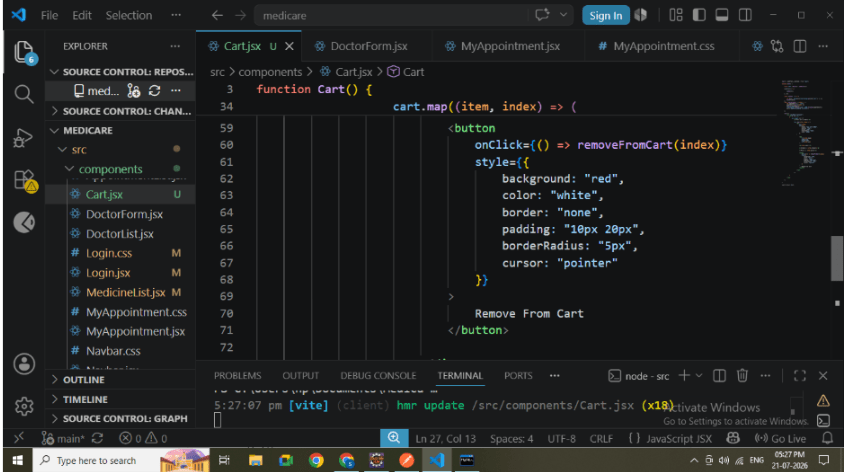
Each selected medicine is displayed inside a card.
Card includes:
-
Medicine Image
-
Medicine Name
-
Category
-
Price
-
Remove Button
Benefits:
-
Better UI
-
Easy readability
-
User-friendly shopping experience
6
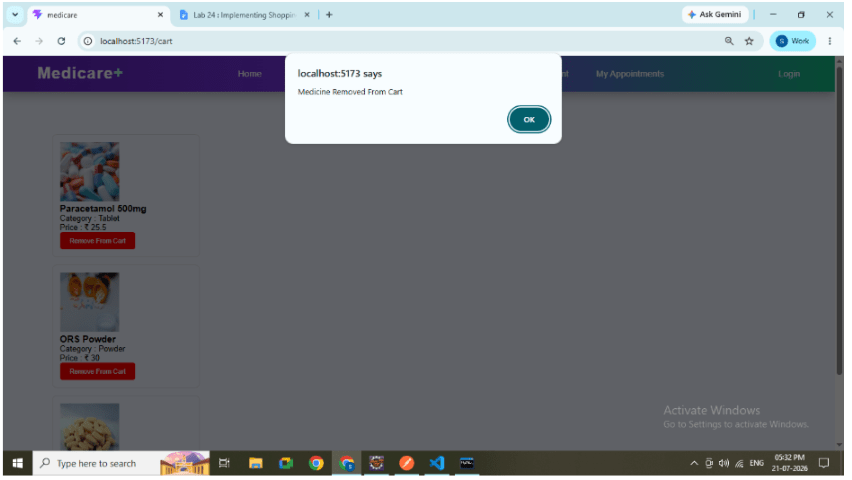
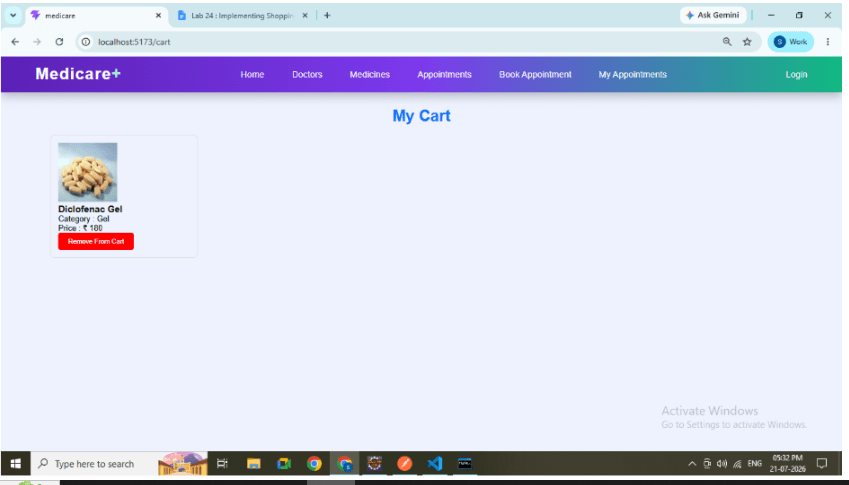
Implement Remove From Cart
Create a Remove From Cart button.
Responsibilities:
-
Remove selected medicine.
-
Update React state.
-
Update Local Storage.
-
Refresh UI automatically.
Flow:
Click Remove
↓
Delete Item
↓
Update Local Storage
Refresh Cart
7
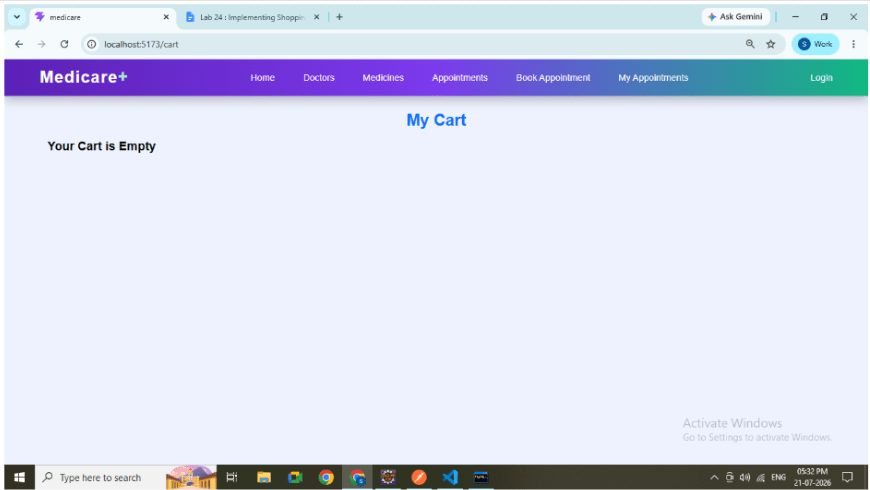
Handle Empty Cart
If no medicines are available:
Display:
Your Cart is Empty
This improves user experience by providing meaningful feedback.
8
Configure React Routing
Add routing inside App.jsx.
Routes:
/medicines
/cart
Navigation Flow:
Medicine List
↓
Cart Page
React Router Configuration
9
Run React Application
npm run devVerify:
-
Medicine List loads successfully.
-
Cart page is accessible..
- Navigation works correctly.
10
Test Complete Flow
Perform the following sequence:
-
Open Medicine List.
-
Click Add To Cart.
-
Navigate to Cart.
-
Verify medicine details.
-
Remove medicine.
-
Verify Local Storage updates.
-
Refresh application.
-
Verify remaining cart items.
Complete Shopping Cart Flow
Great job!
- Developed a Shopping Cart module using React and Local Storage.
- Enabled users to add, view, and remove medicines with dynamic cart updates.
- Implemented React routing, state management, and frontend-only e-commerce functionality.
Checkpoint