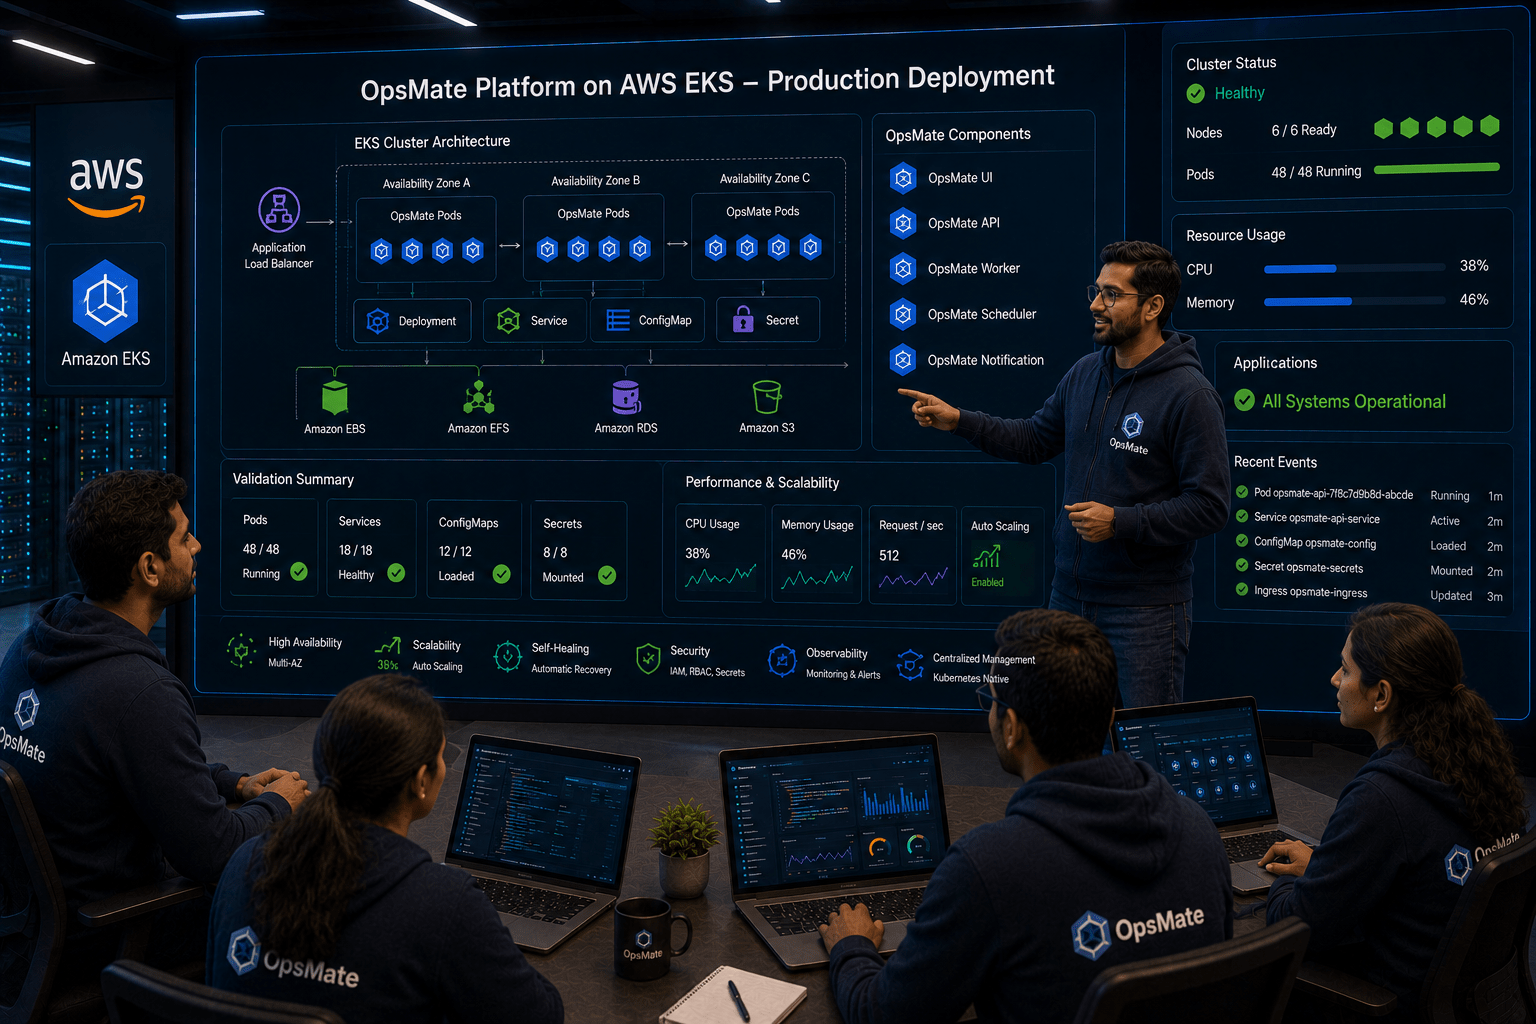
Deploying OpsMate Platform on AWS EKS

Business Scenario
Manager:
We have successfully created the AWS EKS cluster and configured Kubernetes resources. Now it's time to deploy the complete OpsMate platform on EKS and make it available to users.
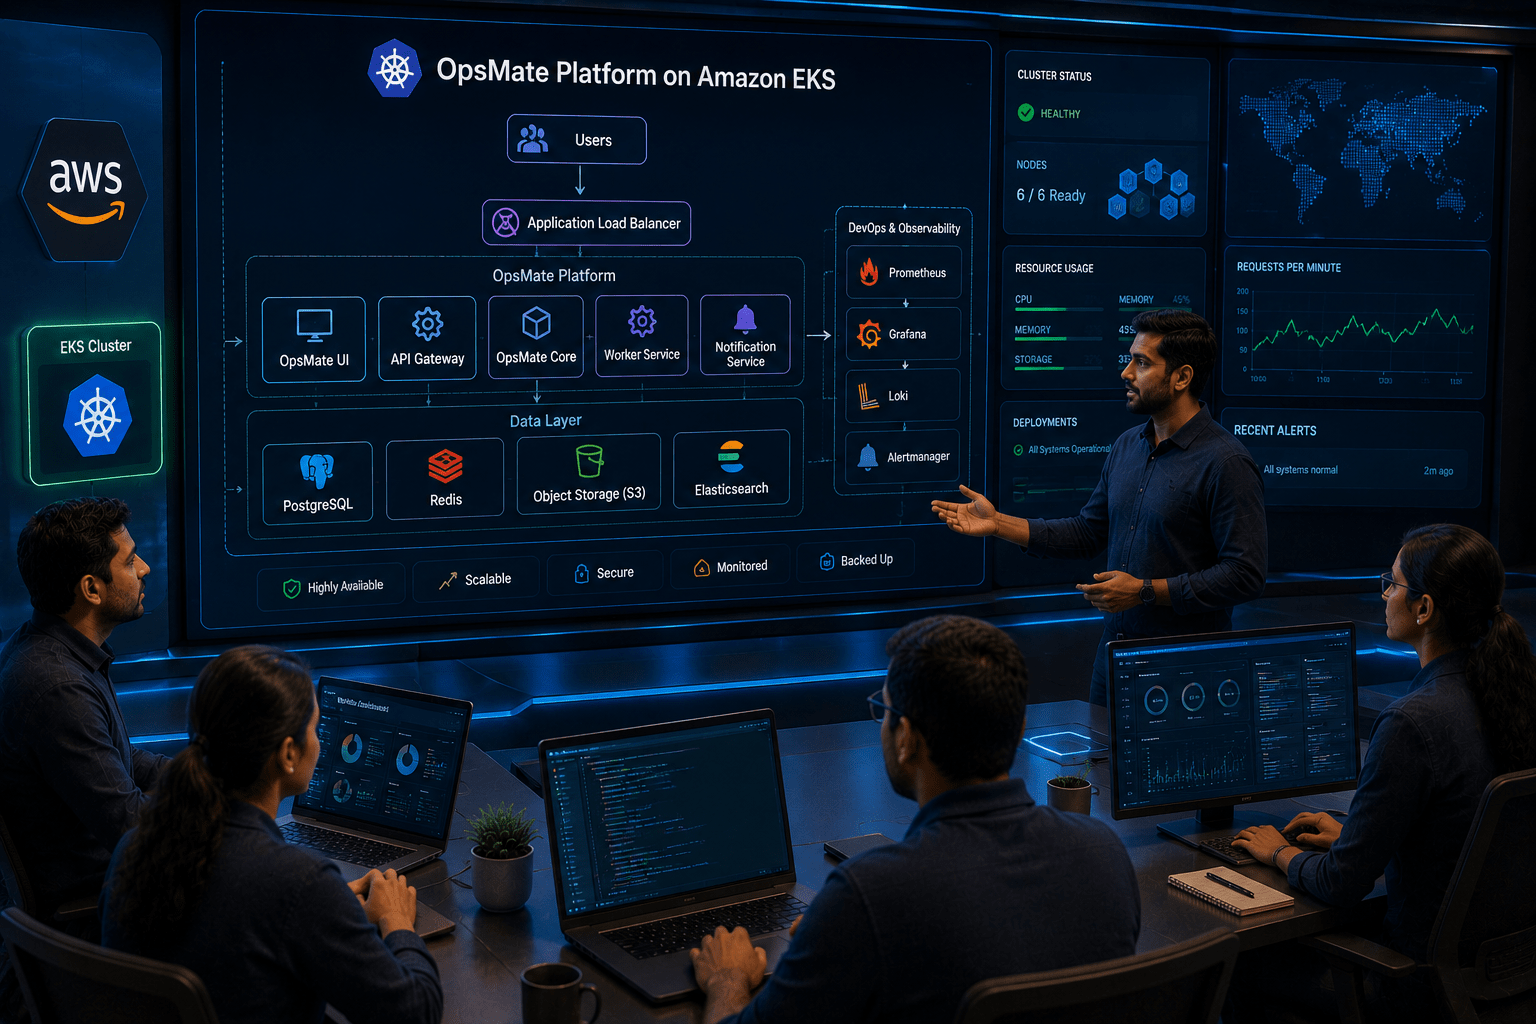
DevOps Engineer:
That's correct. We will deploy all OpsMate components, including Deployments, Services, ConfigMaps, and Secrets, into the EKS cluster and verify that they are running properly.

Manager:
How will this improve our application availability?

DevOps Engineer:
EKS will ensure high availability, automatic scaling, self-healing, and centralized management of the OpsMate platform in a production environment.

Manager:
What is our deployment plan?
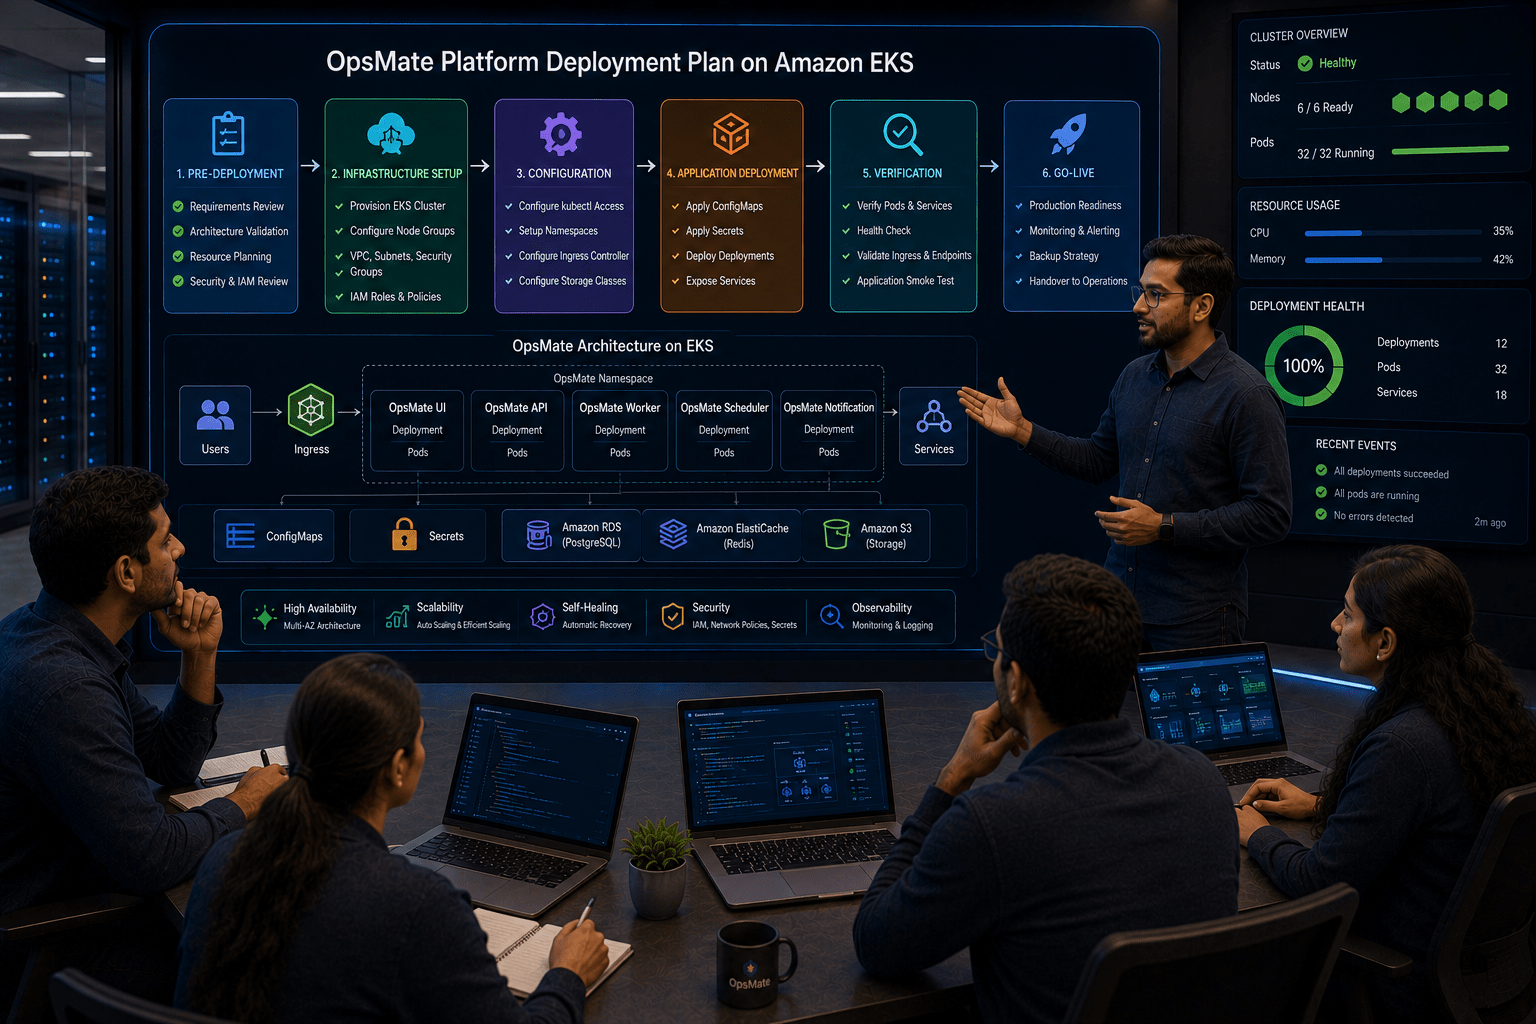
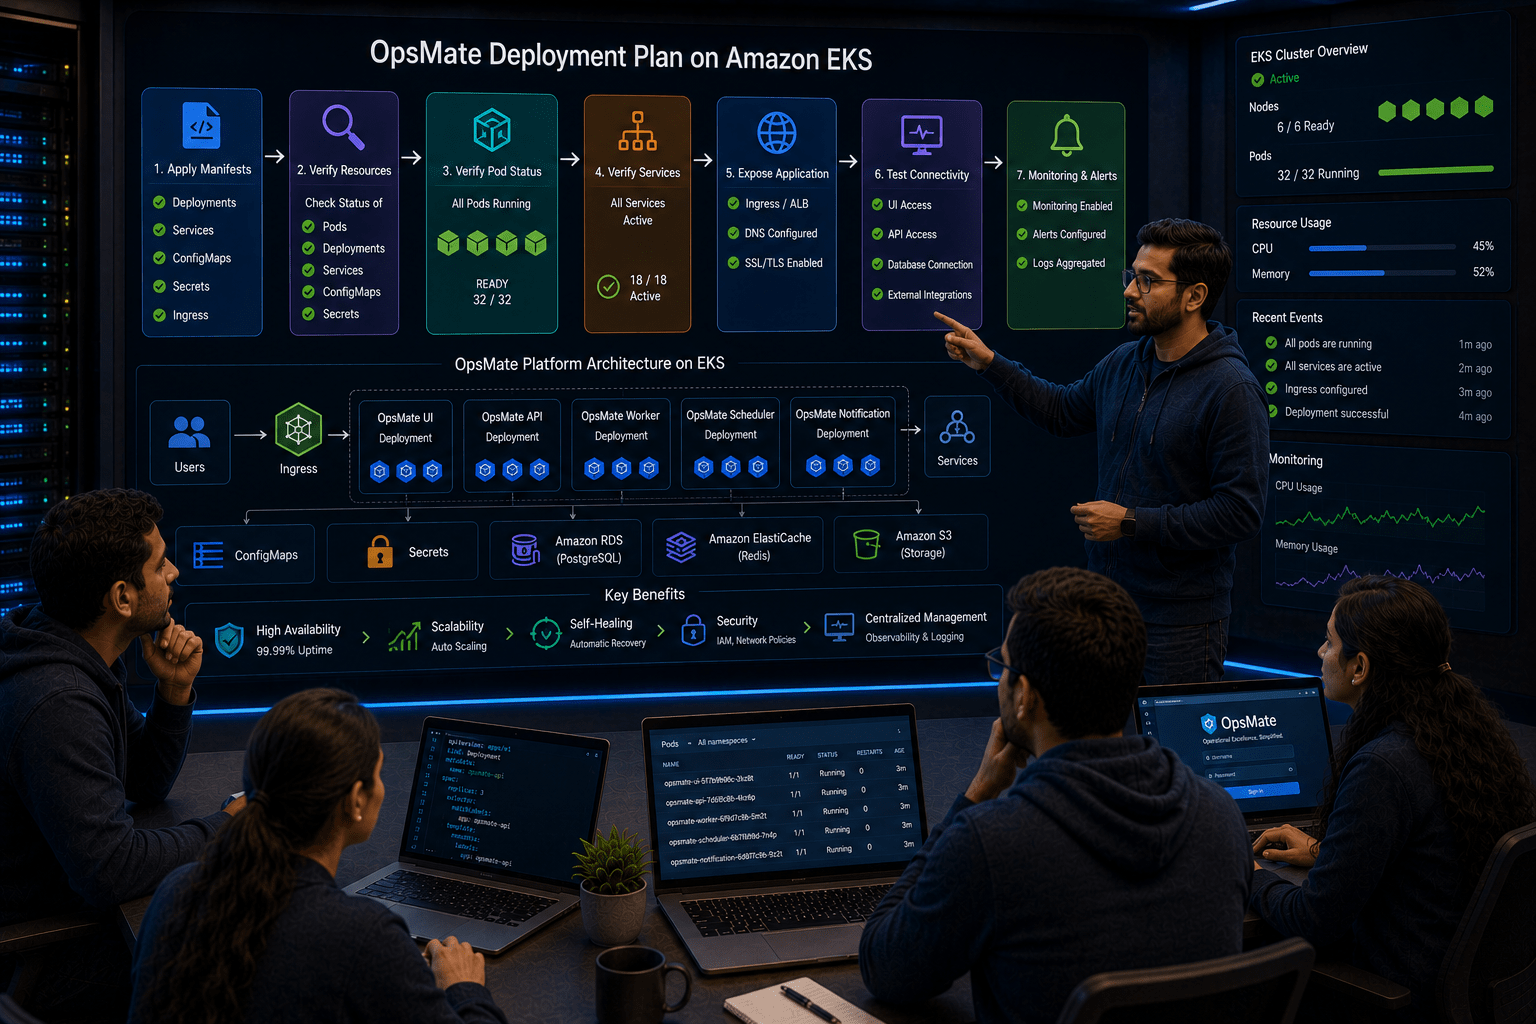
DevOps Engineer:
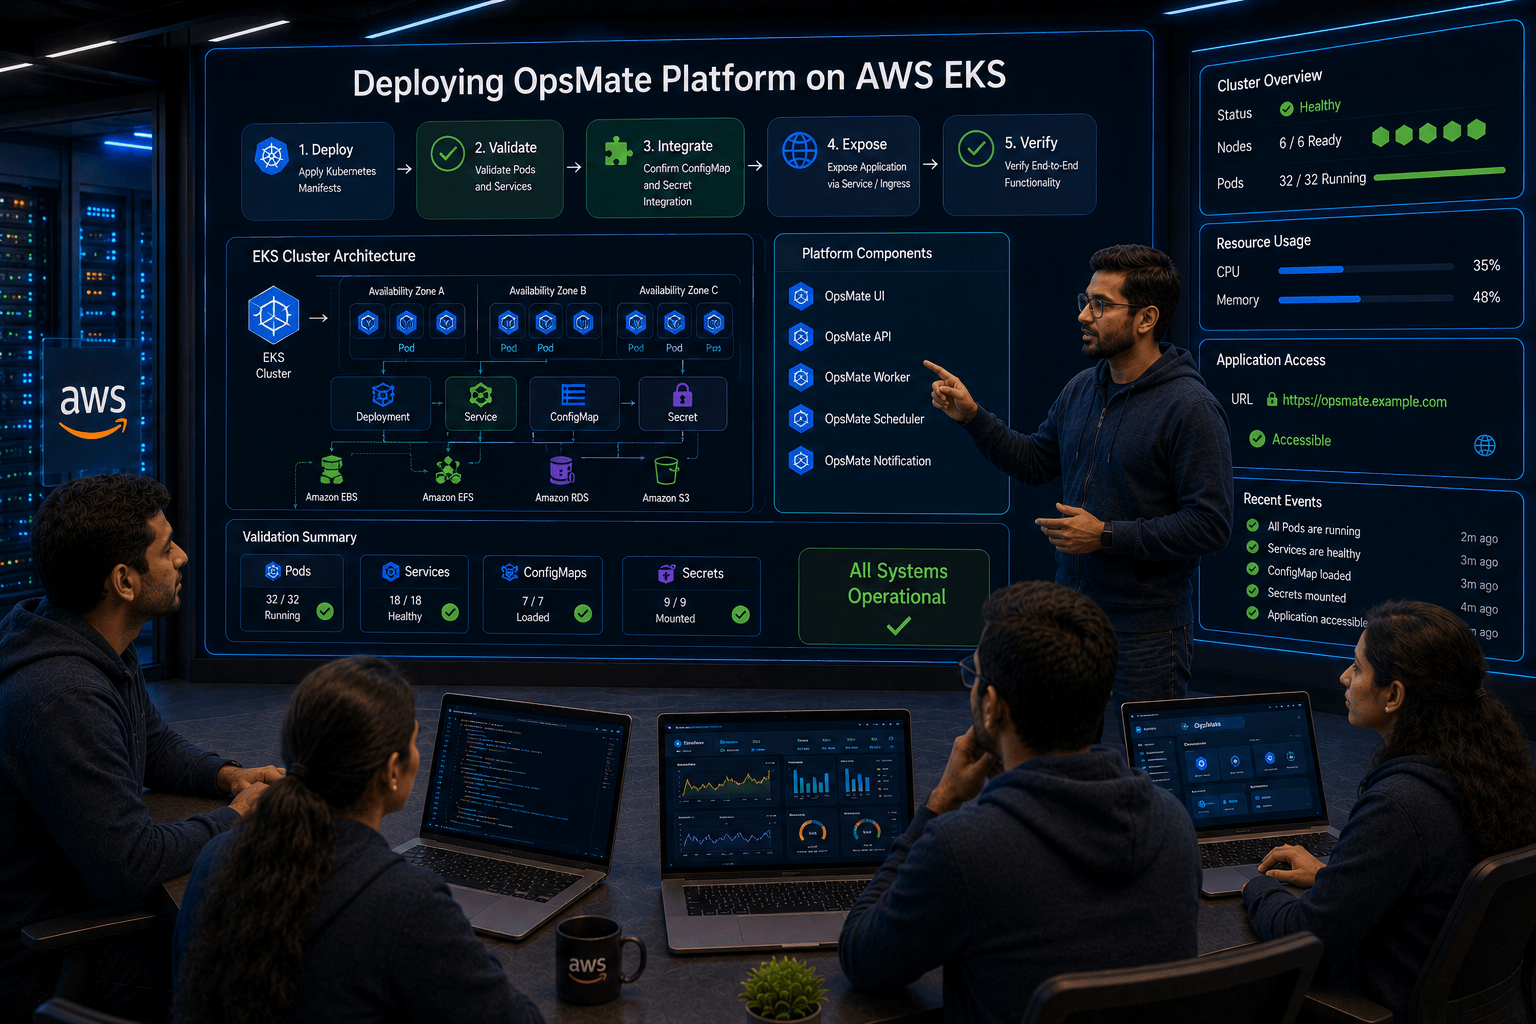
We will apply the Kubernetes manifests, verify Pod and Service status, expose the application, and test connectivity across all components.
DevOps Engineer to Team:
Team, we will deploy the OpsMate platform on AWS EKS, validate all Pods and Services, confirm ConfigMap and Secret integration, and ensure the application is accessible and running smoothly.
Team:
Understood. We will deploy the complete OpsMate platform on AWS EKS and verify that it is scalable, secure, and fully operational for production use.
Pre-Lab Preparation
-
Create Kubernetes namespaces
-
Organize OpsMate resources
-
Deploy the OpsMate application
-
Verify Pods and Deployments
-
Expose applications using Kubernetes Services
-
Access the application from outside the cluster
Task 1: Verify EKS Cluster Connectivity
Connect to your EC2 administration server.
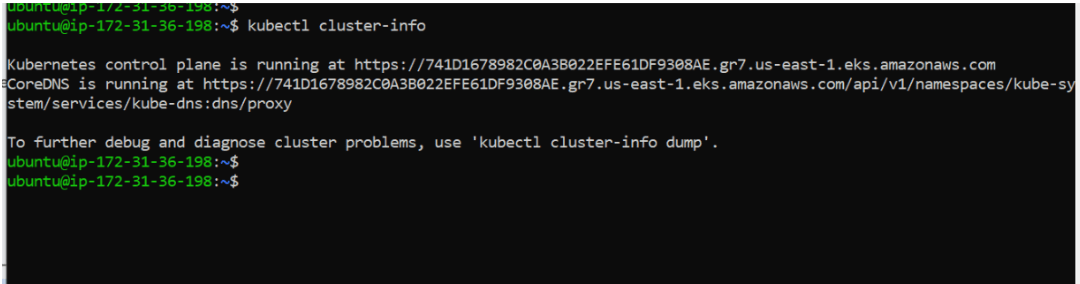
Verify cluster access:
kubectl cluster-info
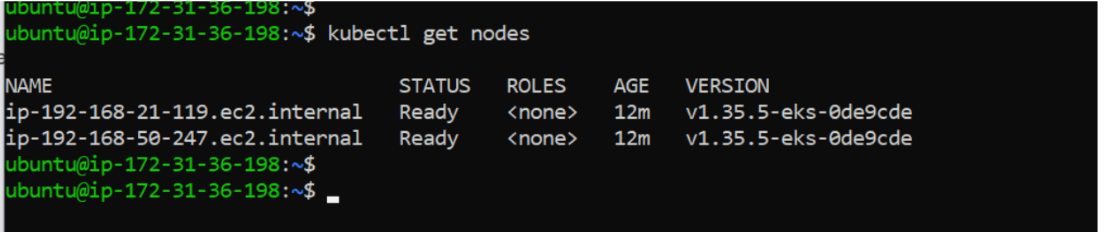
Verify worker nodes:
kubectl get nodes
View current context:
kubectl config current-context

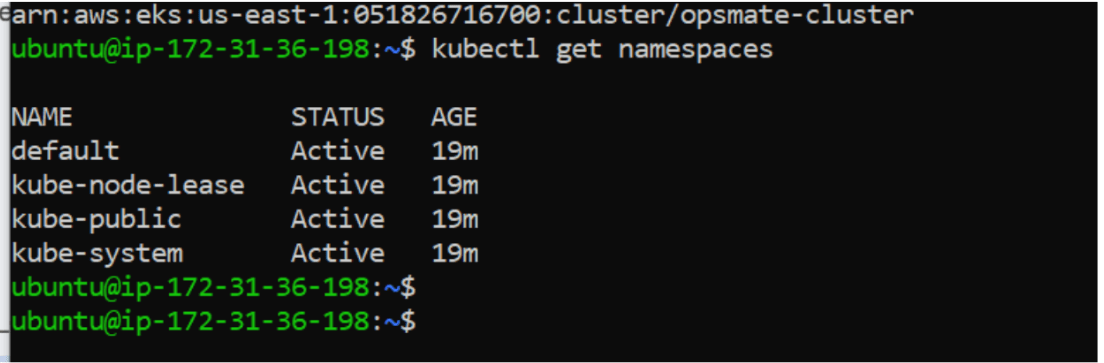
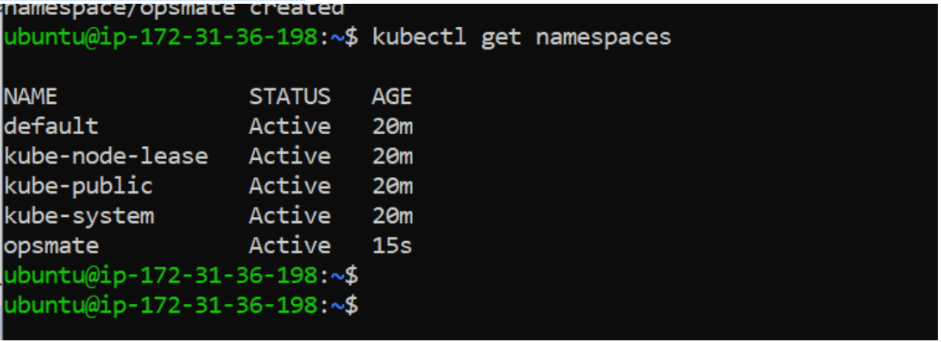
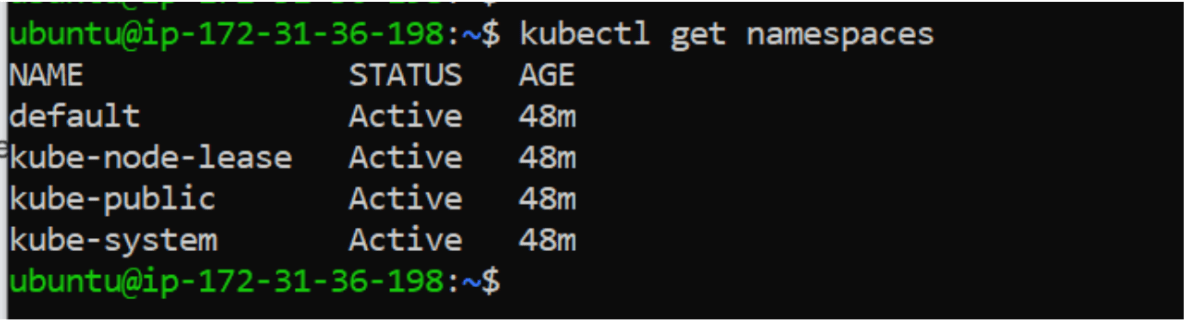
Check existing namespaces:
kubectl get namespaces
Task 2: Understand Kubernetes Namespaces
What is a Namespace?
A Namespace is a logical partition inside a Kubernetes cluster.
Instead of placing every application in the default namespace, we can organize workloads separately.
Example:
EKS Cluster
│
├── development
├── testing
├── production
└── monitoring
This helps teams manage resources more efficiently.
For the OpsMate project, we will create a dedicated namespace.
Task 3: Create OpsMate Namespace
Create namespace:
kubectl create namespace opsmate

Verify namespace:
kubectl get namespaces
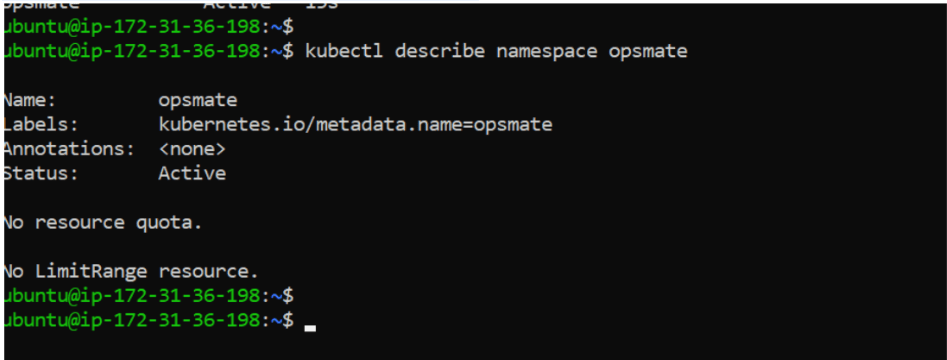
View namespace details:
kubectl describe namespace opsmate
Task 4: Set Default Namespace Context
Instead of specifying the namespace every time, configure kubectl to use the OpsMate namespace.
kubectl config set-context --current --namespace=opsmate
Verify:
kubectl config view --minify | grep namespace

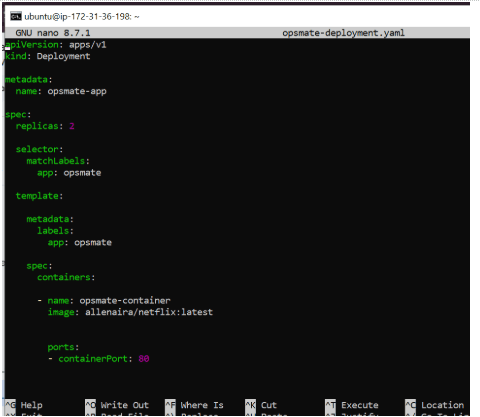
Task 5: Create OpsMate Deployment
Create deployment file:
nano opsmate-deployment.yaml
Apply deployment:
kubectl apply -f opsmate-deployment.yaml

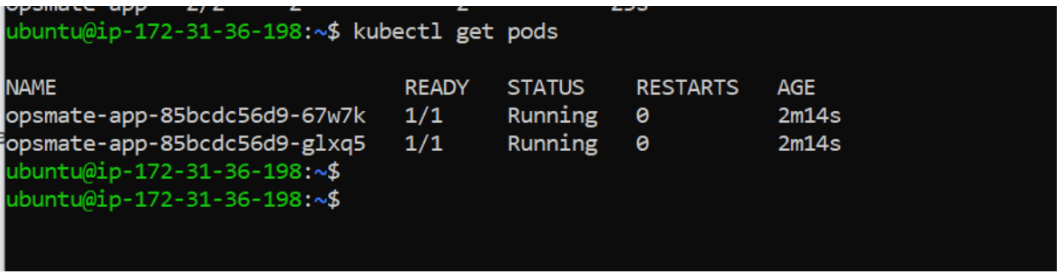
Verify deployment:
kubectl get deploymentsVerify Pods:
kubectl get pods
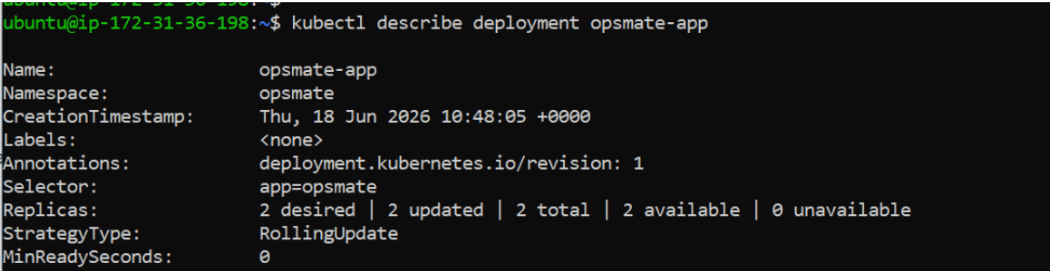
Describe deployment:
kubectl describe deployment opsmate-app
Task 6: Expose OpsMate Application
Currently Pods are running only inside the cluster.
External users cannot access them.
Create a Service.
nano opsmate-service.yaml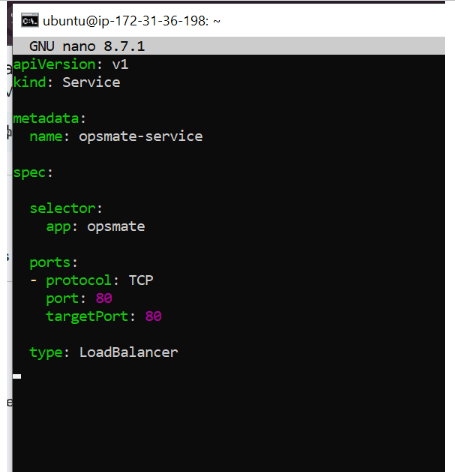
Apply configuration:
kubectl apply -f opsmate-service.yaml

Verify Service:
kubectl get svc
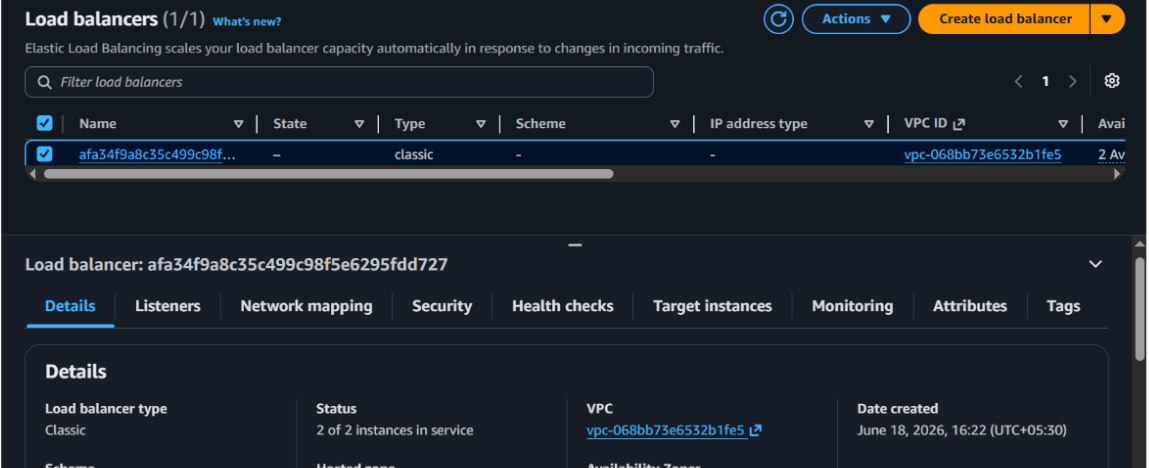
Task 8: Access the Application
Copy the external DNS name:a123456.us-east-1.elb.amazonaws.com

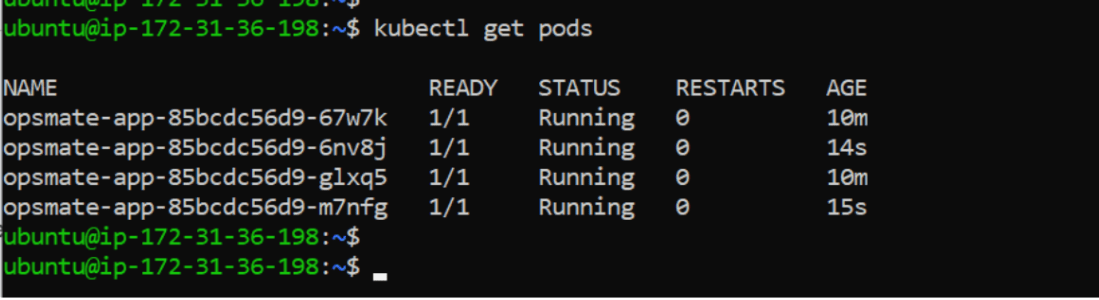
Task 9: Scale OpsMate Application
Increase replicas:
kubectl scale deployment opsmate-app --replicas=4

Verify:
kubectl get pods
Verify deployment:
kubectl get deployment

Task 10: Validate Application Availability
View deployment status:
kubectl rollout status deployment opsmate-app
View endpoints:
kubectl get endpoints

Verify Services:
kubectl get svc

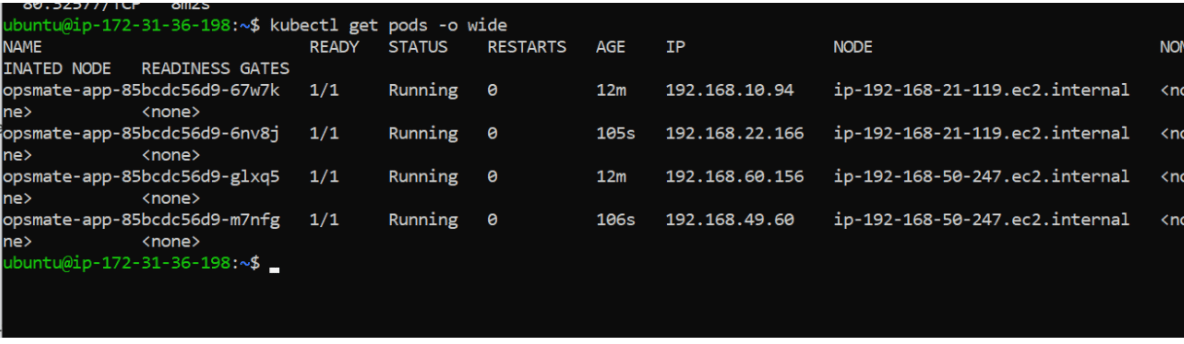
Verify Pods:
kubectl get pods -o wide
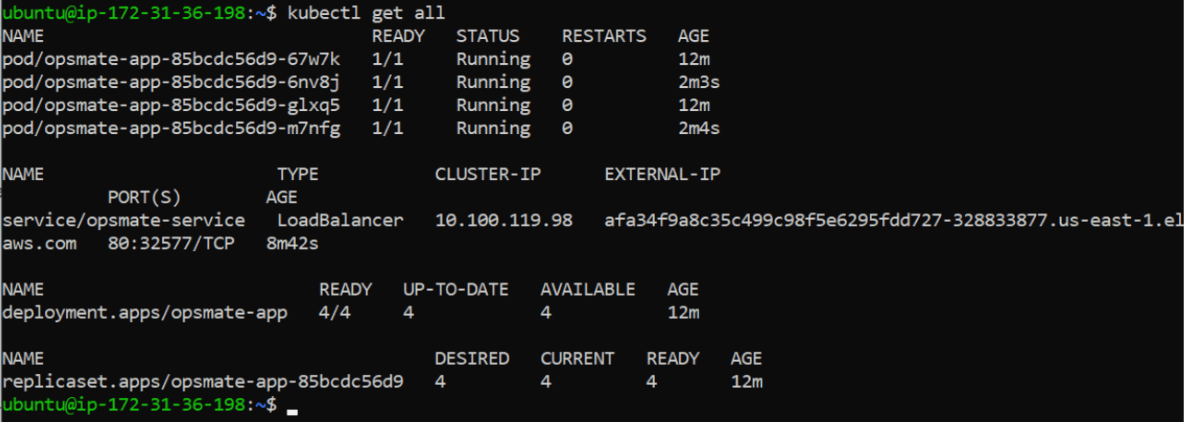
View all namespace resources:
kubectl get all
Cleanup Resources
Delete Service:
kubectl delete -f opsmate-service.yaml

Delete Deployment:
kubectl delete -f opsmate-deployment.yaml

Delete Namespace:
kubectl delete namespace opsmate

Verify cleanup:
kubectl get namespaces
Delete the cluster
eksctl delete cluster --name opsmate-cluster --region us-east-1

Verify the cluster
eksctl get cluster --region us-east-1

Great job!
- Created an OpsMate namespace, deployed the application using Kubernetes Deployment, and verified Pods, Deployments, and workload organization.
- Exposed the application using a LoadBalancer Service, accessed it through AWS Load Balancer, and scaled workloads inside the cluster.
Checkpoint