Interactive BiteBox Interface

Business Scenario
In previous lab, we improved the Menu experience by implementing smart menu search and category filtering. Customers could search for dishes by name and browse food items through the existing categories such as Pizza, Burger, Pasta, Biryani, and Desserts.However, although these features made BiteBox functional, the interface still needed to provide better visual feedback and a more user-friendly experience.

In Lab 17 — Interactive BiteBox Interface, we will use JavaScript and DOM manipulation to add these interface-level interactions.
But what is the need for this lab ?
In a real food-ordering application, customers should immediately understand what is happening when they interact with the website.

A customer should be able to switch between Bright and Dark themes according to their preference.
When food is added to the cart, the customer should immediately know that the item was successfully added.
The header should show the current cart item count, so customers can quickly see how many items they have selected.
Pre-Lab Preparation
Module:
1) Unlocking JavaScript's Secrets: Mastering Core Concepts
2) Delving into JavaScript Object Dynamics
3) Journey into DOM and Event Dynamics
git pull origin branchName
Git Pull
Task 1: Implement Dark / Bright Theme Toggle
Add the Theme Toggle Button
1
Add a theme button to the existing BiteBox navigation. The customer will use this button to switch between Bright Mode and Dark Mode.
<button type="button" id="theme-toggle" class="theme-toggle">
        <span class="theme-icon">☀</span>
        <span class="theme-text"> DAY MODE</span>
</button>
Style the toggle theme button
2
.theme-toggle {
    width: 125px;
    height: 36px;
    border: none;
border-radius: 20px;
background-color: #e5e5e5;
position: relative;
padding: 3px;
cursor: pointer;
display: flex;
align-items: center;
box-sizing: border-box;
overflow: hidden;
}
.theme-text {
position: absolute;
left: 8px;
right: 38px;
font-size: 12px;
font-weight: 700;
color: #111111;
white-space: nowrap;
text-align: left;
transition: all 0.35s ease-in-out;
}
.theme-icon {
position: absolute;
top: 3px;
left: 92px;
width: 30px;
height: 30px;
border-radius: 50%;
background-color: white; display: flex;
align-items: center;
justify-content: center;
font-size: 18px;
color: #111111;
transition: transform 0.35s ease-in-out;
z-index: 2;
}
.dark-theme .theme-icon {
transform: translateX(-89px);
}
.dark-theme .theme-text {
left: 38px;
right: 16px;
text-align: right;
}
.theme-toggle:hover .theme-icon {
transform: scale(1.05);
}
/* Keep smooth movement in Night Mode */
.dark-theme .theme-toggle:hover .theme-icon {
transform: translateX(-89px) scale(1.05);
}
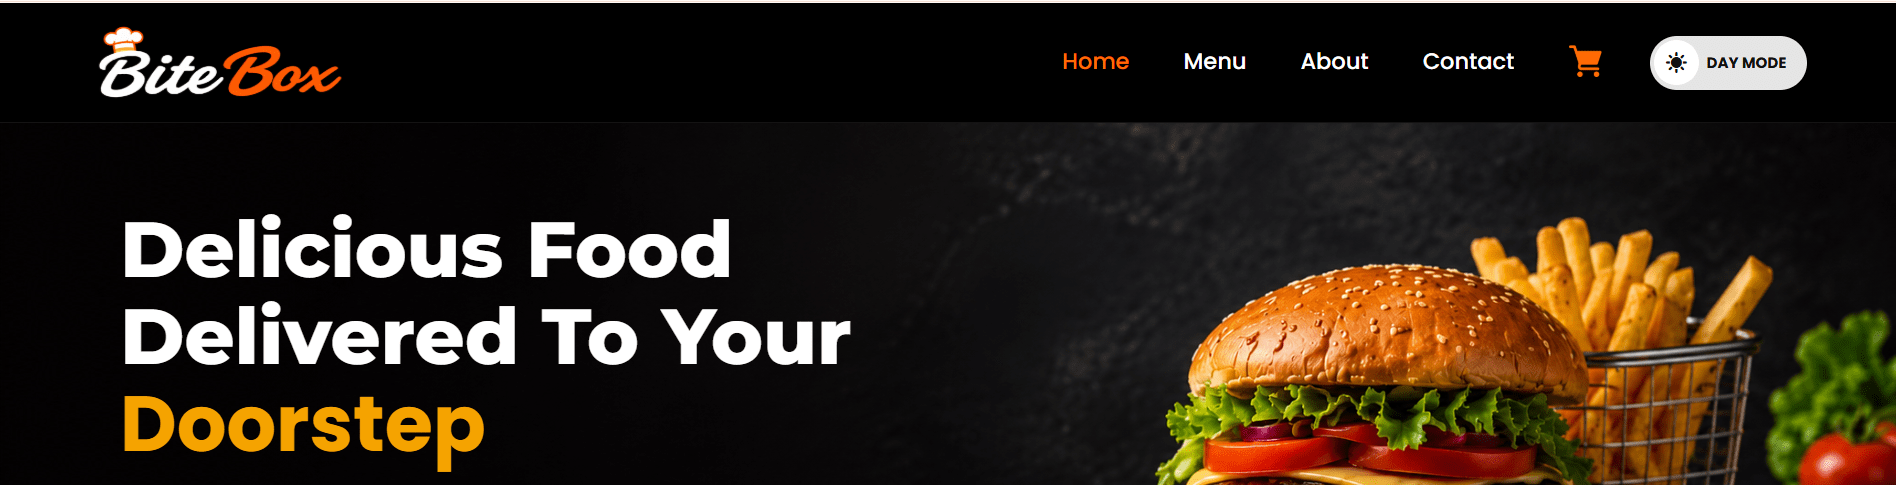
Create the Dark Theme
3
This is the link for the dark Mode CSS.
You can add your own styling or use the styles provided in the attached file. Add them at the very bottom of your CSS file, after your existing responsive CSS.
Create toggleTheme()
4
Create toggleTheme() function to switch between Day Mode and Night Mode. The function adds or removes the dark-theme class, changes the theme icon and text, and stores the selected theme in localStorage.
let themeButton = document.getElementById("theme-toggle");


function toggleTheme() {
    document.body.classList.toggle("dark-theme");

    let themeIcon = themeButton.querySelector(".theme-icon");

    let themeText = themeButton.querySelector(".theme-text");

    if (document.body.classList.contains("dark-theme")) {
        themeIcon.textContent = "☾";
        themeText.textContent ="NIGHT MODE";
        localStorage.setItem("biteboxTheme","dark");
    }
else {
themeIcon.textContent = "☀";
themeText.textContent ="DAY MODE";
localStorage.setItem("biteboxTheme","light");
}
}Load the Saved Theme
5
Create the loadTheme() function to retrieve the saved theme from localStorage and apply it when the page loads. It also restores the correct icon and text for the selected theme.
function loadTheme() {
    let savedTheme = localStorage.getItem("biteboxTheme");

    /* Disable animation while loading */
    document.body.classList.add("theme-loading");

    if (savedTheme === "dark") {
       document.body.classList.add("dark-theme");
    }
else {
document.body.classList.remove("dark-theme");
}
let themeIcon = themeButton.querySelector(".theme-icon");
let themeText = themeButton.querySelector(".theme-text");
if (savedTheme === "dark") {
if (themeIcon) {
themeIcon.textContent ="☾";
}
if (themeText) {
themeText.textContent = "NIGHT MODE";
}
}
else {
if (themeIcon) {
themeIcon.textContent = "☀";
}
if (themeText) {
themeText.textContent = "DAY MODE";
}
} /* Allow animation again */
setTimeout(function () {
document.body.classList.remove("theme-loading");
}, 50);
}Connect the Toggle Button.
6
Finally, connect the theme button with the toggletTheme() function and called loadTheme() when the page loads
if (themeButton) {
     themeButton.addEventListener("click",function () {
            toggleTheme();
        }
    );
}
loadTheme();
Task 2: Implement Dynamic Cart Count
Add Cart Count Badge to Existing Cart Icon
1
- We will add a small badge to the existing cart icon in the navigation bar.
- The badge will display the total quantity of items in the cart.
<a href="cart.html" class="cart-icon">
    <span class="cart-wrapper">
        <img src="assets/icons/cart.png" alt="Cart Icon" width="22" height="22">
        <span id="cart-count">0</span>
    </span>
</a>
Style the Cart Icon Container and Badge
2
.cart-wrapper {
    position: relative;
    display: inline-flex;
}

#cart-count {
    position: absolute;
    top: -8px;
    right: -10px;
    width: 18px;
    height: 18px;
background: #ff3b30;
color: #ffffff;
border-radius: 50%;
font-size: 11px;
font-weight: 600;
display: flex;
align-items: center;
justify-content: center;
}
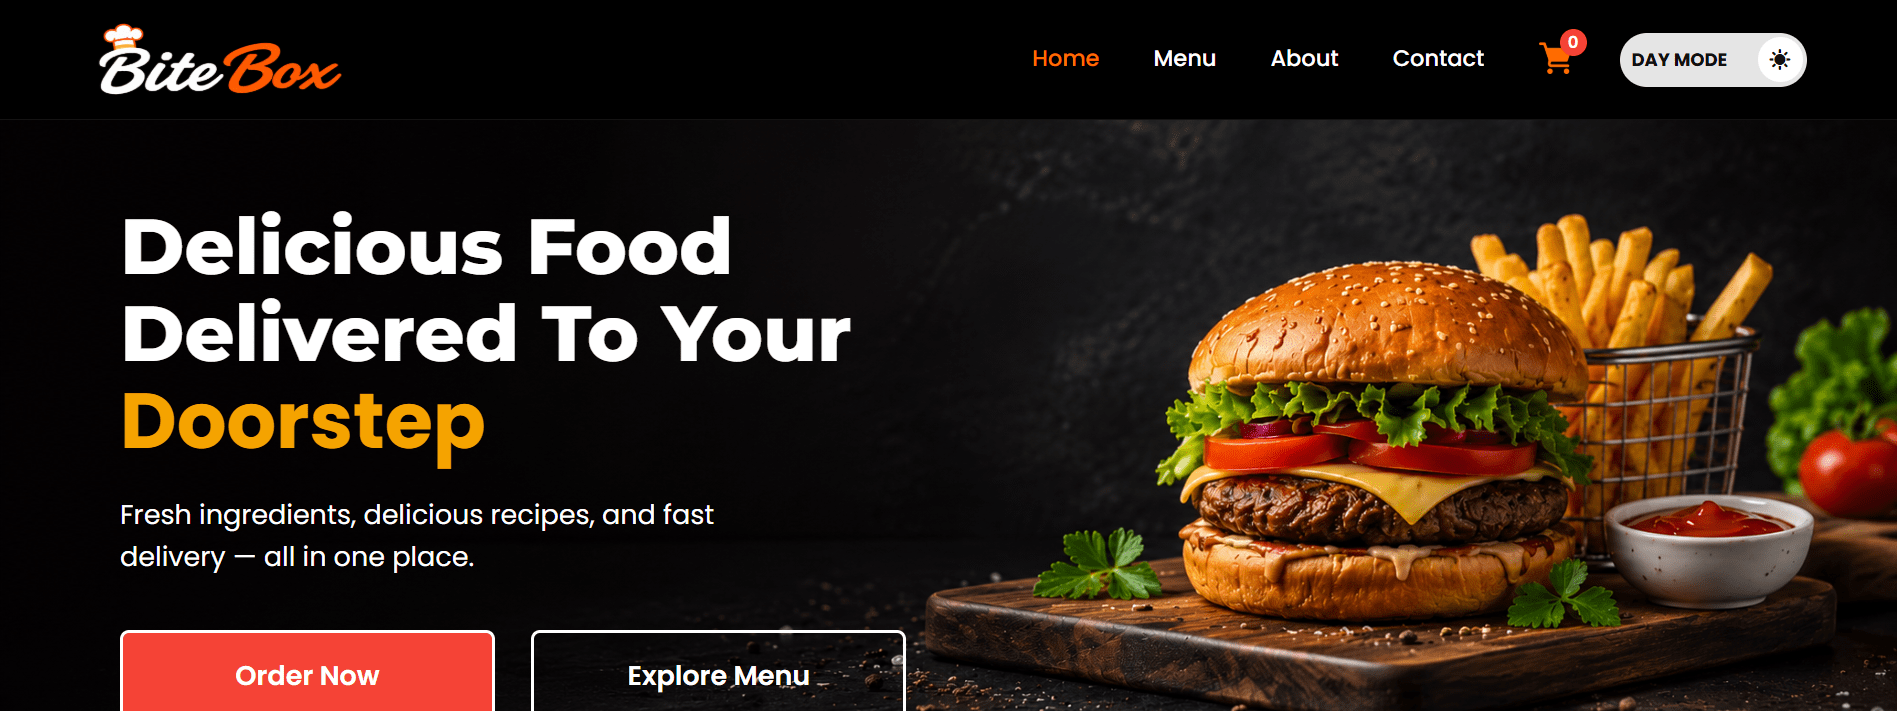
Create the updateCartCount() Function
3
Create a function to calculate the total quantity of all items in the cart and display that number inside the cart badge.
function updateCartCount() {

    let cartCount = 0;

    cart.forEach(function (item) {
        cartCount += item.quantity;
    });

    let cartCountElement =
        document.getElementById("cart-count");

    if (cartCountElement) {
        cartCountElement.textContent = cartCount;
    }
}
Update Cart Count When an Item Is Added
4
Your existing addToCart() function already saves the updated cart and calls renderCart().
updateCartCount();Add :
after renderCart()
Update Cart Count When Quantity Is Increased
5
- Your existing
increaseQuantity()function increases the quantity of the selected item. - After updating the cart and rendering it, call: updateCartCount()
Updated function:
function increaseQuantity(index) {
    cart[index].quantity++;
    localStorage.setItem(
        "biteboxCart",
        JSON.stringify(cart)
    );
    renderCart();
    updateOrderSummary();
    updateCartCount();
}
Update Cart Count When Quantity Is decreased
6
- Your existing de
creaseQuantity()function decreases the quantity of the selected item. - Update the badge when the user clicks the
−button.
Updated function:
function decreaseQuantity(index) {
    if (cart[index].quantity > 1) {
        cart[index].quantity--;
        localStorage.setItem(
            "biteboxCart",
            JSON.stringify(cart)
        );
    }
    renderCart();
    updateOrderSummary();
    updateCartCount();
}
Update Cart Count When an Item Is Removed
7
- Your existing
removeFromCart()function removes selected item from thecartarray. - Add
updateCartCount()after the cart is rendered.
Updated function:
function removeFromCart(index) {

    cart.splice(index, 1);
    localStorage.setItem("biteboxCart", JSON.stringify(cart));

    renderCart();
    updateOrderSummary();
    updateCartCount();

}
Update Cart Count When the Cart Is Cleared
8
- Your existing
clearCart()function resets the cart. - Add
updateCartCount()at the end.
Updated function:
function clearCart() {
    cart = [];
    localStorage.removeItem("biteboxCart");
    renderCart();
    updateOrderSummary();
    updateCartCount();
}
Load the Cart Count When the Page Opens
8
- Finally, we need the badge to show the correct count when the user opens or refreshes a page.
- At the bottom of your JavaScript, after your existing initialization calls, add:
updateCartCount();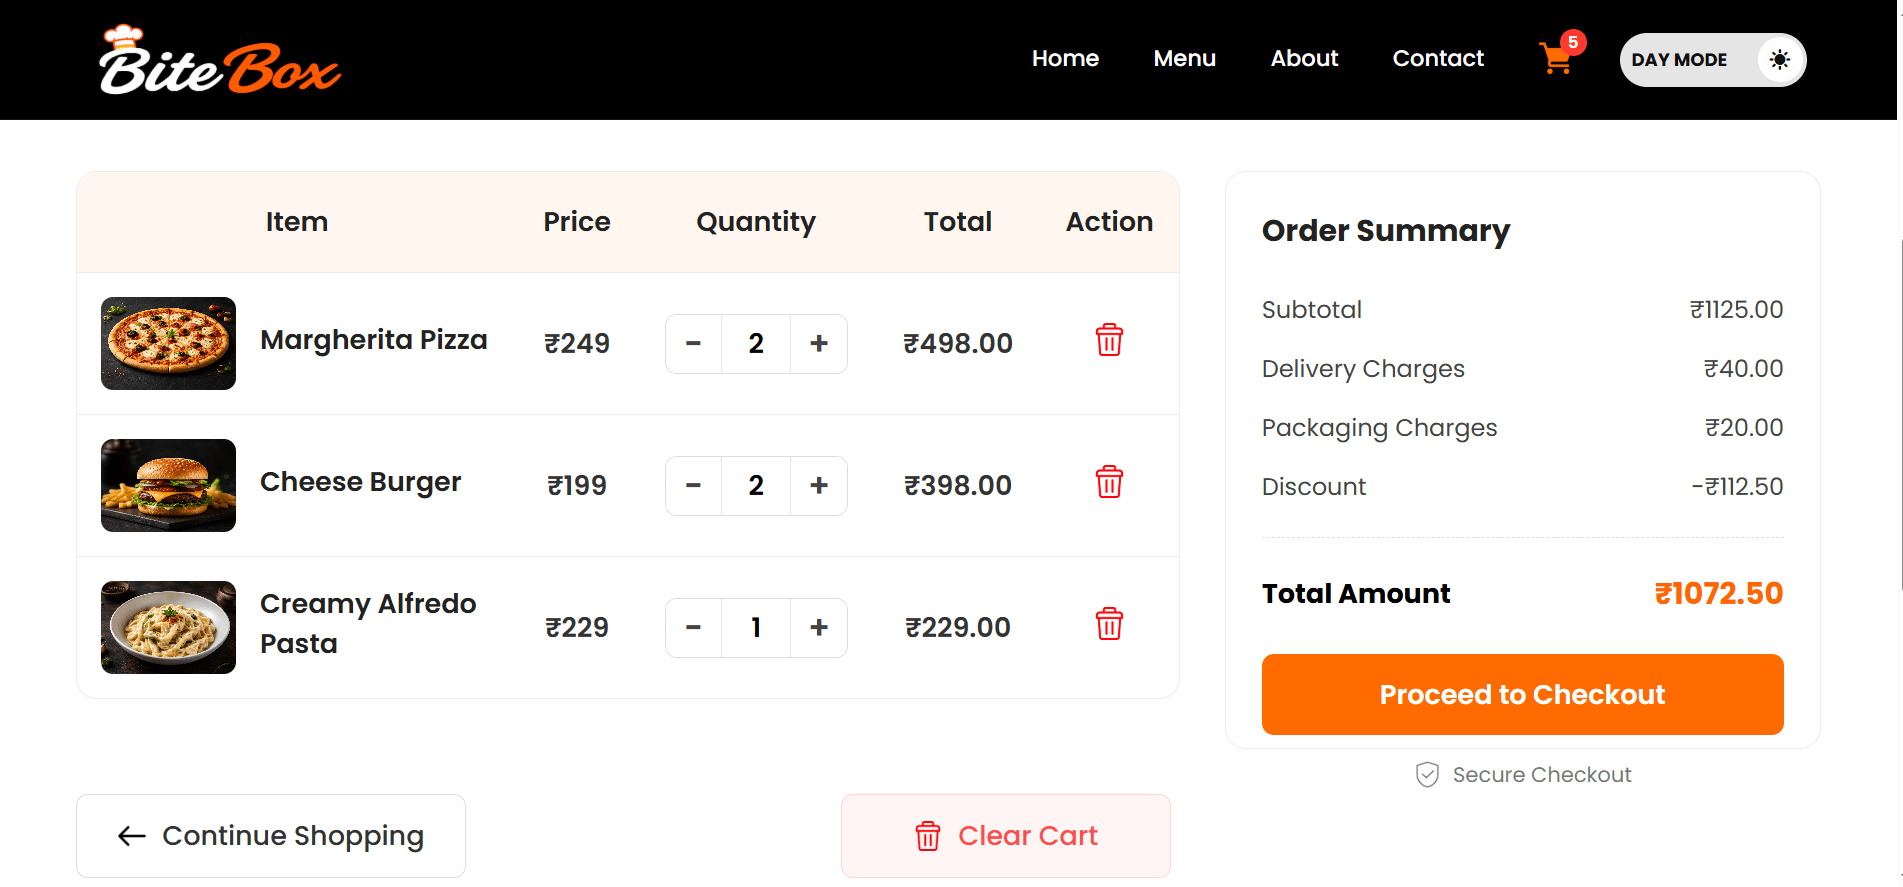
Task 3: Implement Contact Form Feedback
Select the Contact Form
1
Select the existing Contact form using JavaScript.
let contactForm = document.querySelector(".right-column form");Create the Toast Message Function
2
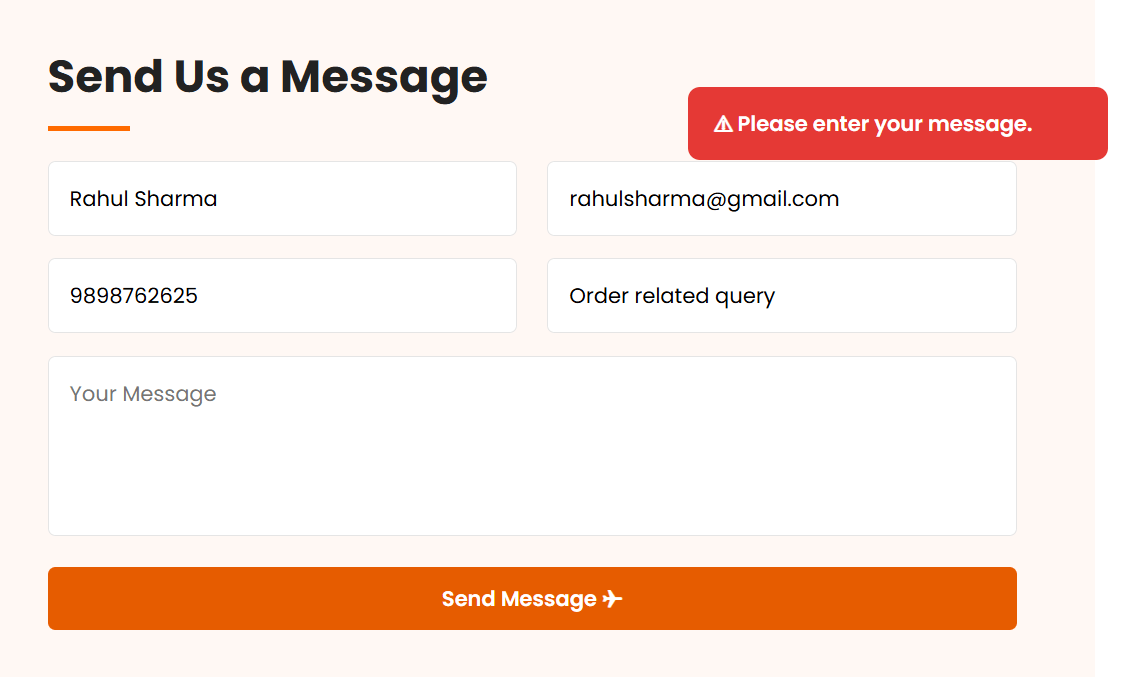
Create one reusable function for displaying toast messages.
function showToast(message, type) {
    let toast = document.createElement("div");
    toast.className = "toast " + type;
    toast.textContent = message;
document.body.appendChild(toast);
setTimeout(function () {
toast.classList.add("show");
}, 100);
setTimeout(function () {
toast.classList.remove("show");
setTimeout(function () {
toast.remove();
}, 300);
}, 3000);
}Style the toast
3
.toast {
    position: fixed;
    top: 90px;
right: 25px;
min-width: 280px;
padding: 14px 18px;
border-radius: 8px;
color: white;
font-size: 14px;
font-weight: 600;
opacity: 0;
transform: translateX(120%);
transition: 0.3s ease;
z-index: 9999;
}
.toast.show {
opacity: 1;
transform: translateX(0);
}
.toast.error {
background: #e53935;
}
.toast.success {
background: #28a745;
}<input type="text" name="name" placeholder="Your Name">
<input type="email" name="email" placeholder="Your Email">
<input type="tel" name="phone" placeholder="Phone Number">
<input type="text" name="subject" placeholder="Subject">
<textarea name="message" placeholder="Your Message"></textarea>Add name Attributes
Select the Form Fields
4
4
5
let name = contactForm.querySelector('input[name="name"]');
let email = contactForm.querySelector('input[name="email"]');
let phone = contactForm.querySelector('input[name="phone"]');
let subject = contactForm.querySelector('input[name="subject"]');
let message = contactForm.querySelector('textarea[name="message"]');
contactForm.addEventListener("submit", function (event) {
event.preventDefault();
});Add the Submit Event
Validate the input fields
4
6
7
if (contactForm) {
    contactForm.addEventListener(
        "submit",
        function (event) {
            event.preventDefault();
            let name = contactForm.querySelector('input[name="name"]');
            let email = contactForm.querySelector('input[name="email"]');
            let phone = contactForm.querySelector('input[name="phone"]');
let subject = contactForm.querySelector('input[name="subject"]');
let message = contactForm.querySelector('textarea[name="message"]');
if (!name.value.trim()) {
showToast("⚠ Please enter your name.","error");
return;
}
if (!email.value.trim()) {
showToast("⚠ Please enter your email address.","error");
return;
}
if (!email.validity.valid) {
showToast("⚠ Please enter a valid email address.","error");
return;
}
let phonePattern = /^[6-9]\d{9}$/;
if (!phone.value.trim()) {
showToast( "⚠ Please enter your phone number.","error");
return;
}
if (!phonePattern.test(phone.value.trim())) {
showToast("⚠ Please enter a valid 10-digit phone number.",
"error");
return;
} if (!subject.value.trim()) {
showToast("⚠ Please enter a subject.","error");
return;
}
if (!message.value.trim()) {
showToast("⚠ Please enter your message.","error");
return;
}
showToast("✓ Message sent successfully!","success");
contactForm.reset();
}
);
}
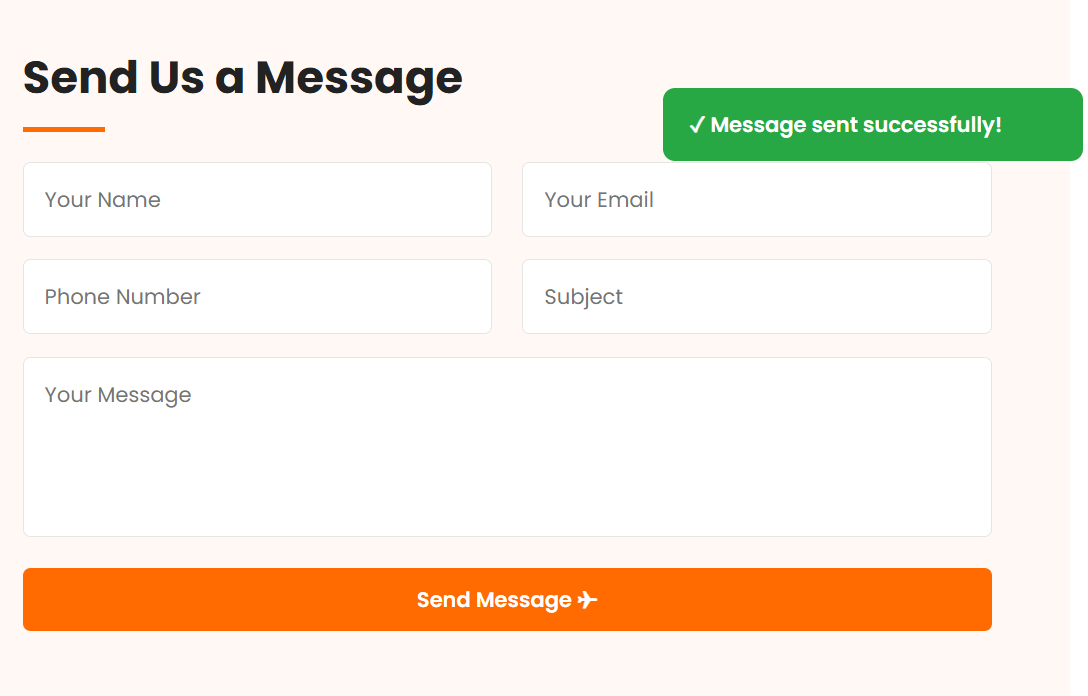
We are done with this lab. The latest source code has been uploaded to GitHub. You can access the latest commit using the link below:
Git Push
git push origin branchName
Great job!
You’ve successfully completed all three features:Theme Toggle • Dynamic Cart Count • Contact Form Validation
Checkpoint
Next-Lab Preparation
Module:
1) Unlocking JavaScript's Secrets: Mastering Core Concepts
2) Delving into JavaScript Object Dynamics
3) Journey into DOM and Event Dynamics