Website Refactoring & Professional Layout Planning

Business Scenario
The BiteBox website is now fully functional. Customers can browse restaurant information, explore the menu, register themselves, and place food orders using HTML forms.


Now our next task is to refactor the website

But Why Are We Refactoring the Website?
Throughout the previous labs, we learned the fundamental HTML concepts required to create a multi-page website. While our website is functional, it still reflects a beginner-level structure. In real-world web development, developers often revisit and refactor their HTML before applying CSS to improve readability, maintainability, and scalability.
In this lab, we will reorganize the BiteBox website into a modern, professional structure inspired by popular food delivery platforms.
Pre-Lab Preparation
git pull origin branchName
Git Pull
Module:
1) HTML Foundations: From Web Basics to Page Content
2) HTML Structure, Links, and Images
3) Advanced HTML: Structure, Tables, Forms, and Media
Task 1: Create a Common Website Header
<header>
        <img src="assets/images/logo.png" alt="BiteBox Logo"
        width="150">

        <!--Navigation Menu-->
        <nav>
            <a href="index.html">Home</a>
            |
            <a href="menu.html">Menu</a>
            |
            <a href="about.html">About</a>
            |
            <a href="contact.html">Contact</a>
        </nav>

    </header>
Open index.html - Add a logo inside the header section and remove the "Bitebox" heading
1
Update the Header on All Webpages
2
The BiteBox website currently uses different header structures on different webpages. To maintain a consistent brand identity, the restaurant owner wants the same header to appear on every page.
Open the following files:
menu.htmlabout.htmlcontact.html
Replace their existing top section with the same header created in
index.html.
Task 2: Reorganize the Homepage into a Professional Landing Page
<section>

    <h1>Delicious Food Delivered To Your Doorstep</h1>
    <p>
        Fresh ingredients, delicious recipes, and fast delivery
        — all in one place.
    </p>

    <a href="menu.html">Order Now</a>
    |
    <a href="menu.html">Explore Menu</a>

</section>
Open index.html - Immediately below the <header> element, create a hero section
1
Replace the Existing Welcome Section with a Hero Section
 <section id="features">
            <h2>Why Choose BiteBox?</h2>

            <article>
                <img src="assets/images/fresh.png" alt="Fresh Ingredients"
                 width="80">
                <h3>Fresh Ingredients</h3>
                <p> Every meal is prepared using fresh vegetables and premium
                    quality ingredients.
                </p>
            </article>

            <article>
                <img src="assets/images/fast-delivery.png"
                alt="Fast Delivery" width="80">
                <h3>Fast Delivery</h3>
                <p>
                    Get your favorite meals delivered quickly to your doorstep.
                </p>
            </article>
Immediately below the Hero section, add a section "Why to choose bitebox"
2
            <article>
                <img src="assets/images/hygienic.png" alt="Hygienic Kitchen"
                 width="80">
                <h3>Hygienic Kitchen</h3>
                <p>
                    Our meals are prepared under strict hygiene standards by
                    experienced chefs.
                </p>
            </article>

            <article>
                <img src="assets/images/easy.png" alt="Easy Online Ordering"
                width="80">
                <h3>Easy Online Ordering</h3>
                <p>
                    Browse the menu, place your order, and enjoy your meal with
                    just a few clicks.
                </p>
            </article>
        </section>
 <!--Todays Featured Dishes -->
        <section id="popular-dishes">
            <h2>Popular Dishes</h2>

            <article>
                <img src="assets/images/pizza.png" alt="Cheese Pizza" width="220">
                <h3>Cheese Pizza</h3>
                <p>
                    Loaded with fresh vegetables and mozzarella cheese.
                </p>
                <p> <span>⭐⭐⭐⭐⭐ </span> <small>(126)</small></p>
                <p> <strong> ₹249 </strong></p>
            </article>

            <article>
                <img src="assets/images/burger.png" alt="Chicken Burger" width="220">
                <h3>Chicken Burger</h3>
                <p>
                    Crispy chicken patty served with fresh lettuce and cheese.
                </p>
                <p> <span>⭐⭐⭐⭐⭐ </span> <small> (99)</small> </p>
                <p> <strong>₹199</strong> </p>
          </article>
Replace the existing Featured Dishes section with the Popular Dishes section.
3
             <article>
                <img src="assets/images/pasta.png" alt="White Sauce Pasta" width="220">
                <h3>White Sauce Pasta</h3>
                <p>
                    Creamy white sauce pasta tossed with herbs and fresh vegetables.
                </p>
                <p> <span>⭐⭐⭐⭐⭐ </span><small> (76) </small> </p>
                <p> <strong>₹229</strong></p>
            </article>

            <article>
                <img src="assets/images/biryani.png" alt="Chicken Biryani" width="220">
                <h3>Chicken Biryani</h3>
                <p>
                    Aromatic basmati rice layered with tender chicken and authentic spices.
                </p>
                <p> <span>⭐⭐⭐⭐⭐ </span><small>(112)</small> </p>
                <p><strong>₹249</strong></p>
            </article>

            <article>
                <img src="assets/images/cake.png" alt="Chocolate Cake" width="220">
                <h3>Chocolate Cake</h3>
                <p>
                    Rich chocolate sponge layered with creamy chocolate frosting.
                </p>
                <p><span>⭐⭐⭐⭐⭐</span><small>(58)</small> </p>
                <p> <strong>₹149</strong></p>
            </article>
        </section>
<!--Todays Special Offers -->
<section id="offer">
<div class="offer-content">
<h2>Today's Special Offer!</h2>
<p> Get <strong>20% OFF</strong> on all orders above
<strong>₹499</strong>
</p>
<p> Use Code: <strong>BITE20</strong> </p>
<a href="menu.html"> Order Now </a>
</div>
<div class="offer-image">
<img src="assets/images/pizza-discount.png"
alt="Special Offer Pizza" width="420" height="420">
<img src="assets/images/badge.png" alt="20% OFF" width="180"
height="180">
</div>
</section>Replace the Existing Today's Offer Section
4
 <!--Customer Reviews-->
        <section id="reviews">
            <h2>What Our Customers Say</h2>

            <article>
                <img src="assets/images/customer1.png" alt="Priya Sharma"
                width="80" height="80">
                <h3>Priya Sharma</h3>
                <p> Amazing food and super fast delivery.
                    BiteBox is my go-to place every time!
                </p>
                <p> <span>⭐⭐⭐⭐⭐</span> </p>
            </article>

            <article>
                <img src="assets/images/customer2.png" alt="Rahul Verma"
                 width="80"  height="80">
                <h3>Rahul Verma</h3>
                <p> The food quality is excellent and
                    always fresh. Highly recommended!
                </p>
Add Customer Review Section immediately below the "Today's Special Offer" section.
5
                 <p> <span>⭐⭐⭐⭐⭐</span> </p>
            </article>

            <article>
                <img src="assets/images/customer3.png" alt="Anjali Mehta"
                width="80" height="80">
                <h3>Anjali Mehta</h3>
                <p>
                    Great taste, great service and
                    very easy to order. Love it!
                </p>
                <p> <span>⭐⭐⭐⭐⭐</span> </p>
            </article>
        </section>
<label for="deliveryDate">
Preferred Delivery Date
</label>
<br>
<input
type="date"
id="deliveryDate"
name="deliveryDate">
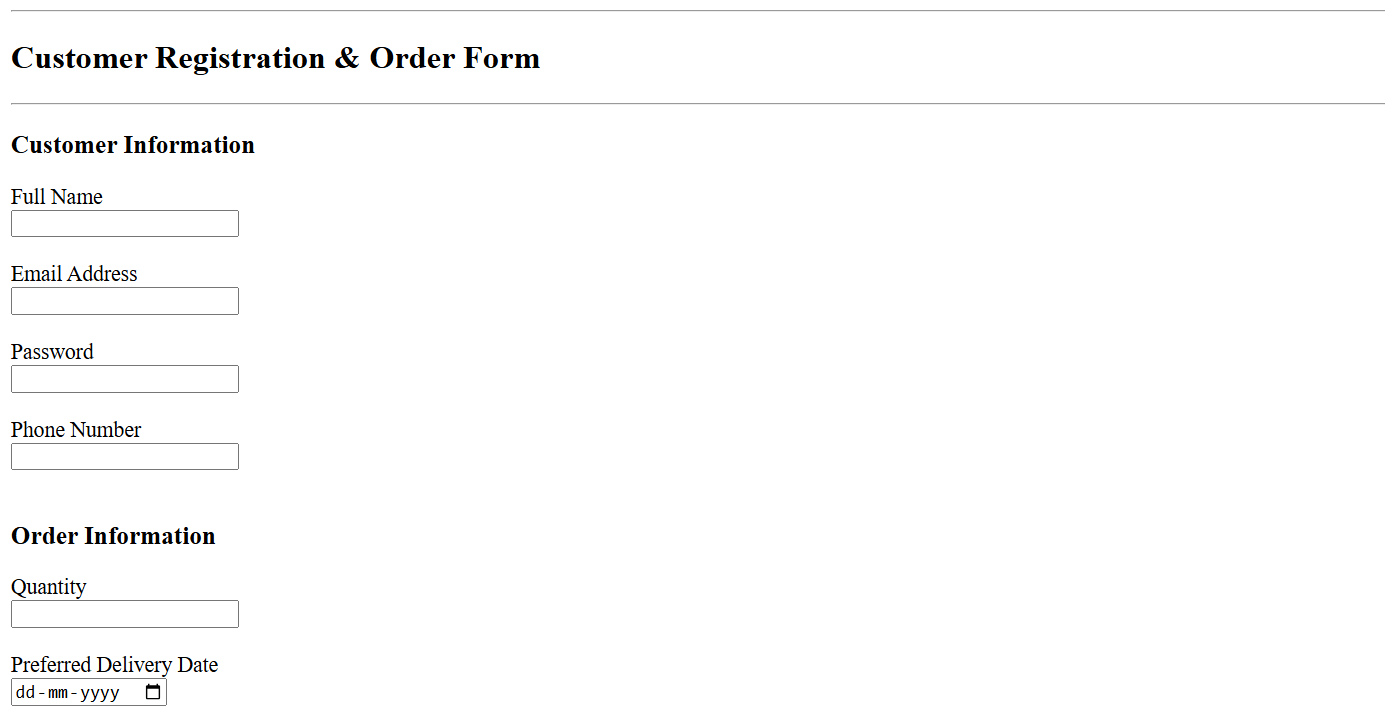
<br><br>Add the Preferred Delivery Date field.
2
Check the output
3
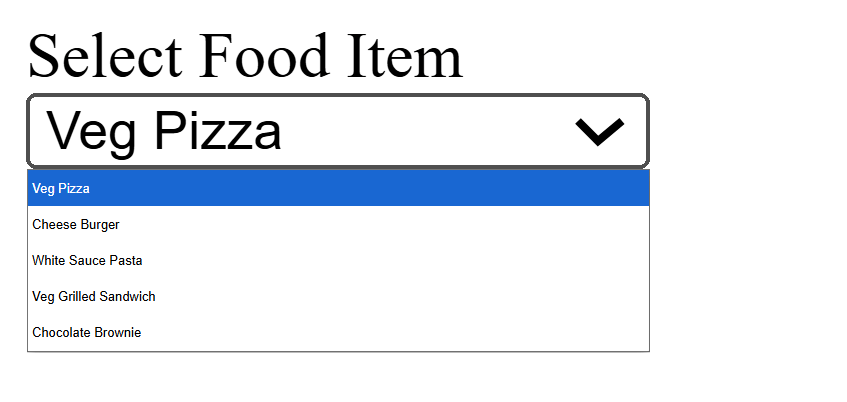
Task 4: Create Food Selection Using Dropdown List
<label for="food"> Select Food Item </label>
<br>
<select id="food"
name="food">
<option>
Veg Pizza
</option>
<option>
Cheese BurgerAdd a label and create the dropdown.
1
</option>
<option>
White Sauce Pasta
</option>
<option>
Veg Grilled Sandwich
</option>
<option>
Chocolate Brownie
</option>
</select>
<br><br>2
Check the output
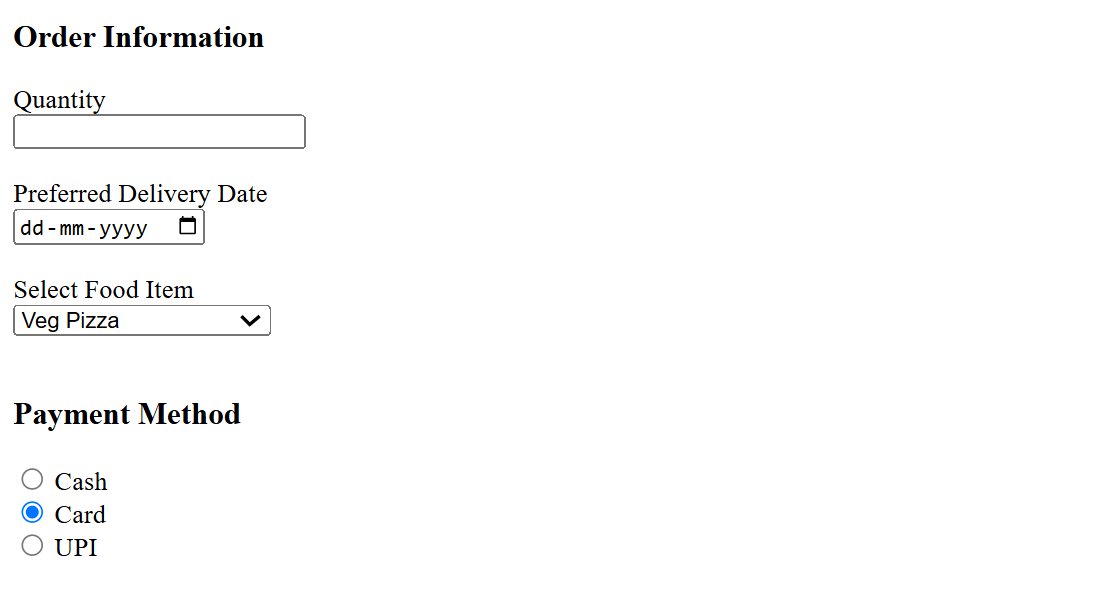
Task 5: Add Payment Method Using Radio Buttons
<h3> Payment Method </h3>
<input type="radio" id="cash" name="payment">
<label for="cash"> Cash </label>
<br>
<input type="radio" id="card" name="payment">
<label for="card"> Card </label>
<br>
<input type="radio" id="upi" name="payment">
<label for="upi">UPI </label>
<br><br>Add a section heading and Add the payment options.
1
Check the Output
2
Task 6: Add Extras Using Checkboxes
1
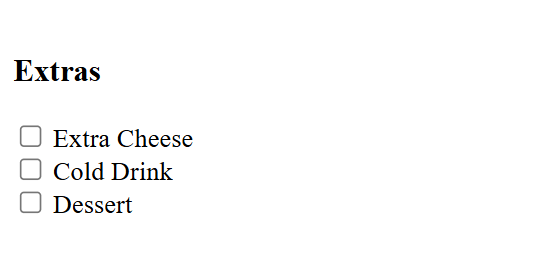
Add a heading and add the checkboxes.
<h3> Extras </h3>
<input type="checkbox" id="cheese" name="extras">
<label for="cheese"> Extra Cheese </label>
<br>
<input type="checkbox" id="drink" name="extras">
<label for="drink"> Cold Drink </label>
<br>
<input type="checkbox" id="dessert" name="extras">
<label for="dessert"> Dessert </label>
<br><br>2
Check the output
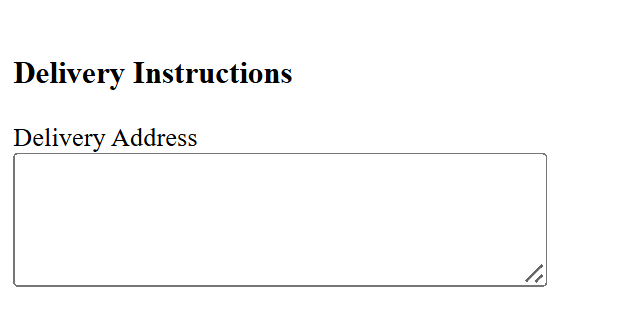
Task 7: Add Delivery Instructions Using <textarea>
1
Add a heading as "Delivery Instruction " - Below the heading add a label and textarea
<h3>Delivery Instructions </h3>
<label for="address">
Delivery Address
</label>
<br>
<textarea id="address" name="address" rows="5" cols="40">
</textarea>
<br><br>2
Check the output
Task 8: Add submit and reset button
1
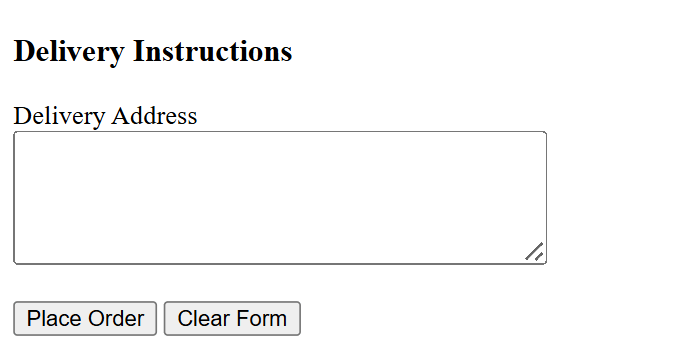
Add a submit and reset button below the textarea
<h3>Delivery Instructions </h3>
<label for="address"> Delivery Address </label>
<br>
<textarea id="address" name="address" rows="5" cols="40">
</textarea>
<br><br>
<input type="submit" value="Place Order">
<input type="reset" value="Clear Form">
</form>2
Check the output
*
Complete Solution
Contact Page (contact.html)
<!DOCTYPE html>
<html lang="en">
<head>
<meta charset="UTF-8">
<meta name="viewport" content="width=device-width, initial-scale=1.0">
<title>Contact - BiteBox</title>
</head>
<body>
<h1> Contact Us </h1>
<p>
<a href="index.html">Home</a>
|
<a href="menu.html">Menu</a>
|
<a href="about.html">About</a> |
<a href="contact.html">Contact</a>
</p>
<h2> Visit Our Website </h2>
<p>
<a href="https://www.google.com">
Visit Google
</a>
</p>
<hr>
<!--Customer Registeration form -->
<h2>Customer Registration & Order Form</h2>
<hr>
<form>
<h3>Customer Information</h3>
<label for="fullname">Full Name</label>
<br>
<input type="text" id="fullname" name="fullname">
<br><br> <label for="email">Email Address</label>
<br>
<input type="email" id="email" name="email">
<br><br>
<label for="password">Password</label>
<br>
<input type="password" id="password" name="password">
<br><br>
<label for="phone">Phone Number</label>
<br>
<input type="tel" id="phone" name="phone">
<br><br>
<h3>Order Information</h3>
<label for="quantity">Quantity</label>
<br>
<input type="number" id="quantity" name="quantity">
<br><br>
<label for="deliveryDate">

Preferred Delivery Date

</label>

<br>

<input
type="date"
id="deliveryDate"
name="deliveryDate">

<br><br>
<label for="food"> Select Food Item </label>
<br><select id="food" name="food">
<option>
Veg Pizza
</option>
<option>
Cheese Burger
</option>

<option>

White Sauce Pasta

</option>

<option>

Veg Grilled Sandwich

</option>

<option>

Chocolate Brownie

</option>
</select>
<br><br>
<h3> Payment Method </h3>

<input type="radio" id="cash" name="payment">
<label for="cash"> Cash </label>
<br>

<input type="radio" id="card" name="payment">
<label for="card"> Card </label>
<br>

<input type="radio" id="upi" name="payment">
<label for="upi">UPI </label>
<br><br>
<h3> Extras </h3>
<input type="checkbox" id="cheese" name="extras">
<label for="cheese"> Extra Cheese </label>
<br>

<input type="checkbox" id="drink" name="extras">
<label for="drink"> Cold Drink </label>
<br>

<input type="checkbox" id="dessert" name="extras">
<label for="dessert"> Dessert </label>
<br><br>
<h3>Delivery Instructions </h3>

<label for="address">

Delivery Address

</label>

<br>

<textarea id="address" name="address" rows="5" cols="40">
</textarea>

<br><br>
<input type="submit" value="Place Order">
<input type="reset" value="Clear Form">
</form>
</body>
</html>
Great job!
You built a structured HTML form to collect customer information.
Checkpoint
Git Push
git push origin branchNameNext-Lab Preparation
Module: CSS Foundations and Text Styling
1) Getting Started With CSS
2) Understanding different types of css