Evaluation Post 4:
How did we use new media technologies in the construction stage?
Both of the following studios and their lighting set-ups were invaluable in building our media products and artist. As Carol Vernallis said in her theories, technology is essential for creating aesthetic, which is important for an artist overall, as it forms the stylistic basis of their image and identity. The studios and lightings we used allowed us to manipulate all the biggest facets of aesthetic, such as colour and softness, while the subjects of our lighting used gestures and acting and so on to continue building this aesthetic.
Studio Lighting
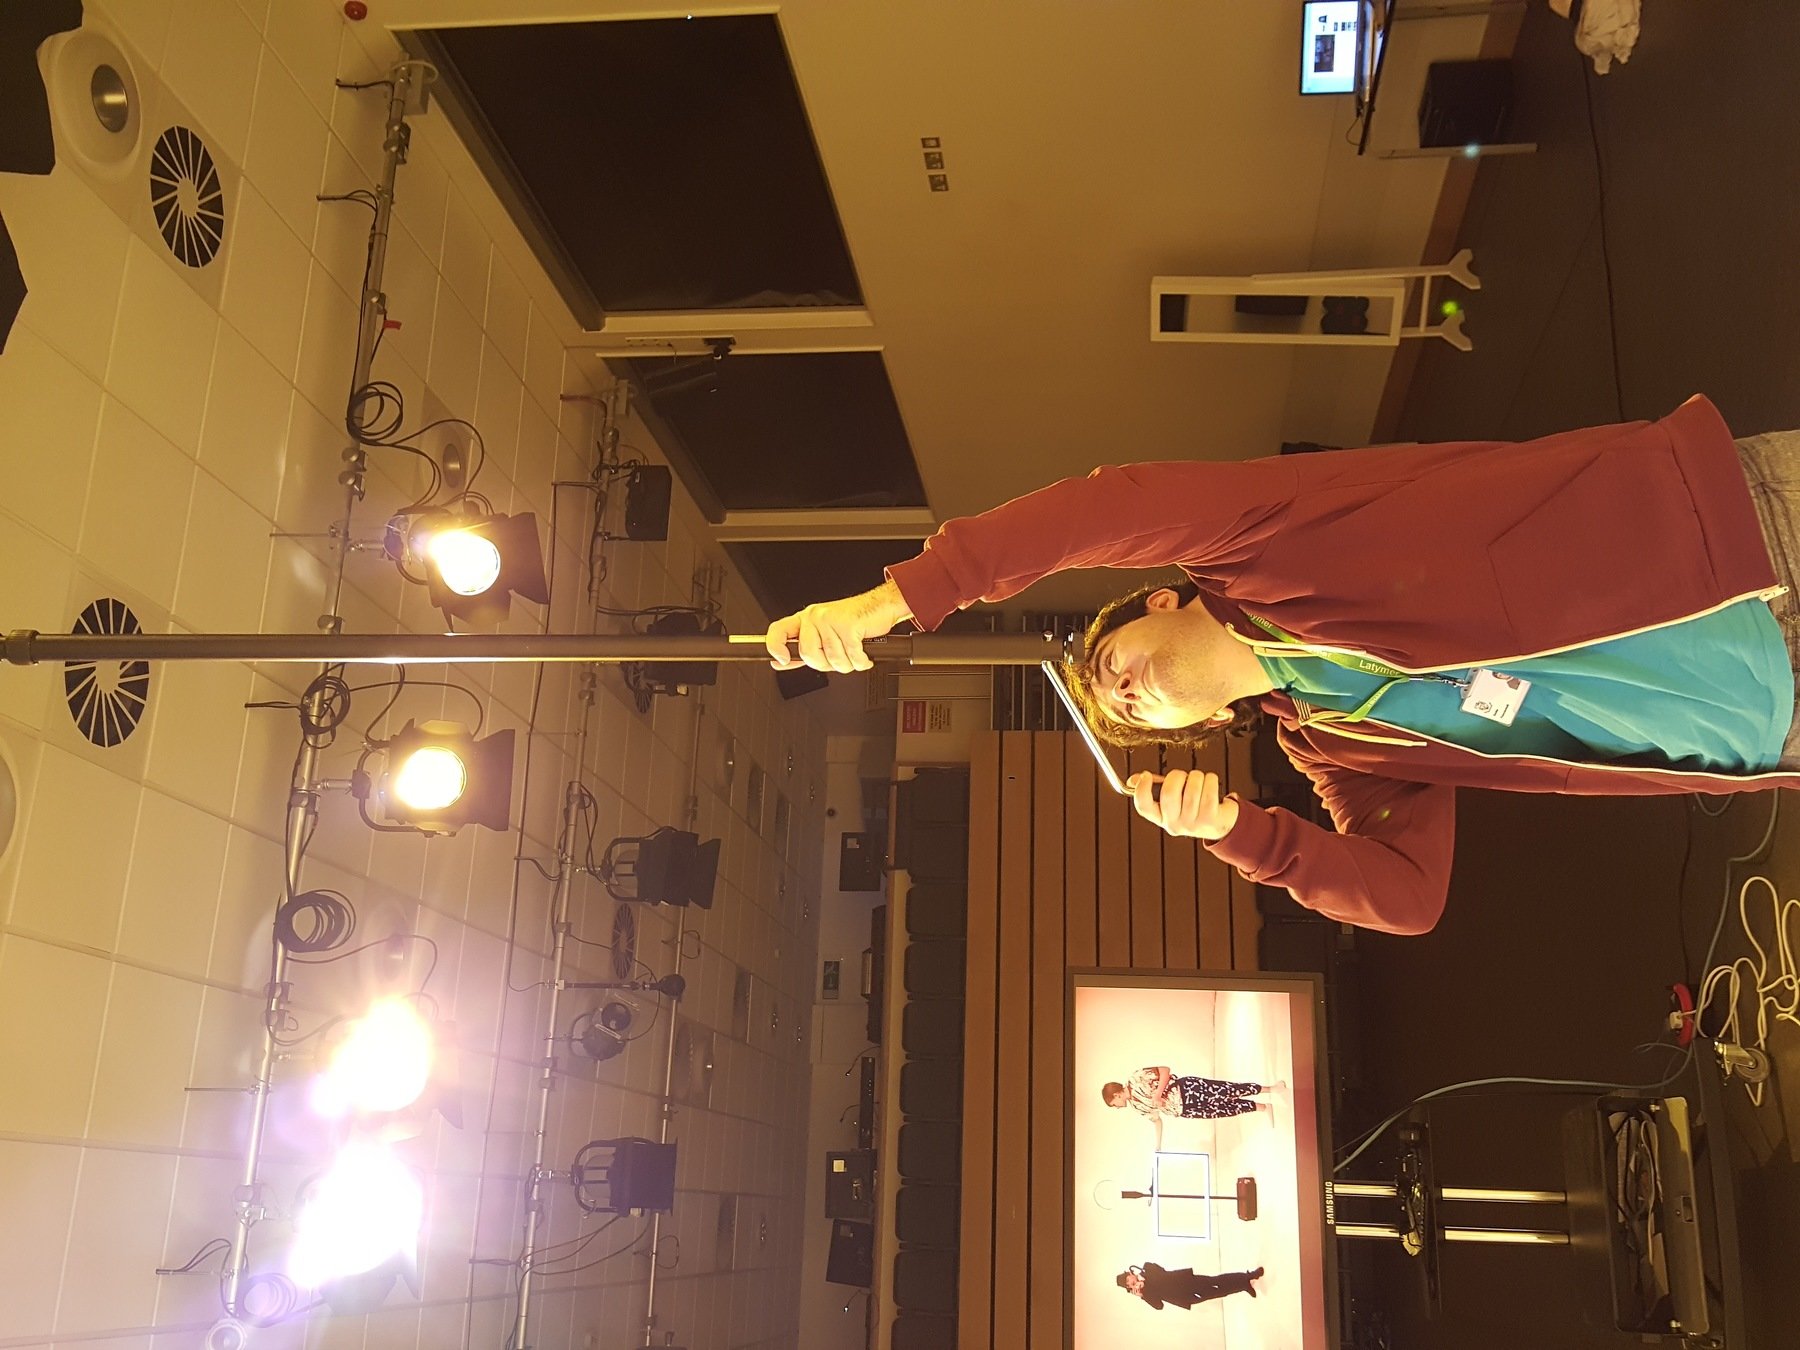
One of the main new technologies we had access to in order to create our media products was the main studio. Its stand-out feature was easily the advanced lighting system, which could create almost any kind of lighting in any colour and brightness and so on you could think of, if you learned the combination of digital controls and manual tweaking needed to operate everything fully. We were taught how to use the lighting desk, which controlled the colour and intensity of the lights, as well as which ones are on or off in each scene, and we were taught how to use the hooks which were needed to change the position of these lights physically. All the work paid off, because by the time we got to the construction phase, we had a lot of ideas from research and planning, and some small experience in using the studio from the planning stage, but we needed to master the studio to move on from experimental test shots and paper documents to fully-fledged professional footage. While this was no mean feat, it was rewarding and arguably essential to do, as it provided us with the colours we needed to build our environments, and the lighting needed to make everything and everyone look beautiful and dreamlike even before the grading we did during the editing phase.
Studio Lighting
Studio Lighting
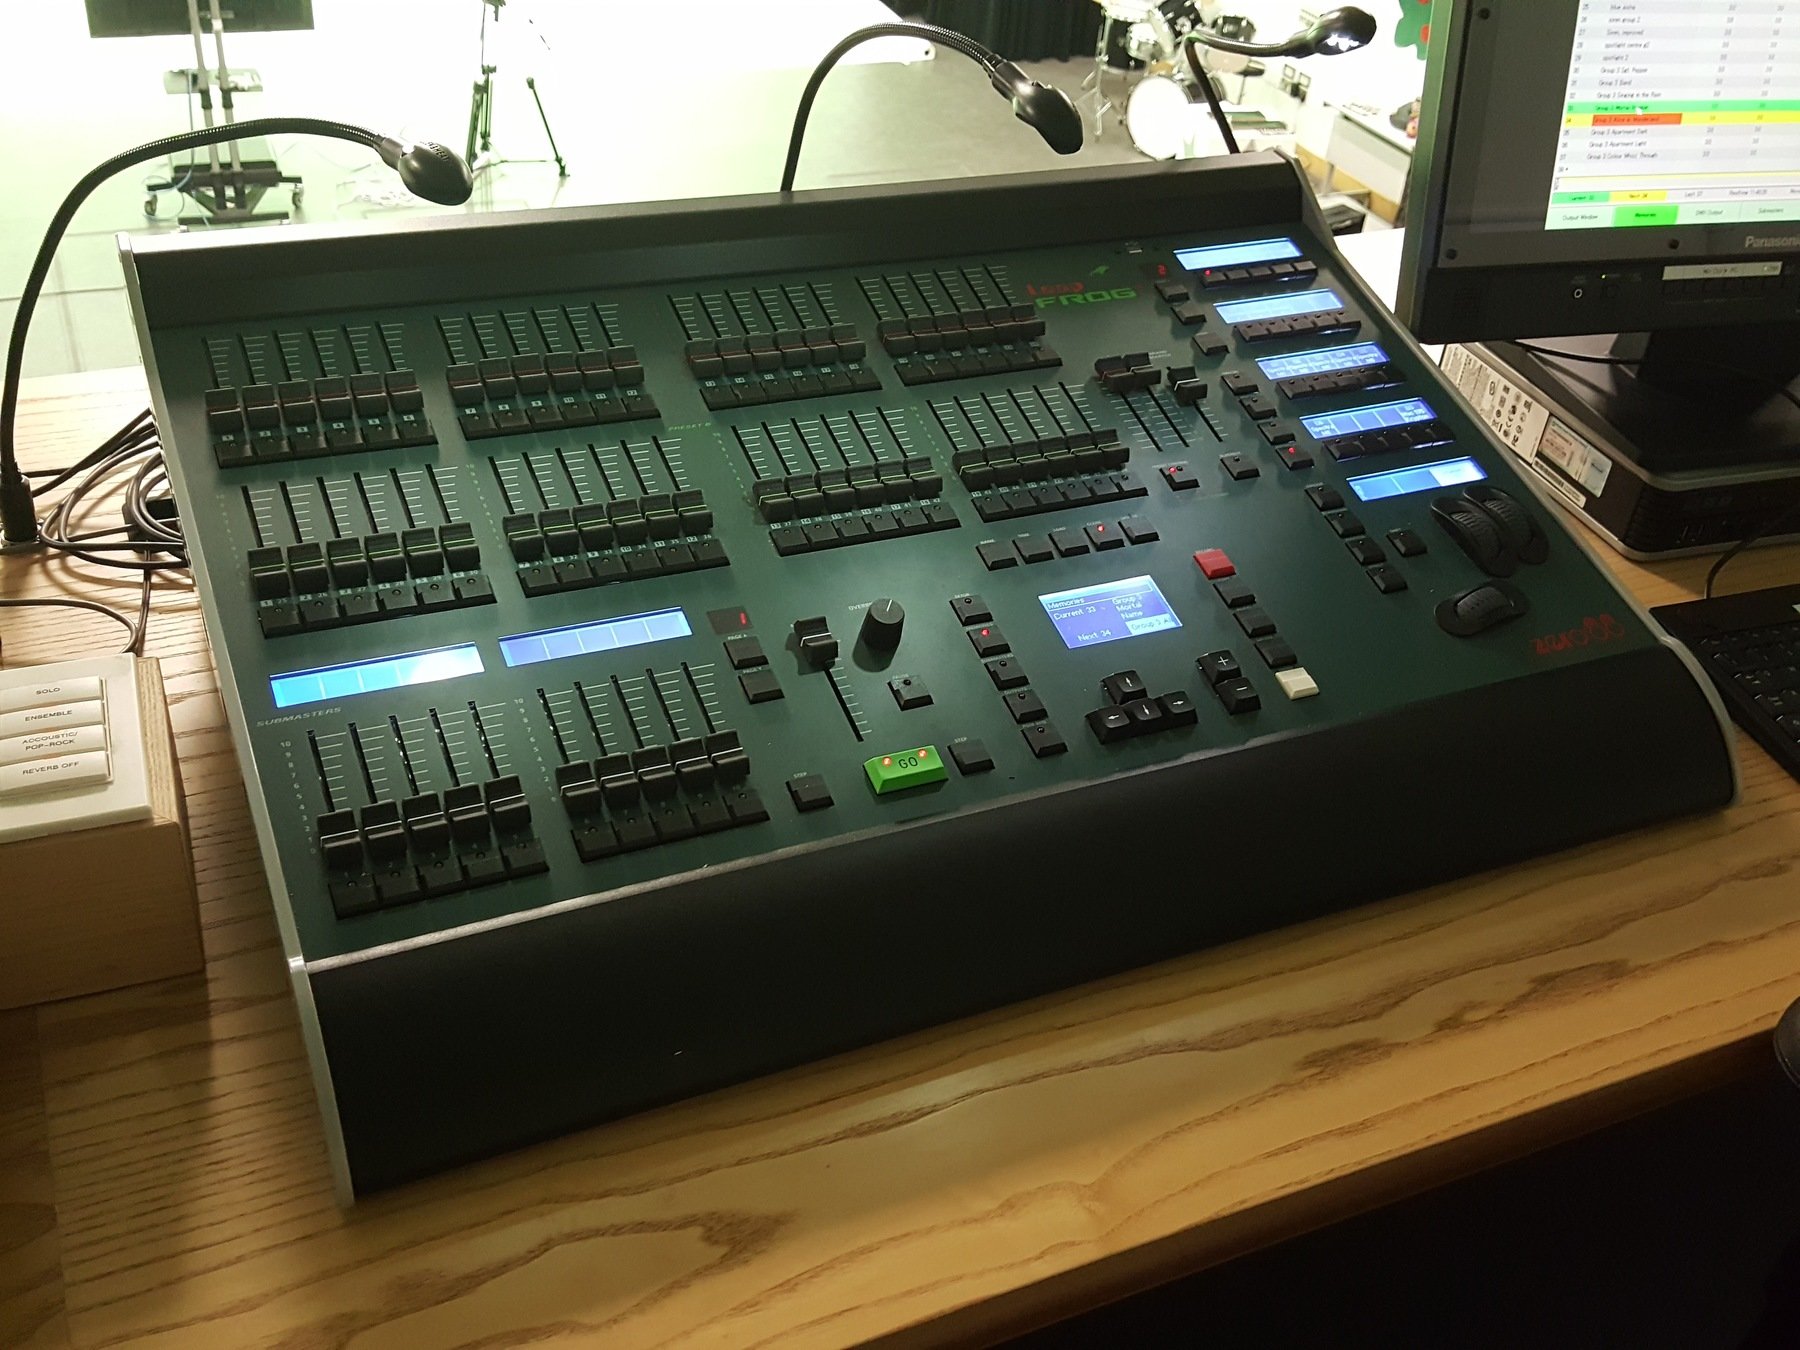
Left is the lighting desk used to manipulate the colour, intensity, and so on of the studio lights.
Right is me adjusting the position of one of those lights, so that it falls better on the set and actors.
A clip showing how use of the main studio's lighting system enhanced our music video, through the example of a few of the many different coloured set-ups in the music video.
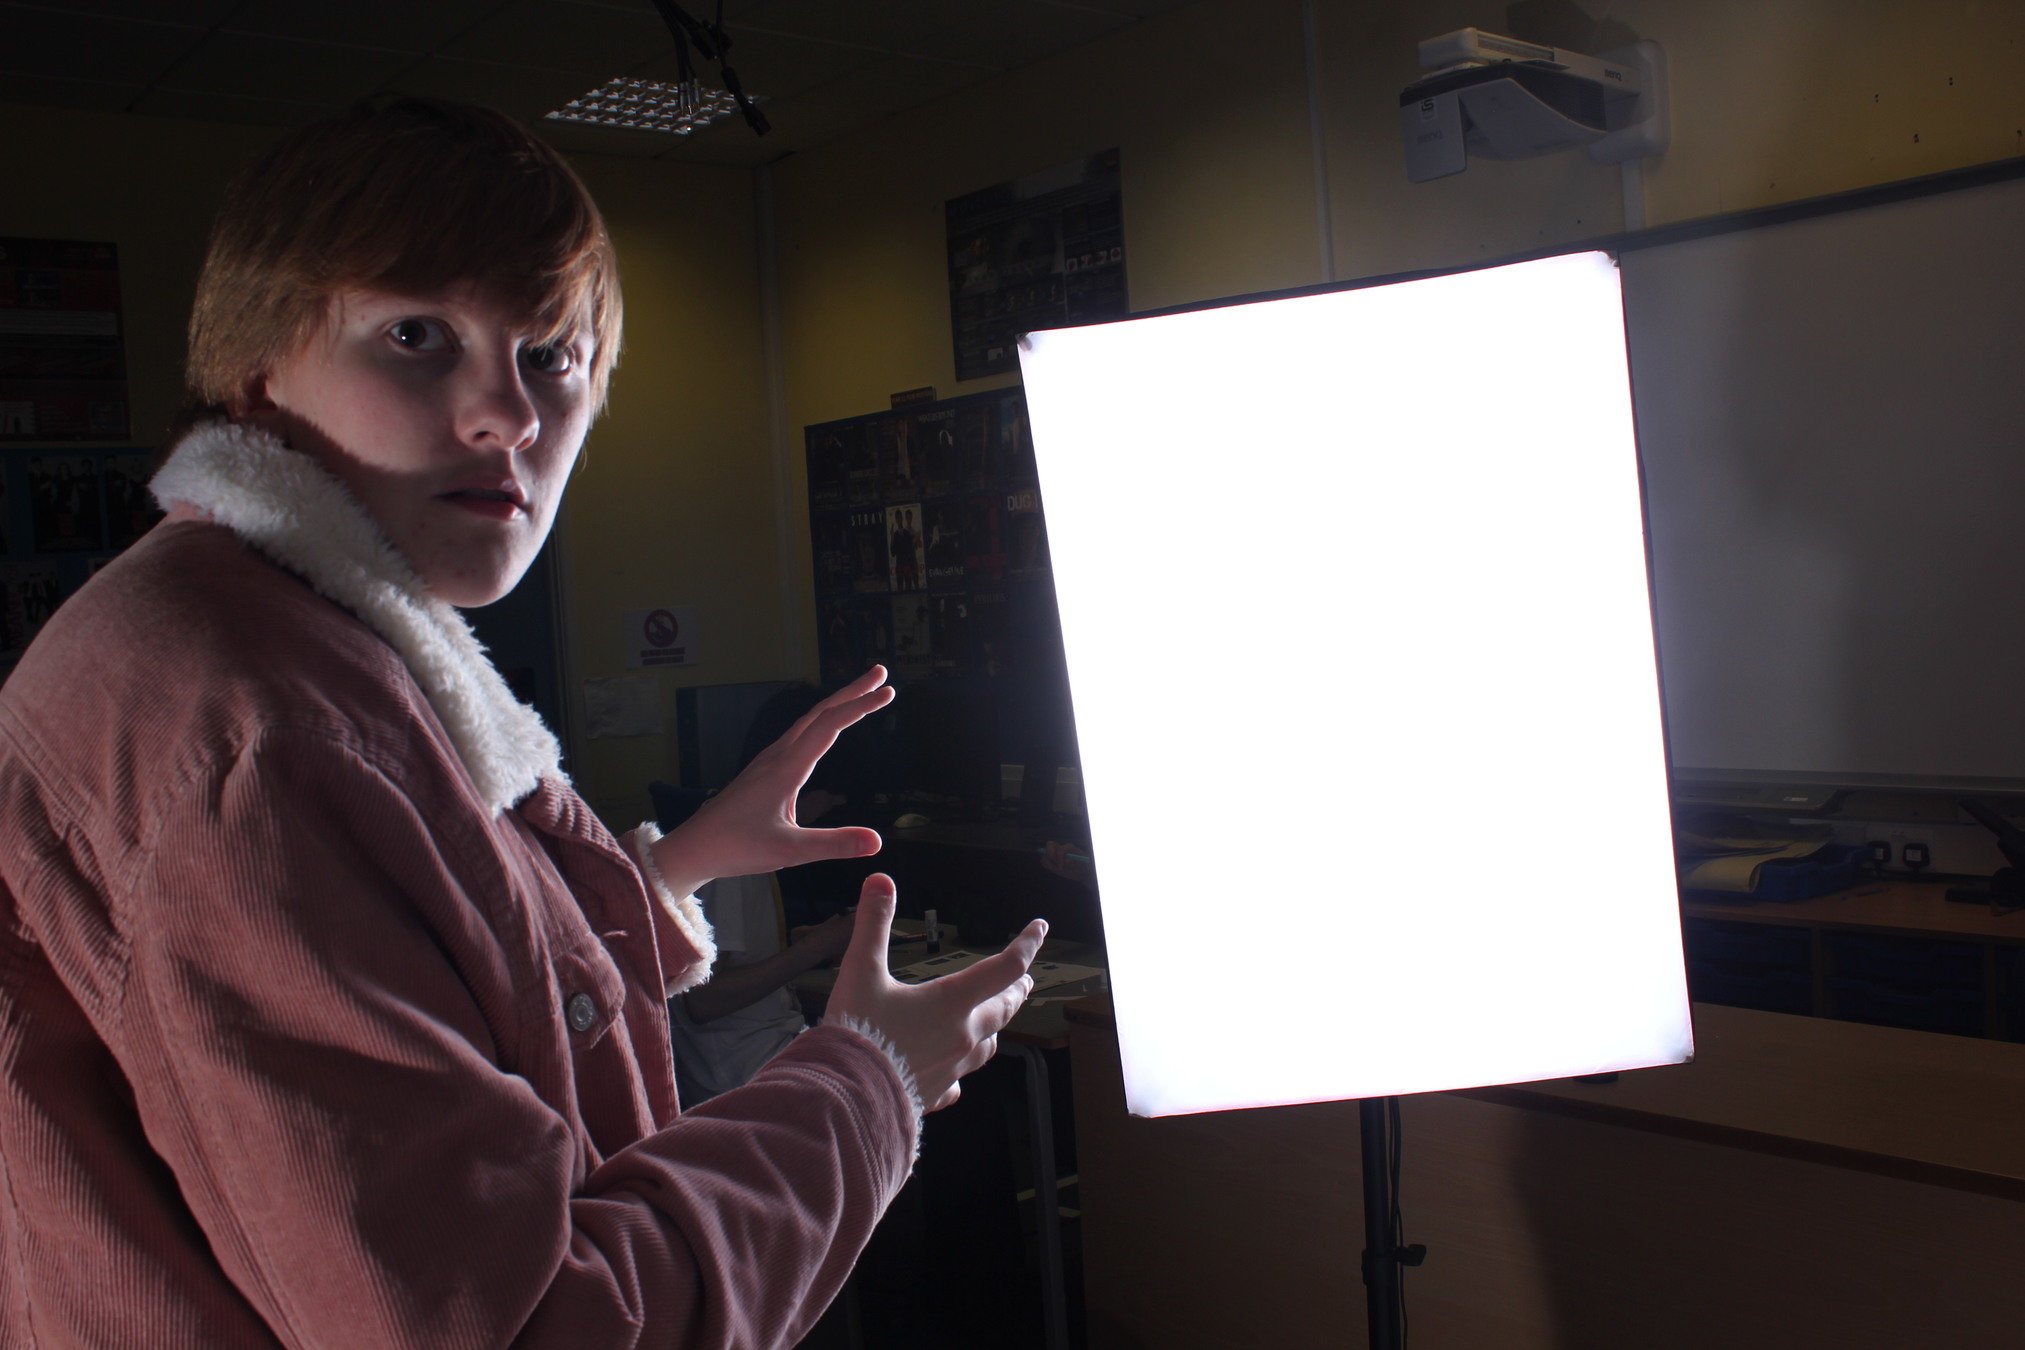
We once again discovered the power of studio lighting when we came to taking our promo pictures. We used a smaller photography studio this time, with a smaller and different style of lighting, designed for flash still photography rather than constantly lit video. However, we still needed to put in the time and effort to build on our experience from the planning stage and master it. The kit included multiple standing slave flashes, controlled by a master unit attached to the camera. These receivers flashed when the transmitter told them to, which was when the camera was fired, and each light had a different attachment for a different effect. One had a softbox, allowing for the lighting of someone without making them too bright, and another was bare, allowing for maximum brightness at the cost of softness. Using both together created a professional look against the plain background, creating images with subjects lit by an obvious directional source (the bare light,) yet without any loss of detail in the shadows (thanks to the diffused flash.) We used this technology to full effect in creating many great-looking promotional images for use across our entire campaign and set of media products, from the main pictures on the front of the digipak album, to some of the gallery images on the website.
Studio Lighting
Studio Lighting
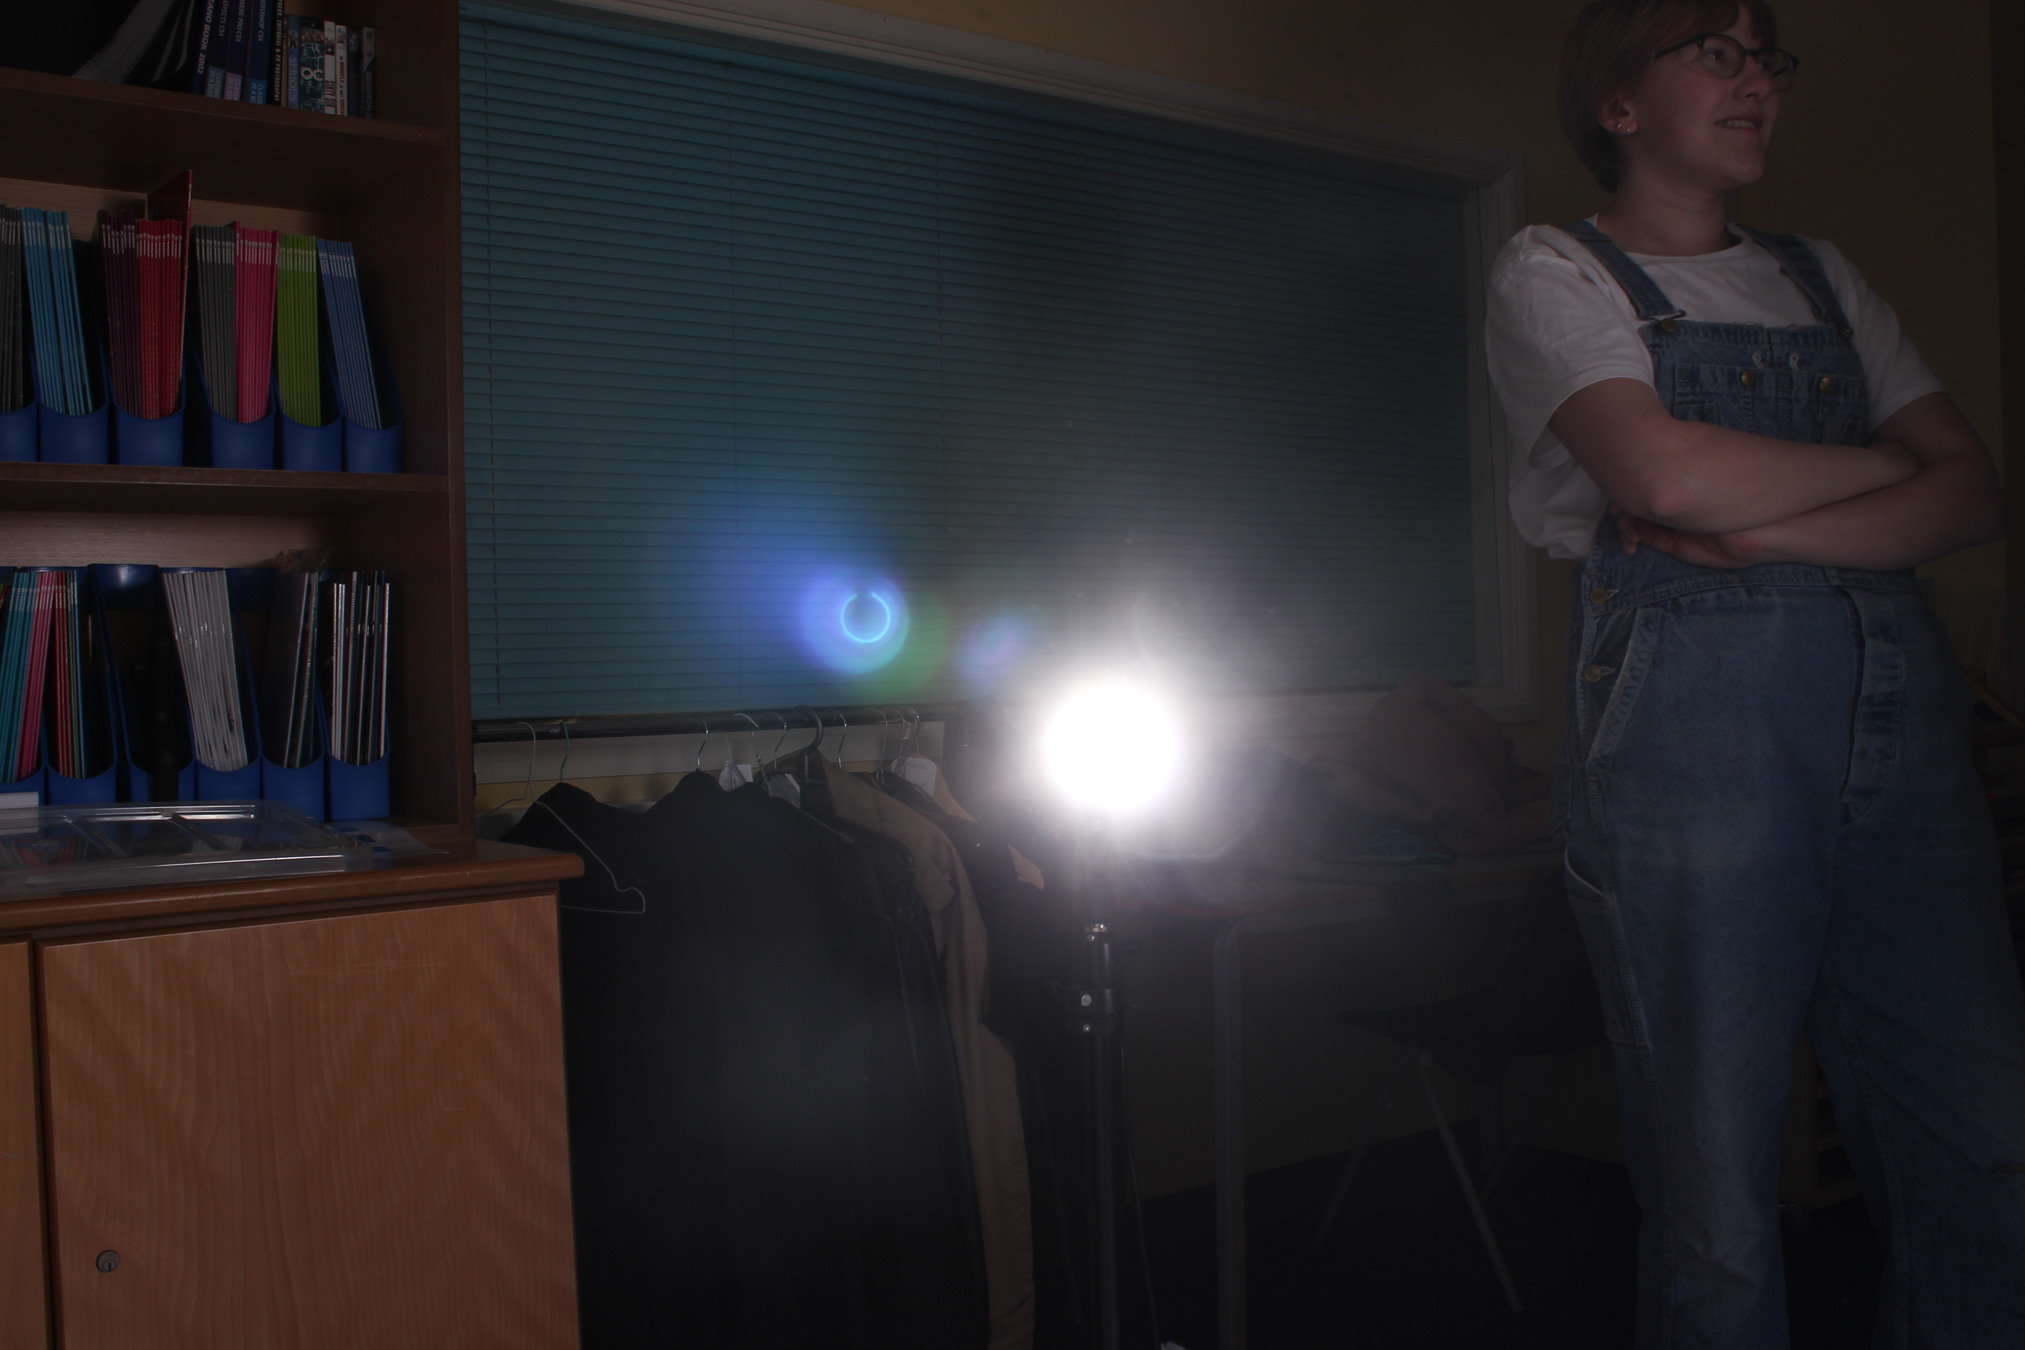
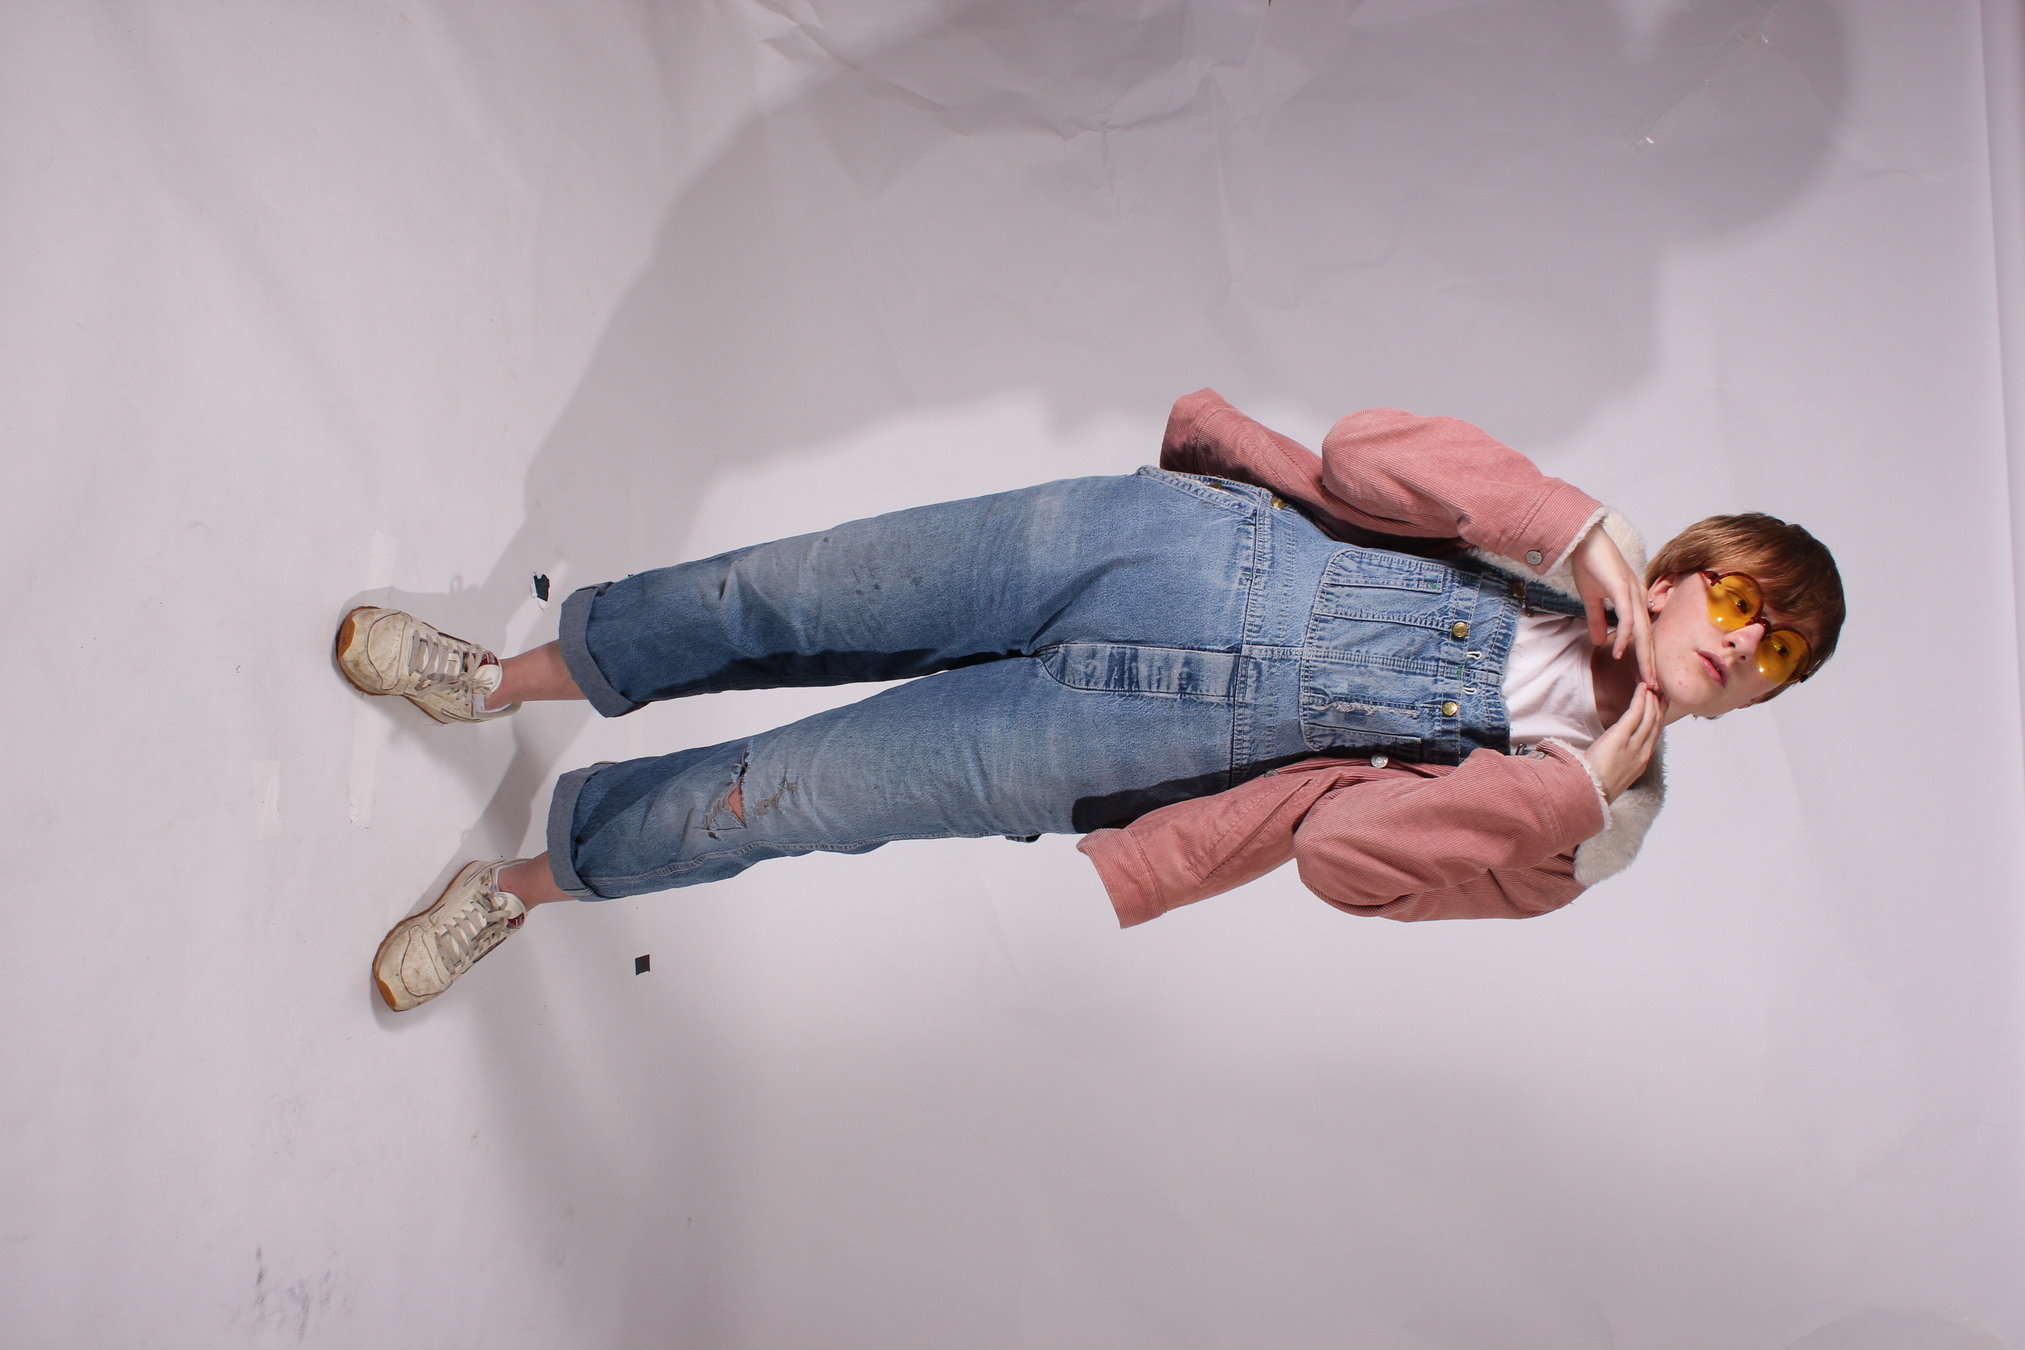
Above is Noa by the bare light. Note the halo and lens flare.
Below is Noa by the softbox light- its diffusion makes it a lot less harsh.
To the right is a picture of Noa taken with the lighting system. It looks very nice because of it- and if you look at the floor, you can see the harsh shadow created by the bare light and the soft shadow created by the softbox light.
The camera equipment, including the cameras themselves as well as all the accessories like tripods and wires and so on, that we had access to throughout this project phase was very important to its completion; but as most photographers will tell you, the camera lens is more important than the camera body in determining how the final image will look. Luckily, in both major situations in which we needed a camera (filming the video and taking promo shots) we had access to various different lenses, and this allowed us to capture everything we needed in all the ways we wanted to.
Lenses
For the music video, we had a normal prime lens as well as a telephoto zoom lens, which was more than sufficient for all the effects we needed. The former was perfect for shots without much movement forwards and backwards, such as certain solo shots and shots with sideways movement such as in the 'Alice in Wonderland' and 'Mortal Kombat' scenes- it had a shallow depth of field which meant things went out of focus quickly with forward and backwards movement, but it gave the whole shot a soft dreamy effect and slightly blurred background while maintaining focus on the same plane, which is exactly what we needed. Its fixed 'normal' focal length meant it had great framing to work with and compose inside, while being very bright and high-quality and providing a very detailed picture when properly focused. We even used it to do some focus pulls due to its shallow depth of field, which was a great effect.
The telephoto lens was useful for shots where we needed more things in focus, and where we wanted to worry less about things going out of focus when moving, which was a fair amount of shots, such as the band and party ones. Its widest setting was more than wide enough to allow for great framing, and its high variable zoom allowed us to frame and compose even better- and thanks to the variably bright studio lights, the narrower aperture didn't have too much of a negative darkening effect on our shots. Where it WAS too dark, grading could help. We also had a similar telephoto lens in the photography studio, which we used in a similar way- the bright flashes negated the downsides of the lens, the variable zoom aided framing and composition, and the deep depth of field kept everyone in focus when we were doing group shots.
Lenses
Lenses
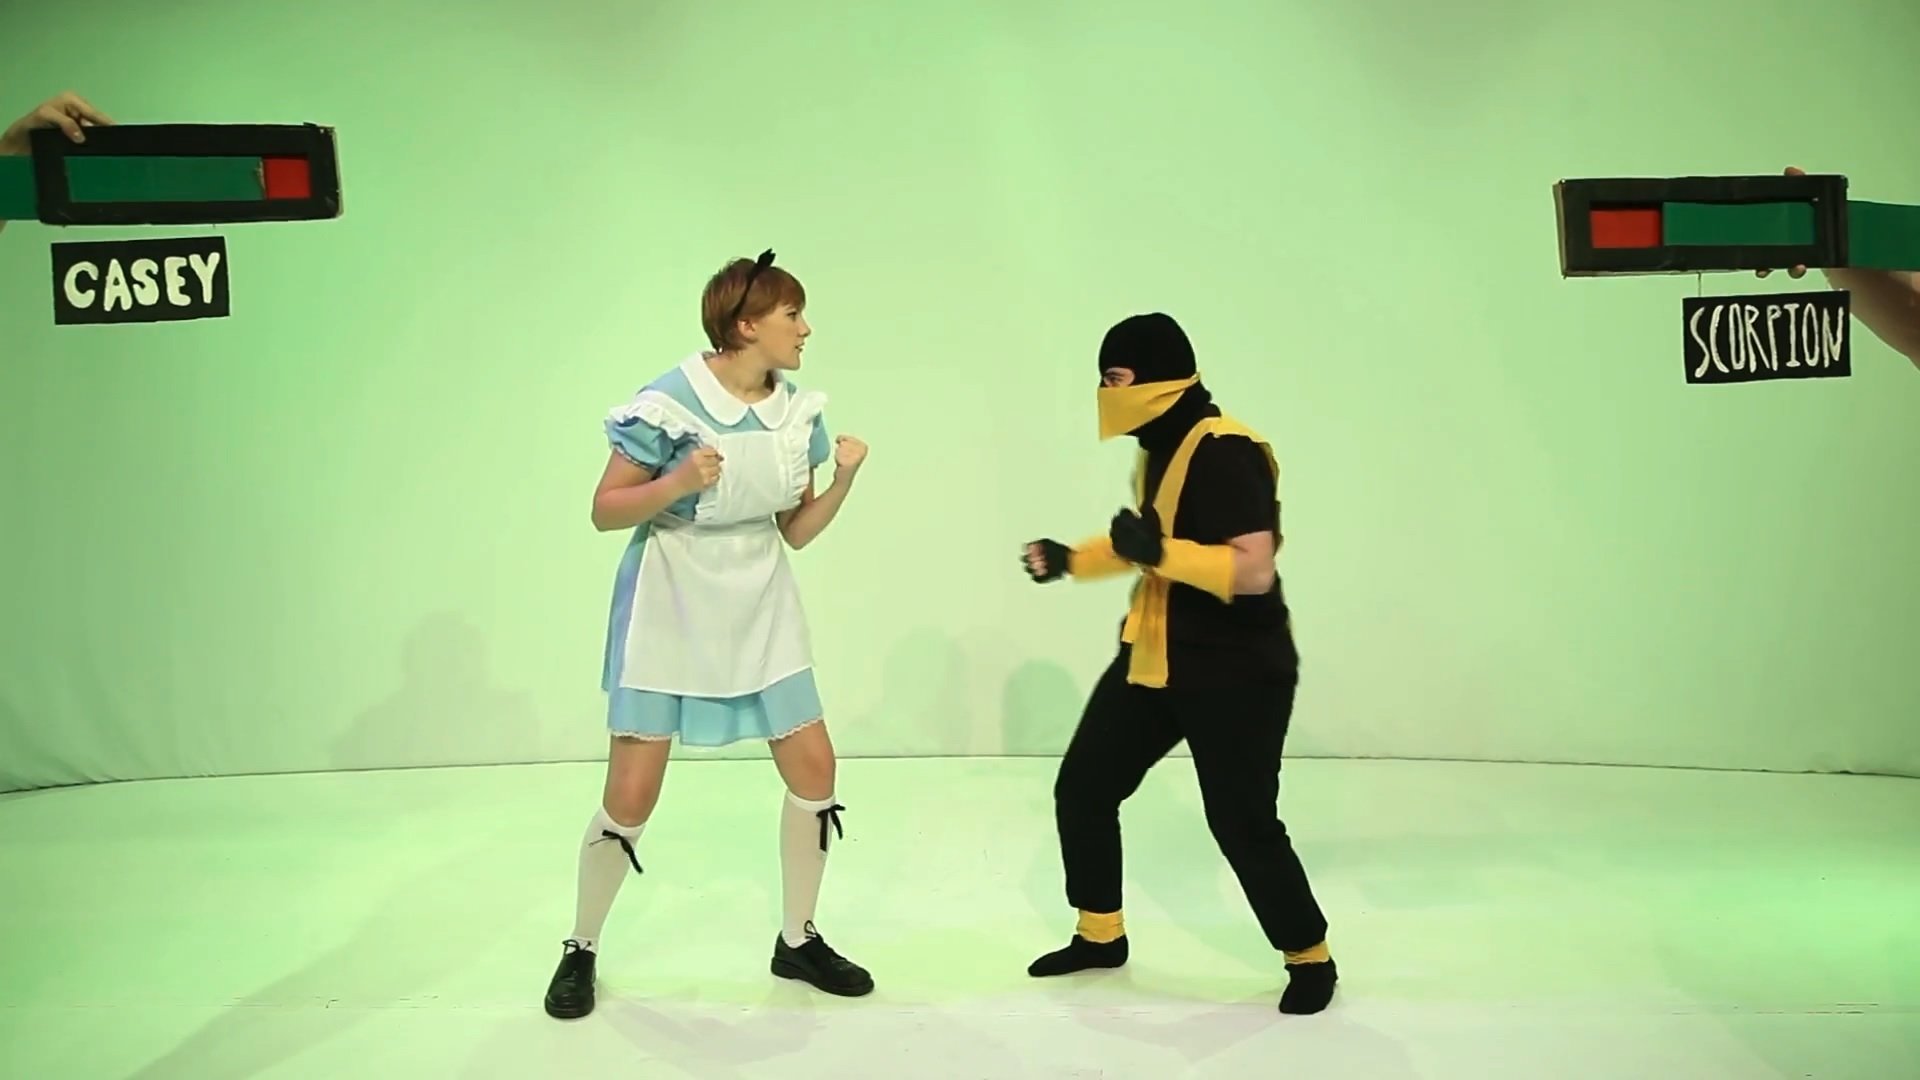

The top right clip shows a focus pull in our music video, only possible with a lens with shallow depth of field. Bottom right shows a shot with lots of sideways movement and just enough space for composition, also possible with this lens due to the lack of forwards and backwards movement in the shot.
Bottom left is from a shot with lots of different people who are lots of different distances from the camera- thus, a telephoto lens with a deeper depth of field was required to keep everyone in focus. The ability to zoom out also helped keep everyone in frame.
For the out-of-studio promo shots, we had access to even more lenses, including my own. We used a vintage Soviet-Union-era lens with a shallow depth of field and cheap (and thus soft) optics to get great portraits of some of our band members, with blurry backgrounds and dreamy foregrounds. We also had a kit lens with a great focal range, from bordering ultra-wide to almost telephoto- despite it being a kit lens, the optics were good enough to capture high-quality in-focus images of the band members alone and together in any lighting or situation we put them in, including various levels of shade and motion.
Lenses
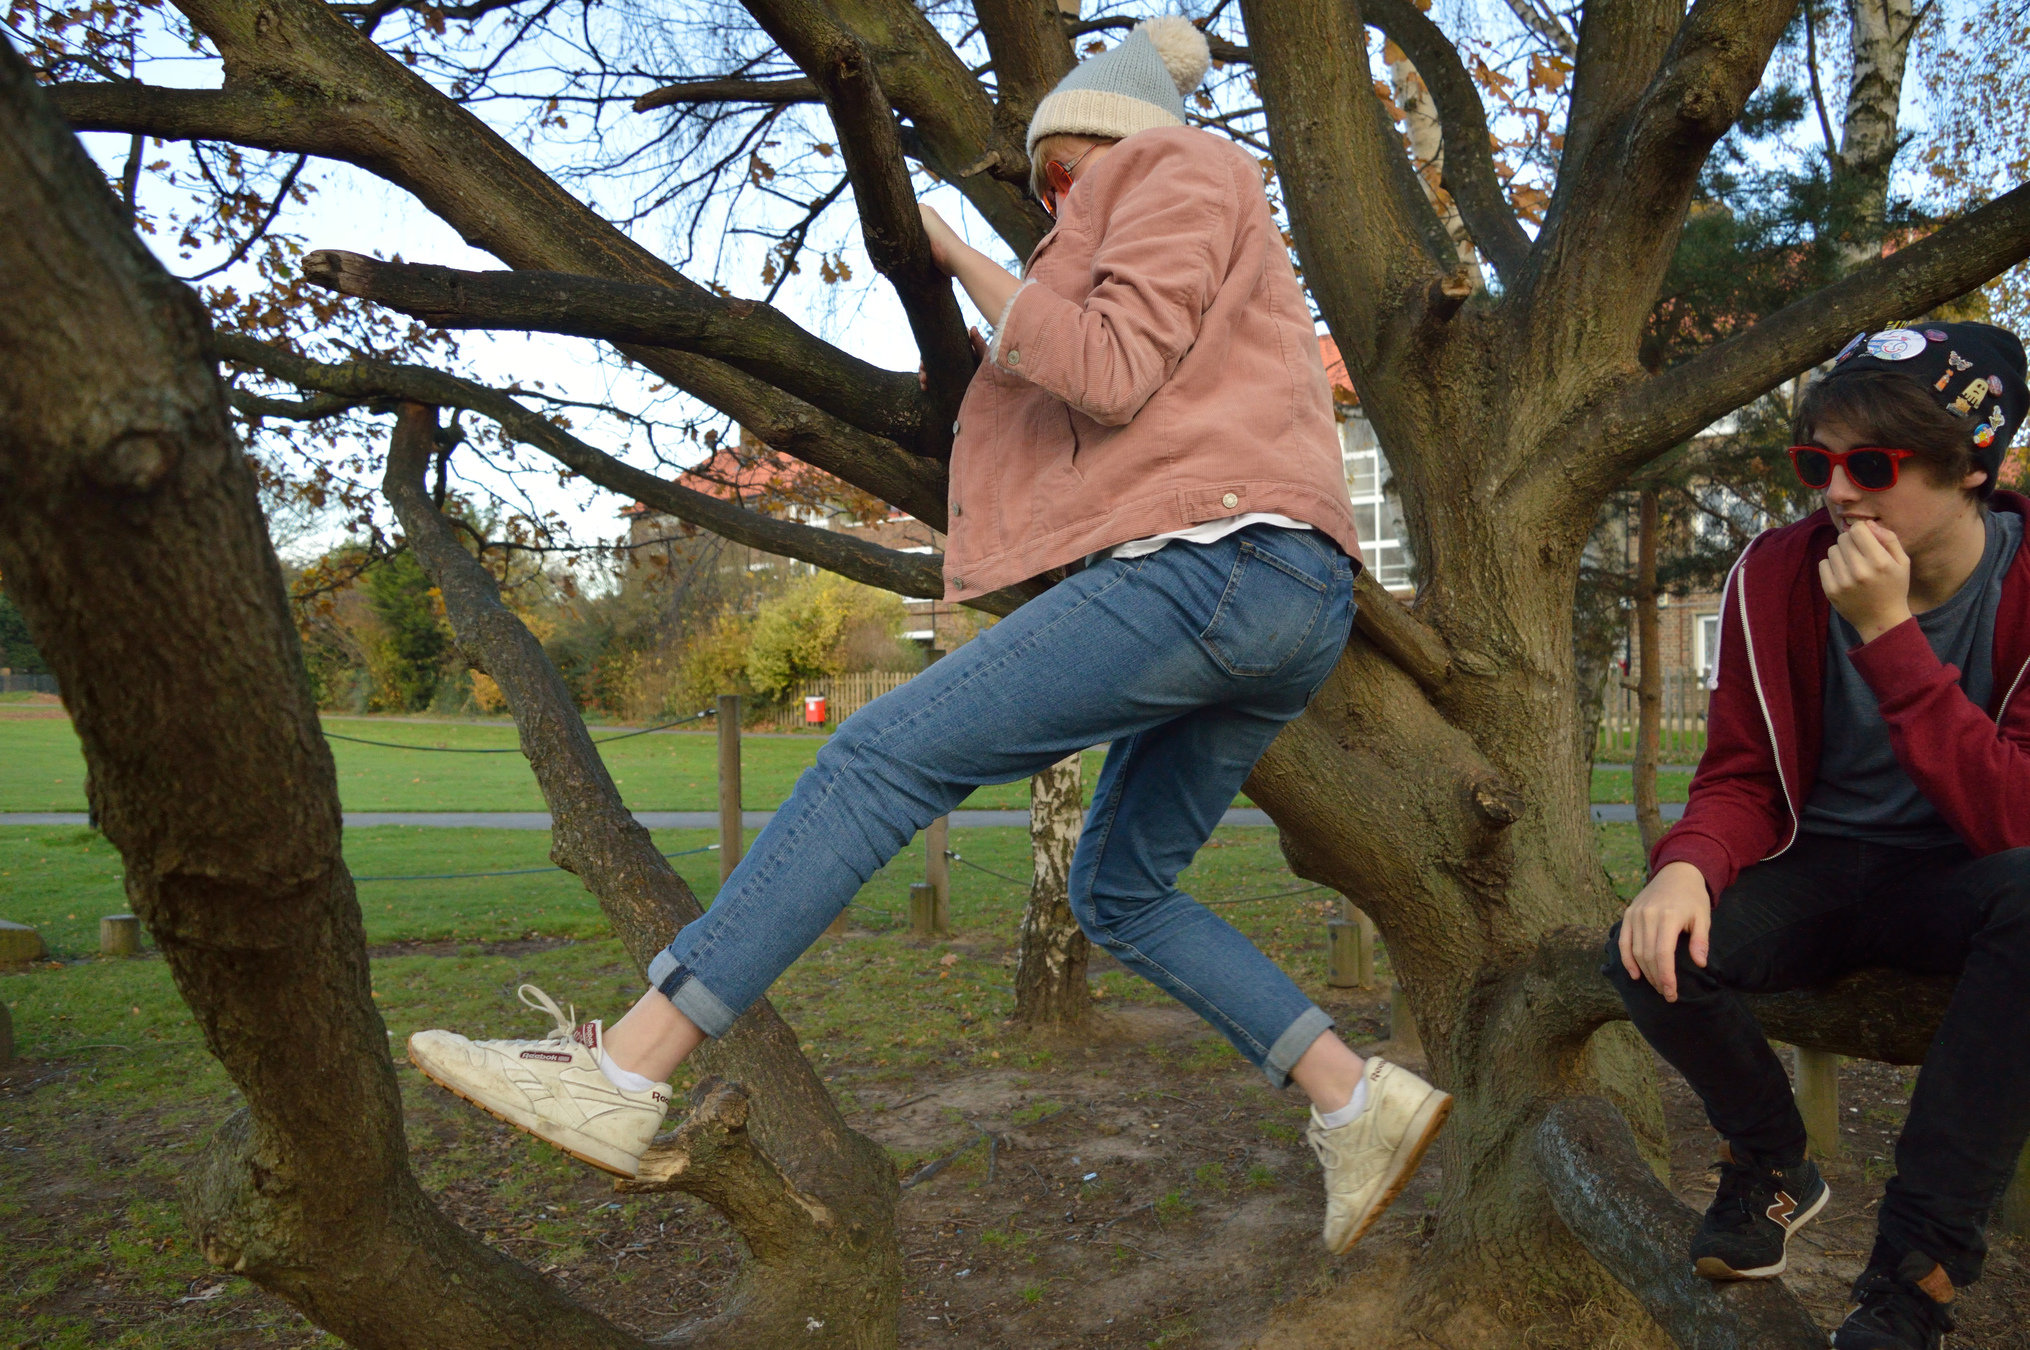
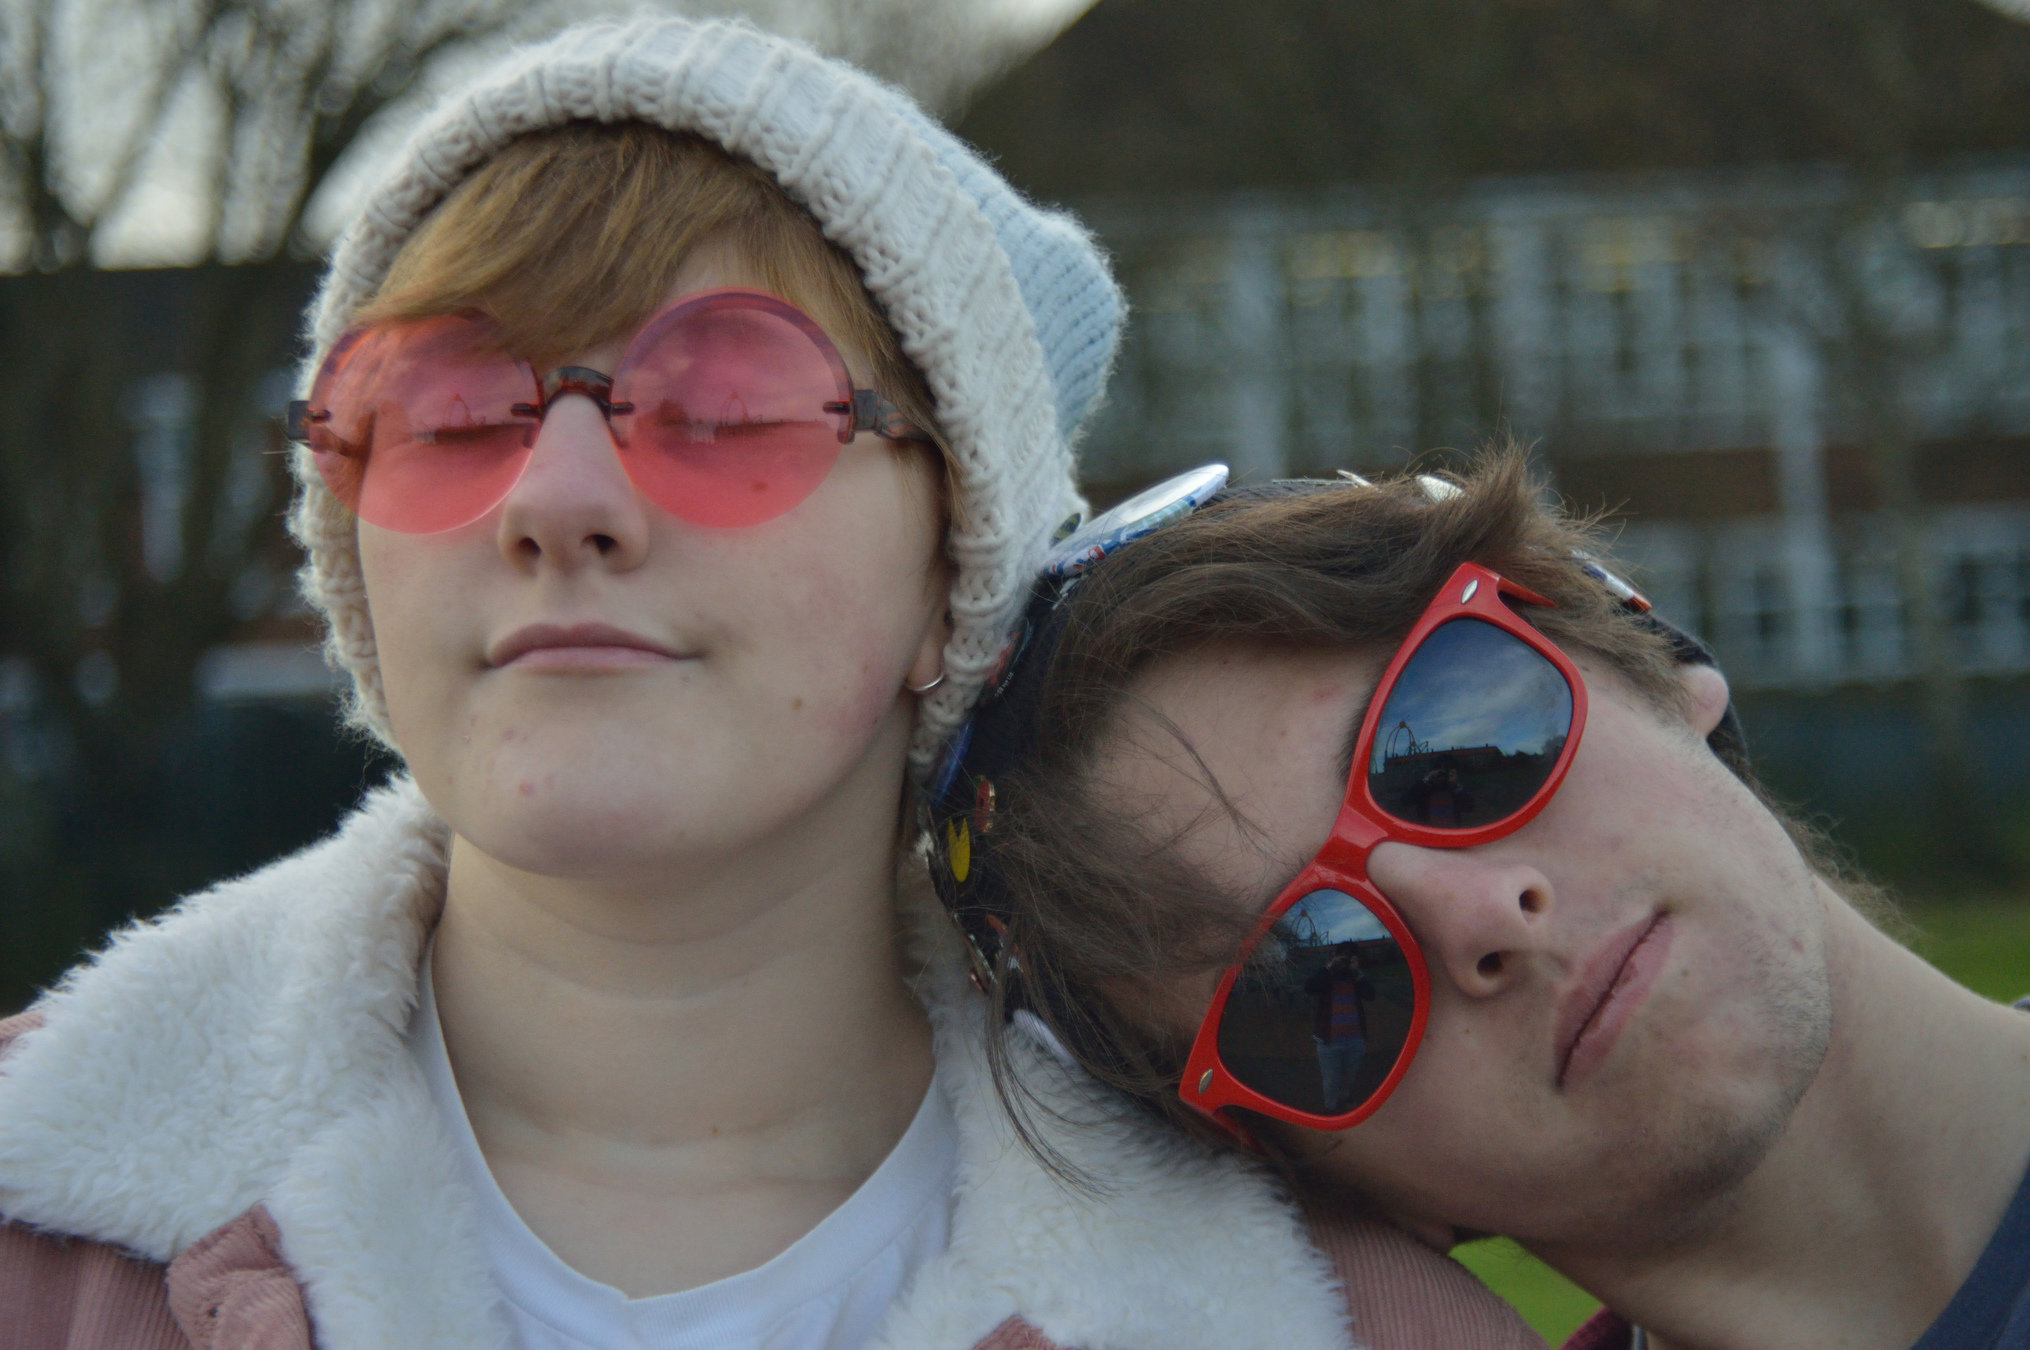
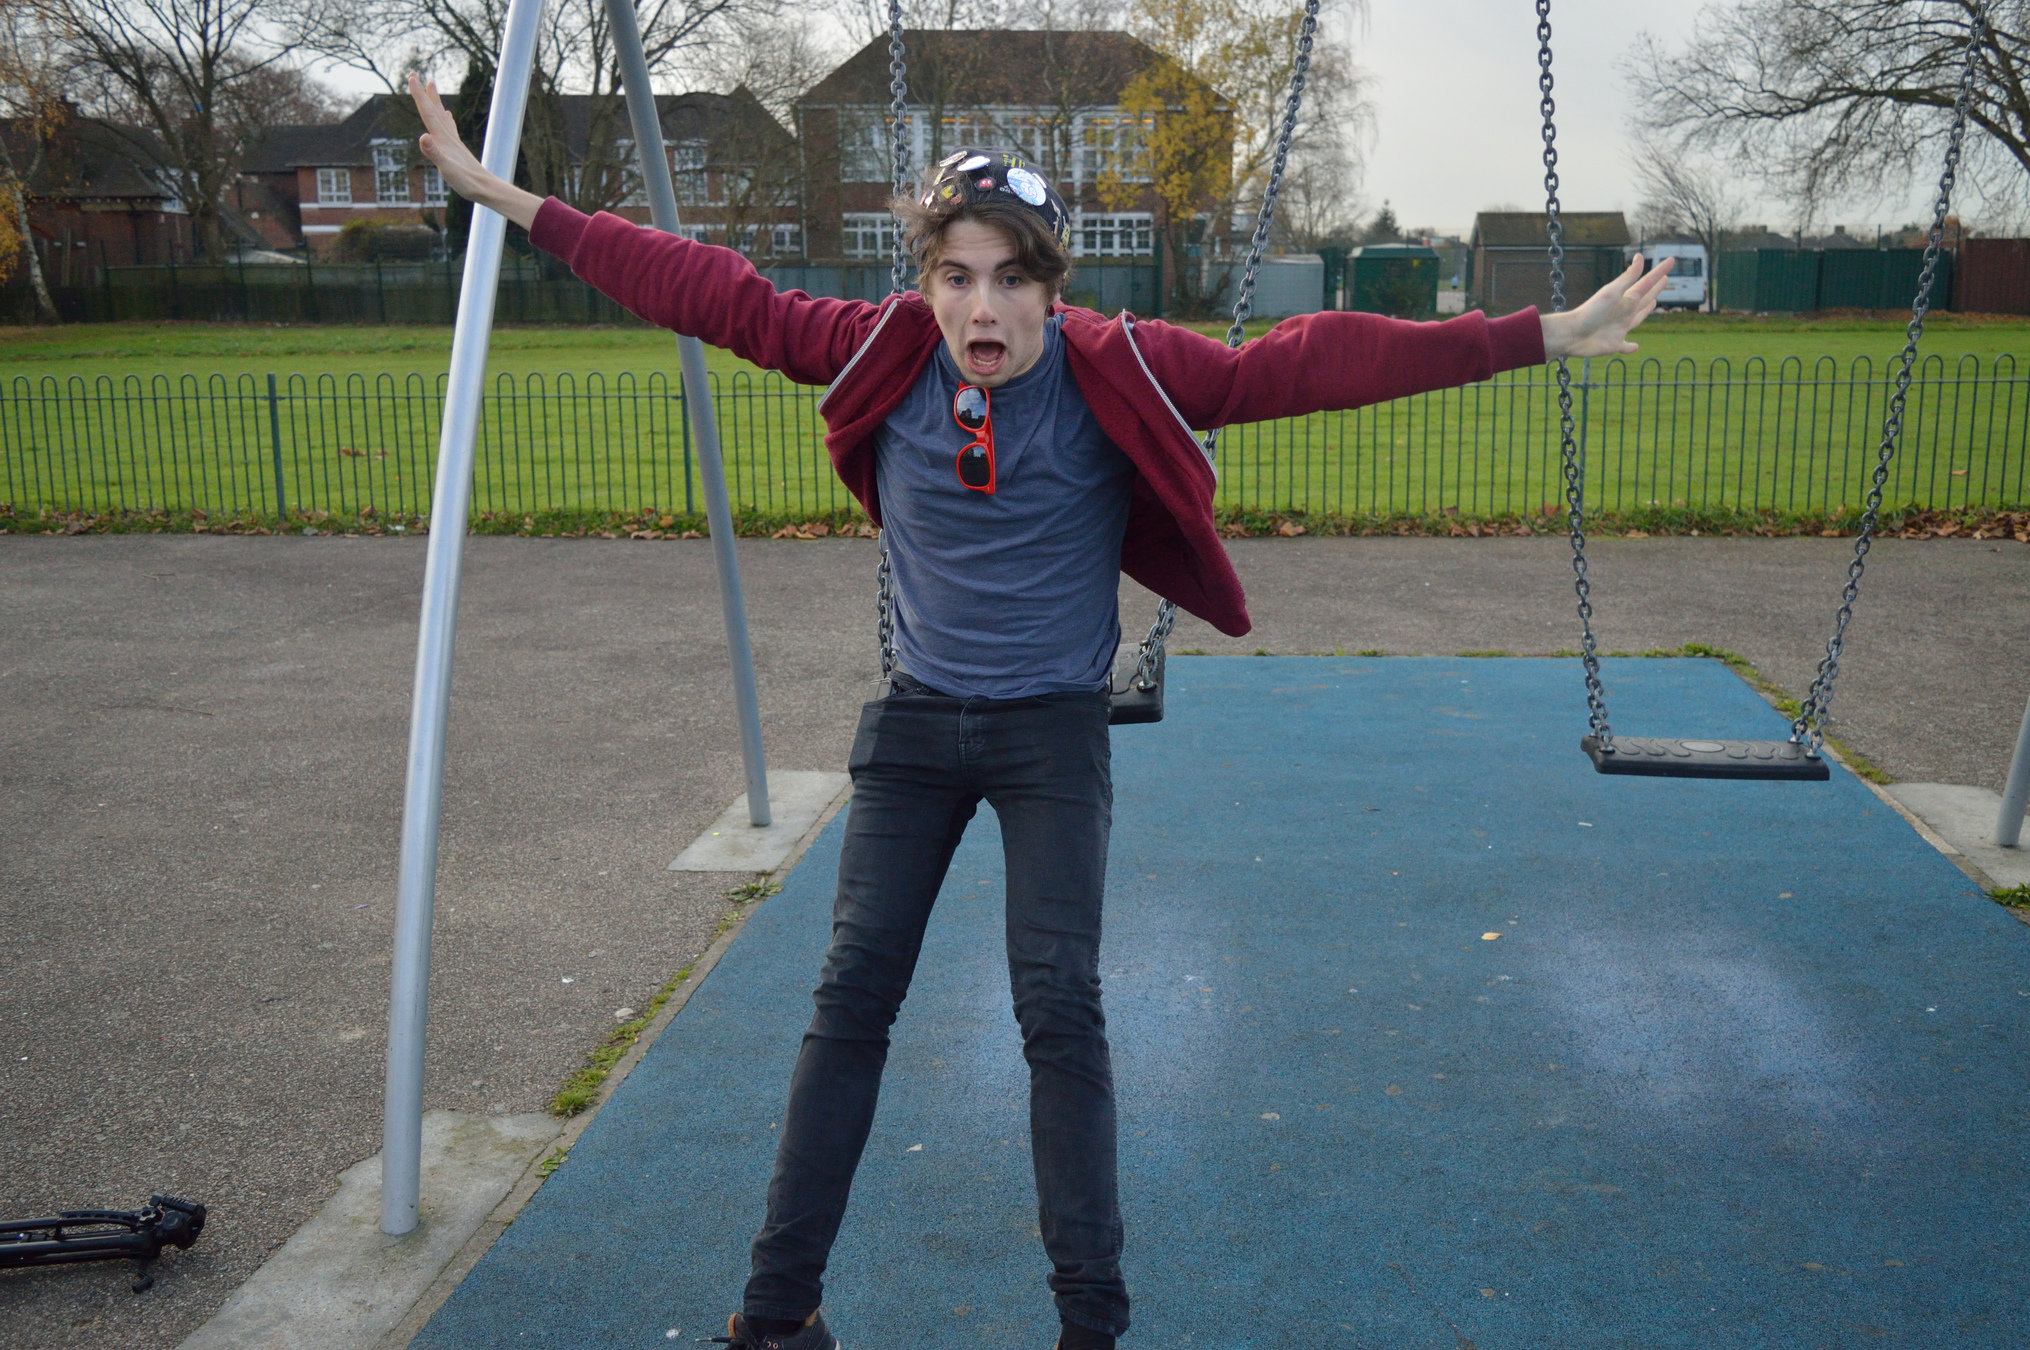
On the left, Jack is jumping from a swing, but the kit lens has allowed for a fast shutter speed and thus his motion is frozen and he isn't blurry. In the middle photo, the same kit lens has allowed both Noa and Jack, as well as the tree and background, to remain in focus and clearly visible, despite Noa jumping, the different depths, and the dimness of the shade under the tree. The right picture has a much blurrier background, and Noa and Jack are a lot softer despite being in focus- this effect could not be achieved by the kit lens despite being advantageous to the photo, but the unique character of the old, cheap Russian lens allows it to be created.
For the digital parts of construction, we had access to edit suites, in every sense of the term- by this I mean we had dedicated computers in the media department called "edit suites" by the media staff, with high processing power and two screens each, and on those computers (plus all the other high-standard computers in the department) we had access to the main Adobe software suite, known as Adobe Master Collection. These new technologies worked in tandem to allow us to create great media products, as we did almost all of our post-processing work on them thanks to the great flexibility they provided.
Edit Suites
Regarding the edit suite computers- these heavy-duty PCs allowed us to quickly edit the high-quality and therefore huge files from our music video shoot, and they even had enough power to render everything themselves. The first use of Adobe Master Collection here was Premiere, the video editing software we did everything in. We used this software to take advantage of the power of the edit suites, putting all of our clips onto a single timeline and cutting between them and adding effects and grading and so on. The software did nearly everything we needed in one package- even when we needed to create effects outside this particular piece of software and then import them in, we just used another Adobe Master Collection program, in this case Photoshop, to do this. The two flat screens of the edit suites allowed for multi-tasking and for having more information and toolbars available at once in software like Premiere. Overall these computers were incredibly useful for everything we needed them for, due to their all-in-one approach to media product creation.
The other computers in the media department, while not as powerful as the edit suites and with only one screen, were still more than good enough for the digital part of the creation of the other two media products. The digipak was created entirely inside Photoshop, of the Adobe software suite- a single .PSD file, thanks to modern technology, stored every single image and piece of text and so on of the digipak in one place. Even the website, which was created in Wix's browser-based software, took advantage of these computers, and also of Photoshop- almost every image on the website was created in or at least doctored in Photoshop before being put on the website. This technology was invaluable in creating the ancillary media products.
Edit Suites
Edit Suites


Top right is me using an edit suite computer to edit the music video in Premiere. One screen has lots of tools and so on; the other has live playback of changes.
Bottom right is me editing the digipak on a regular computer in Photoshop. The entire digipak is taking up the bulk of the screen, with all the controls around it.
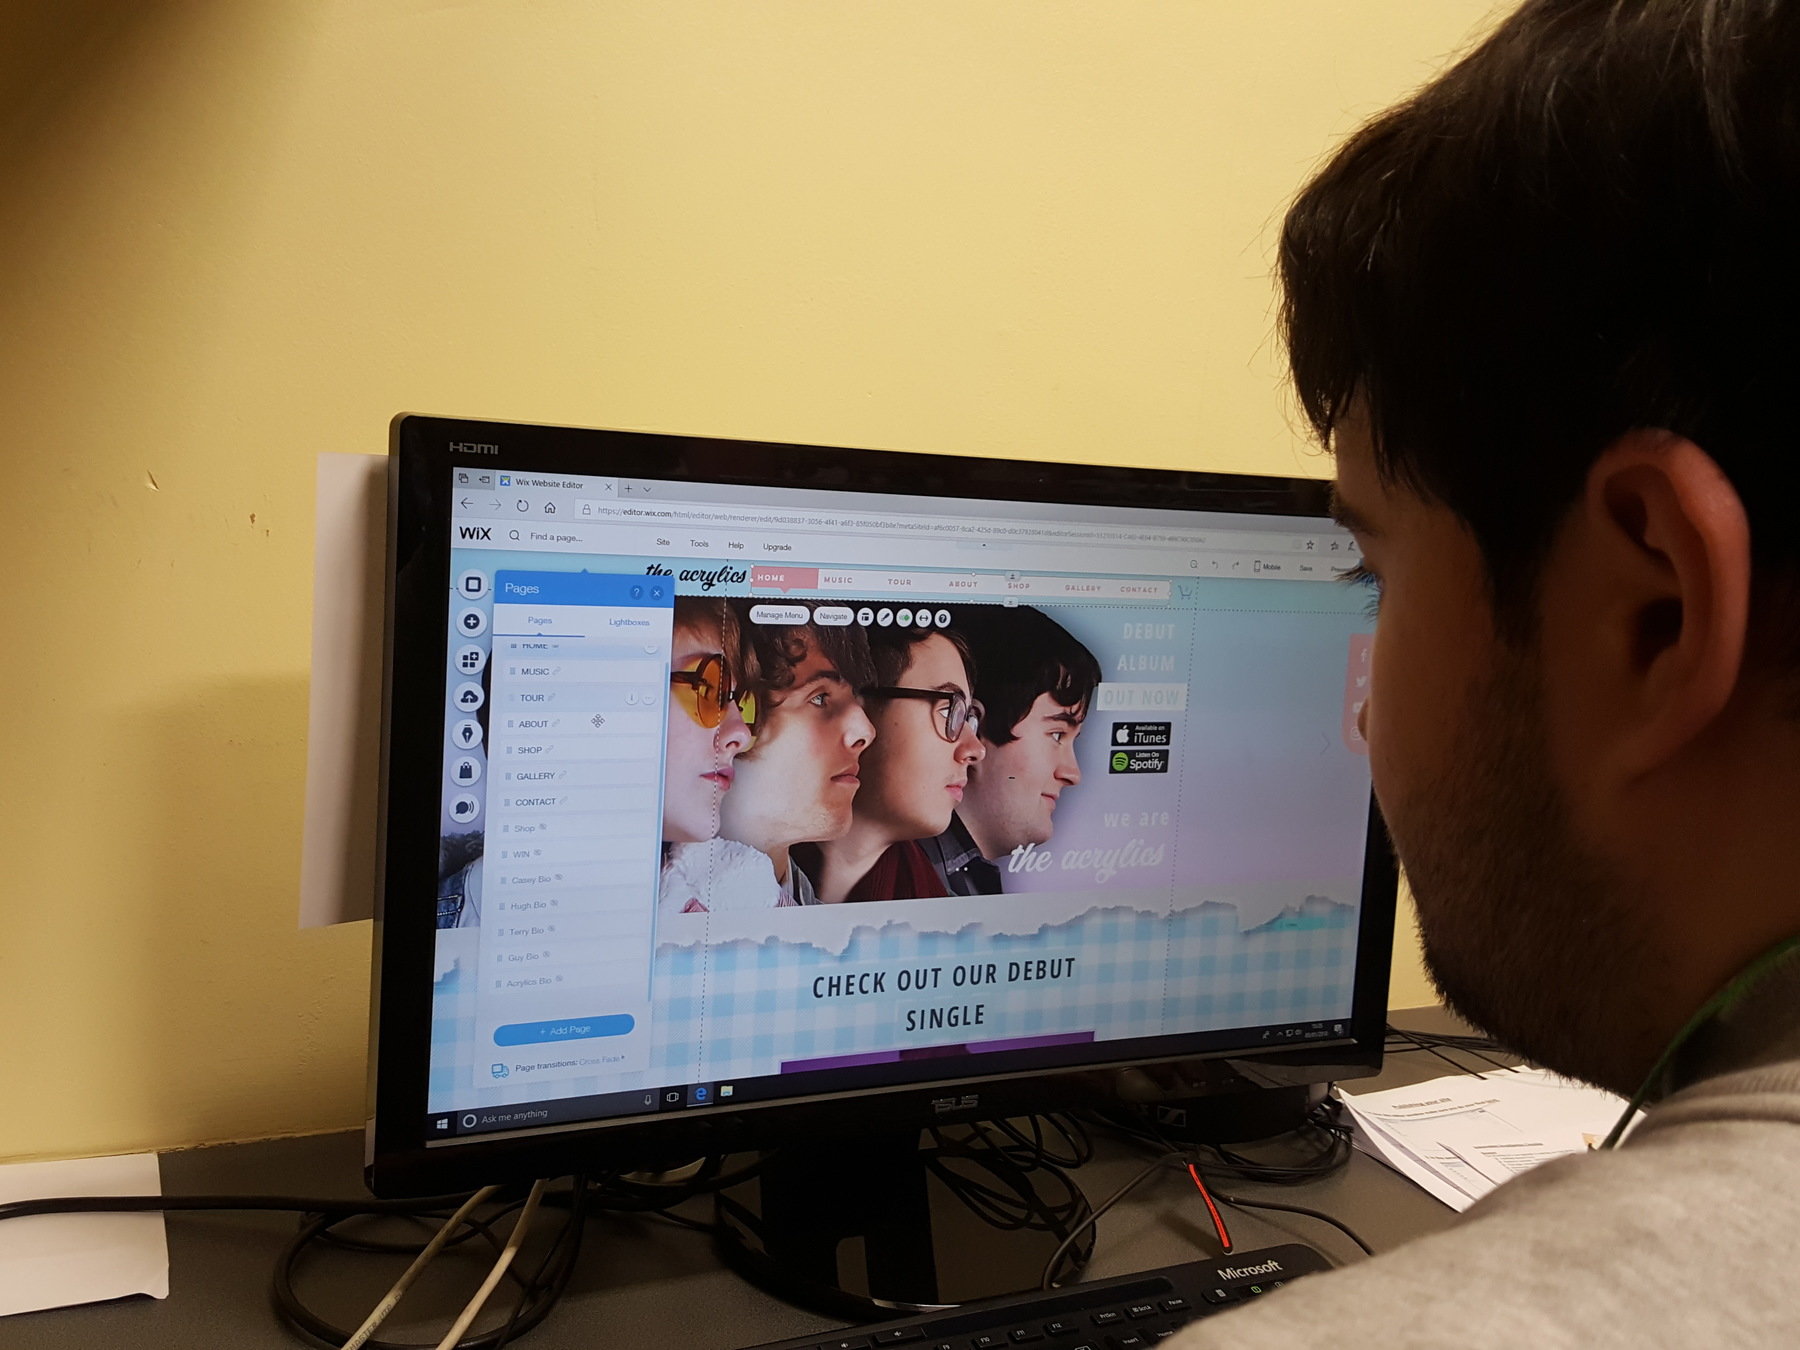
Bottom left is me editing the website on a regular computer, using Wix's website on a regular web browser. It shows what the website will look like to a normal viewer, but allows you to tweak anything from this view.