Tech Worskshop:
HOW TO EDIT A DANCE VIDEO

a slide deck by Johara Meyer
Before we begin:
- What software are you using ?
- Where are you getting your music from?
- How are you filming your dance?
- What do you want to edit?
my recommendations:
Mac
- iMovie (beginner friendly, free)
- Final Cut Pro (more advanced, more expensive)
Windows, Mac, Linux:
- Premier Pro (around 20 pounds per month)
- DaVinci Resolve (more advanced, free)
Online
- Kapwing ( lots of creative freedom, free)
- Veed.io ( free, insane if you need subtitles)
Phone
- KineMaster ( simple, free)
- iMovie ( not nearly as many features as on desktop version, free)
my recommendations:
for songs:
- use Youtube to mp3 (sound file) converters
!! If you want to publish your dances on social media without getting a copyright strike you may need to use royalty free music or edit your sound file so that it doesn't get recognised by the algorithm !!
for royalty free music:
- YouTube Audio Library
- Soundcloud ( filter to show show tracks that are licensed for reuse)
- Incompetech, Ben Sound etc.
for editing sound files:
- look for the newest tutorials, algorithms keep changing so do the workarounds
know:
- are you editing multiple clips together or only one?
- are editing multiple choreographies together?
- are the dancers dancing to the song you are using in the edit?
decide:
- are you filming vertically or horizontally?
- will your camera move (handheld) or is it going to be still ( tripod)?
- are dancers filming themselves? what instructions do they need from you?
- where are you filming? multiple locations?
- how many takes are you doing? will you film from different angles or change the number of dancers in a shot?
- how can your filming help you express your choreo best?
For example, to highlight emotion you could highlight close-up details of a performer in the foreground while the whole body of another performer is shown out of focus, distanced in the background
iMovie: understanding the workspace
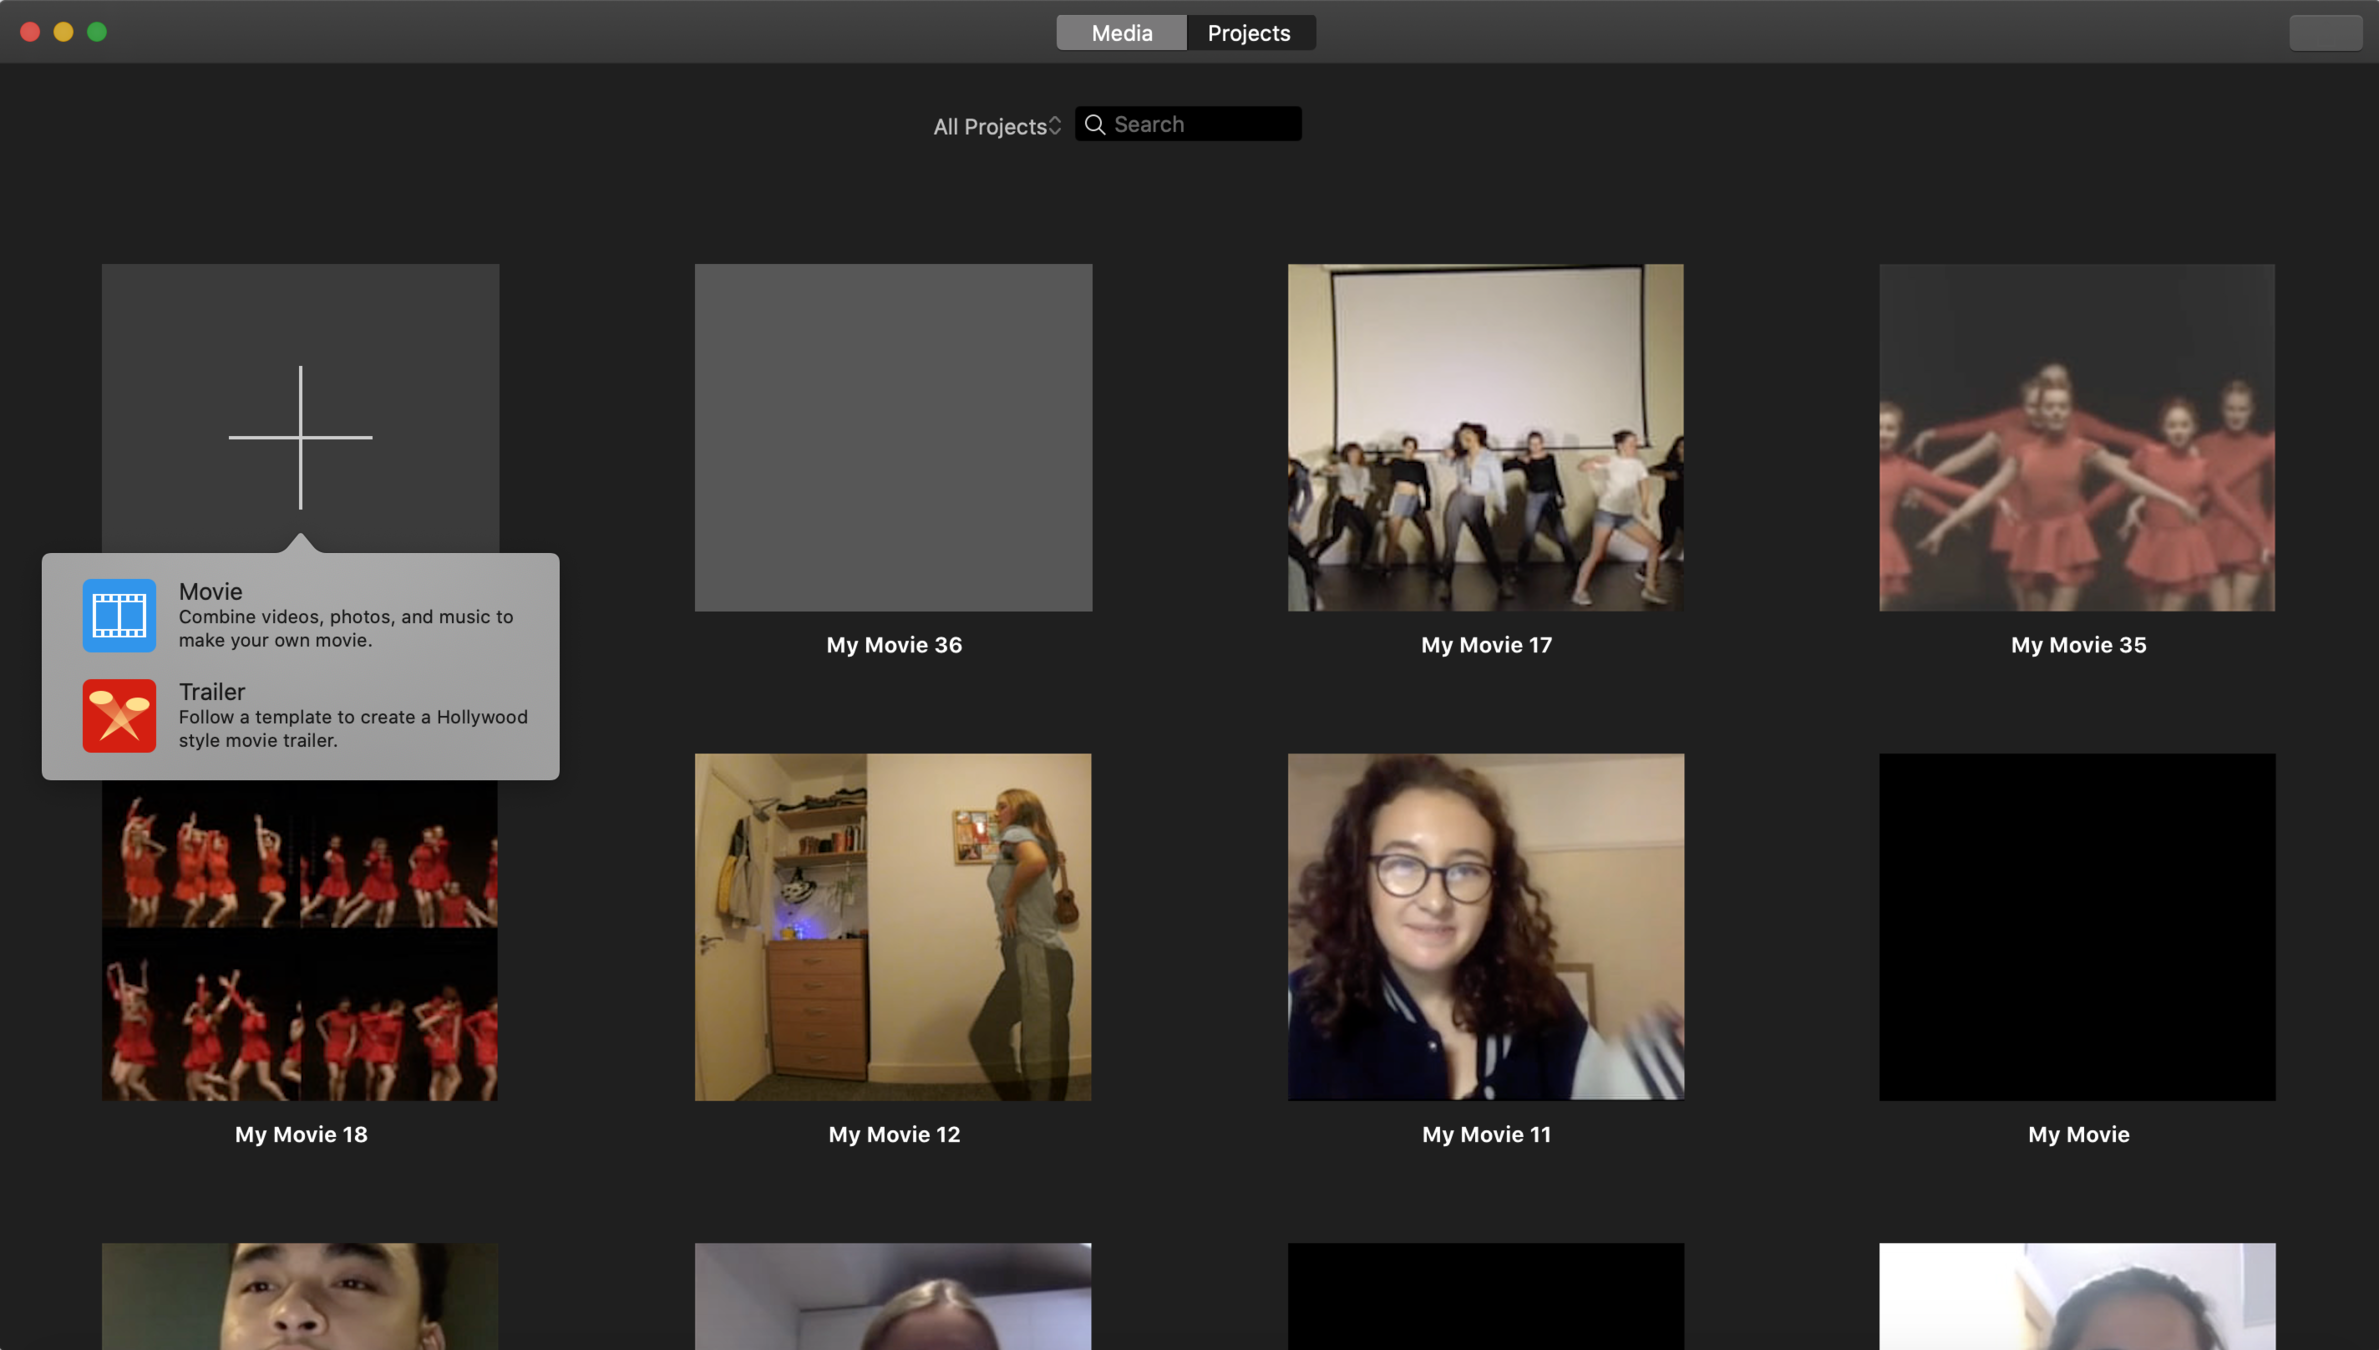
- first thing you'll see when opening app, all your projects are here
- to start a new project click the plus and select "Movie"
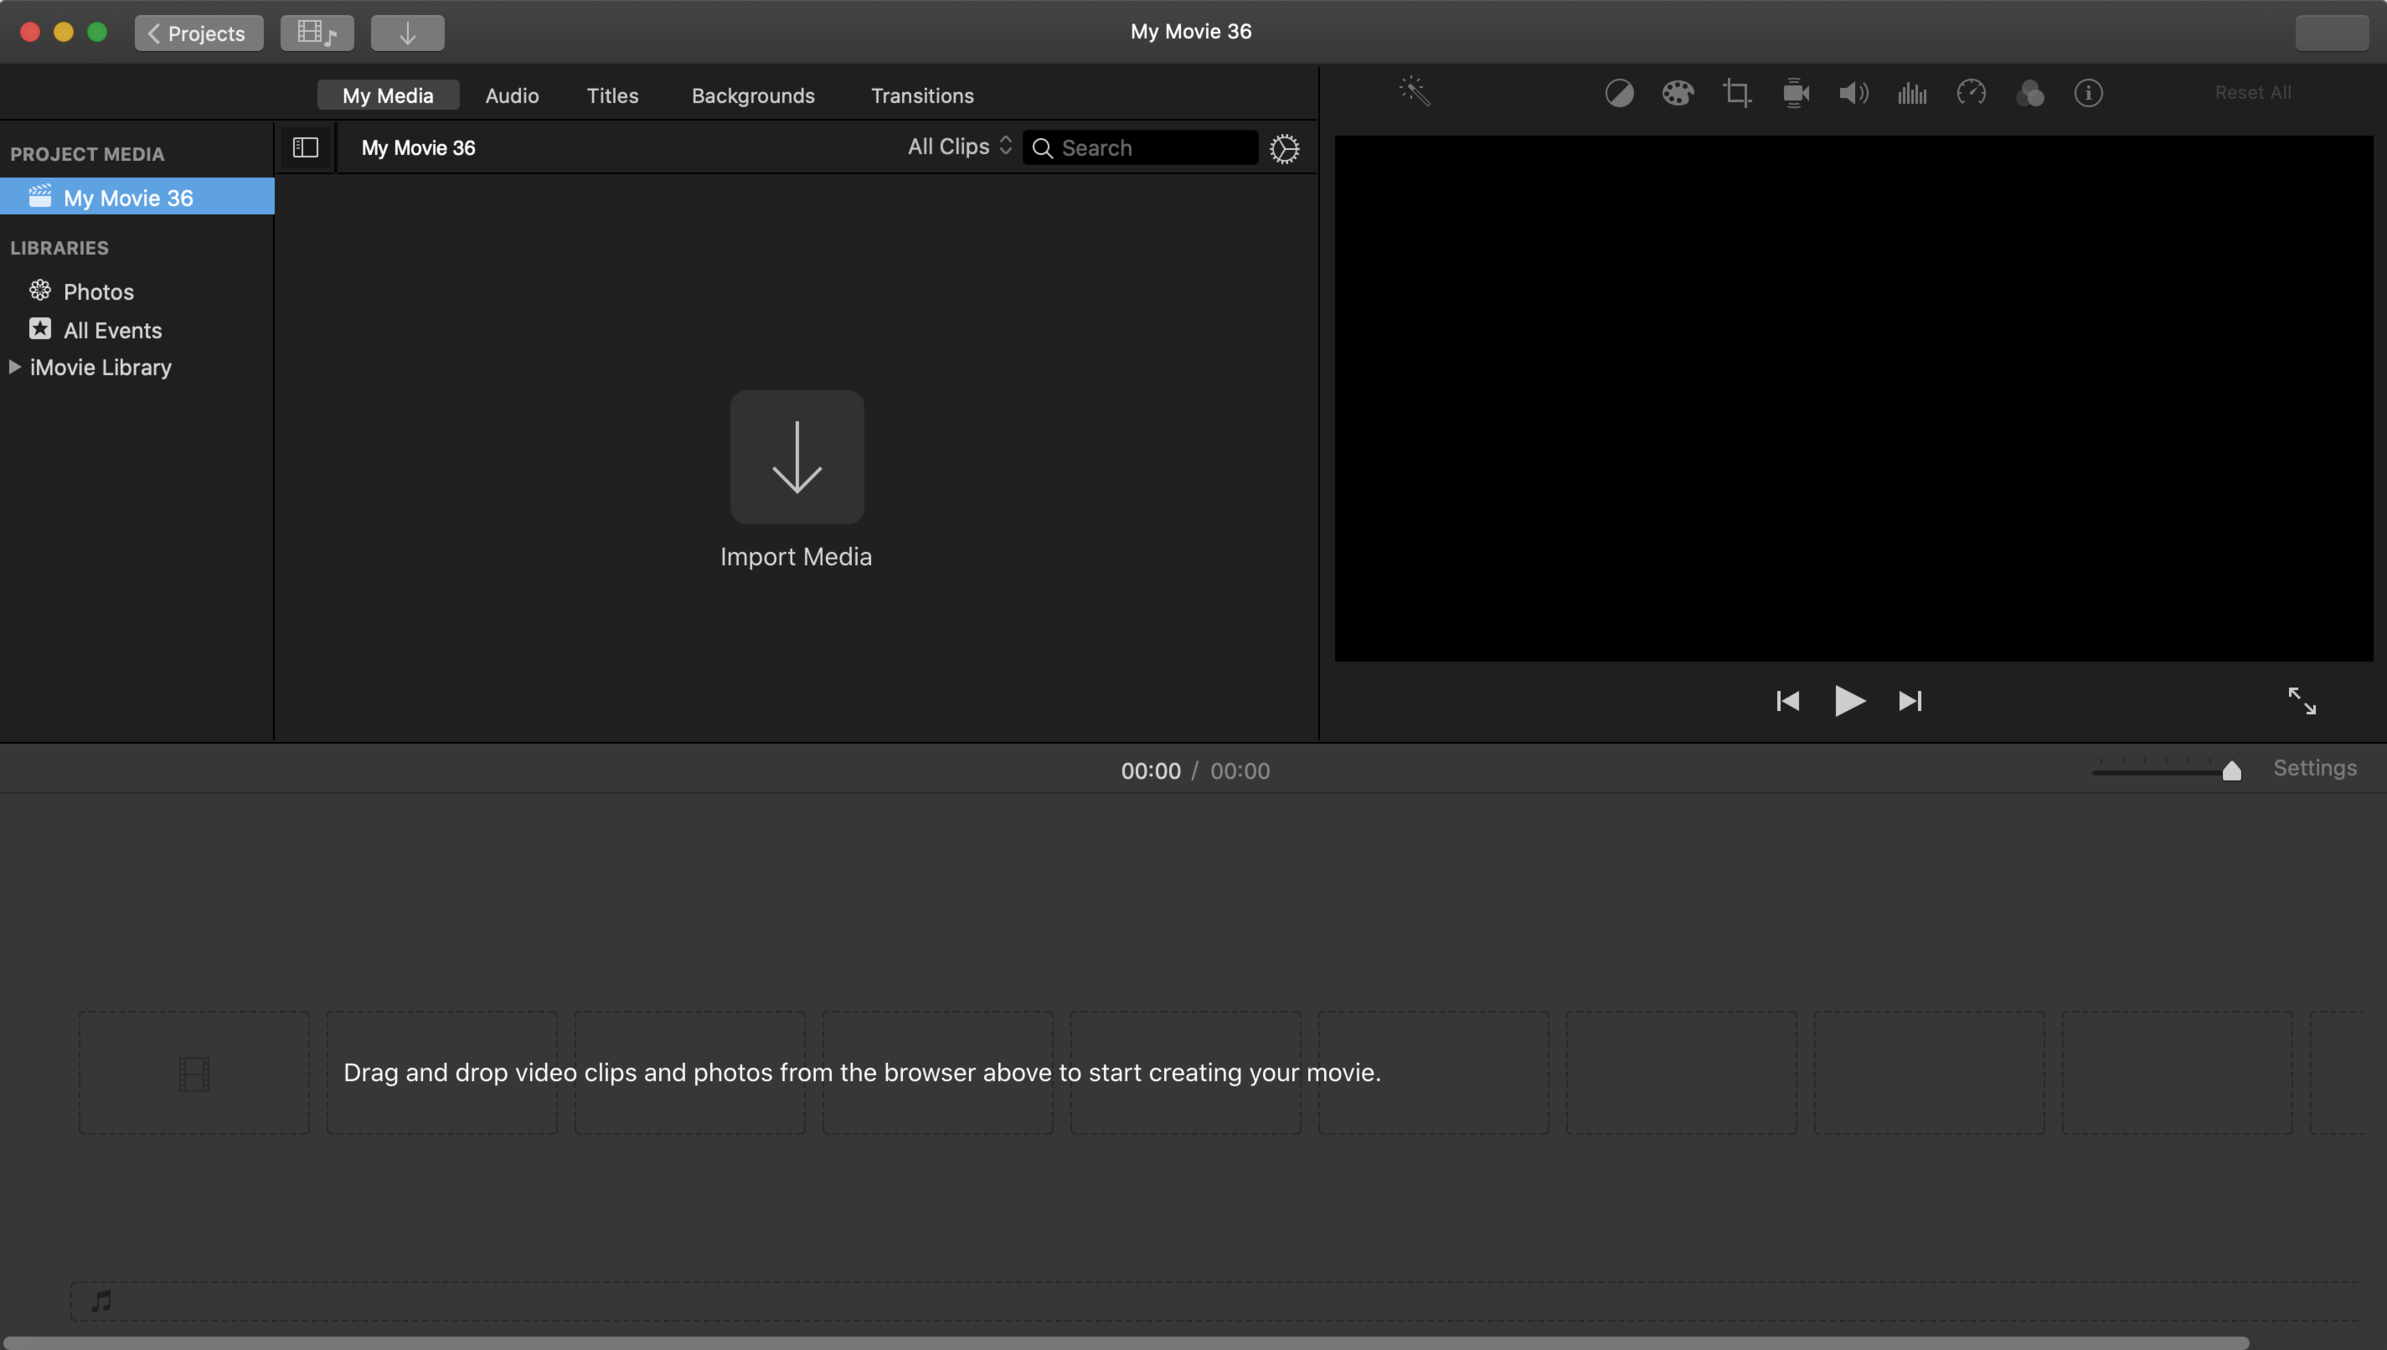
drag and drop all files you wanna use here (videos, pictures, music)
this is your preview window where you can see a preview of your edit (by pressing the play button) and view the files you dropped in (by hovering your cursor over them)
your timeline, this is where the editing happens
photo and vidoe files get put in this lane
audio files get put in this lane
BEGINNER:
iMovie: adjusting your footage
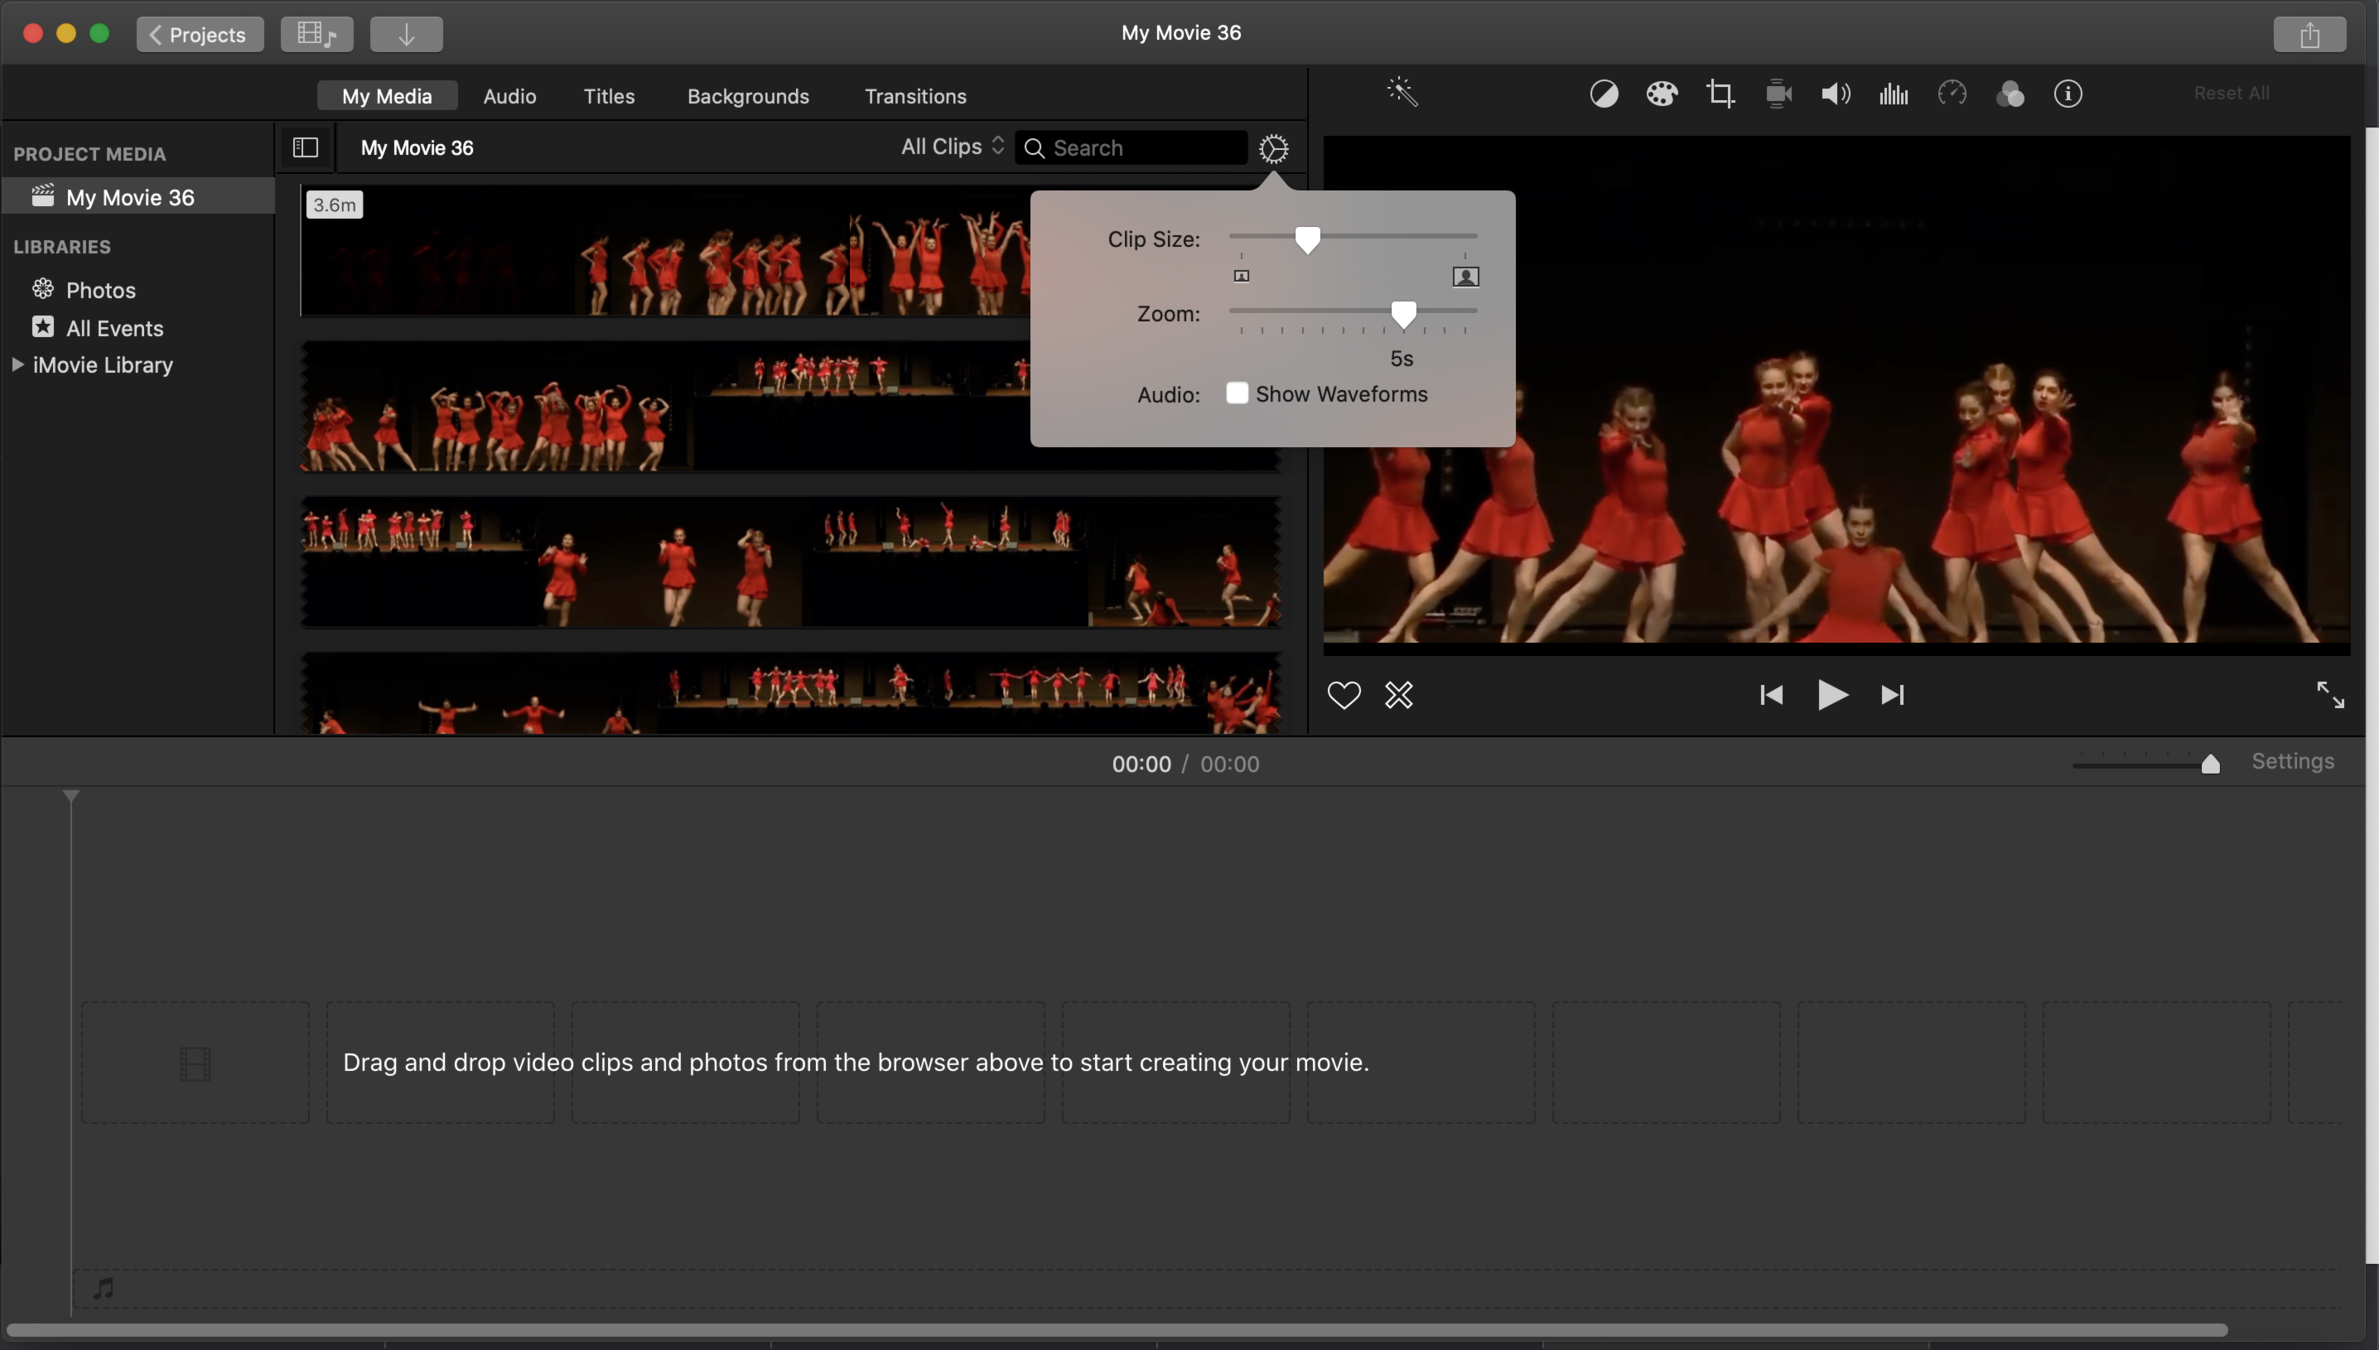
after you have uploaded your files make sure you adjust zoom and clip size. I like to adjust mine so that when I hover my cursor over a video file I can catch individual moves ( turn, jump, etc.) so I set my Zoom to approx. 5 sec.
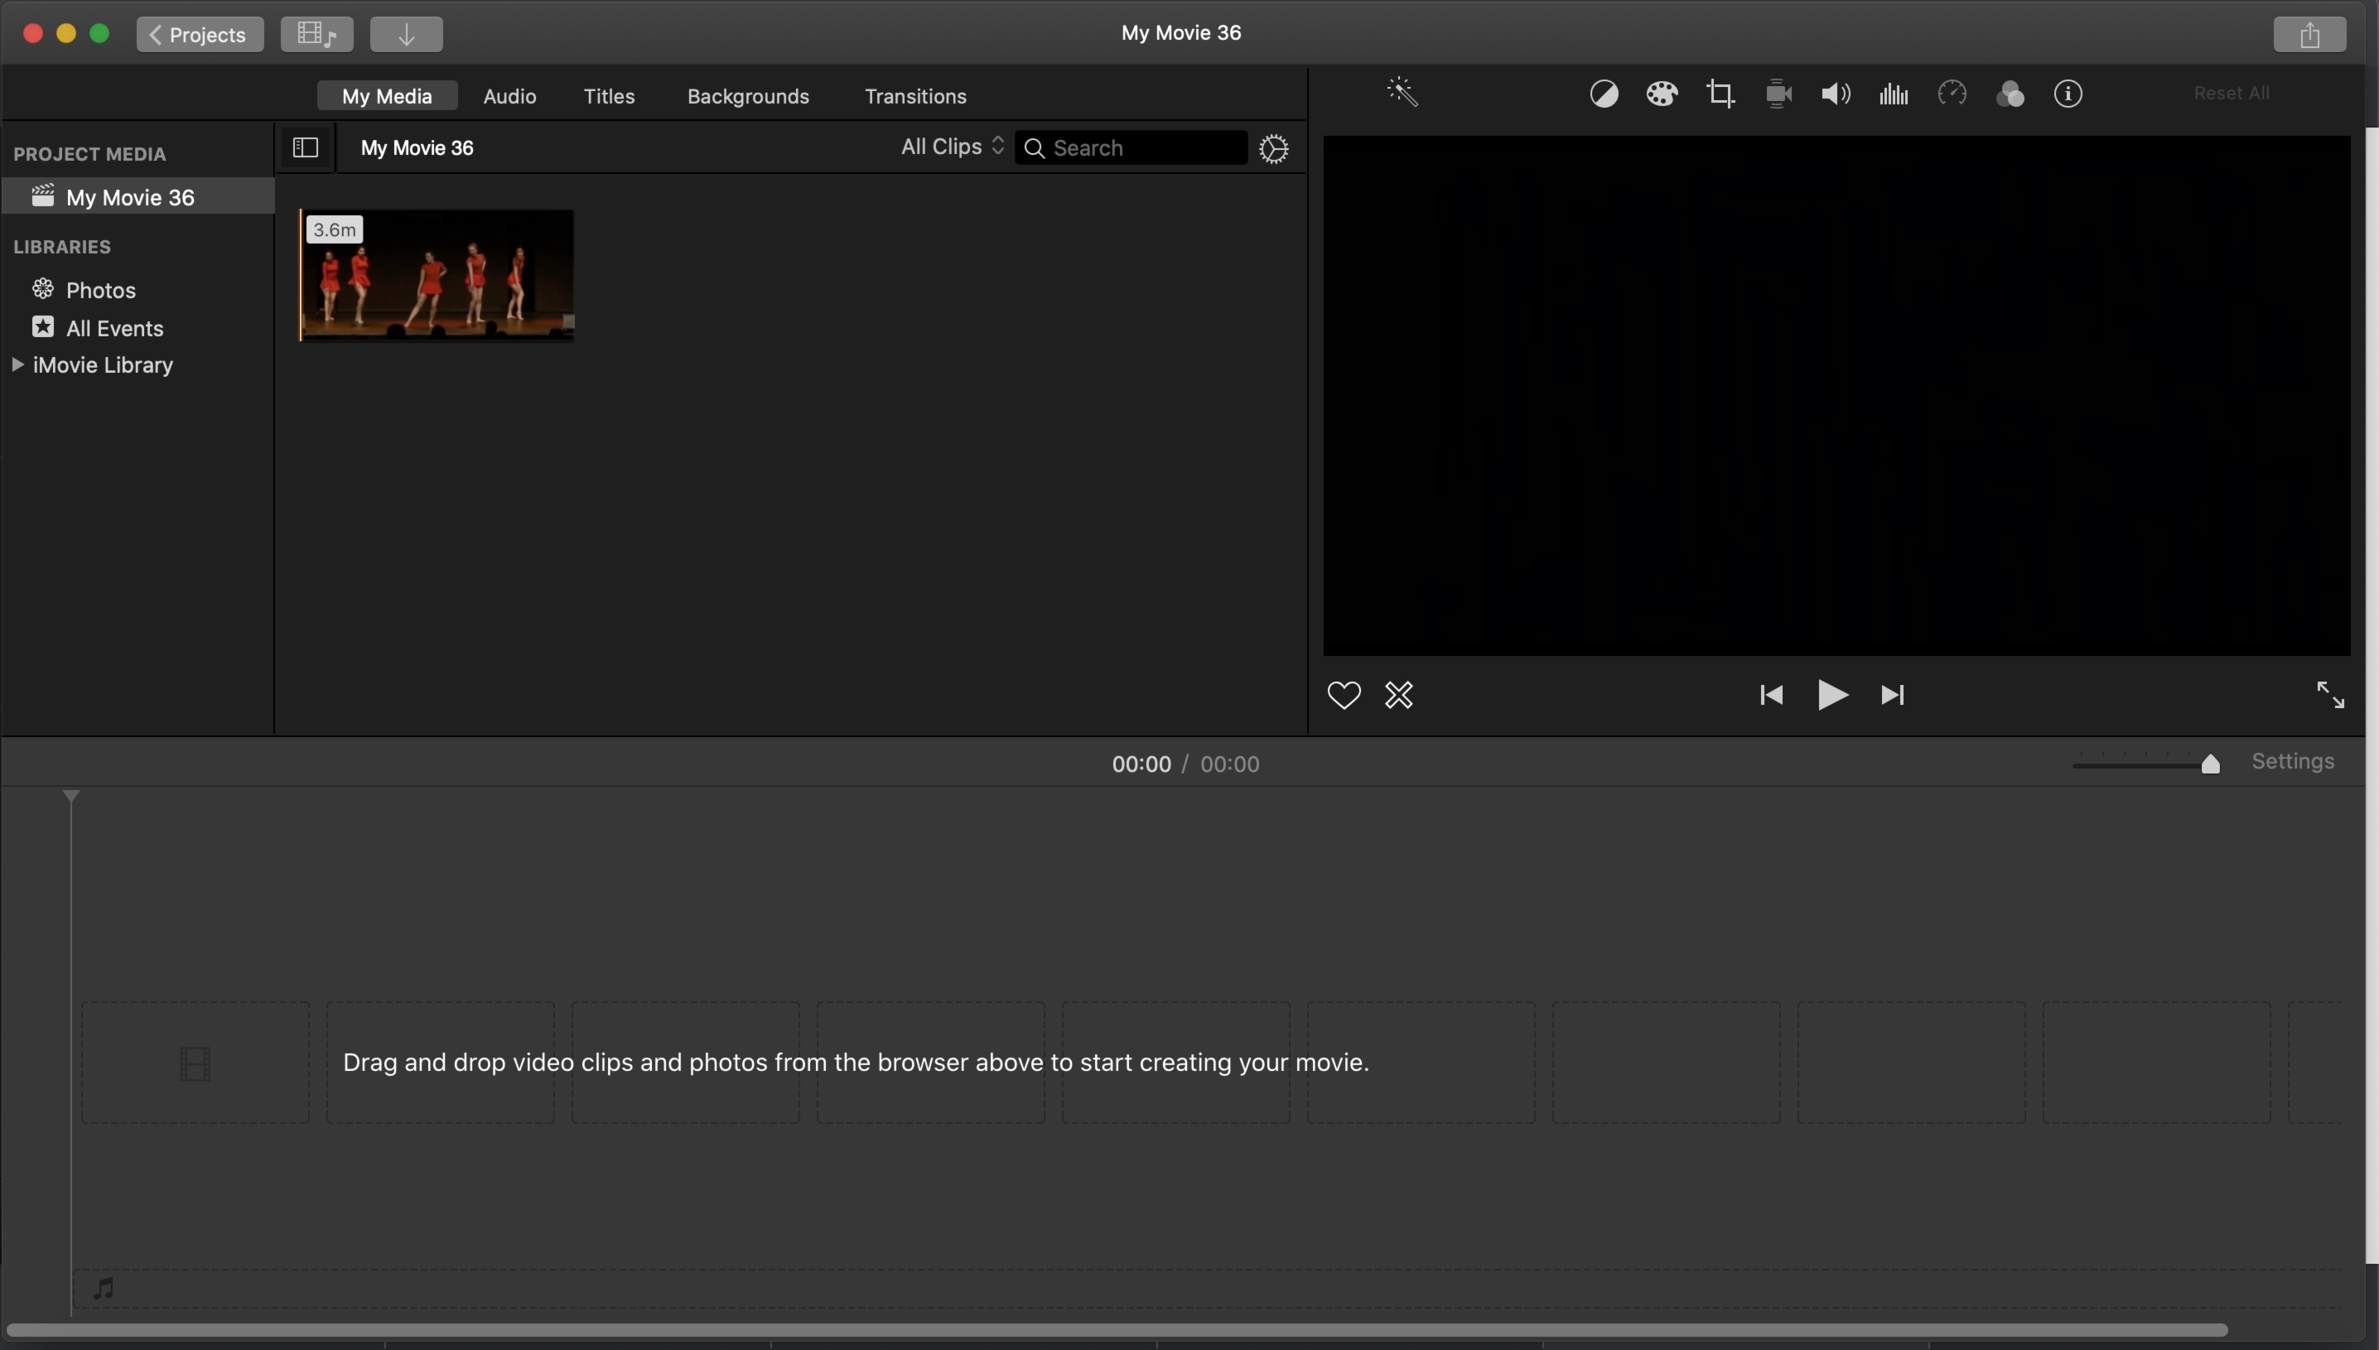
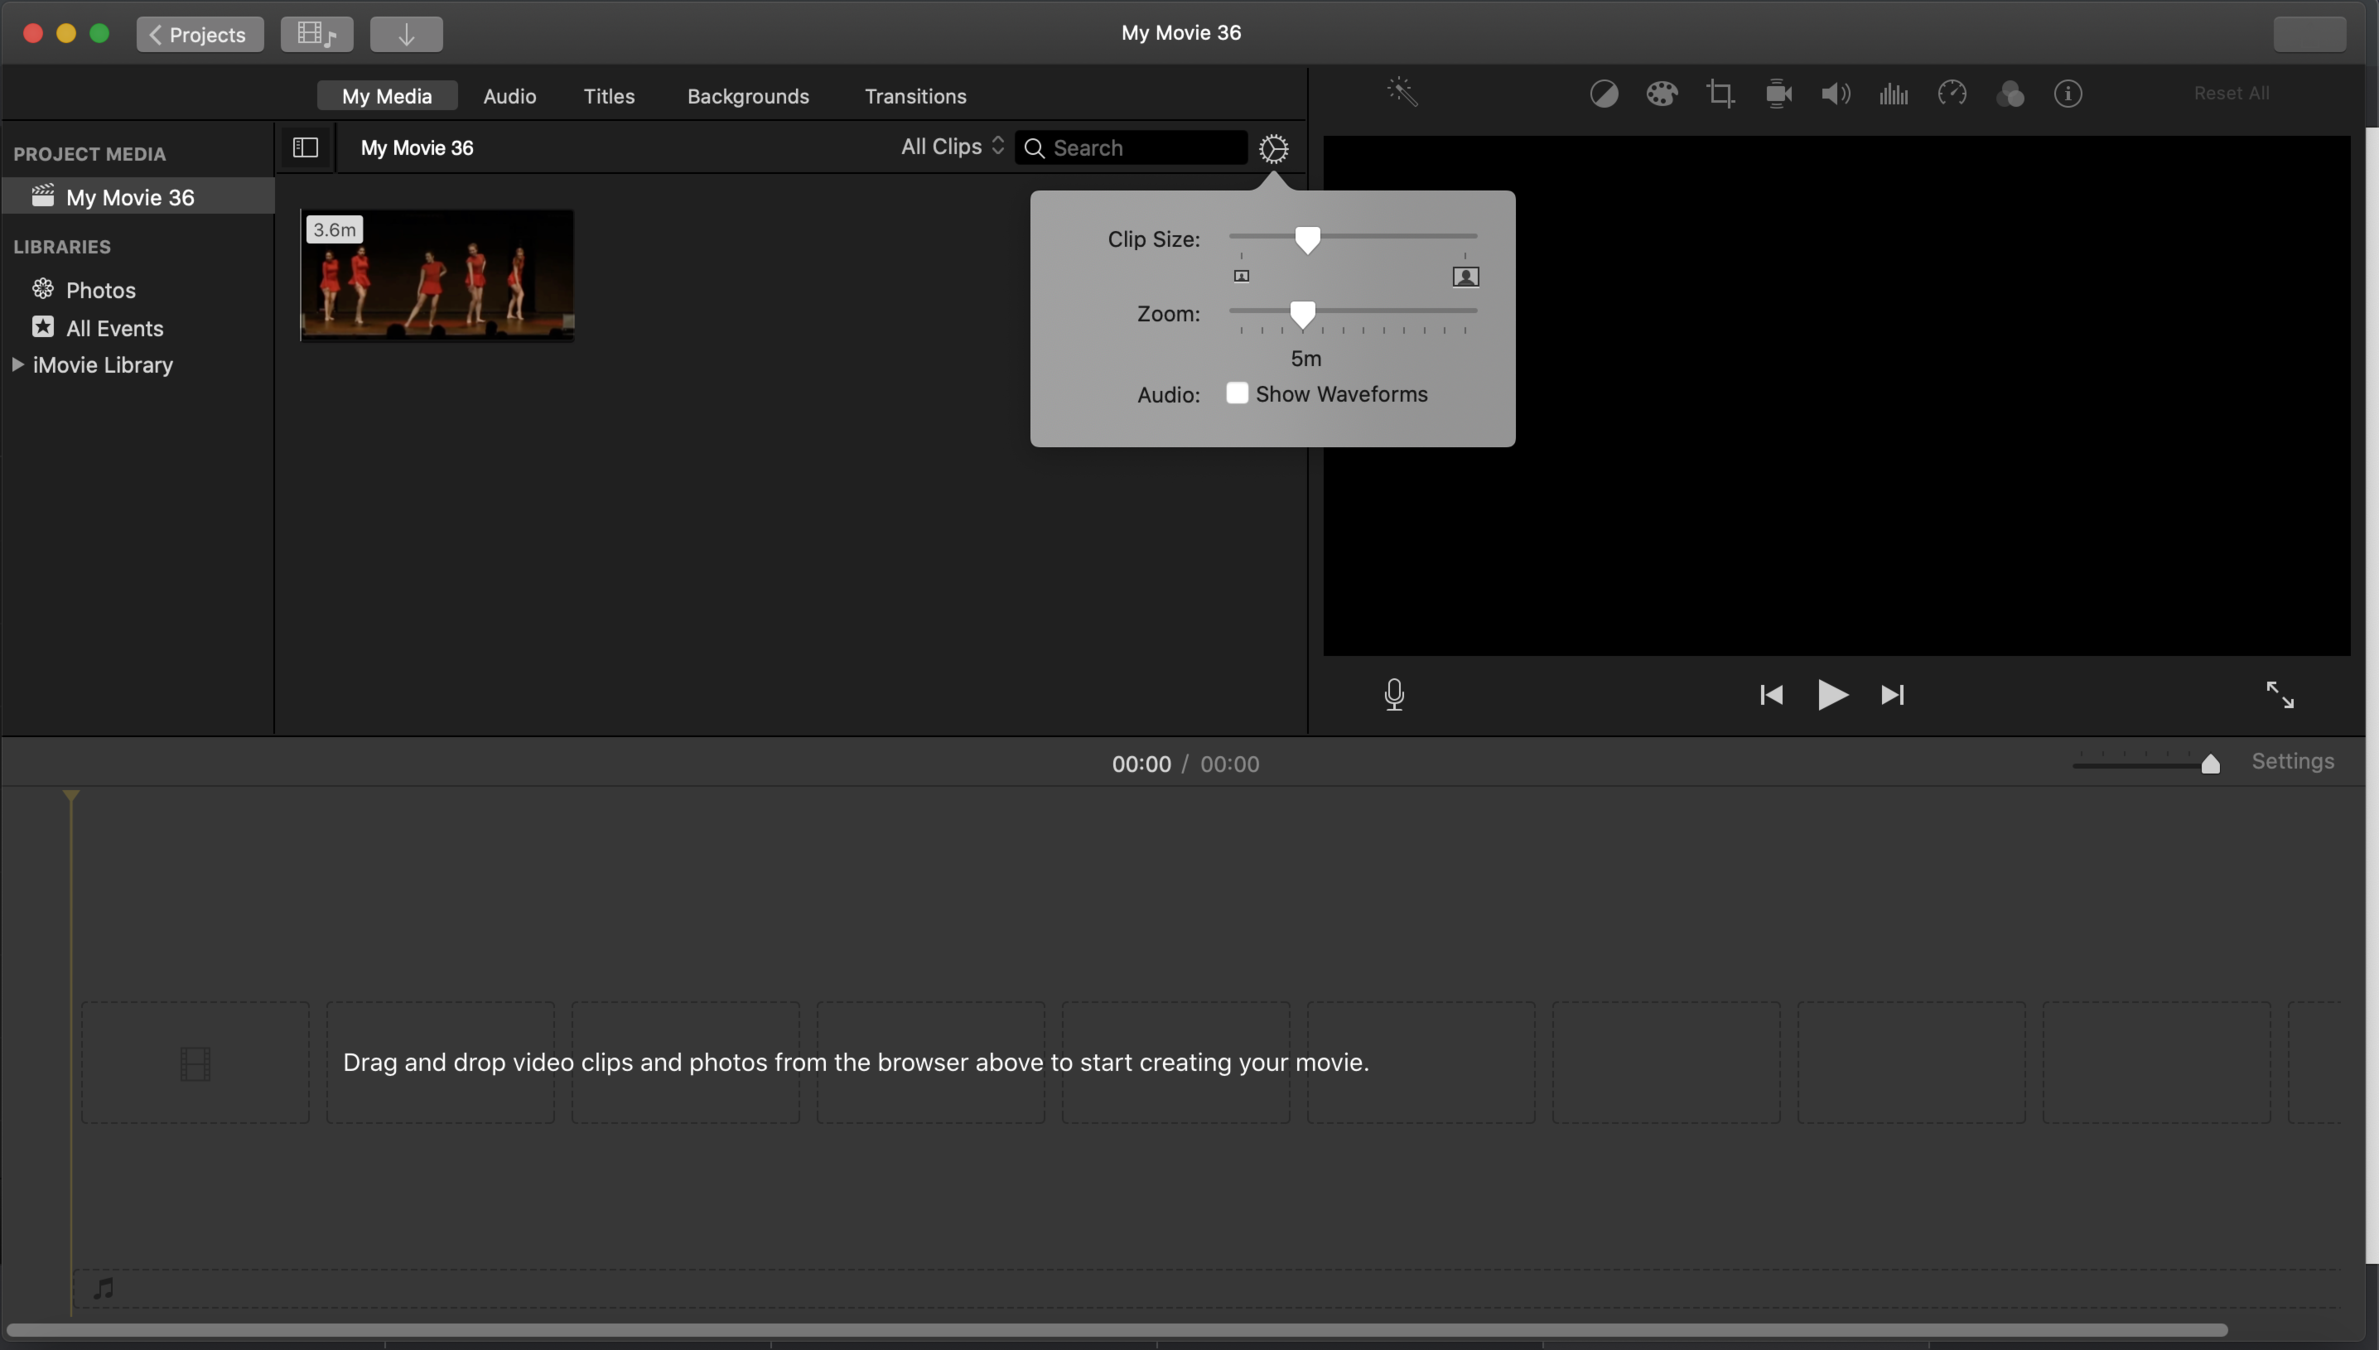
click here to adjust
BEGINNER:
iMovie: inserting footage onto the timeline
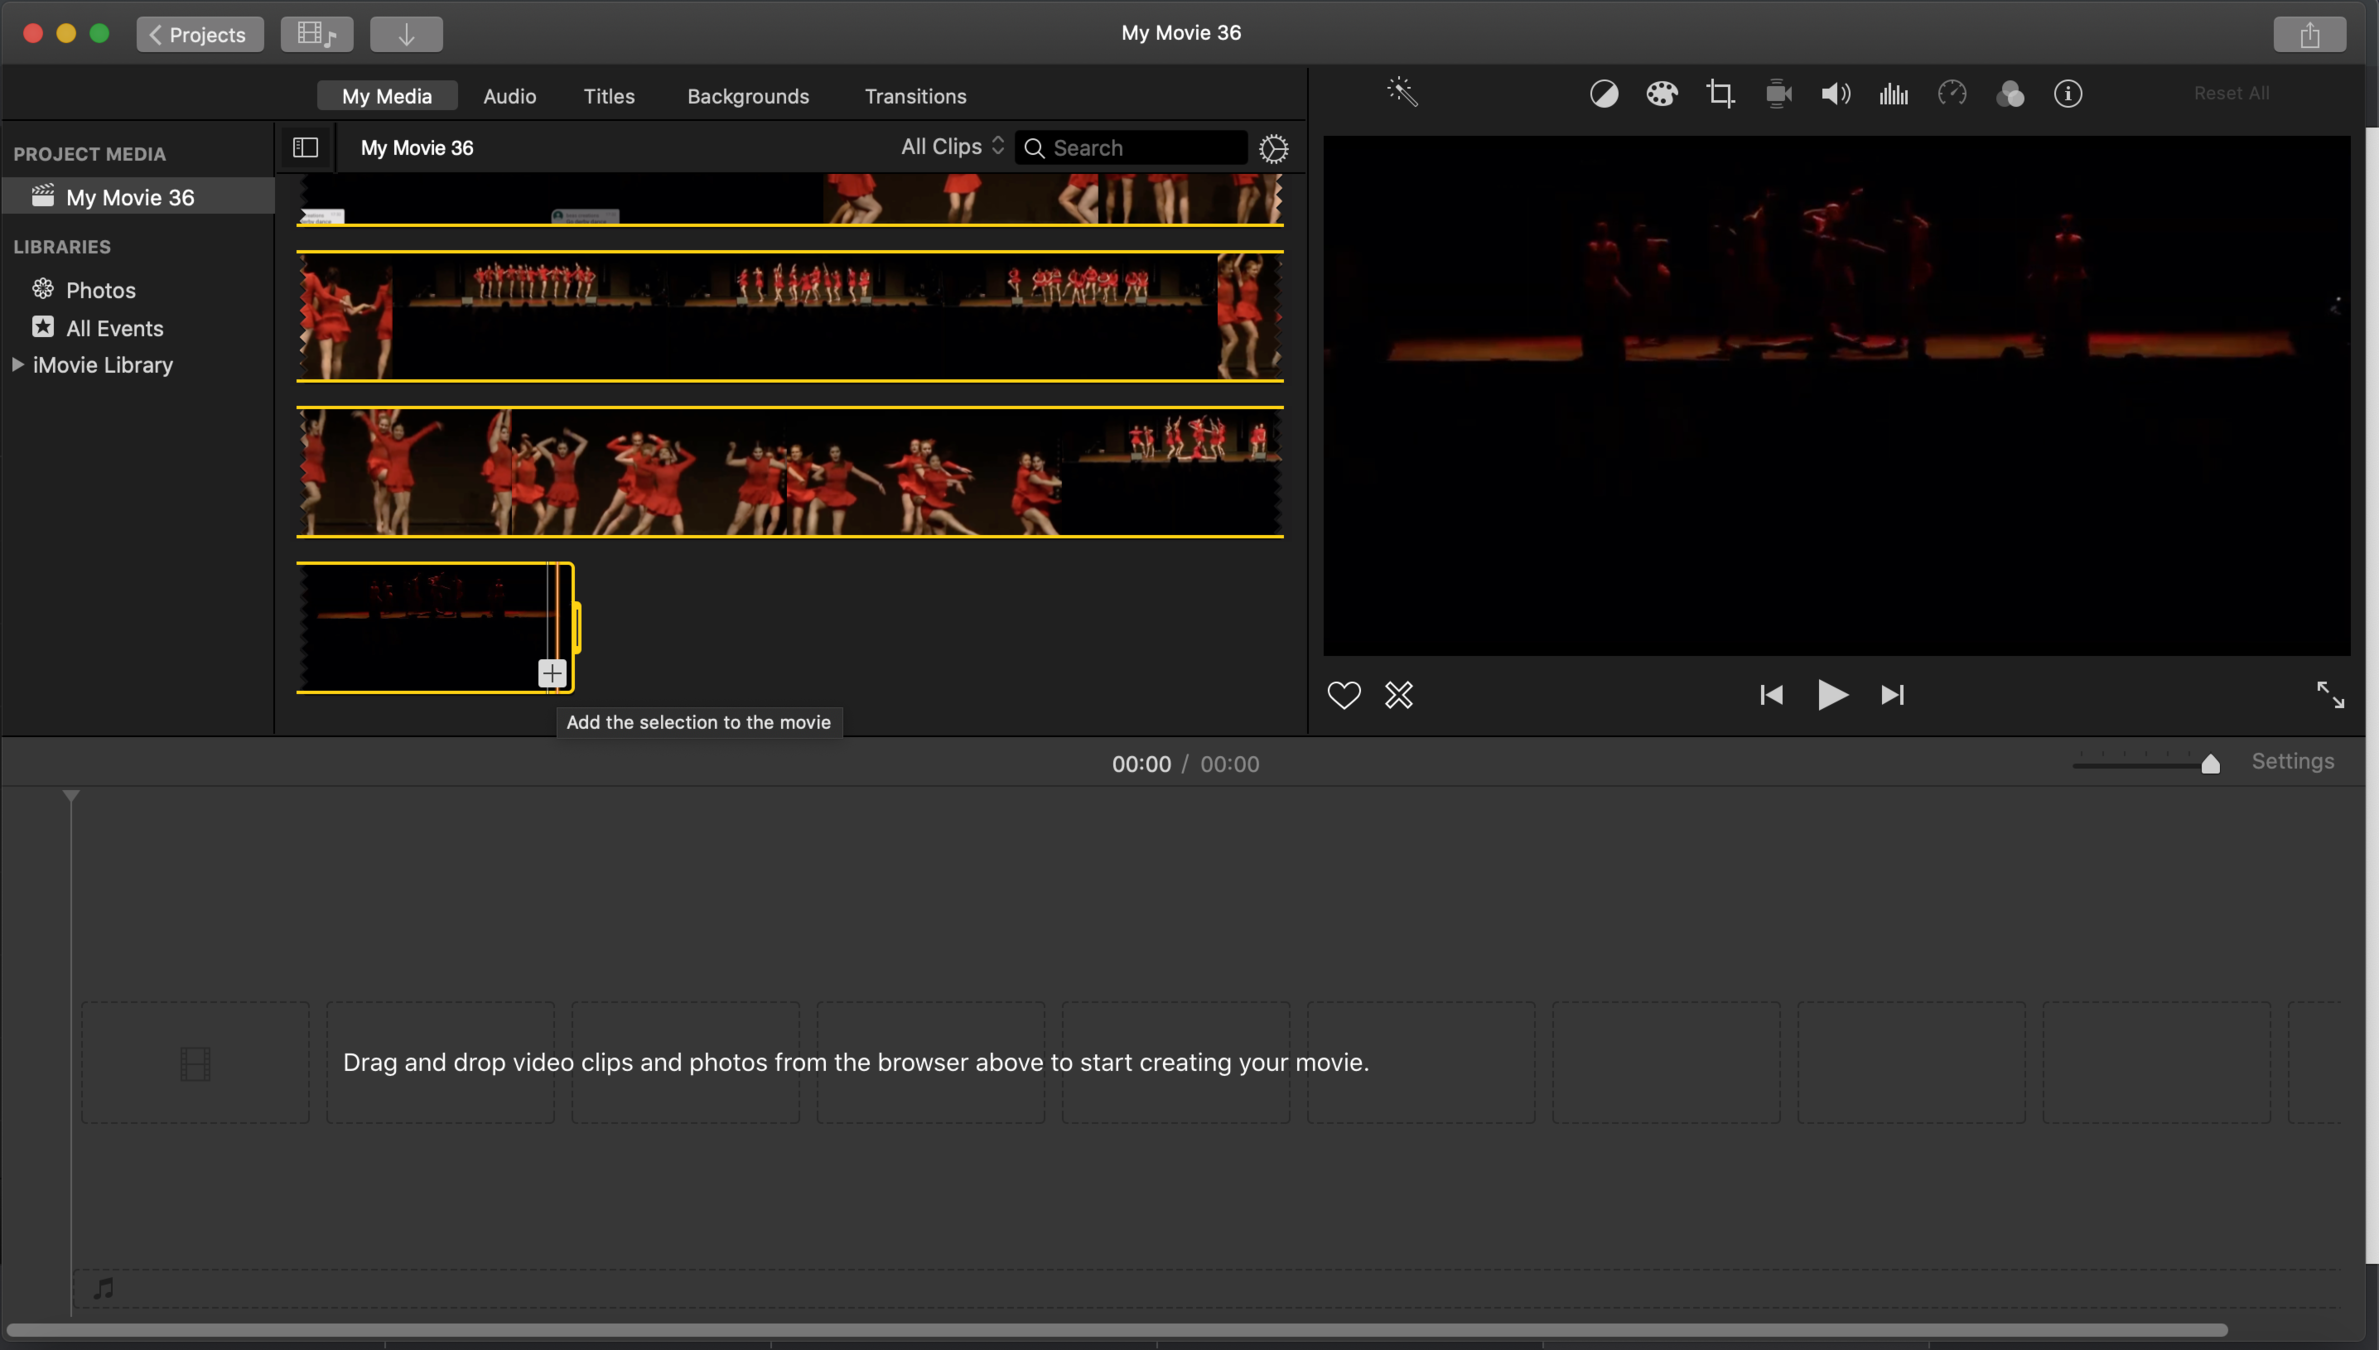
... in 3 ways.
Way 1
- select file and press "+"
- this adds the whole clip to your editing space
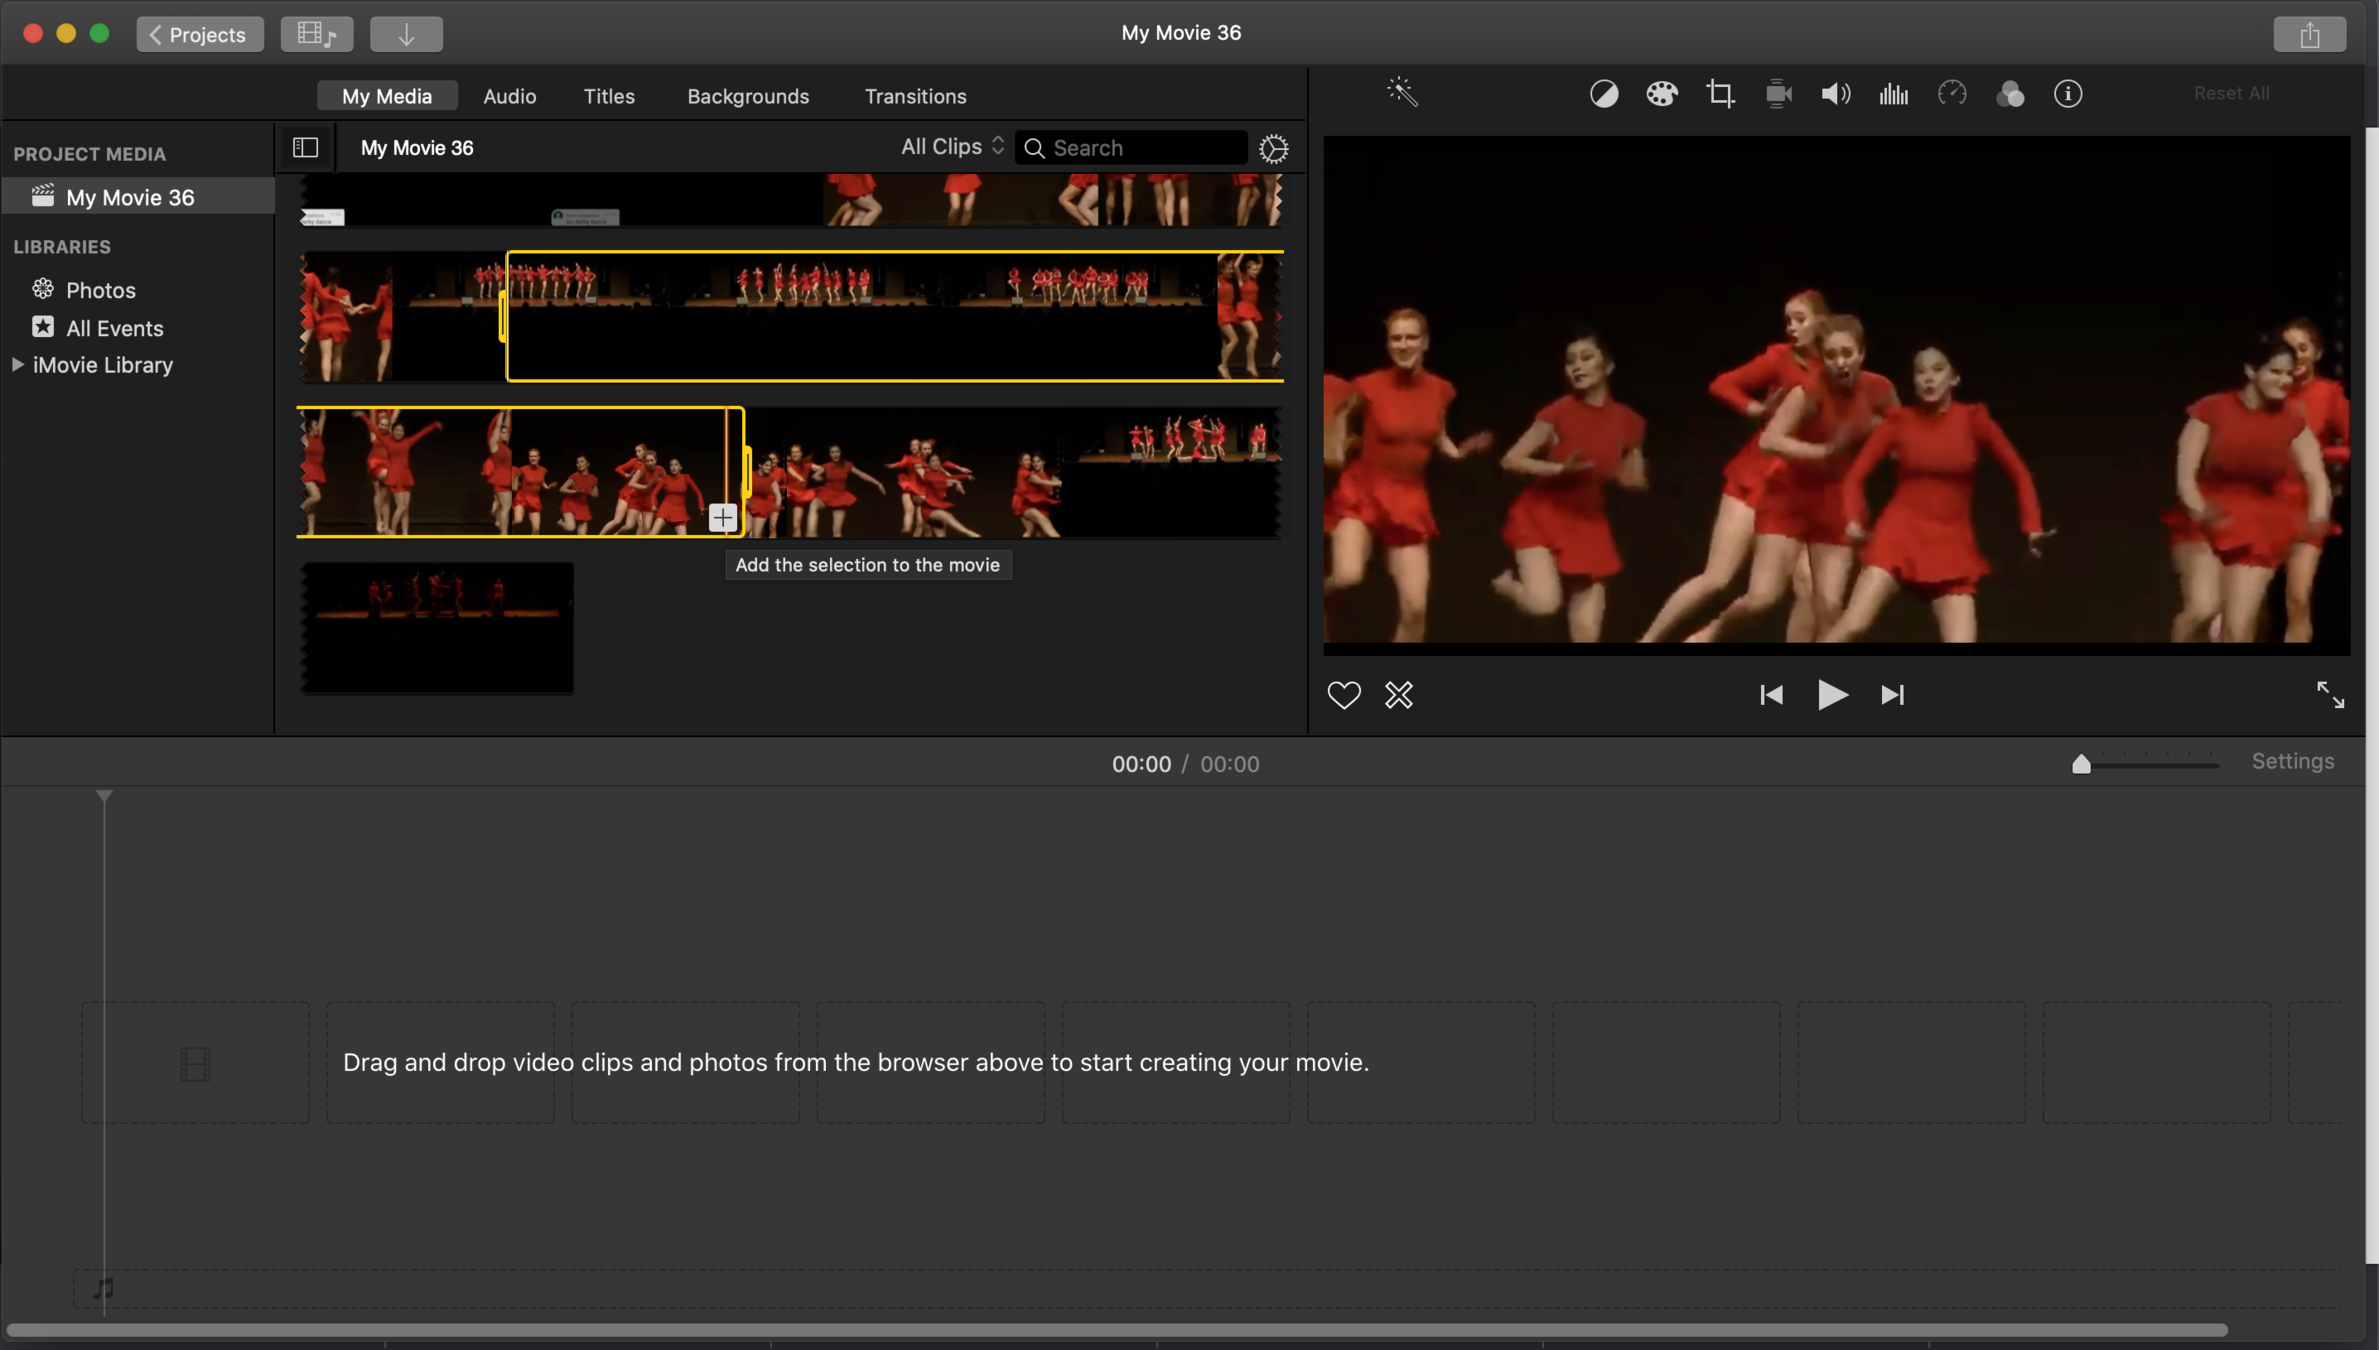
Way 2
- select file and move the yellow bar at the start and end of clip to the part of the clip you wanna add, press "+"
- this adds your selected section of the clip to your editing space
Way 3 (my favorite)
- hover your cursor over the clip and find from where you want to start selecting footage, press and hold the "r" key on your keyboard as you hold down and drag your cursor to the end of where you want to select footage, release the "r" key and cursor and press "+"
- this adds your selected section of the clip to your editing space

BEGINNER:
iMovie: understanding cutting and trimming
BEGINNER:
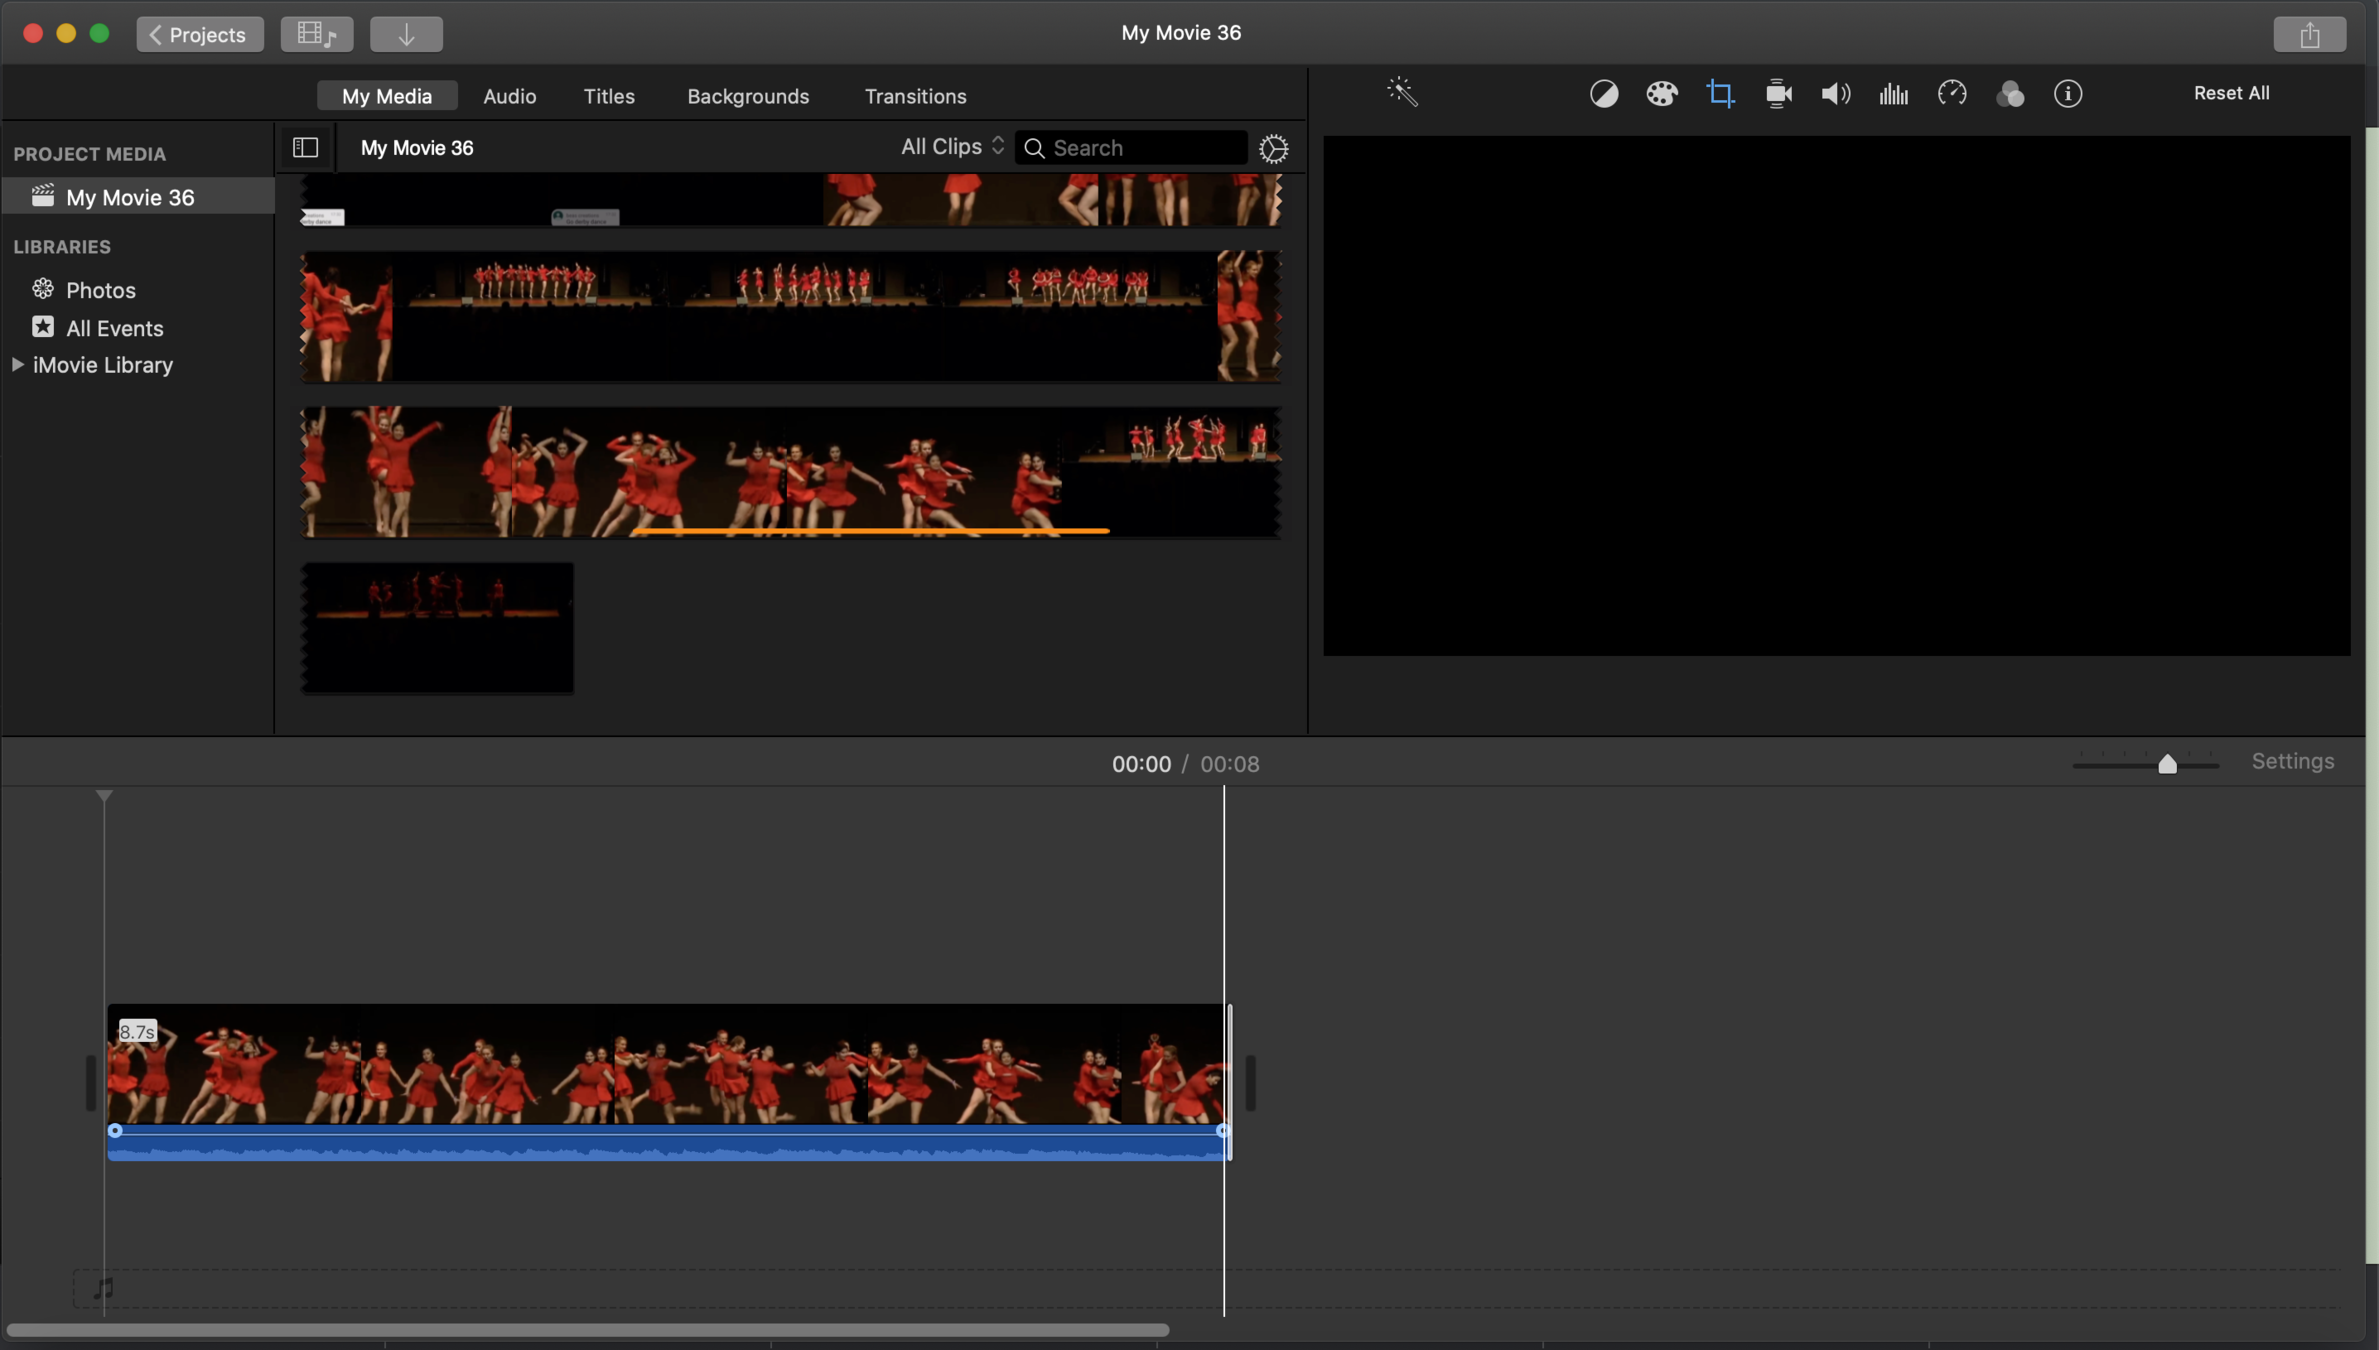
drag this way to trim
drag this way to extend
trim/extend your clip by clicking and dragging the start or end of the clip in your editing space
cut your clip by
cut your clip by hovering over where in the clip you want to make a cut and press "command(⌘)" and "b" at the same time
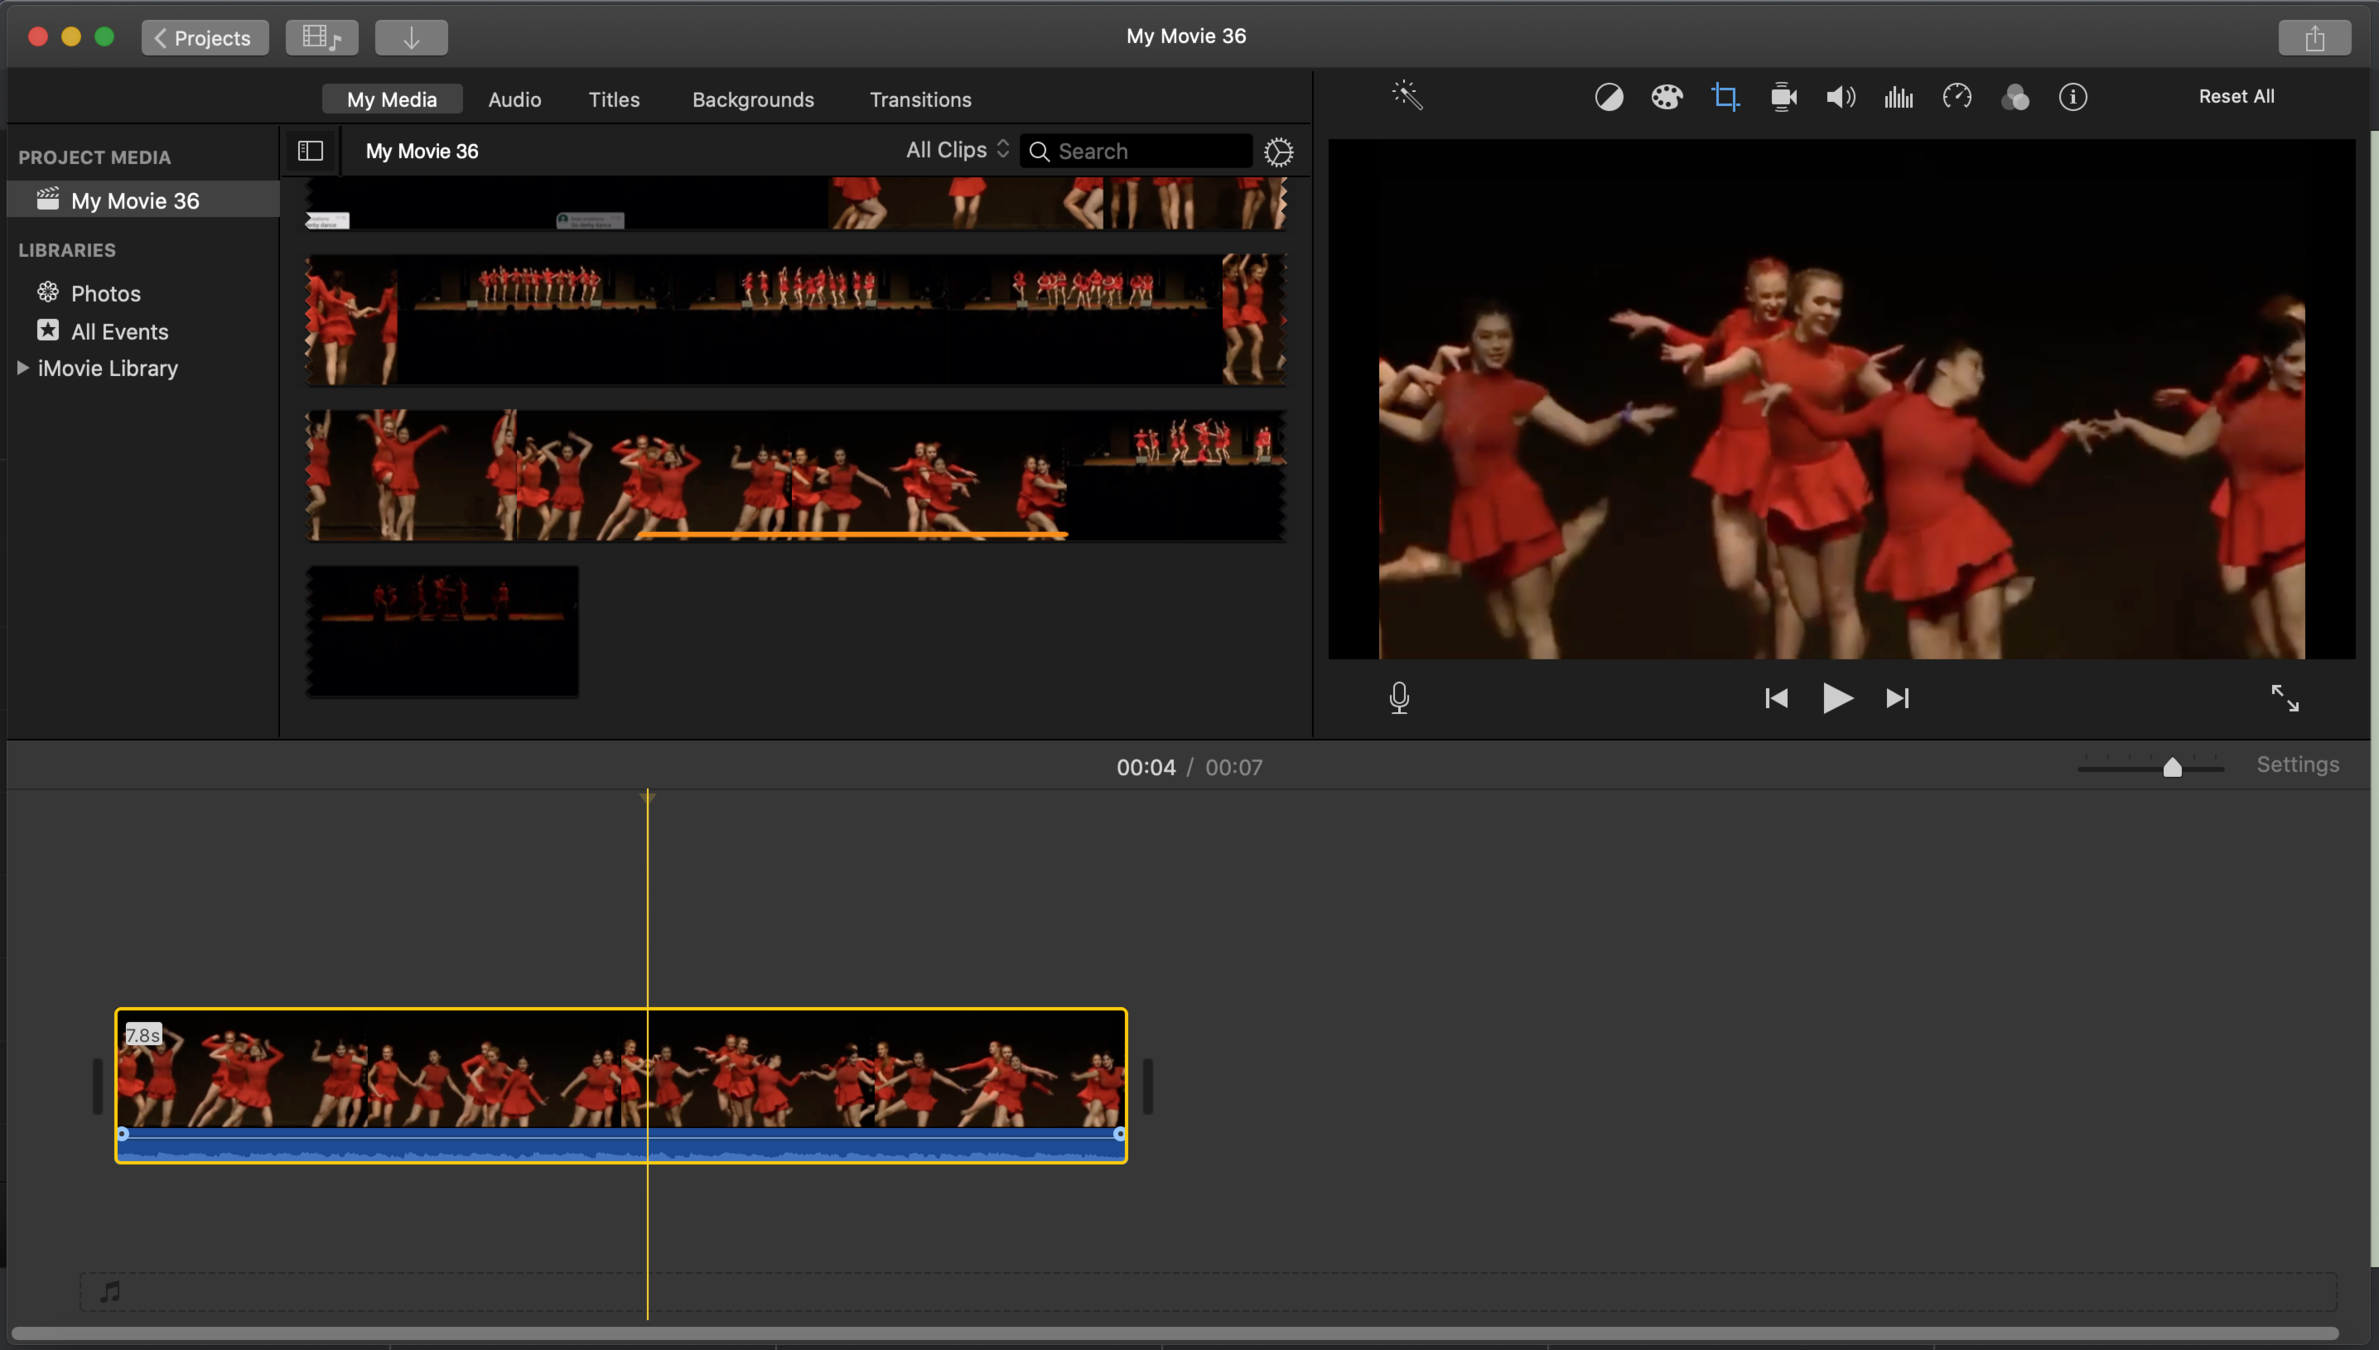
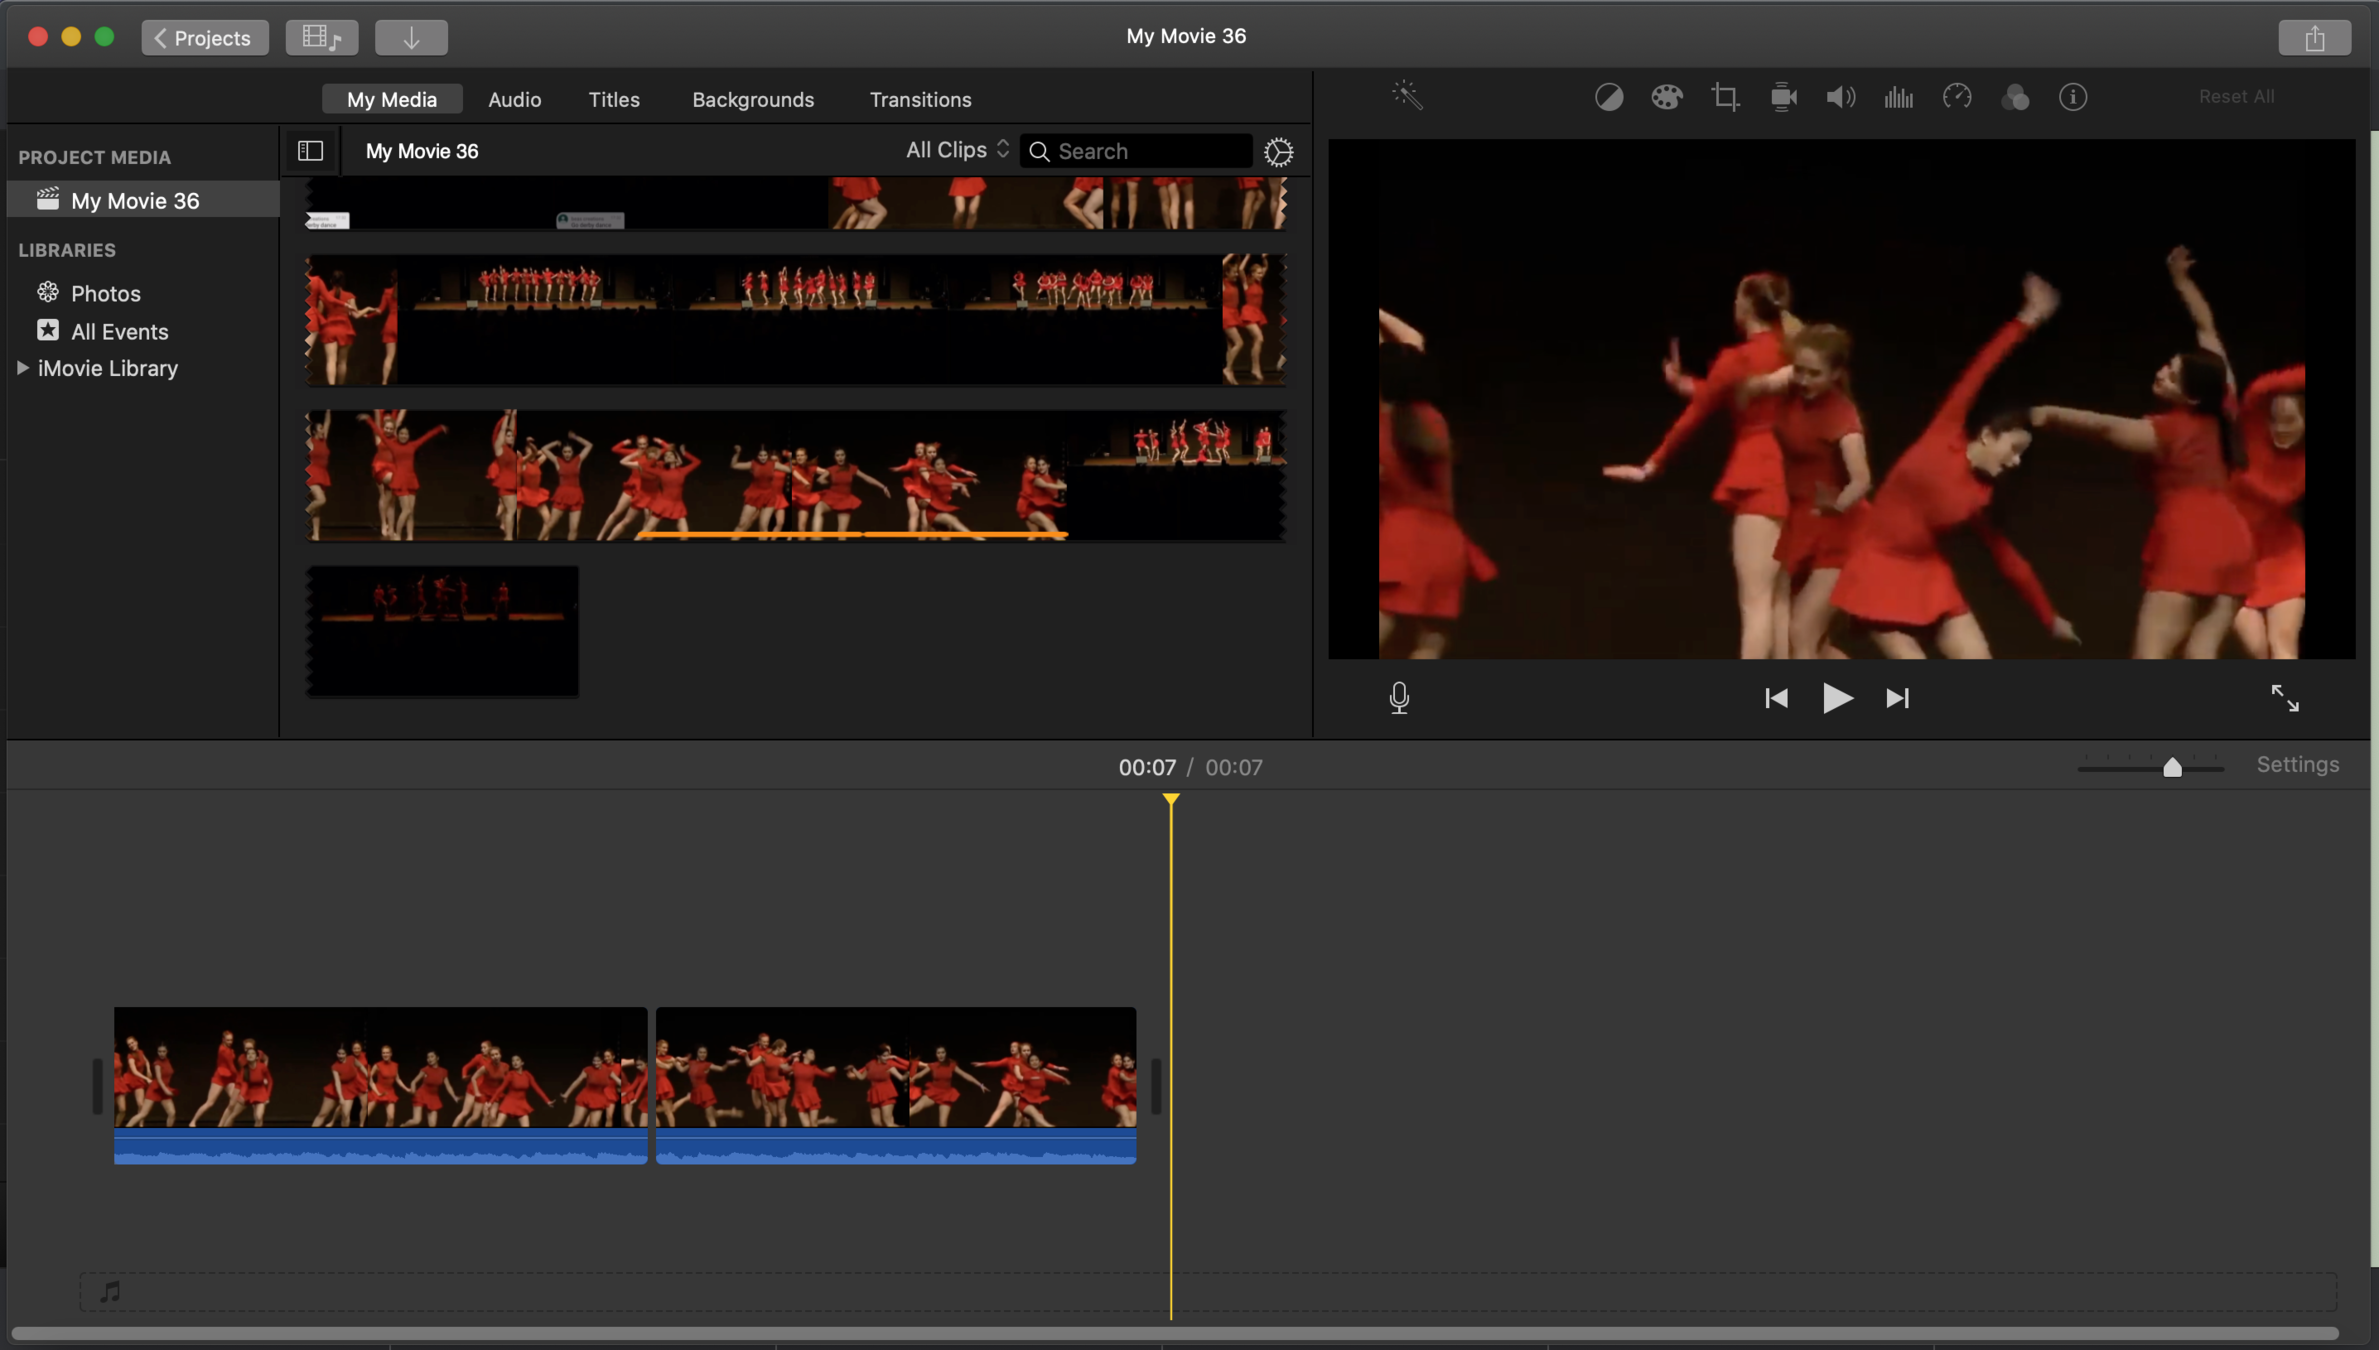
trim/extend your clip by clicking and dragging the start or end of the clip in your editing space
iMovie: adjusting speed, adjusting sound, cropping frame, changing colours of a clip
BEGINNER:
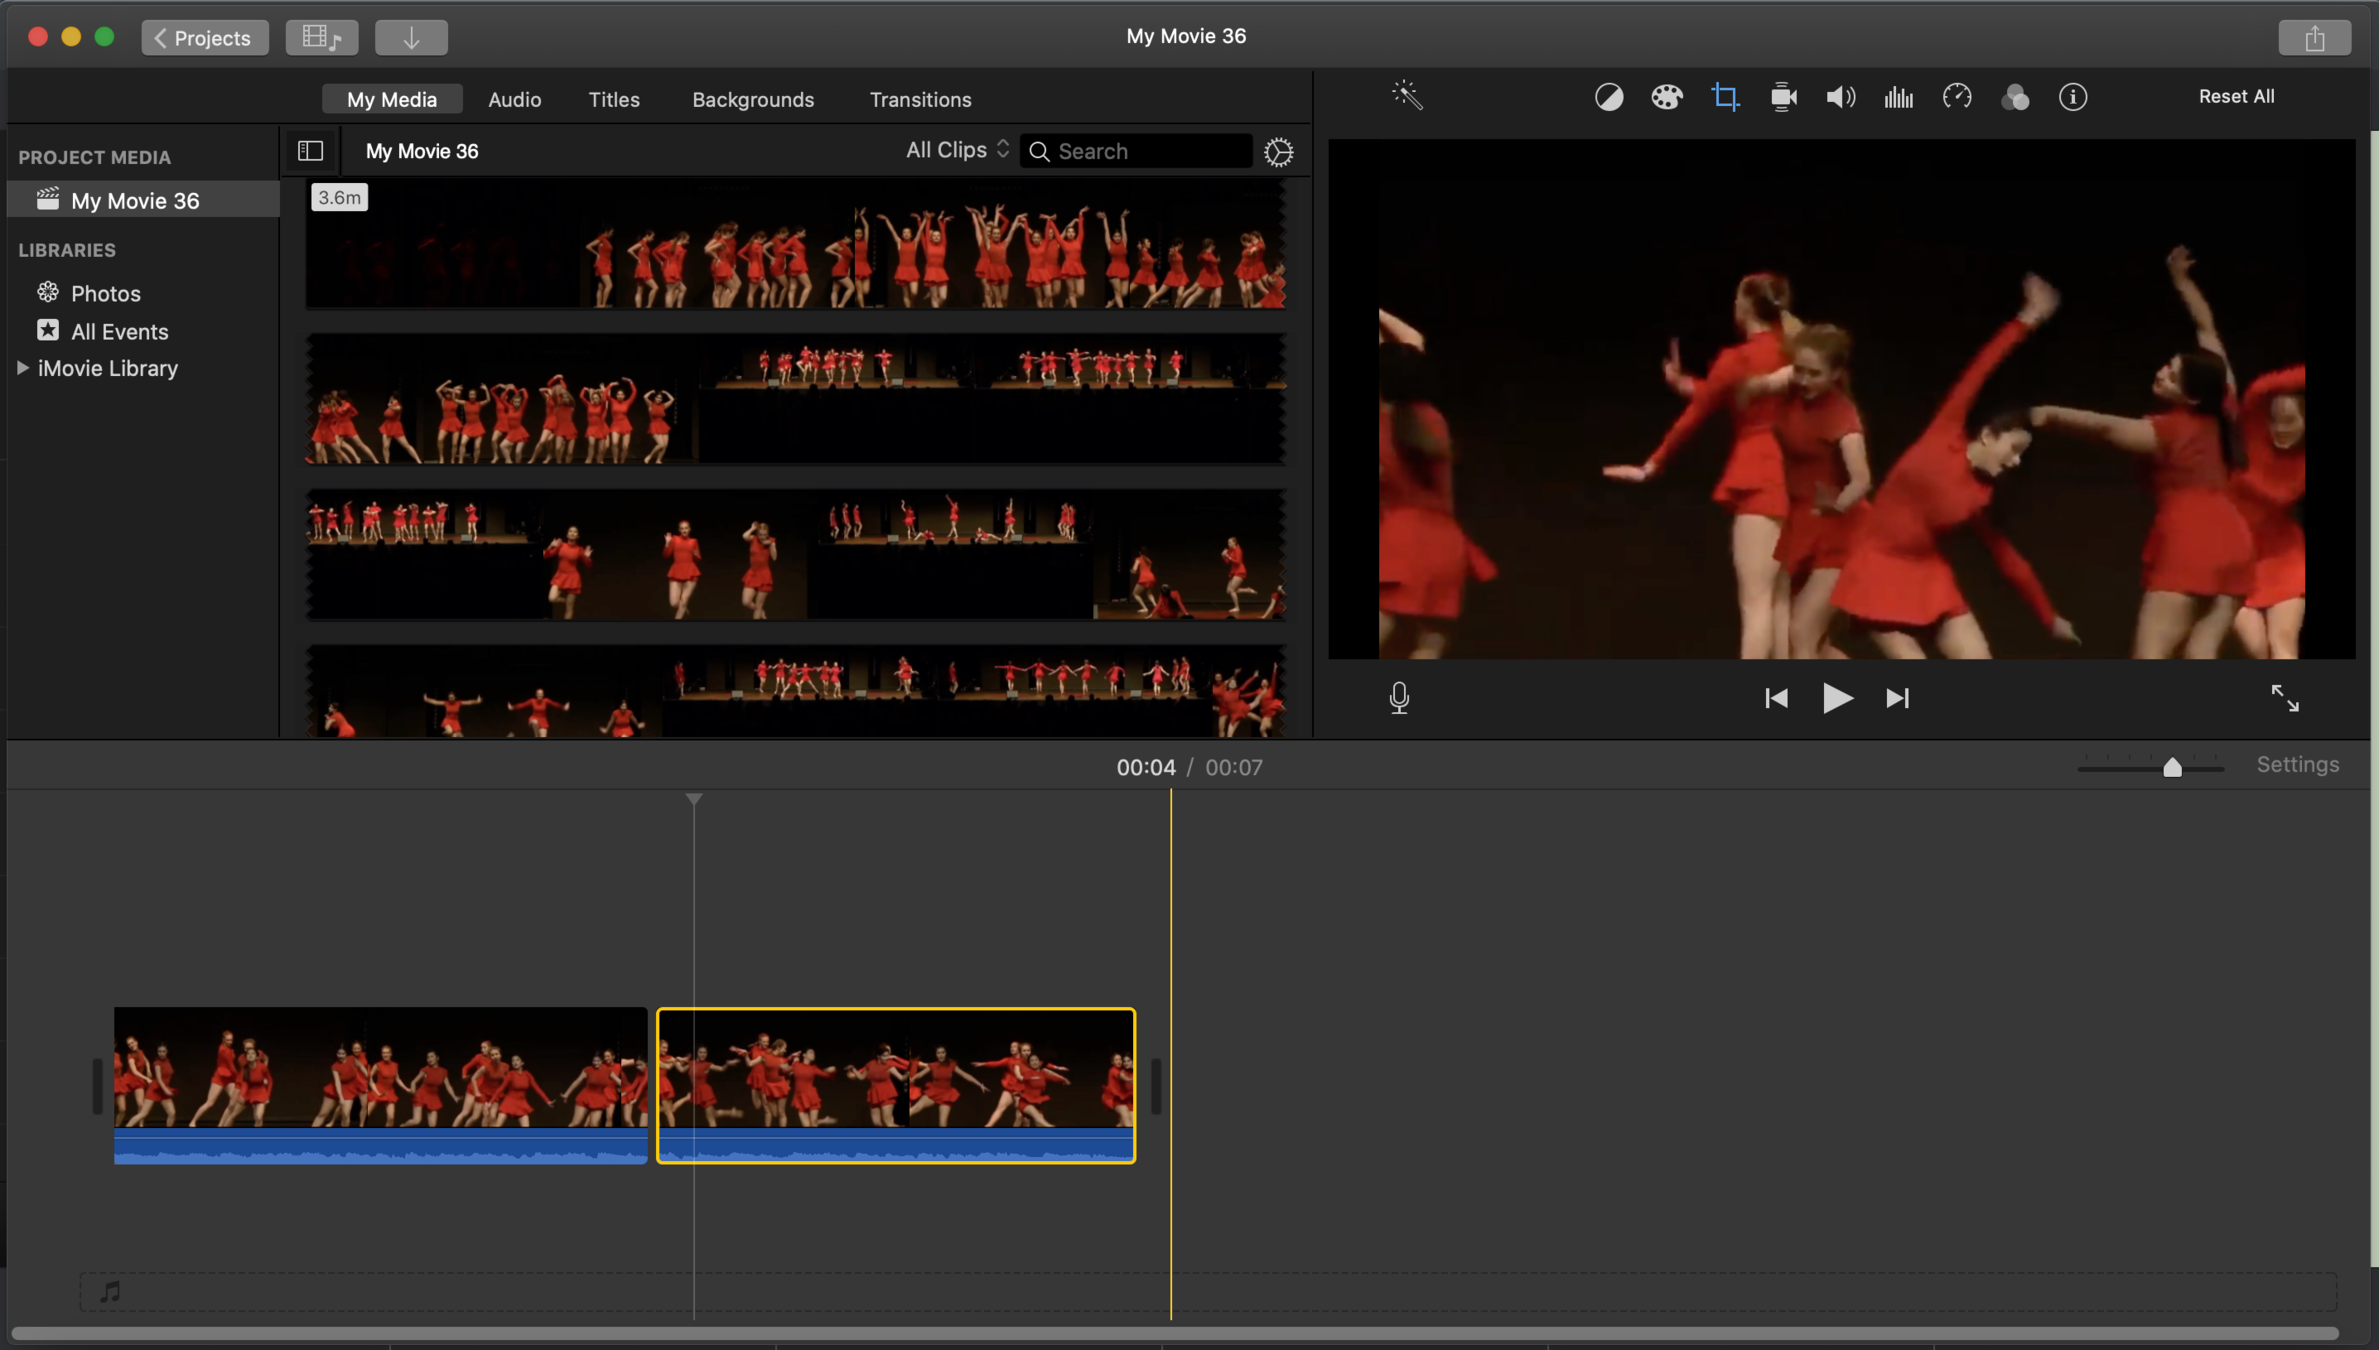
select a clip
use this panel to make changes to that clip

stabilize shaky video (good for videos where you filmed handheld )

change color
cropping
volume
( it often makes sense to mute the sound of the clip if you are adding a separate song file)
reduce background noise
adjust speed
add effects
iMovie: adding titles, backgrounds, transitions, sound effects
BEGINNER:
- here you find templates for sound effects, titles, backgrounds, transitions
- they can be cut and trimmed like video files
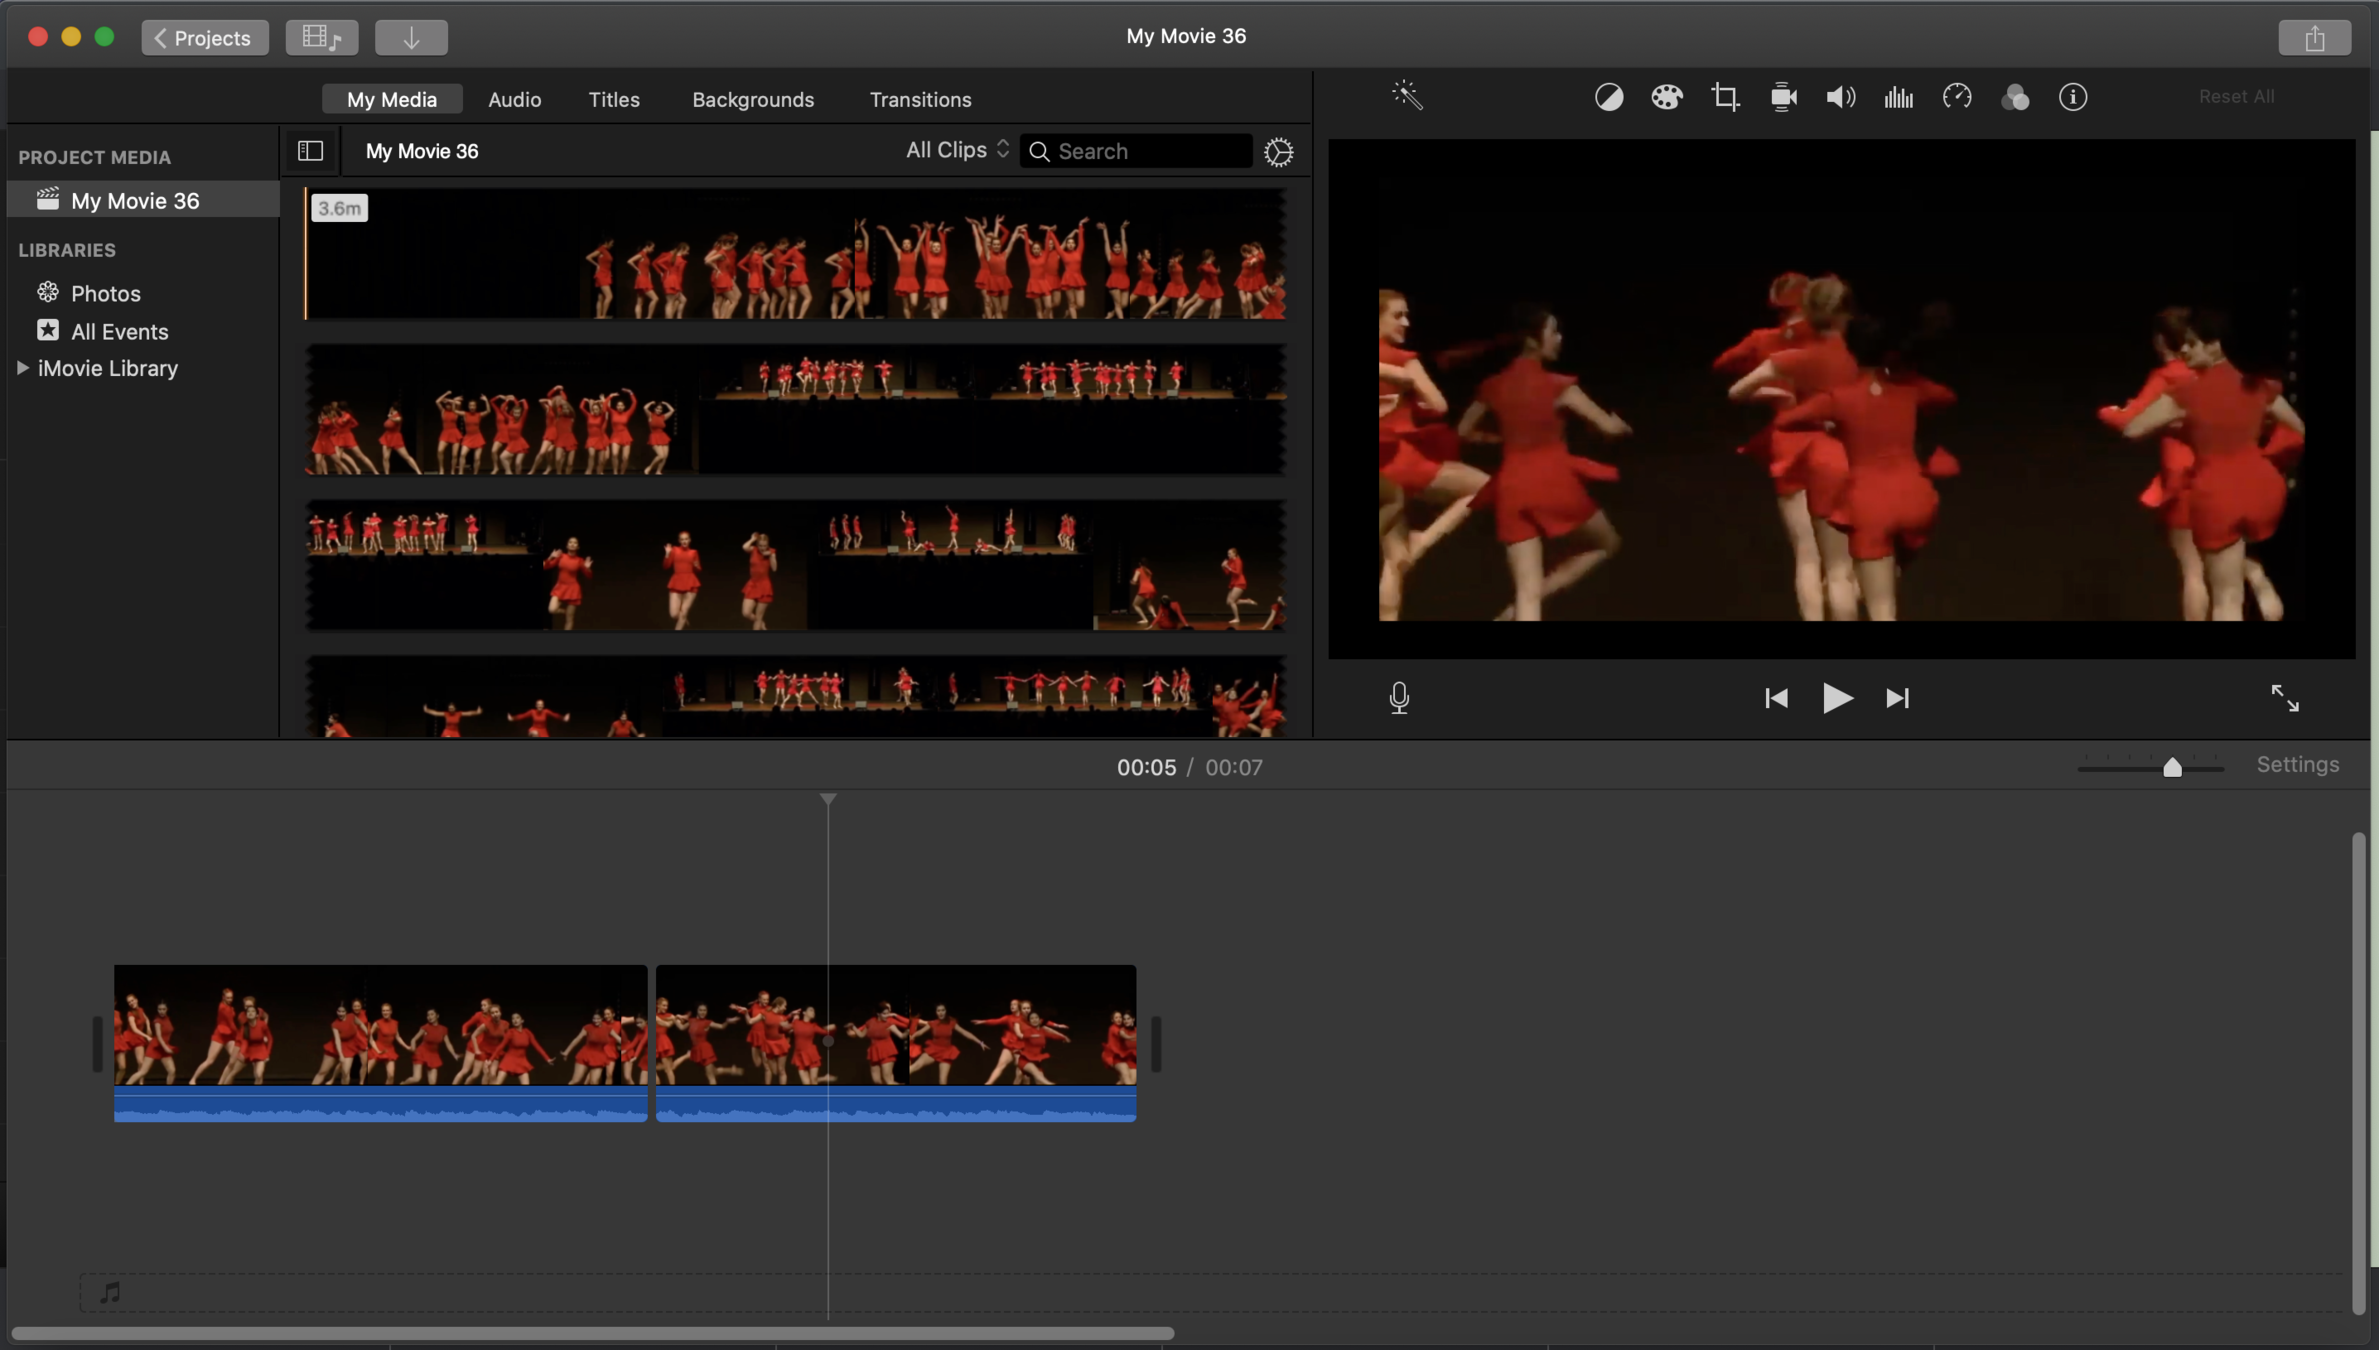
sound effects
- select template
- drag and drop BELOW video clip or in audio lane
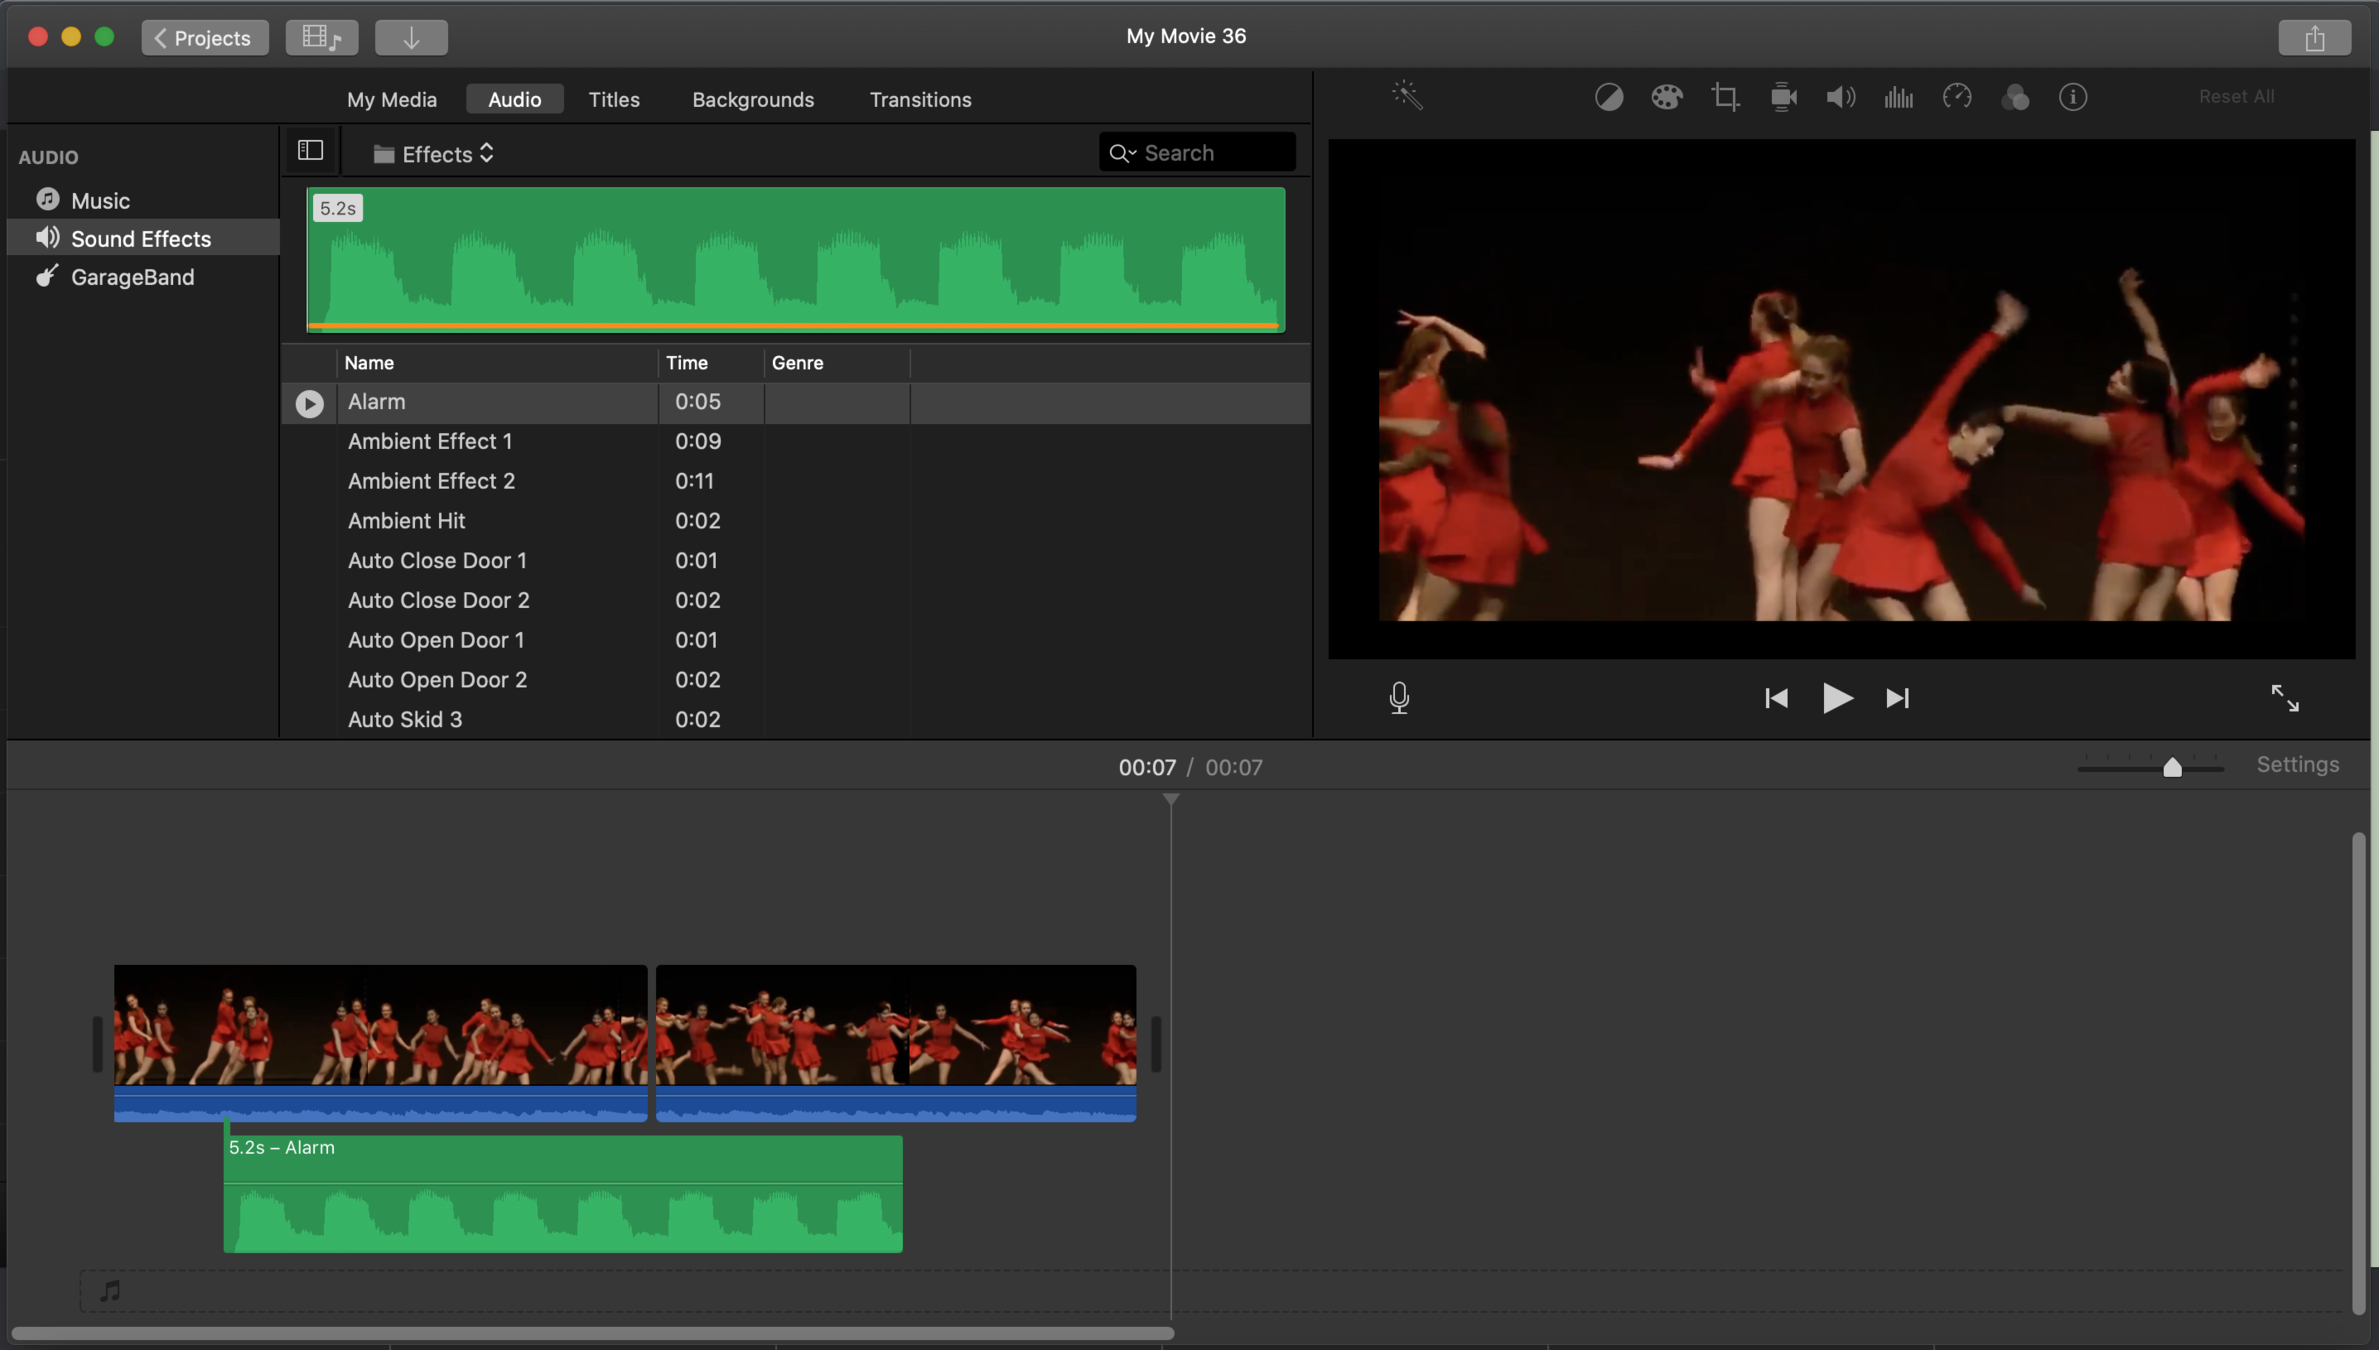
sound effects
- select template
- drag and drop BELOW video clip or in audio lane
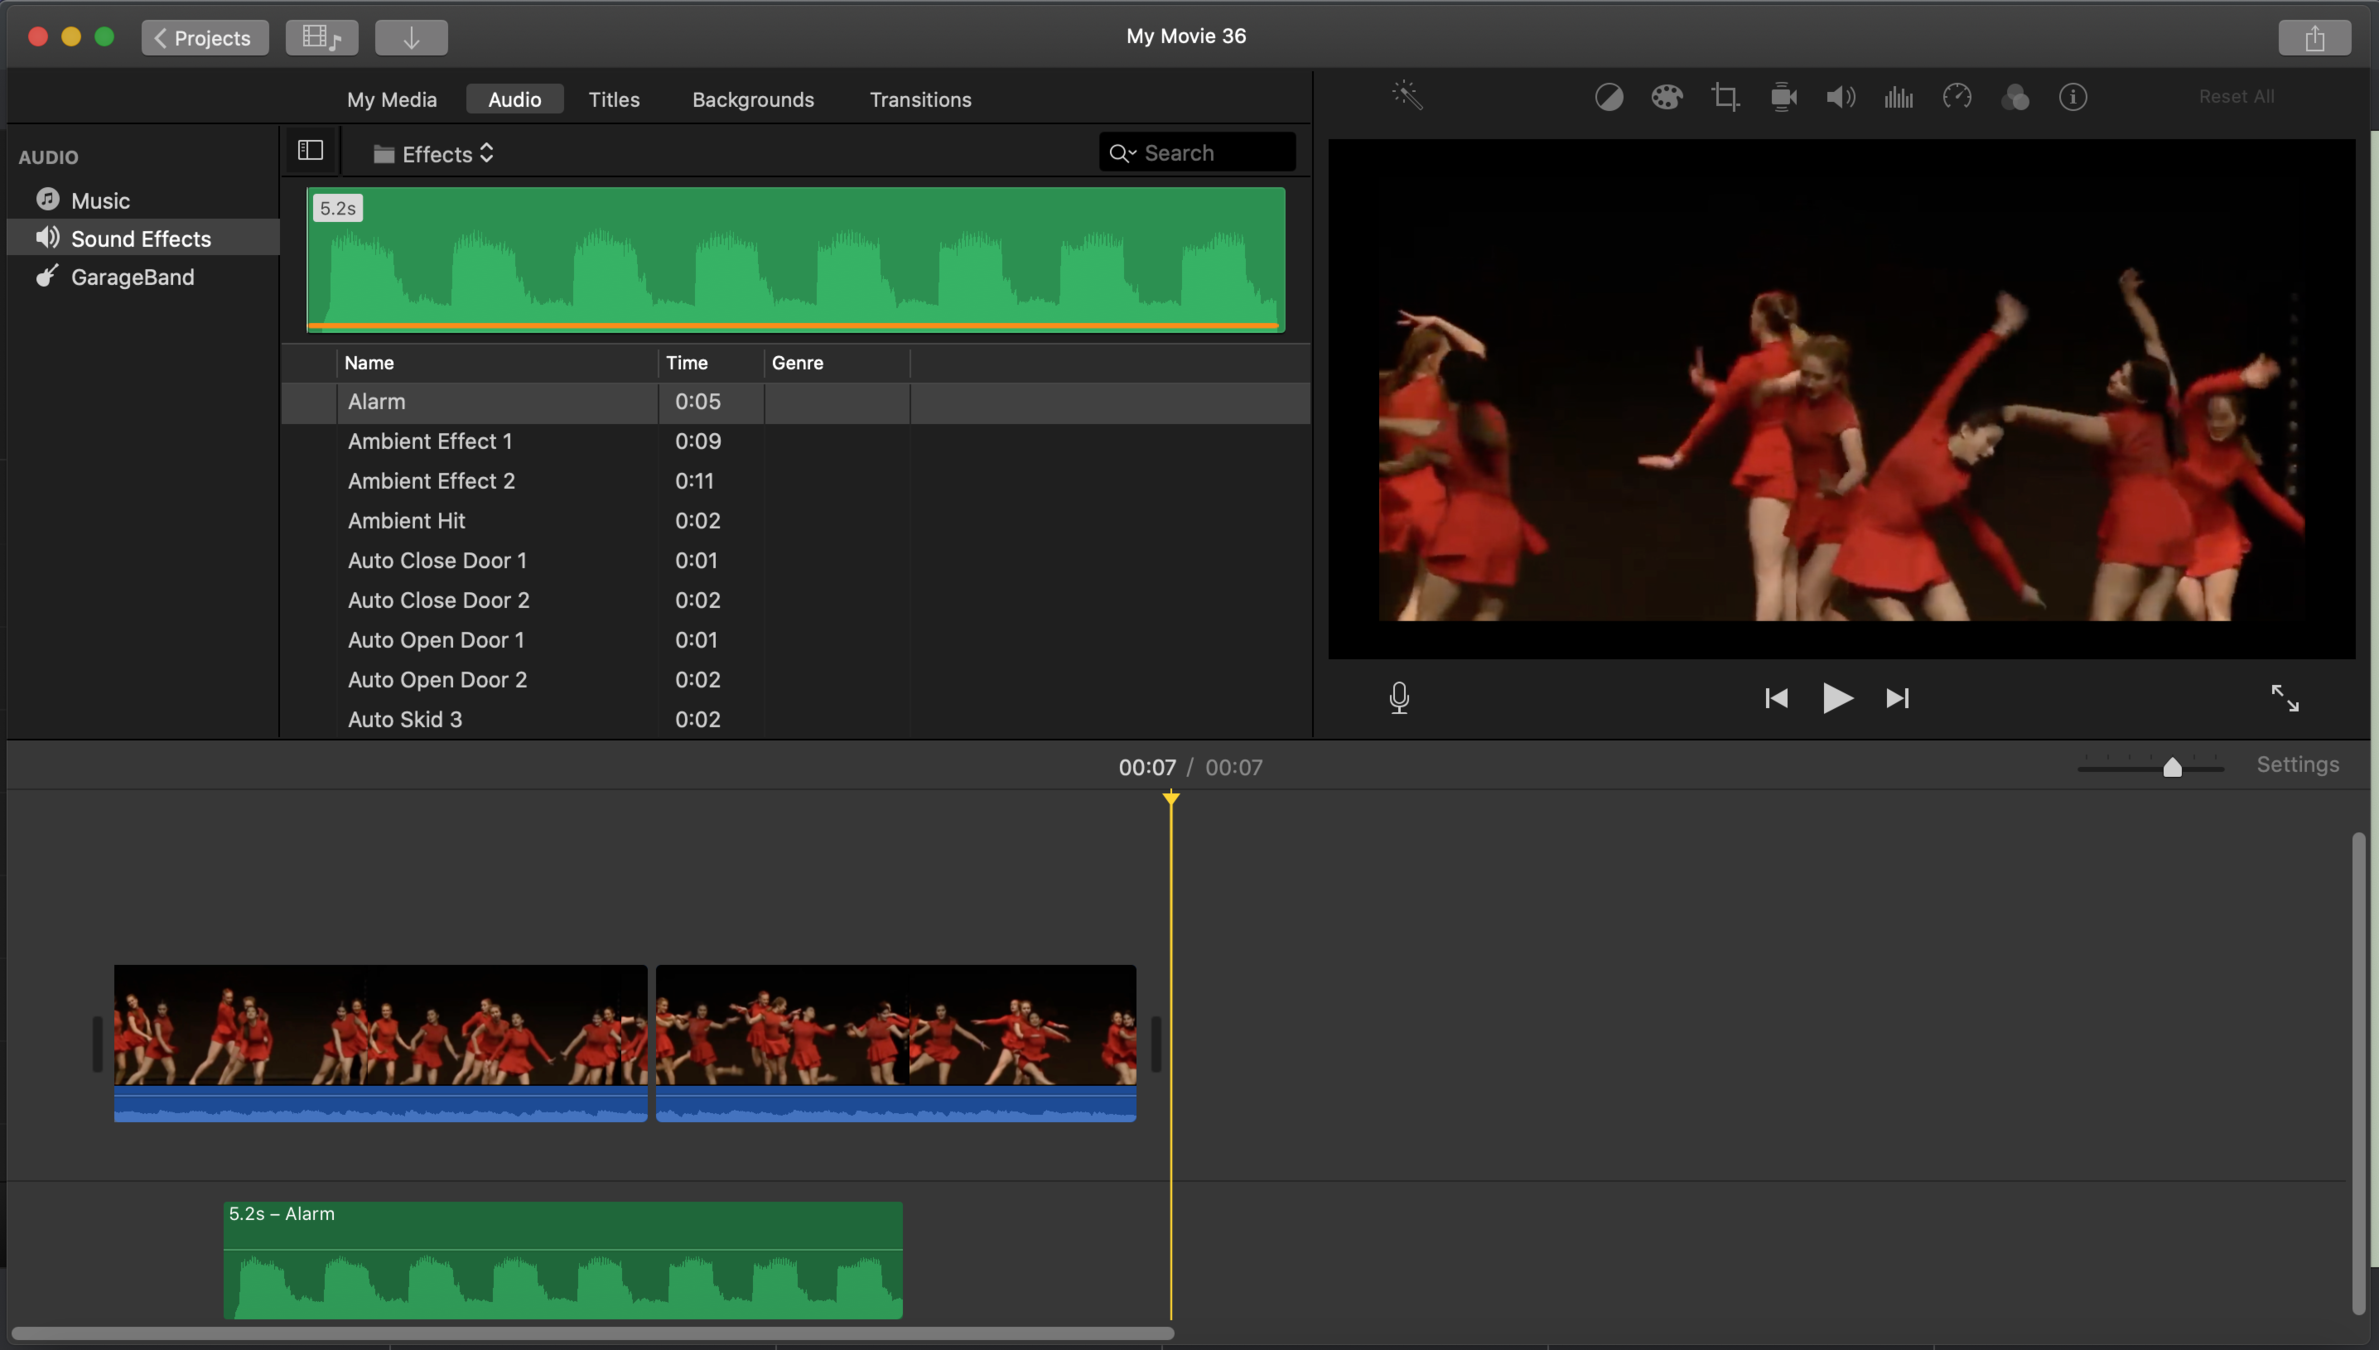
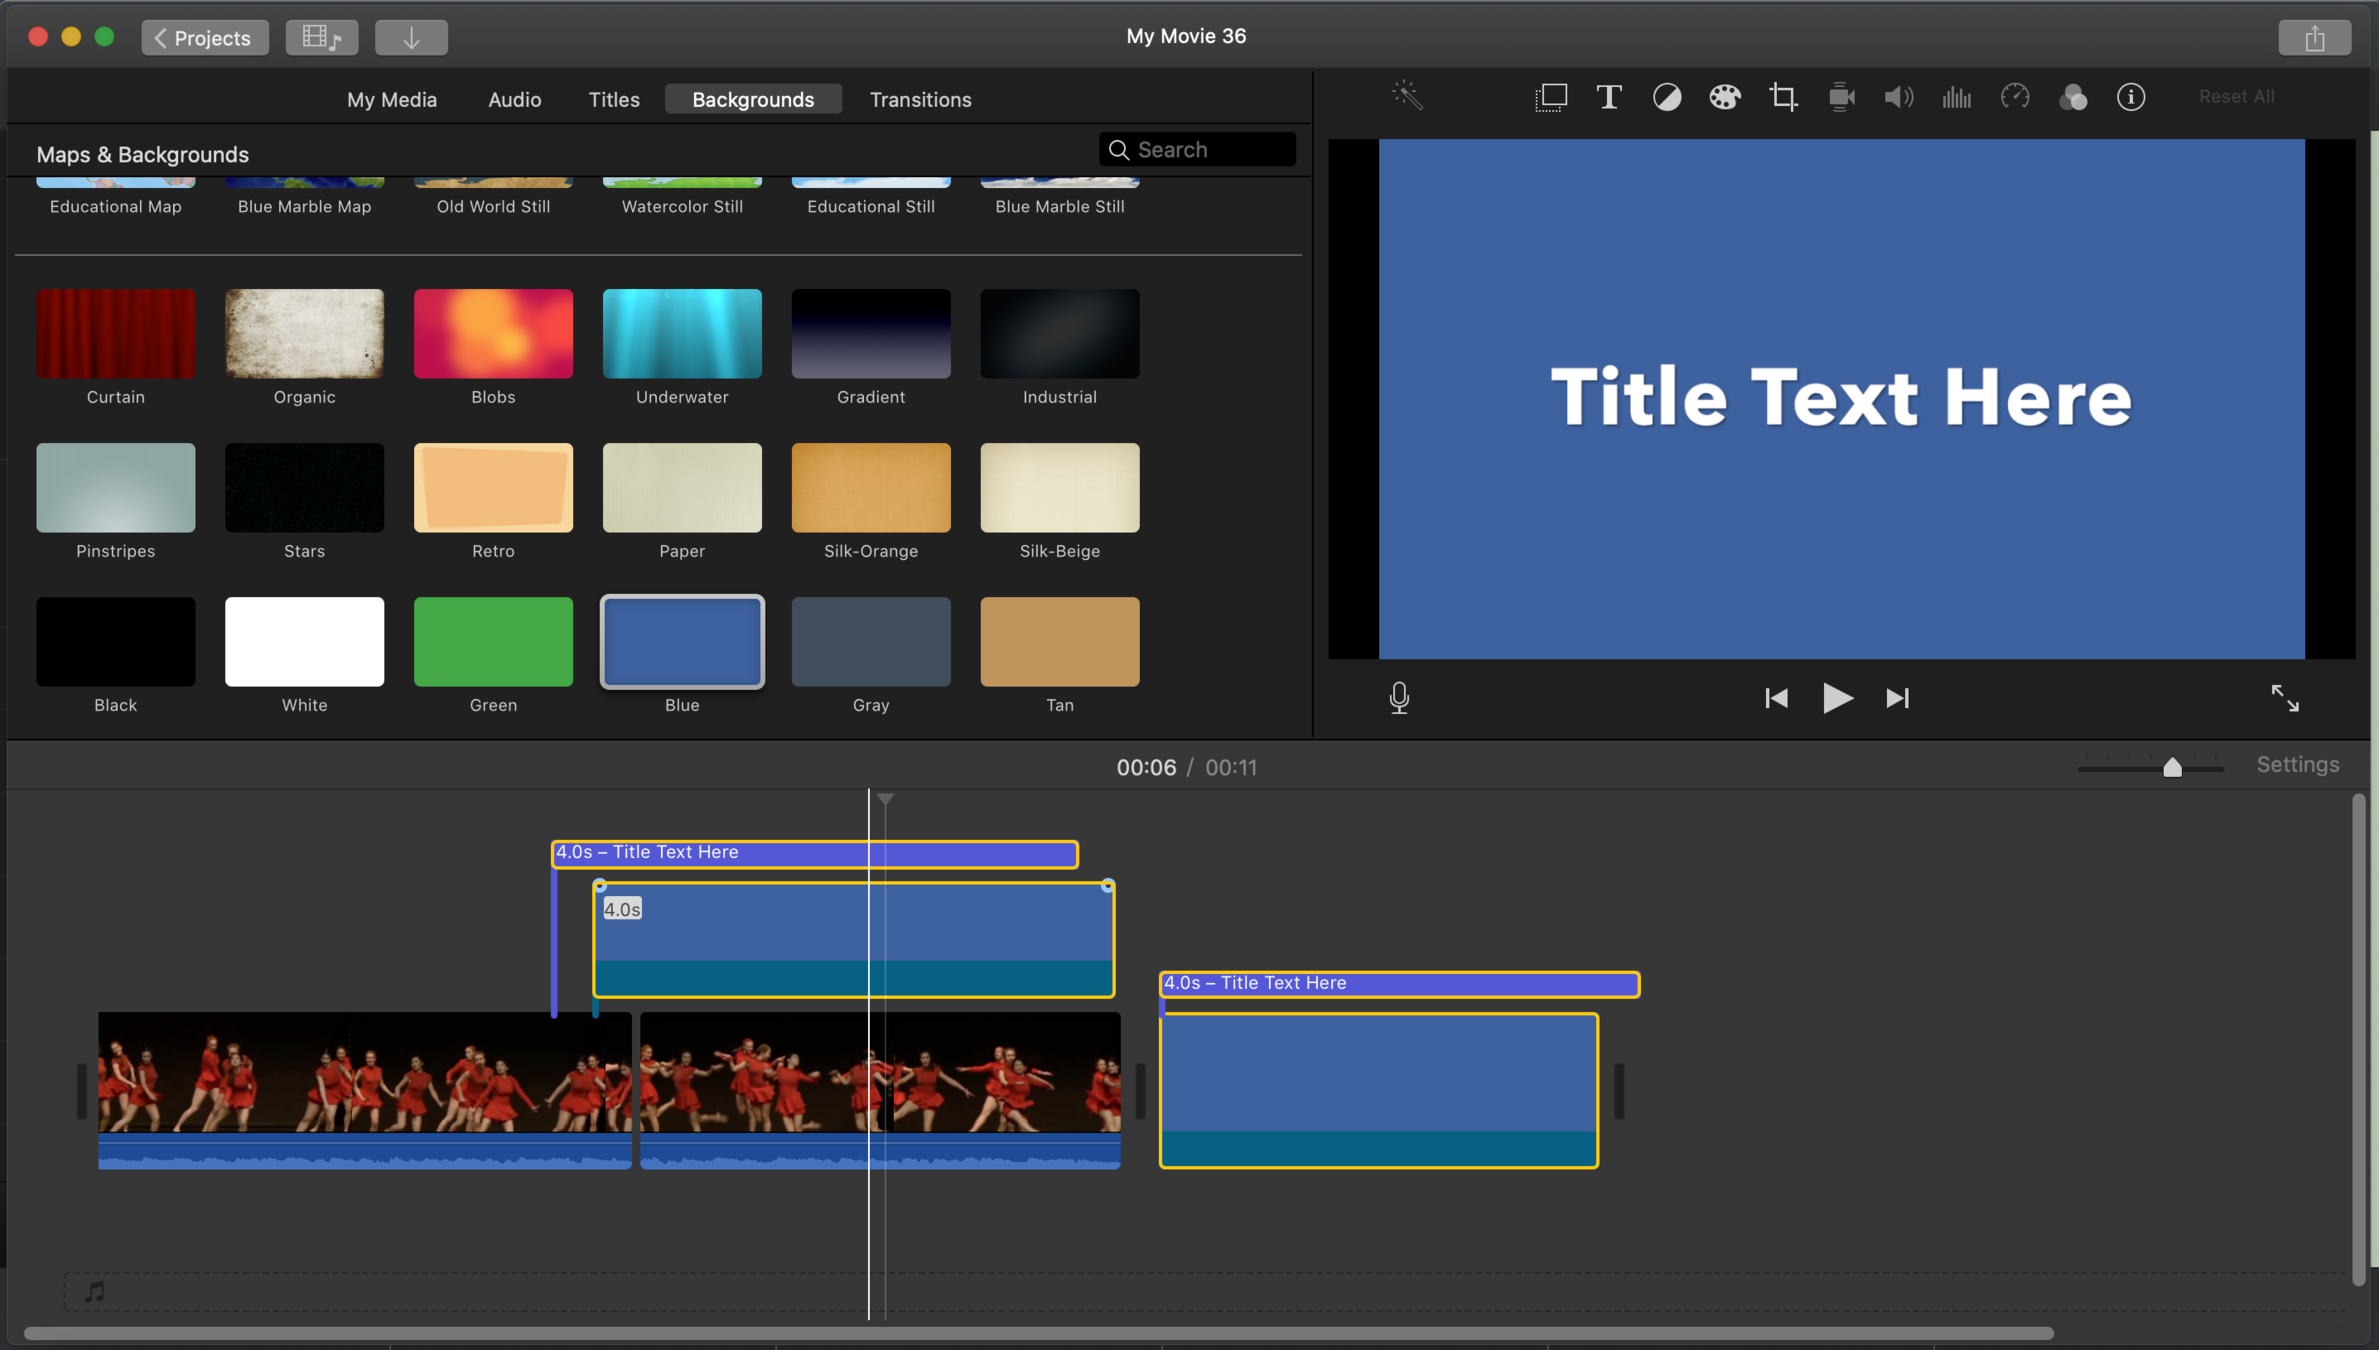
titles and backgrounds
- select template
- drag and drop ABOVE or BESIDE video clip
- can be layered
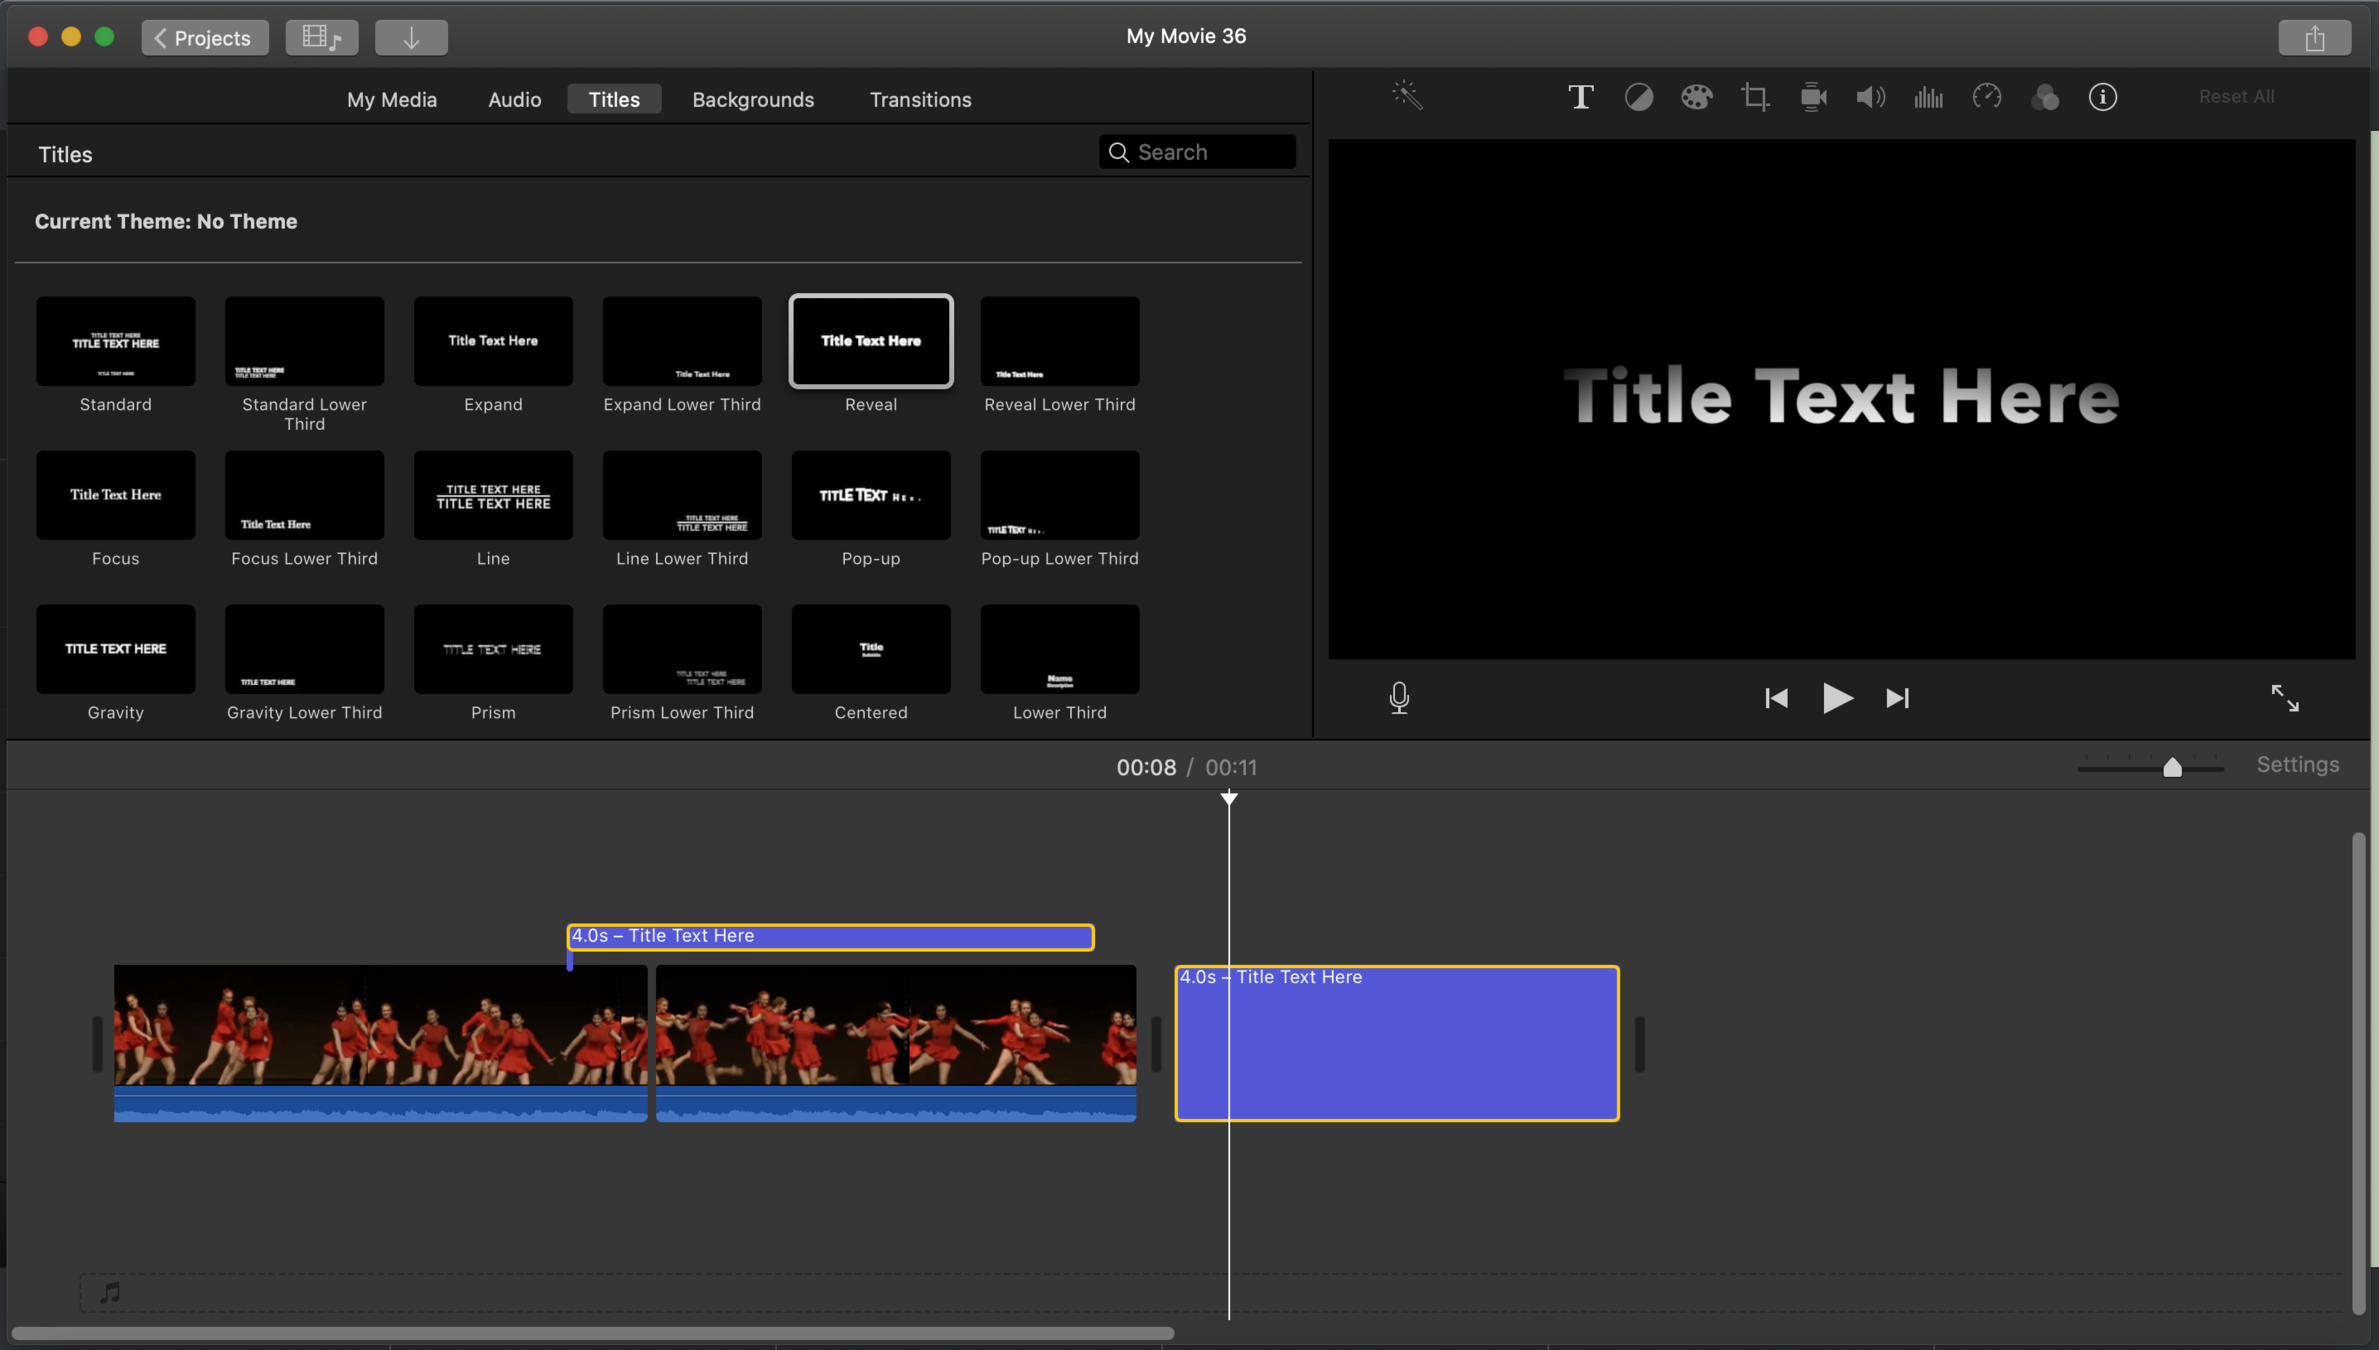
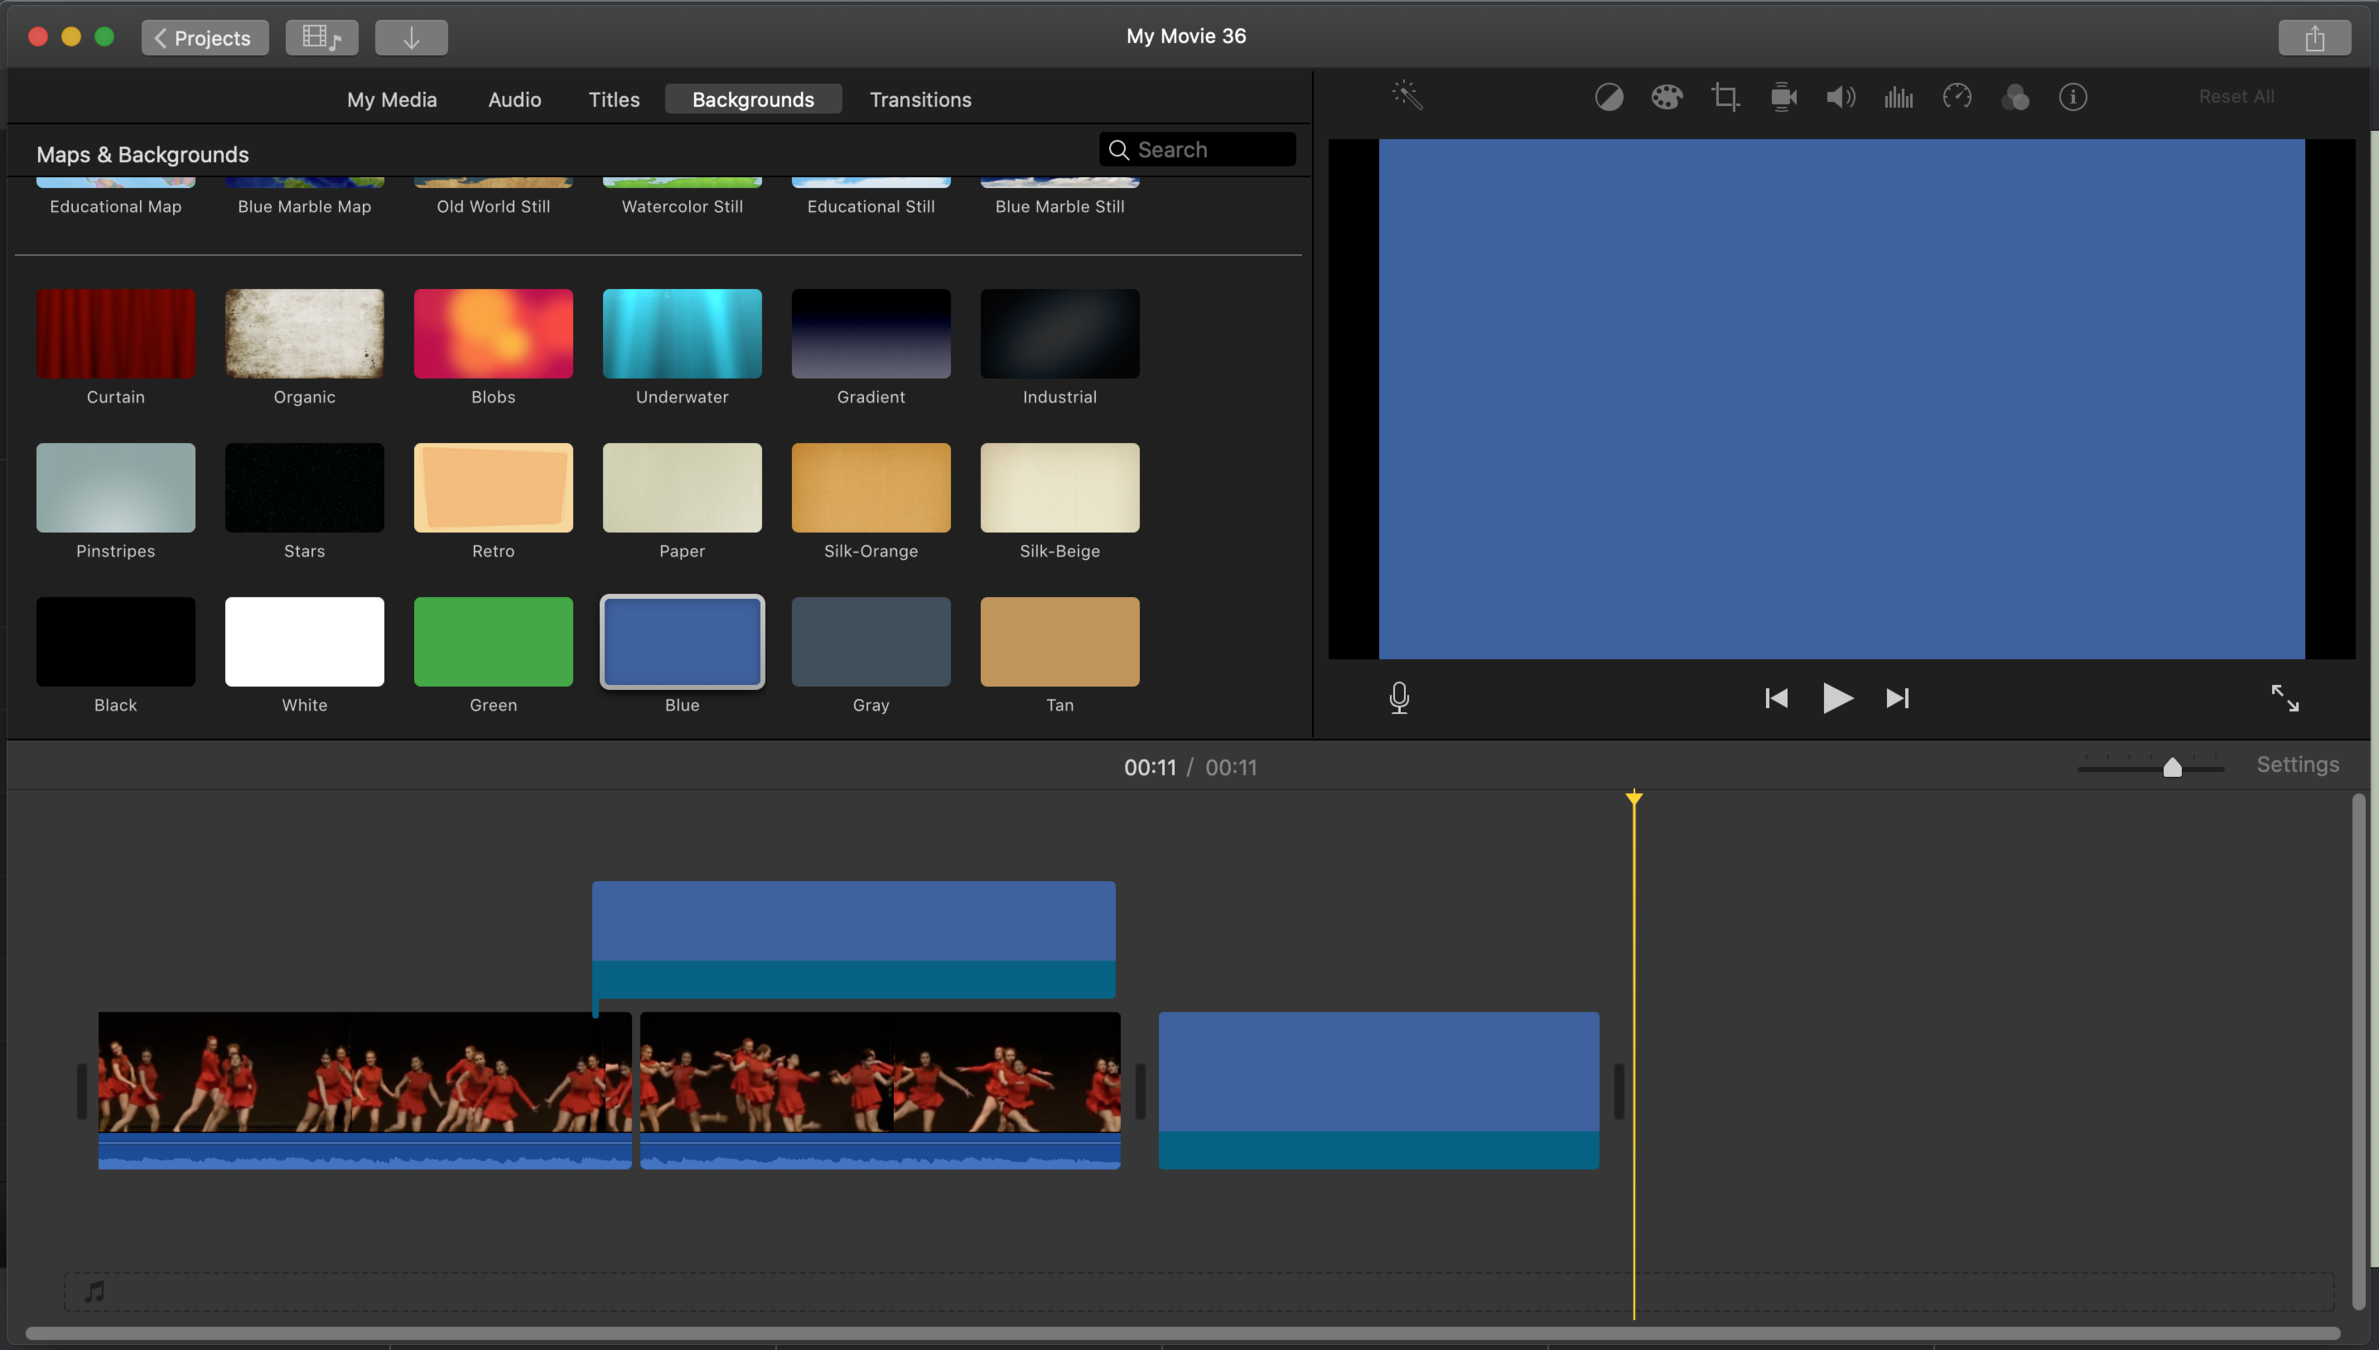
titles and backgrounds
- select template
- drag and drop ABOVE or BESIDE video clip
- can be layered
titles and backgrounds
- select template
- drag and drop ABOVE or BESIDE video clip
- can be layered
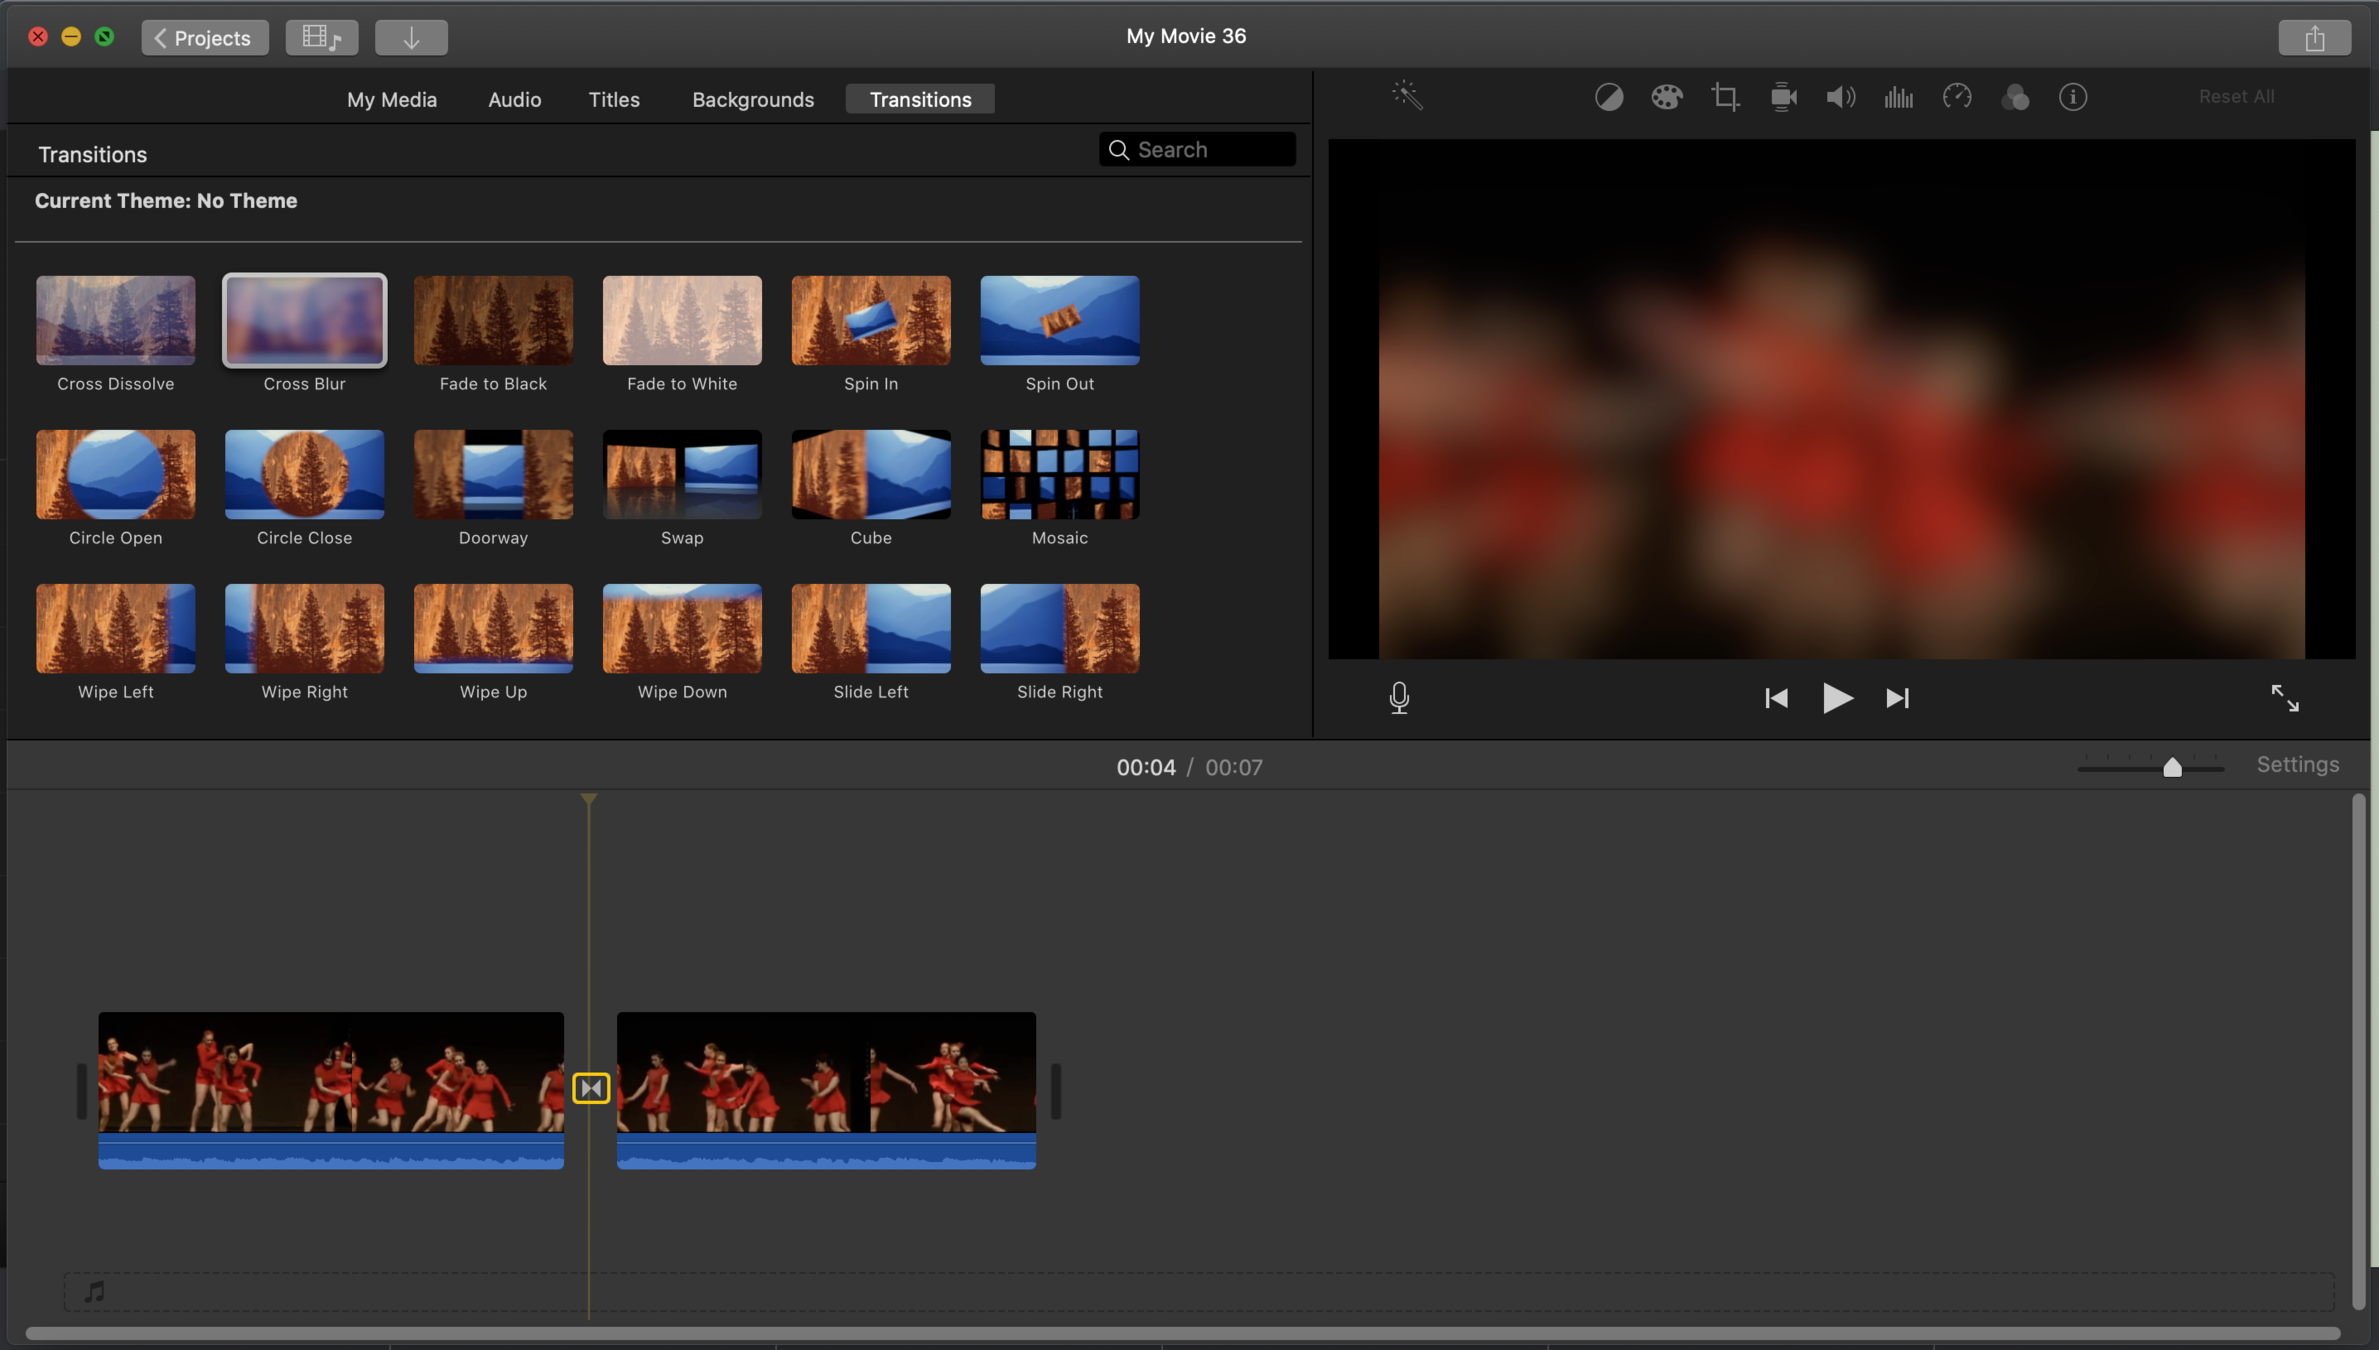
transitions
- select template
- drag and drop BESIDE video clip
- double click on the transition to change its duration
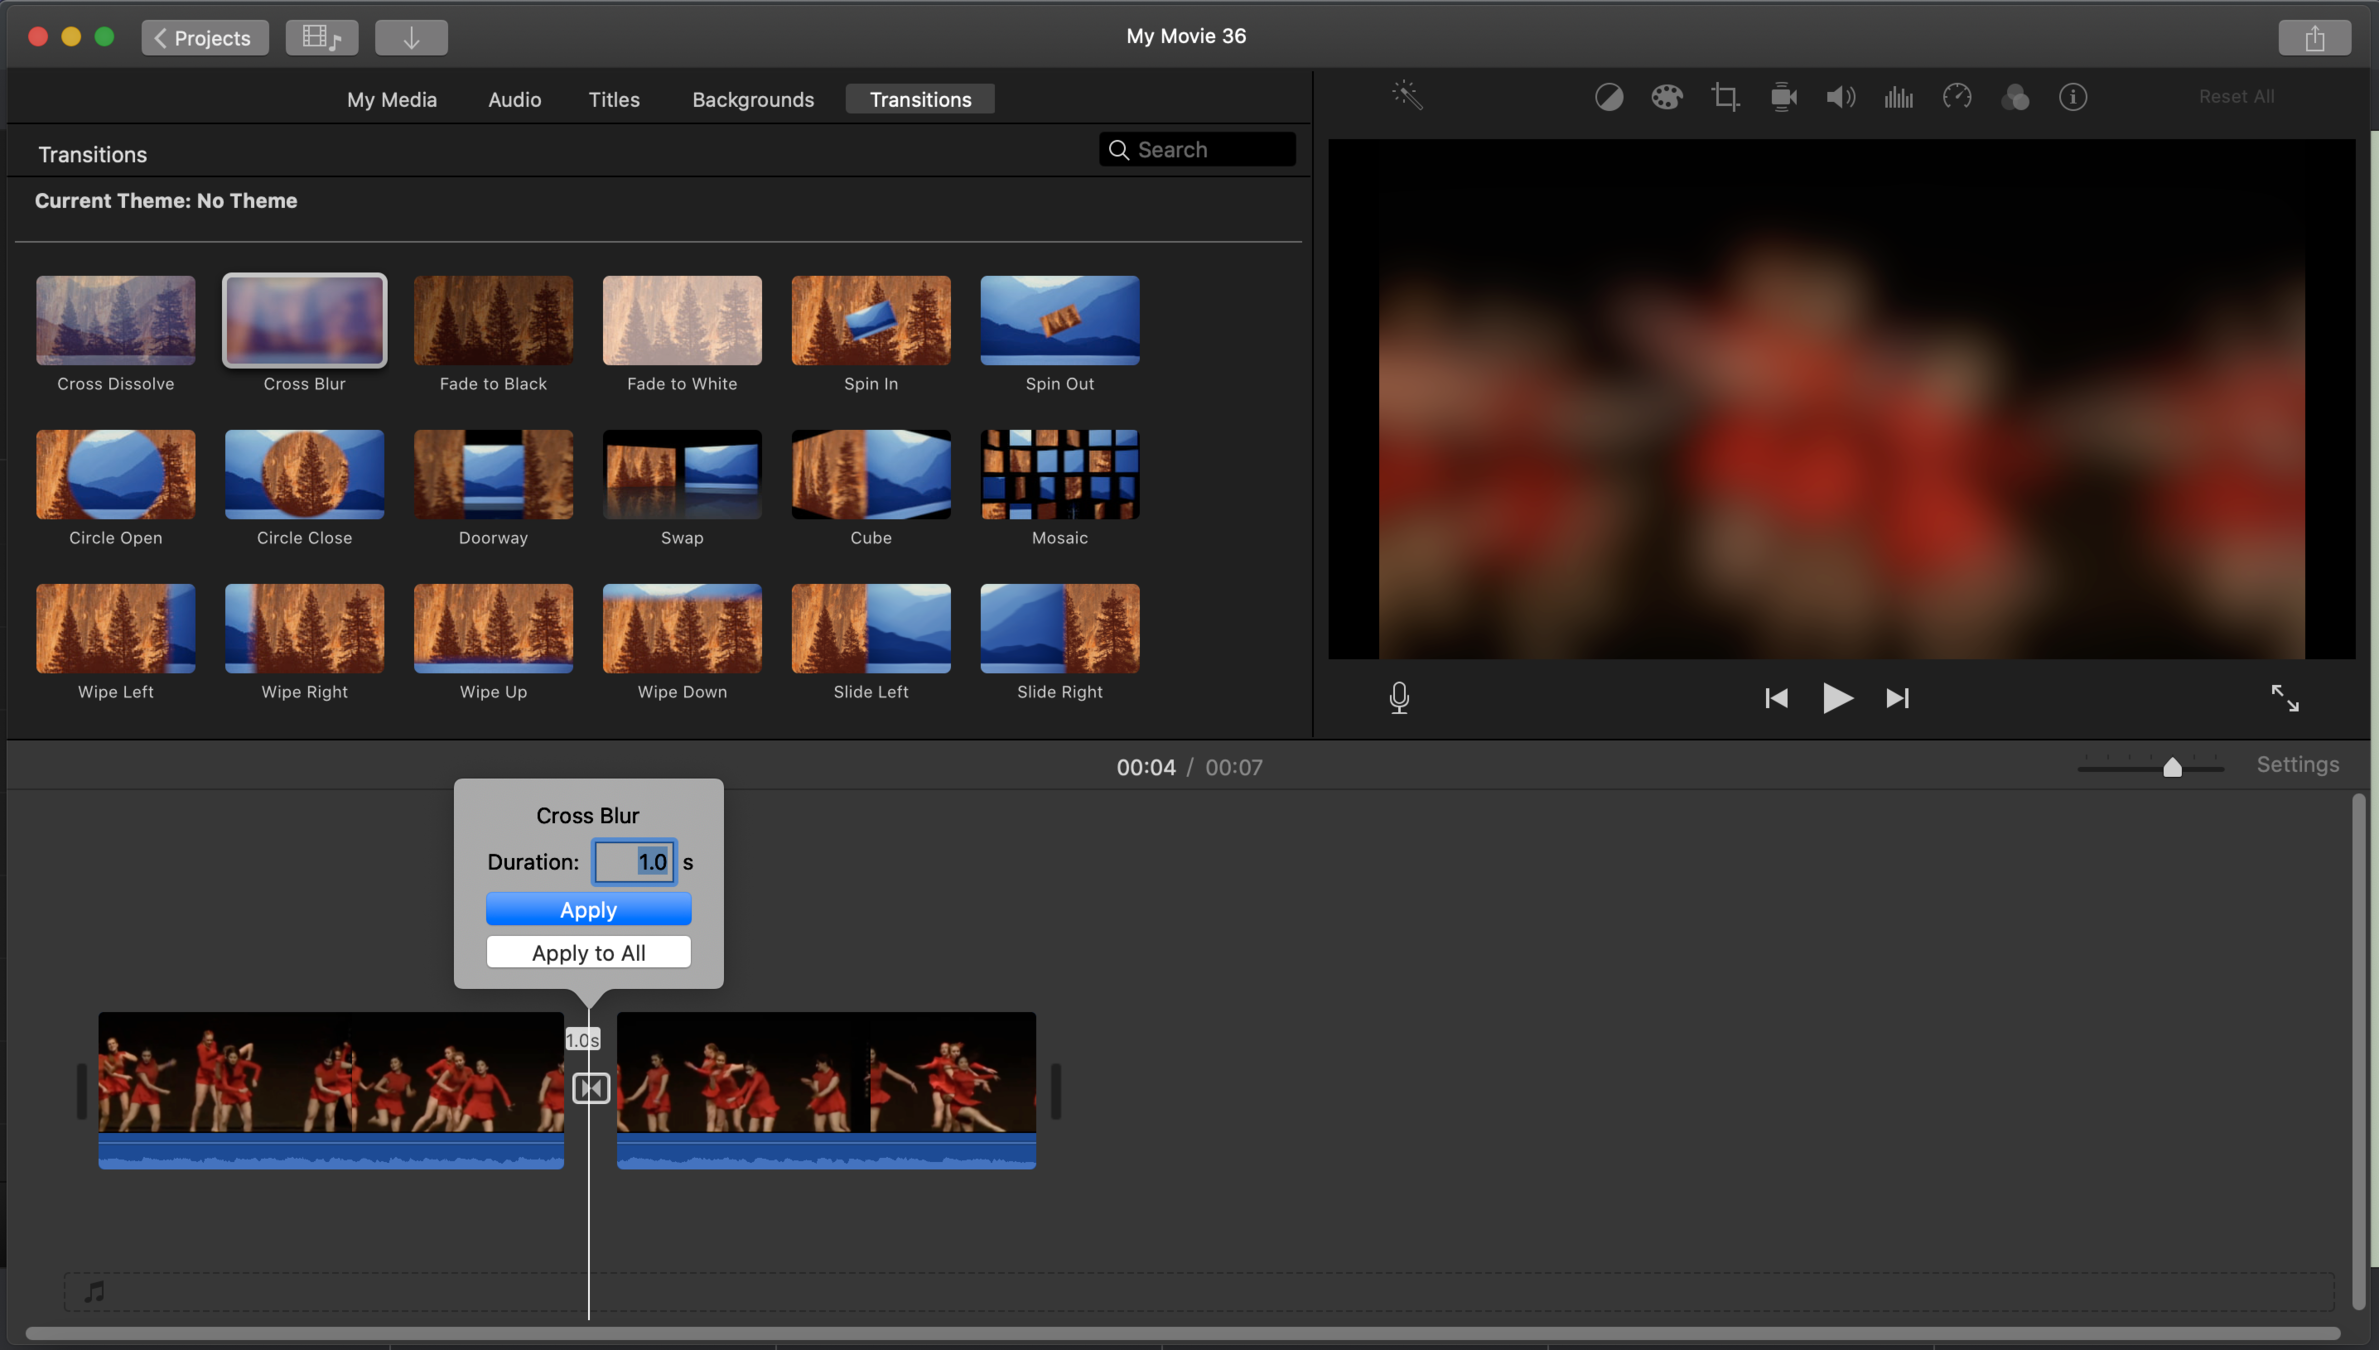
transitions
- select template
- drag and drop BESIDE video clip
- double click on the transition to change its duration
iMovie: inserting sound files into the timeline
... in 2 ways.
Way 1
- add an audio file to the audio lane
- this way whatever you do in the video/photo lane does not affect your audio
Way 2
- add an audio file BELOW a clip in the video/photo lane
- this way whatever you audio is attached to a clip and will move when the clip moves
INTERMEDIATE:
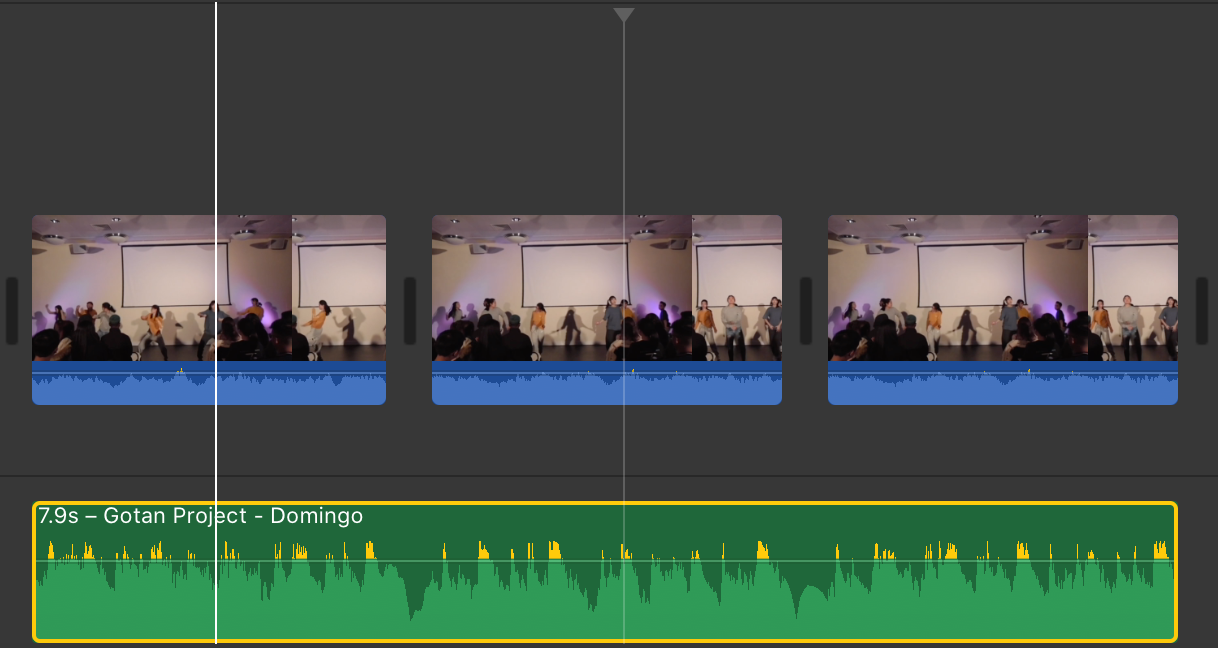
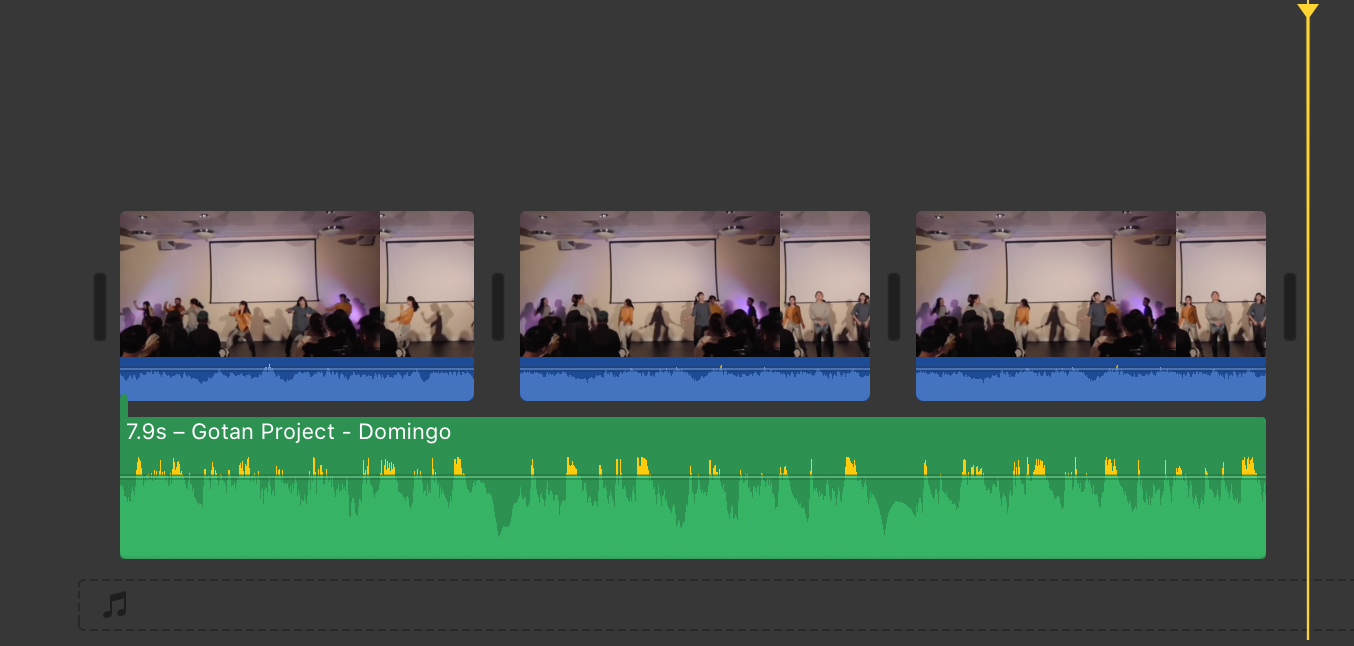
iMovie: matching audio to choreo clips

- play around with this lever on the right side to zoom in/out of the files in your editing space. It can particularly useful when you are trying to overlay a song file with a choreo clip.
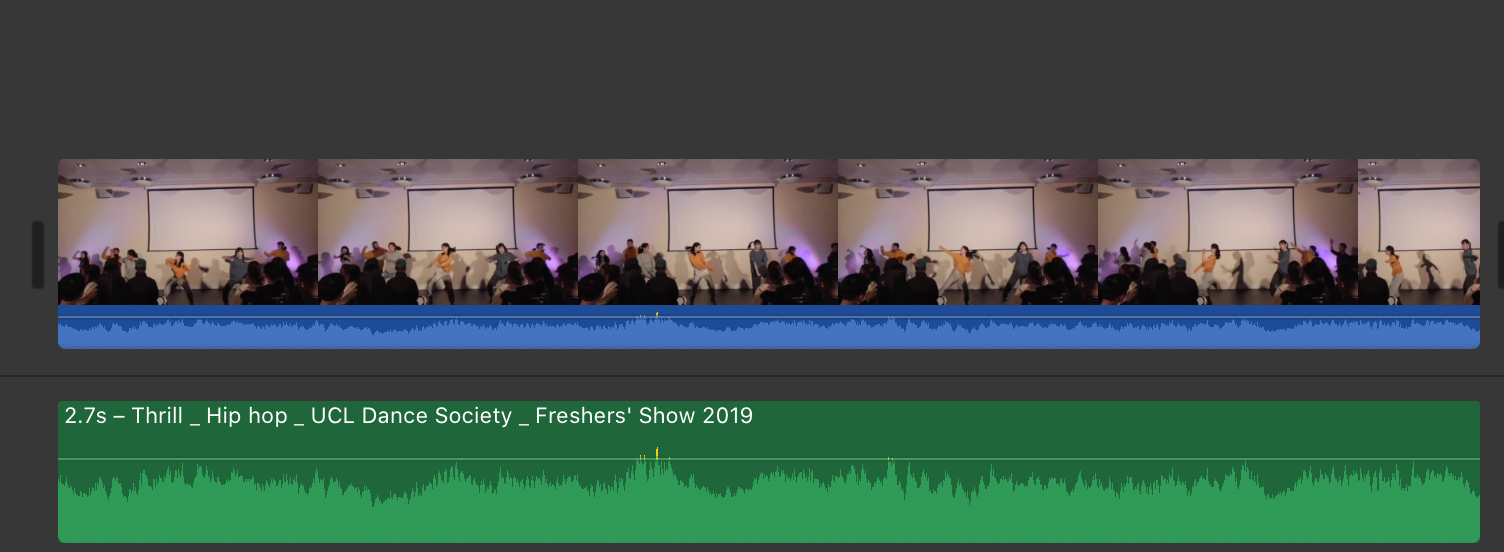
- Example: see how the audio waves looks similar? I have used the lever to zoom in and can see that I have done a good job matching up the audio waves so I could now mute the audio of the video clip (which I don't want because it has lots of background noise) and keep the crisp sound of the audio file
INTERMEDIATE:
iMovie: editing audio
- editing audio clips is almost no different to editing video clips
INTERMEDIATE:
- however, you are able to layer multiple audio files while you can only layer 2 video files
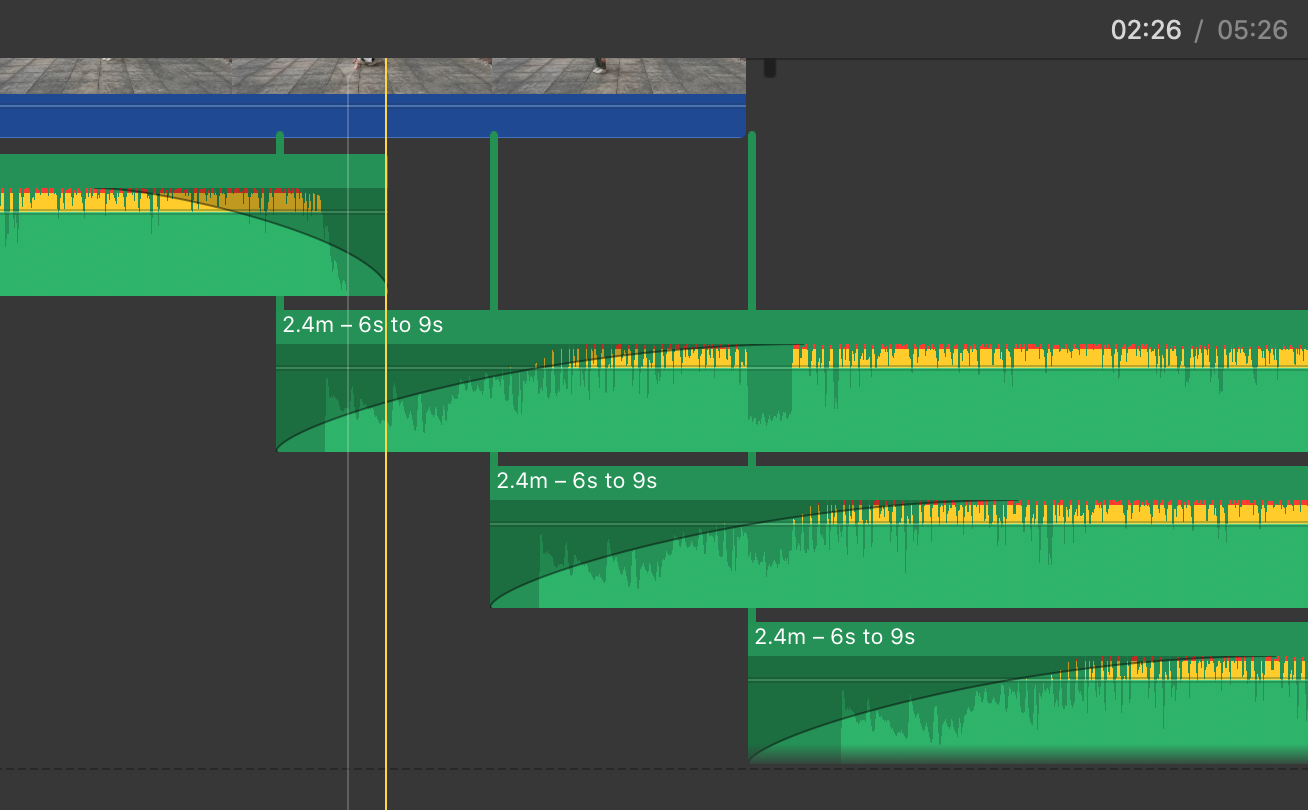
- you can also make audio in video or audio files phase in and out by dragging these two dots
Kapwing: multiple clips in one frame
- make a free account on kapwing.com
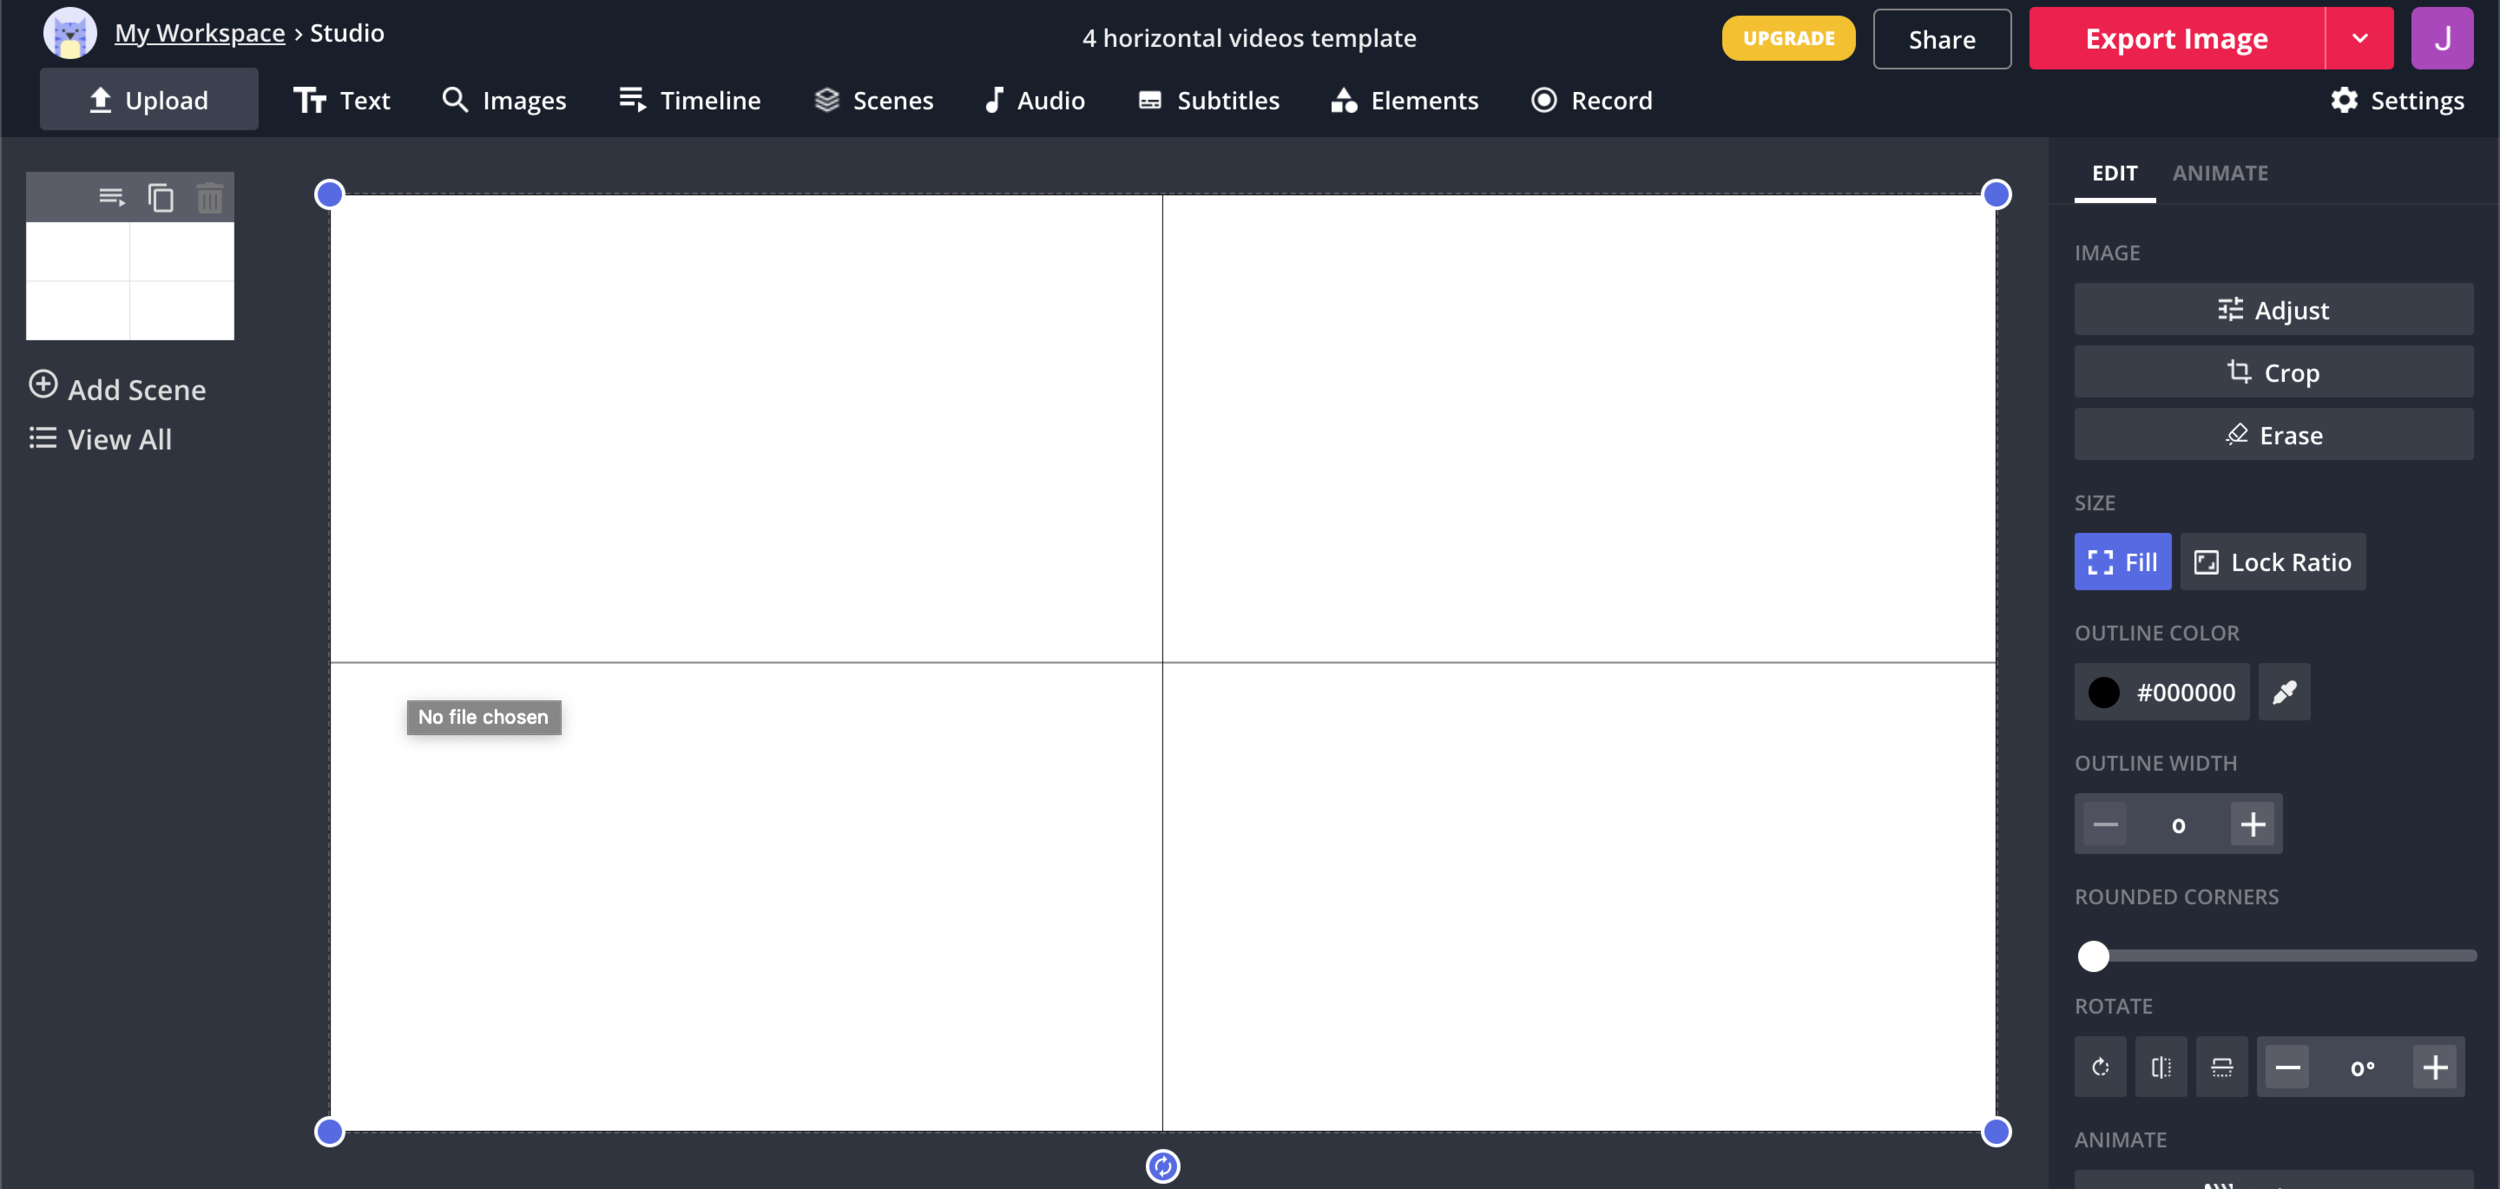
- upload a template or use a blank document ( I am using a 4 x clip template I made: you can download it here: https://drive.google.com/drive/folders/1iEpXjVQ-14DlnqL-hY7SRavyfKaAgXwP?usp=sharing)
- upload your clips!
INTERMEDIATE:
Kapwing: multiple clips in one frame
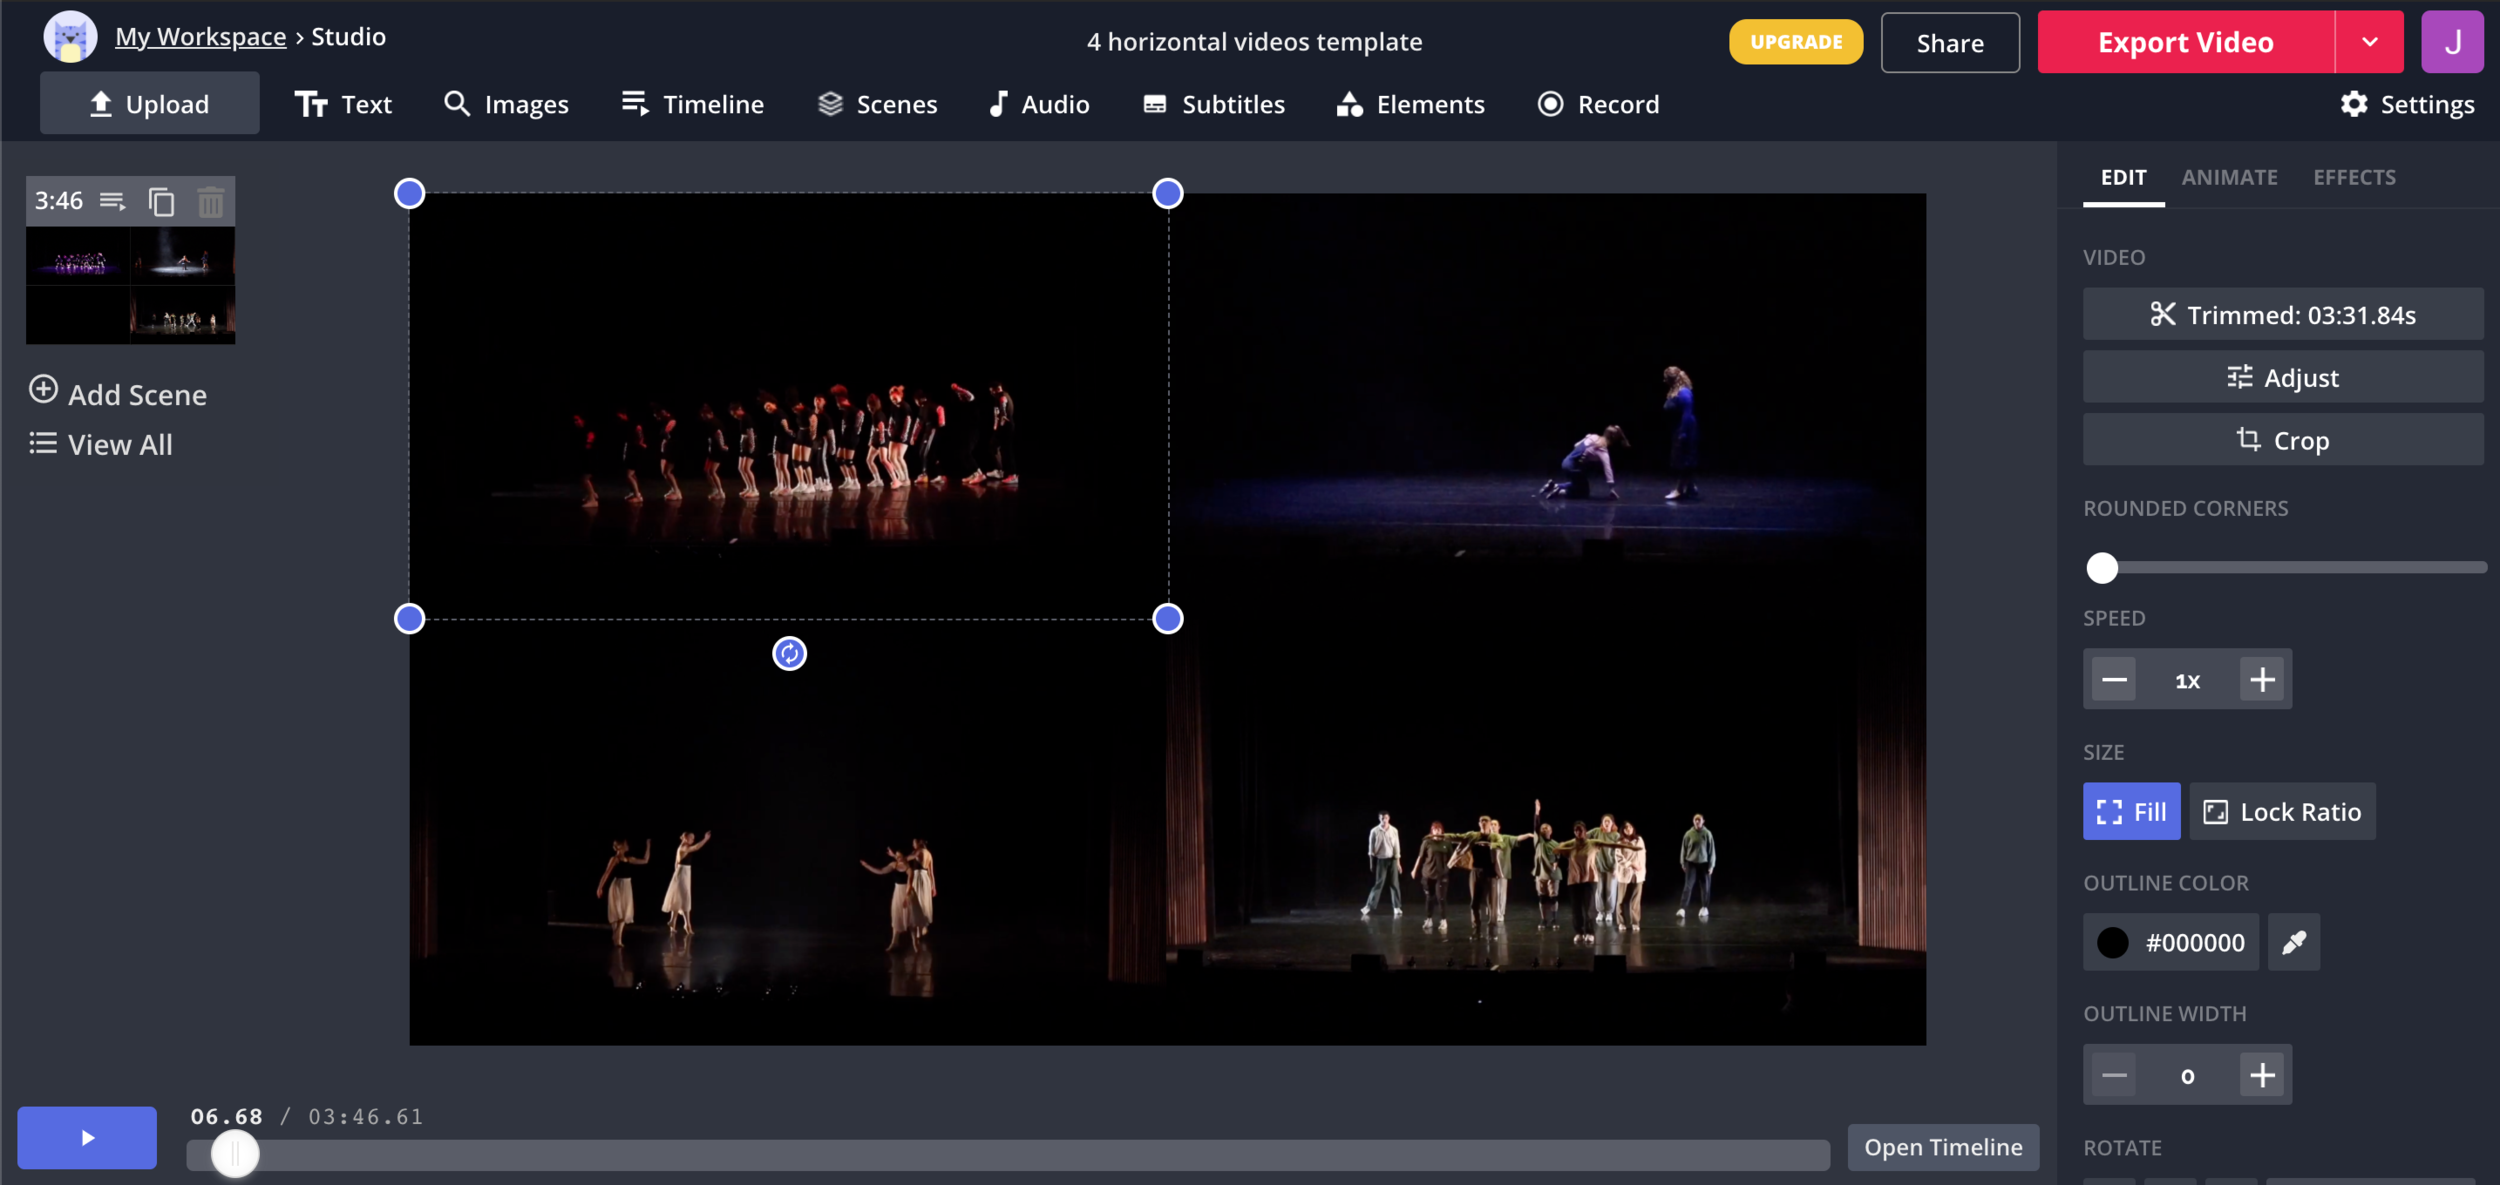
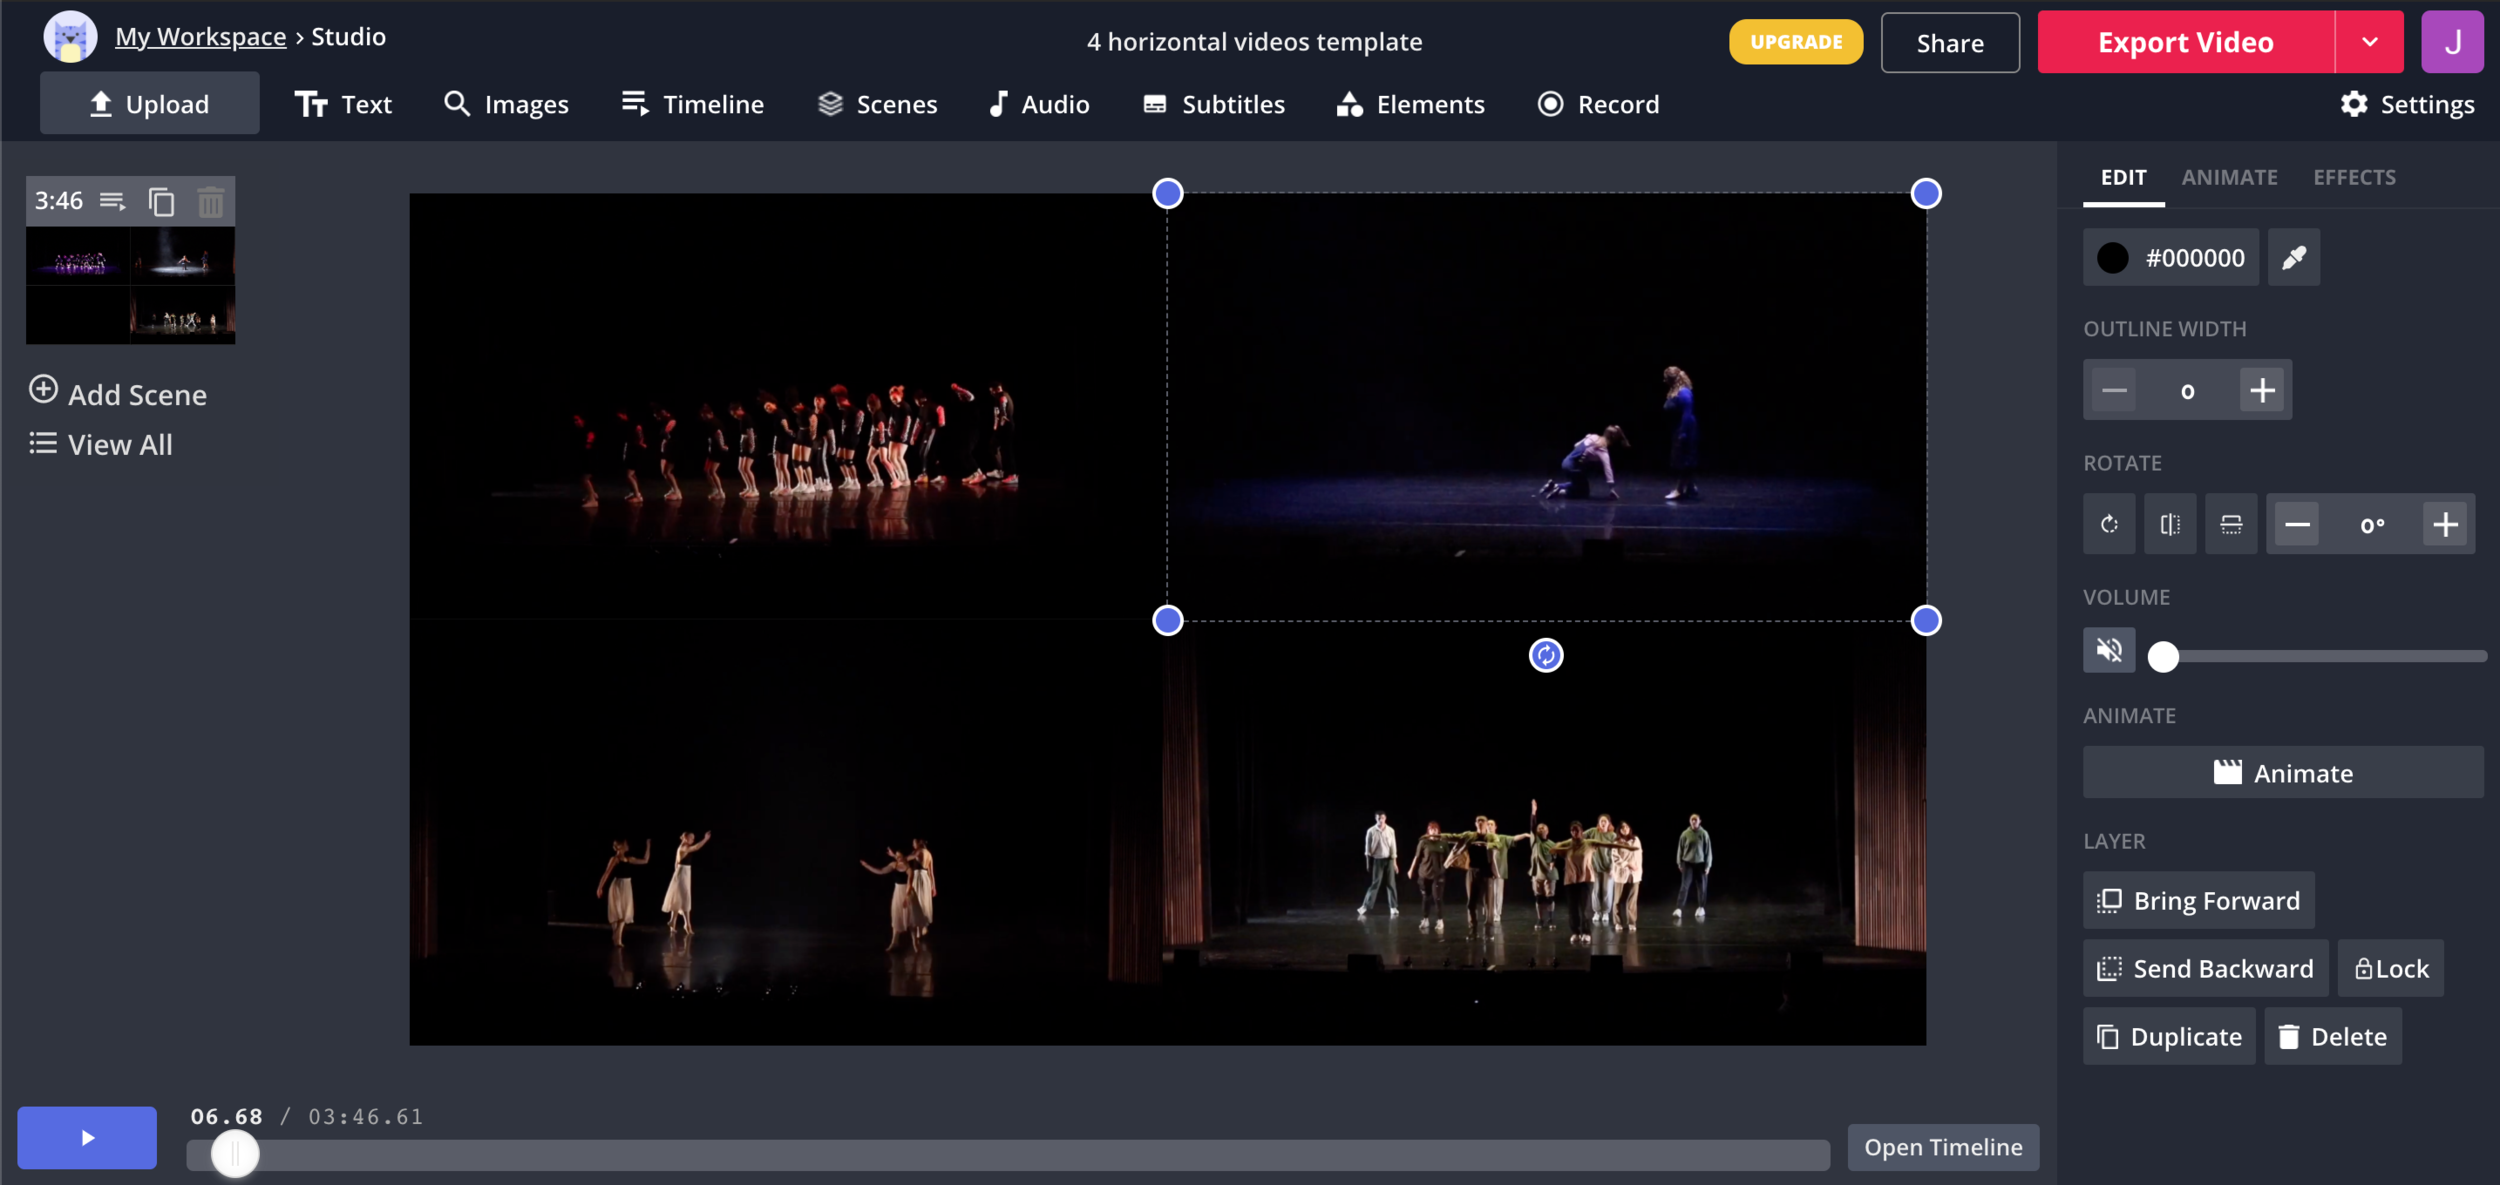
- fit the videos to the template (or your desired look)
- I'd recommend using the "lock ratio" and "crop" features to avoid distorting the video
- make sure you have turned the sound off on all or most videos
INTERMEDIATE:
Kapwing: multiple clips in one frame
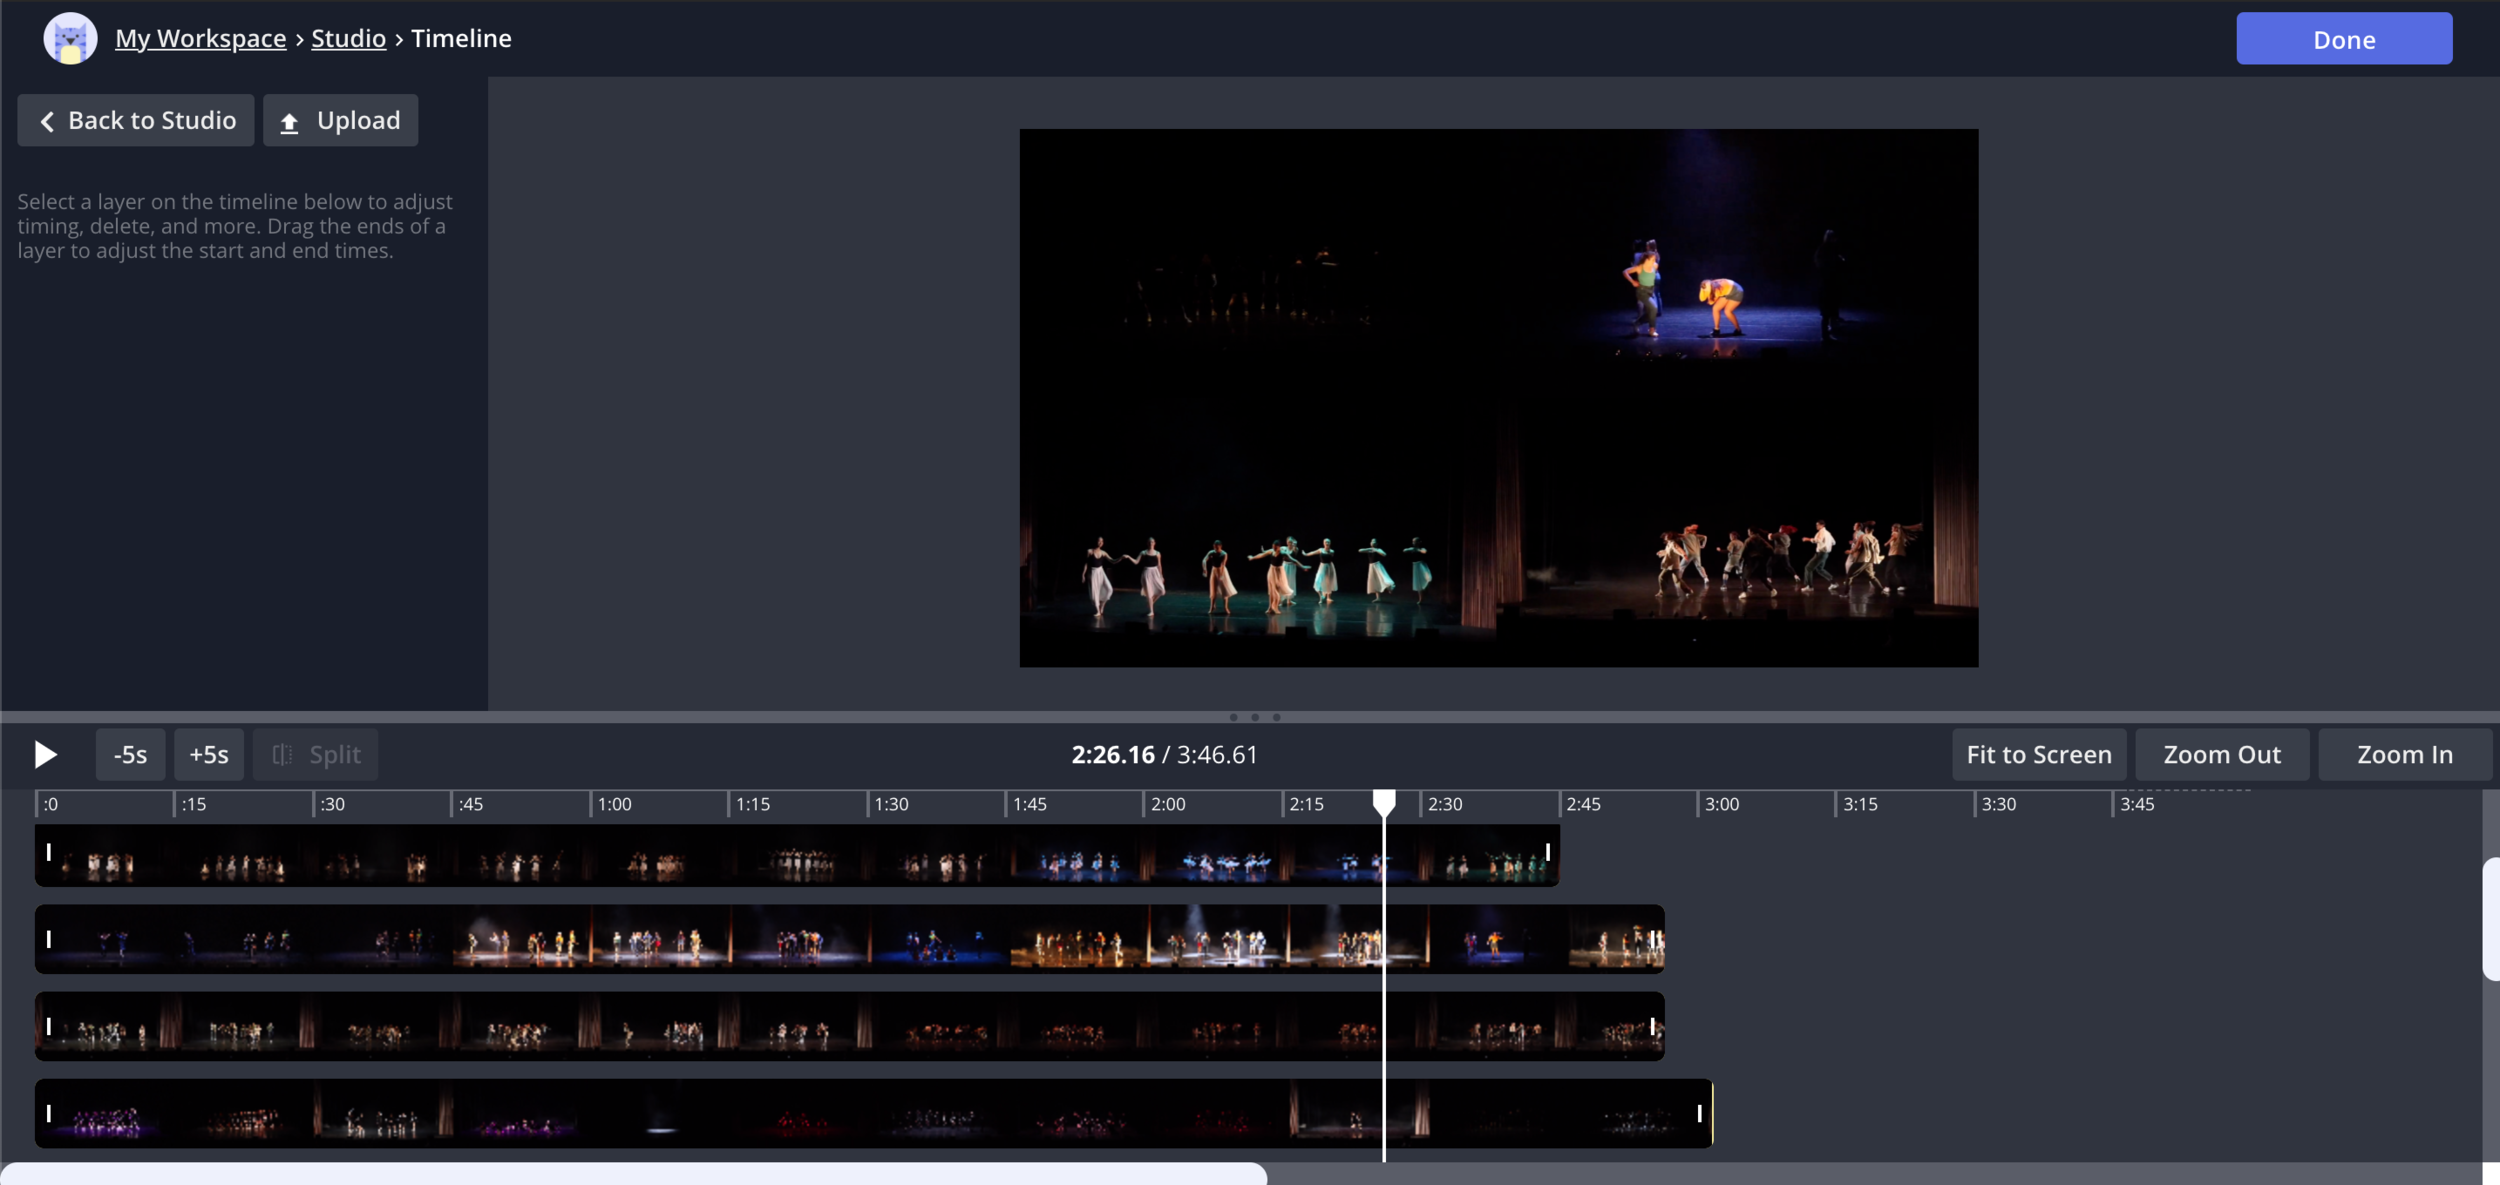
- click "timeline" in the top menu of your page
- trim (using the white panels at the end of each clip)
- cut (hovering over where you want to make the cut and using the split button )
- You have a video! Press "Done" and then "Export Video"
INTERMEDIATE:
Editing technique: cutting clips on audiowaves
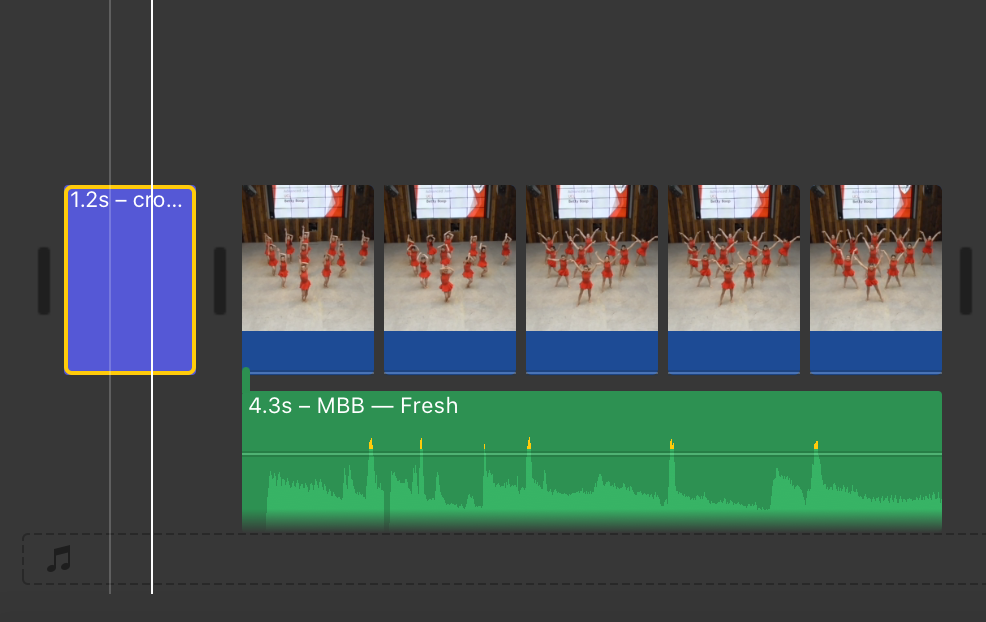
one very popular editing technique is making cuts to a video at the peaks or troughs in the audio. For this video I looked at the audio wave, made cuts on the peaks, then cropped the 2nd and 4th clip.
ADVANCED:
Editing technique: using jump cuts
ADVANCED:

this can be a really fun way to switch between locations, angles or numbers of dancers in a video. Jump cuts are a major reason to film a dance a number of times. For this video I made jumps between two scenes where the dancers in the middle are doing the same move in both scenes. By keeping the motion consistent there is a common thread that guides the viewer through the cuts ( or smth like that lol ).
Editing technique: reverse/slow motion/fast motion
ADVANCED:
using reverse/slow motion/fast motion are amazing when you have more creative freedom. They can also be really useful in hiding when dancers aren't quite on beat. For this video I used slow motion in reverse and then fast motion forwards.

Editing technique: fading audio
ADVANCED:
Fading between audio clips can be quite helpful in smoothing out transitions between songs and even between parts of the same song. In this video the music fades between a middle and end bit of a song and fades out at the end of the video.
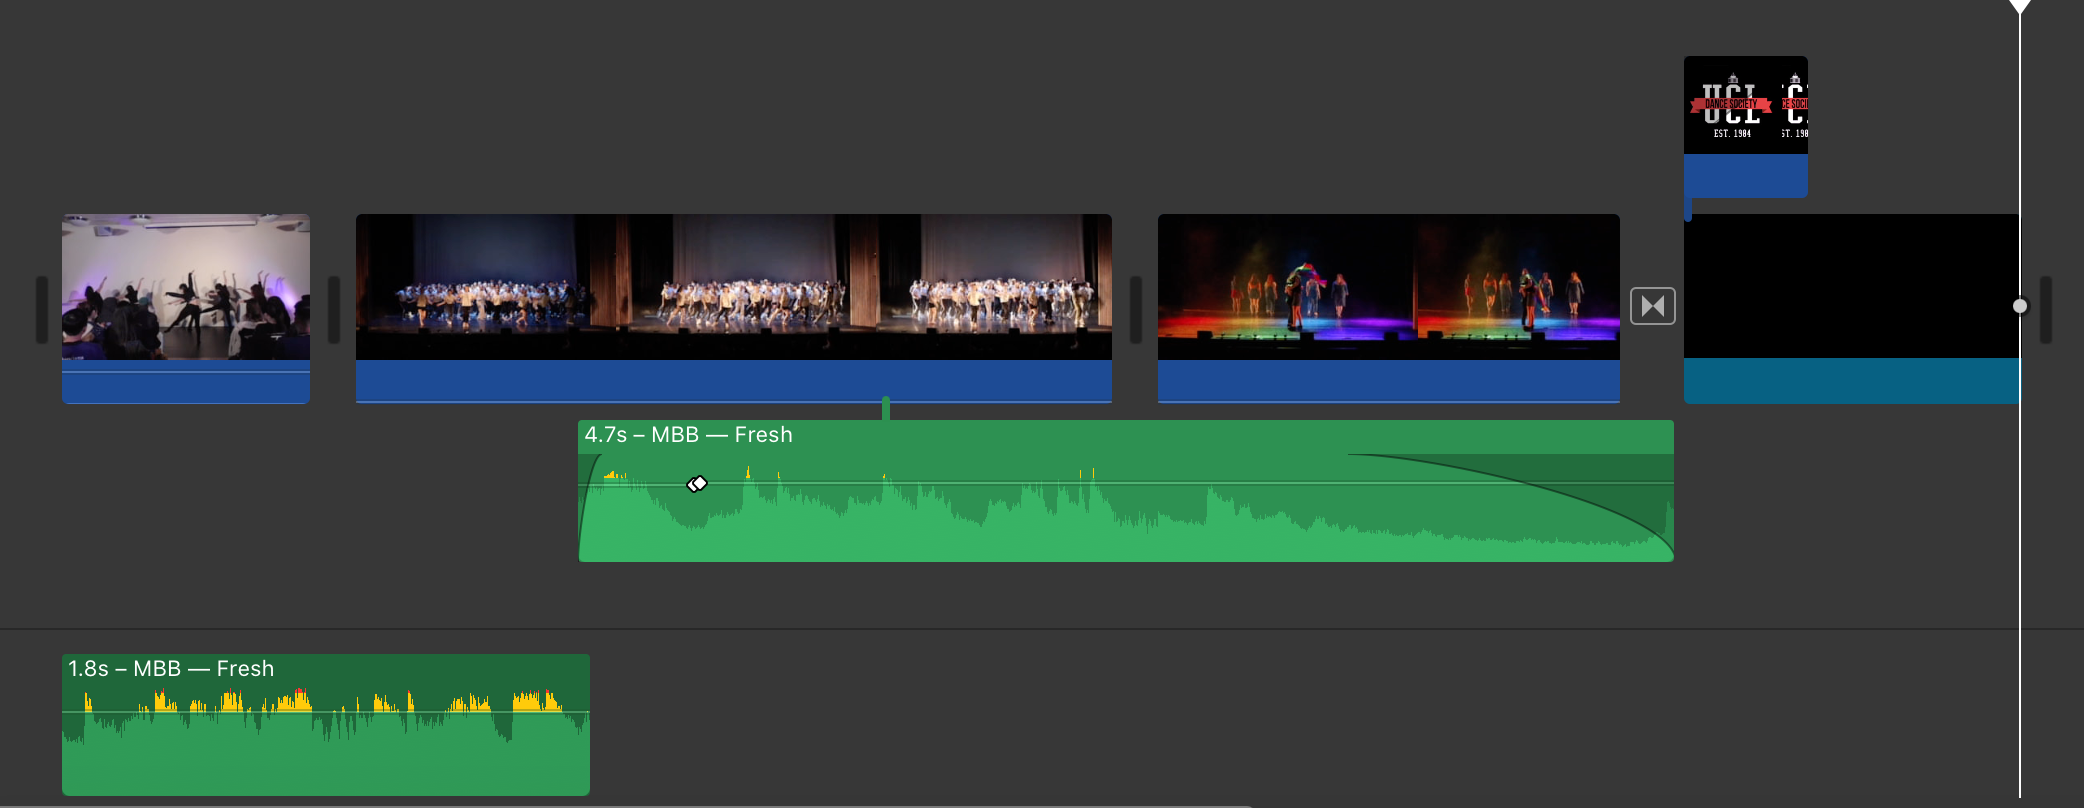
Techniques used: overlapping audio files, adjusting the volume of a portion of a clip, fading in and out
Some last tips:
- don't ever edit last minute. Even if you are done editing it will always take longer than expected for it to be processed and saved.
- experiment. Try out a bunch of things and see what works.
- if you are scared of loosing a particular draft of your video. Create a new project, copy and paste everything into there.
- two links I found really useful:
http://marionwalker.org/dfw-lesson-plan/ - tips specifically for making dance videos ( choreography, shooting, editing), also lots of videos to inspire you!
https://www.studiobinder.com/blog/walter-murch-rule-of-six/ - some more on editing theory
Editing can take a lot of time but it can be really enjoyable once you get the hang of it!!
Give it a go and let me know of you have any questions I can help you with: https://forms.gle/cvbQfCNwTEVDyVfCA
You can find all the material I used in this folder:
https://drive.google.com/drive/folders/10f6DSW5Qq385rtR-bMM9EqWYOhTSADuR?usp=sharing