Stage 2
Electrics - Advanced
26 Slides
Electrics Overview
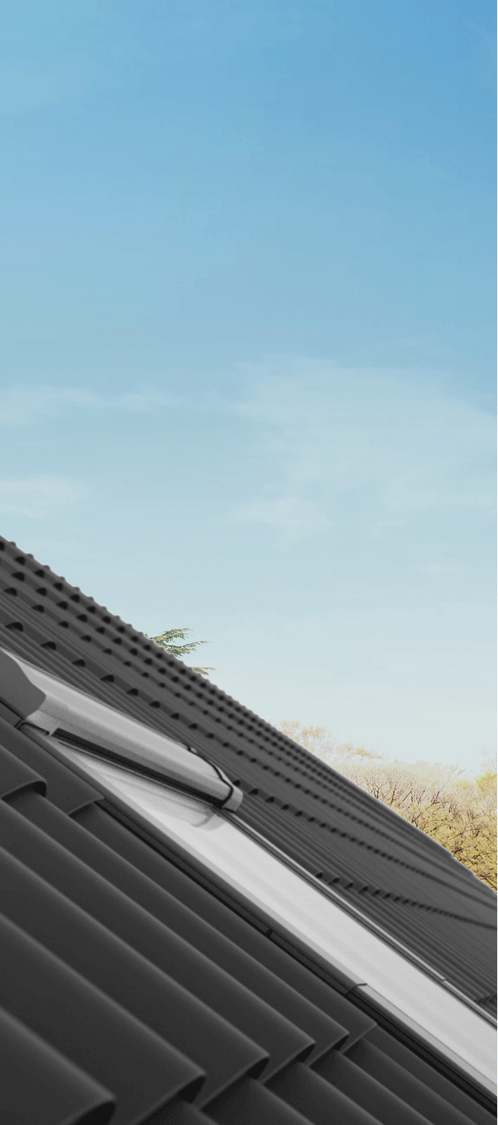
Standard Electric Kit (SEK)
Premium Electric Kit (PEK)
Solar Powered Electric Kit (SPEK)
Roller Shutters
Troubleshooting
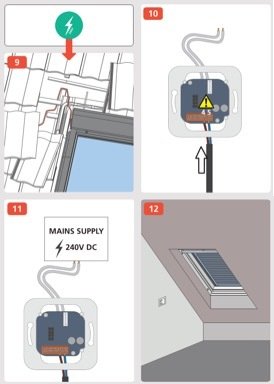
Standard Electric Kit
Standard Electric Kit
Our standard electric kits are pre-fitted with a window actuator which is linked to a wall-mounted transformer switch. This system cannot be directly connected to the mains.
Contains a 24v DC Window Actuator.
An SEK has the ability to wire up to
2 roof windows to a single switch.
More than two windows will require
additional transformer switches.
(SEK)
SEK Components
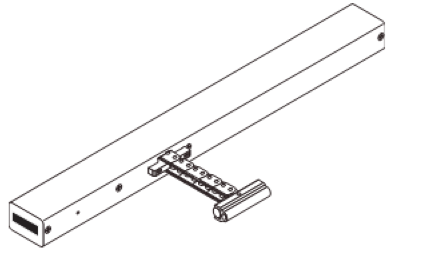

Window Motor
2 Metre Motor Cable
Transformer Wall Switch
SEK Motor Cable
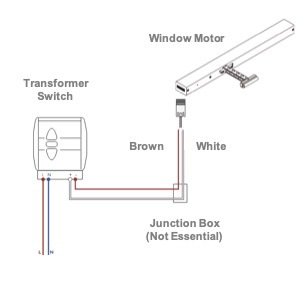
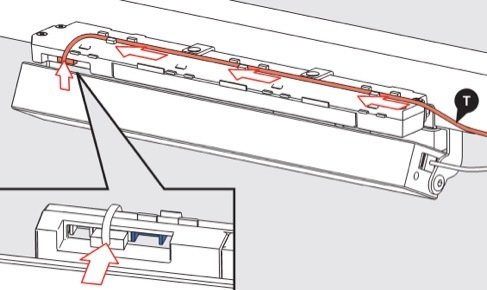
The motor cable is a four core cable, consisting of Brown, White, Green & Yellow cores.
As we are looking to introduce two operations (to allow the window to open and close) only two of the four cables will be required.
In order to enable these performances the Brown and White cables will be utilised to send the correct drives to the actuator, the Yellow and Green cores can be disregarded.
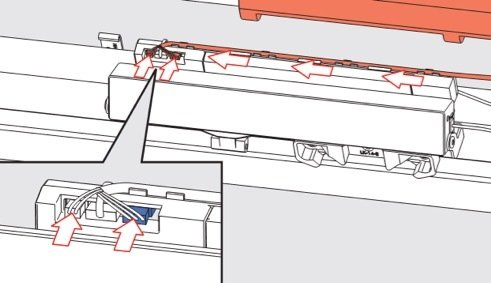
SEK Motor Cable Extension
The Motor will be supplied with enough cable to satisfy 2 metres.
It is possible to extend the two cores however a ‘Junction Box’ will be required which Keylite do not supply.
Including a ‘Junction Box’ may introduce additional coloured wires, therefore the Brown/White cable may not be consistent throughout the length of the cable.
Premium Electric Kit
(PEK)
Premium Electric Kit
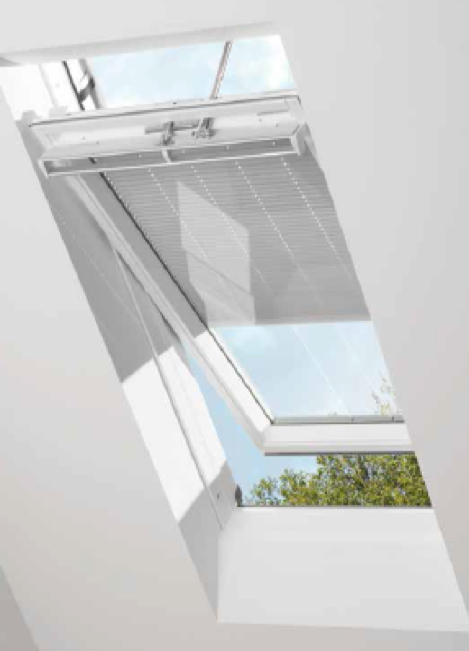
Our premium electric kits are pre-fitted with an electrical control unit which enables easy installation, simply plug in and power up.
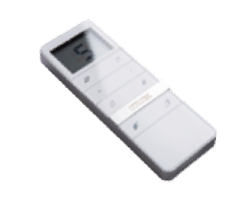
Our ECU is linked to a digital remote control
and an external rain sensor.
A PEK has the ability to automatically close your roof window in the event of rain as
well as operate multiple windows and
blinds with a 15 channel capacity remote.
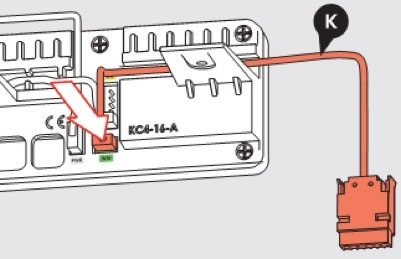
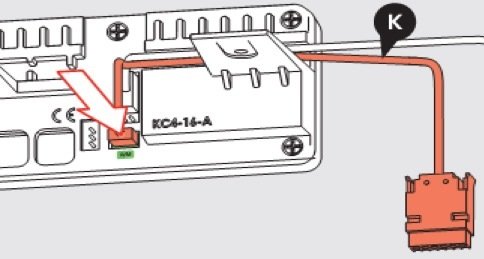
PEK Connection
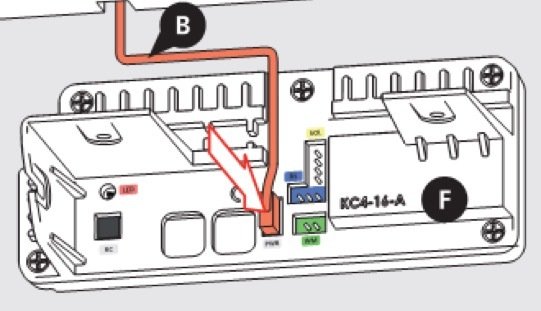
Step 1
Connect the white power lead into the white socket located on the left hand side of the ECU.
Step 2
The blue rain sensor cable to the blue horizontal socket.
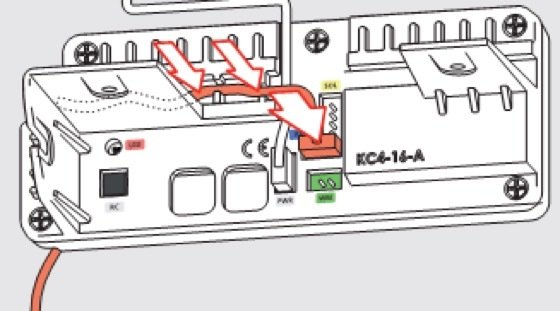
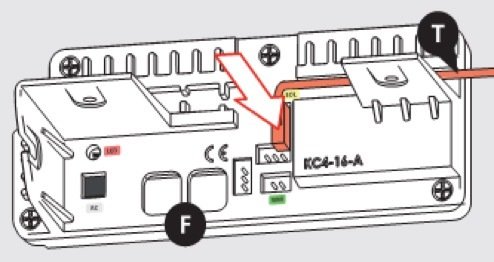
PEK Connection
Step 3
Finally connect the green plug from the motor cable into the green horizontal socket to complete the connection.
Step 4
Once all cables have been connected successfully, ensure the LED light is flashing. When the intermittent illumination stops the remote is ready to be connected.
Solar Powered Electric Kit
Solar Powered Electric Kit

Our solar electric option stores up power for operation during the day and night. Electrical operation of blinds can also be added.
- An environmentally friendly solution to operating your roof window.
- Reduces energy costs of your entire dwelling due to no power supply from the mains.
- System is operated using a hand held remote and includes a rain sensor similar to a SPEK.
- Solar cells are clipped onto the hood flashing with inbuilt rain sensor for improved aesthetic finish.
- An additional minor ECU is built into the rechargeable battery pack that is riveted to the rear of the motor bracket that will be concealed within the hood flashing.
(SPEK)
SPEK Connection
Step 1
Connect the white plug from the ‘Loom lead’ into the white vertical socket located at the top of the ECU. Remembering the white socket on the left hand side is for the PEK to plug into.
Step 2
The green plug from the motor cable should be connected into the green horizontal socket.
SPEK Connection
Step 3
Connect the opposite white plug from the ‘Loom lead’ into the white horizontal socket located in the middle of the battery pack’s ECU.
Step 4
Finally the solar cells and rain sensor cables need connecting into the remaining two plugs located on the battery pack’s ECU. The blue rain sensor cable will correspond to the blue plug and the white solar cell cable is designed for the white plug.
Roller Shutters
Roller Shutters
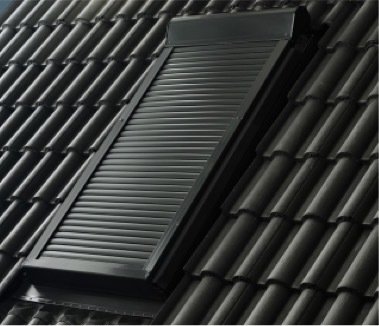
Available in electric and solar operation.
Electric applications can be supplied with a hand held remote or a wall mounted transformer switch. Solar powered roller shutters are solely operable via a hand held remote.
RS 01 ER – Roller Shutter 550x780mm
Electric Remote
RS 01 ES – Roller Shutter 550x780mm
Electric Switch
RS 01 SR – Roller Shutter 550x780mm
Solar Remote
Roller Shutters
Our Solar Roller Shutter units are supplied with a small power pack which is concealed underneath the roofing material that delivers a trickle charge to the solar cells.
The remote control is already pre-programmed to the solar battery pack, when the power is activated the unit can automatically be operated using the remote control.
Electric Roller Shutters
Electric Roller Shutters with a wall mounted switch are designed similarly to our standard electric kit. The roller shutter actuator is connected to the switch by a two metre dual core cable.
Remote controlled electric shutters are also pre-programmed to factory limit positions, this must be checked and adjusted after installation.
Limit Positioning
To reset the factory limit positions you must first open the programming mode by holding the ‘WT’ function for around 3 seconds. This will drive the shutter UP and DOWN for a moment.
Hold the UP button again for 3 seconds, the shutter will complete a second UP and DOWN cycle.
Use the UP and DOWN actions to adjust the shutter to your desired higher position. In order to save the new limit, select DOWN for 1 second and then again for 1 second. The shutter will drive UP and DOWN for a moment before the positon is saved.
Limit Positioning
To set the lower limit, use the UP and DOWN actions once again to adjust the shutter to your desired position. In order to save the new limit, select UP for 1 second and then again for 1 second.
The shutter will drive UP and DOWN for a moment before your lower position will be saved.
Ensure to close the programming function once you have successfully reset your Roller Shutter limits. Press and hold the ‘WT’ action for 3 seconds to complete and close programming.
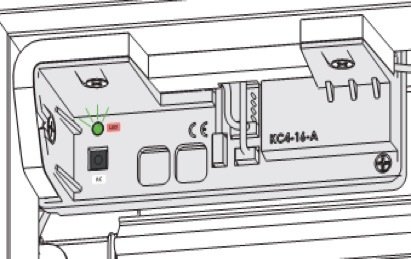
Troubleshooting
Troubleshooting
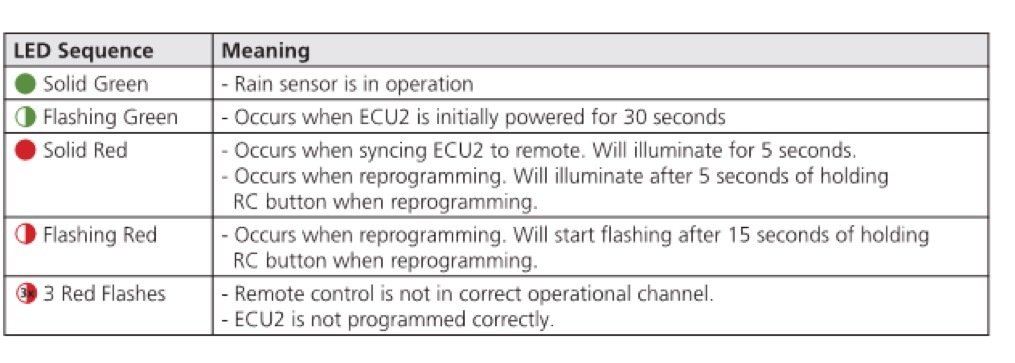
If a customer is having difficulty operating their premium or solar electric kit, the following steps could help isolate the problem before seeking assistance from Keylite’s technical team. Understanding the sequence of the LED lights located on the ECU will help identify the source of the fault.
Troubleshooting
1. Firstly check your power supply:
- If the blue LED light is not illuminated please try a different socket to ensure there is a sufficient power source.
- Make sure all leads from the power-pack to the ECU are connected correctly.
2. Ensure to check the ECU2 and remote control communications. If the LED on ECU2 shows three consecutive flashes when the Window Open action is selected:
- Make sure remote control is in the correct operational channel. If the remote channel has been changed ensure to return to the original channel the window was programmed to.
- If the remote control is in correct channel and LED persists to flash when the Window Open action is selected, the ECU2 has not been programmed correctly. Attempt to programming process from the beginning.
Troubleshooting
3. When the solid green LED light appears on the ECU2 this indicates that the rain sensor is in operation.
Please disconnect rain sensor and power down the ECU. Restore the power to erase the panels memory and select the Window Open action.
If the window begins to open there is an issue with the external rain sensor.

Quiz
Please continue to the quiz below