Angular Tutorial
第八課 Firestore資料庫存取(How-to)
Outline
- 專案前置工作
- Firestore資料模型
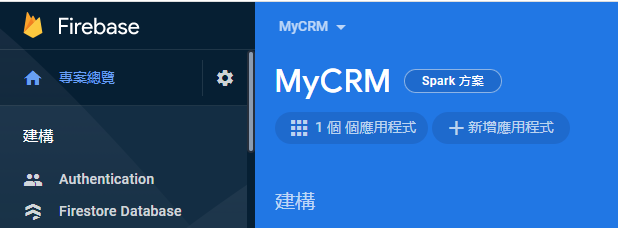
專案前置工作 Firebase控制台
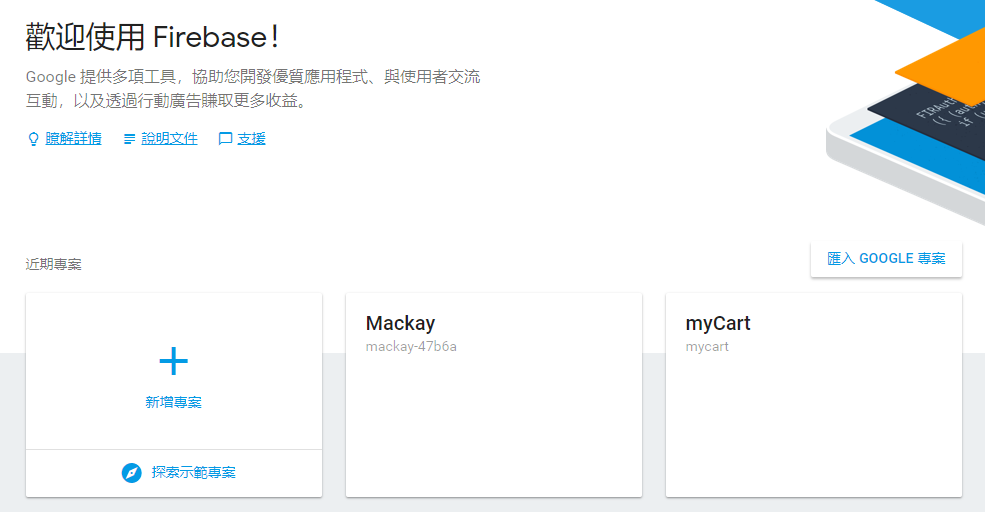
❶ 新增專案
❷ 啟用Cloud Firestore資料庫
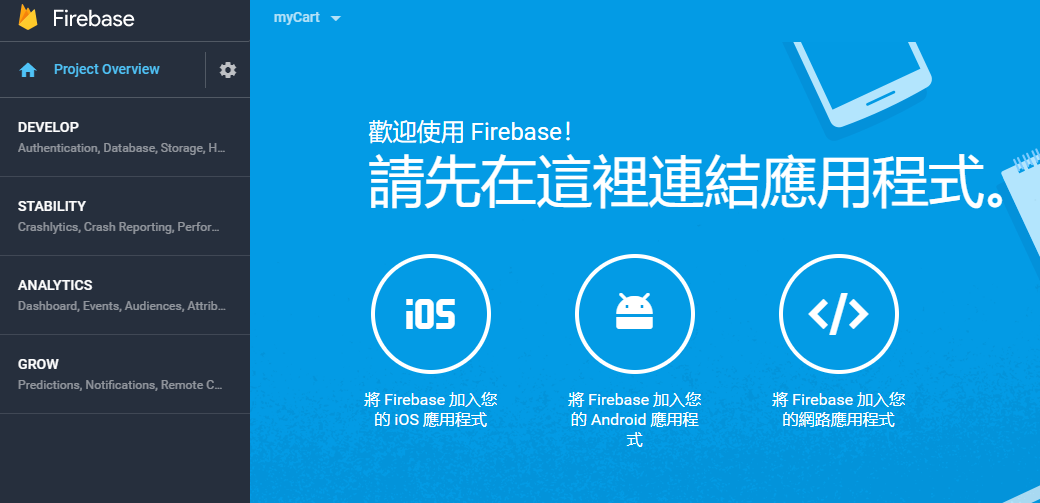
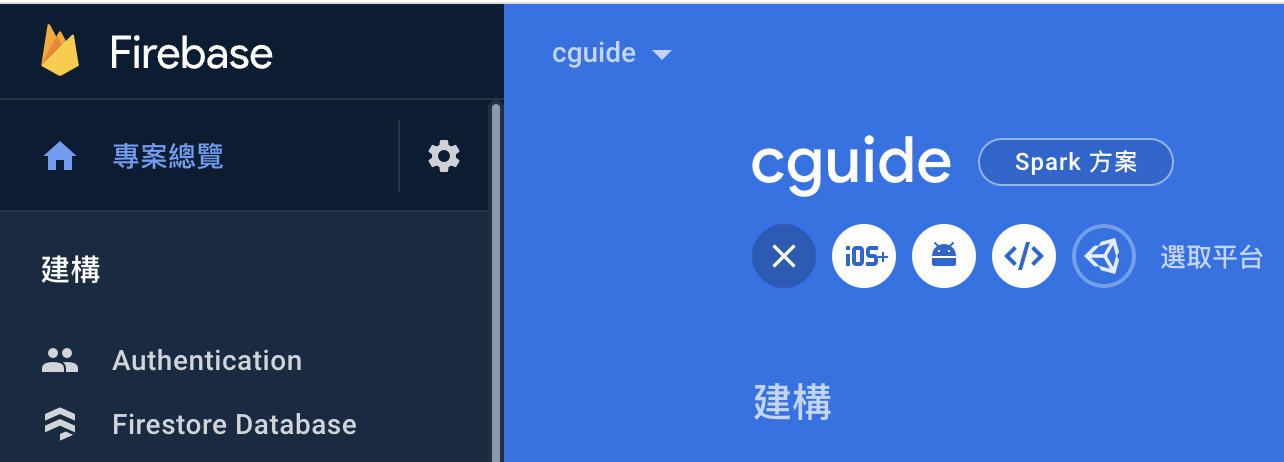
❸ 新增應用程式 / 取得Firestore連線設定值
專案前置工作 新增專案(1/5)
專案前置工作 啟用Cloud Firestore(2/5)
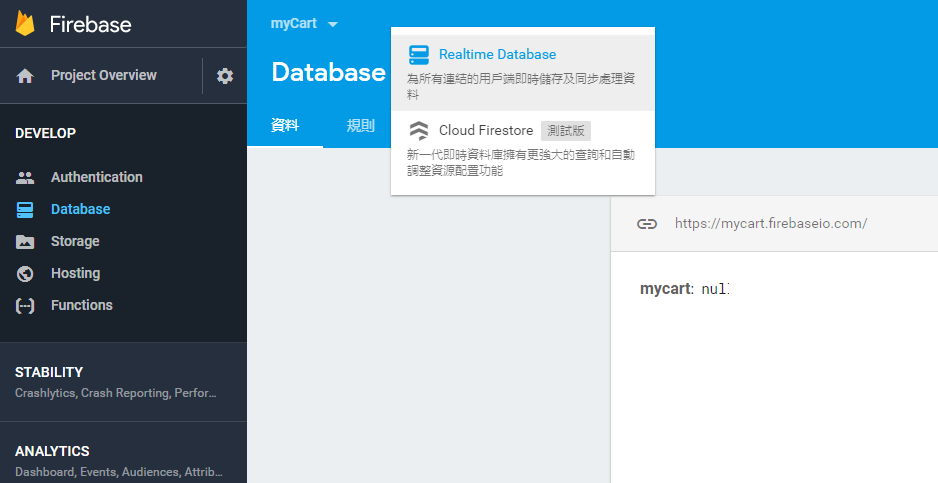
選擇 Cloud Firestore
專案前置工作 啟用Cloud Firestore(3/5)

留意安全性規則設定
專案前置工作 啟用Cloud Firestore(4/5)
以鎖定模式啟動
service cloud.firestore {
  match /databases/{database}/documents {
    match /{document=**} {
      allow read, write;
    }
  }
}
service cloud.firestore {
match /databases/{database}/documents {
match /{document=**} {
allow read, write: if false;
}
}
}
以測試模式啟動
任何人都不能讀寫!
任何人都能讀寫!
修改安全性規則
做好資料庫權限控管
測試期採用
專案前置工作 取得連線設定值(5/5)
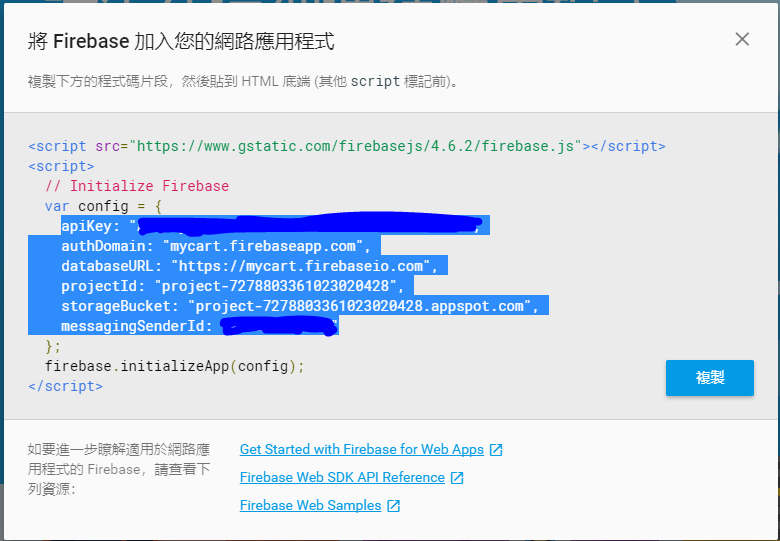
複製反白區域
準備貼至Angular專案
專案前置工作 Angular專案
❶ 安裝Firebase相關套件
❷ 資料庫連線設定
Angular專案前置工作 安裝套件(1/3)
-
新建Angular專案
-
安裝firebase, @angular/fire套件
ng new DatabaseApp
cd DatabaseApp
ng add @angular/fire
Angular v. 13.0.0
firebase: v. 9.4.0
@angular/fire: v. 7.2.0
2021/12/14
@angular/fire v. 7.x.x 與Angular v. 12, v.13不完全相容!
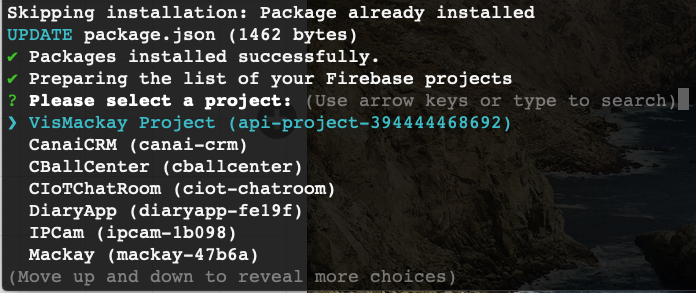
ng add @angular/fire 執行成功最後會出現Firebase專案列表上下箭頭選擇專案
正常狀況

套件安裝成功!
準備列出你的Firebse專案列表
Failed...
npm i -g firebase-tools解決方法:
(1) 安裝firebase管理工具,從cmd登入firebase控制台
firebase logout
firebase login      # 會跳出Google登入畫面
錯誤狀況排除
(2) 安裝好後,先登出,再重新登入
(3) firebase控制台登入成功後,在專案資料夾內再執行一次:
ng add @angular/fire錯誤狀況排除
上下箭頭選擇專案
Angular專案前置工作 連線設定(2/3)
export const environment = {
  production: false,
  firebaseConfig: {
    apiKey: 'XXXXXXXXXXXXXXXXXXXXXXXXXXXXXXXXXXXXX',
    authDomain: '專案id.firebaseapp.com',
    databaseURL: 'https://專案id.firebaseio.com',
    projectId: '專案id',
    storageBucket: '專案id.appspot.com',
    messagingSenderId: 'XXXXXXXXXXXX'
  }
};
檢視environments/environment.ts
ng add @angular/fire會自動完成此連線設定
Angular專案前置工作 連線設定(3/3)
...
import { AngularFireModule } from '@angular/fire/compat';
import { environment } from '../environments/environment';
import { AngularFireAuthModule } from '@angular/fire/compat/auth';
import { AngularFirestoreModule } from '@angular/fire/compat/firestore';
...
  imports: [
    AngularFireModule.initializeApp(environment.firebase),
    AngularFireAuthModule,
    AngularFirestoreModule
  ],
 ...
app.module.ts(修改後)
...
import { initializeApp,provideFirebaseApp } from '@angular/fire/app';
import { environment } from '../environments/environment';
import { provideAuth,getAuth } from '@angular/fire/auth';
import { provideFirestore,getFirestore } from '@angular/fire/firestore';
    ...
   imports: [
    ...
    provideFirebaseApp(() => initializeApp(environment.firebase)),
    provideAuth(() => getAuth()),
    provideFirestore(() => getFirestore())
   ],
...
app.module.ts(修改前)
重要!請修改
主要模組設定檔
Firestore資料模型
Firestore 資料模型 (1/3)
- NoSQL
- 集合 (Collection)
- 集合內可含多個文件 (Document)
- 每一文件內可含多個欄位 (field)

2個集合

prodcuts集合內含6個文件
此文件有4個欄位
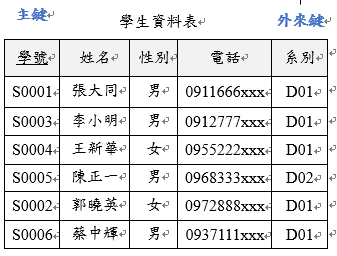
1張資料表
6筆紀錄
5個欄位
Firestore 資料模型更多階層 (2/3)

1. Root Collections
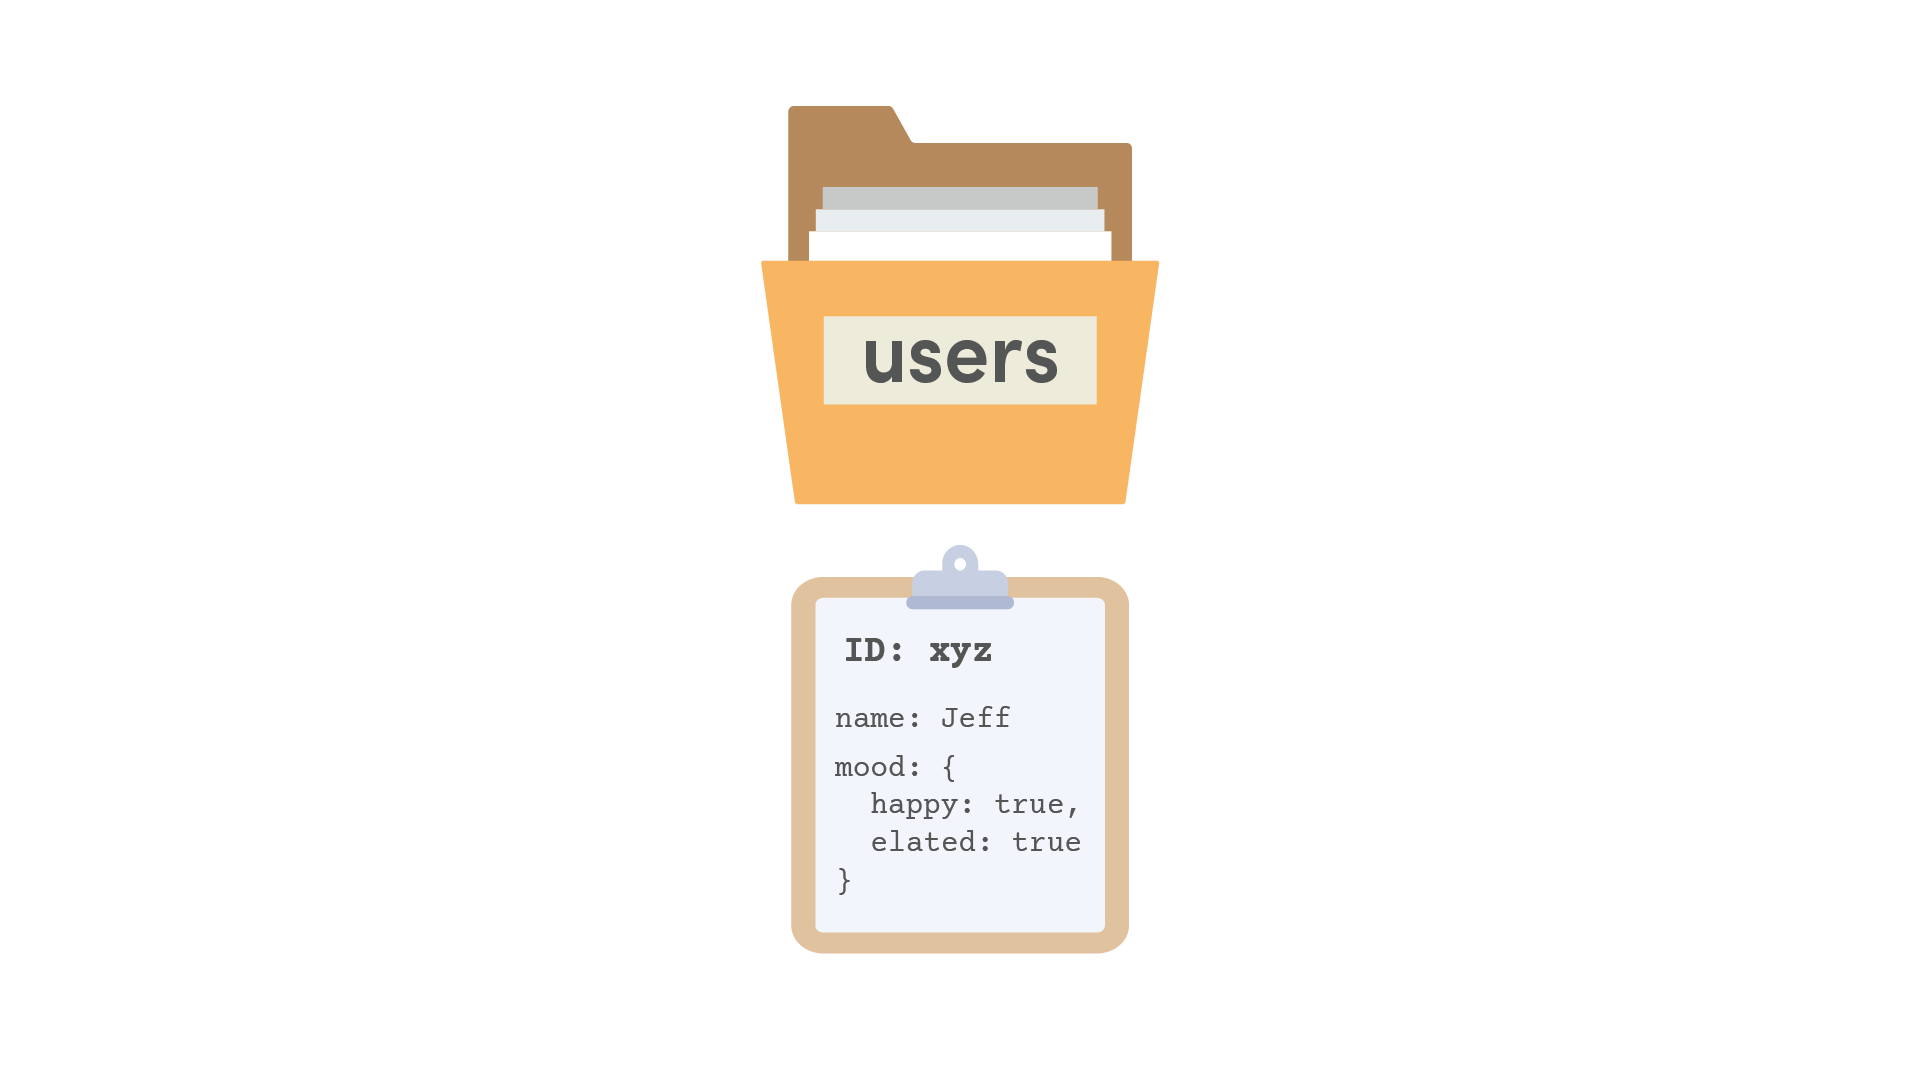
2. Embedded Data
mood欄位值為
兩個欄位的文件
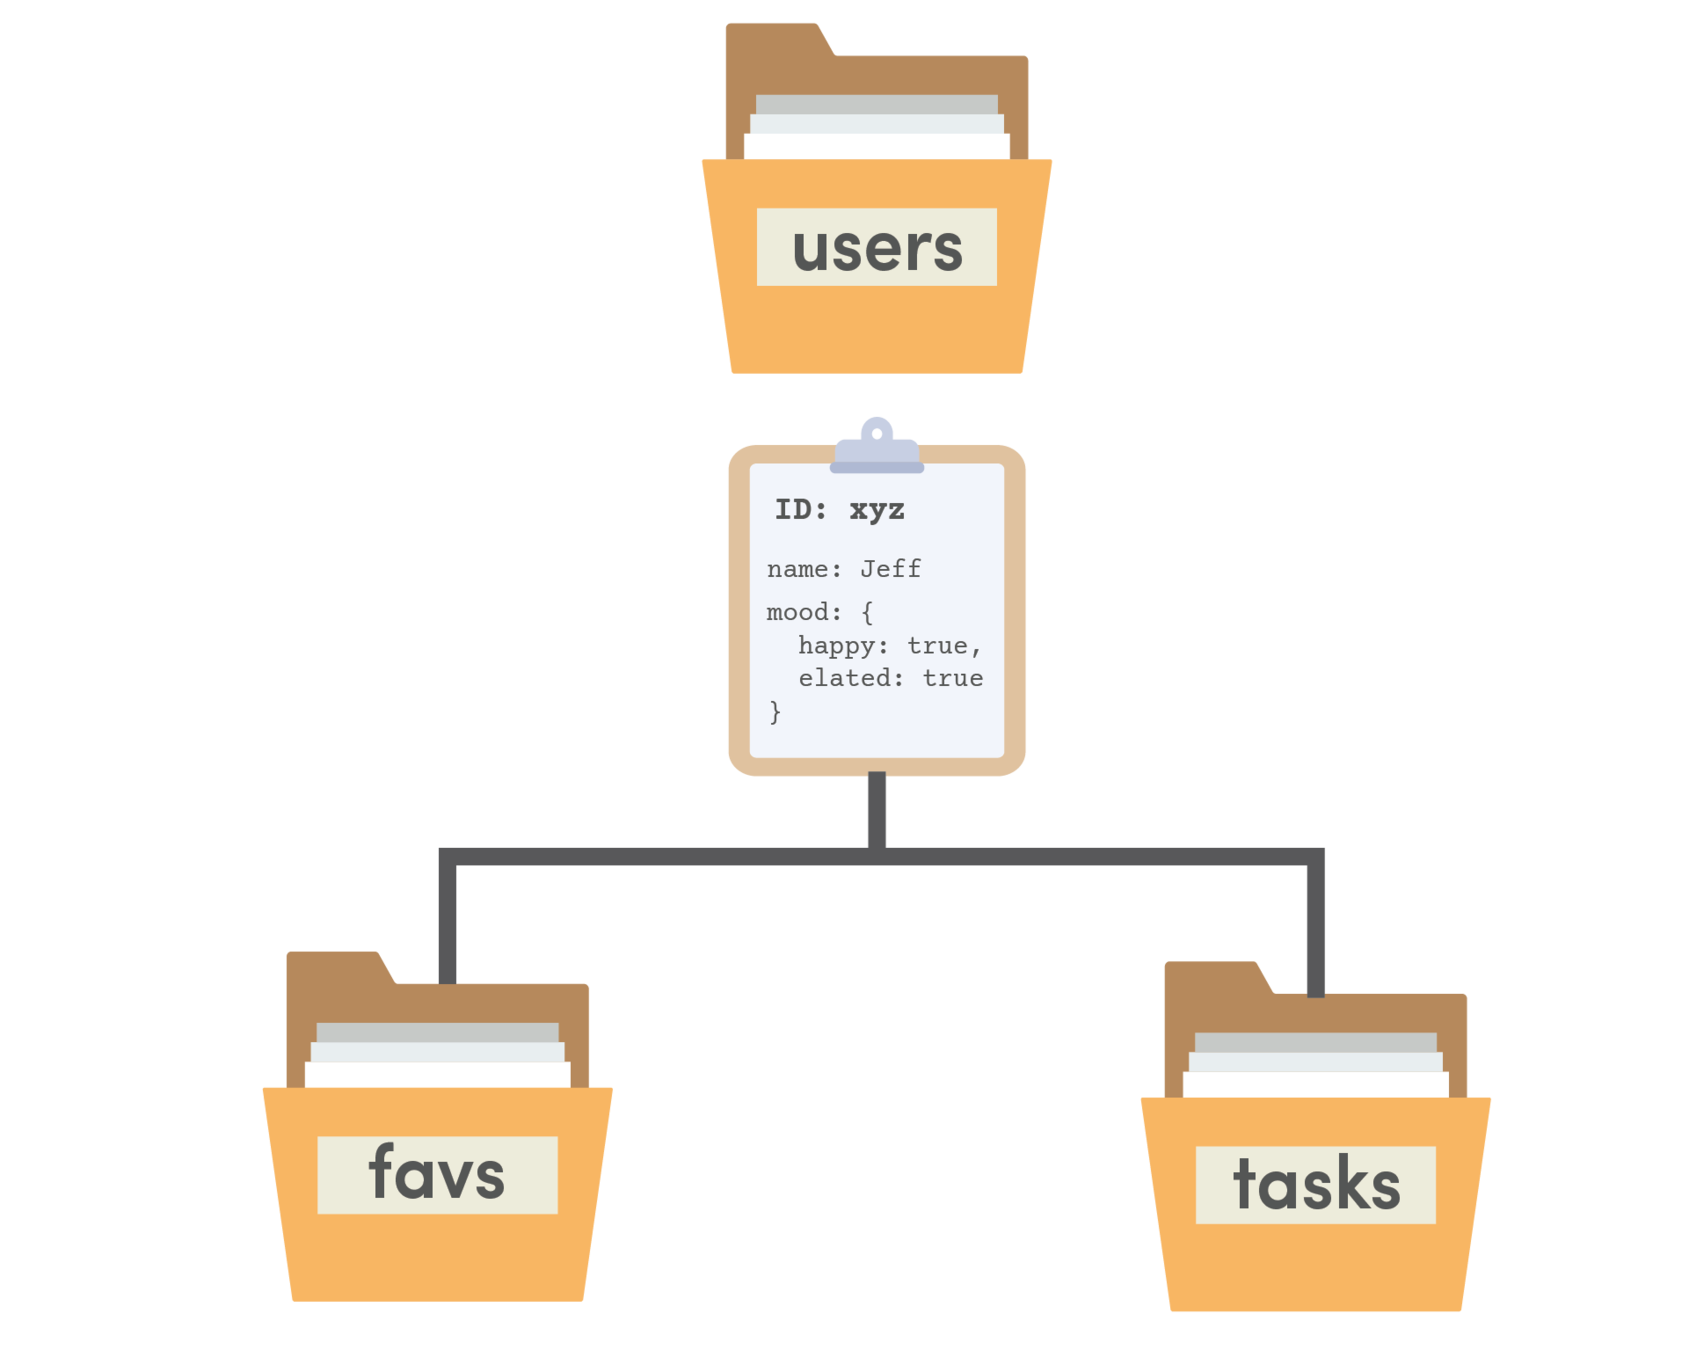
3. Subcollections
除欄位外,文件內也可包含子集合
Firestore 資料模型設計原則 (3/3)
關聯式資料庫之relationships
1個員工分配1台電腦
1個部門負責很多個專案
每台電腦只屬於某個員工
適用 Embedded Data
每個專案只屬於1個部門
1個員工負責很多個專案
每個專案隸屬於多個員工
可用 Root Collections
Subcollections
或 Embedded Data
經常查詢某部門專案 也
經常條件式查詢所有專案
專案查詢功能不涉及跨部門
Firestore資料模型設計方式
專案資料量少又欄位簡單
或 Root Collections
資料量少又欄位簡單
資料量大
額外加上第三個Collection
包含employeeId, projectId
在各自Collection內加入Embedded Data
在每個員工下重複儲存專案資料
在每個專案下重複儲存員工資料
Subcollections
將上述embedded data改成subcollections
客戶管理範例
- 範例1: 客戶資料表「查詢」
- 範例2: 客戶資料表「新增/查詢」
- 範例3: 客戶資料表「修改/刪除」
客戶管理範例資料庫需求
銷售代表資料表
客戶資料表
1對多
1對多
工作項目資料表
1對多
練習: 客戶管理
ng g interface model/customer
ng g service service/customer

ng g c customer/customer-list
ng g c customer/customer-detail

ng g c customer/customer-form
ng new MyCRM
cd MyCRM
ng add @angular/fire
ng g c dashboard建立專案
firebase資料庫
資料庫存取服務
資料欄位定義
客戶清單
單一客戶資料
客戶資料維護表單(modal)
首頁
會員管理: customer-list
新增客戶: customer-form
Modal視窗
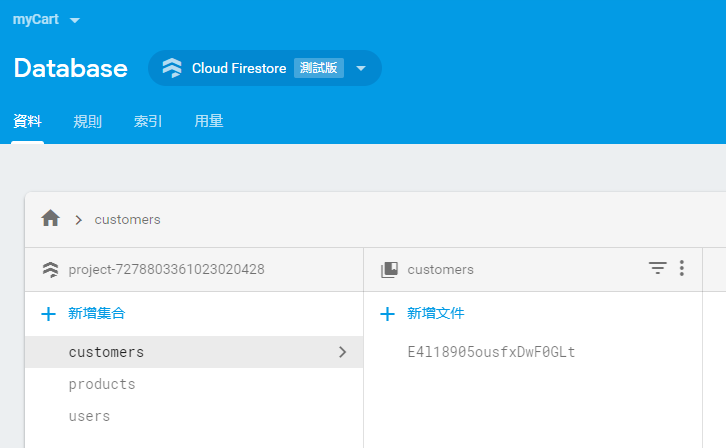
Firebase資料庫前置動作
❶前往Firebase控制台,建立新資料集合
❷安裝firebase, @angular/fire套件
Ⓐ準備工作
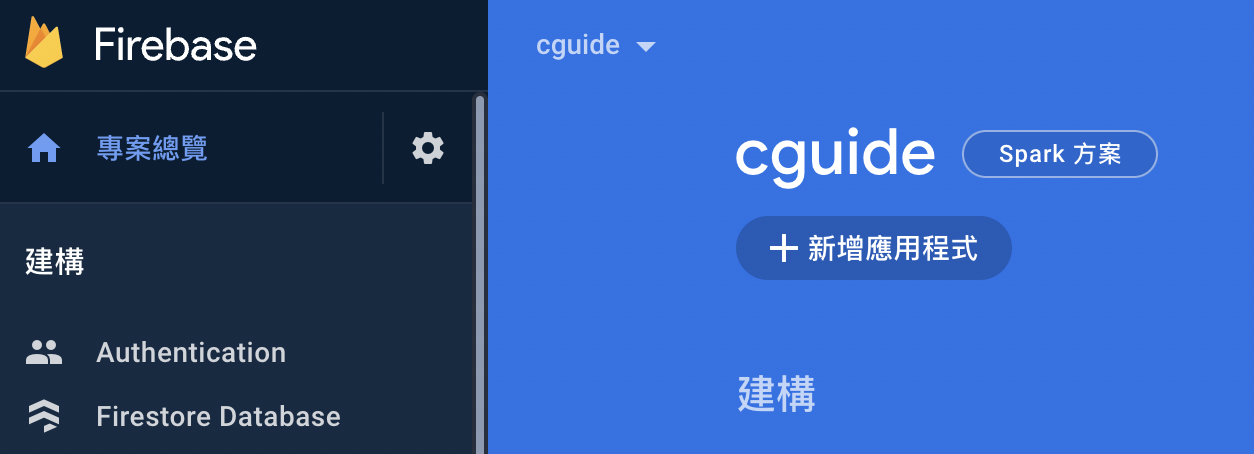
(1-1) 前往Firebase控制台,建立新專案或開啟舊專案
新增專案,即可建立資料庫
(1-2) 建立網頁「應用程式」
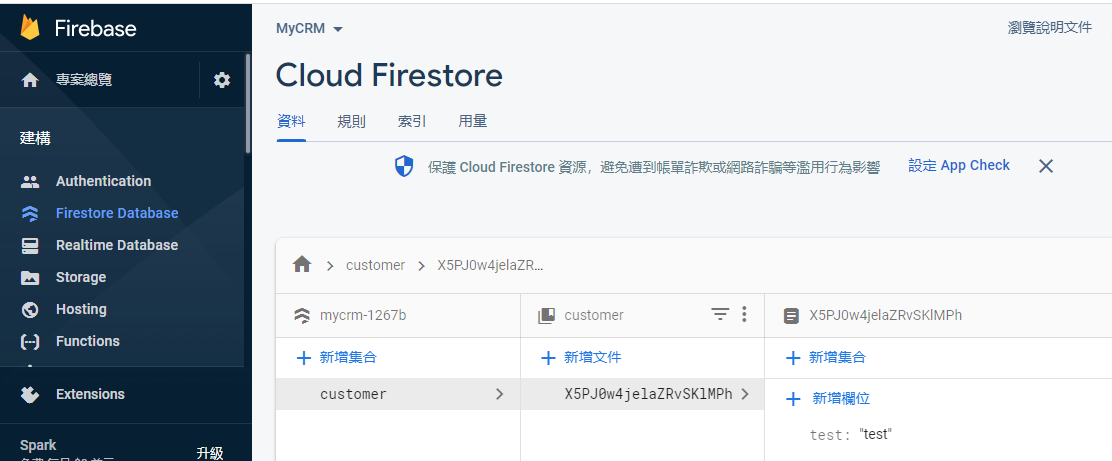
(1-3) 啟用firestore資料庫,新增集合

ng add @angular/fire(2-1) 選擇要加入(app.module.ts)的功能
Authentication(認證服務)
Firestore(資料庫)

Y
選擇Google帳戶,允許存取
(2-2) 讓firebase CLI取得權限
(2) 安裝firebase, @angular/fire套件流程
firebase: v. 9.4.0
@angular/fire: v. 7.2.0
2021/12/11
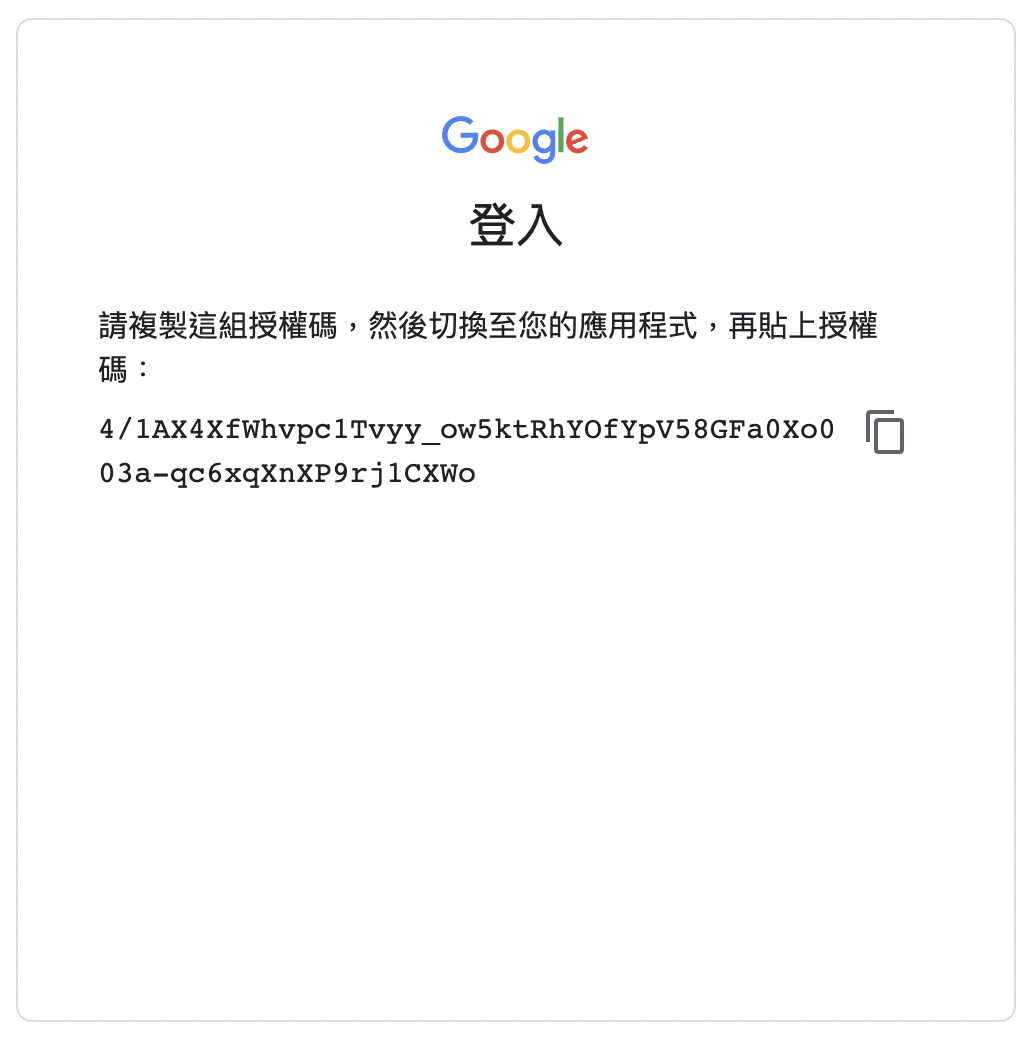

(2-3) 複製授權碼,貼到下一個問題
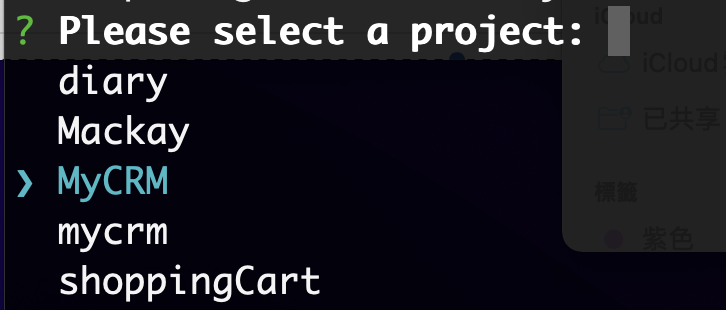
(2-4) 選擇專案

(2-5) 選擇應用程式
授權碼
(2-5-1) 若無應用程式,到Firebase主控台進行新增
選取「網頁」平台
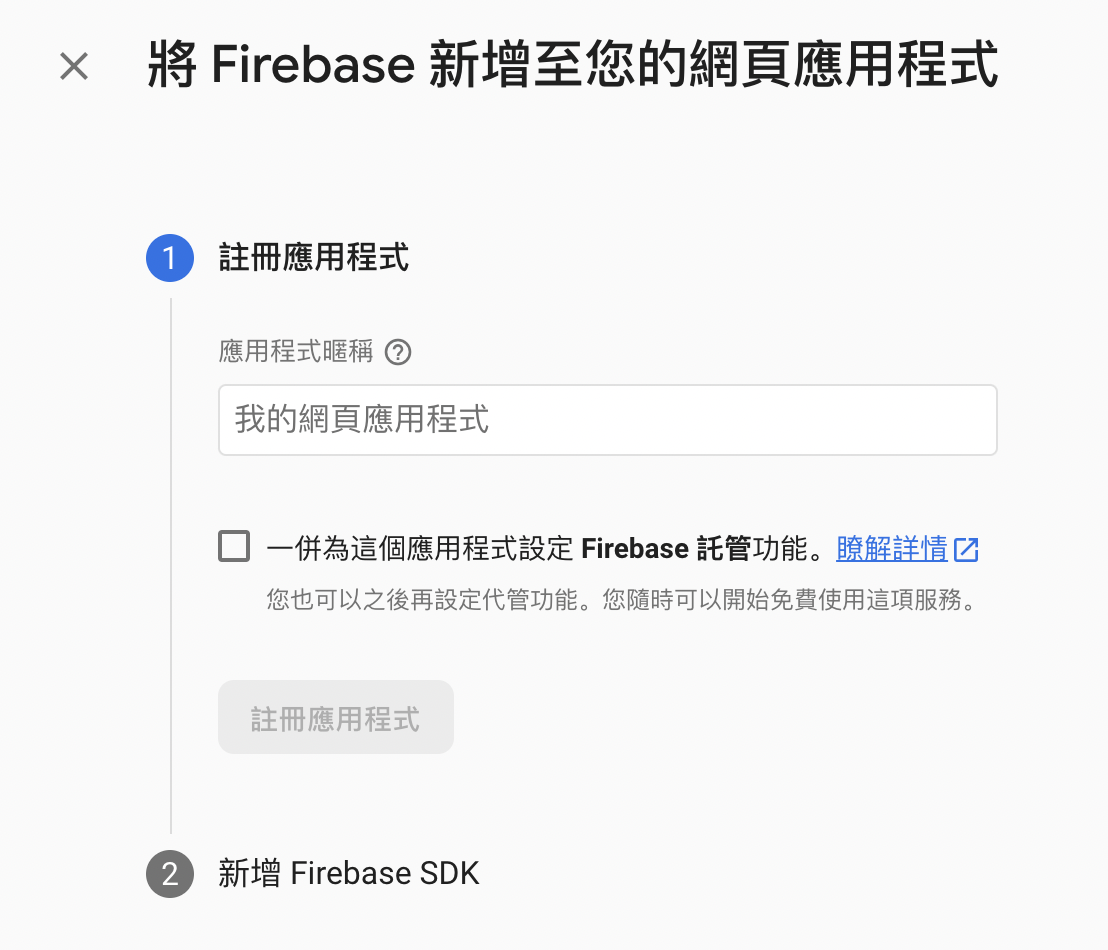
任何名稱皆可
不要勾選
輸入暱稱後即可「註冊應用程式」

(2-6) 完成後,會更新下列檔案
export const environment = {
  production: false,
  firebaseConfig: {
    apiKey: 'XXXXXXXXXXXXXXXXXXXXXXXXXXXXXXXXXXXXX',
    authDomain: '專案id.firebaseapp.com',
    databaseURL: 'https://專案id.firebaseio.com',
    projectId: '專案id',
    storageBucket: '專案id.appspot.com',
    messagingSenderId: 'XXXXXXXXXXXX'
  }
};
ng add @angular/fire會自動完成此連線設定
(2-6-1) 檢視Firebase應用程式連線設定(已自動加入)
environment.ts片段
...
import { AngularFireModule } from '@angular/fire/compat';
import { environment } from '../environments/environment';
import { AngularFireAuthModule } from '@angular/fire/compat/auth';
import { AngularFirestoreModule } from '@angular/fire/compat/firestore';
...
  imports: [
    AngularFireModule.initializeApp(environment.firebase),
    AngularFireAuthModule,
    AngularFirestoreModule
  ],
 ...
app.module.ts(修改後)
...
import { initializeApp,provideFirebaseApp } from '@angular/fire/app';
import { environment } from '../environments/environment';
import { provideAuth,getAuth } from '@angular/fire/auth';
import { provideFirestore,getFirestore } from '@angular/fire/firestore';
    ...
   imports: [
    ...
    provideFirebaseApp(() => initializeApp(environment.firebase)),
    provideAuth(() => getAuth()),
    provideFirestore(() => getFirestore())
   ],
...
app.module.ts(修改前)
(2-6-2) 重要!修改專案主要模組設定檔(angularfire v.7.x.x有相容問題)
其他前置準備工作
☑ 安裝ng-bootstrap(modal視窗)
☑ Argon Dashboard CSS/Javascript設定(版型)
☑ 路徑設定
☑ 加入FormsModule(表單模組)
☑ Font Awesome icon連結設定(icon來源)
前置工作bootstrap設定
<!doctype html>
<html lang="en">
<head>
  <meta charset="utf-8">
  <title>NewFormExample</title>
  <base href="/">
  <meta name="viewport" content="width=device-width, initial-scale=1">
  <link rel="icon" type="image/x-icon" href="favicon.ico">
  <!-- Favicon -->
  <link href="/assets/img/brand/favicon.png" rel="icon" type="image/png">
  <!-- Fonts -->
  <link href="https://fonts.googleapis.com/css?family=Open+Sans:300,400,600,700" rel="stylesheet">
  <!-- Icons -->
  <link href="/assets/vendor/nucleo/css/nucleo.css" rel="stylesheet">
  <link href="/assets/vendor/@fortawesome/fontawesome-free/css/all.min.css" rel="stylesheet">
  <!-- Argon CSS -->
  <link type="text/css" href="/assets/css/argon.min.css" rel="stylesheet">
</head>
<body>
  <app-root></app-root>
  <!-- Core -->
  <script src="/assets/vendor/jquery/dist/jquery.min.js"></script>
  <script src="/assets/vendor/bootstrap/dist/js/bootstrap.bundle.min.js"></script>
  <!-- Argon JS -->
  <script src="/assets/js/argon.min.js"></script>
</body>
</html>
加入 ArgonDashboard 相關css檔, js檔(index.html)
index.html
npm i --legacy-peer-deps @ng-bootstrap/ng-bootstrap加入ng-bootstrap套件(處理modal視窗)
import { BrowserModule } from '@angular/platform-browser';
import { NgModule } from '@angular/core';


import { FormsModule } from '@angular/forms';
// ...[略]...

@NgModule({
  // ...[略]...
  imports: [
    BrowserModule,
    AppRoutingModule,
    NgbModule,
    FormsModule
  ],
  entryComponents: [ CustomerFormComponent ],
  providers: [],
  bootstrap: [AppComponent]
})
export class AppModule { }
加入外部元件: NgbModule,FormsModule (app.module.ts)
app.module.ts
⓵ 引入模組名稱
⓶ 注入模組
前置工作appModule設定
前置工作路徑設定
import { CustomerDetailComponent } from './customer/customer-detail/customer-detail.component';
import { CustomerListComponent } from './customer/customer-list/customer-list.component';
import { DashboardComponent } from './dashboard/dashboard.component';
import { NgModule } from '@angular/core';
import { Routes, RouterModule } from '@angular/router';

const routes: Routes = [
  { path: '', redirectTo: '/dashboard', pathMatch: 'full' },
  { path: 'dashboard', component: DashboardComponent },
  { path: 'customer', component: CustomerListComponent },
  { path: 'customer/:cid', component: CustomerDetailComponent }
];

@NgModule({
  imports: [RouterModule.forRoot(routes)],
  exports: [RouterModule]
})
export class AppRoutingModule { }
❹ 在app-routing.module.ts設定多個路徑
app-routing.module.ts
⓶ 三個路徑
⓵ 首頁
⓷ 引入元件名稱
<router-outlet></router-outlet>❺ 在app.component.html使用router-outlet
app.component.html
刪除其他內容
或是加入導覽列Navbar, 頁尾Jumbotrum
前置工作Font Awesome CSS連結
❻ 加入Font Awesome 圖案css連結(可不加,Argon Dashboard已包含)
<!doctype html>
<html lang="en">
<head>
   <!--...略--->
   <link rel="stylesheet" href="https://cdnjs.cloudflare.com/ajax/libs/font-awesome/5.11.2/css/all.css">
</head>
<body>
    <!--...略--->
</body>
</html>
index.html
css 連結
首頁 dashboard
首頁dashboard
<div class="container">
  <div class="card-columns text-center my-5">
    <div class="card p-3">
      <i class="fas fa-users fa-5x"></i>
      <div class="card-body">
        <h4 class="card-title">
          <a class="btn btn-lg btn-primary text-light" [routerLink]="['/customer']">會員管理</a>
        </h4>
        <p class="card-text">會員資料管理</p>
      </div>
    </div>
    <div class="card p-3">
      <i class="fas fa-user-circle fa-5x"></i>
      <div class="card-body">
        <h4 class="card-title">
            <a class="btn btn-lg btn-secondary text-light">員工管理</a>
        </h4>
        <p class="card-text">銷售代表管理,工作指派等</p>
      </div>
    </div>
    <div class="card p-3">
      <i class="fas fa-book-open fa-5x"></i>
      <div class="card-body">
        <h4 class="card-title">
            <a class="btn btn-lg btn-success text-light">待辦事項</a>
        </h4>
        <p class="card-text">待辦事項行事曆</p>
      </div>
    </div>
  </div>
</div> <a class="btn btn-lg btn-primary" [routerLink]="['/customer']">
會員管理
</a>dashboard.component.html
資料存取設計模式(DAO)
簡化版(僅建立資料模型檔, 無資料界面檔)
☑ 建立 customer.ts (資料模型檔)
☑ 撰寫CRUD服務 (service/customer.service.ts)
☞ 查詢全部資料
☞ 新增一筆資料
☞ 修改一筆資料
☞ 刪除一筆資料
☞ 查詢一筆資料
☑ 撰寫個別頁面(使用CRUD服務)
第一階段
第一階段
查詢全部資料
☑ 建立 customer.ts (資料模型檔)
☑ 撰寫CRUD服務 (service/customer.service.ts)
☞ 查詢全部資料
☑ 撰寫個別頁面(使用CRUD服務)
☞ 客戶列表(customer-list)
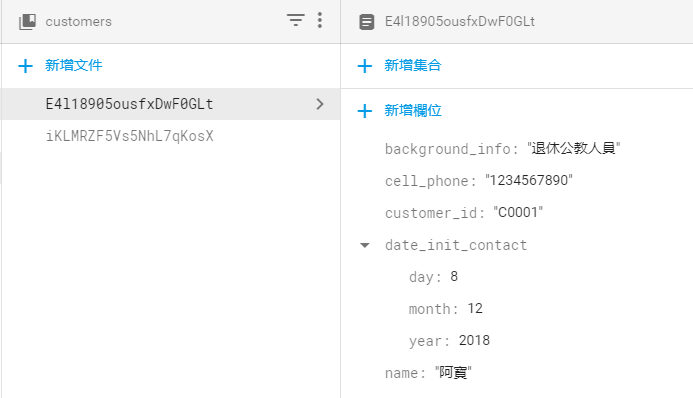
❶ 已建立之customers集合(資料表): 用來儲存客戶資料
❷ 每一客戶文件(紀錄): 包含5個欄位,如下圖
Firestore資料庫需求
複合欄位的類型:map
資料模型檔設定欄位 (1/3)
export interface Customer {
    name: string;       // 姓名
    date_init_contact: {  // 初次接觸日期
        day: number,
        month: number,
        year: number
    };
    cell_phone: string; // 手機
    background_info?: string;   // 背景資訊
    customer_id: string;   // 客戶編號
}

// 增加firestore特有的"亂數id"欄位
export interface CustomerId extends Customer {
  id: string;
}
models/customer.ts
⓶ 日期格式
⓵ 5個欄位
⓷ Firestore特有欄位
❶ 建立資料模型檔: 設定欄位
客戶資料表: 5個欄位
第6個id欄位:此為外加Firestore欄位
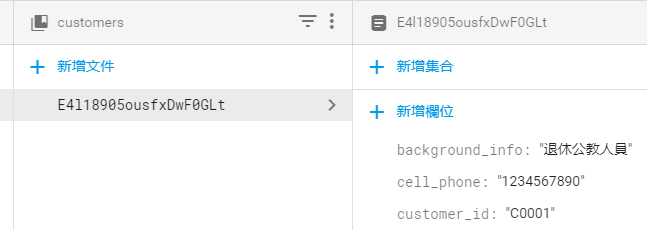
Firestore管理平台
id: 用來建立資料
建立CRUD服務(1/2)
...[略]...
export class CustomerService {
  customerRef: AngularFirestoreCollection<Customer>; // DB參照點
  customers: Observable<CustomerId[]> | undefined;    // 動態資料流(供訂閱)

  constructor(private db: AngularFirestore) {
    // 設定資料庫集合參照點
    this.customerRef = this.db.collection<Customer>('customers');
  }
  // 新增一筆會員資料
  addCustomer(customer: Customer): Promise<any> {
     return new Promise((resovle, reject) => {}); // 暫時使用
  }
  // 刪除一筆會員資料
  removeCustomer(id: string): Promise<any> {
     return new Promise((resovle, reject) => {}); // 暫時使用
  }
  // 修改一筆會員資料
  updateCustomer(id: string, data: Customer): Promise<any> {
     return new Promise((resovle, reject) => {}); // 暫時使用
  }
  // 取得所有會員資料
  getCustomers(): Observable<CustomerId[]> {
  }
}
⓵ 2個屬性
⓶ 建構子: 設定「資料集合」連結
⓷ 預計有4個方法
customer.service.ts預計功能
❷ 建立服務檔: 提供CRUD等存取功能
建立CRUD服務(2/2)
...[略]...
import { AngularFirestoreCollection } from '@angular/fire/compat/firestore';
import { AngularFirestore} from '@angular/fire/compat/firestore';
import { AngularFirestoreDocument } from '@angular/fire/compat/firestore';
...[略]...

export class CustomerService {
  // 資料庫集合參照點
  customerRef: AngularFirestoreCollection<Customer> ;
  // 所有客戶的資料流
  customers: Observable<CustomerId[]>;
...[略]...
customer.service.ts
AngularFirestoreCollection : 資料集合的參考點
AngularFirestore : 資料庫服務
AngularFirestoreDocument : 資料文件的參考點
所需import之@angular/fire套件: 共3個
❸ 檢視服務檔所需import有無遺漏
可從firestore後台手動輸入資料
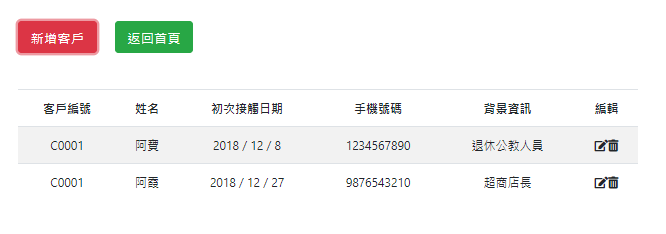
完成「查詢全部資料」功能(customer.service.ts)
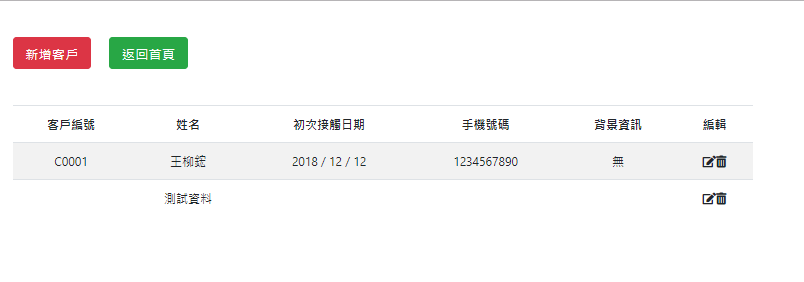
「客戶列表」(customer-list.component) 頁面後之畫面
注意:手動輸入時,所有欄位都要建立
完成「查詢全部資料」
export class CustomerService {
  ...
  // 取得所有會員資料
  getCustomers(): Observable<CustomerId[]> {
    return this.customers = this.customerRef.valueChanges({idField: 'id'});
  }
}
查詢所有資料/未排序
- @angular/fire的版本必須為5.2.0以上(目前為7.2.0)
- 改呼叫valueChanges(),參數為{idField: 欄位名稱}
- idField:指定索引欄位名稱(類似關聯式資料庫的主鍵)
文件id
排序版
客戶資料查詢資料-排序版
export class CustomerService {
  ...
  // 取得所有會員資料
  getCustomers(): Observable<CustomerId[]> {
    const dref = this.db.collection<Customer>('customers', ref => {
      return ref.orderBy('customer_id');
    });
    return dref.valueChanges({ idField: 'id' });
  }
}
此處以customer_id欄位排序,預設是小排到大(asc)
第5行建立另一種類型的db參照
需要加第二個函式型的參數,在參數內呼叫orderBy()進行排序
Ⓒ查詢資料
完成「客戶列表」頁面ts檔:使用服務
import { CustomerId } from './../../models/customer';
import { CustomerService } from './../../services/customer.service';
import { Component, OnInit } from '@angular/core';
import { Observable } from 'rxjs';

@Component({
  selector: 'app-customer-list',
  templateUrl: './customer-list.component.html',
  styleUrls: ['./customer-list.component.css']
})
export class CustomerListComponent implements OnInit {
  customers: Observable<CustomerId[]>; // 所有客戶的資料流
  subscription: any;

  constructor(private cs: CustomerService) {
    this.customers = this.cs.getCustomers(); // 取得所有客戶的資料流
  }

  ngOnInit() {}
}
customer-list.component.ts(第一版)
注意:資料流並非直接可顯示的「資料」
HTML頁面使用時必須加上「非同步」指令
import { CustomerId } from './../../models/customer';
// .... 省略 ....//

export class CustomerListComponent implements OnInit {
  customers: Observable<CustomerId[]>;
  subscription: any;

  constructor(private cs: CustomerService) {
    this.customers = this.cs.getCustomers();
  }

  ngOnInit() {}
  // 彈出視窗: 新增一筆客戶資料
  openModal() {}
  // 編輯一筆客戶資料
  editCustomer(c: CustomerId) {}
  // 刪除一筆客戶資料
  deleteCustomer(c: CustomerId) {}
}
customer-list.component.ts(第二版)
頁面提供三個功能:新增、修改、刪除
完成「客戶列表」頁面ts檔:預留功能函式
<div class="container">
  <div class="row my-5">
    <!-- 列1:按鈕列 -->
    <div class="col">
      <button class="btn btn-lg btn-danger mr-4" (click)="openModal()">新增客戶</button>
      <button class="btn btn-lg btn-success" [routerLink]="['/dashboard']">返回首頁</button>
    </div>
  </div>
  <!-- 列2:資料列-->
  <div class="row">
    <div class="col">
      <table class="table table-striped table-inverse">
        <thead class="thead-inverse text-center">
          <tr>
            <th>客戶編號</th>
            <th>姓名</th>
            <th>初次接觸日期</th>
            <th>手機號碼</th>
            <th>背景資訊</th>
            <th>編輯</th>
          </tr>
        </thead>
        <tbody class="text-center">
          <tr *ngFor="let c of customers | async">
            <td>{{ c.customer_id }}</td>
            <td>{{ c.name }}</td>
            <td>{{ c.date_init_contact.year }} / {{ c.date_init_contact.month }} / {{ c.date_init_contact.day }}</td>
            <td>{{ c.cell_phone }}</td>
            <td>{{ c.background_info }}</td>
            <td>
              <i class="fas fa-edit" (click)="editCustomer(c)"></i>
              <i class="fas fa-trash-alt" (click)="deleteCustomer(c)"></i>
            </td>
          </tr>
        </tbody>
      </table>
    </div>
  </div>

  <div class="row">
    <!-- 列3:分頁(pagination)-->

  </div>

</div>
customer-list.component.html (完整版)
<tr *ngFor="let c of customers | async">
| : pipeline指令,將前面的輸出,作為後面指令的輸入參數
async : 「非同步」指令,必須等資料到才會顯示
完成「客戶列表」頁面html檔
第二階段
完成新增功能
☑ 撰寫CRUD服務 (service/customer.service.ts)
☞ 新增一筆資料
☑ 撰寫個別頁面(使用CRUD服務)
☞ 完成新增Modal視窗(customer-form)
☞ 修改「客戶列表」(customer-list)
新增資料
customer.service.ts加入「新增功能」
customer-list.component.html:新增按鈕
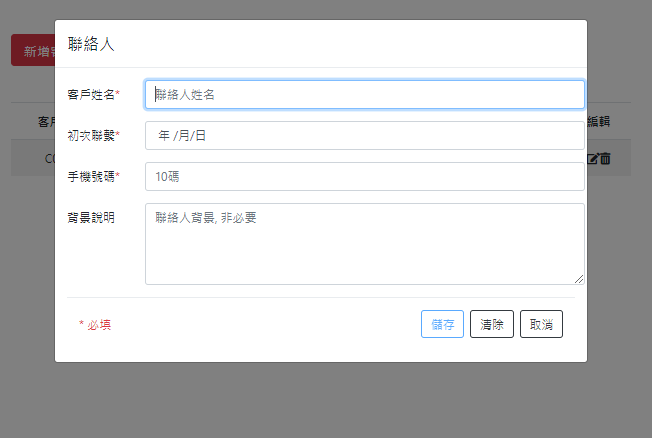
customer-form:輸入表單(modal視窗)
關於Modal視窗
ng add @ng-bootstrap/ng-bootstrap
❶ 若未安裝,請安裝ng-bootstrap
import { BrowserModule } from '@angular/platform-browser';
import { NgModule } from '@angular/core';

import { NgbModule } from '@ng-bootstrap/ng-bootstrap';
// ...[略]...

@NgModule({
  // ...[略]...
  imports: [
    BrowserModule,
    AppRoutingModule,
    NgbModule
  ],
  providers: [],
  bootstrap: [AppComponent]
})
export class AppModule { }
❷ 修改app.module.ts,加入NgbModule
app.module.ts
⓵ 引入模組名稱
⓶ 注入模組
npm i --legacy-peer-deps @ng-bootstrap/ng-bootstrap...
import { CustomerFormComponent } from './customer/customer-form/customer-form.component';
@NgModule({
declarations: [
AppComponent,
DashboardComponent,
CustomerListComponent,
CustomerDetailComponent,
CustomerFormComponent
],
entryComponents: [ CustomerFormComponent ],
...
providers: [],
bootstrap: [AppComponent]
})
export class AppModule { }修改app.module.ts
❸ 修改app.module.ts,加入entryComponents設定
指定modal視窗是哪一個元件
暫時不修改!!
dismiss()
關閉modal頁面
回傳處理結果
❷使用NgbActiveModal
呼叫dismiss()
元件頁面
❶使用NgbModal
呼叫open()開啟視窗
Modal頁面
主頁面呼叫open()
import { NgbModal } from '@ng-bootstrap/ng-bootstrap';
import { ContactmodalComponent } from '../contactmodal/contactmodal.component';
export class ContactComponent implements OnInit {
constructor(
private modal: NgbModal,
) { }
ngOnInit() {
}
openContactModal() {
const modalRef = this.modal.open(ContactmodalComponent, {
size: 'lg'
});
}
}
假設主頁面為contact
modal頁面為contactmodal
<button class="btn btn-sm btn-outline-secondary" (click)="openContactModal()">
<i class="fas fa-user-alt"></i> 新增聯絡人
</button>
open()函式來自NgbModal
Modal頁面呼叫dismiss()
...
import { NgbActiveModal } from '@ng-bootstrap/ng-bootstrap';
@Component({
selector: 'app-contactmodal',
templateUrl: './contactmodal.component.html',
styleUrls: ['./contactmodal.component.css']
})
export class ContactmodalComponent implements OnInit {
constructor(
public activeModal: NgbActiveModal,
) {
}
ngOnInit() {
}
contactSave() {
// 儲存資料進資料庫 或 回傳資料至主頁面...
this.activeModal.close('Y');
}
}
<button type="submit" class="btn btn-outline-primary" (click)="contactSave()">儲存</button>
<button type="reset" class="btn btn-outline-dark">清除</button>
<button type="button" class="btn btn-dark" (click)="activeModal.dismiss('cancel')">取消</button>
dismiss()函式來自NgbActiveModal
可以從html檔呼叫dismiss()?
服務參數必須設定為public
主頁面修改以便傳遞參數到modal視窗
import { NgbModal } from '@ng-bootstrap/ng-bootstrap';
import { ContactmodalComponent } from '../contactmodal/contactmodal.component';
export class ContactComponent implements OnInit {
constructor(
private modal: NgbModal,
) { }
ngOnInit() {
}
openContactModal() {
const modalRef = this.modal.open(ContactmodalComponent, {
size: 'lg'
});
// 送出資料到modal
modalRef.componentInstance.data = {name: '書名', price: 300};
modalRef.componentInstance.id = id;
}
}
使用componentInstance設定要傳遞到modal的參數
此處設定了data物件、與id兩個參數
...
import { NgbActiveModal } from '@ng-bootstrap/ng-bootstrap';
@Component({
selector: 'app-contactmodal',
templateUrl: './contactmodal.component.html',
styleUrls: ['./contactmodal.component.css']
})
export class ContactmodalComponent implements OnInit {
@Input() data: any; // 資料
@Input() id: string; // id
// this.data, this.id便可直接使用
constructor(
public activeModal: NgbActiveModal,
) {
}
ngOnInit() {
}
contactSave() {
// 儲存資料進資料庫 或 回傳資料至主頁面...
this.activeModal.close('Y');
}
}
Modal頁面修改接收參數
使用@Input()元件
完成「新增一筆資料」功能customerService
export class CustomerService {
fake_cid = 1 // 模擬顧客編號, 每次重新執行都會歸1
...
// 新增一筆會員資料
addCustomer(customer: Customer): Promise<any> {
customer.customer_id = 'C' + ('0000' + this.fake_cid).slice(-4);
this.fake_cid ++; // 遞增
return this.customerRef.add(customer);
}
...
}customer.service.ts
constructor(private db: AngularFirestore) {
// 設定資料庫集合參照點
this.customerRef = this.db.collection<Customer>('customer');
}修改客戶列表加入新增資料功能(html檔)
<div class="container">
<div class="row my-5">
<!-- 列1:按鈕列 -->
<div class="col">
<button class="btn btn-lg btn-danger mr-4" (click)="openModal()">
新增客戶
</button>
<button class="btn btn-lg btn-success" [routerLink]="['/dashboard']">
返回首頁
</button>
</div>
</div>
<!--省略-->
</div>customer-list.component.html(片段)
確認新增客戶有無綁定click事件
修改客戶列表加入新增資料功能(ts檔)
...[略]...
export class CustomerListComponent implements OnInit {
customers: Observable<CustomerId[]> | undefined;
subscription: any;
constructor(private cs: CustomerService,
private modal: NgbModal
) { }
// 開啟客戶視窗
openModal() {
const ref = this.modal.open(CustomerFormComponent, {
size: 'lg'
});
this.subscription = ref.componentInstance.result.subscribe(
result => {
console.log('表單輸入資料為:', result);
this.cs.addCustomer(result);
}
);
}
...[略]...
}
customer-list.component.ts(第三版)
加入NgbModal服務:提供彈出視窗功能
open(): 開啟Modal視窗
訂閱Modal視窗的回傳結果
注意: result為表單頁發佈的資料
(customer-form的ts檔必須定義)
...
import { CustomerFormComponent } from './customer/customer-form/customer-form.component';

@NgModule({
  declarations: [
    AppComponent,
    DashboardComponent,
    CustomerListComponent,
    CustomerDetailComponent,
    CustomerFormComponent
  ],
  entryComponents: [ CustomerFormComponent ],
  ...
  providers: [],
  bootstrap: [AppComponent]
})
export class AppModule { }
修改app.module.ts
修改模組設定加入entryComponents陣列
暫時不修改!!
建立Modal視窗新增表單(TS檔)
//... 省略不顯示....
export class CustomerFormComponent implements OnInit {
  @Output() result: EventEmitter<Customer> = new EventEmitter<Customer>();


  customer: Customer = {  // 儲存表單各位欄位的資料,供表單ngModel使用
    name: '',
    date_init_contact: {day:0, month:0 ,year:0 },
    cell_phone: '',
    background_info: '',
    customer_id: ''
  };

  constructor(public activeModal: NgbActiveModal) { }

  ngOnInit() {
  }

  save() {
    this.result.emit(this.customer);
    this.activeModal.close('儲存');  // 關閉視窗,回傳訊息'儲存'
  }
}
customer-form.component.ts(第一版)
注意: result為表單頁打算回傳的資料
發佈回傳資料,訂閱者可收到通知
<div class="modal-header">
    <h4 class="modal-title">聯絡人</h4>
  </div>
  <div class="modal-body">
    <form #cform="ngForm">
      <div class="form-group">
        <div class="row">
          <label for="name" class="col-2 col-form-label">客戶姓名<span class="text-danger">*</span></label>
          <input type="text" class="col-10 form-control" [(ngModel)]="customer.name" name="name" #name="ngModel" placeholder="聯絡人姓名" required>
        </div>
        <div *ngIf="name.dirty">
          <span *ngIf="name.errors; then errors"></span>
        </div>
      </div>

      <div class="form-group">
        <div class="row">
          <label for="date" class="col-2 col-form-label">初次聯繫<span class="text-danger">*</span></label>
          <input type="date" class="col-10 form-control" [(ngModel)]="customer.date_init_contact" name="date" #date="ngModel" ngbDatepicker #d="ngbDatepicker"
            required>
        </div>
        <div *ngIf="date.dirty">
            <span *ngIf="date.errors; then errors"></span>
        </div>
      </div>

      <div class="form-group">
        <div class="row">
          <label for="cell_phone" class="col-2 col-form-label">手機號碼<span class="text-danger">*</span></label>
          <input type="text" class="col-10 form-control" [(ngModel)]="customer.cell_phone" name="phone" #phone="ngModel" placeholder="10碼" required minlength="10"
          maxlength="10">
        </div>
        <div *ngIf="phone.dirty">
            <span *ngIf="phone.errors; then phone_errors"></span>
        </div>
      </div>

      <div class="form-group row">
        <label for="background" class="col-2 col-form-label">背景說明</label>
        <textarea type="text" class="col-10 form-control" [(ngModel)]="customer.background_info" name="background"
        placeholder="聯絡人背景, 非必要" rows="4">
            </textarea>
      </div>

      <div class="modal-footer">
        <small class="text-danger mr-auto">* 必填</small>
        <button type="submit" class="btn btn-outline-primary" (click)="save()" [disabled]="!cform.form.valid">儲存</button>
        <button type="reset" class="btn btn-outline-dark">清除</button>
        <button type="button" class="btn btn-outline-dark" (click)="activeModal.dismiss('cancel')">取消</button>
      </div>
    </form>
  </div>

  <ng-template #errors>
      <p class="text-danger">欄位未填!</p>
  </ng-template>
  <ng-template #phone_errors>
      <p class="text-danger">手機號碼需10碼!</p>
  </ng-template>
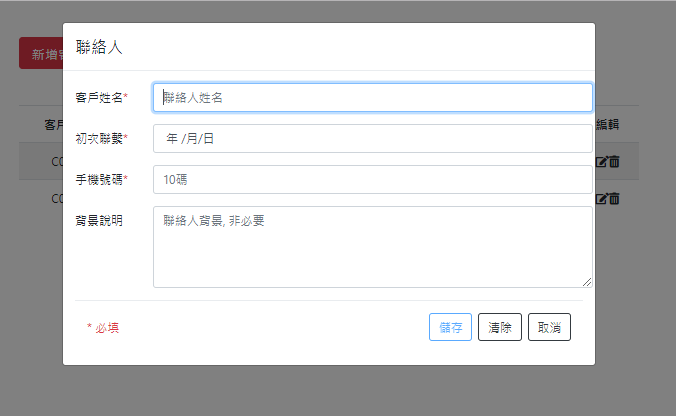
customer-form.component.html(第一版)
建立Modal視窗新增表單(HTML檔)
含欄位錯誤檢查
(FormsModule式的錯誤檢查)
第三階段
修改資料
☑ 撰寫CRUD服務 (service/customer.service.ts)
☞ 修改一筆資料
☑ 撰寫個別頁面(使用CRUD服務)
☞ 修改Modal視窗(customer-form)
☞ 修改「客戶列表」(customer-list)
修改資料
customer.service.ts加入「修改一筆資料」
customer-form:修改資料視窗
customer-list: 加入修改、刪除功能
傳入編輯的資料
修改一筆資料完成修改資料功能
export class CustomerService {
  ...
  // 修改一筆會員資料
  updateCustomer(id: string, data: Customer): Promise<any> {
    const docRef: AngularFirestoreDocument
        = this.db.doc<Customer>(`customers/${id}`);
    return docRef.set(data, {merge: true});
  }
}
修改一筆資料
需傳入id
文件id
${id} 在ts檔的作用相當於 用於html檔的 {{ id }}
docRef.set():設定文字為新值
{merge: true}:只更新修改的欄位
修改Modal視窗加入修改功能(TS檔)
import { Component, OnInit, Output, EventEmitter, Input } from '@angular/core';
import { Customer, CustomerId } from 'src/app/_models/customer';
import { NgbActiveModal } from '@ng-bootstrap/ng-bootstrap';

@Component({
  selector: 'app-customer-form',
  templateUrl: './customer-form.component.html',
  styleUrls: ['./customer-form.component.css']
})
export class CustomerFormComponent implements OnInit {
  @Input() cdoc: CustomerId;
  @Output() result: EventEmitter<Customer> = new EventEmitter<Customer>();

  customer: Customer = {
    name: '',
    date_init_contact: null,
    cell_phone: '',
    background_info: '',
    customer_id: ''
  };

  constructor(public activeModal: NgbActiveModal) { }

  ngOnInit() {
    if (this.cdoc) {
      this.customer = {
        name: this.cdoc.name,
        date_init_contact: this.cdoc.date_init_contact,
        cell_phone: this.cdoc.cell_phone,
        background_info: this.cdoc.background_info,
        customer_id: this.cdoc.customer_id
      };
    }
  }

  save() {
    this.result.emit(this.customer);
    this.activeModal.close('儲存');
  }

}
customer-form.component.ts
要能從customer-list將資料傳入
<div class="modal-header">
    <h4 class="modal-title">聯絡人</h4>
  </div>
  <div class="modal-body">
    <form #cform="ngForm">
      <div class="form-group">
        <div class="row">
          <label for="name" class="col-2 col-form-label">客戶姓名<span class="text-danger">*</span></label>
          <input type="text" class="col-10 form-control" [(ngModel)]="customer.name" name="name" #name="ngModel" placeholder="聯絡人姓名" required>
        </div>
        <div *ngIf="name.dirty">
          <span *ngIf="name.errors; then errors"></span>
        </div>
      </div>

      <div class="form-group">
        <div class="row">
          <label for="date" class="col-2 col-form-label">初次聯繫<span class="text-danger">*</span></label>
          <input type="date" class="col-10 form-control" [(ngModel)]="customer.date_init_contact" name="date" #date="ngModel" ngbDatepicker #d="ngbDatepicker"
            required>
        </div>
        <div *ngIf="date.dirty">
            <span *ngIf="date.errors; then errors"></span>
        </div>
      </div>

      <div class="form-group">
        <div class="row">
          <label for="cell_phone" class="col-2 col-form-label">手機號碼<span class="text-danger">*</span></label>
          <input type="text" class="col-10 form-control" [(ngModel)]="customer.cell_phone" name="phone" #phone="ngModel" placeholder="10碼" required minlength="10"
          maxlength="10">
        </div>
        <div *ngIf="phone.dirty">
            <span *ngIf="phone.errors; then phone_errors"></span>
        </div>
      </div>

      <div class="form-group row">
        <label for="background" class="col-2 col-form-label">背景說明</label>
        <textarea type="text" class="col-10 form-control" [(ngModel)]="customer.background_info" name="background"
        placeholder="聯絡人背景, 非必要" rows="4">
            </textarea>
      </div>

      <div class="modal-footer">
        <small class="text-danger mr-auto">* 必填</small>
        <button type="submit" class="btn btn-outline-primary" (click)="save()" [disabled]="!cform.form.valid">儲存</button>
        <button type="reset" class="btn btn-outline-dark">清除</button>
        <button type="button" class="btn btn-outline-dark" (click)="activeModal.dismiss('cancel')">取消</button>
      </div>
    </form>
  </div>

  <ng-template #errors>
      <p class="text-danger">欄位未填!</p>
  </ng-template>
  <ng-template #phone_errors>
      <p class="text-danger">手機號碼需10碼!</p>
  </ng-template>
customer-form.component.html(最終版)
修改Modal視窗加入修改功能(HTML檔)
修改「客戶列表」加上 編輯、刪除函式
import { CustomerId } from './../../_models/customer';
import { CustomerService } from './../../_services/customer.service';
import { Component, OnInit } from '@angular/core';
import { NgbModal } from '@ng-bootstrap/ng-bootstrap';
import { CustomerFormComponent } from '../customer-form/customer-form.component';
import { Observable } from 'rxjs';
import { ConfirmModalComponent } from 'src/app/_modal/confirm-modal/confirm-modal.component';

@Component({
  selector: 'app-customer-list',
  templateUrl: './customer-list.component.html',
  styleUrls: ['./customer-list.component.css']
})
export class CustomerListComponent implements OnInit {
  customers: Observable<CustomerId[]>;
  subscription: any;
  edit: boolean;

  constructor(private cs: CustomerService,
    private modal: NgbModal
  ) { }

  ngOnInit() {
    this.customers = this.cs.getCustomers();
  }
  // 開啟客戶視窗
  openModal(cdoc?: CustomerId) {
    const ref = this.modal.open(CustomerFormComponent, {
      size: 'lg'
    });
    // 傳資料進來,代表是[編輯]功能, 而非新增
    if (cdoc) {
      ref.componentInstance.cdoc = cdoc;
      this.edit = true;   // 編輯
    } else {
      this.edit = false;  // 新增
    }
    this.subscription = ref.componentInstance.result.subscribe(
      result => {
        console.log('表單輸入資料為:', result);
        if (this.edit) {
          this.cs.updateCustomer(cdoc.id, result);
        } else {
          this.cs.addCustomer(result);
        }
      }
    );
  }

  editCustomer(c: CustomerId) {
    this.openModal(c);
  }

  deleteCustomer(c: CustomerId) {
    const cmref = this.modal.open(ConfirmModalComponent, {
      size: 'lg'
    });
    cmref.componentInstance.data = c;
    cmref.result
      .then(
        (result) => {
          this.cs.removeCustomer(c.id);
        }
      )
      .catch(
        (reason) => {
          console.log('Cancel原因', reason);
        });
  }
}
customer-list.component.ts(最終版)
  // 開啟客戶視窗
  openModal(cdoc?: CustomerId) {
    const ref = this.modal.open(CustomerFormComponent, {
      size: 'lg'
    });
    // 傳資料進來,代表是[編輯]功能, 而非新增
    if (cdoc) {
      ref.componentInstance.cdoc = cdoc;
      this.edit = true;   // 編輯
    } else {
      this.edit = false;  // 新增
    }
    this.subscription = ref.componentInstance.result.subscribe(
      result => {
        console.log('表單輸入資料為:', result);
        if (this.edit) {
          this.cs.updateCustomer(cdoc.id, result);
        } else {
          this.cs.addCustomer(result);
        }
      }
    );
  }
  editCustomer(c: CustomerId) {
    this.openModal(c);
  }
1. 更新openModal() 函式
2. 編輯函式editCustomer()
cdoc?代表此參數可有可無
判斷呼叫openModal()時有無給參數
有參數: 轉送到modal視窗進行編輯
呼叫openModal()時給了參數c
訂閱modal視窗的result資料流
無參數: 代表新增
檢查edit旗號
  deleteCustomer(c: CustomerId) {
    const cmref = this.modal.open(ConfirmModalComponent, {
      size: 'lg'
    });
    cmref.componentInstance.data = c;
    cmref.result
      .then(
        (result) => {
          this.cs.removeCustomer(c.id);
        }
      )
      .catch(
        (reason) => {
          console.log('Cancel原因', reason);
        });
  }
3. 刪除函式deleteCustomer()
必須另外新增modal元件:
ng g c modal/confirm-modal第四階段
刪除資料
☑ 撰寫CRUD服務 (service/customer.service.ts)
☞ 刪除一筆資料
☑ 撰寫個別頁面(使用CRUD服務)
☞ 建立確認Modal視窗(customer-modal)
☞ 修改「客戶列表」(customer-list)
ng g c modal/confirm-modal刪除資料
ng g c modal/confirm-modal
customer.service.ts加入「刪除一筆資料」
confirm-modal:刪除確認視窗
customer-list:呼叫刪除資料功能
刪除一筆資料完成刪除資料功能
export class CustomerService {
  ...
  // 刪除一筆會員資料
  removeCustomer(id: string): Promise<any> {
    const docRef: AngularFirestoreDocument = this.db.doc<Customer>(`customers/${id}`);
    return docRef.delete();
  }
}
刪除一筆資料
需傳入id
文件id
${id} 在ts檔的作用相當於 用於html檔的 {{ id }}
docRef.delete():永久刪除該筆資料
...
import { ConfirmModalComponent } from './_modal/confirm-modal/confirm-modal.component';

@NgModule({
  declarations: [
    AppComponent,
    DashboardComponent,
    CustomerListComponent,
    CustomerDetailComponent,
    CustomerFormComponent,
    ConfirmModalComponent
  ],
  entryComponents: [ CustomerFormComponent, ConfirmModalComponent ],
  ...
  providers: [],
  bootstrap: [AppComponent]
})
export class AppModule { }
修改app.module.ts
刪除資料加入entryComponents陣列
暫時不修改!!
修改「客戶列表」執行刪除資料
// ...略...
export class CustomerListComponent implements OnInit {
// ...略...
  deleteCustomer(c: CustomerId) {
    const cmref = this.modal.open(ConfirmModalComponent, {
      size: 'lg'
    });
    cmref.componentInstance.data = c;
    cmref.result
      .then(
        (result) => {
          this.cs.removeCustomer(c.id);
        }
      )
      .catch(
        (reason) => {
          console.log('Cancel原因', reason);
        });
  }
}
customer-list.component.ts
刪除Modal視窗確認表單(TS檔)
import { CustomerId } from './../../_models/customer';
import { Component, OnInit, Input } from '@angular/core';
import { NgbActiveModal } from '@ng-bootstrap/ng-bootstrap';

@Component({
  selector: 'app-confirm-modal',
  templateUrl: './confirm-modal.component.html',
  styleUrls: ['./confirm-modal.component.css']
})
export class ConfirmModalComponent implements OnInit {
  @Input() data: CustomerId;

  constructor(public activeModal: NgbActiveModal) { }

  ngOnInit() {
  }

}
confirm-modal.component.ts(最終版)
確認13行修飾字元為public
11行變數名稱將用於HTML檔
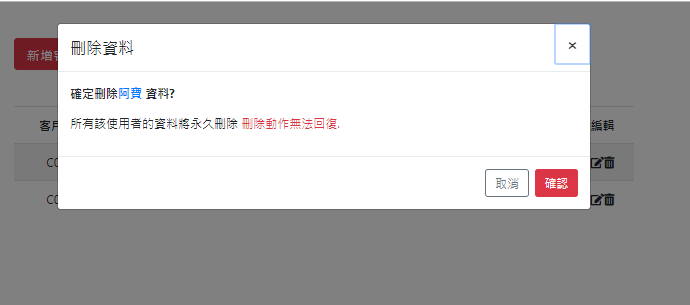
刪除資料確認表單
<div class="modal-header">
<h4 class="modal-title" id="modal-title">刪除資料</h4>
<button type="button" class="close" aria-describedby="modal-title" (click)="activeModal.dismiss('Cross')">
<span aria-hidden="true">×</span>
</button>
</div>
<div class="modal-body">
<p><strong>確定刪除<span class="text-primary">{{ data.name }}</span> 資料?</strong></p>
<p>所有該使用者的資料將永久刪除
<span class="text-danger">刪除動作無法回復.</span>
</p>
</div>
<div class="modal-footer">
<button type="button" class="btn btn-outline-secondary" (click)="activeModal.dismiss('Cancel')">取消</button>
<button type="button" class="btn btn-danger" (click)="activeModal.close('DELETE')">確認</button>
</div>confirm-modal.component.html(最終版)
第五階段
查詢一筆資料
☑ 撰寫CRUD服務 (service/customer.service.ts)
☞ 查詢一筆資料
☑ 撰寫個別頁面(使用CRUD服務)
☞ 完成個別客戶頁面(customer-detail)
☞ 修改「客戶列表」(customer-list)
export class CustomerService {
  ...
  /**
   * 讀取單一客戶
   * @param id: 客戶id
   */
  getCustomer(id: string): Observable<Customer> {
    return this.customerRef.doc<Customer>(`customer/${id}`).valueChanges();
  }
  ...
}
「取得一筆資料」服務功能
customer-detail?
如何使用getCustomer()?
頁面內容版型?
如何回到customer-list?
關於期末考
- 時間:18週
- 請先決定你要實作的「資料表」欄位(不含id, 至少4個欄位)
- 以firebase為資料庫
- 完成「新增/刪除/查詢/修改」功能
- 首頁為列表頁面(如customer-list)
- 名稱為「學號-list」
例如: AA123456-list
新增元件 ng g c AA123456-list
- 名稱為「學號-list」
- 其餘新增/修改/刪除功能參考本投影片範例
關於期末考-如何修改
步驟一:修改資料模型檔,定義自己的欄位
_models/customer.ts
import { NgbDate } from '@ng-bootstrap/ng-bootstrap/datepicker/ngb-date';

export interface Customer {
    name: string;       // 姓名
    date_init_contact: NgbDate;    // 初次接觸日期
    cell_phone: string; // 手機
    background_info?: string;   // 背景資訊
    customer_id: string;   // 客戶編號
}

// 增加firestore特有的"亂數id"欄位
export interface CustomerId extends Customer { id: string; }
export interface Diary {
date: string; // 日期
date_field: {
day: number,
month: number,
year: number
};
residence: string; // 留宿地點
text: string; // 中文翻譯
text_en: string; // 英文
}
// document id(用於修改/刪除)
export interface DiaryID extends Diary { id: string; }_models/diary.ts
id欄位要保留
關於期末考-如何修改
步驟二:至Firebase後台建立新的集合
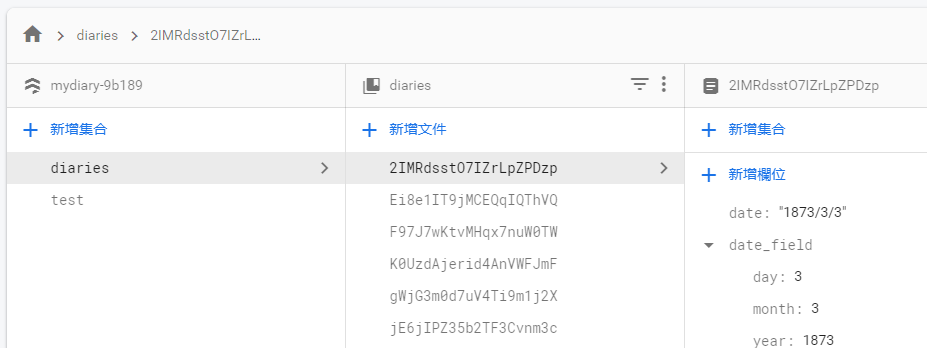
集合名稱: diaries
關於期末考-如何修改
步驟三:修改服務檔(以模型檔Diary, 集合名稱diaries為例)
...[略]...
export class DiaryService {
  customerRef: AngularFirestoreCollection<Customer> ; // 資料庫集合參照點
  customers: Observable<CustomerId[]>;    // 所有客戶的動態資料流(供訂閱)

  constructor(private db: AngularFirestore) {
    // 設定資料庫集合參照點
    this.customerRef = this.db.collection<Customer>('customers');
  }
  // 新增一筆會員資料
  addCustomer(customer: Customer): Promise<any> {
  }
  // 刪除一筆會員資料
  removeCustomer(id: string): Promise<any> {
  }
  // 修改一筆會員資料
  updateCustomer(id: string, data: Customer): Promise<any> {
  }
  // 取得所有會員資料
  getCustomers(): Observable<CustomerId[]> {
  }
}
1. 建立ng g service diary
2. 將所有Customer/customer改為Diary/diary
關於期末考-如何修改
步驟四:重新設計首頁
更換圖示、文字、超連結
<div class="container">
  <div class="card-columns text-center my-5">
    <div class="card p-3">
      <i class="fas fa-users fa-5x"></i>
      <div class="card-body">
        <h4 class="card-title">
          <a class="btn btn-lg btn-primary text-light" [routerLink]="['/customer']">會員管理</a>
        </h4>
        <p class="card-text">會員資料管理</p>
      </div>
    </div>

    ...略...
  </div>
</div>
修改連結時,app-routing.module.ts必須同步修改
<i class="fas fa-anchor fa-5x"></i>
<a class="btn btn-lg btn-primary text-light" [routerLink]="['/diary']">日記管理</a> 關於期末考-如何修改
步驟五:修改查詢全部(以Customer-list為例)
關於期末考-如何修改
步驟六:修改新增表單(以Customer-form為例)
HTML表單是更改最多的地方
因為可能有不同的欄位(數量 or 類型)
關於期末考-如何修改
步驟七:修改「修改功能」(以Customer-form為例)
關於期末考-如何修改
步驟八:修改「刪除功能」(以Confirm-modal為例)