行動技術與應用
Lesson 3: 沈浸式體驗
last updated: 2020/3/14
Outline
- VR (3D) 範例介紹
- 新世代標準: Web VR
- Google Cardboard體驗
- Web VR (A-Frame)網頁製作
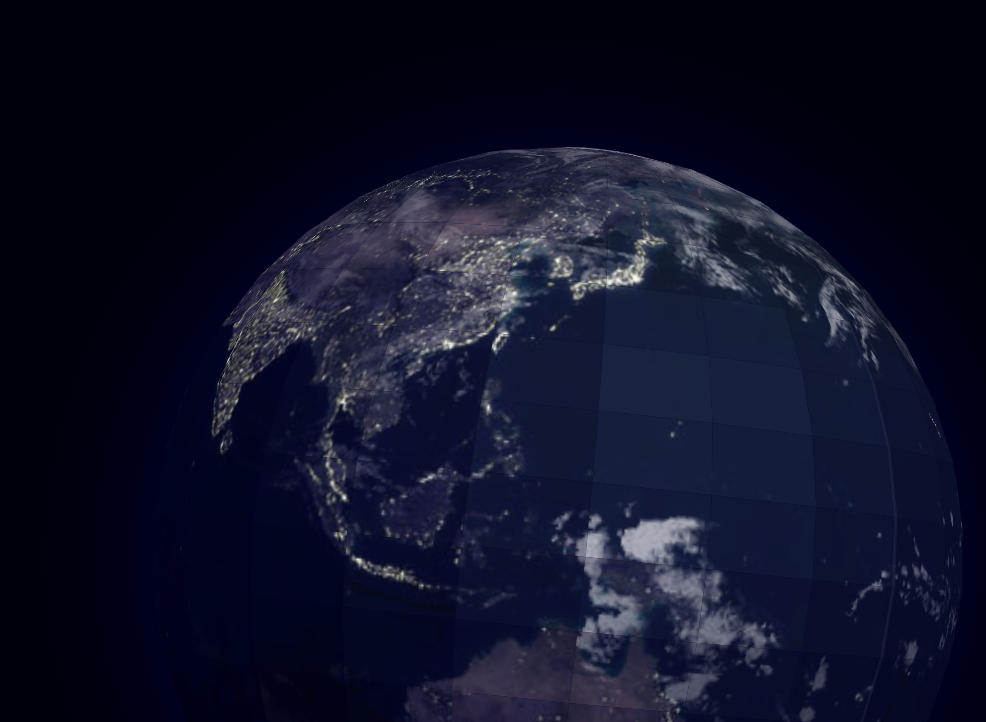
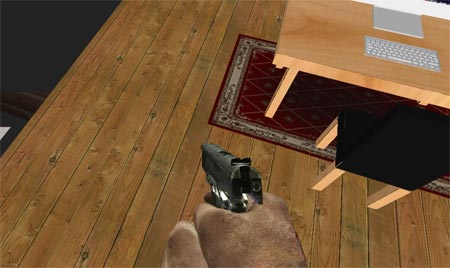
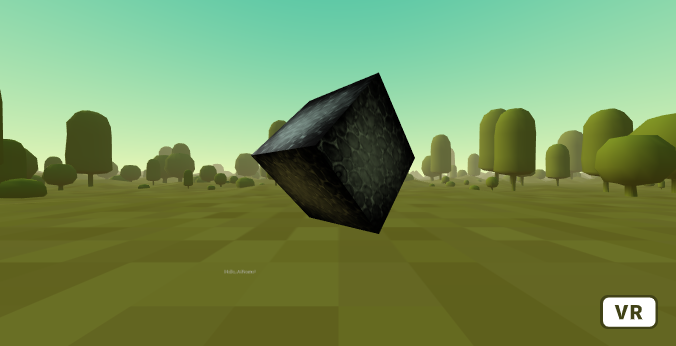
VR 範例
- Desktop & OpenGL
- On the Web
OpenGL 繪圖API
用於3D/2D繪圖的API規格。具有跨程式語言、跨平臺之特性
用於桌面程式
用於手機app
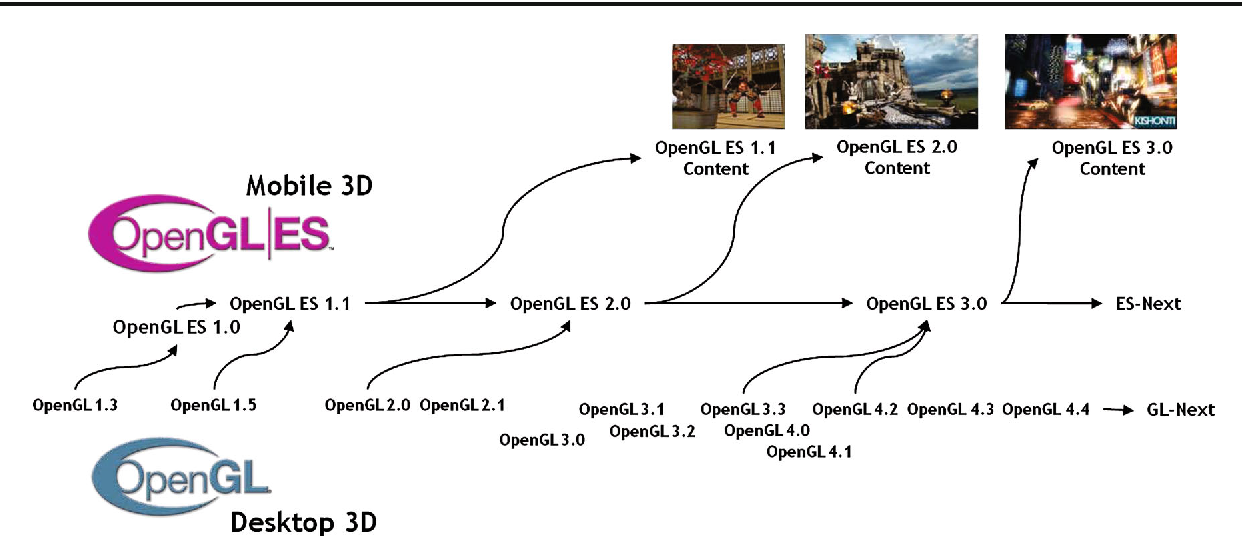
OpenGL發展歷程
OpenGL Open Graphics Library
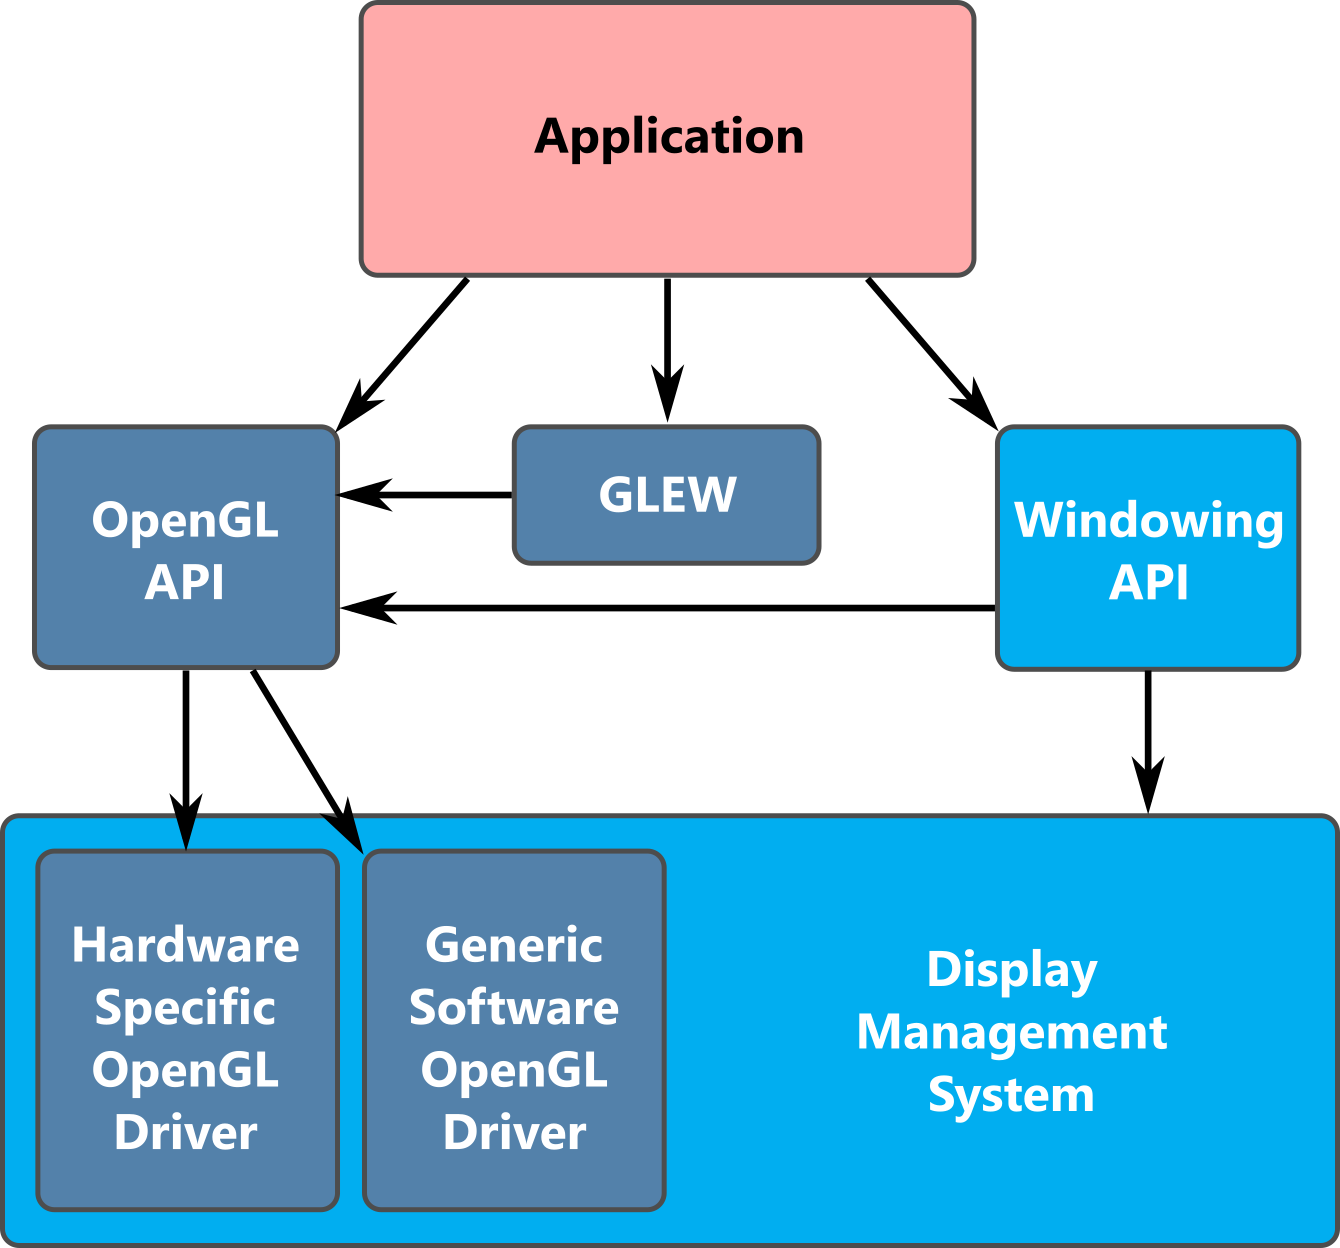
OpenGL開發架構
作業系統
驅動程式
函式庫
應用程式
視窗元件
外掛管理
繪圖元件
硬體相關
軟體相關
如何在桌面程式上呈現3D場景?
OpenGL !!
OpenGL函式庫
OpenGL函式庫
3D應用程式
作業
系統
硬體
硬體加速
顯示器
VR on the Web

新世代標準: WebVR
WebVR the history(1/9)
Canvas 3D
2006
2009
2011
工作小組成立
發布1.0版API
專案啟動
2007
瀏覽器實作
如何在Browser上呈現3D場景?
2019
所有browser都支援WebGL
問題:WebGL太難!
three.js
2010
WebGL上層API
專注於建立3D場景
避免直接使用WebGL

1992
桌面程式3D函式庫
Web API (WebGL)
瀏覽器呈現3D場景
網頁
WebGL
網頁
three.js
桌面程式
問題: 開發應用仍不夠簡單
WebGL
A-Frame框架
網頁
three.js
DOM

2015


2013
2014

WebVR the framework(2/9)
A-Frame框架: https://aframe.io/

實體 (Entity): (元件組合(components), 行為)
WebVR the future(3/9)
Web VR 1.1 API
- JavaScript API for accessing VR displays.
- 即將被WebXR Device API所取代
Web XR Device API
- 提供AR/VR應用的輸出入存取功能

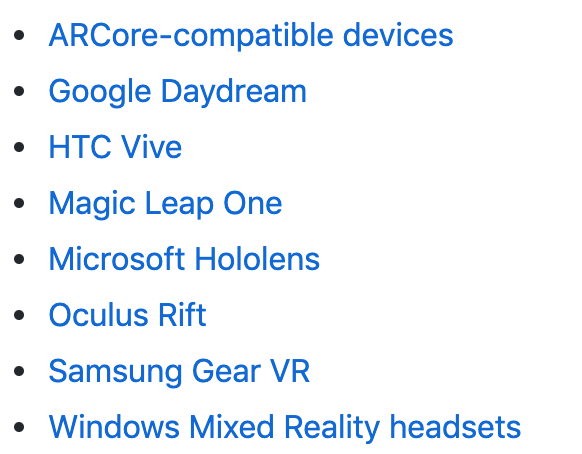
支援的VR顯示器
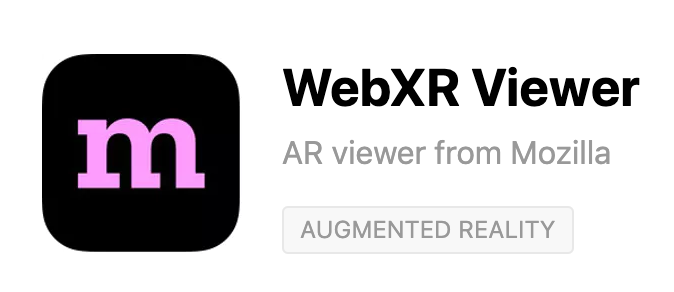
iOS WebXR Viewer
WebVR體驗(4/9)

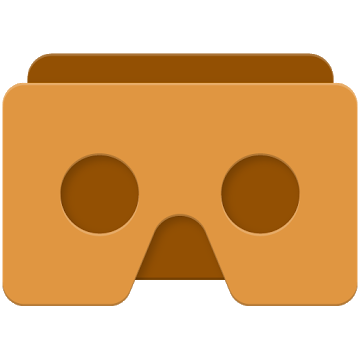
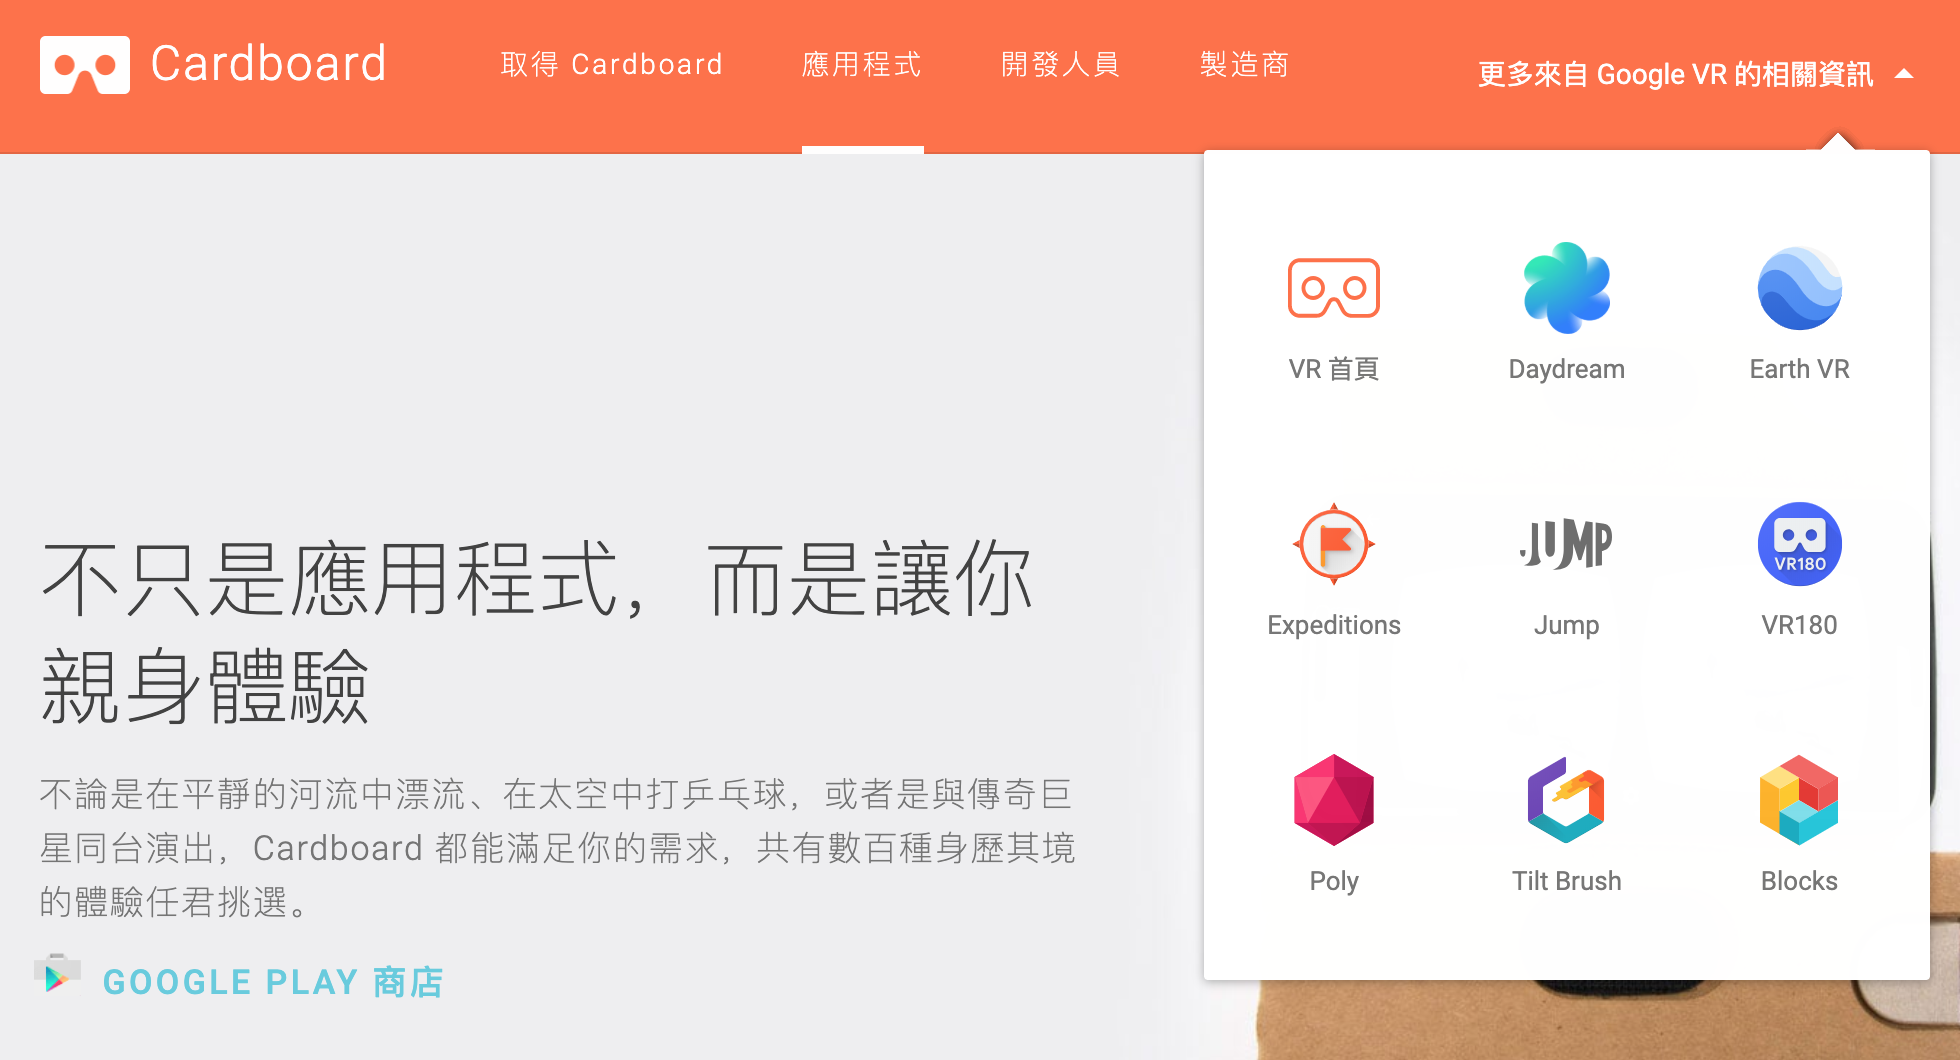
Google Cardboard $9

Google Daydream $60
準備工作❶: 頭戴式顯示器(Headset)
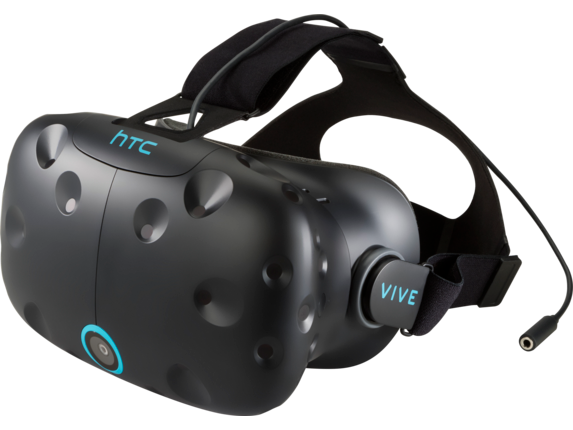
HTC VIVE $499

Oculus Rift $399

Mixed Reality Headset $399

Playstation VR $399
WebVR體驗(5/9)
頭戴式顯示器的差別?
- Positional Tracking: 3DoF vs. 6DoF
- Controllers: 有無控制器 ➡ 例: 手持控制器
- Controller Positional Tracking: 3DoF vs. 6DoF

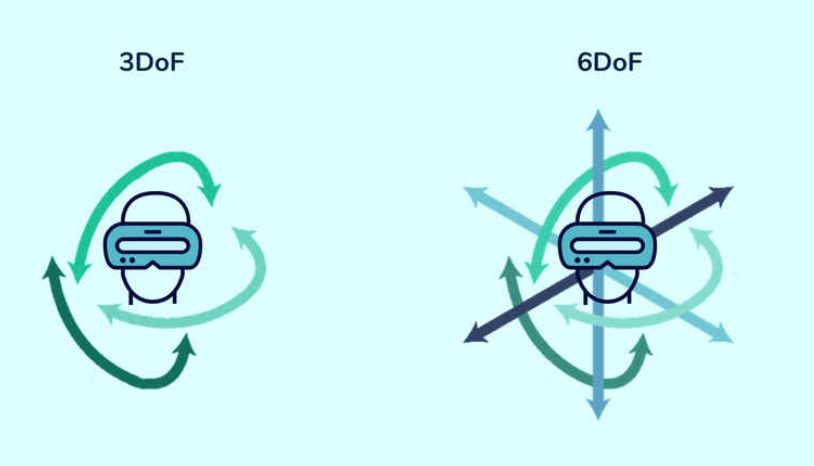
3DoF
6DoF
WebVR 體驗(6/9)
準備工作❷: Web VR相容Browser
Can I Use WebVR/XR? https://caniuse.com/


- Edge
- Firefox
- Chrome for Android
支援度較佳(非最新結果?)
實際測試Mac OS
- Safari 12.0.3 ✔
- Firefox 66.0.1 ✔
- Chrome 73.0.3683.86 ✘
WebVR體驗(7/9)
What is WebVR?
WebVR in iPhone
WebVR實際體驗(8/9)
❶ Cardboard 2代
❷ mobile phone
❸ google cardboard app

Android

iOS

任選一viewer profile
❹ 設定cardboard app搭配的硬體

❺ Let's go
WebVR實際體驗(9/9)
Web VR 網站實作
- A-Frame框架: https://aframe.io/
- 使用線上編輯器: Repl.it
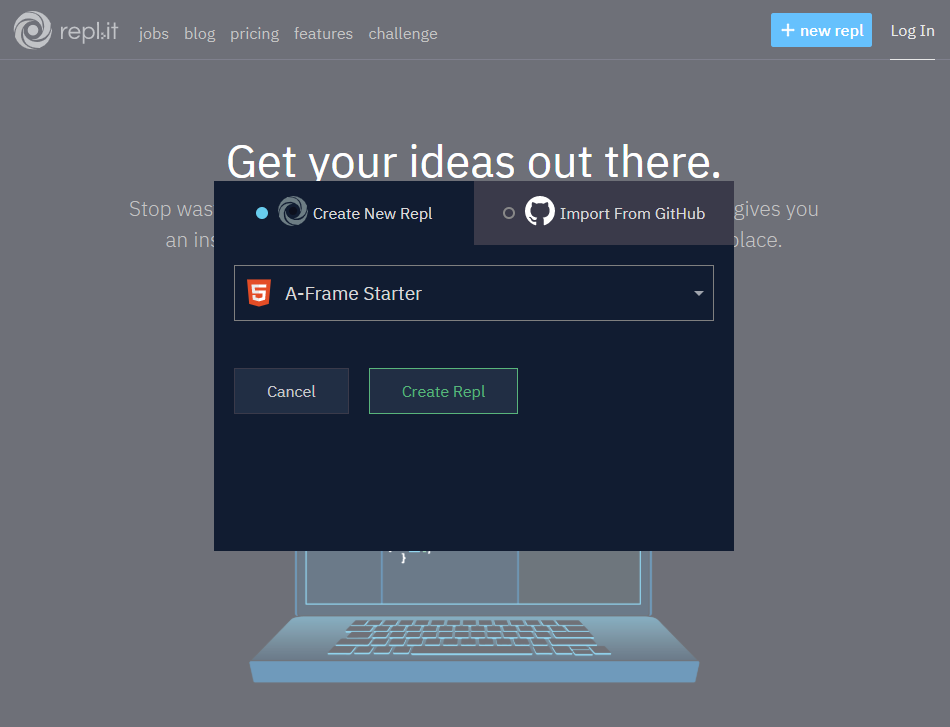
開啟A-Frame Starter專案
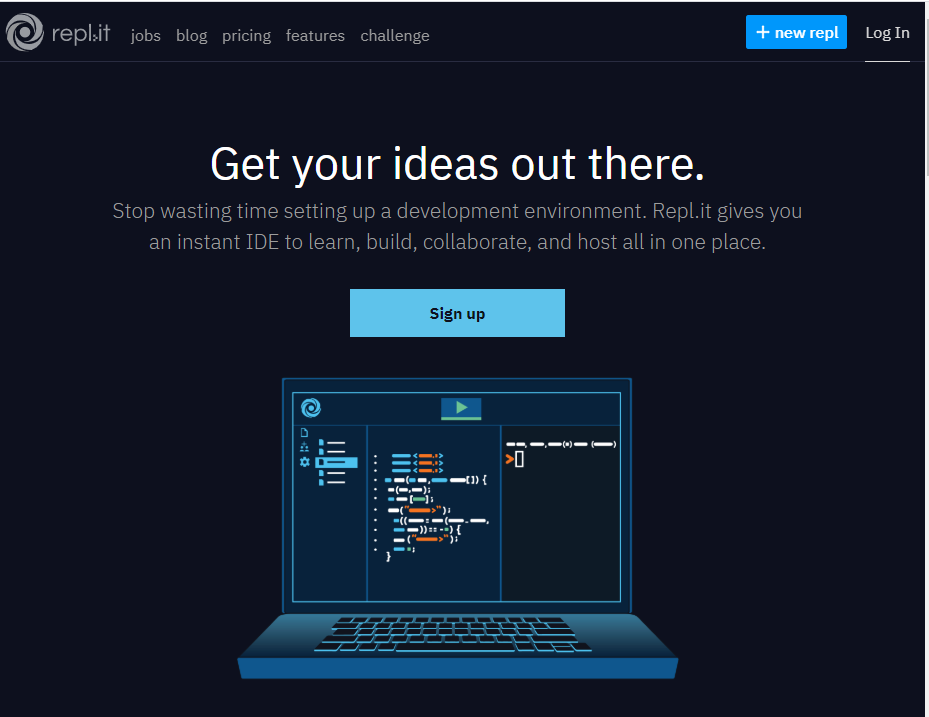
建立新專案
開啟A-Frame Starter專案
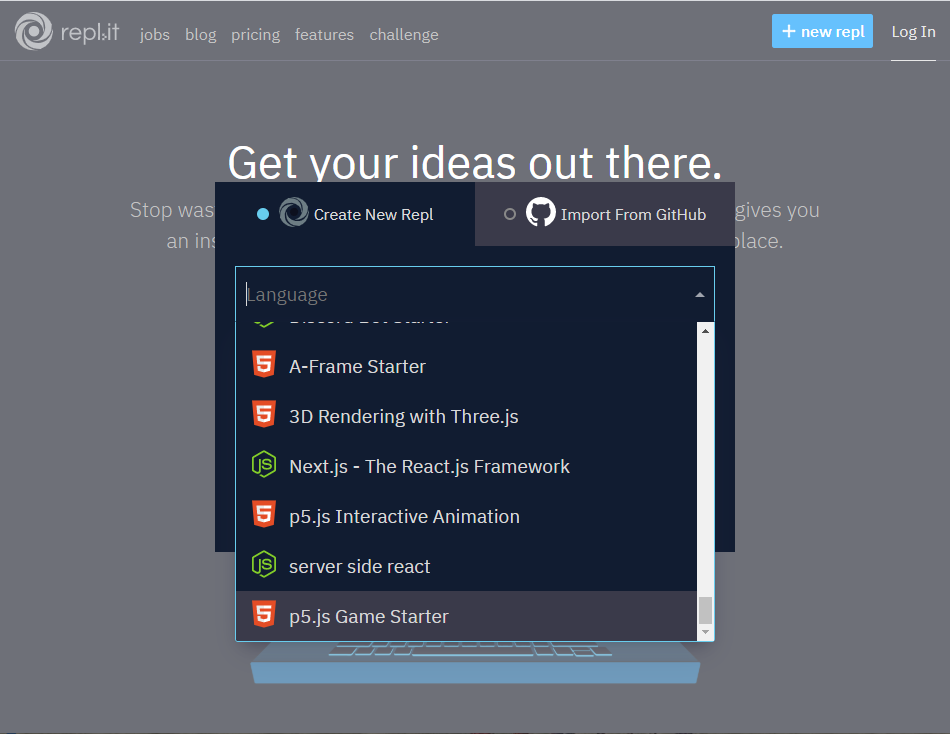
選取專案類型
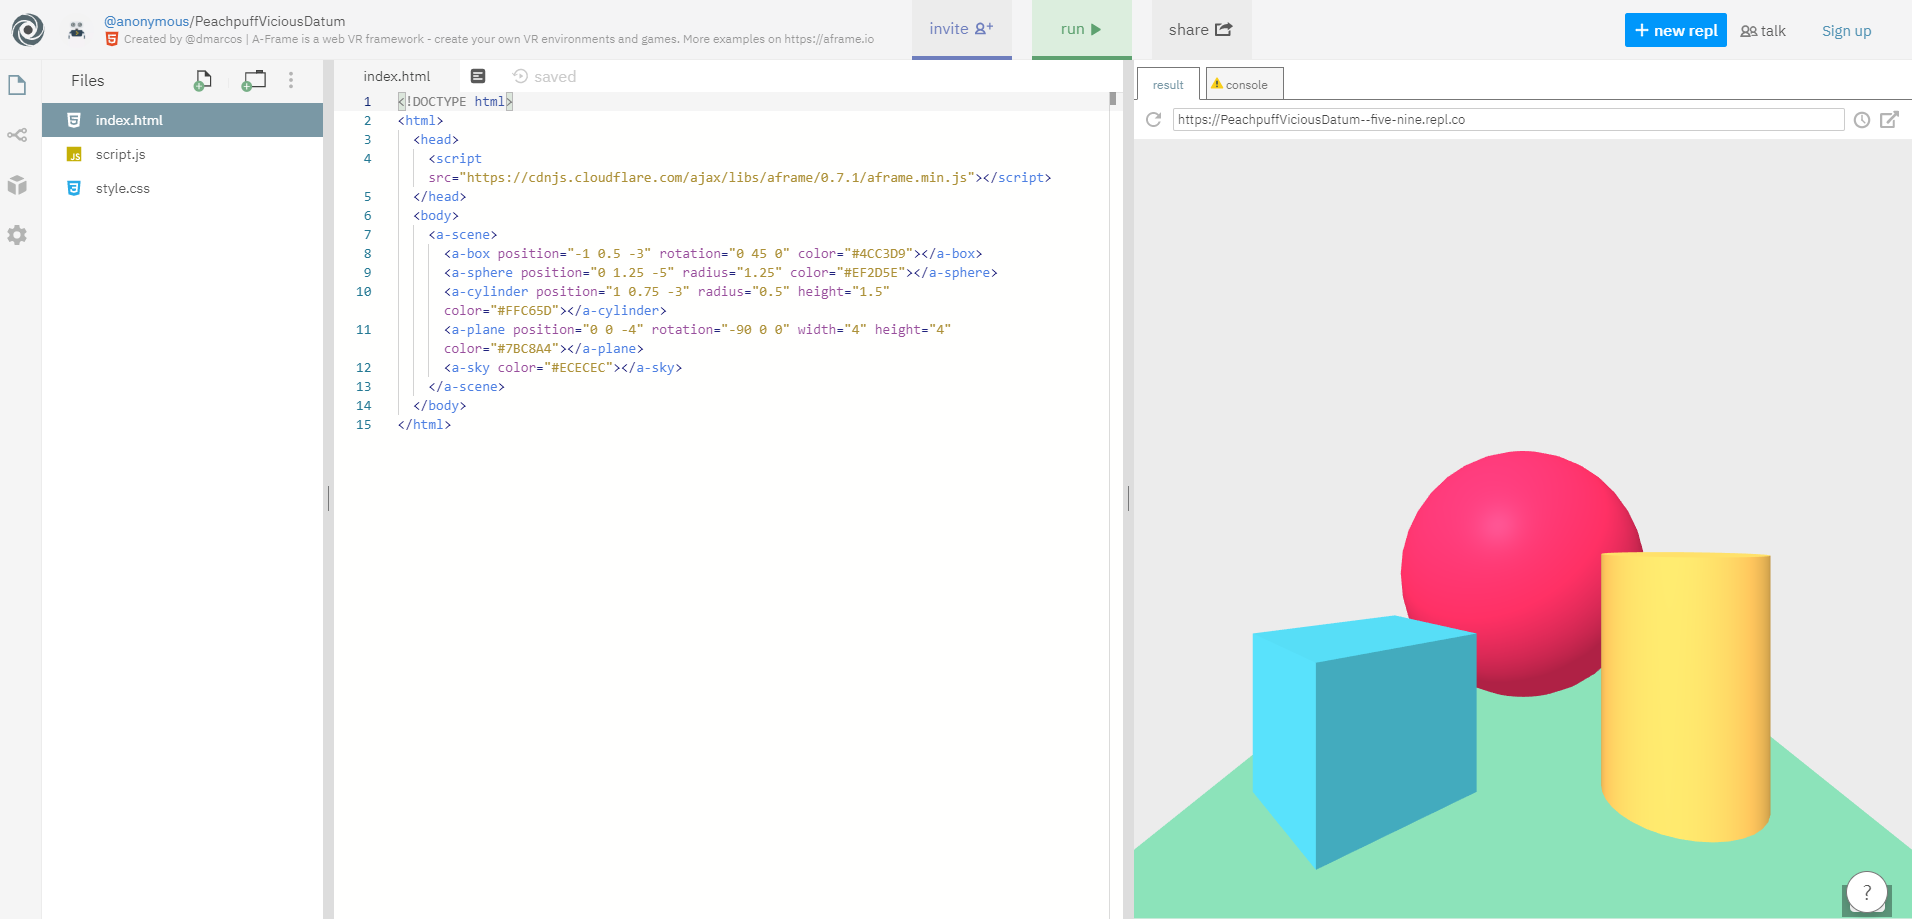
開啟A-Frame Starter專案
建立專案
開啟A-Frame Starter專案
執行專案
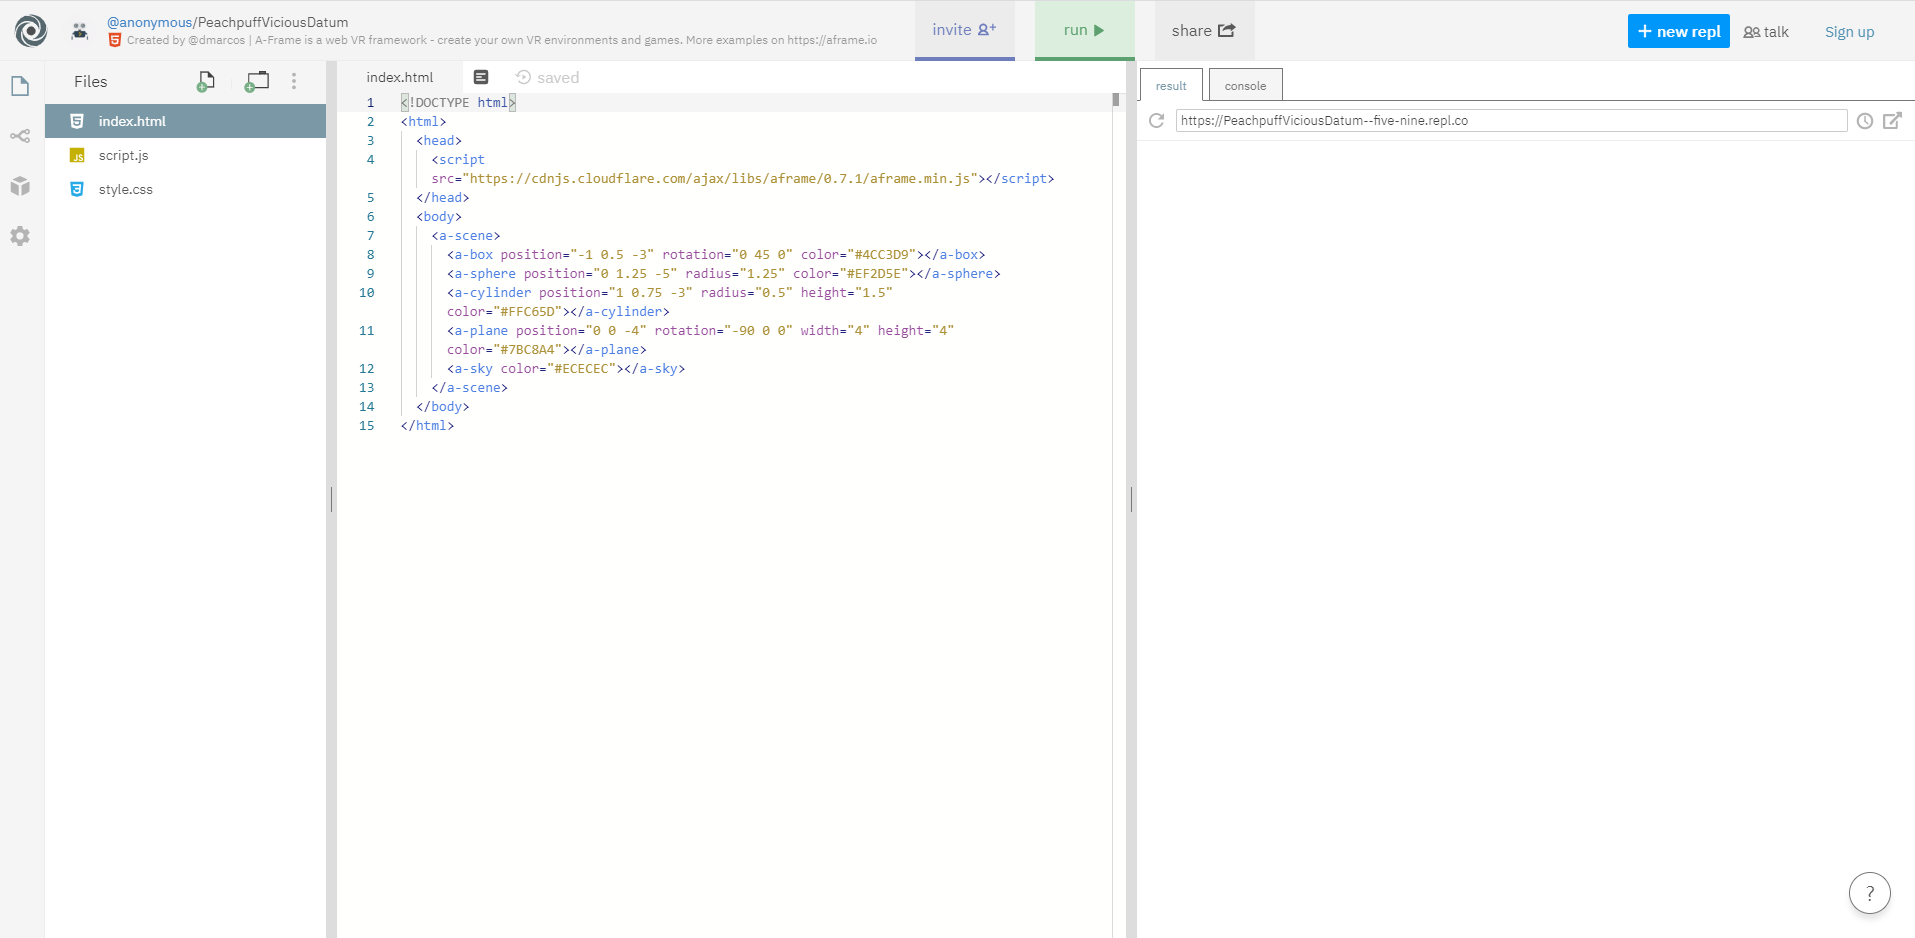
開啟A-Frame Starter專案
A-Frame基本架構
<html>
  <head>
    <script src="https://aframe.io/releases/1.0.4/aframe.min.js"></script>
  </head>
  <body>
    <a-scene>
    </a-scene>
  </body>
</html>
引用A-Frame程式庫
建立場景、操控場景
場景包括:2D/3D物體、紋理、光源、鏡頭
操控方式:平移、旋轉、縮放(zoom in/out)
A-Frame場景範例
<!DOCTYPE html>
<html>
<head>
<script src="https://cdnjs.cloudflare.com/ajax/libs/aframe/0.7.1/aframe.min.js"></script>
</head>
<body>
<a-scene>
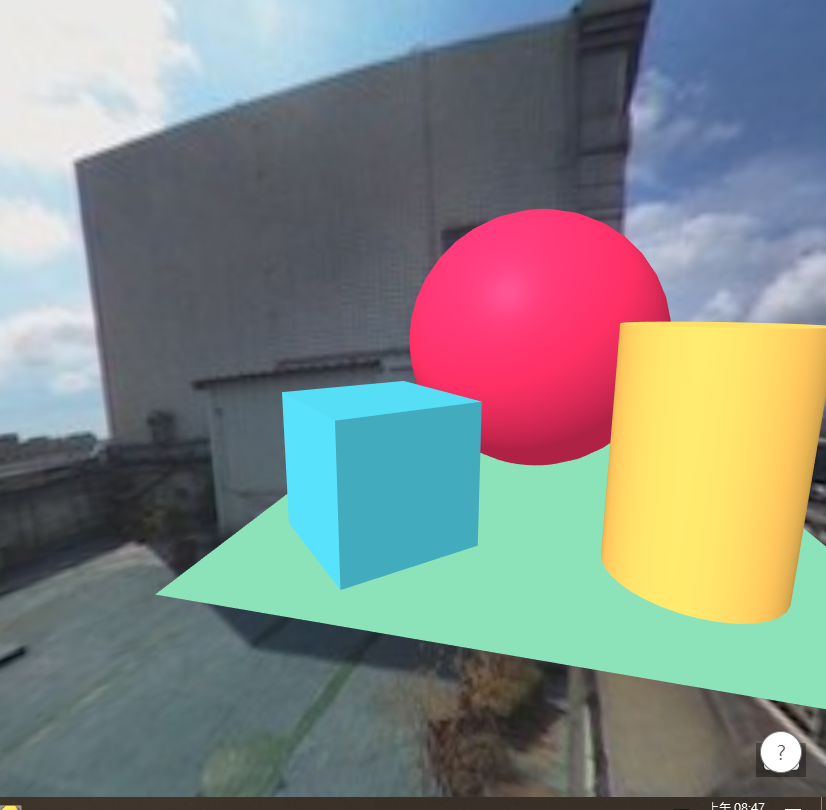
<a-box position="-1 0.5 -3" rotation="0 45 0" color="#4CC3D9"></a-box>
<a-sphere position="0 1.25 -5" radius="1.25" color="#EF2D5E"></a-sphere>
<a-cylinder position="1 0.75 -3" radius="0.5" height="1.5" color="#FFC65D"></a-cylinder>
<a-plane position="0 0 -4" rotation="-90 0 0" width="4" height="4" color="#7BC8A4"></a-plane>
<a-sky color="#ECECEC"></a-sky>
</a-scene>
</body>
</html>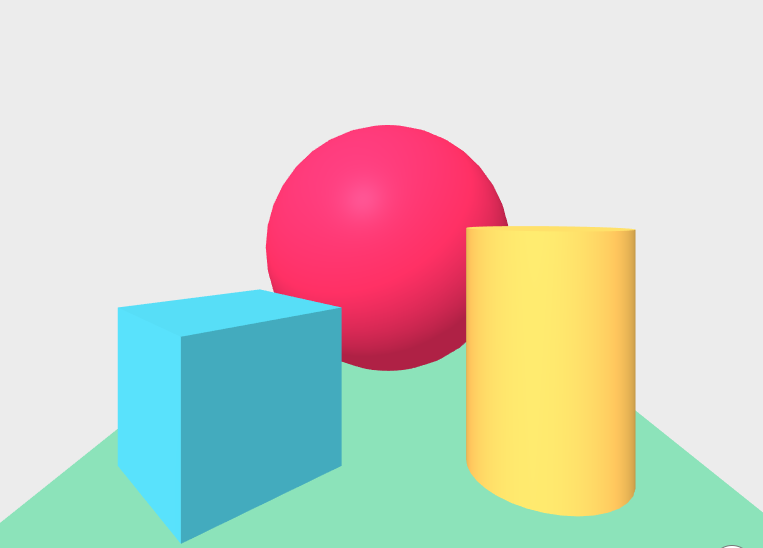
物體:a-box, a-sphere, a-cylinder
地面:a-plane
天空:a-sky
A-Frame場景範例
 ...
  <body>
    <a-assets>
      <img id="city" src="images/city2.jpg">
    </a-assets>
    <a-scene>
      <a-box position="-1 0.5 -3" rotation="0 45 0" color="#4CC3D9"></a-box>
      ...
      <a-sky id="image-360" radius="10" src="#city"></a-sky>
    </a-scene>
  </body>
 ...
上傳360環景照片
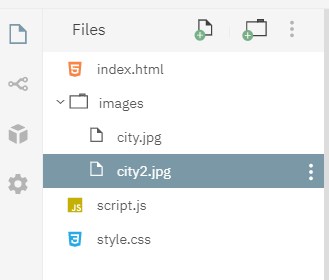
建立圖片資源,所有資源都有自己的id
使用圖片資源(指定id)
A-Frame基本場景建立
物體與鏡頭
<!DOCTYPE html>
<html>
<head>
<script src="https://aframe.io/releases/1.0.4/aframe.min.js"></script>
</head>
<body>
<a-scene>
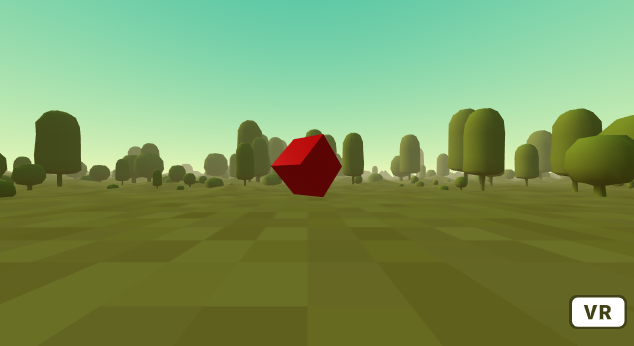
<a-box color="red" position="0 2 -5" rotation="0 45 45" scale="2 2 2"></a-box>
</a-scene>
</body>
</html>
position="0 2 -5"
背景環境
...
  <head>
    <script src="https://aframe.io/releases/1.0.4/aframe.min.js"></script>
    <script src="https://unpkg.com/aframe-environment-component/dist/aframe-environment-component.min.js">
    </script>
  </head>
  <body>
   <a-scene>
     <a-box color="red" position="0 2 -10" rotation="0 45 45" scale="2 2 2"></a-box>
     <!-- 背景環境! -->
     <a-entity environment="preset: forest; dressingAmount: 500"></a-entity>
   </a-scene>
  </body>
 ...
加入外部環境js檔
設定外部環境
套用紋理
<a-box color="red" ...></a-box>設定紋理的圖檔來源
<a-box src="https://i.imgur.com/mYmmbrp.jpg" color="red"...></a-box>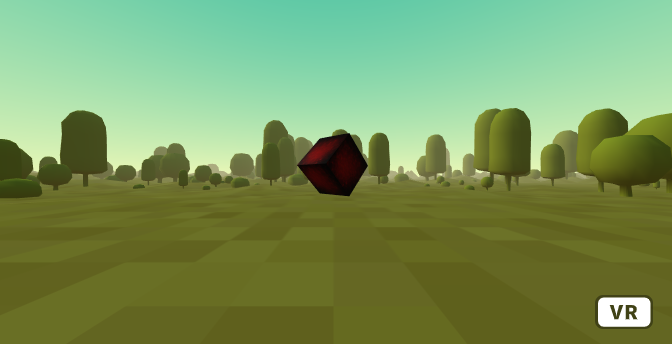
資源管理
...
<a-scene>
  <a-assets>
    <img id="boxTexture" src="https://i.imgur.com/mYmmbrp.jpg">
  </a-assets>

  <a-box src="#boxTexture" position="0 2 -5" rotation="0 45 45" scale="2 2 2"></a-box>

  <a-sky color="#222"></a-sky>
</a-scene>
...
紋理圖檔以a-assets進行管理
每張圖加上id
物體使用時改用「指定id」方式
<a-box src="#boxTexture"...></a-box>加入動畫
...
<a-box src="#boxTexture" position="0 2 -5" rotation="0 45 45" scale="2 2 2"
   animation="property: object3D.position.y; to: 2.2; dir: alternate; dur: 2000; loop: true">
</a-box>
...
y軸變化
y的位置從2變到2.2(上移20公分)
dir: alternate => 方向改變
dur: 2000 => 每輪2秒
加入文字
...
<a-entity
  text="value: Hello, A-Frame!; color: #BBB"
  position="-0.9 0.2 -3"
  scale="1.5 1.5 1.5"></a-entity>
...
Web VR App 實作(Deprecated)
- Ionic 4
- BabylonJS

Ionic App 實作
npm i -g @ionic/cli cordovaionic start VRApp blank
cd VRApp
npm i babylonjs@4.0.0-alpha.4ionic g module shared
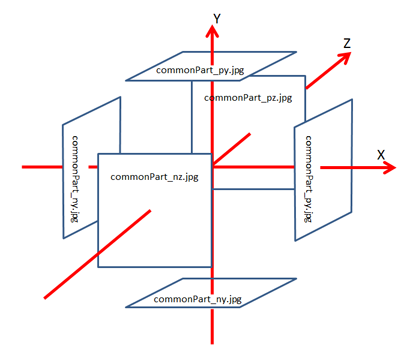
ionic g component shared/cube --export新增/assets/images/textures資料夾
加入1_nx.jpg, 1_ny.jpg, 1_nz.jpg等6個檔案
安裝Ionic專案環境
建置Ionic專案
加入babylonjs模組
建立3D共用元件
紋理貼圖
Ionic App 實作
import { FormsModule } from '@angular/forms';
import { IonicModule } from '@ionic/angular';
import { NgModule } from '@angular/core';
import { CommonModule } from '@angular/common';
import { CubeComponent } from './cube/cube.component';

@NgModule({
  declarations: [ CubeComponent],
  imports: [
    CommonModule,
    IonicModule,
    FormsModule
  ],
  exports: [
    CubeComponent
  ]
})
export class SharedModule { }
shared.module.ts
Exports 3D元件供其他頁面使用
Ionic App 實作
<ion-list>
  <ion-item no-lines>
    <ion-label>
      <h1>3D物件,使用滑鼠 或 方向鍵操控</h1>
    </ion-label>
  </ion-item>

  <ion-item no-lines>
      <ion-label>球Y方向</ion-label>
      <ion-range [(ngModel)]="y" (ionChange)="moveSphere($event)"
        min="0" max="10" step="0.1" pin="true">
        <ion-label slot="start">0</ion-label>
      <ion-label slot="end">10</ion-label>
      </ion-range>
  </ion-item>
  <ion-item no-lines>
    <ion-label>光X方向</ion-label>
    <ion-range [(ngModel)]="lightX" (ionChange)="moveLight($event)"
        min="-10" max="10" step="0.1" pin="true">
        <ion-label slot="start">-10</ion-label>
      <ion-label slot="end">10</ion-label>
      </ion-range>
  </ion-item>
</ion-list>
<canvas id="renderCanvas"></canvas>
cube.component.html
<canvas id="renderCanvas"></canvas>
3D場景所在之HTML標籤
Ionic App 實作
  ngOnInit() {
    this.canvas = document.getElementById('renderCanvas');
    this.engine = new BABYLON.Engine(this.canvas, true, { preserveDrawingBuffer: true, stencil: true });
    createScene  = function() {
            ......略(詳見下頁,3d物件等).....
            return scene;
    };
    const scene = createScene();
    this.world = scene;
    // run the render loop
    this.engine.runRenderLoop(function () {
      scene.render();
    });
    window.addEventListener('resize', function () {
      scene.resize();
    });
  }
cube.component.ts
建立3D引擎
建立3D場景
渲染迴圈: 讓場景出現
重畫場景(動畫效果)
Ionic App 實作
 const createScene = function () {
      const scene = new BABYLON.Scene(this.engine);
      const camera = new BABYLON.FreeCamera('camera1', new BABYLON.Vector3(0, 5, -10), scene);
      camera.setTarget(BABYLON.Vector3.Zero());
      camera.attachControl(this.canvas, false);
      const light = new BABYLON.HemisphericLight('light1', new BABYLON.Vector3(this.lightX, 1, 0), scene);

      this.skybox = BABYLON.Mesh.CreateBox('skyBox', 100, scene, true);
      const skyboxMaterial = new BABYLON.StandardMaterial('skyBox', scene);
      skyboxMaterial.backFaceCulling = false;
      skyboxMaterial.reflectionTexture = new BABYLON.CubeTexture(
        '/assets/images/textures/1',
        scene
      );
      skyboxMaterial.reflectionTexture.coordinatesMode = BABYLON.Texture.SKYBOX_MODE;
      skyboxMaterial.diffuseColor = new BABYLON.Color3(0, 0, 0);
      skyboxMaterial.specularColor = new BABYLON.Color3(0, 0, 0);
      this.skybox.material = skyboxMaterial;

      this.sphere = BABYLON.Mesh.CreateSphere('sphere1', 16, 2, scene, false, BABYLON.Mesh.FRONTSIDE);

      let myMaterial = new BABYLON.StandardMaterial('blue', scene);
      myMaterial.diffuseColor = new BABYLON.Color3(.5, 0, 1);
      myMaterial.specularColor = new BABYLON.Color3(this.red, 0.6, 0.87);
      this.sphere.material = myMaterial;
      this.sphere.position.y = this.y;

      const ground = BABYLON.Mesh.CreateGround('ground1', 6, 6, 2, scene, false);
      myMaterial = new BABYLON.StandardMaterial('green', scene);
      myMaterial.diffuseColor = new BABYLON.Color3(0, .8, 0);
      myMaterial.specularColor = new BABYLON.Color3(0.7, 0.6, 0.87);
      ground.material = myMaterial;
      // Return the created scene
      return scene;
    }.bind(this);
cube.component.ts
攝影機
光源
物件
材質紋理
Ionic App 實作
skyboxMaterial.reflectionTexture = new BABYLON.CubeTexture(
        '/assets/images/textures/1',
        scene
      );
cube.component.ts
Ionic App 實作
import { Component, OnInit } from '@angular/core';

import * as BABYLON from 'babylonjs';

@Component({
  selector: 'app-cube',
  templateUrl: './cube.component.html',
  styleUrls: ['./cube.component.scss'],
})
export class CubeComponent implements OnInit {
  name = 'Angular 6';
  y = 1;
  lightX = 0;
  red = 0.7;
  canvas: any;
  engine: any;
  world: any;

  sphere: any;
  skybox: any;


  constructor() { }

  ngOnInit() {
    this.canvas = document.getElementById('renderCanvas');
    this.engine = new BABYLON.Engine(this.canvas, true, { preserveDrawingBuffer: true, stencil: true });
    const createScene = function () {
      const scene = new BABYLON.Scene(this.engine);
      const camera = new BABYLON.FreeCamera('camera1', new BABYLON.Vector3(0, 5, -10), scene);
      camera.setTarget(BABYLON.Vector3.Zero());
      camera.attachControl(this.canvas, false);
      const light = new BABYLON.HemisphericLight('light1', new BABYLON.Vector3(this.lightX, 1, 0), scene);

      this.skybox = BABYLON.Mesh.CreateBox('skyBox', 100, scene, true);
      const skyboxMaterial = new BABYLON.StandardMaterial('skyBox', scene);
      skyboxMaterial.backFaceCulling = false;
      skyboxMaterial.reflectionTexture = new BABYLON.CubeTexture(
        '/assets/images/textures/1',
        scene
      );
      skyboxMaterial.reflectionTexture.coordinatesMode = BABYLON.Texture.SKYBOX_MODE;
      skyboxMaterial.diffuseColor = new BABYLON.Color3(0, 0, 0);
      skyboxMaterial.specularColor = new BABYLON.Color3(0, 0, 0);
      this.skybox.material = skyboxMaterial;

      this.sphere = BABYLON.Mesh.CreateSphere('sphere1', 16, 2, scene, false, BABYLON.Mesh.FRONTSIDE);

      let myMaterial = new BABYLON.StandardMaterial('blue', scene);
      myMaterial.diffuseColor = new BABYLON.Color3(.5, 0, 1);
      myMaterial.specularColor = new BABYLON.Color3(this.red, 0.6, 0.87);
      this.sphere.material = myMaterial;
      this.sphere.position.y = this.y;

      const ground = BABYLON.Mesh.CreateGround('ground1', 6, 6, 2, scene, false);
      myMaterial = new BABYLON.StandardMaterial('green', scene);
      myMaterial.diffuseColor = new BABYLON.Color3(0, .8, 0);
      myMaterial.specularColor = new BABYLON.Color3(0.7, 0.6, 0.87);
      ground.material = myMaterial;
      // Return the created scene
      return scene;
    }.bind(this);

    const scene = createScene();
    this.world = scene;
    // run the render loop
    this.engine.runRenderLoop(function () {
      scene.render();
    });
    window.addEventListener('resize', function () {
      scene.resize();
    });
  }

  moveSphere(event) {
    console.log('y值=', event.detail.value);
    const ball = this.world.getMeshByID('sphere1');
    const new_position = new BABYLON.Vector3(ball.position.x, event.detail.value, ball.position.z);
    ball.position = new_position;
  }

  moveLight(event) {
    console.log('x值=', event.detail.value);
    const light = this.world.getLightByID('light1');
    light.setDirectionToTarget(new BABYLON.Vector3(event.detail.value, 1, light.getAbsolutePosition().z));
  }

  handleFileSelect($event) {
    // tslint:disable-next-line:no-debugger
    debugger;
    const files = $event.target.files; // FileList object
    // Loop through the FileList and render image files as thumbnails.
    for (let i = 0, f; f = files[i]; i++) {
      // Only process image files.
      if (!f.type.match('image.*')) {
        continue;
      }
      const reader = new FileReader();
      // Closure to capture the file information.
      reader.onload = (function (theFile) {
        return function (e) {
          console.log(e.target.result);
          const image = e.target.result;
          const texture = new BABYLON.Texture('data:my_image_name', this.world, true,
            true, BABYLON.Texture.BILINEAR_SAMPLINGMODE, null, null, image, true);
          // tslint:disable-next-line:no-debugger
          debugger;
          const ball = this.world.getMeshByID('sphere1');
          ball.material.diffuseTexture = texture;
        };
      })(f).bind(this);

      // Read in the image file as a data URL.
      reader.readAsDataURL(f);
    }
  }
}
cube.component.ts(完整)
Ionic App 實作
#renderCanvas {
    width: 100vh;
    height: 100%;
}
cube.component.scss
Ionic App 實作
<app-cube></app-cube>home.component.html
ionic serveionic cordova run android建立Android apk檔(可安裝至手機)
瀏覽器模擬
需其他前置作業