Question 3
During the research, planning, production and evaluation stages of our project, we used a wide variety of different technologies and equipment to make sure that both our music video and ancillary work is made in a way, which appeals to our target audience.
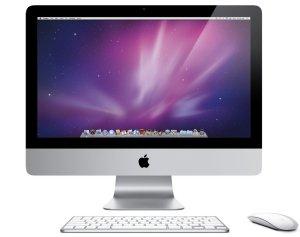
While we were still in the research and planning stages, we used a few Internet browsers such as Safari and Firefox. This enabled us to look at many already existing music videos on websites such as YouTube and Vimeo, make notes of the common aspects and conventions in the particular genre that we noticed in some of them and include those in our own music video to represent the genre (indie pop). But obviously none of this would have been possible without using computers, so they were probably the most important technology we used. We browsed through different pages and read information on other existing indie pop artists, which made us aware of the main elements.
Another
important technological device that we used was our hard
drive. We were given one at the start of our project in order to be
able to organise all of our files on there, rather than saving them in
different folders so we wouldn’t misplace them. An advantage of this was that
its capacity is very big and we were able to store many pictures and videos
from our research and planning stage, as well as our actual footage and the
final product. Furthermore, it’s portable which made it easy for us as we were
able to use it on any computer without having to worry about where we had
previously worked.
We used Blogger to keep track of the research and record
our ideas. This helped us in many ways, as we were able to organise our project
better by setting dates to complete different parts, creating brainstorms and
putting links to a few music videos
that inspired us. On my blog, I was able to be independent by working at home
and organising my materials for the lessons such as planning the mise en scene
which we were going to include in our final production. It was also useful to
me because it helped me get into the habit of blogging regularly and organising
my work in a digital format. I tried using a different type of technology
in each one of my post including GoAnimate, PowToon,
Voki and ZooBurst which were animation websites. To present images,
I used Photosnack, Animoto, Kizoa and Photobucket.

The JVC cameras were one of the fundamental parts
of the equipment that we needed to make our music videos. We used it to capture
our footage, in a variety of ways such as high/low angle shots, close-ups, and
location shots. They were all important aspects of our music video, which
showed its genre and allowed the audience to gain a better knowledge of the
artist as she isn’t well known yet. One of the benefits of using a professional camera was that we were able to
apply the rules that we had learnt in class including the 180-degree rule and
the rule of thirds. This made our music video seem a lot more professional, but
this was also because we were able to focus the camera really well to show
exactly what we wanted our audience to see. In addition to that, we were also
able to capture the artist from different angles, track their movement and use
good shot composition.
In addition to that, we used another two types of recording devices – a still camera and a flip camera. With the flip camera we were able to record our teacher giving us feedback so that we can later go back to it and make the changes suggested. This enabled us to improve some aspects of our music video and make it seem more professional. On the other hand, with our still camera we took many behind the scenes pictures, in order to be able to document everything that happened while we were filming. This made me feel more creative as I was able to capture various different aspects of the process. The other way in which we used a still camera was to take pictures for our ancillary work. One interesting thing I learnt was that if we took screenshots from the actual video, the quality would be awful, therefore we had to go out and take pictures with an SLR camera. After taking 491 pictures, we discovered how much better the depth of field was when we used this camera as opposed to the one we used to film our footage. Just like with our footage for the music video, we continued following the rule of thirds so we had a good shot composition.
To edit my ancillary work I mainly just used Photoshop. I had previous experience with the program so it wasn’t very difficult for me – although I learnt how to add text and use many many layers which was something I hadn’t focused on before. I also learnt quite a lot of new skills through searching for Photoshop tutorials on YouTube. Especially for my ancillary work, I installed a specifically chosen font from a website, which was also used in our music video in order to create synergy. To make my CD cover seem more sophisticated, I also downloaded Photoshop brushes with floral patterns which I incorporated on the back panel and the inside of the CD. The other editing software I used was a website called PicMonkey, where I added some effects which I wasn’t able to add on Photoshop. The combination of both editing software made my images look exactly the way I wanted them to. (MORE DETAILS ON HOW I USED PHOTOSHOP IN THE PREZI BELOW!)
Title
In terms
of distributing our media product, we used a variety of social networks.
Initially it was uploaded on Vimeo,
after which I uploaded it on YouTube too.
After sharing it on other social networks like
Facebook, Twitter and even Snapchat, we got over 200 views which shows
just how effective social promoting is. We had also created an Instagram account for our artist and a Twitter account which we used while filming to
let our teachers know what’s happening and where we are.