xdiff

Needs
ETS's diff utility often was not using the latest version of XLIFF files (in PISA 2021), so they were not reliable and there was a lot of back and forth to get the right report.
ETS's diff utility could only compare XLIFF files, whereas OmegaT projects may contain many other kind of files (Word, Excel, InDesign, etc.)
Solution
Bring xDiff to the next level and allow to compare full OmegaT projects.
Caveats
Two OmegaT projects are only comparable as long as the source files and the segmentation have not been altered.
Two OmegaT projects are only comparable if they have been packed with the latest version of the OMT plugin.
Warnings and messages
If no differences are found:
If source is different -> will not be included in the report.


OmegaT version
Do's
- Install OmegaT from the link provided in this guide.
- Install OmegaT version 4.2.0
- Ignore prompt to update to latest version
Don'ts
- Do not download OmegaT from another link.
- Do not install any other version of OmegaT
- Do not update OmegaT to a newer version unless you are instructed to do so.
Install and customize
Notice that there are two steps in the installation process:
-
Installation of OmegaT (the software itself)
-
Installation of the custom files
While the customization might need to be updated often, the OmegaT version you need is unlikely to change during this cycle.
A customization update does not require re-installing OmegaT.
Choose your path
Click on the box that corresponds to your current status:
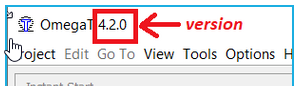
The title bar shows your OmegaT version
You will:
- Uninstall (other versions)
- Install OmegaT 4.2.0
- Install customization
You will:
- Install OmegaT 4.2.0
- Install customization
You will:
- Install customization
Step 0: Uninstall OmegaT
If you have OmegaT installed but its version is
different from 4.2.0, please uninstall it.
After having uninstalled that version, please proceed to step 1 to install version 4.2.0 of OmegaT.


Step 1.0: Download installer
Please download the installer that corresponds to the processor your computer has (32-bit or 64-bit).
The links above point to version 4.2.0 of OmegaT. Do not install any other version.
☝
32bit or 64bit machine?
To check whether your computer is 32-bit or 64-bit:
- Press Windows key+E to launch the File Explorer
-
Right-click on “This PC”
-
Select item “Properties” from the contextual menu
-
In the System window, look for “System type”. See screenshot below:

Step 1.1: Install OmegaT
During the installation:
-
Choose English as the language of the installation and the interface
-
In the License Agreement screen, please select
“I accept the agreement” and click “Next” -
Tick option to create a desktop shortcut
-
In all other dialogs, just press “Next” to use the default options until you reach “Ready to Install” screen.
-
Then click on “Install”.

Step 2: Customization
- The OmegaT installation must be customized.
- The customization consists of adding some additional custom files to your OmegaT installation, which will allow you to work with the OmegaT project packages that you will download from the portal.
- To do that, you must run the customization script.
---
-
-
Step 2.1: Get the script
Download the updateConfigBundle.groovy script from here.
Tip: To download the script, right click on the link and select “Save Link As” (or “Save Target As”, depending on your browser)
☝
right click
Save Link As
1
2
Step 2.2: Open the script
In OmegaT, go to Tools > Scripting > File > Open script, and select the updateConfigBundle.groovy file from wherever you have saved it. Press Open.
Warning: Please do not update OmegaT to a newer version even if OmegaT prompts you to.

Step 2.3: Run the script
Press the Run button at the bottom left of the Scripting dialog.
The script will install all the necessary custom files in your OmegaT's user configuration folder.

Step 2.4: Delete some files??
It could be that the script doesn't have permissions to delete certain files in your C:\Program Files\OmegaT\plugins folder.
If prompted, delete all jar files manually.

Step 2.5: Everything ok?
- You should now see all the script shortcuts under menu Tools > Scripting.
- You should also see menu items Import OMT package and Export OMT package under Project.

Step 3: Auxiliary tools
If you need to insert non-breaking spaces:
-
Download and install AutoHotKey
-
Press Win+R on your keyboard and type shell:startup to open the Startup folder. Copy the path to that folder (e.g. C:\Users\<your-username>\AppData\Roaming\Microsoft\Windows\Start Menu\Programs\Startup).
-
Right click on this link, choose “Save link as” and paste the path to the Startup folder, to download the script file in that folder.
-
Right click the script file (insert_unicode_char.ahk) in the Startup folder and choose Run script.
This script will be run automatically the next time your machine starts.