
React Native
Day 3
-
Navigation
-
Why navigation is needed
-
Installing & using React Navigation
-
Stack, Tab, and Drawer navigators
-
-
Passing Data Between Screens
-
Params, navigation props
-
-
State Management Overview
-
Prop drilling vs. Context API
-
-
Using the Context API
-
Creating and providing context
-
Practical state sharing (e.g., theme, authentication)
-
-
Hands-On
-
Multi-screen app with navigation
-
Global state with Context for login/user profile
-
Hands-On
-
Build a user profile screen with images and lists
-
Add custom styles, flex layouts
-
-
Debugging & Tools
-
Using React Native Debugger/Flipper
-
Emulator/Device testing tips
-
Navigation
https://reactnavigation.org/
React Native uses external library for routing and navigation (in a similar way how React uses React-Router-Dom). The library is React Navigation.
Probably the easiest way to start is by installing it with Expo (as a template).
npx create-expo-app@latest --template react-navigation/templateNavigation
React Navigation typically needs some external libraries to work depending on the type of navigation. Those are some of them
-
@react-navigation/native – core navigation library
-
react-native-screens – native screen management
-
react-native-safe-area-context – handling safe areas on iOS/Android
-
react-native-gesture-handler – gesture support
-
react-native-reanimated – animations for navigation transitions
-
@react-navigation/native-stack – stack navigator (or
@react-navigation/stack) -
@react-navigation/bottom-tabs – bottom tab navigation (if needed)
-
@react-navigation/drawer – drawer navigation (if needed)
React Navigation
React Navigation comes with two standard way o configuring the routing.
- Static configration
- Dynamic configuration
Static configration
The static configuration API lets you write your configuration in an object, and is defined statically, i.e. it cannot change at runtime. This has reduced boilerplate and simplifies things such as TypeScript types and deep linking.
If you're starting a new project or are new to React Navigation, this is the recommended way to set up your app. If you need more flexibility in the future, you can always mix and match with the dynamic configuration.
Dynamic configration
The dynamic configuration API lets you write your configuration in React components, and can change at runtime based on state or props. This allows for more flexibility but requires more boilerplate and configuration for Typescript types, deep linking etc.
Types of Navigators
-
Stack Navigator: Typical push/pop navigation.
-
Tab Navigator: Bottom or top tabs.
-
Drawer Navigator: Side drawer menu.
Stack Navigator
This navigator is quite similar to browser navigation. As the name suggests screens work as stack data structure. They can be pushed on top of previous one a pop back to go to earlier screen. Stack navigator utilizes "back arrow" in the IoS and Android platforms.
Stack Navigator
import { NavigationContainer } from '@react-navigation/native';
import { createStackNavigator } from '@react-navigation/stack';

const Stack = createStackNavigator();

function App() {
  return (
    <NavigationContainer>
      <Stack.Navigator>
        <Stack.Screen name="Home" component={HomeScreen} />
        <Stack.Screen name="Details" component={DetailsScreen} />
      </Stack.Navigator>
    </NavigationContainer>
  );
}
Static Example
// In App.js in a new project

import * as React from 'react';
import { View, Text } from 'react-native';
import { createStaticNavigation } from '@react-navigation/native';
import { createNativeStackNavigator } from '@react-navigation/native-stack';

function HomeScreen() {
  return (
    <View style={{ flex: 1, alignItems: 'center', justifyContent: 'center' }}>
      <Text>Home Screen</Text>
    </View>
  );
}

const RootStack = createNativeStackNavigator({
  screens: {
    Home: HomeScreen,
  },
});

const Navigation = createStaticNavigation(RootStack);

export default function App() {
  return <Navigation />;
}
Dynamic example
import * as React from 'react';
import { View, Text } from 'react-native';
import { NavigationContainer } from '@react-navigation/native';
import { createNativeStackNavigator } from '@react-navigation/native-stack';

function HomeScreen() {
  return (
    <View style={{ flex: 1, alignItems: 'center', justifyContent: 'center' }}>
      <Text>Home Screen</Text>
    </View>
  );
}

const Stack = createNativeStackNavigator();

function RootStack() {
  return (
    <Stack.Navigator>
      <Stack.Screen name="Home" component={HomeScreen} />
    </Stack.Navigator>
  );
}

export default function App() {
  return (
    <NavigationContainer>
      <RootStack />
    </NavigationContainer>
  );
}
Stack Navigator
You can navigate to the screen with navigate function. You may as well pass some props to the next screen
navigation.navigate('Details', { userId: 42 });

// Datails screen
function DetailsScreen({ route }) {
  const { userId } = route.params;
  // ...
}
Stack Navigation
Looks like a simple most basic screen
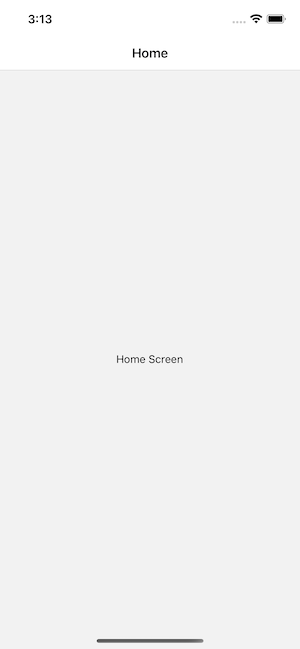
Stack Navigation
Move to another screen
Stack Navigation
import * as React from 'react';
import { View, Text } from 'react-native';
import {
  createStaticNavigation,
  useNavigation,
} from '@react-navigation/native';
import { createNativeStackNavigator } from '@react-navigation/native-stack';
import { Button } from '@react-navigation/elements';

function HomeScreen() {
  const navigation = useNavigation();

  return (
    <View style={{ flex: 1, alignItems: 'center', justifyContent: 'center' }}>
      <Text>Home Screen</Text>
      <Button onPress={() => navigation.navigate('Details')}>
        Go to Details
      </Button>
      <Button onPress={() => navigation.goBack()}>Go back</Button>
      <Button onPress={() => navigation.popTo('Home')}>Go to Home</Button>
      <Button onPress={() => navigation.popToTop()}>
    </View>
  );
}

// ... other code from the previous section
Nesting navigators
function HomeTabs() {
  return (
    <Tab.Navigator>
      <Tab.Screen name="Feed" component={FeedScreen} />
      <Tab.Screen name="Messages" component={MessagesScreen} />
    </Tab.Navigator>
  );
}

function RootStack() {
  return (
    <Stack.Navigator>
      <Stack.Screen
        name="Home"
        component={HomeTabs}
        options={{ headerShown: false }}
      />
      <Stack.Screen name="Profile" component={ProfileScreen} />
    </Stack.Navigator>
  );
}
Stack Navigator
-
initialRouteName— Which screen to show first. -
screenOptions— Set default options for all screens. -
Each
<Stack.Screen>can takename,component,options.
Tab Navigator
A simple tab bar on the bottom of the screen that lets you switch between different routes. Routes are lazily initialized -- their screen components are not mounted until they are first focused.
Tab Navigator
import { createBottomTabNavigator } from '@react-navigation/bottom-tabs';

const Tab = createBottomTabNavigator();

function MyTabs() {
  return (
    <Tab.Navigator>
      <Tab.Screen name="Home" component={HomeScreen} />
      <Tab.Screen name="Profile" component={ProfileScreen} />
    </Tab.Navigator>
  );
}
npm install @react-navigation/bottom-tabsMaterial Top Tabs Navigator
A material-design themed tab bar on the top of the screen that lets you switch between different routes by tapping the tabs or swiping horizontally. Transitions are animated by default. Screen components for each route are mounted immediately.
Material Top Tab Navigator
import { createMaterialTopTabNavigator } from '@react-navigation/material-top-tabs';

const Tab = createMaterialTopTabNavigator();

function MyTabs() {
  return (
    <Tab.Navigator>
      <Tab.Screen name="Home" component={HomeScreen} />
      <Tab.Screen name="Profile" component={ProfileScreen} />
    </Tab.Navigator>
  );
}
npx expo install react-native-pager-viewDrawer navigator
Slides from the side
npm install @react-navigation/drawer
npx expo install
	react-native-gesture-handler
	react-native-reanimated
Drawer Navigator
import { createDrawerNavigator } from '@react-navigation/drawer';

const Drawer = createDrawerNavigator();

function MyDrawer() {
  return (
    <Drawer.Navigator>
      <Drawer.Screen name="Home" component={HomeScreen} />
      <Drawer.Screen name="Profile" component={ProfileScreen} />
    </Drawer.Navigator>
  );
}
React Navigation Hooks
useNavigation Hook
-
Allows access to navigation object inside any component
-
Commonly used for navigating programmatically
import { useNavigation } from '@react-navigation/native';

const MyButton = () => {
  const navigation = useNavigation();
  return (
    <Button title='Go Home' onPress={() => navigation.navigate('Home')} />
  );
};
React Navigation Hooks
useRoute Hook
-
Provides access to route object and params
-
Useful for reading data passed between screens
import { useRoute } from '@react-navigation/native';

const DetailsScreen = () => {
  const route = useRoute();
  const { itemId } = route.params;
  return <Text>Item ID: {itemId}</Text>;
};
React Navigation Hooks
useFocusEffect Hook
-
Runs effect when screen is focused
-
Good for refreshing data or subscribing to events
import { useFocusEffect } from '@react-navigation/native';
import { useCallback } from 'react';

useFocusEffect(
  useCallback(() => {
    console.log('Screen is focused');
    return () => console.log('Screen is unfocused');
  }, [])
);