Workshop
Interaction
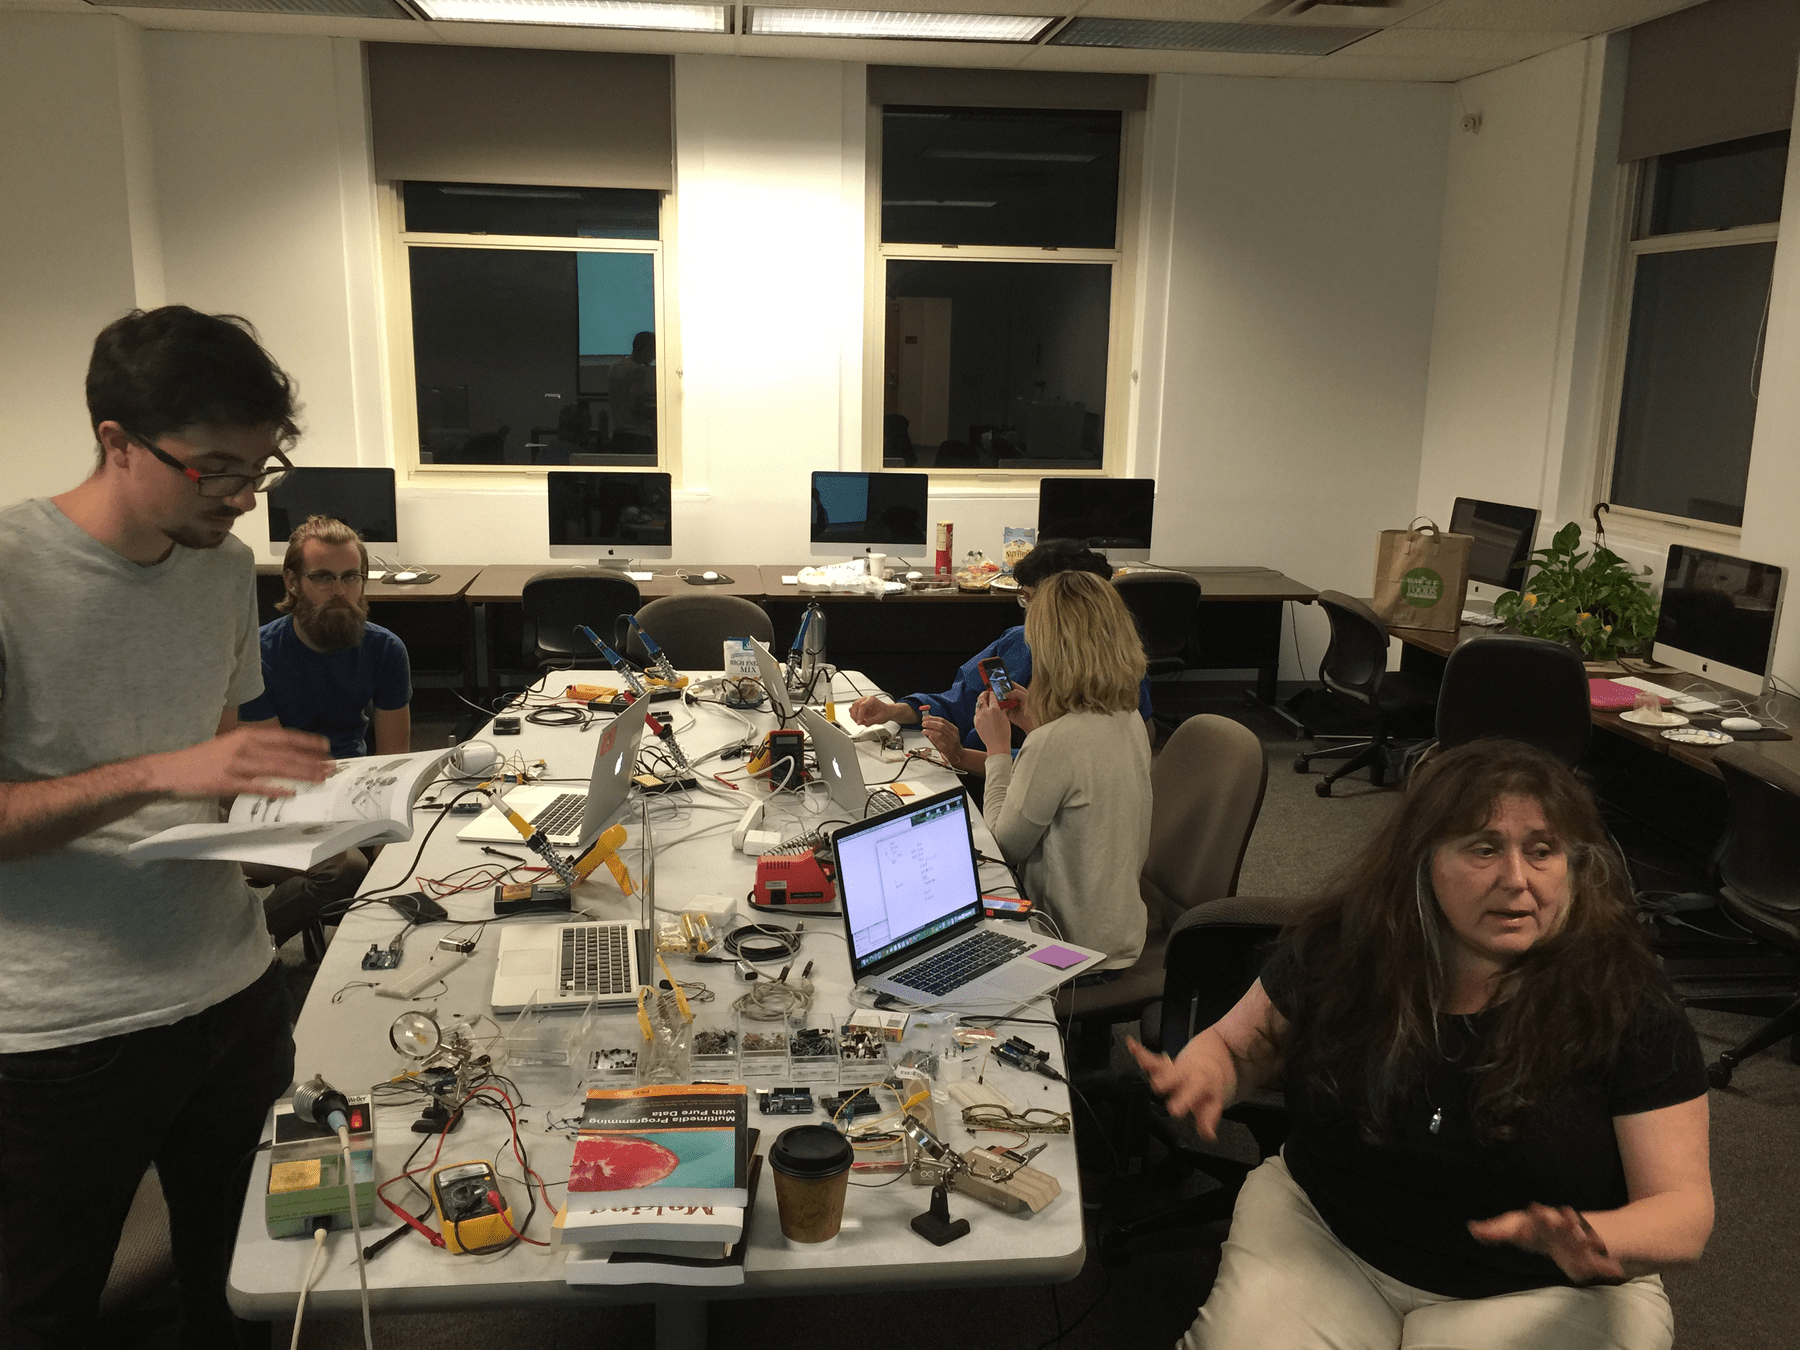
This physical computing workshop aims to experiment with simple input and output mechanisms that utilise electronics.
This may be unusual and uncharted territory for a designer, but as we extend traditional design products into digital and virtual space, we also explore how design can be applied to physical applications that a user can interact with to create physical and tangible experiences.
Through prepared materials and electronic components, you will design a simple physical interaction that demonstrates how a physical input triggers a digital output or vice versa.
Workshop
Interaction
Workshop
Interaction
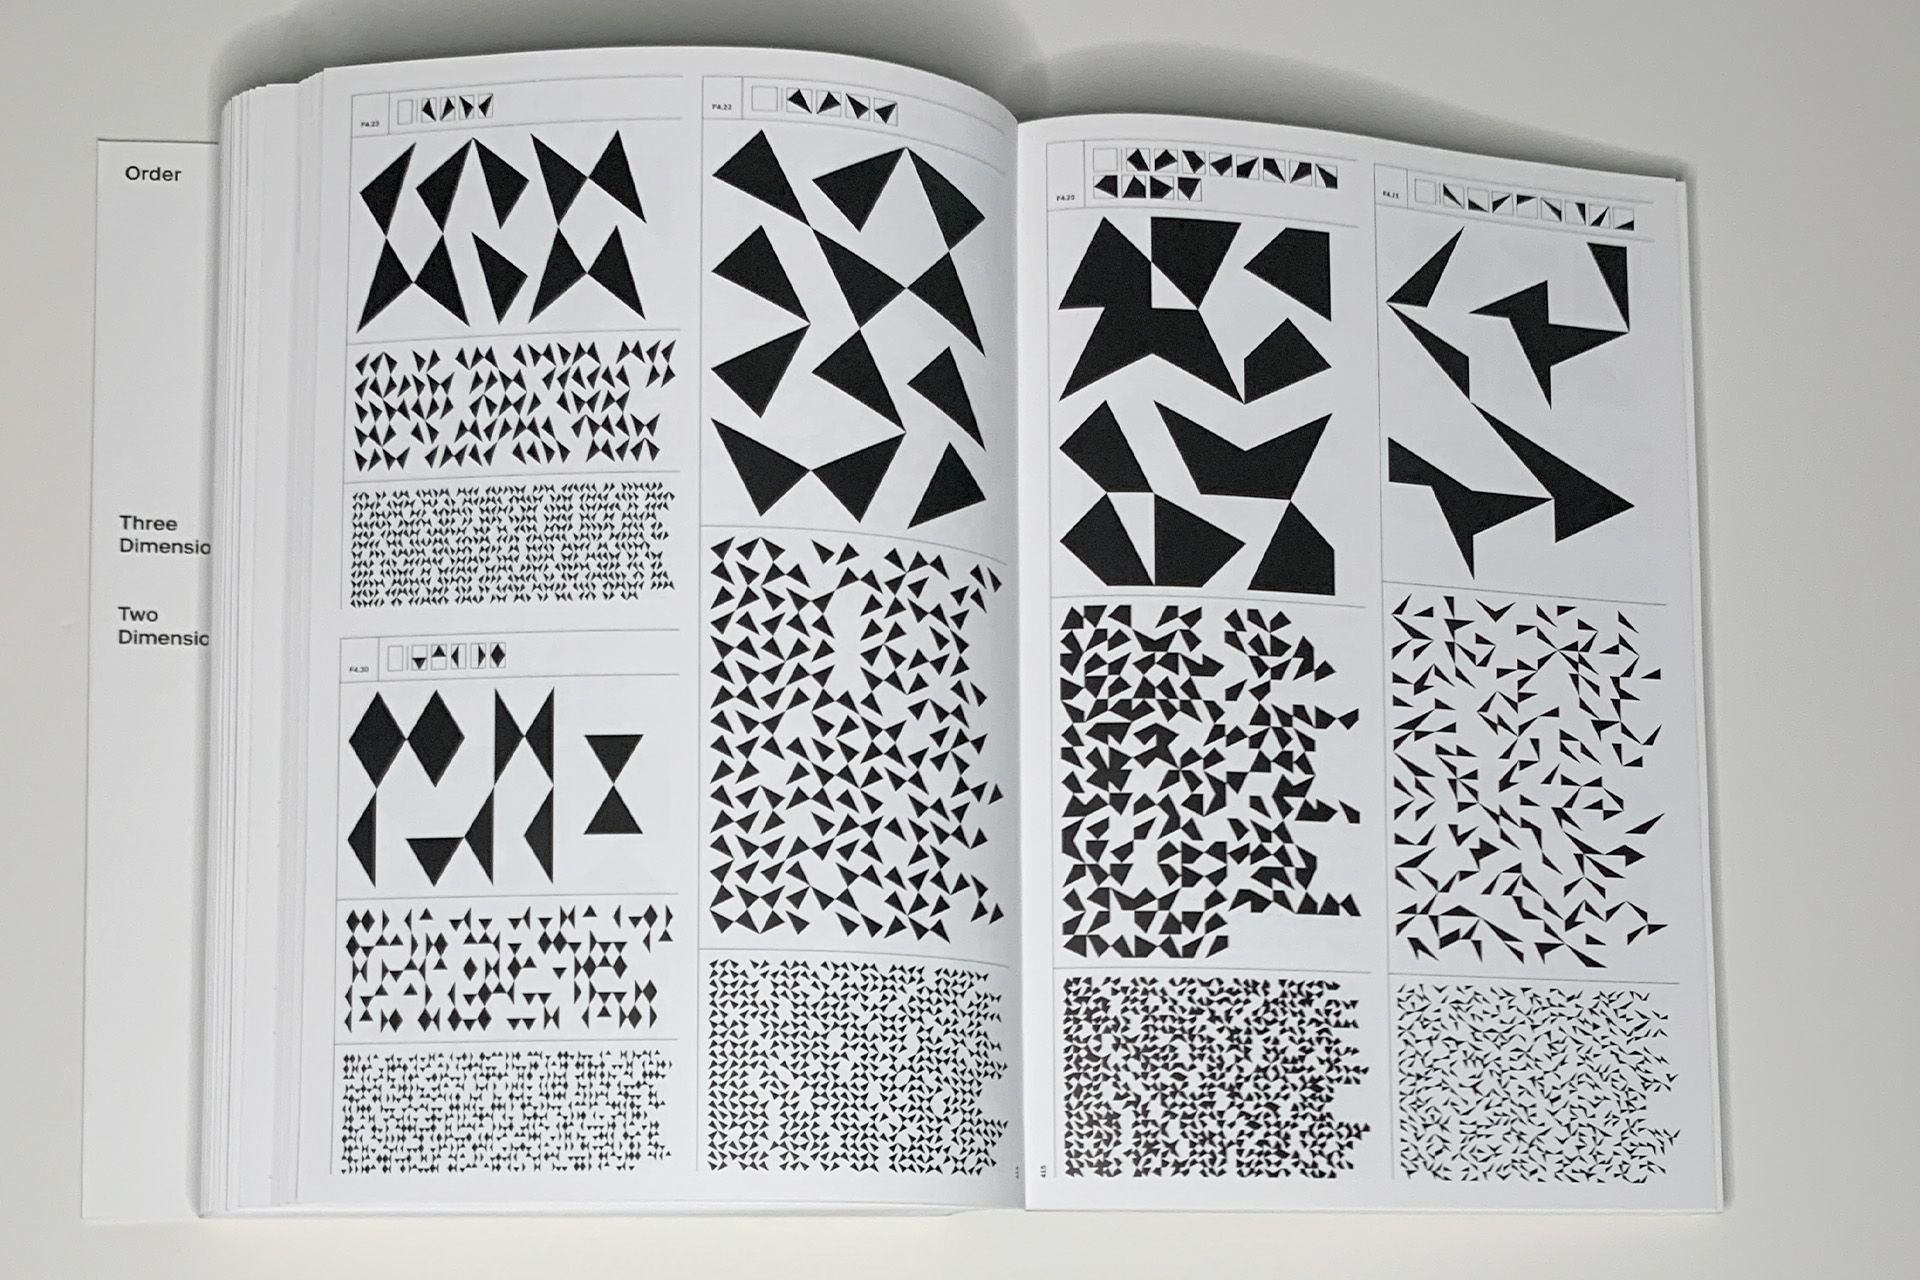
Design can function at multiple levels and in different ways. Design professor Richard Buchanan captured his thinking into these ‘four orders of design’ illustrating how design as a discipline has moved from the traditional concept of the visual or tangible artefact through to orchestrating interactions and experiences, and to transforming systems.
Four Orders of Design. Symbols, Objects, Actions, Systems.
Workshop
Interaction
Four Orders of Design
2D Graphic Design, deals with the nature, shape, and meaning of symbols and consists of four distinct but related activities: typography, illustration, photography, and print. 2
Systems and environments. Environmental design is concerned with “[t]he idea or thought that organizes a system or environment” Therefore, in the fourth order, the focus is on human systems, “the integration of information, physical artifacts, and interactions in environments of living, working, playing, and learning.” 2
4D Interaction. In interaction design, the locus of design is action. Here, the focus is on designing experiences rather than physical objects. 2
3D Industrial Design, industrial design is concerned with tangible, physical artifacts — with things. 2
1 Symbols
3 Actions
2 Objects
4 Systems
Workshop
Interaction
Four Orders of Design
1 Symbols
2 Objects
3 Actions
4 Systems
Poster
Print publication
Website
3D print
Crafted object
Device
Community
Exhibition
Platform
Spaces
Workshop
Immersive Experience
Installation
Interface
Screen
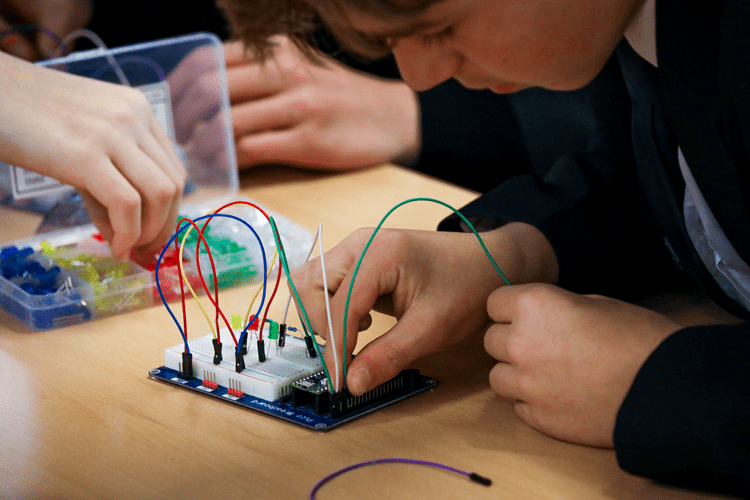
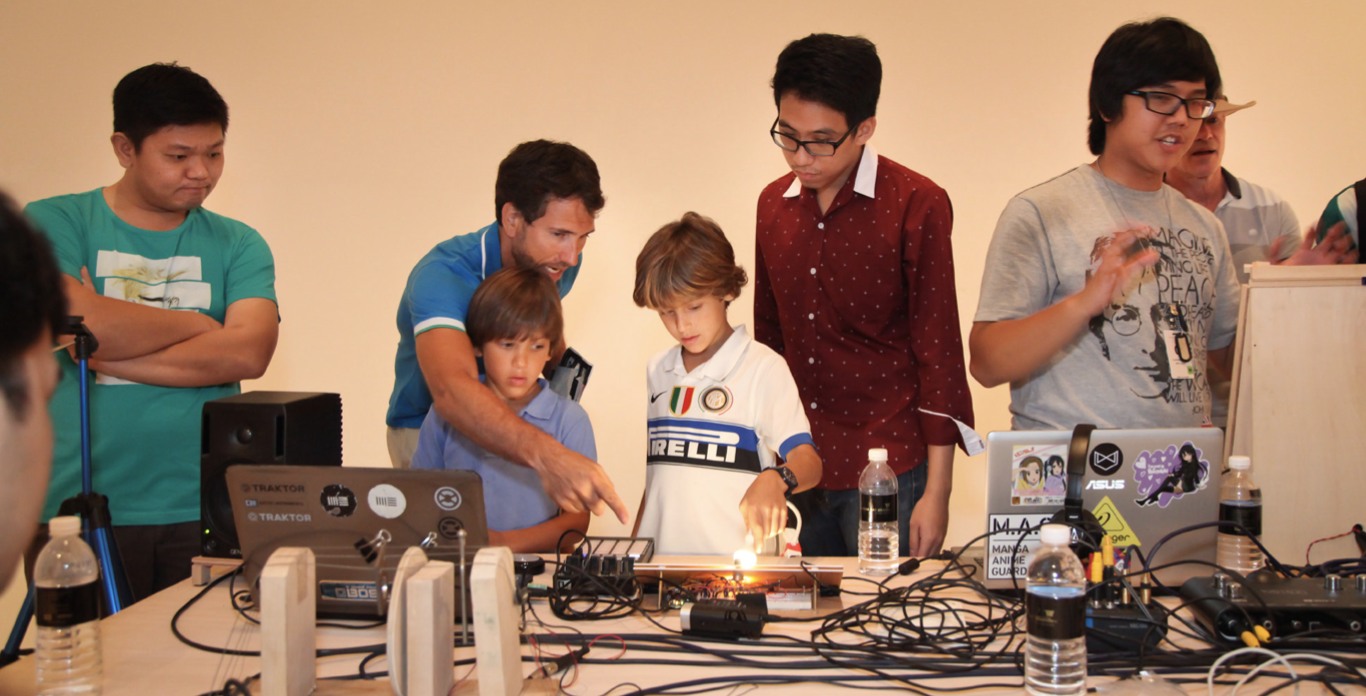
A workshop on interactions using physical computing applications creatively
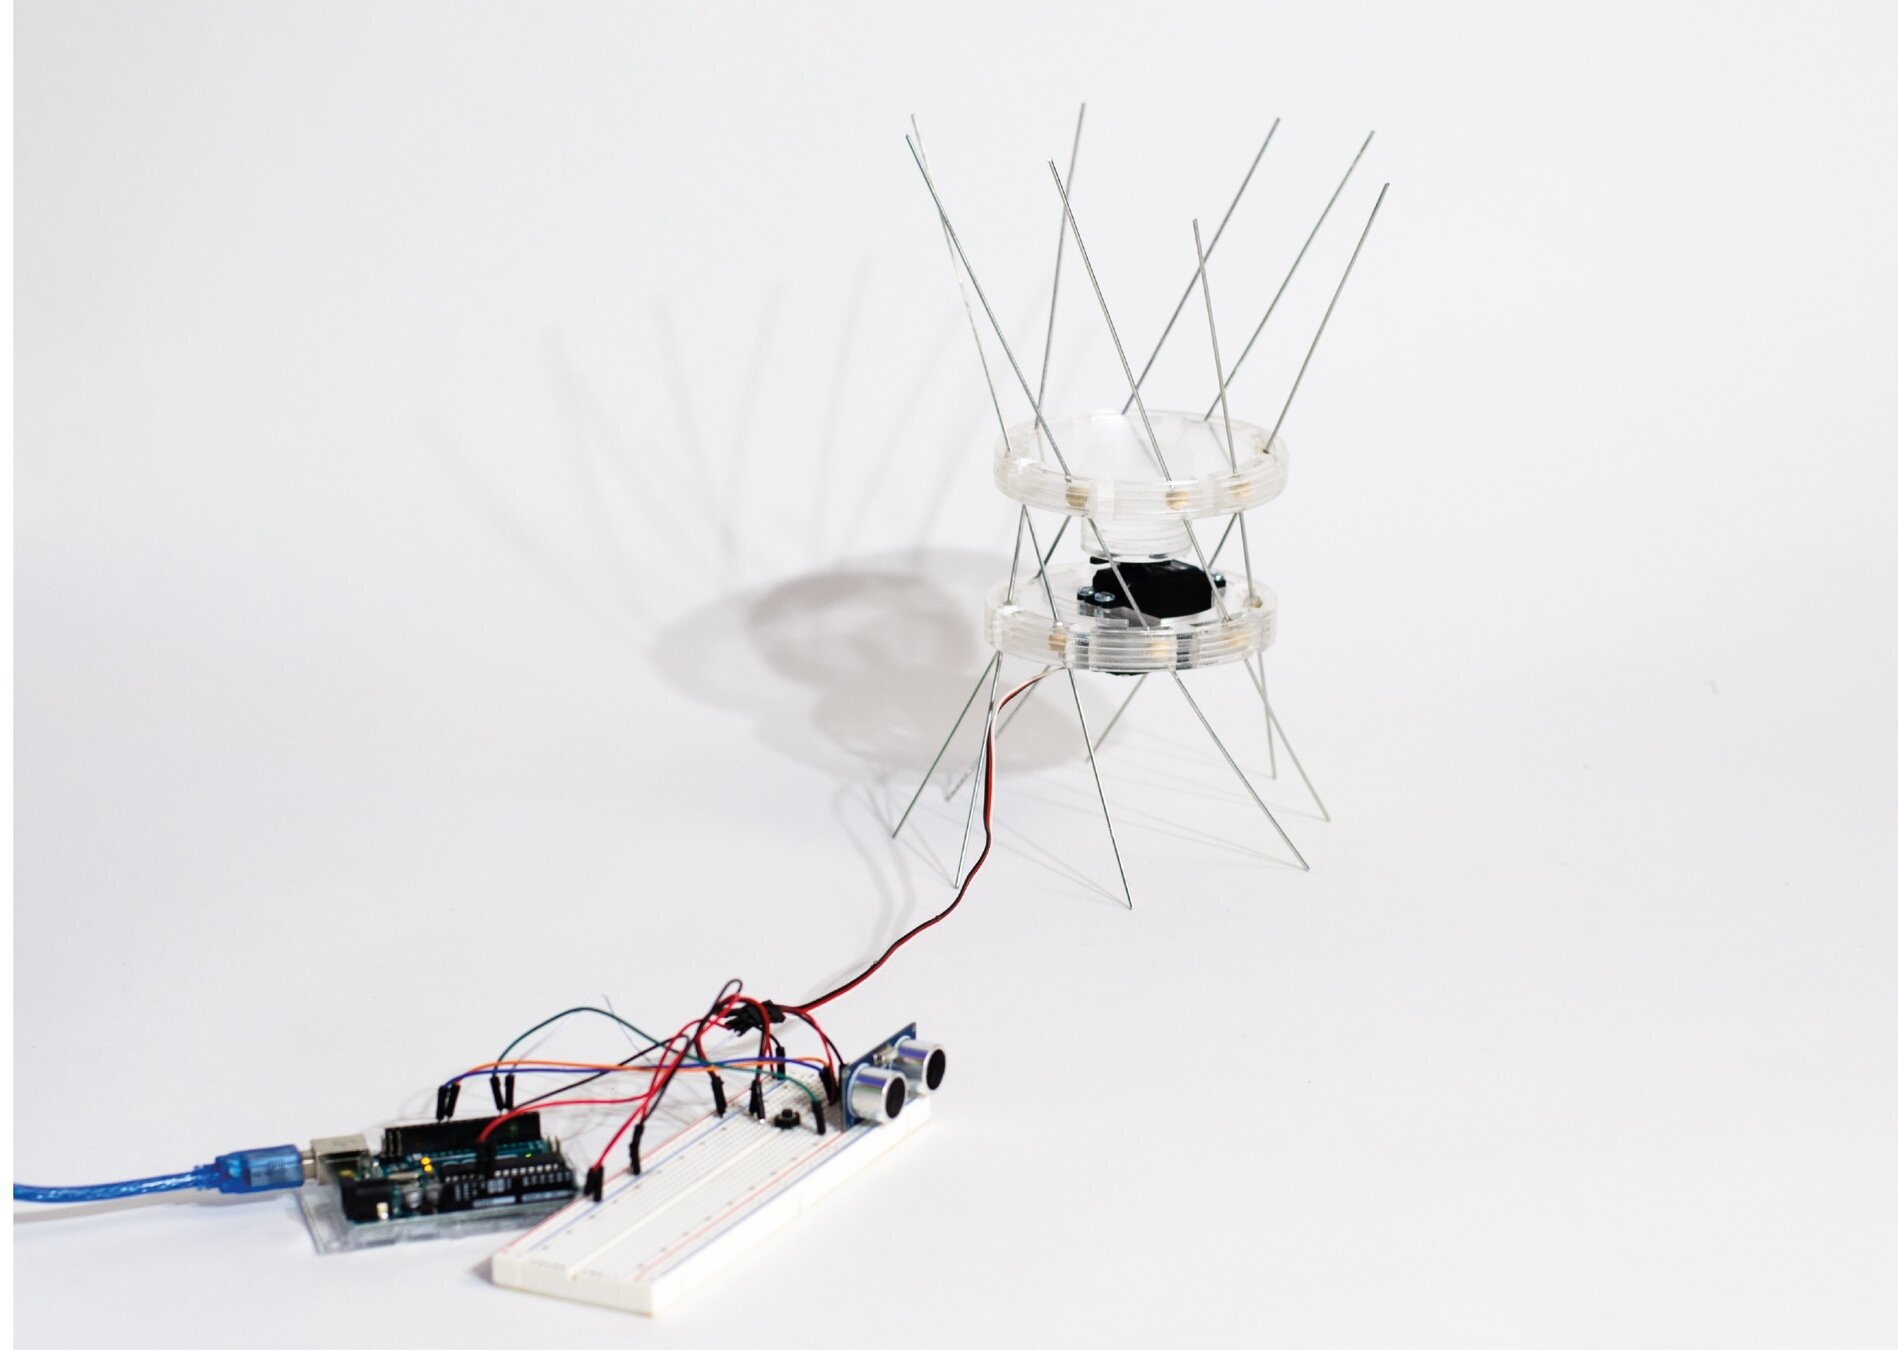
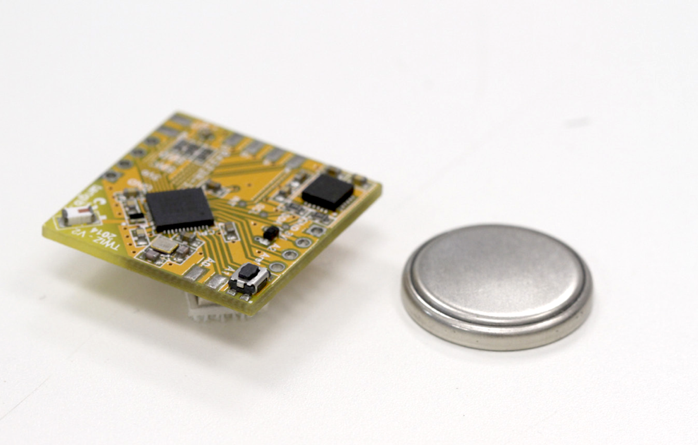
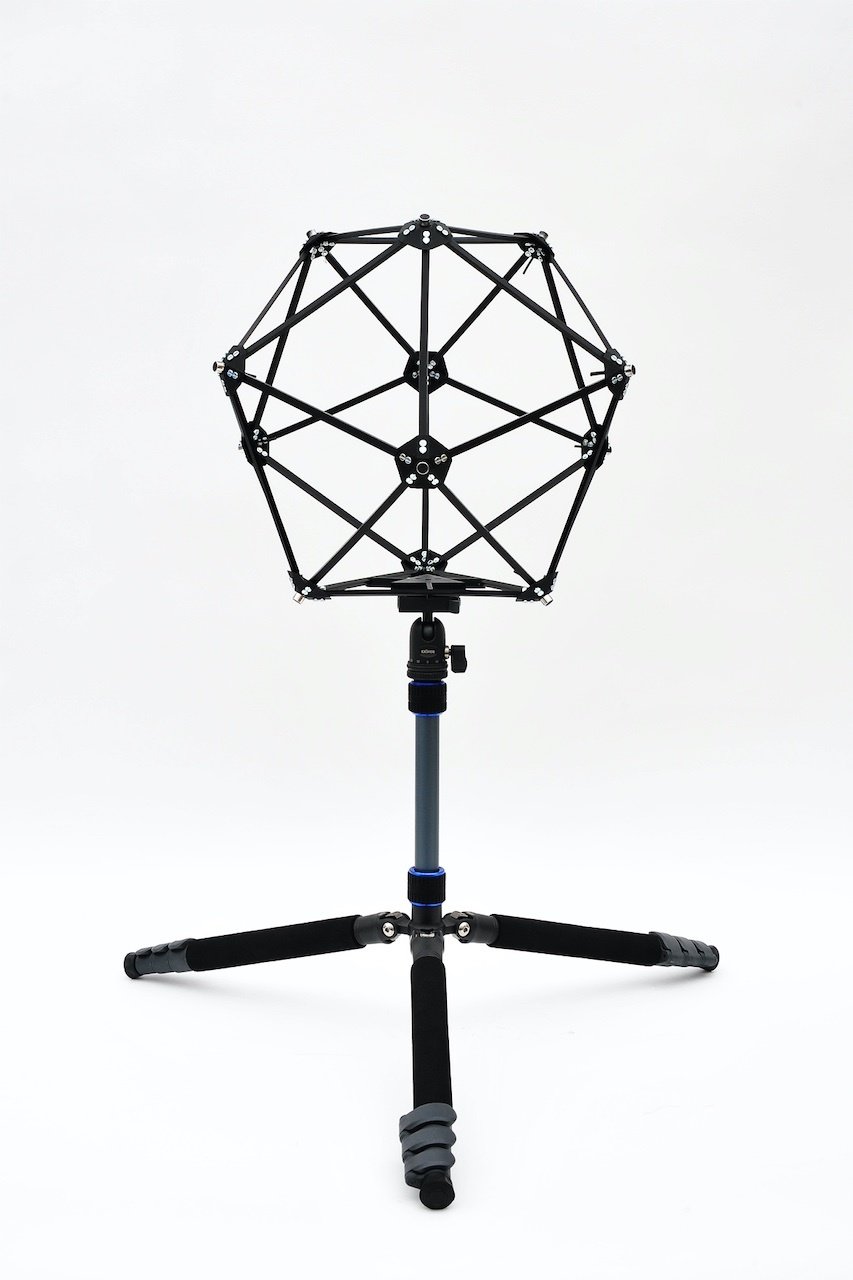
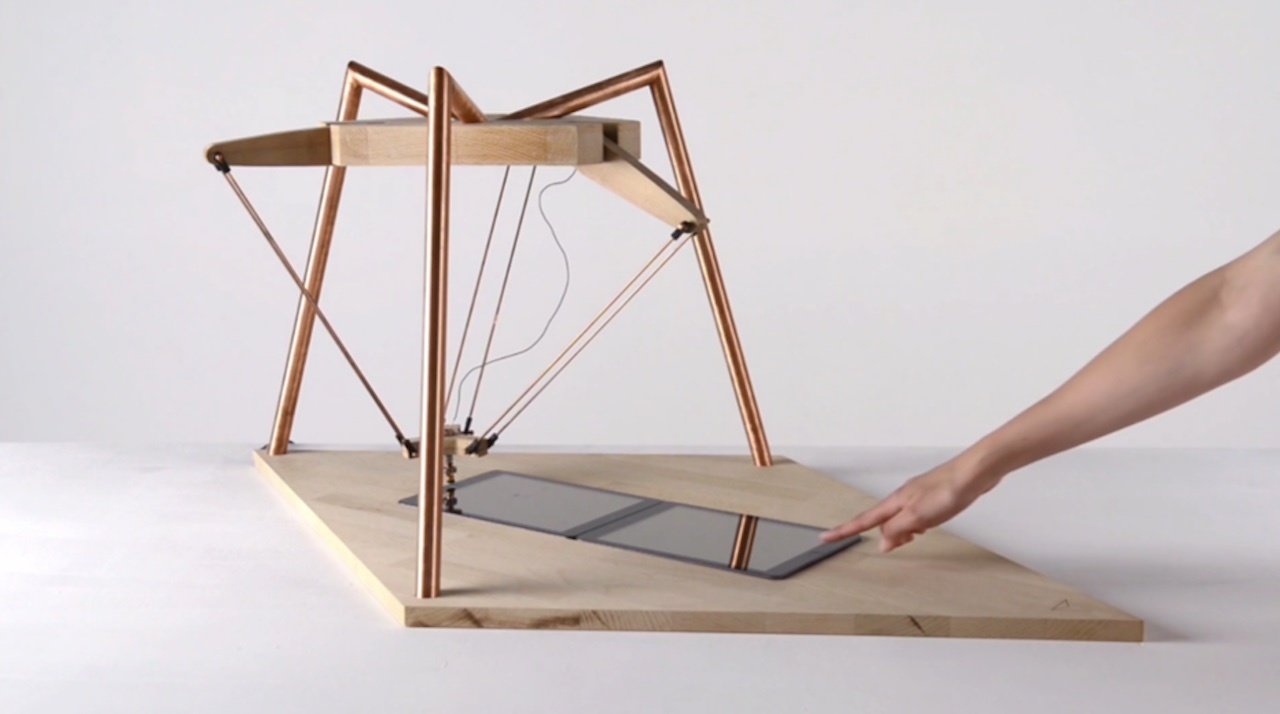
Ergodynamism by Syazwan Hanif, a mechatronically-controlled hyperboloid that uses sensors to translate proximity data to a change in the objects form through control of servo action
Workshop
Interaction
Interactions and Physical Computing
- What is Physical Computing
- Key components of Physical Computing
- Digital and analog worlds
- Why?
- What is possible?
Physical Computing refers to the design and implementation of interactive systems that bridge the digital and physical worlds.
It involves using hardware and software to create systems that can sense and respond to the physical environment.
These systems not only need to be engineered but more importantly for us, designed.
Physical Computing
-
Sensors: Devices that can detect physical inputs from the environment, such as light, temperature, motion, or sound.
-
Actuators: Components that can take digital information and convert it into physical actions, such as motors, LEDs, or speakers.
- Microcontrollers: Small, programmable computers that serve as the brain of a physical computing system. They read input from sensors, process data, and control actuators.
Physical Computing
Key components include
-
Programming: Writing code to define the behavior of the system, including how it responds to input from sensors and how it controls actuators.
- Designing Interactions: How do we or how can we interact with the physical world through interfaces that connect the digital with the physical.
Arduino is a Micro-Controller
Sensors are inputs
Actuators are outputs

Physical Computing
Digital and analog worlds
Physical Computing refers to the design and implementation of interactive systems that bridge the digital and physical worlds.
Coding
Arduino is a Micro-Controller
Sensors are inputs
Actuators are outputs
p5.js
Physical Computing
Digital and analog worlds
Physical Computing refers to the design and implementation of interactive systems that bridge the digital and physical worlds.
Interaction

Physical Computing
Digital and analog worlds
This Physical Computing exercise aims to experiment with simple input and output mechanisms that utilise electronics.
We extend traditional design outcomes into the digital sphere and explore how design can be applied to physical applications that a user can interact with to create physical and tangible experiences.
Through prepared materials and electronic components, you will design a simple physical interaction that demonstrates how a physical input triggers a digital output and vice versa.
Interactions and Physical Computing
Why?
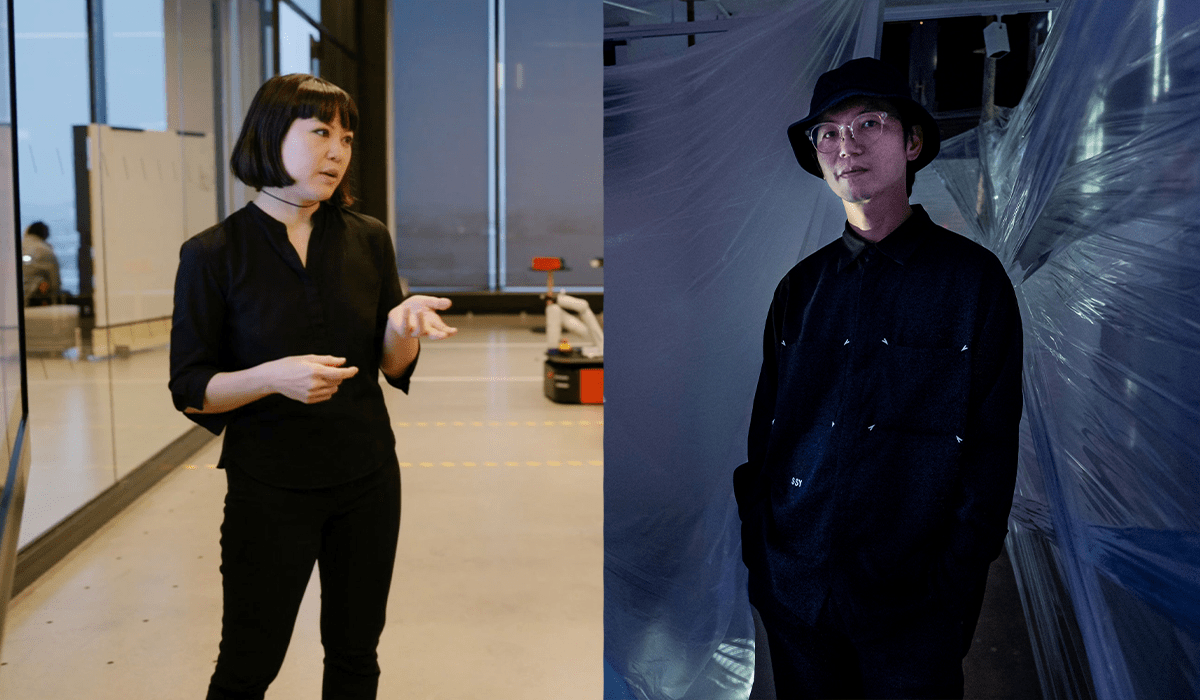
Design as a Force for Good: Lim Si Peng and Ong Kian Peng
DesignSingapore (Dsg) Scholars Lim Si Ping and Ong Kian Peng harbour a profound passion for design and the transformative impact of technology.
Interactions and Physical Computing
Why?
My role as a designer is not just to create visually stunning pieces but also to engage, challenge, and connect with people on a deeper level.
Don’t blindly chase technology. Use them meaningfully. Find poetic uses for technology. That’s our role as designers.
Interactions and Physical Computing
What's possible?
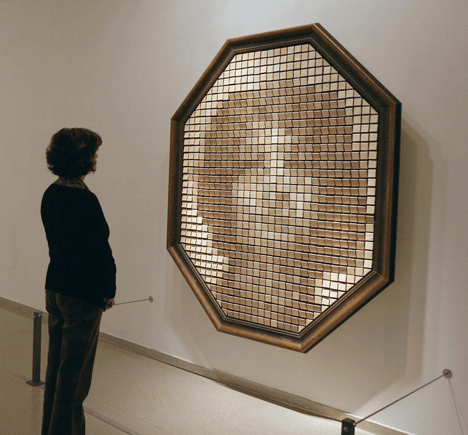
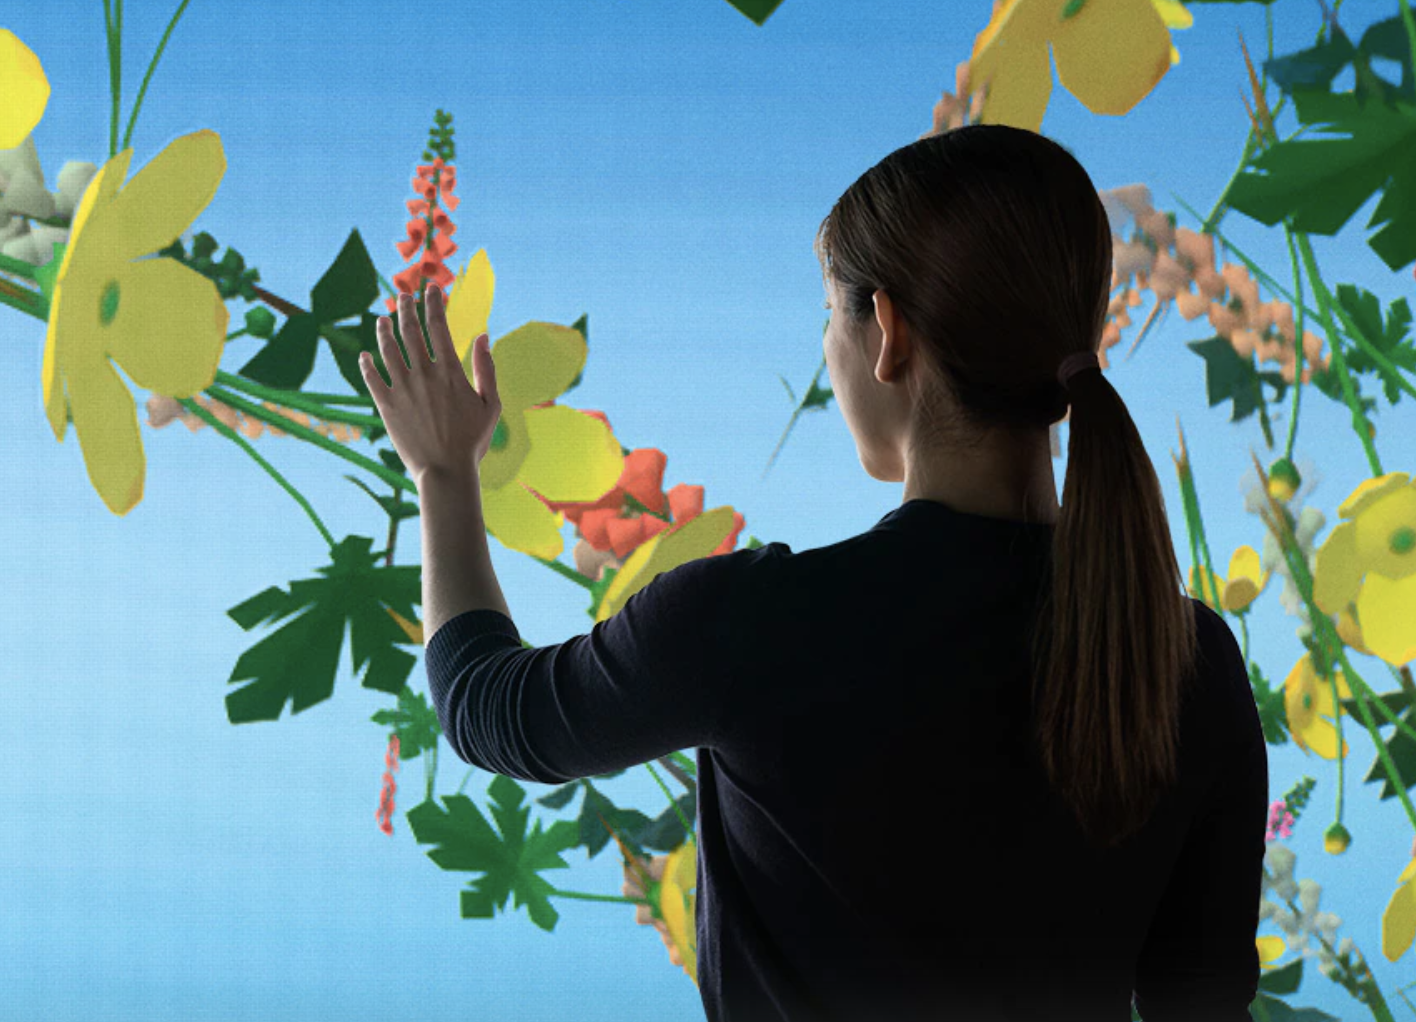
Mechanical Mirrors - use sensors and motors to rearrange objects into a mirror-image of whoever stands in front of them
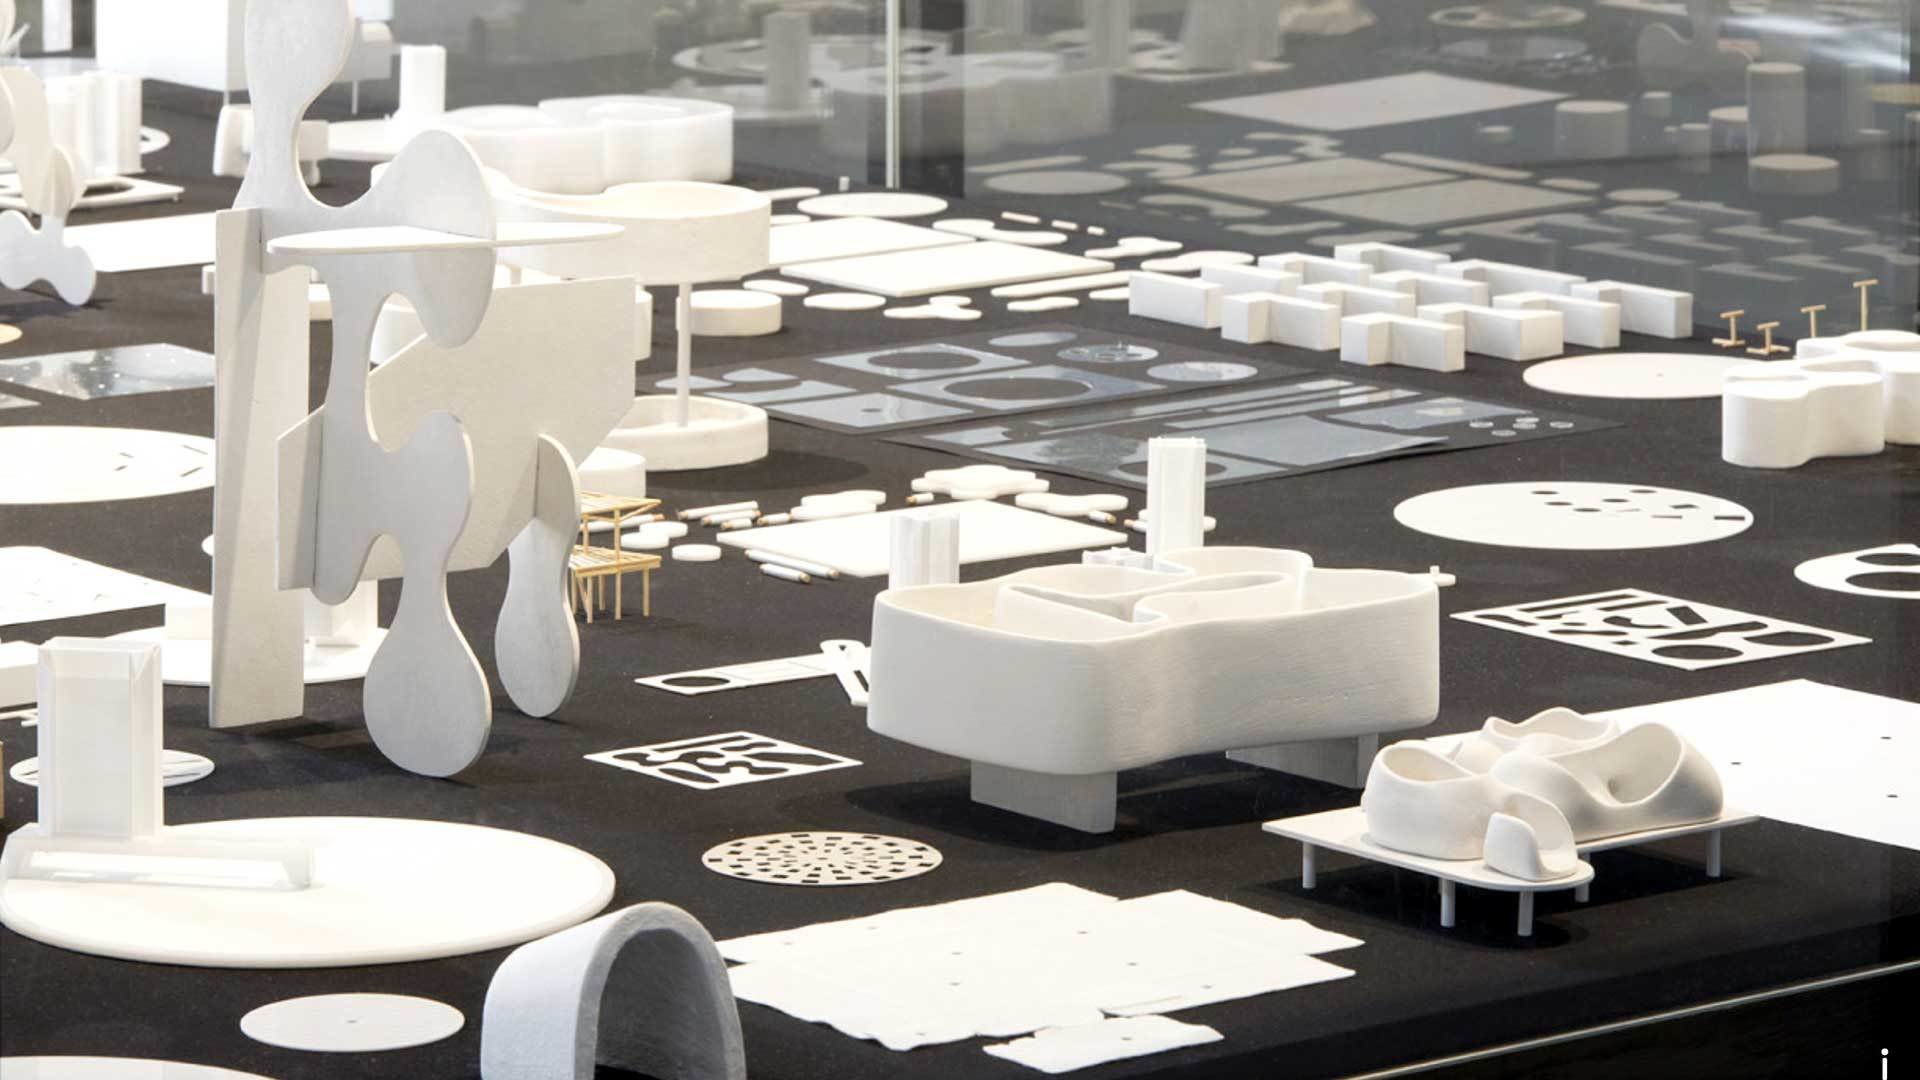
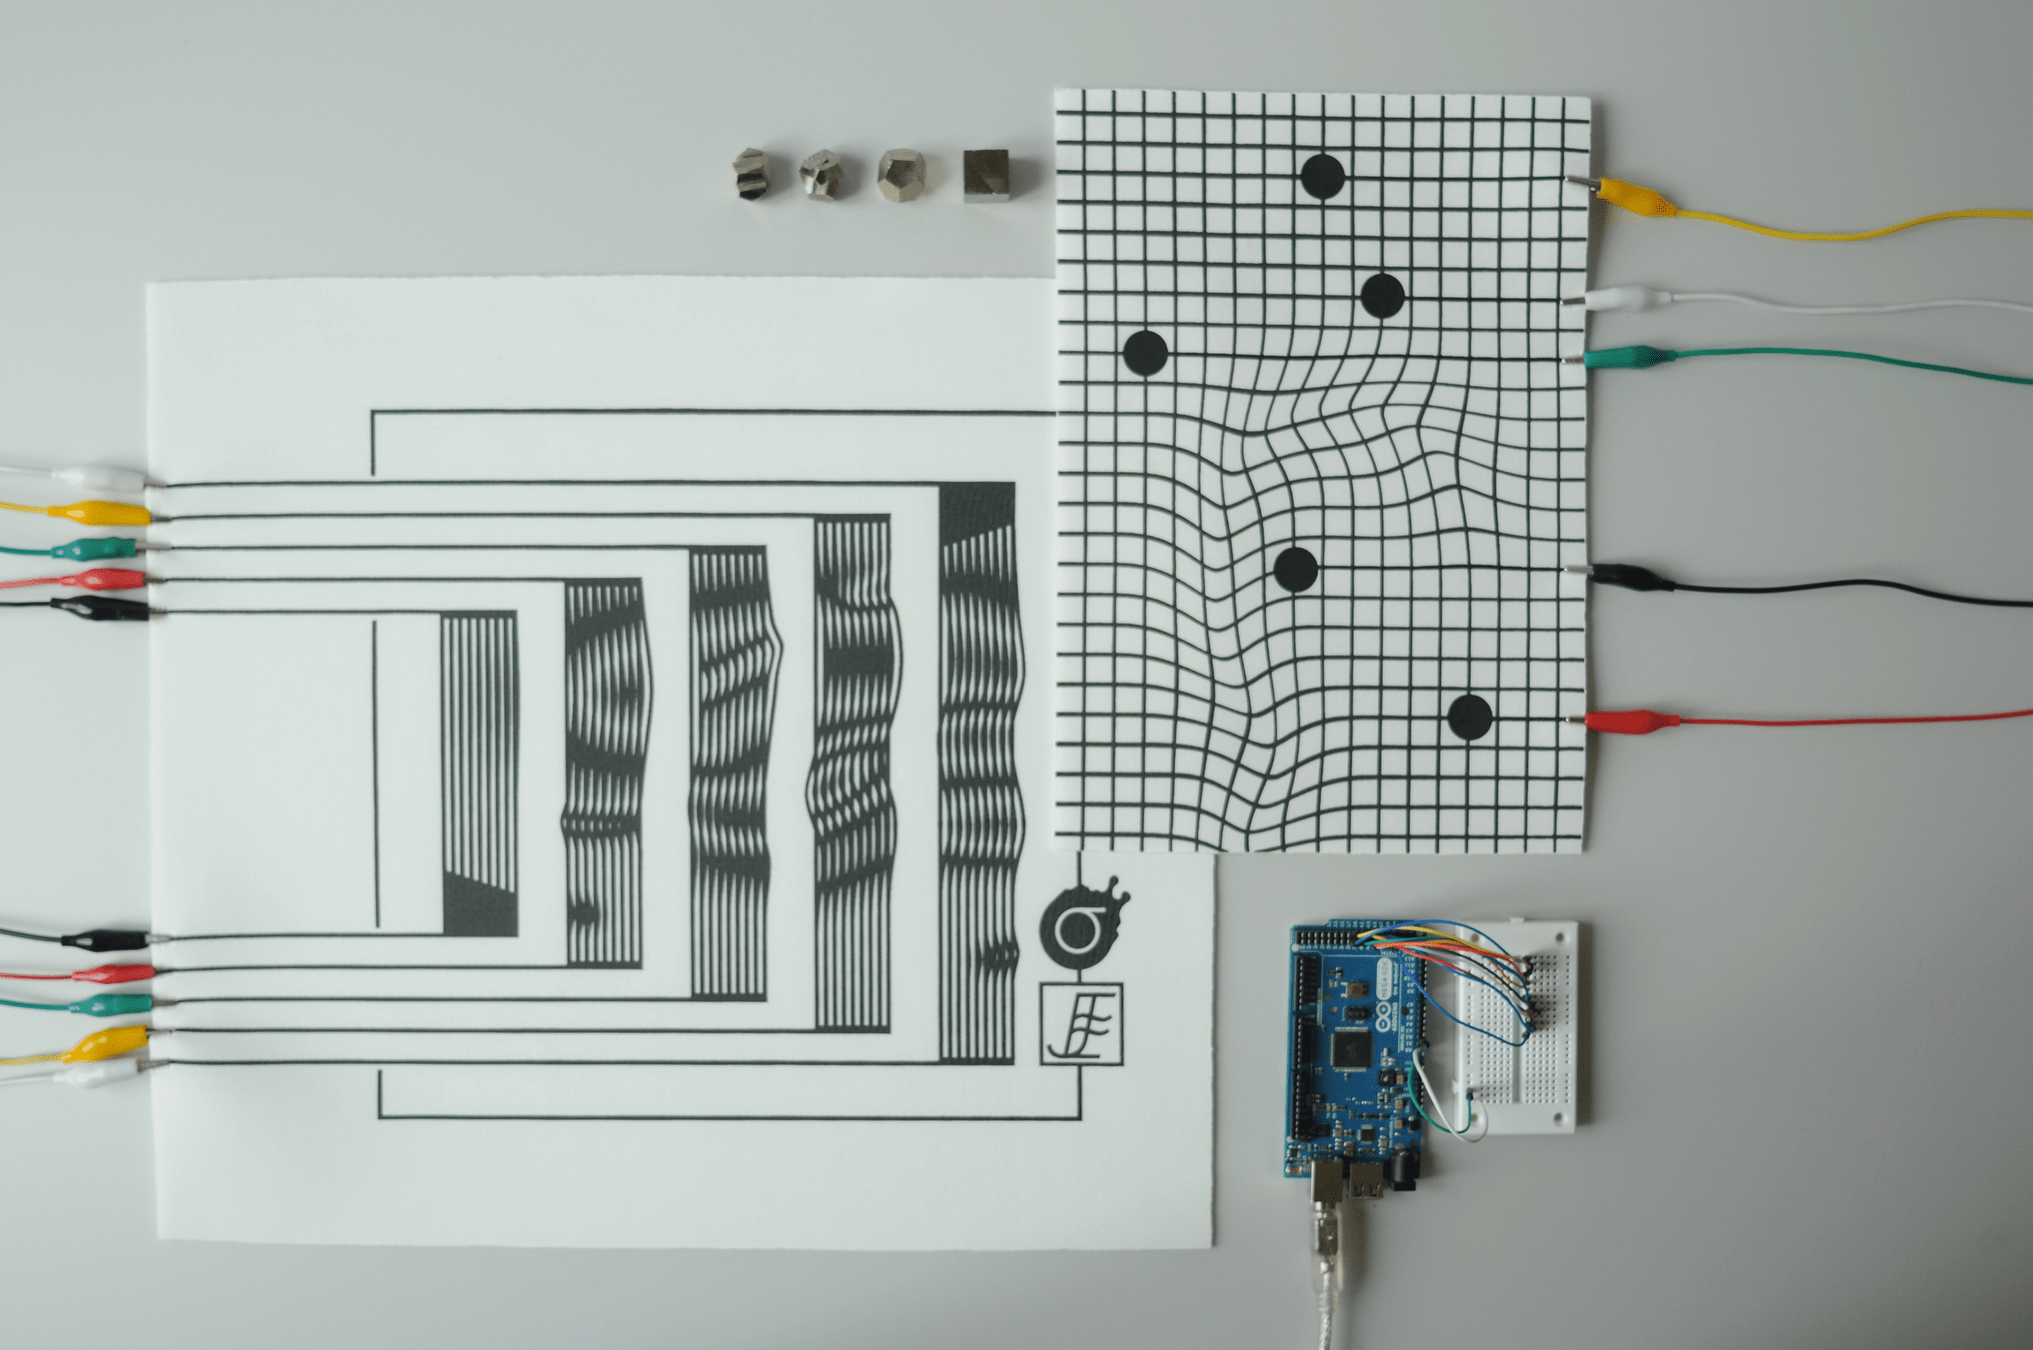
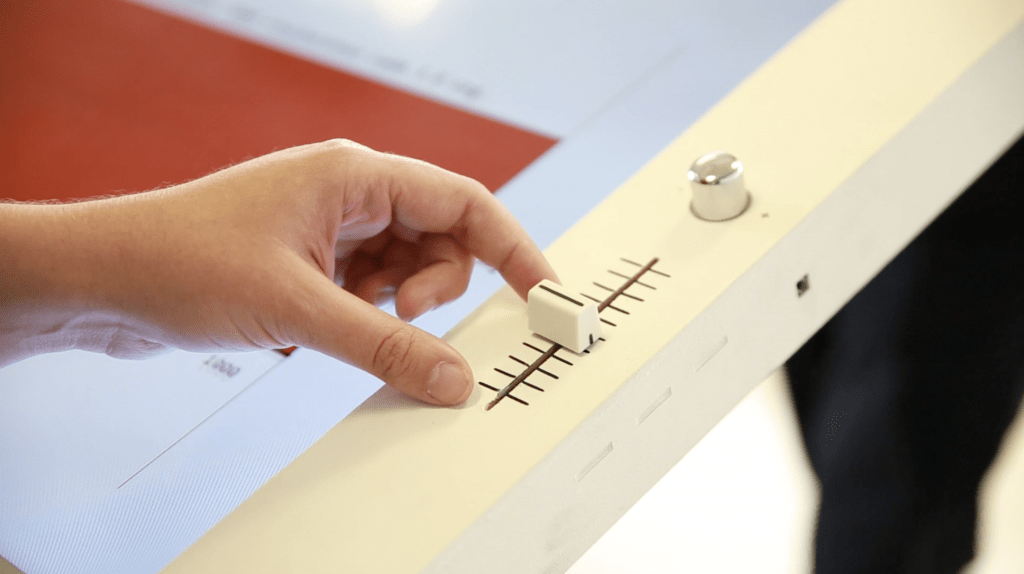
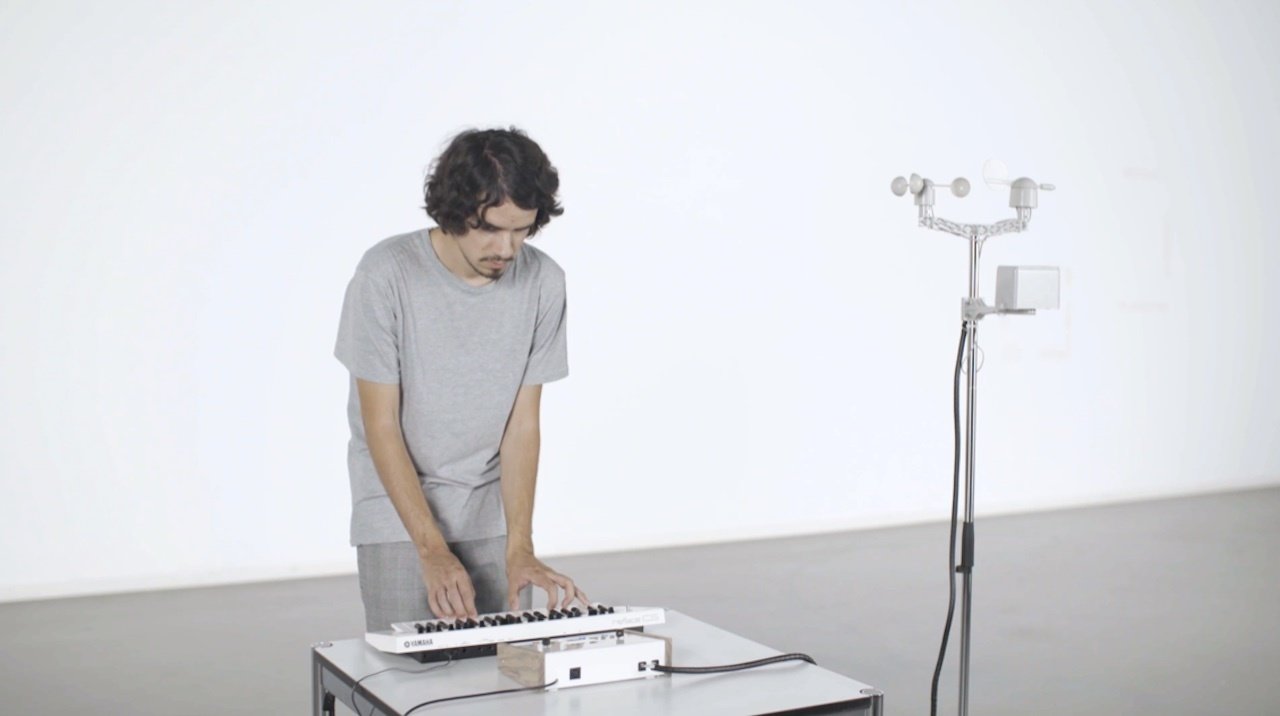
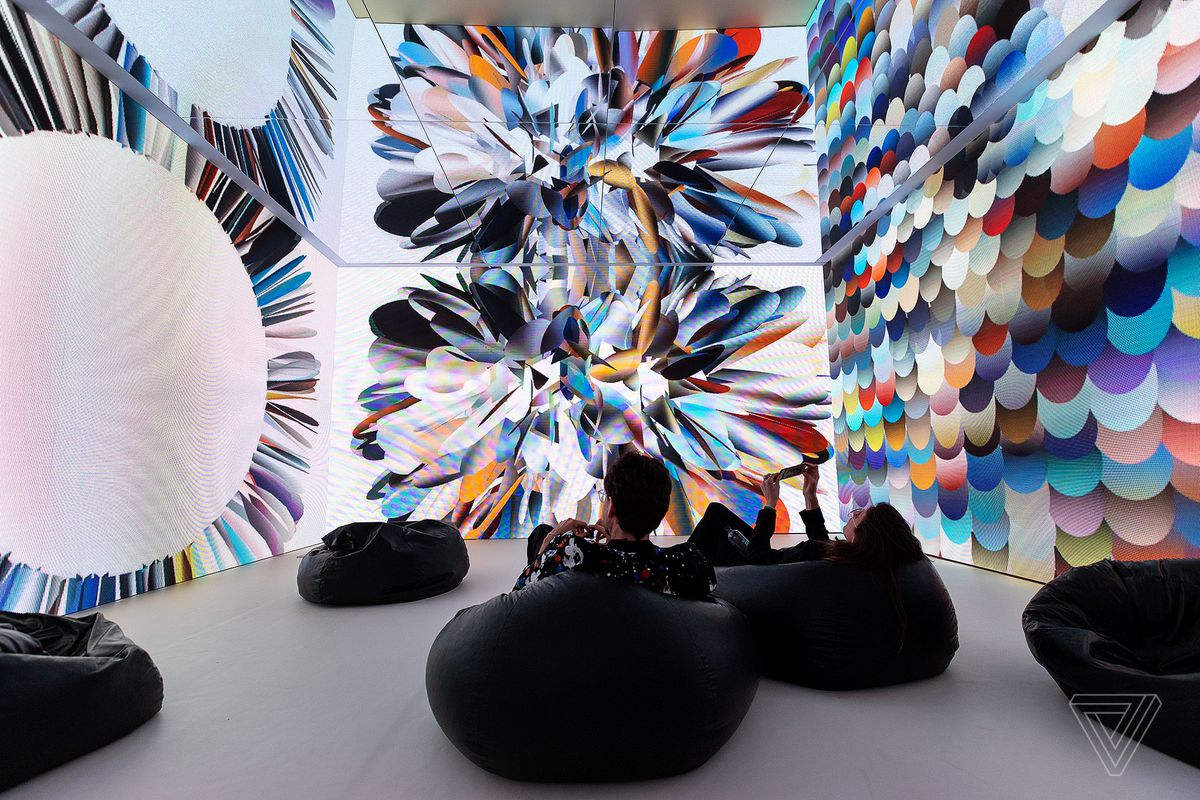
LiquidMidi - An experimental modular textile interface for sonic interactions, exploring aesthetics and morphology on contemporary interaction design.
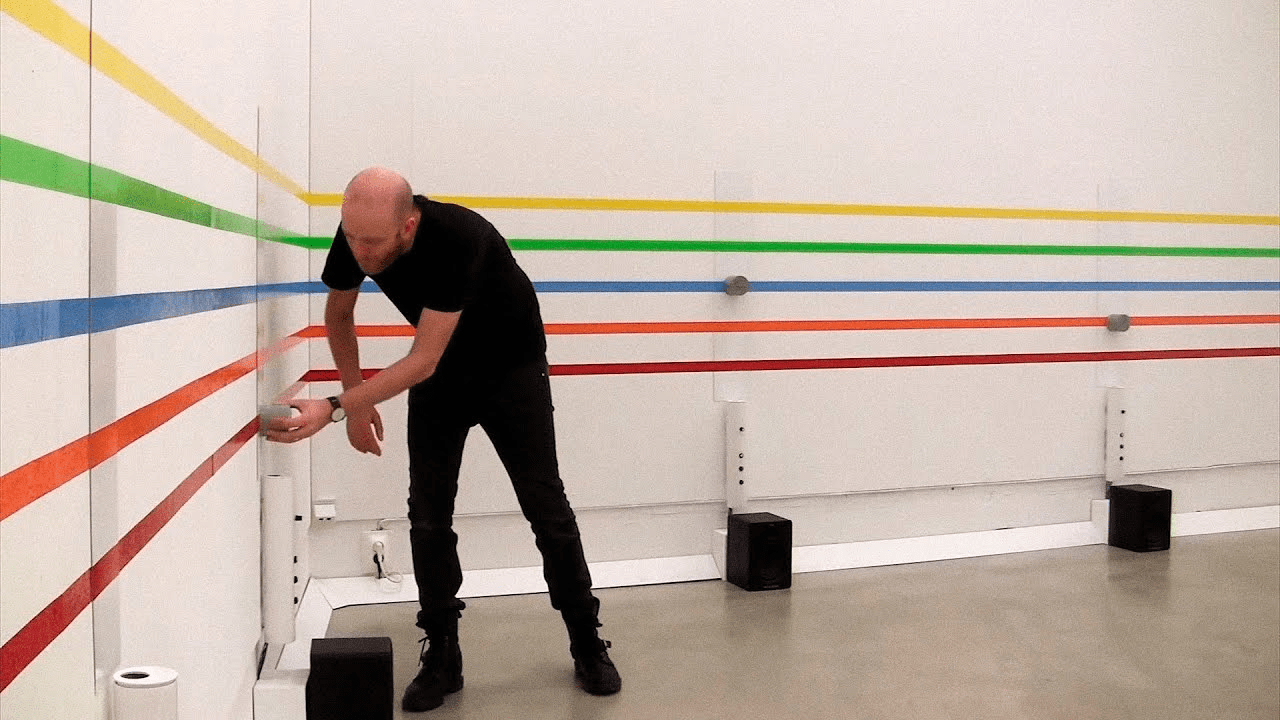
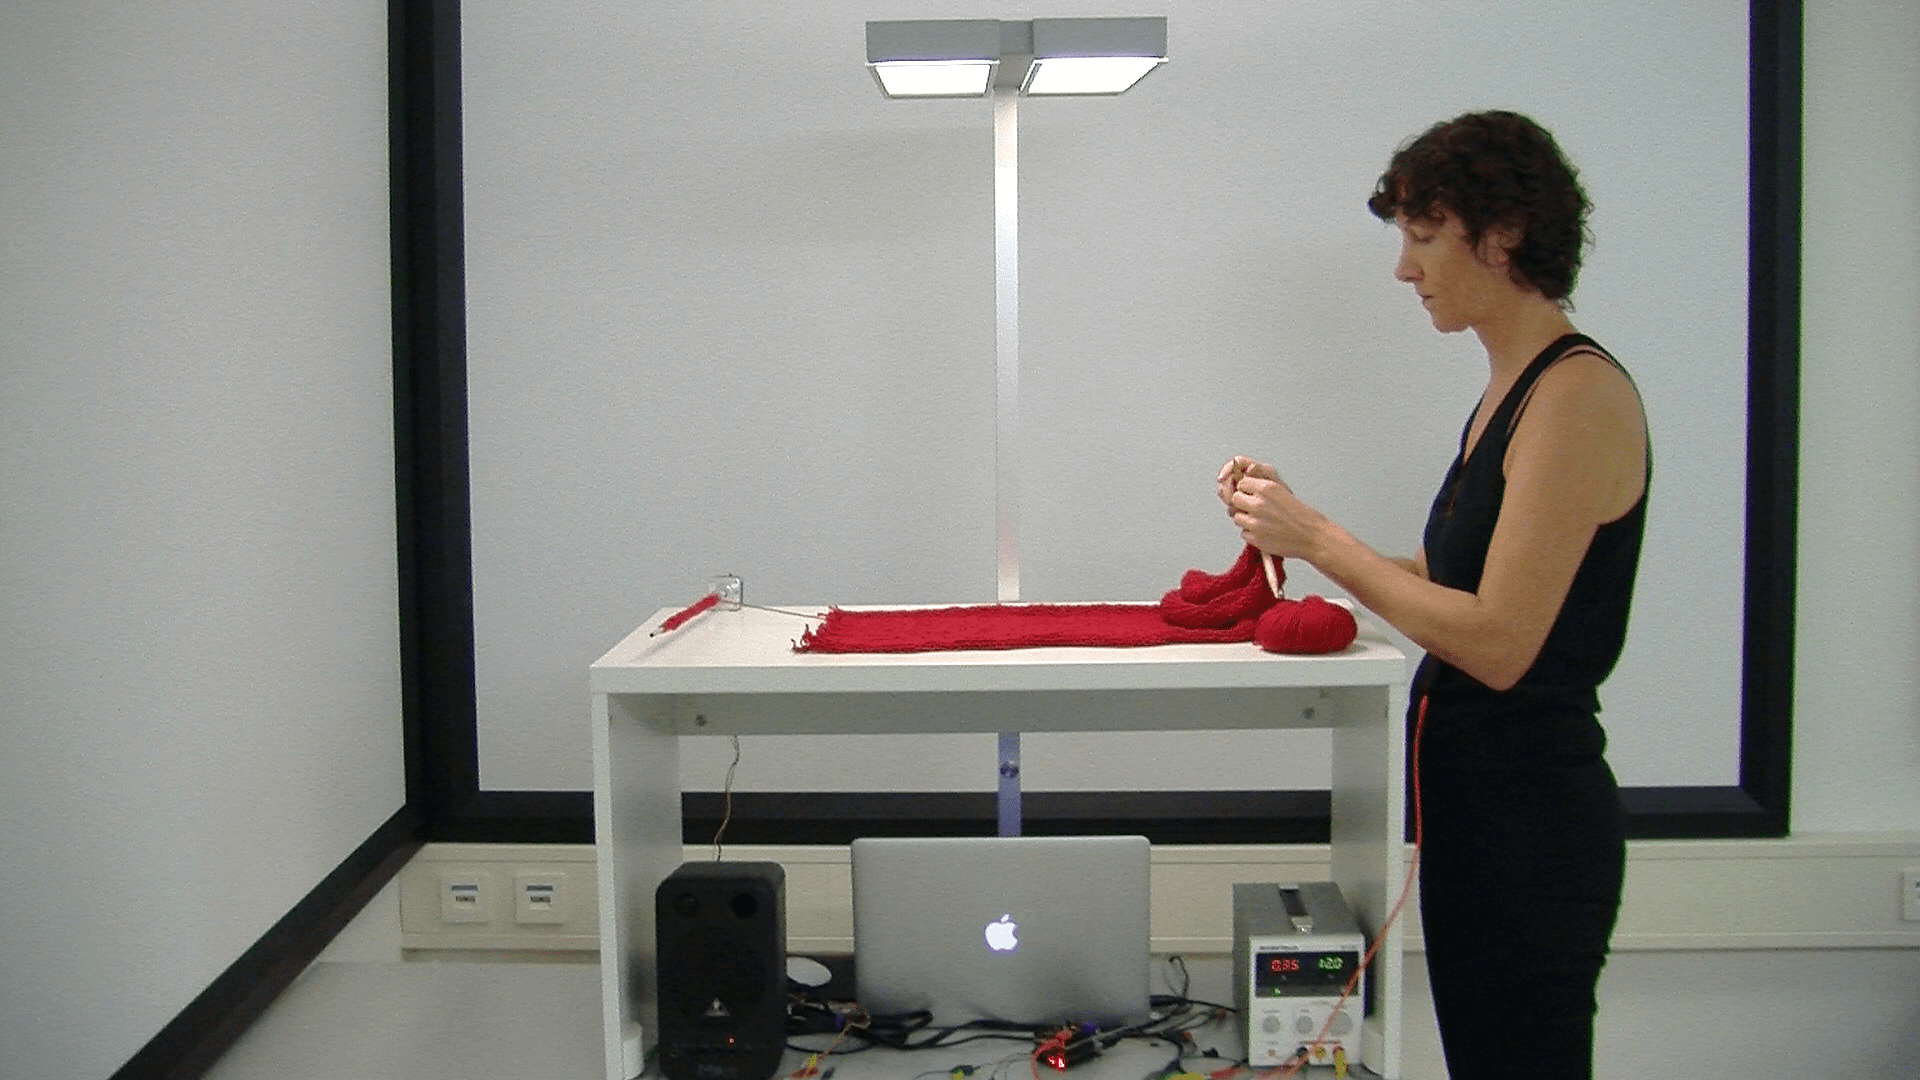
Lines - Lines attached to the wall, on the floor and hanging from the ceiling in combination with sensors and electronics are forming three novel music instruments
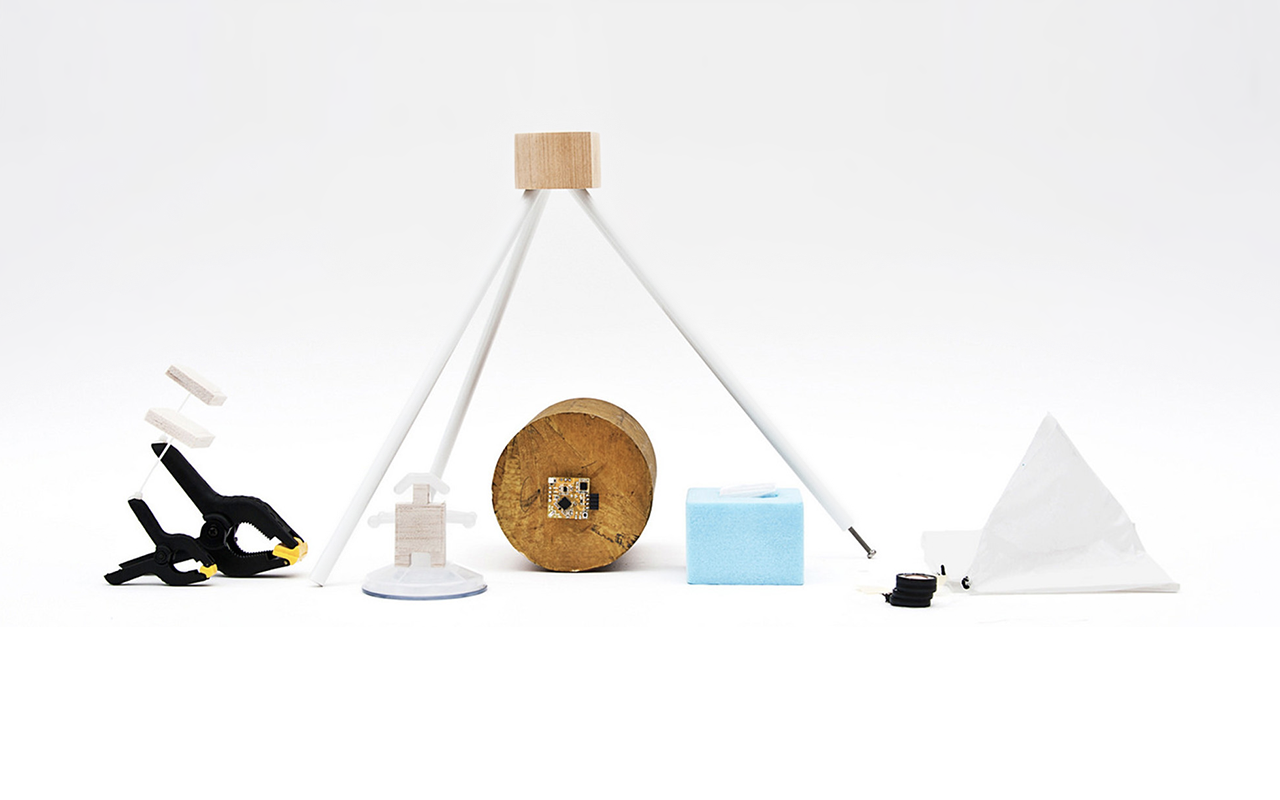
The Air Quality Sensor is a beautiful home object that helps you discover how air quality affects your environment

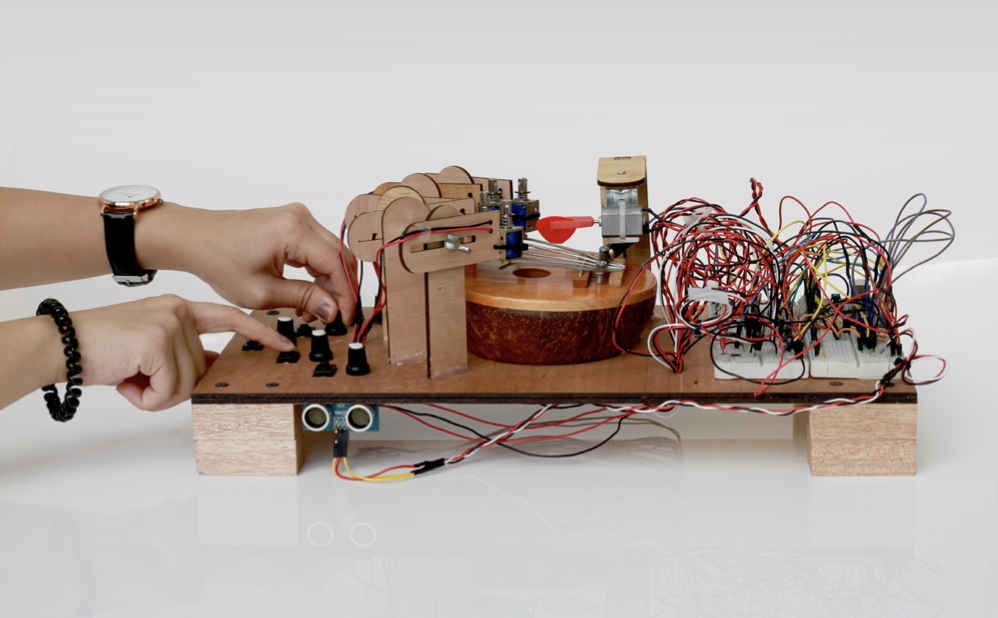
TAMI - an intuitive approach to the learning of trigonometry
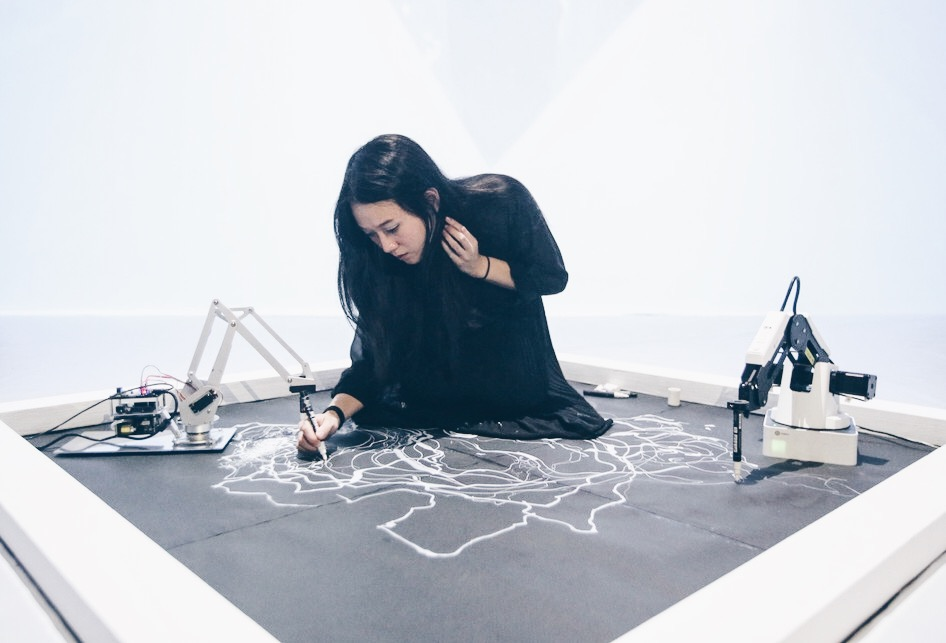
Perception, Data Collection and Memory
Interactions and Physical Computing
What's possible?
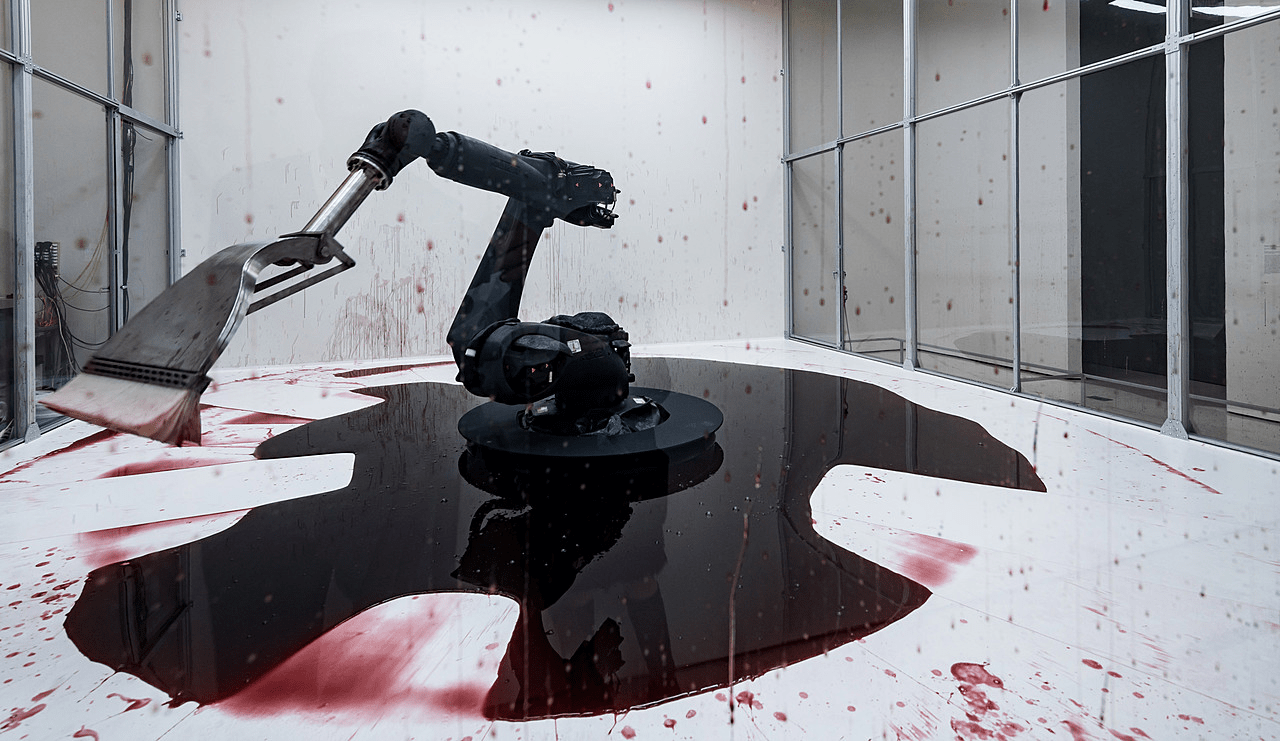
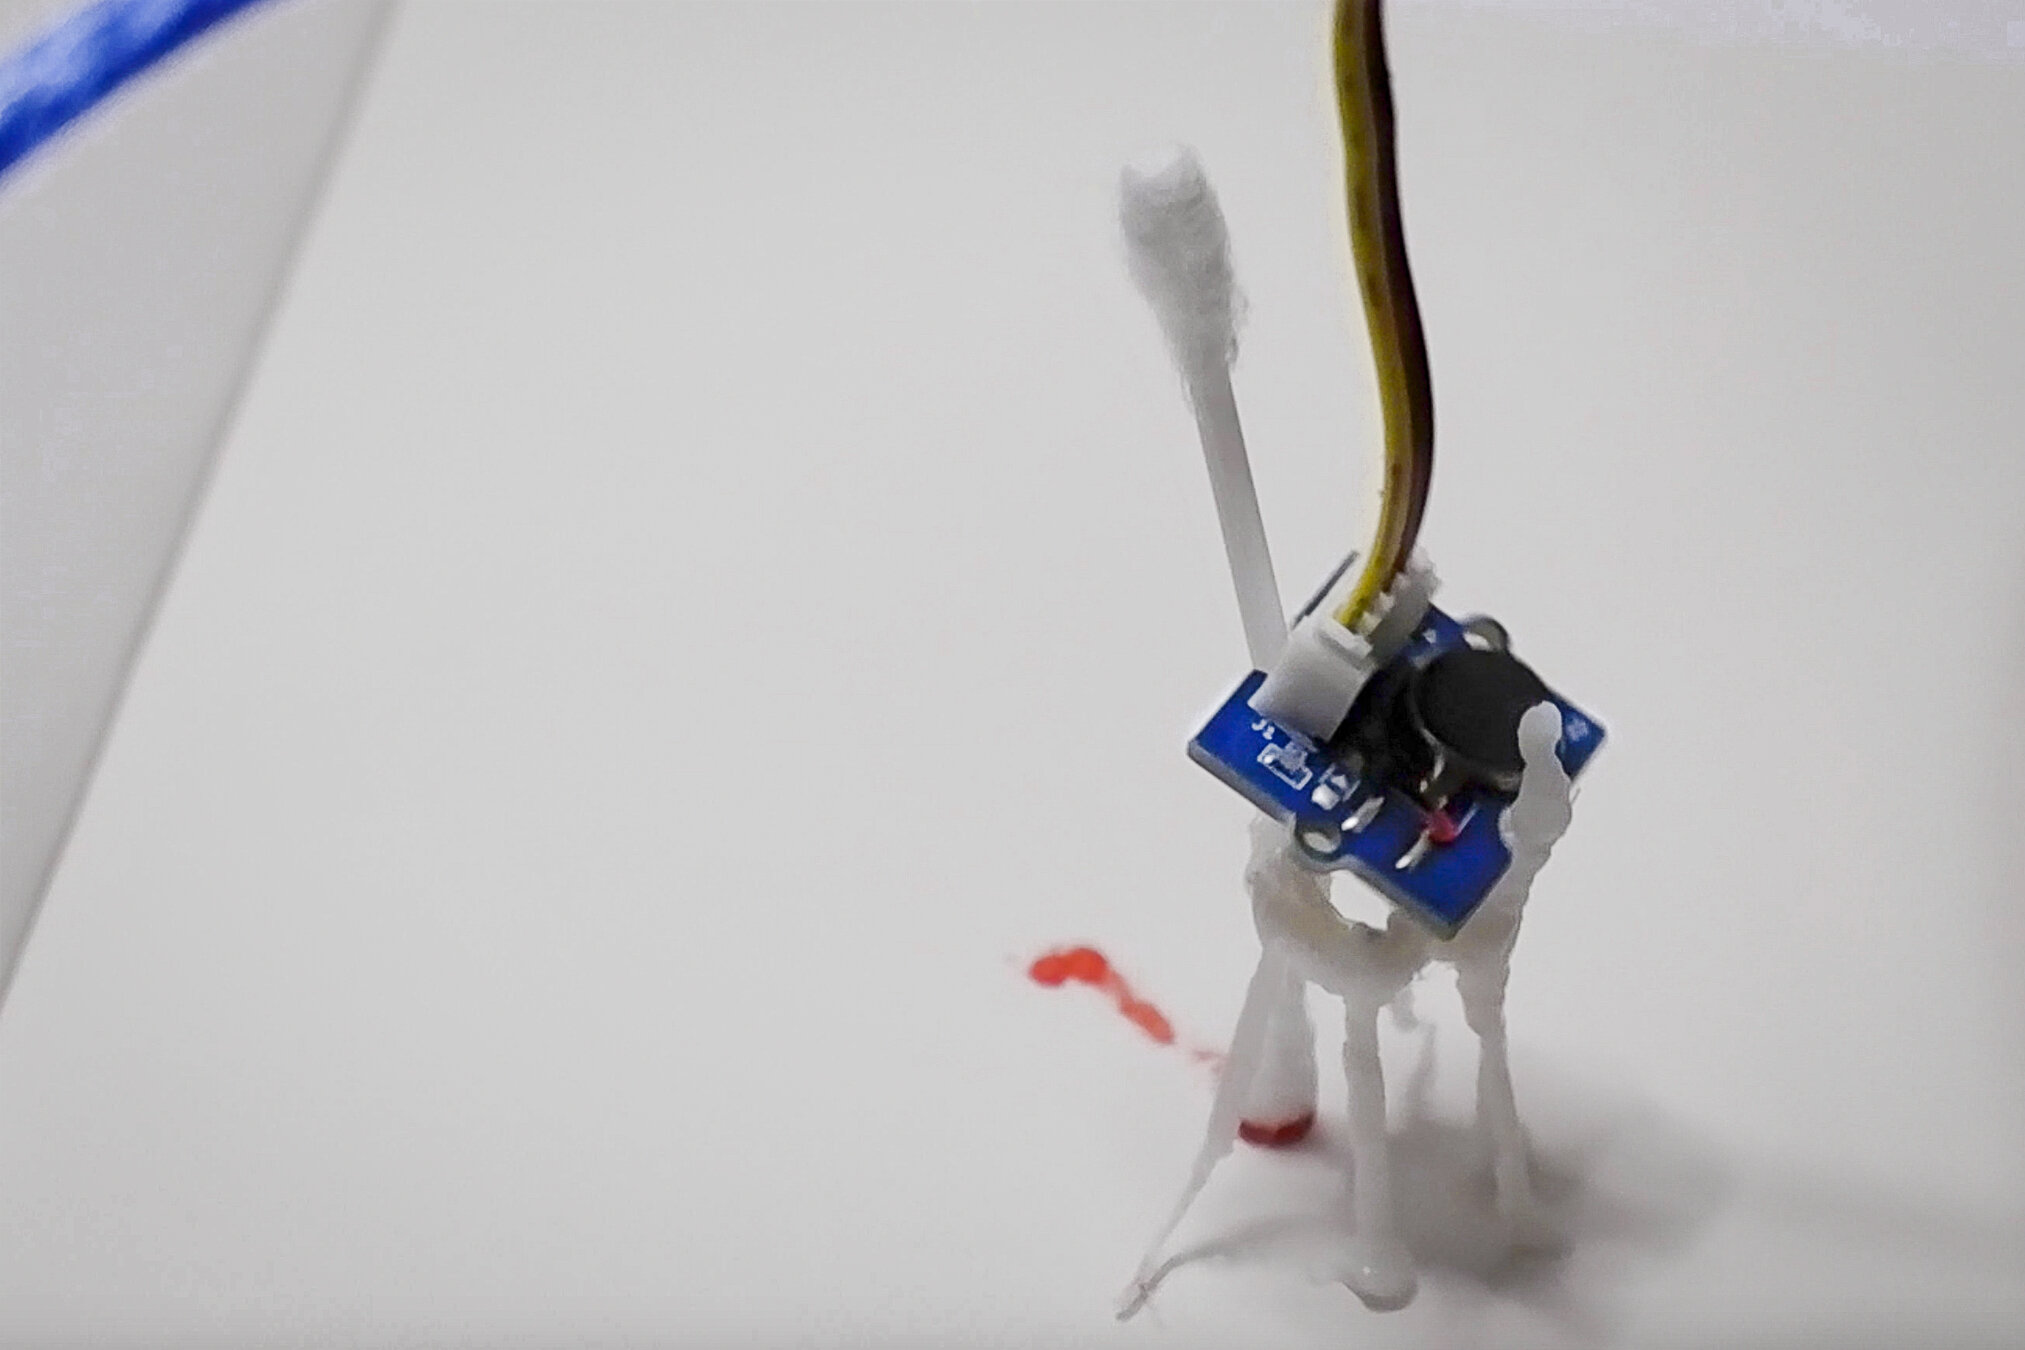
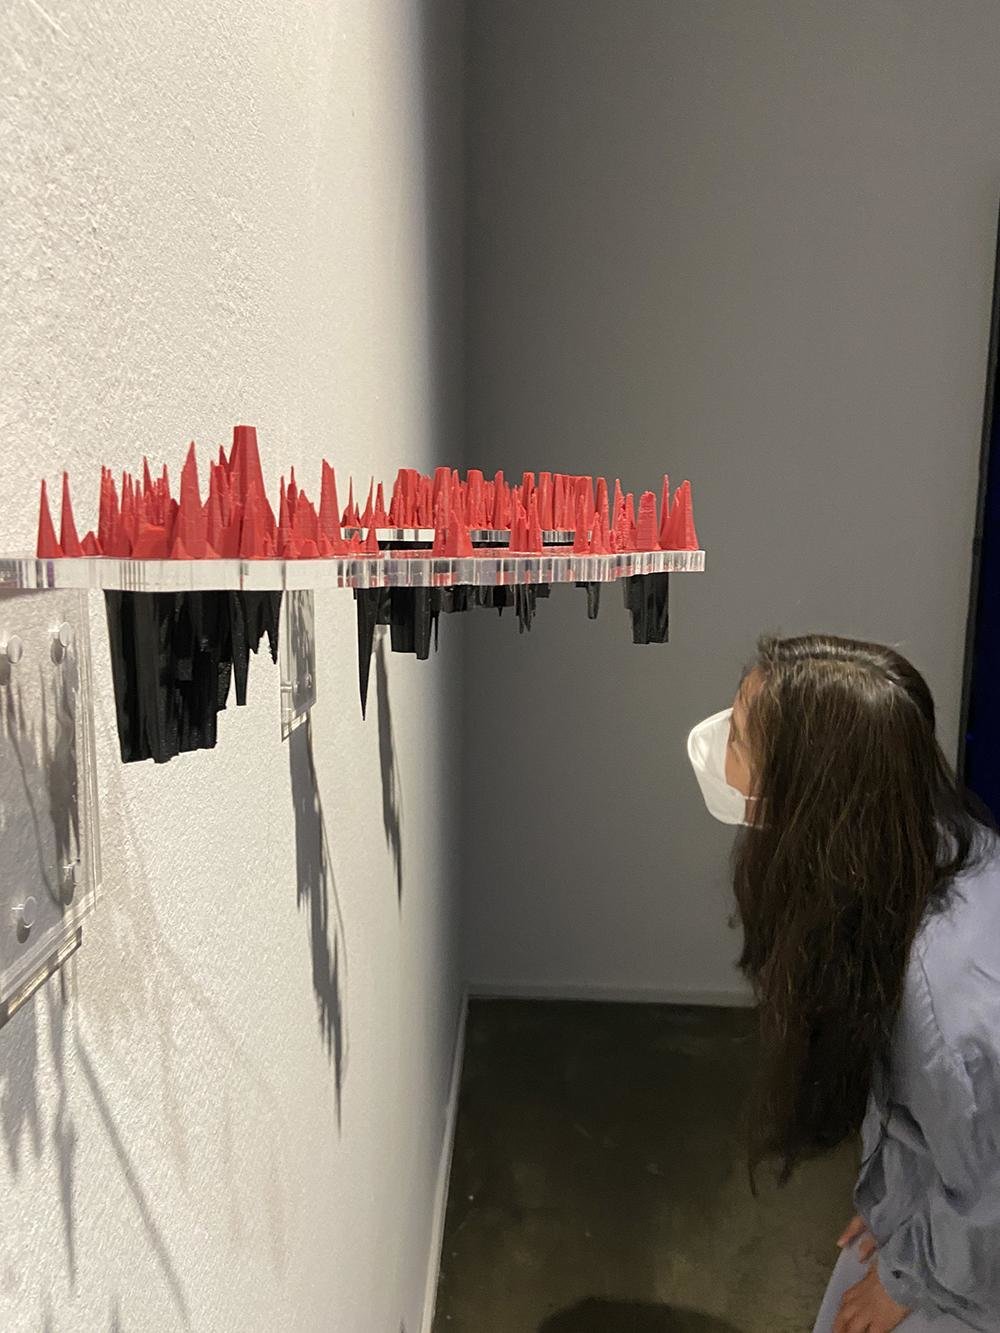
Can't Help Myself - Placed behind clear acrylic walls, their robot has one specific duty, to contain a viscous, deep-red liquid within a predetermined area. When the sensors detect that the fluid has strayed too far, the arm frenetically shovels it back into place, leaving smudges on the ground and splashes on the surrounding walls.
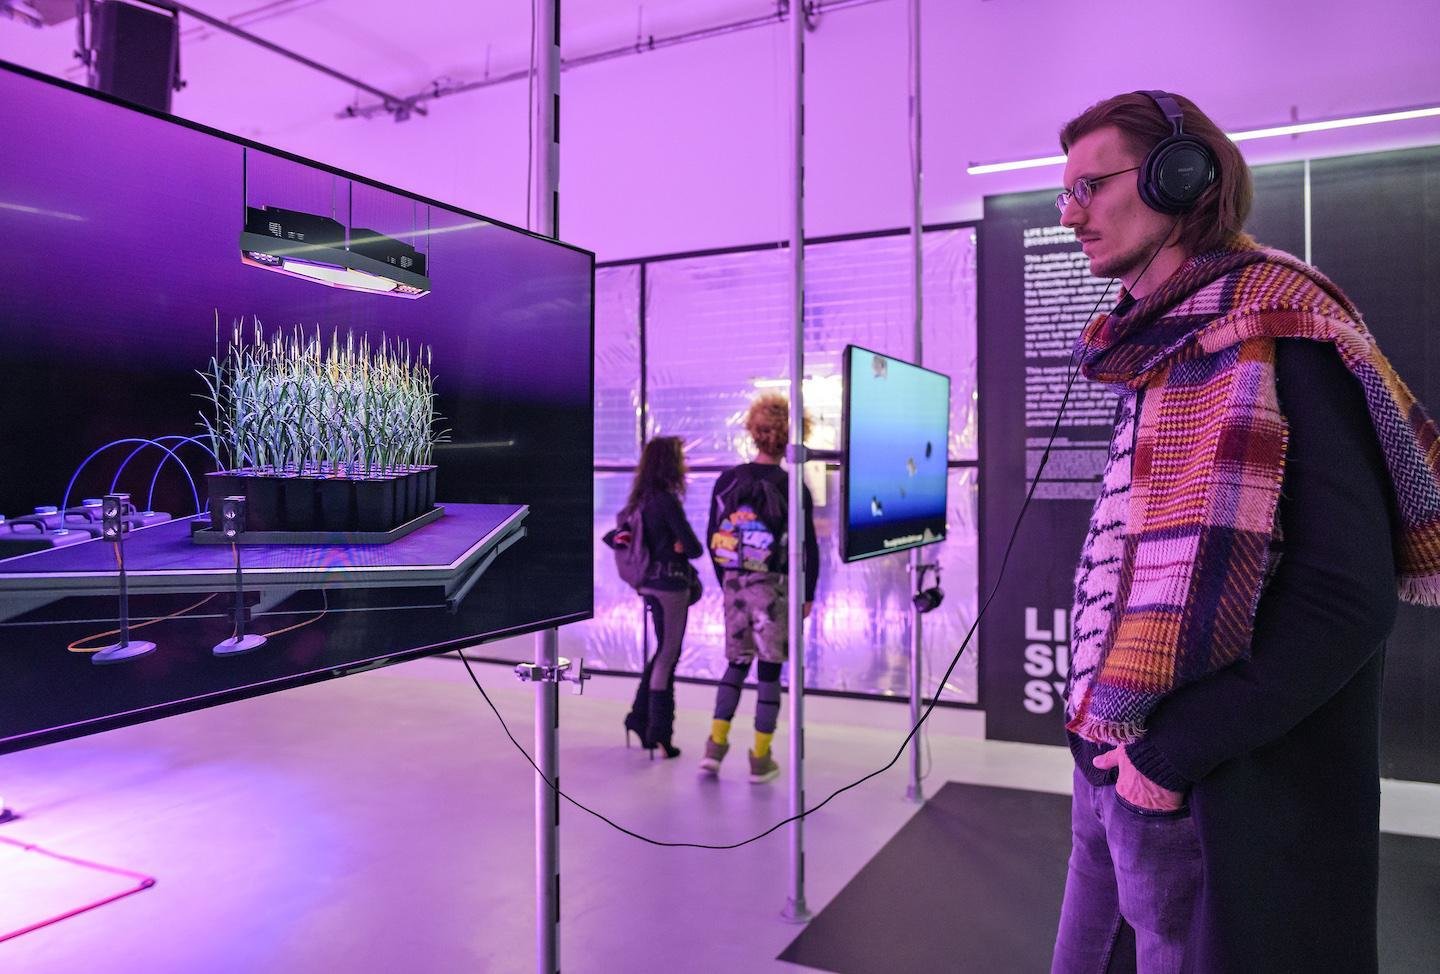
Wifi Tapestry - dynamic wall hanging that visualises the wireless activity of a space. The tapestry visualises the ever changing "landscape" of radio frequencies around us.

Take some time to reflect on
these references
- Which did you like, which did you prefer less?
- How have these examples broadened your perspective on what physical computing is?
- What ideas sprouted out from what you have seen?

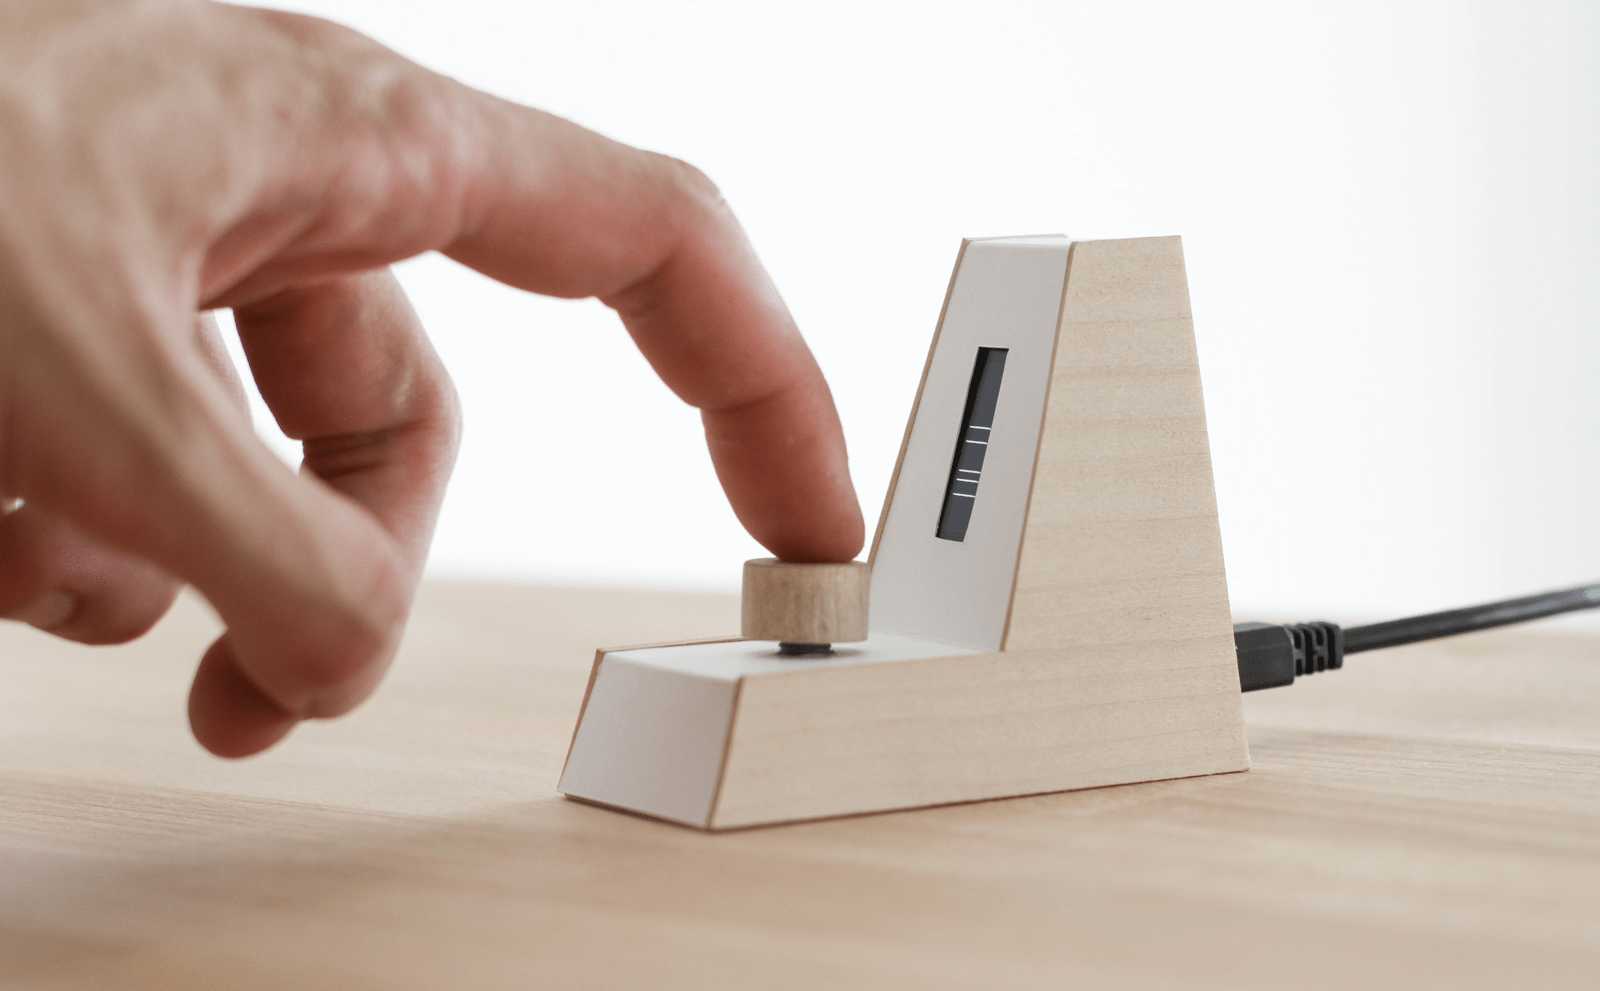
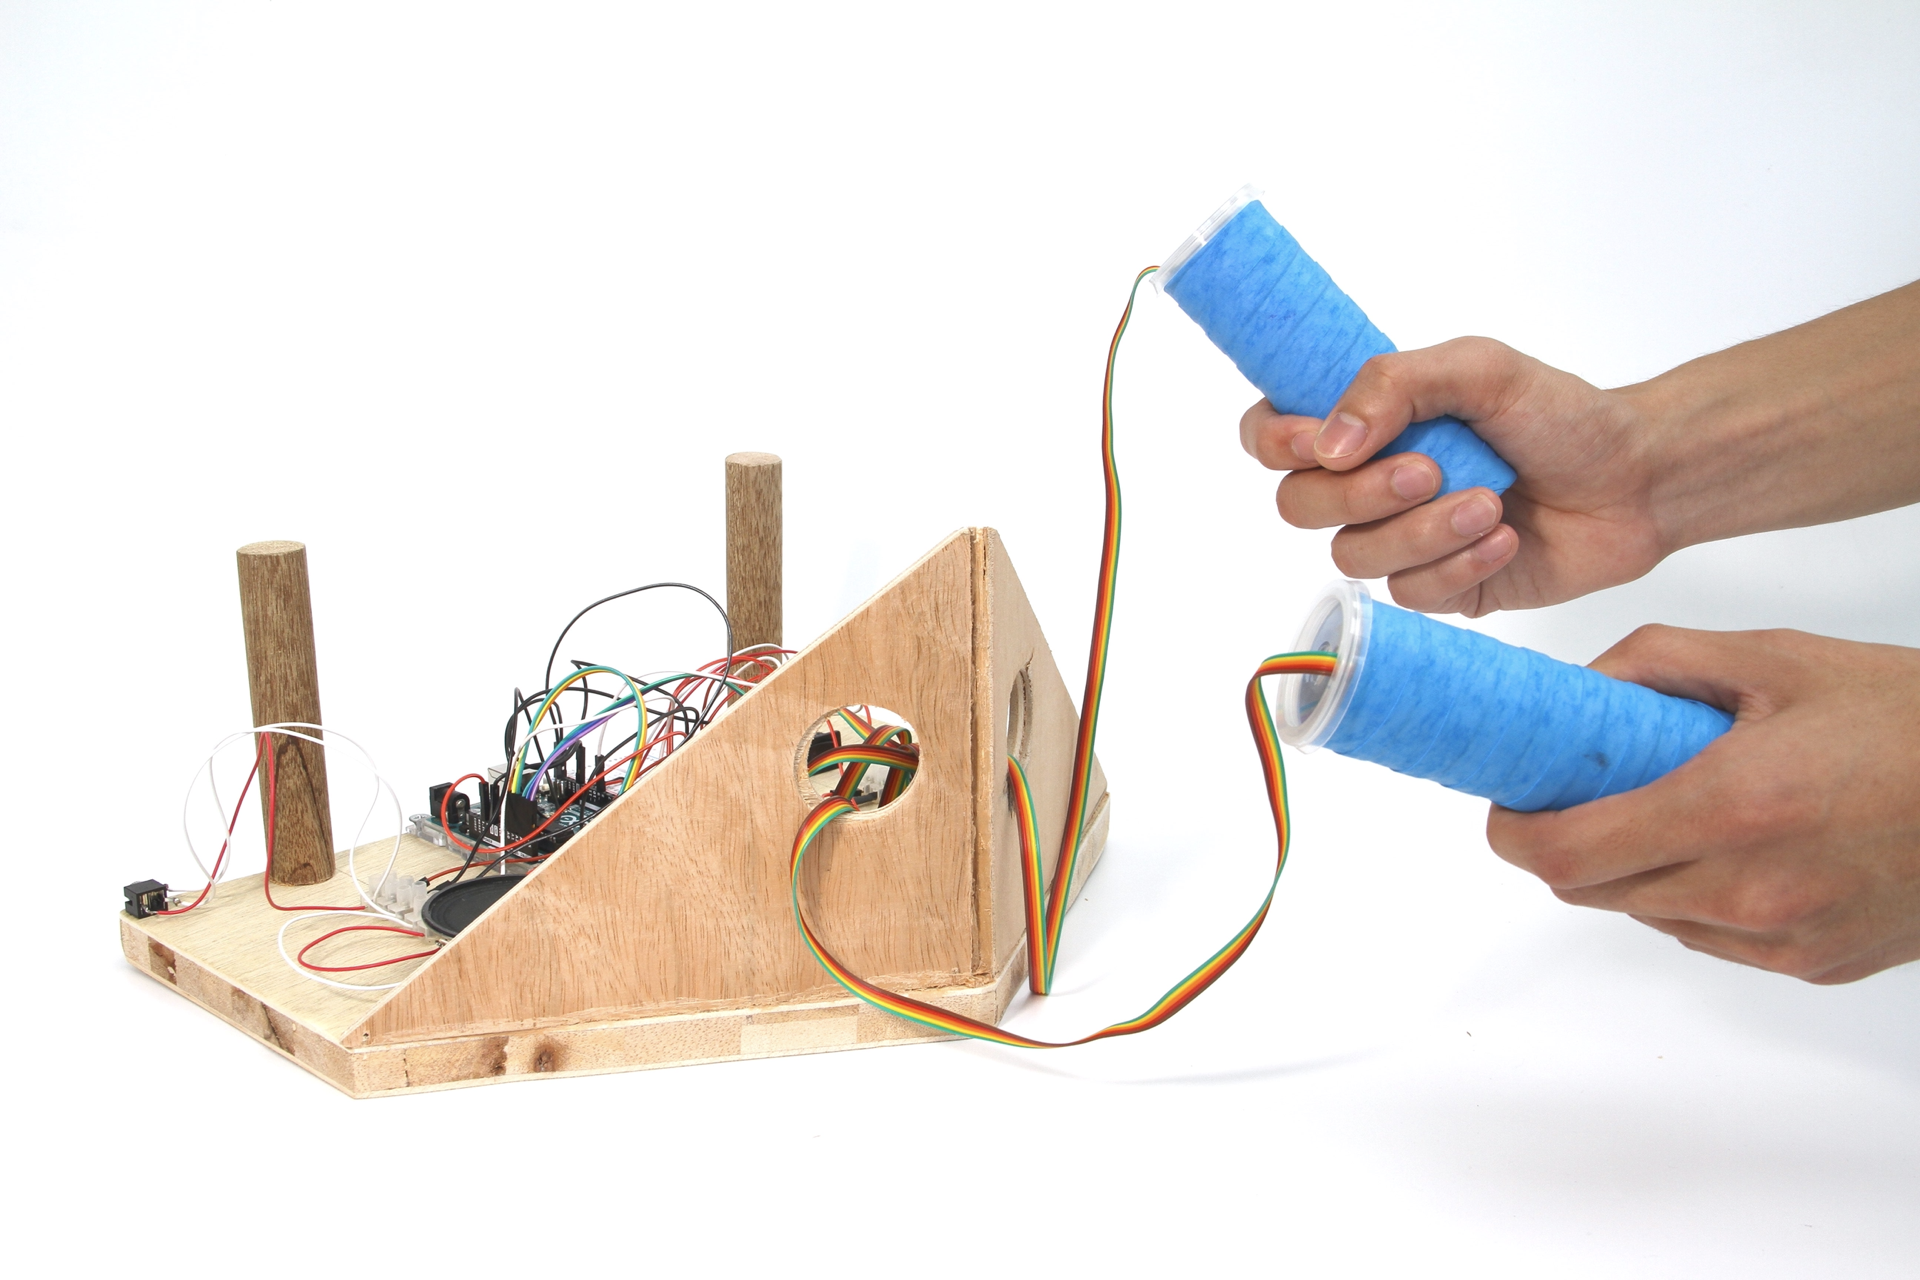
Yo–Yo Machines are playful communication devices that you can make yourself. They’re designed to fill a gap by letting people send one another nonverbal, expressive signals like lights, sounds or simple movements.
Arduino 101
- What is an Arduino?
- Arduino demonstration
- Coding Arduino, the Arduino IDE
Arduino is an open-source electronics platform that consists of both hardware and software components.
It provides a simple and accessible way for individuals, including hobbyists, artists, and students, to create interactive electronic projects.
The Arduino platform includes an easy-to-use integrated development environment (IDE) for programming, as well as a variety of microcontroller boards.
Arduino 101
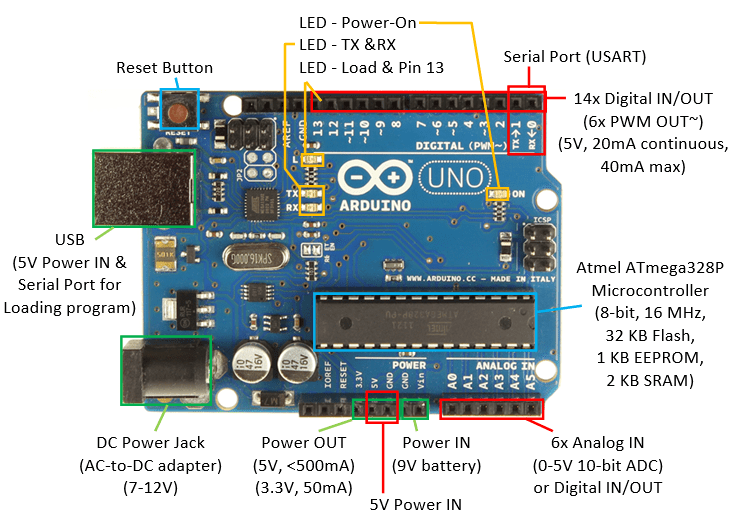
What is an Arduino?
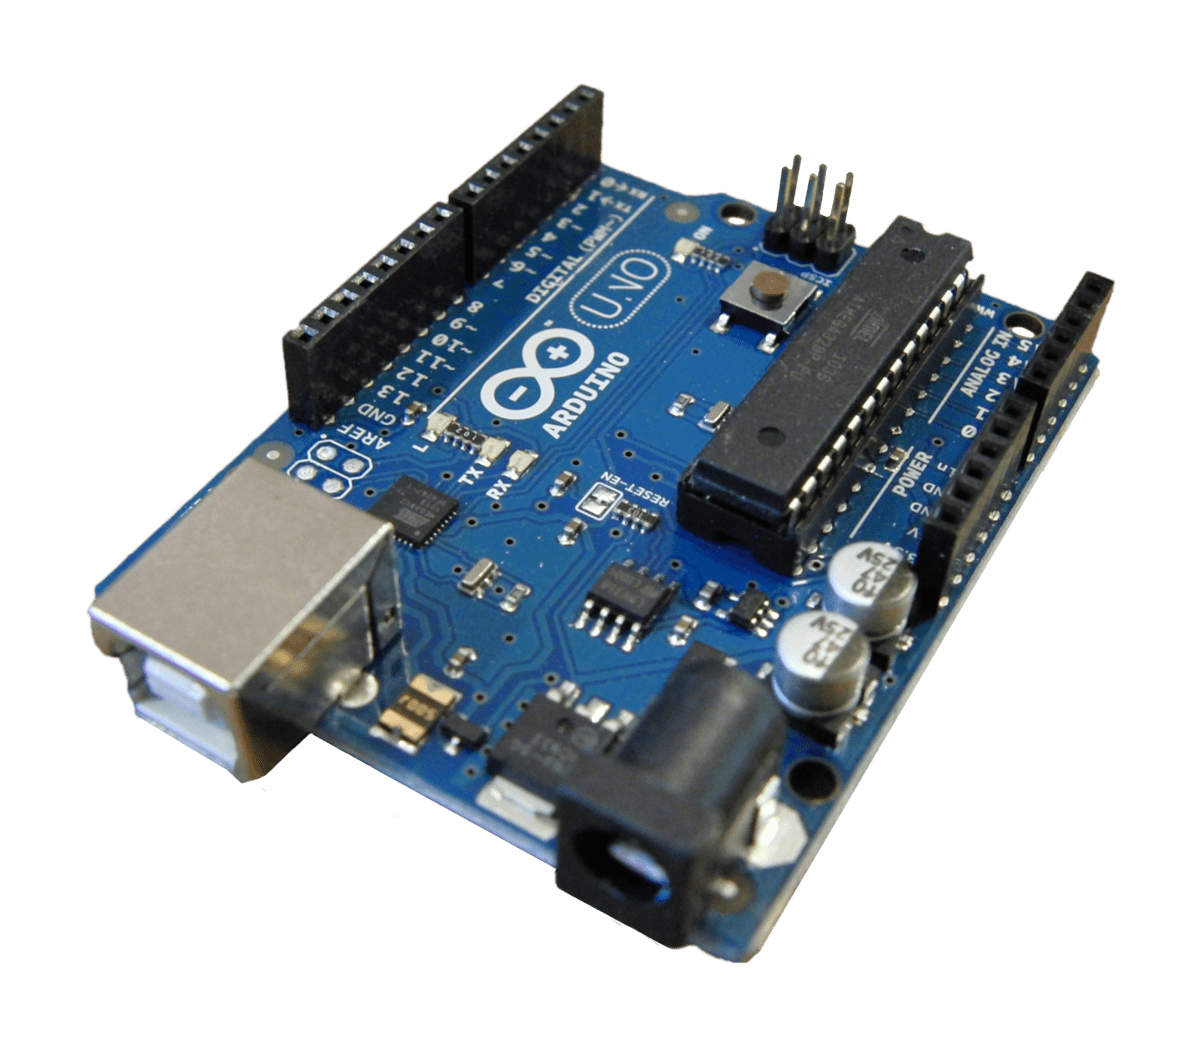
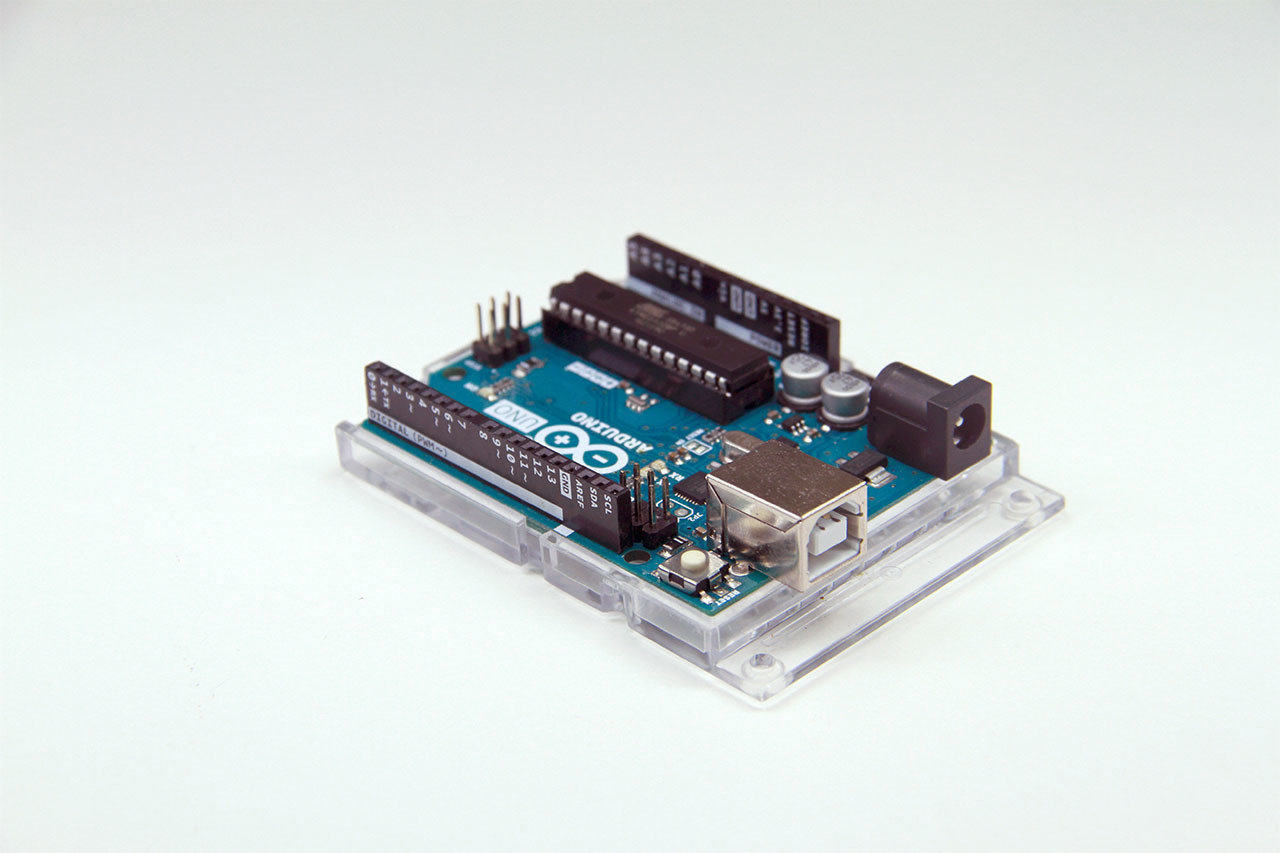
Arduino Uno board
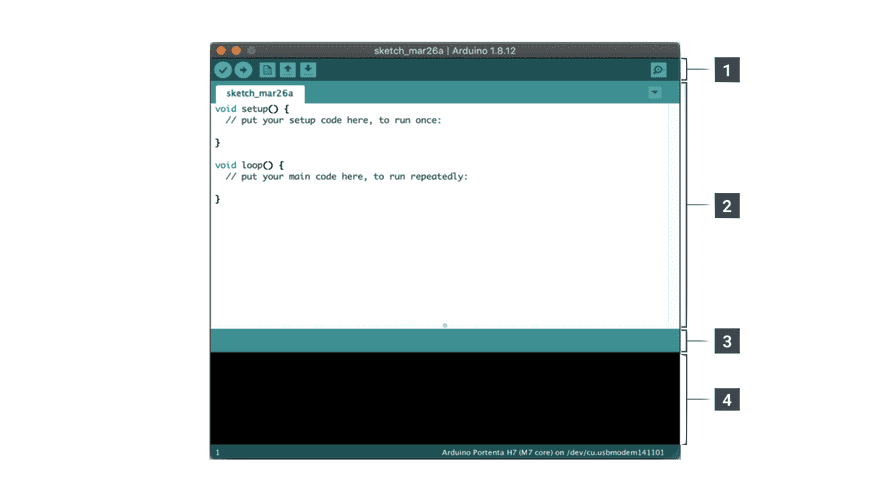
Arduino IDE software
In this exercise, you and your group will receive a small electronics prototyping kit, which includes an Arduino board and a Grove Shield (explanations of both will be provided in the following slides).
With this kit, you can experiment with basic inputs and outputs—such as LED lights, buttons, or knobs. But why should you, as a designer, understand how this works?
Arduino 101
What is an Arduino?
Arduino Uno board
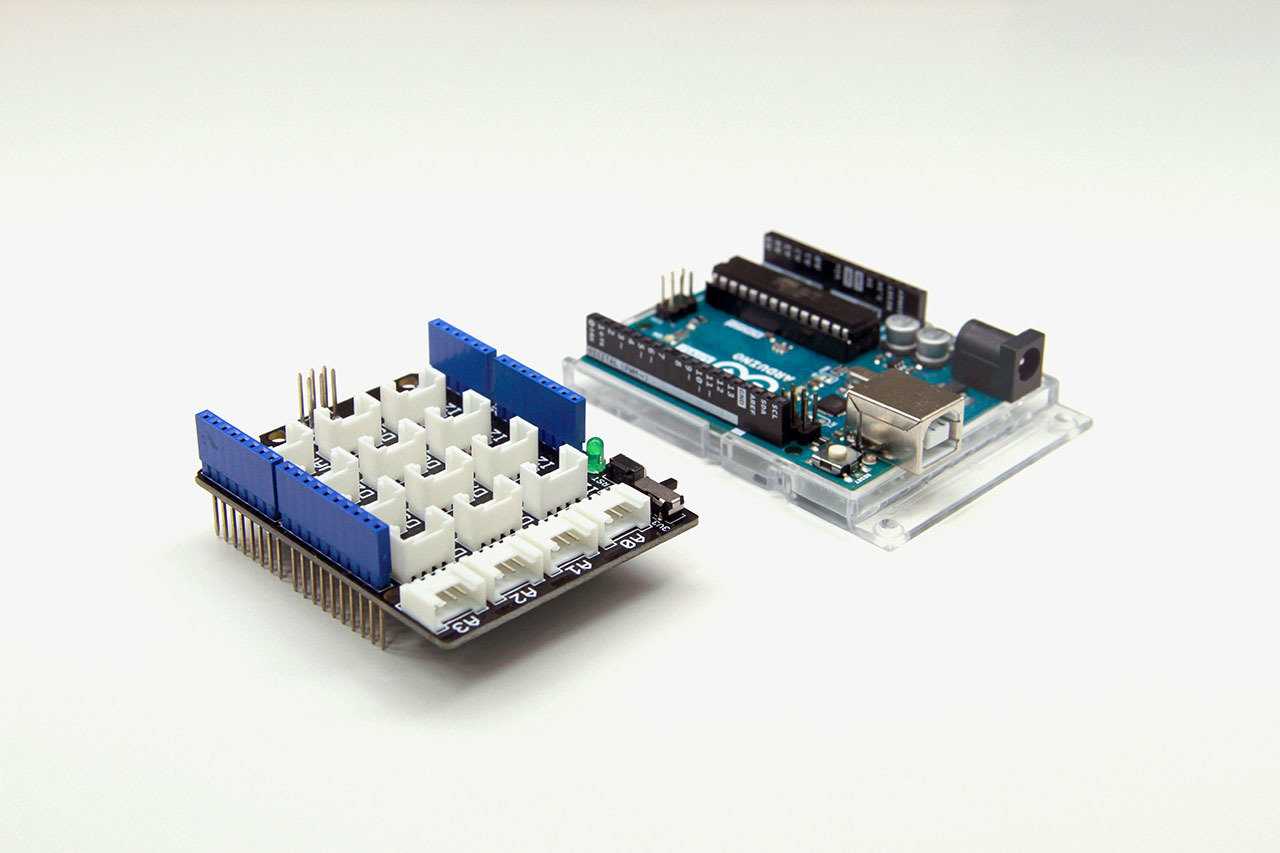
Arduino Uno + Grove Shield
As a designer you may work on projects that go beyond the traditional scope of print, app or web design and you may be tasked to venture out into building interactive interfaces.
- Interaction design
- Exhibition design
- Experience design, installation
- interactive products
- Interface design
- Experimental design and research.
Arduino 101
What is an Arduino?
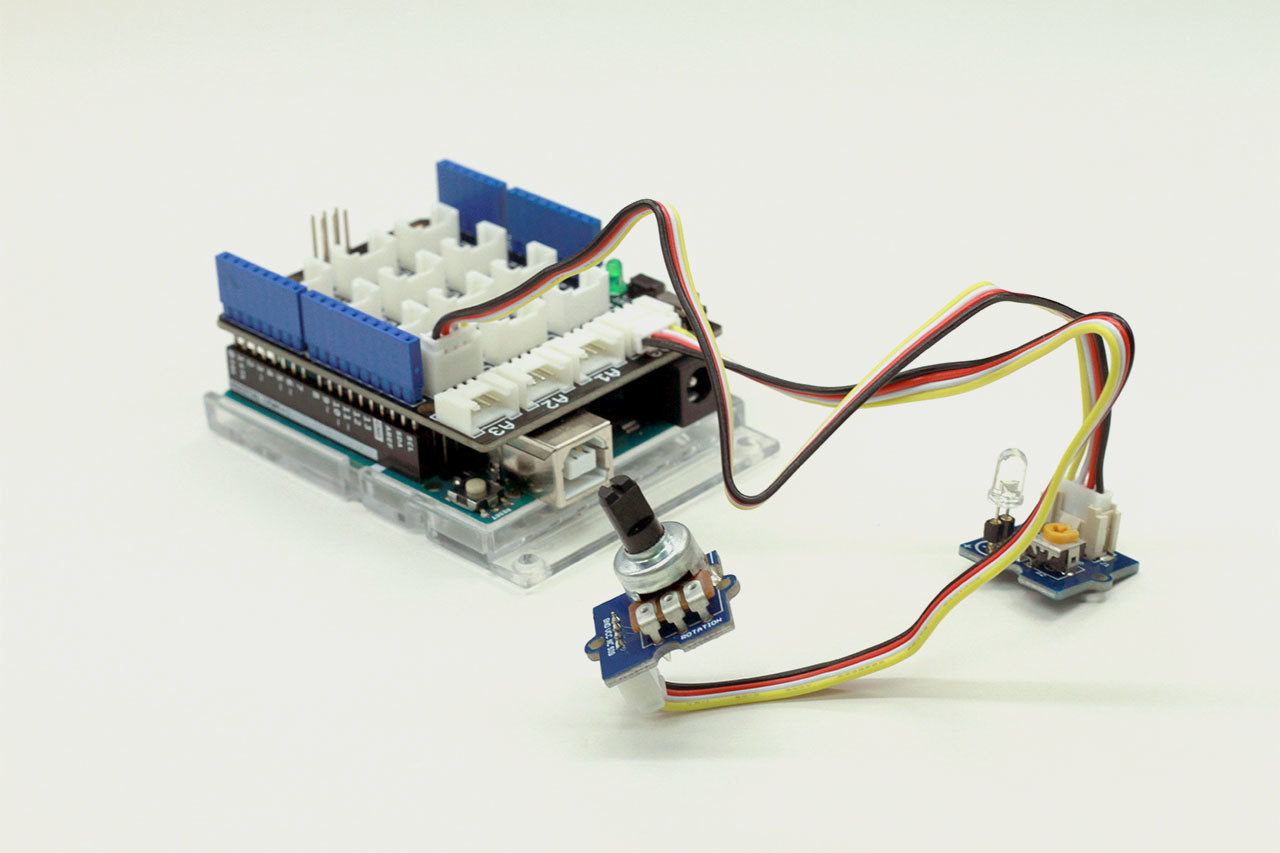
Arduino Uno Board with Grove Shield and two electronic components, a potentiometer aka a knob, the input, and an LED as the output.
Arduino 101
What is an Arduino?
Arduino 101
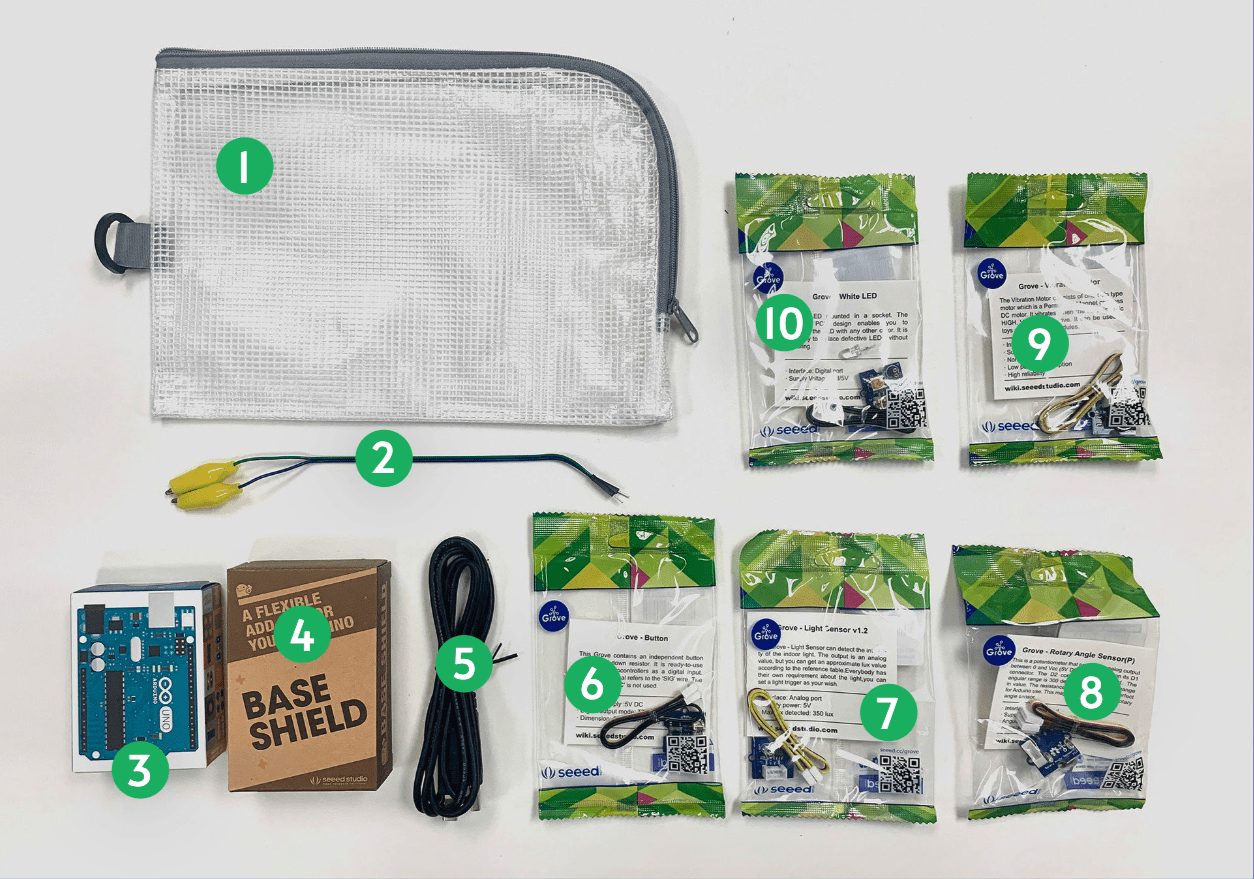
Arduino Workshop Kit
Bag
Wires
Arduino Board
Grove Shield
USB Cable
Button D2
Light Sensor A0
Rotary Angle Sensor A0
Vibration Motor D3
LED Light D3
1
2
3
4
5
6
7
8
9
10
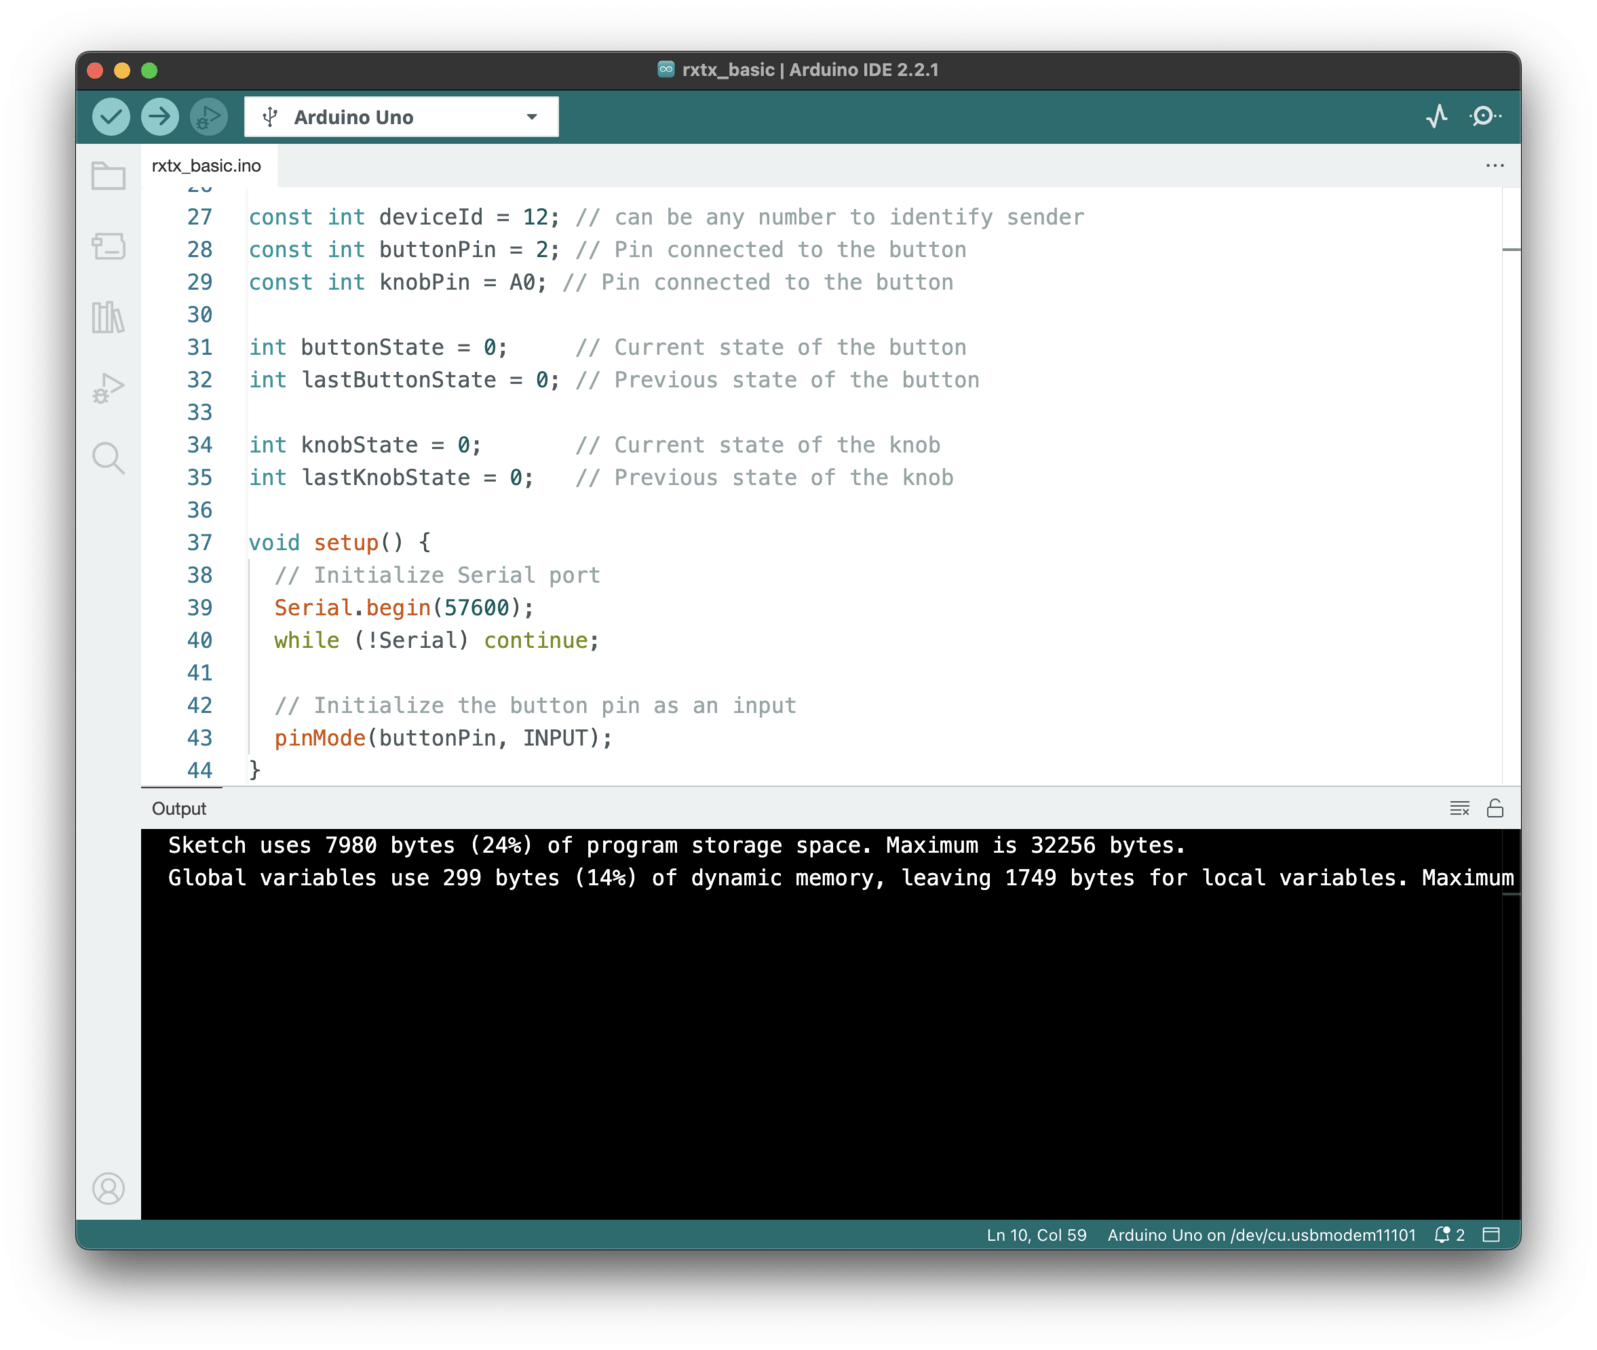
- A Toolbar with buttons for common functions and a series of menus. The toolbar buttons allow you to verify and upload programs, create, open, and save sketches, and open the serial monitor.
- The text editor for writing your code.
- The text console displays text output by the Arduino Software (IDE), including complete error messages and other information.
Arduino 101
What is the Arduino IDE software?
Arduino 101
Arduino Code? Looks like p5.js?
function setup() {
  createCanvas(400, 400);
  // where you set up the p5 document
}

function draw() {
  background(220);
  // where you carry out actions repeatedly
}
void setup() {
// put your setup code here, to run once:
}
void loop() {
// put your main code here, to run repeatedly:
}
p5.js code
Arduino code
pinMode()
digitalWrite()
digitalRead()
analogWrite()
analogRead()
delay()
Arduino 101
Basic Arduino Functions
Configures the specified pin to behave either as an input or output
Control a digital pin by writing a HIGH or a LOW value to it
Reads the value from a specified digital pin, either HIGH or LOW
Writes an analog value to a pin, a value here can be between 0 and 255
Reads the value from an analog pin which in most cases is able to return a values between 0 and 1023
Pauses the program for the amount of time (in milliseconds)
Session 1
Introduction
Getting Started
Ideation
Session 1
Getting Started
Follow Along!
- How to download and setup Arduino IDE software
- How to connect Arduino and the Grove Shield
- Open your first Arduino sketch
- Upload Arduino sketch to Arduino board
- Make changes to example Arduino sketches
- Make changes to example p5.js code
Links
45
Session 1
Getting Started
P5
A
Input
Output
A
A
Arduino to Arduino
A
P5
Arduino to p5.js
P5
A
p5.js to Arduino
Data Flow
Session 1
Getting Started
Input
Output
A
A
Arduino to Arduino
Example
1
Button
LED
Session 1
Getting Started
Input
Output
A
A
Arduino to Arduino
Example
2
Knob
Buzzer
Session 1
Getting Started
Input
Output
A
Arduino to p5.js
Example
3
Knob
Laptop
P5
Session 1
Getting Started
Input
Output
A
p5.js to Arduino
Example
4
Mouse
Buzzer
P5
Session 1
Getting Started
Let's start making an interactive object
- Documentation
- Past works
- Limitations
- Expectation
- Ideation
- Making
Session 1
Getting Started
Let's not forget to document all work from Session 1 and 2
- Save p5.js sketches & Arduino code
- take screenshots of coded visuals
- Take photos and videos of your making
- Write your reflection on learning physical computing for your CPJ
1. Documentation
Session 1
Getting Started
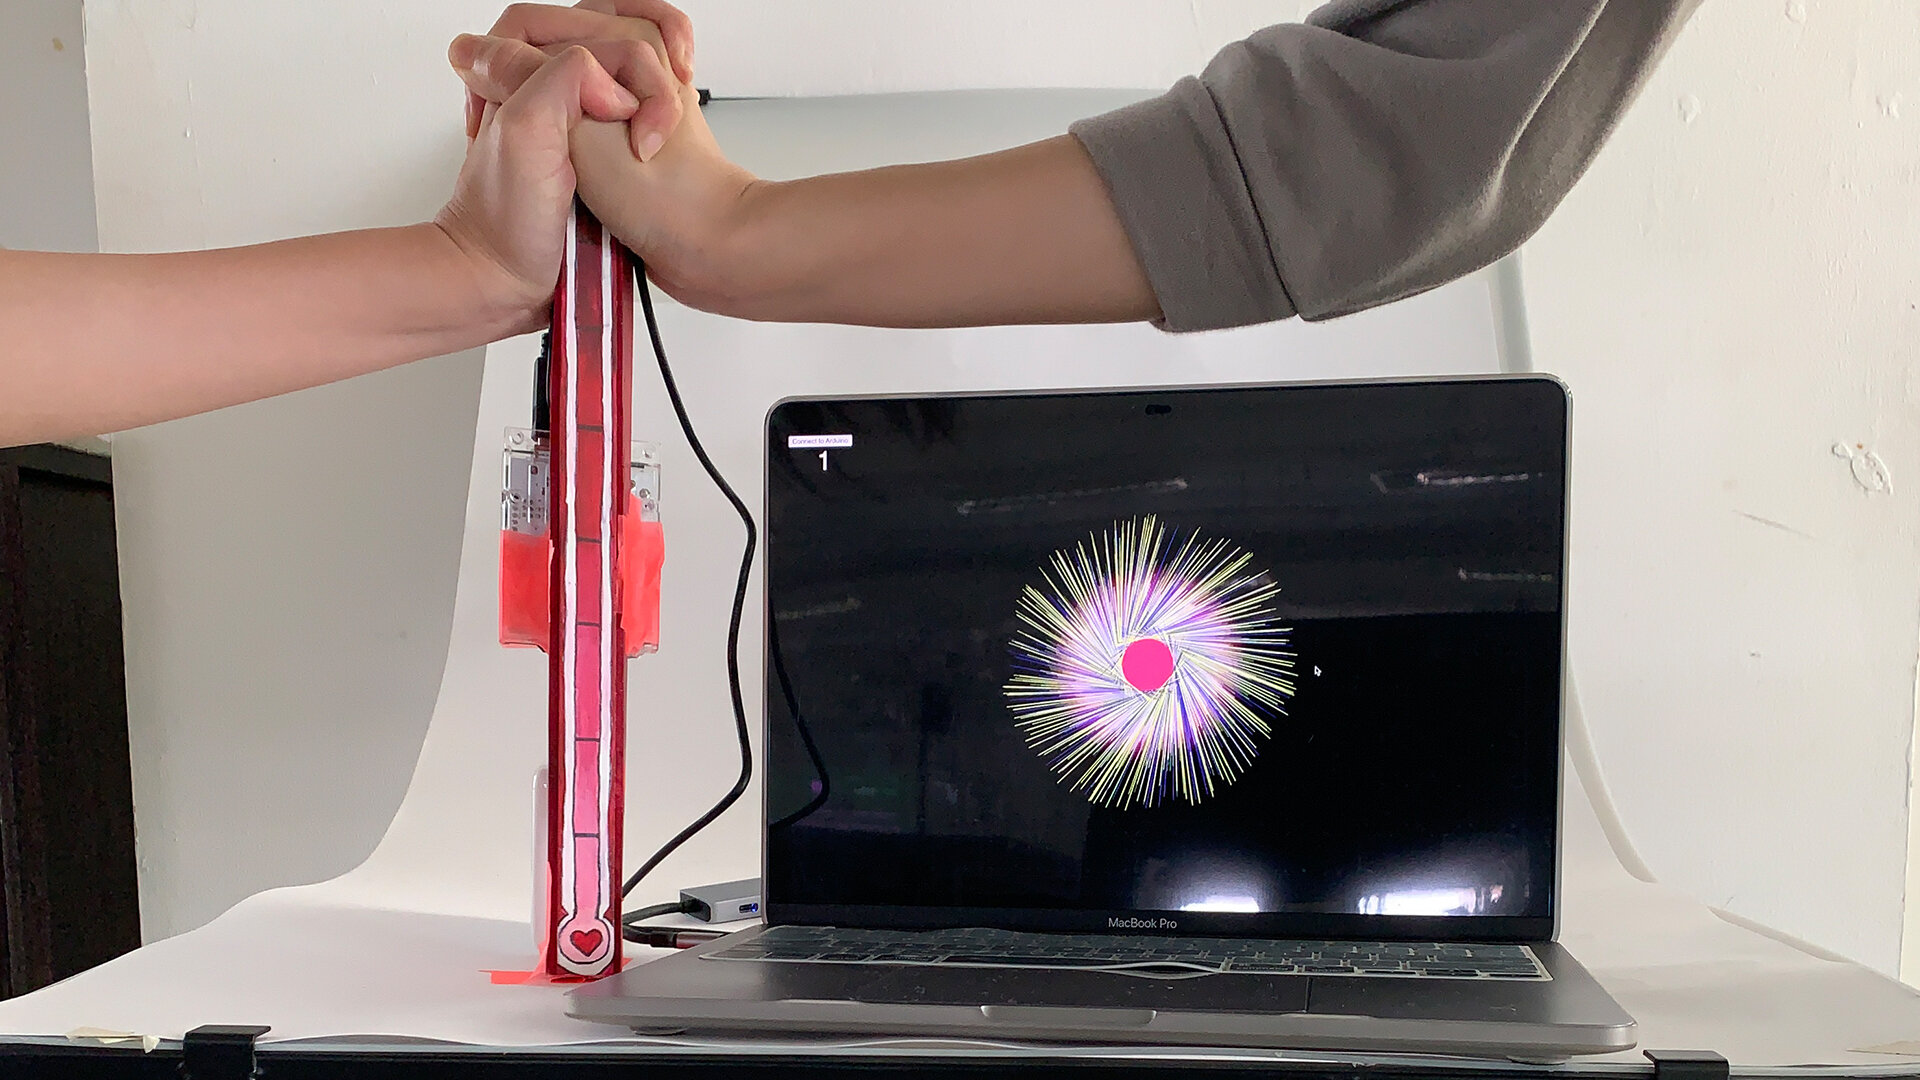

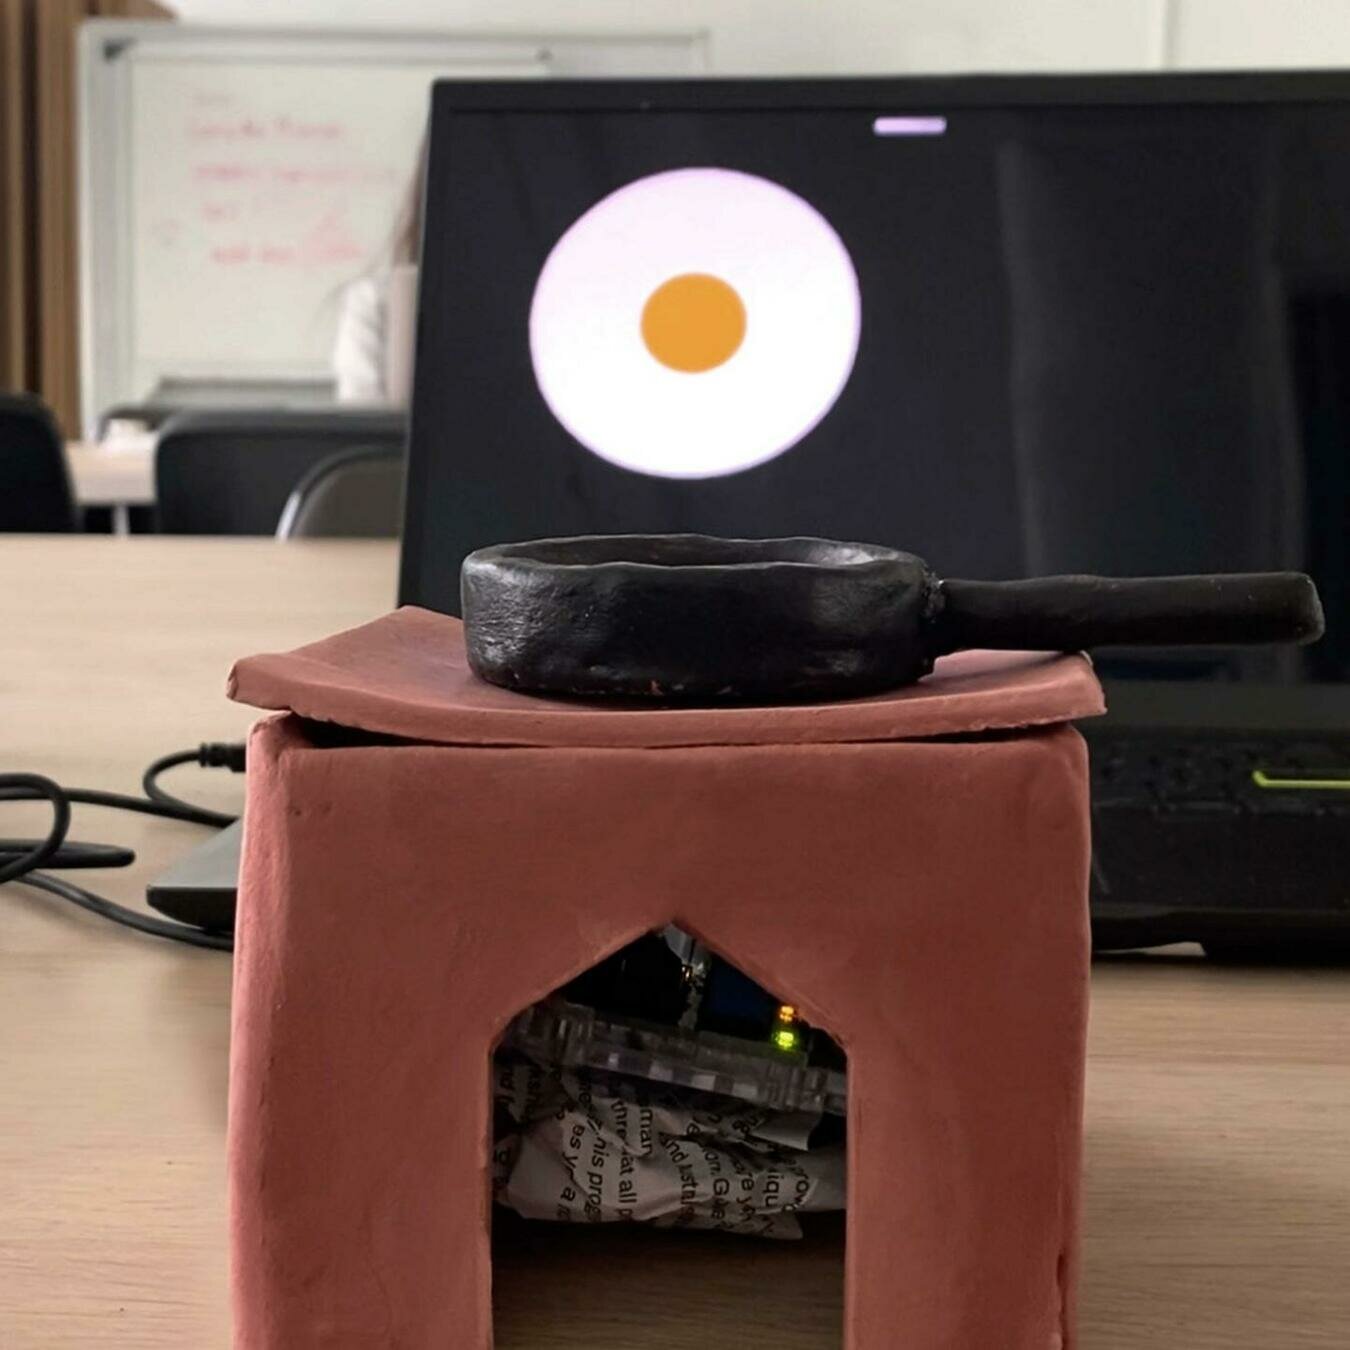
Chon Hu Chin and Wong Mindy, Love Meter
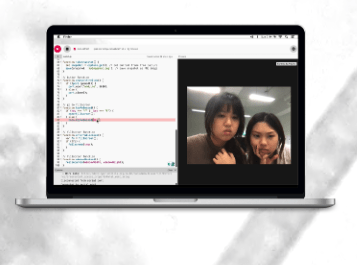
Aaron and Aparupa, Fire
Janessa and Rene
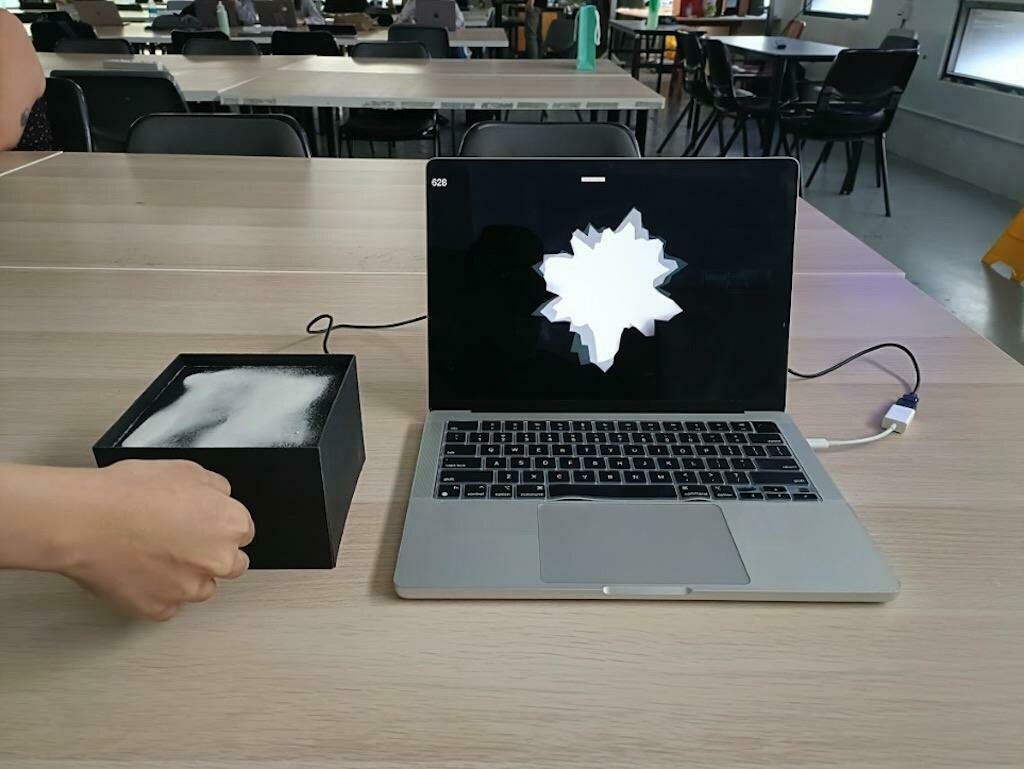
Andrea and Saurish, Sandscape
Eugenia, Jennifer and Kavyasree
Jun Yun So, Drawing with Numbers
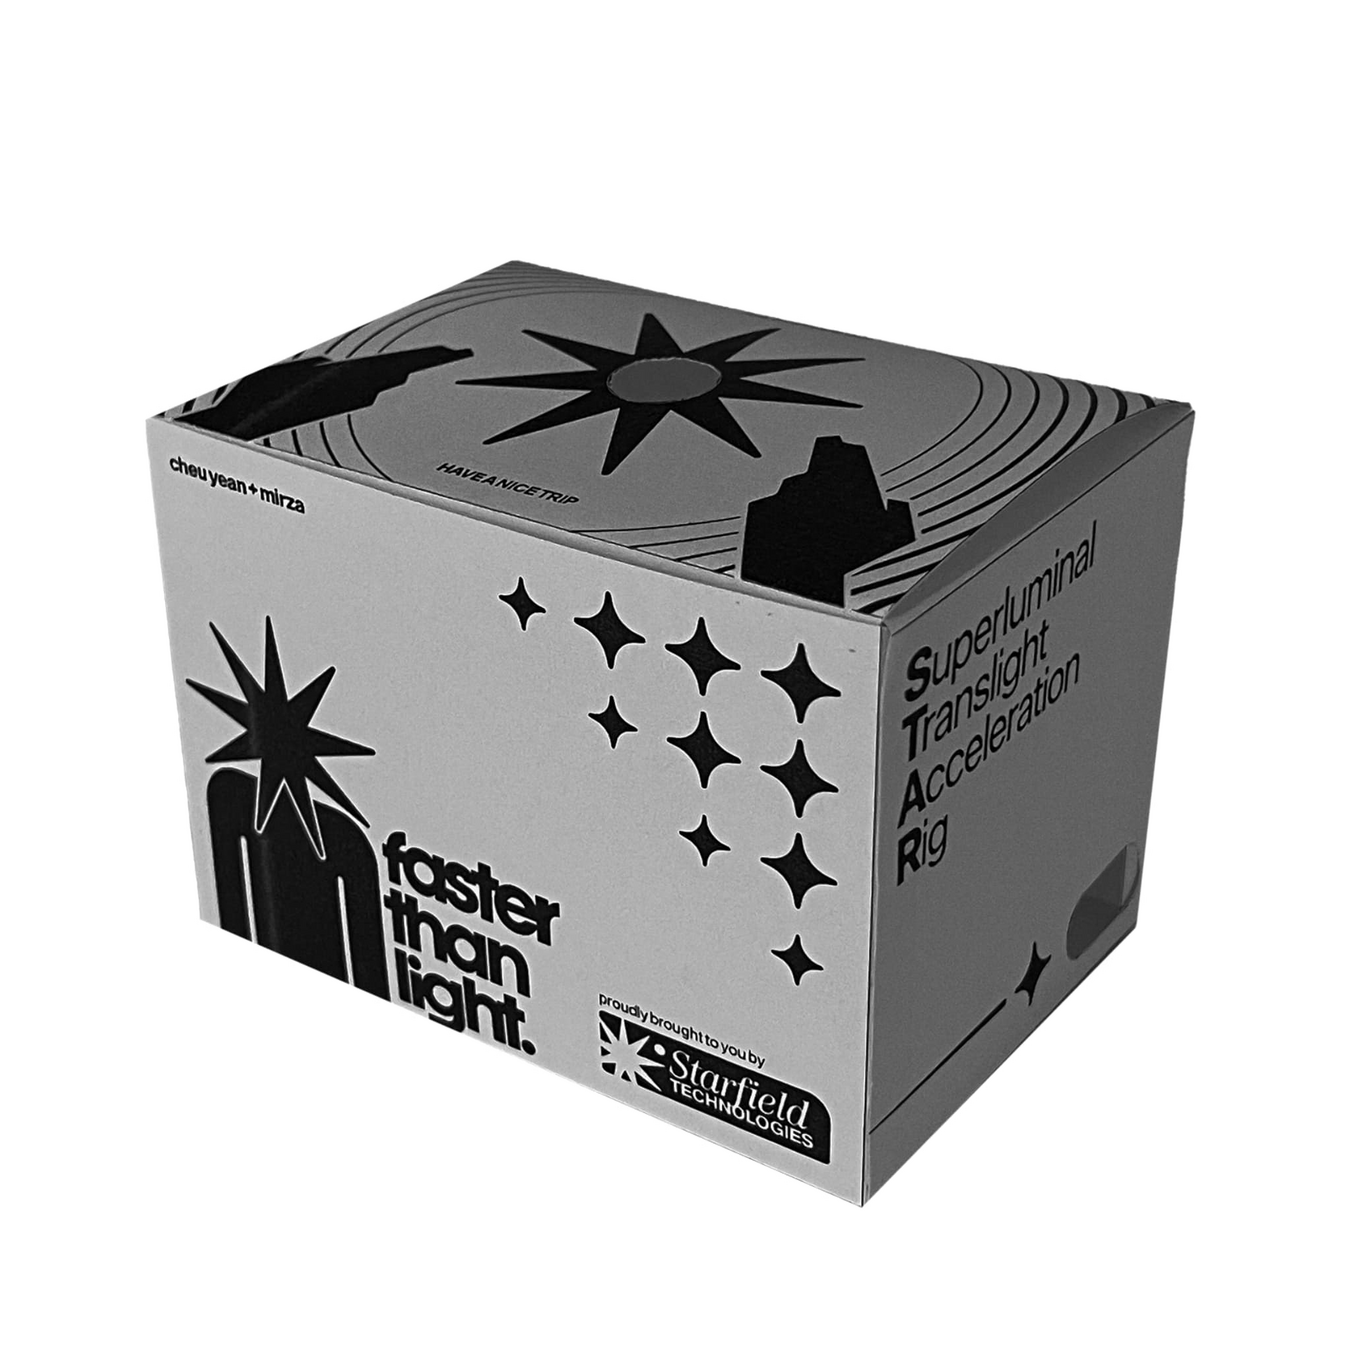
Mirza and Cheu Yean
2. Past works
Session 1
An interactive object
3. Limitations
Create an object that follows only one of the following criteria:
- Use only one sensor (Button, Knob, or Light Sensor) to control a p5.js sketch, starting with Example 3
- Or, alternatively, use only one actuator (Light Bulb or Buzzer) that is controlled by a p5.js sketch, starting with Example 4
Make an object from any of the following materials:
- Paper, cardboard, foamboard
- found materials like branches, leaves, pebbles that can easily be found
- Masking tape
- Wood
Session 1
An interactive object
4. Expectation
- Convincing and simple idea to engage in a simple but meaningful interaction
- Simple p5.js code, start from the examples given
- Simple but effective "casing" for the electronic component and the Arduino
- Good quality documentation
It is important to demonstrate that you can overcome the technical challenges first
Idea and concept should be decided on quickly, so that you can focus on the making
There are 3 things you will build
- p5.js code
- Arduino circuit
- Object around the Arduino circuit
Session 1
An interactive object
Things will break, and it's ok.
We can fix it or find a workaround; this is common practice.
Session 1
An interactive object
Session 1
An interactive object
Discuss within your group a simple but achievable idea
for an Arduino to p5.js (or vice versa) object
5. Ideation
In your idea development you should
-
be reasonable and confident to implement Arduino and p5.js code.
Simple is better!
-
be aware of time, manage your time well
-
sketch your ideas on paper
-
1 .zip file including final Arduino code and final p5.js code
-
8 images of process and outcomes, the minimum size for an image is 1920x1080 pixels in .jpg format
-
1 process video (video size should be 1080p in .mp4 format)
-
1 outcome video (video size should be 1080p in .mp4 format)
- 1 writeup describing your project, the project statement; should include project title and team members
Deliverables, by the end of session 2
Session 1
An interactive object
Homework
- Make good use of the days leading up to next week's session so you come prepared
- Continue to work on your object as much as possible so you can confidently finish it during next week's session
- Bring working code and materials for the screen-based and physical object making
- Document your process and outcomes as required; more is better, so you can curate and choose later
Session 1 → Session 2
It is important to demonstrate that you can overcome the technical challenges first.
Idea and concept should be decided on quickly so that you can focus on the making.
Groups should then continue with
- Stick to your first idea
- Building a simple input-output circuit based on your idea and code samples provided
- Build an object around the electronic component(s)
- Document process, object, feedback and outcome
80
A
P5
A
P5
OR
Session 1
An interactive object
Homework
- Continue to work on your object as much as possible so you are confident you can finish it during next week's session
- Bring working code and materials for the screen-based and physical object making
- Document your process and outcomes as required; more is better, so you can curate and choose later
Session 1 → Session 2
It is important to demonstrate that you can overcome the technical challenges first. Idea and concept should be decided on quickly so that you can focus on the making.
Session 2
In class development
Complete exercise
Documentation
Presentation
Documenting
Documenting
Product shots, clean background so that the focus is solely on the subject. Use a good camera, tripod if necessary, and appropriate lighting.
Documenting
Product shots, clean background so that the focus is solely on the subject. Use a good camera, tripod if necessary, and appropriate lighting.
Documenting
Product shots, clean background so that the focus is solely on the subject, add hands to show interactivity. Use a good camera, tripod if necessary, and appropriate lighting.
Documenting
In action, in use: pictures of the work with people interacting or looking at the work. These photos can be staged and choreographed, or taken during a show and tell or exhibition with audience. Use a good camera, a tripod if necessary and adequate lighting.
Documenting
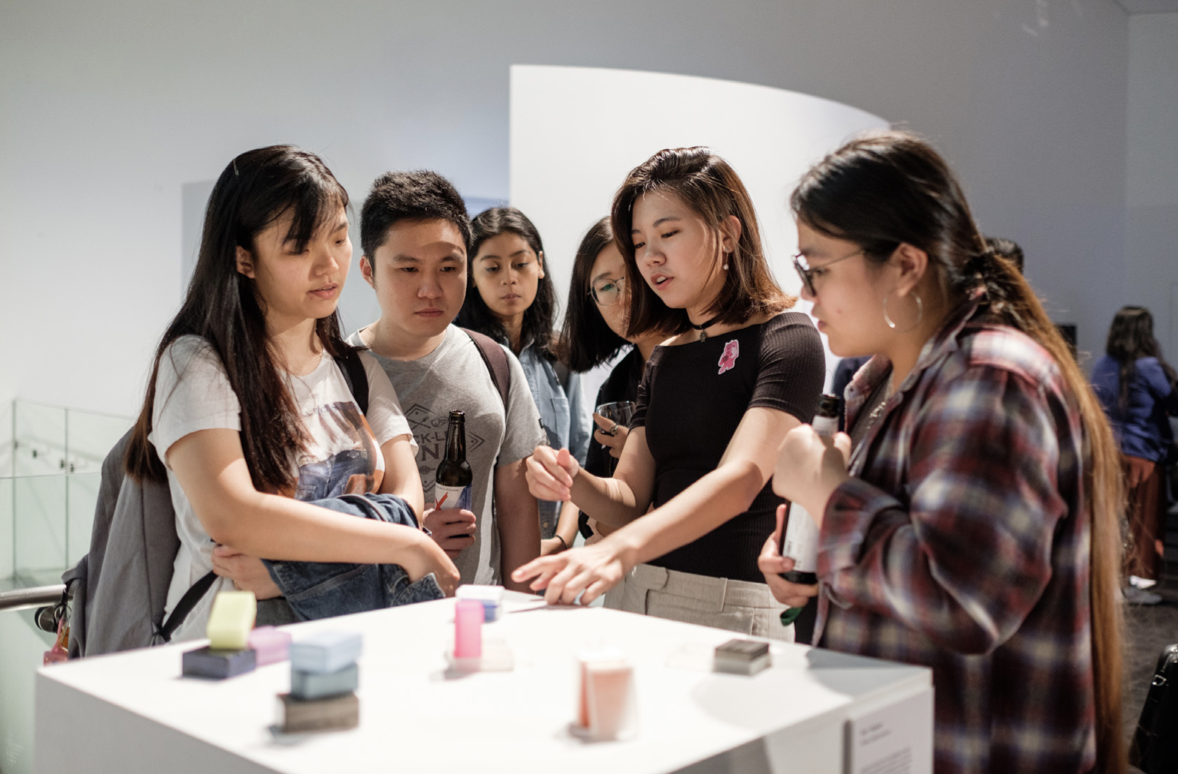

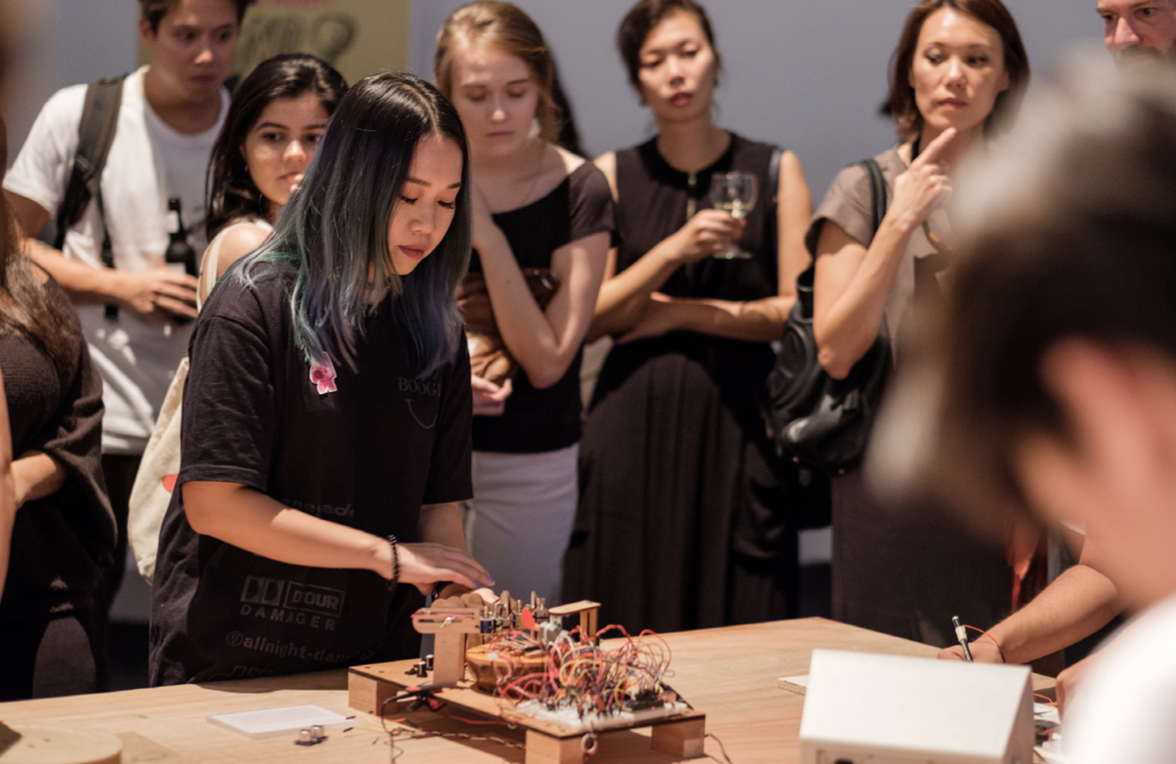
Avoid
In action, in use: pictures of the work with people interacting or looking at the work. These photos can be staged and choreographed, or taken during a show and tell or exhibition with audience. Use a good camera, a tripod if necessary and adequate lighting.
Session 2
Project Interaction
In class development
120
Session 2
Project Interaction
Return of Kits
Session 2
Project Interaction
- Test and demonstrate your outcome, how did others respond to your interactive object
- Take documentation of your outcome and take photos and videos of your peers interacting with it
Finalise
Session 1
Project Interaction
Deliverables, by the end of session 2
Self directed and independent team work
Creative interpretation of field trip findings expressed in one or more artefacts
Designed outcomes convince through creativity, engagement and quality of aesthetics and production
Expectations
Session 1
Desk Research
Tool 1: Context building, theme finding
Context building
Once your preliminary research is completed, take a post-it or piece of paper, write down the context you are most interested about and pin it on the wall.
Your initial interest will then guide the next activity to help you define your field trip task.
30