AGile ANDROID WORKSHOP
Godfrey Nolan
ANDROID Agenda
- Why??
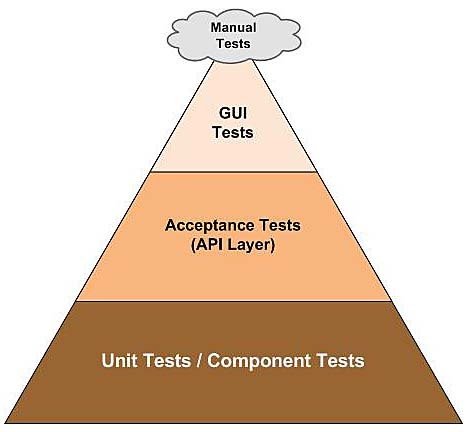
- Unit, UI and API testing 101
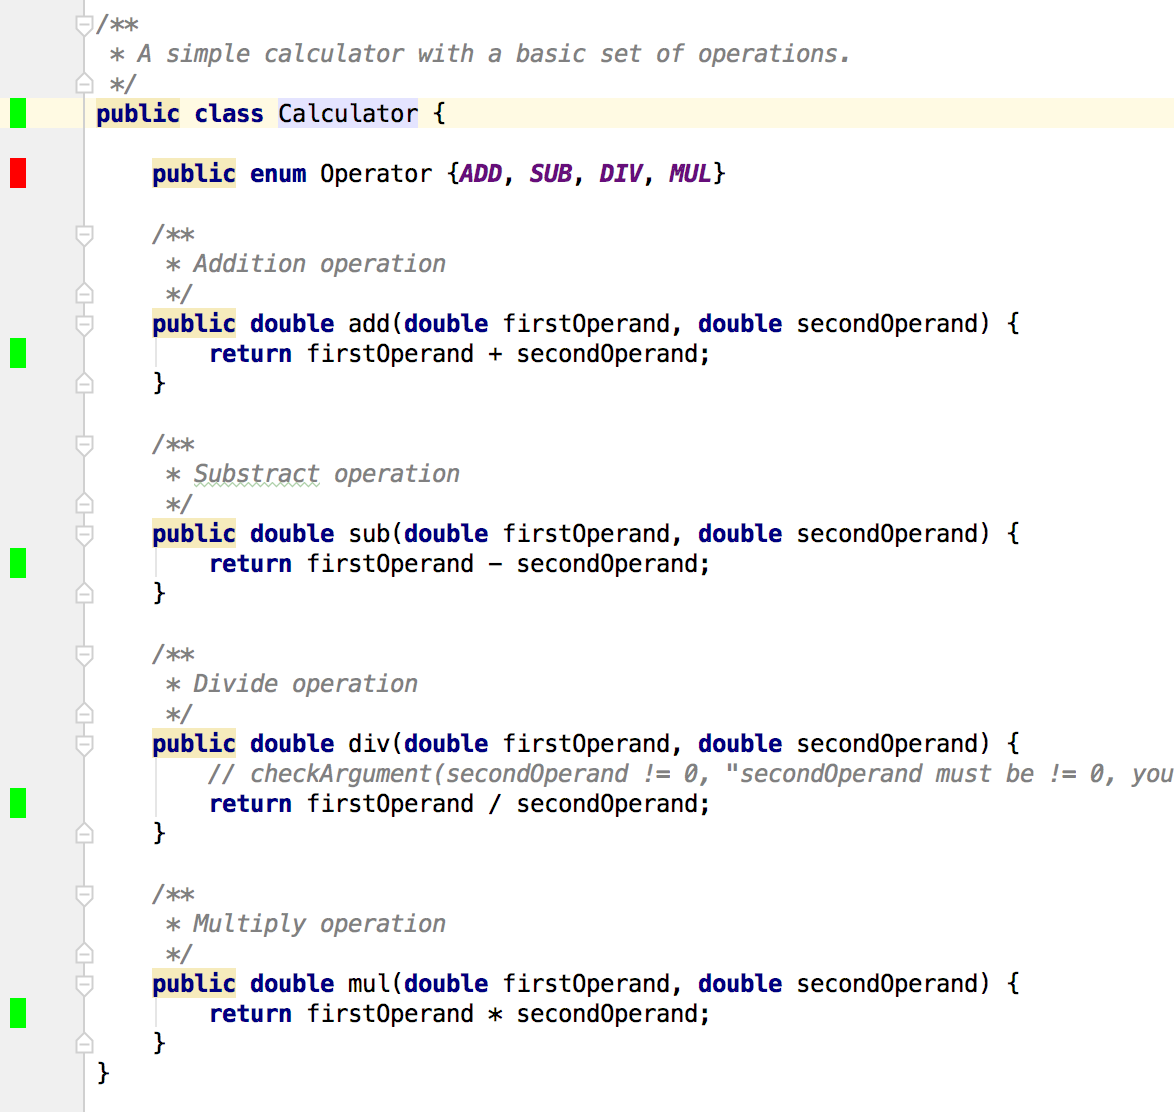
- Calculator Example
- More Tools - FIRST
- ETA Detroit
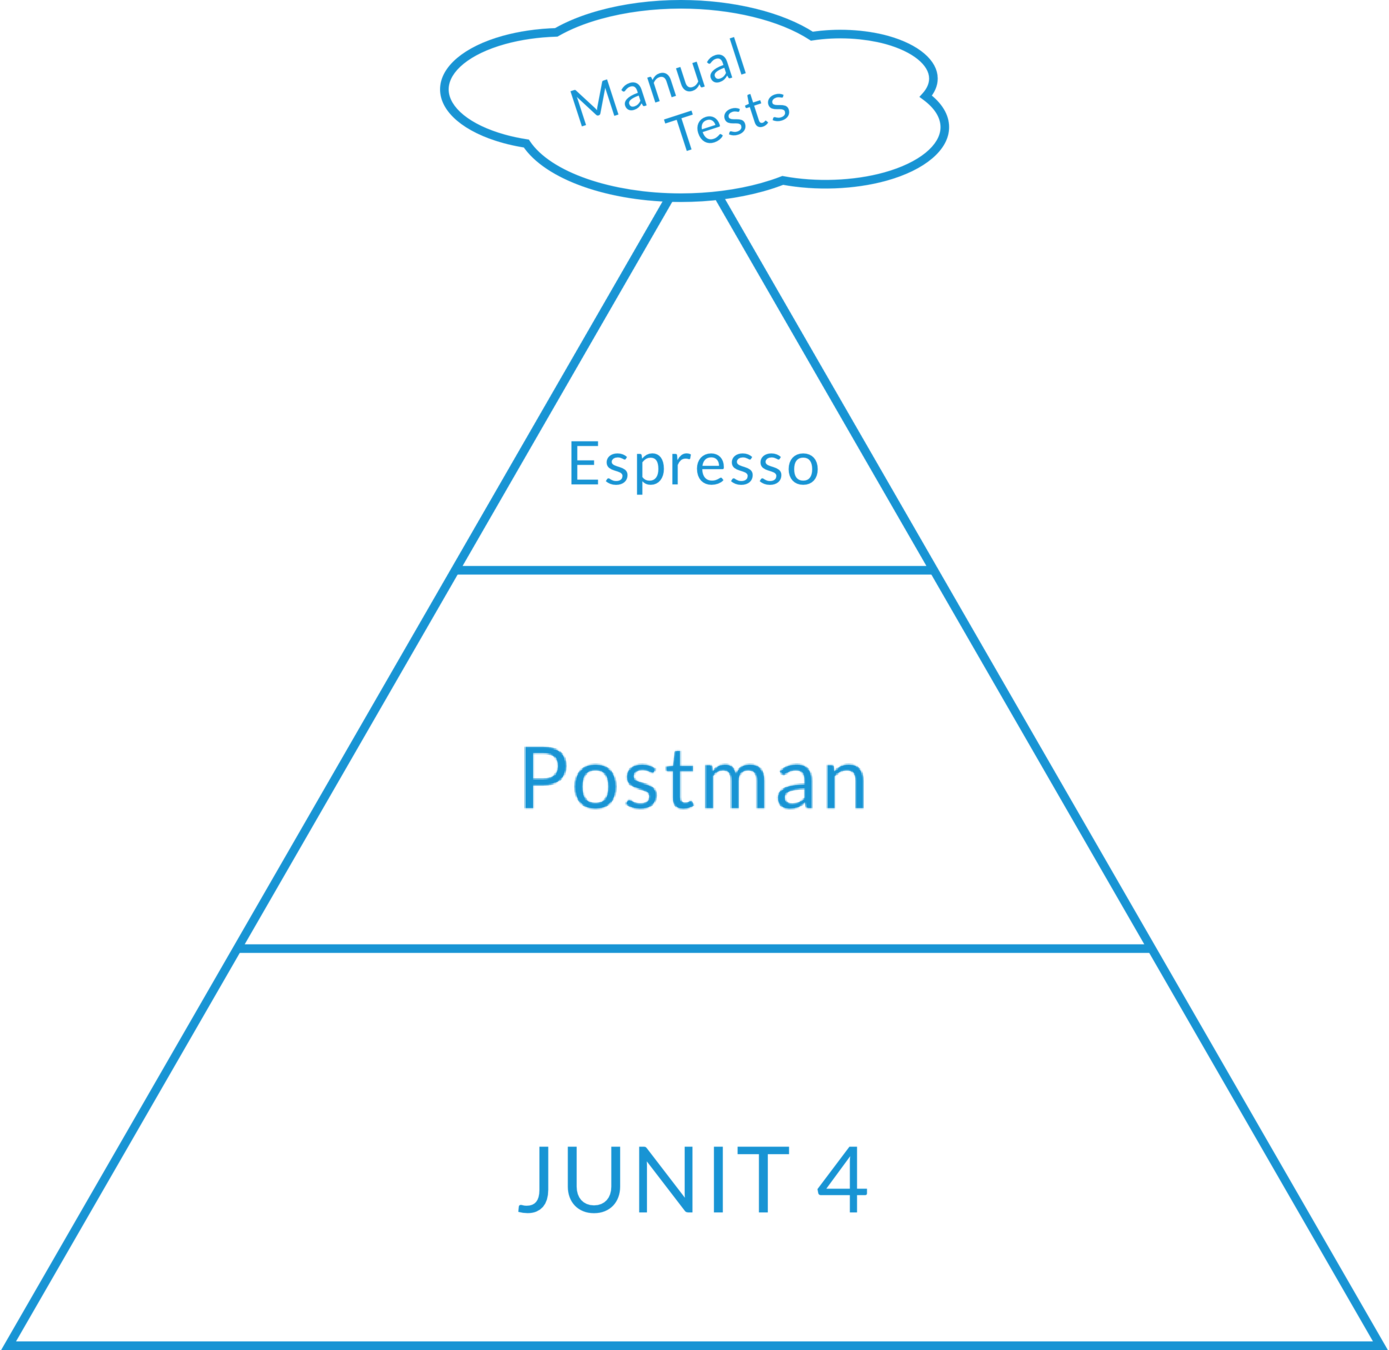
- jUnit Testing
- Espresso
- Postman / Newman
- SonarQube
- Jenkins
ANDROID Agenda

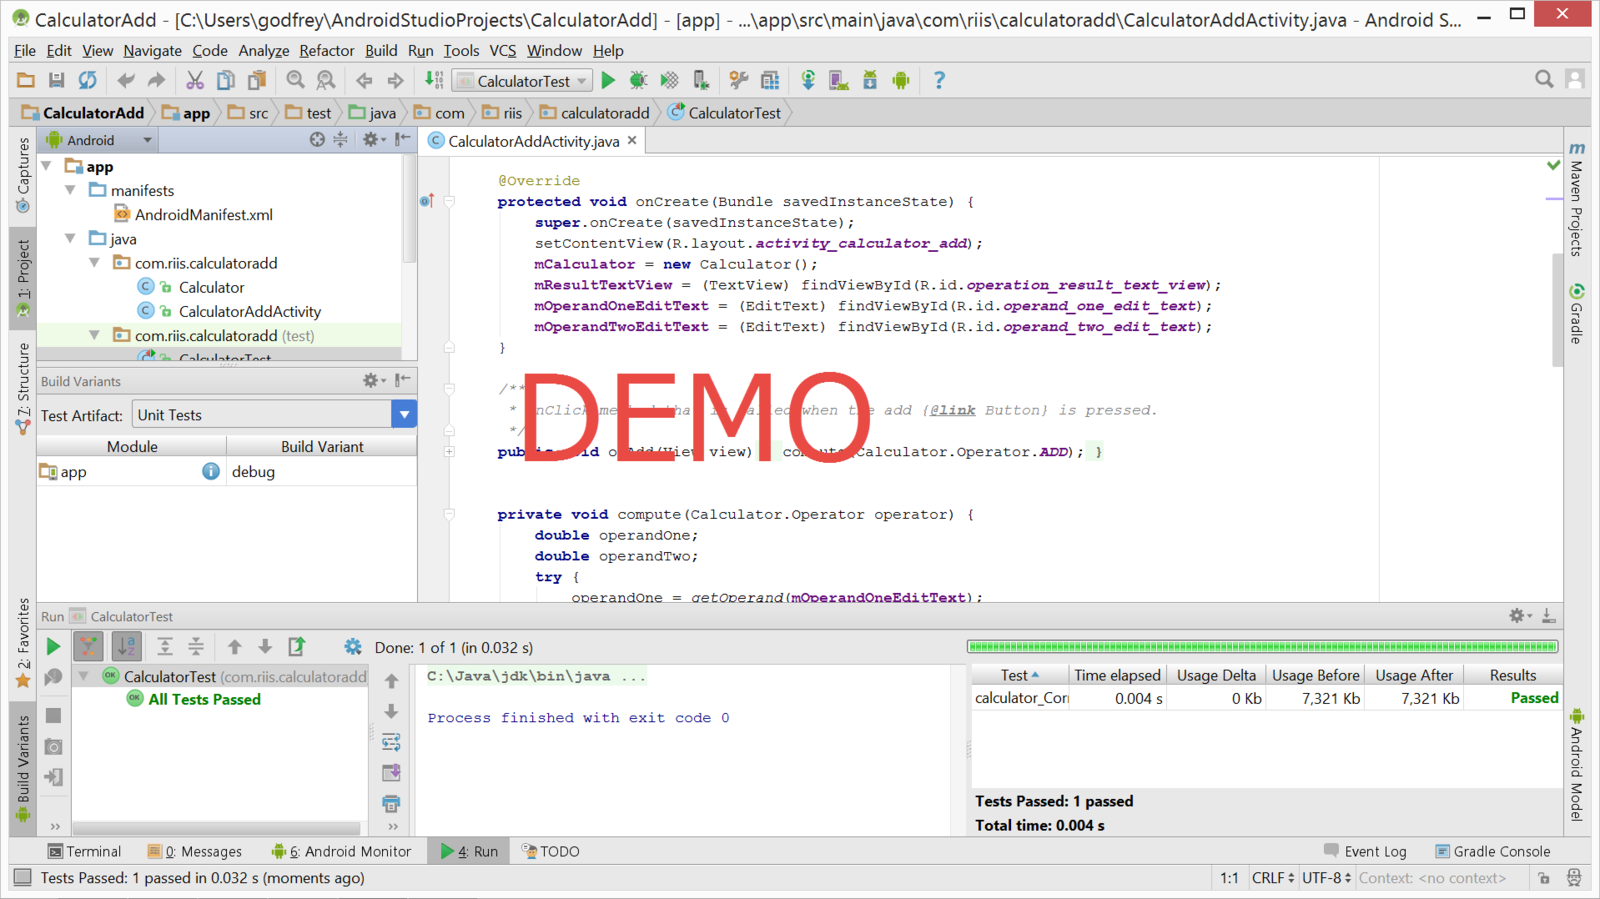
DEMO
ANDROID Agenda

FOLLOW ALONG
git clone http://github.com/godfreynolan/CodeCraftsman
WHY
- Catch more mistakes
- Confidently make more changes
- Built in regression testing
- Extend the life of your codebase
- Better predictability and reliability
LAB 1 - Install JENKINS
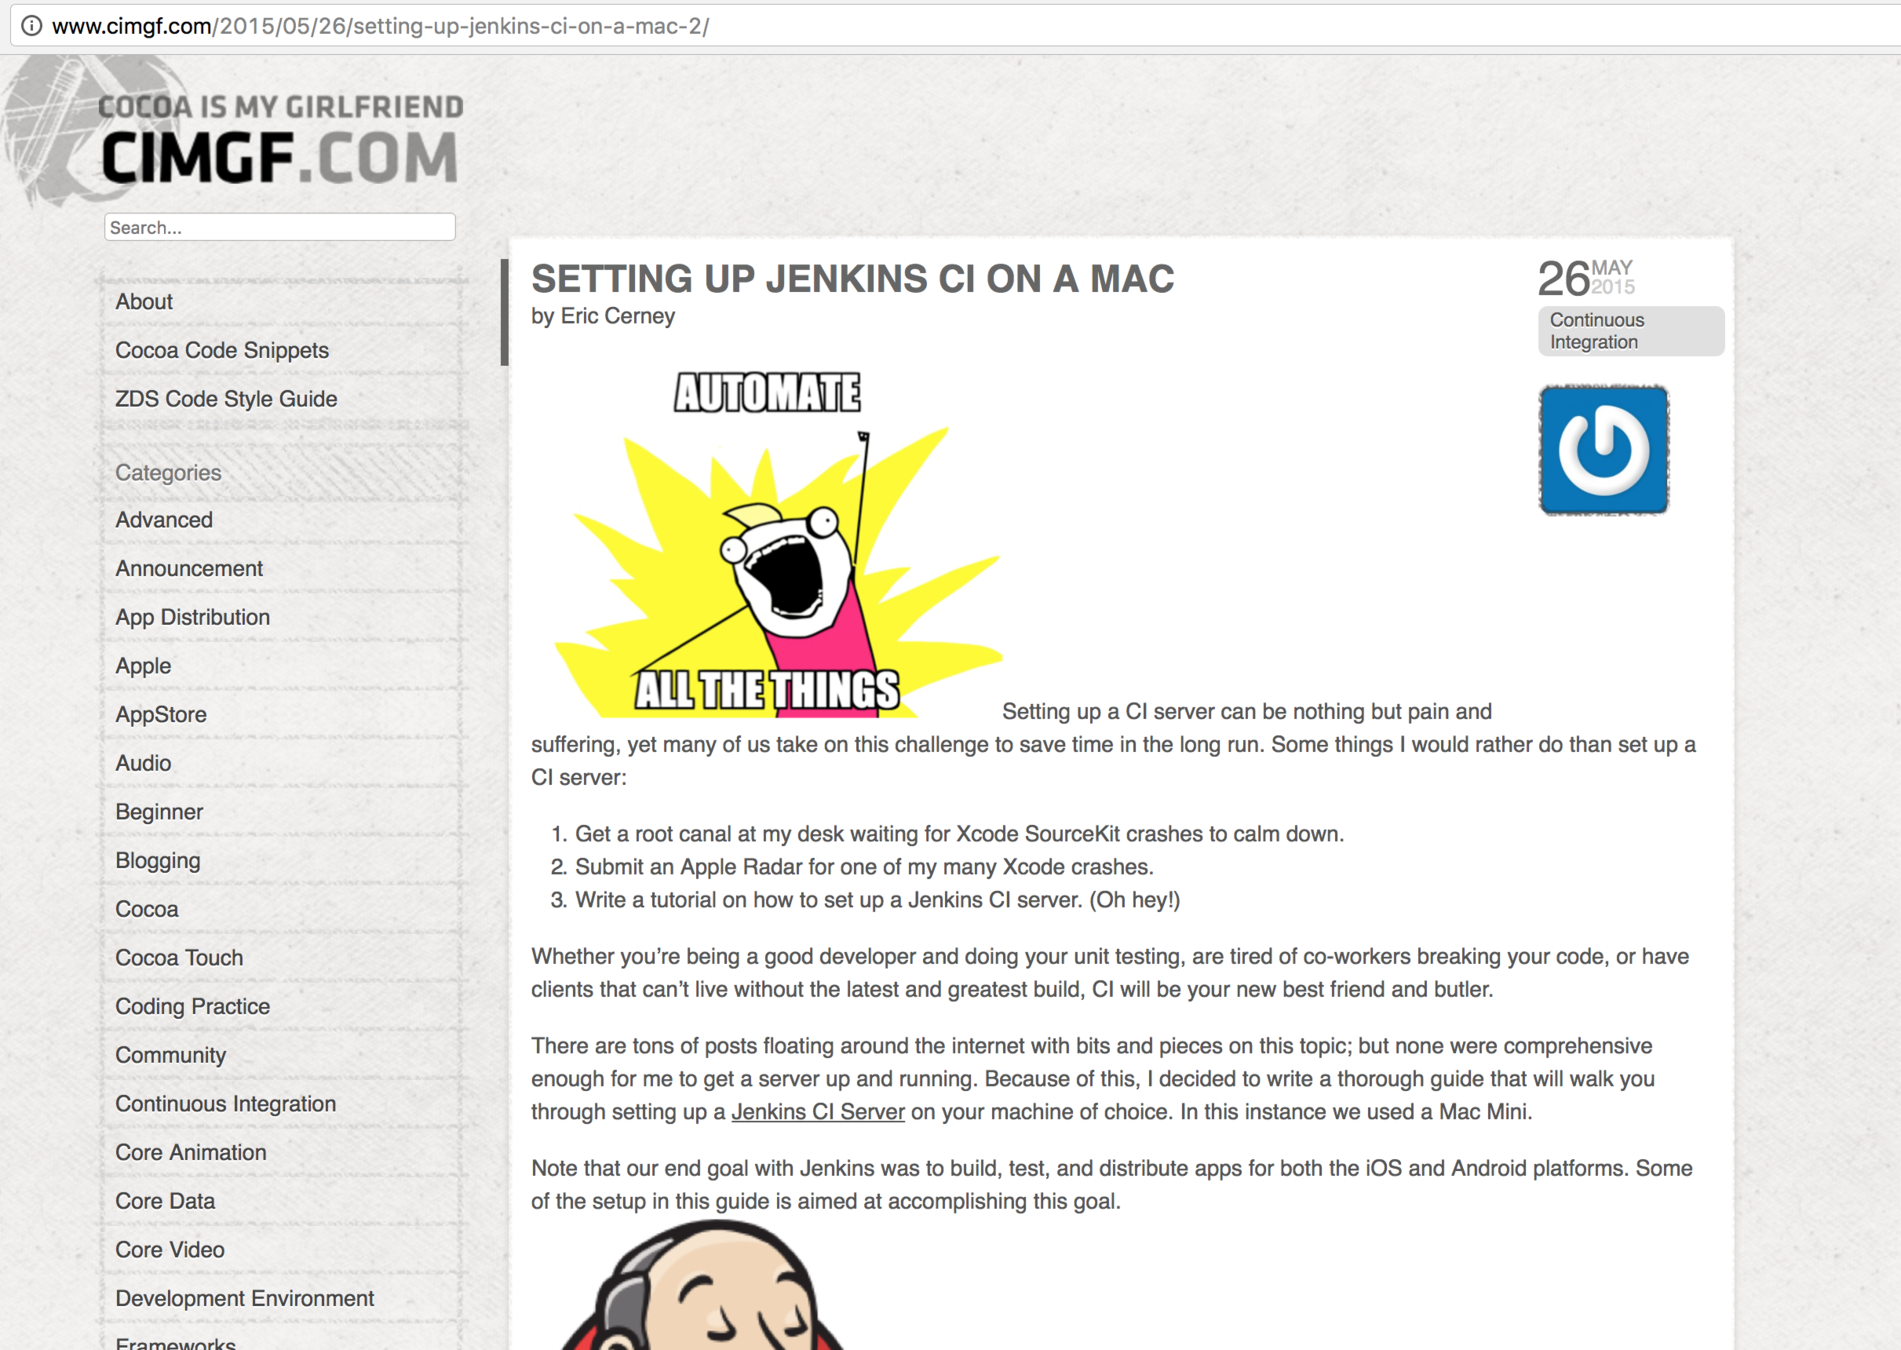
1. Download the Jenkins Mac OS X native package from http://jenkins-ci.org.
2. Double click the .pkg file to install Jenkins.
3. Unlock Jenkins
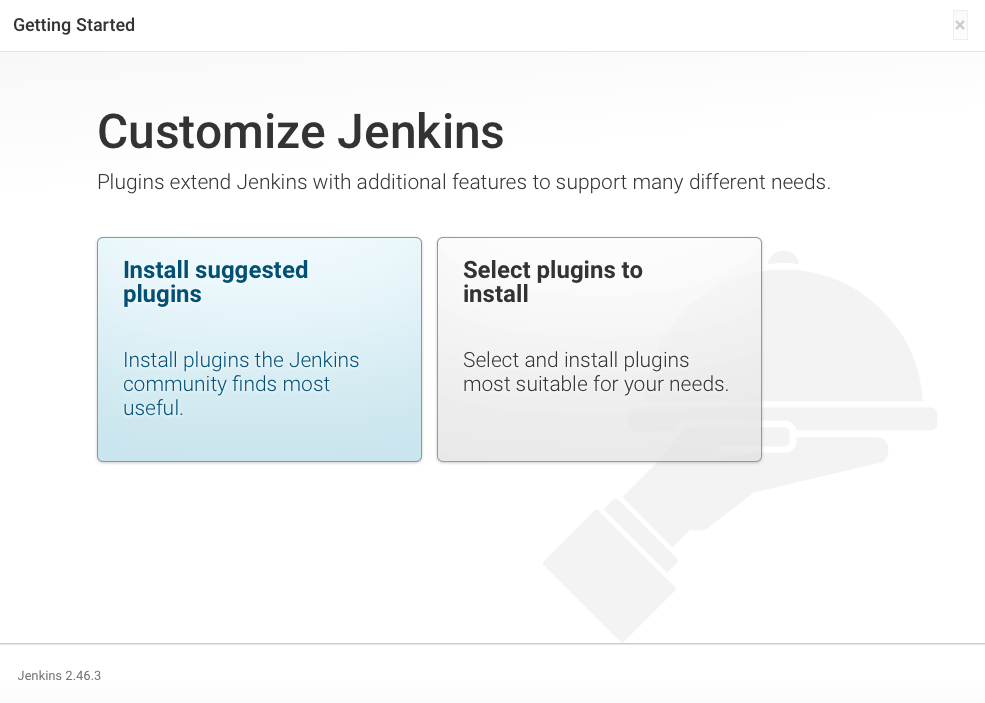
4. Select Plugins to Install
5. Install plugins
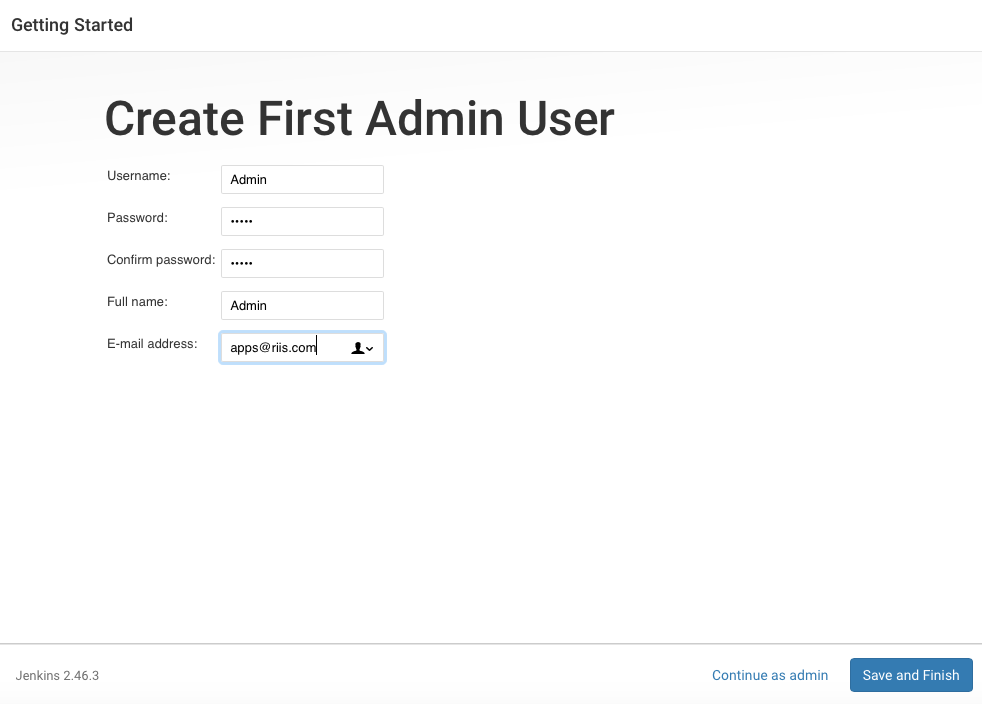
6. Create First Admin User
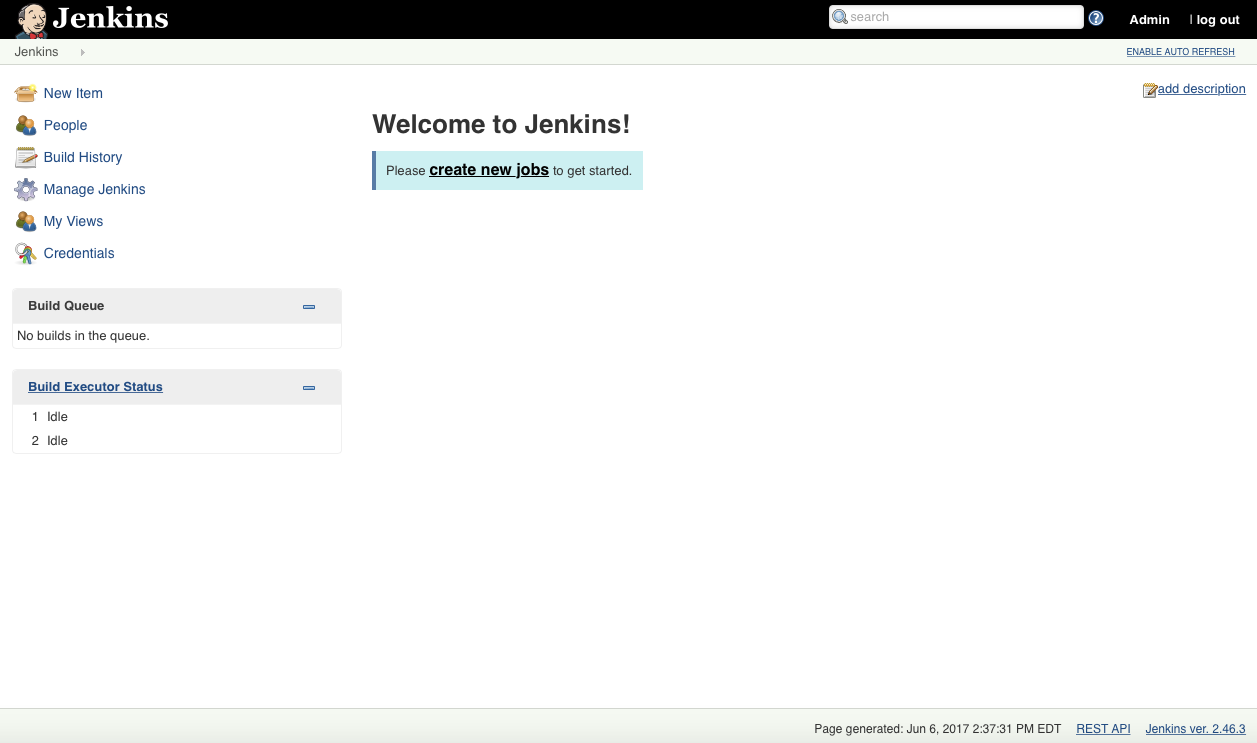
7. Once done, your browser will open to http://localhost:8080 where Jenkins lives.
LAB 1 - Install JENKINS

LAB 1 - Install JENKINS
LAB 1 - Install JENKINS

LAB 1 - Install JENKINS
LAB 1 - Install JENKINS
LAB 1 - Install JENKINS
LAB 1 - Install JENKINS
1. Download the Jenkins Mac OS X native package from http://jenkins-ci.org.
2. Double click the .pkg file to install Jenkins.
3. Once done, your browser will open to http://localhost:8080 where Jenkins lives.
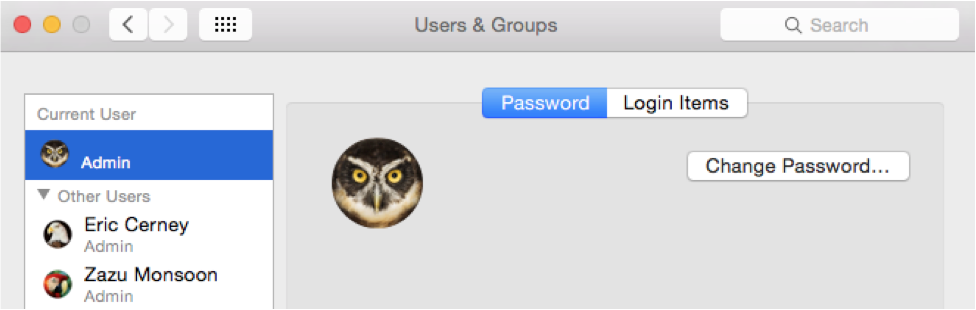
4. Make the Jenkins user an admin:
sudo dseditgroup -o edit -a jenkins -t user admin
5. Add the Jenkins user to the developer group:
sudo dscl . append /Groups/_developer GroupMembership jenkins
6. Make the Jenkins user automatically login when the computer is restarted
7. unload Jenkins as a Daemon:
sudo launchctl unload /Library/LaunchDaemons/org.jenkins-ci.plist
8. move the .plist file, which defines how Jenkins will run, to the LaunchAgents folder:
sudo mv /Library/LaunchDaemons/org.jenkins-ci.plist /Library/LaunchAgents/
9. Edit the plist file:
sudo vim /Library/LaunchAgents/org.jenkins-ci.plist
/* Remove the following lines */
<key>SessionCreate</key
<true />
10. reload the Launch Agent to restart Jenkins:
sudo launchctl load /Library/LaunchAgents/org.jenkins-ci.plist
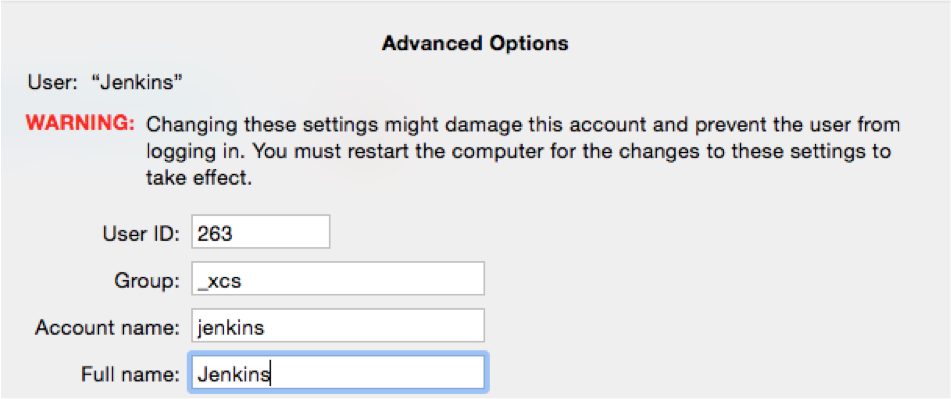
11. Set up the Jenkins userLAB 1 - Install JENKINS

LAB 2 - Install ANDROID STUDIO
ANDROID Agenda
Unit Testing intro
public double add(double firstOperand, double secondOperand) {
    return firstOperand + secondOperand;
}


            @Test
            public void calculator_CorrectAdd_ReturnsTrue() {
                assertEquals(7, add(3,4);
            }

            @Test
            public void calculator_CorrectAdd_ReturnsTrue() {
                assertEquals("Addition is broken", 7, add(3,4);
            }
dependencies {
    // Unit testing dependencies.
    testCompile 'junit:junit:4.12'
}
UNIT TESTING 101
- Command line
- Setup and Teardown
- Assertions
- Parameters
- Code Coverage
C:\Users\godfrey\AndroidStudioProjects\BasicSample>gradlew test --continue
Downloading https://services.gradle.org/distributions/gradle-2.2.1-all.zip
................................................................................
..................................................
Unzipping C:\Users\godfrey\.gradle\wrapper\dists\gradle-2.2.1-all\6dibv5rcnnqlfbq9klf8imrndn\gradle-2.2.1-all.zip to C:\Users\godfrey\.gradle\wrapper\dists\gradle-2.2.1-all\6dibv5rcnnqlfbq9klf8imrndn
Download https://jcenter.bintray.com/com/google/guava/guava/17.0/guava-17.0.jar
Download https://jcenter.bintray.com/com/android/tools/lint/lint-api/24.2.3/lint-api-24.2.3.jar
Download https://jcenter.bintray.com/org/ow2/asm/asm-analysis/5.0.3/asm-analysis-5.0.3.jar
Download https://jcenter.bintray.com/com/android/tools/external/lombok/lombok-ast/0.2.3/lombok-ast-0.2.3.jar
:app:preBuild UP-TO-DATE
:app:preDebugBuild UP-TO-DATE
:app:checkDebugManifest
:app:prepareDebugDependencies
:app:compileDebugAidl
:app:compileDebugRenderscript
.
.
.
:app:compileReleaseUnitTestSources
:app:assembleReleaseUnitTest
:app:testRelease
:app:test

BUILD SUCCESSFUL

Total time: 3 mins 57.013 secs
public class CalculatorTest {

    private Calculator mCalculator;

    @Before
    public void setUp() {
        mCalculator = new Calculator();
    }

    @Test
    public void calculator_CorrectAdd_ReturnsTrue() {
        double resultAdd = mCalculator.add(3, 4);
        assertEquals(7, resultAdd,0);
    }

    @After
    public void tearDown() {
        mCalculator = null;
    }
}
UNIT TESTING 101
- assertEquals
- assertTrue
- assertFalse
- assertNull
- assertNotNull
- assertSame
- assertNotSame
- assertThat
- fail
@RunWith(Parameterized.class)
public class CalculatorParamTest {

    private int mOperandOne, mOperandTwo, mExpectedResult;
    private Calculator mCalculator;

    @Parameters
    public static Collection<Object[]> data() {
        return Arrays.asList(new Object[][] {
                {3, 4, 7}, {4, 3, 7}, {8, 2, 10}, {-1, 4, 3}, {3256, 4, 3260}
        });
    }

    public CalculatorParamTest(int mOperandOne, int mOperandTwo, int mExpectedResult) {
        this.mOperandOne = mOperandOne;
        this.mOperandTwo = mOperandTwo;
        this.mExpectedResult = mExpectedResult;
    }

    @Before
    public void setUp() { mCalculator = new Calculator(); }

    @Test
    public void testAdd_TwoNumbers() {
        int resultAdd = mCalculator.add(mOperandOne, mOperandTwo);
        assertEquals(mExpectedResult, resultAdd, 0);
    }
}
ANDROID Agenda
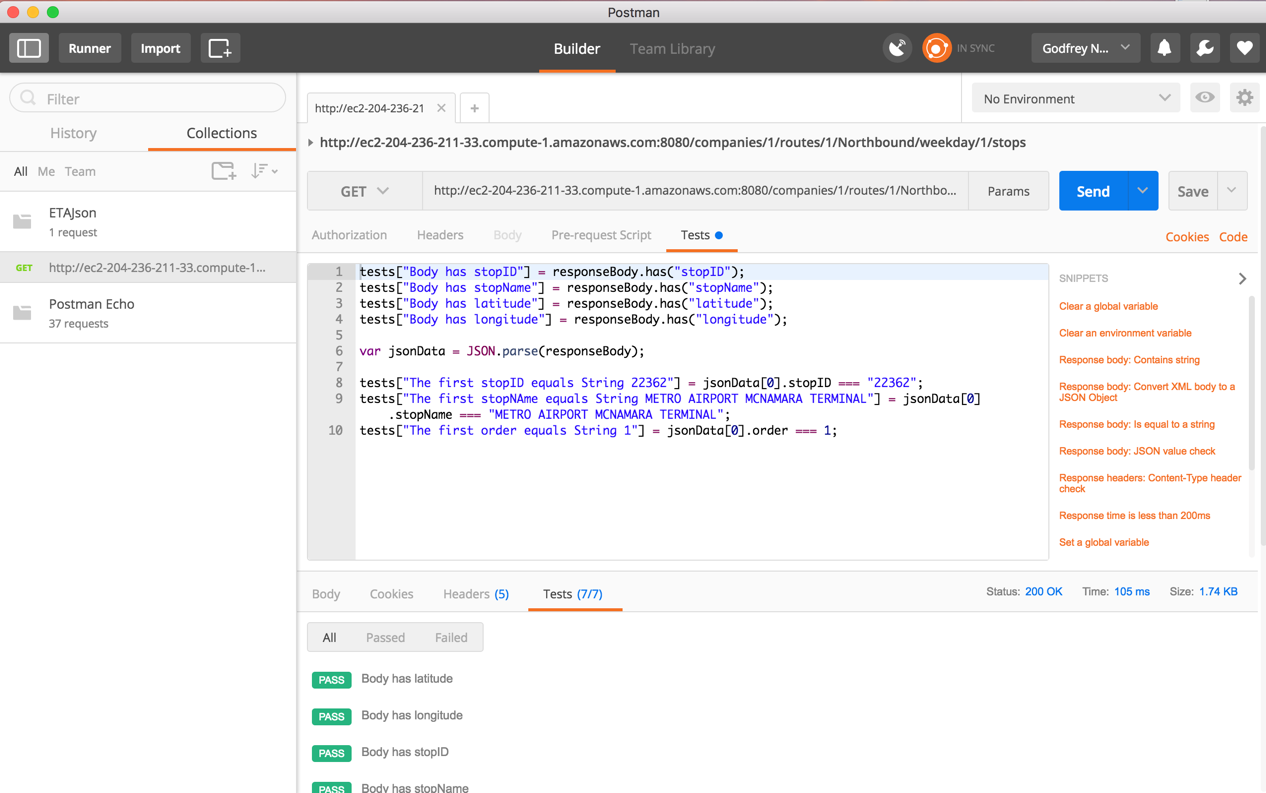
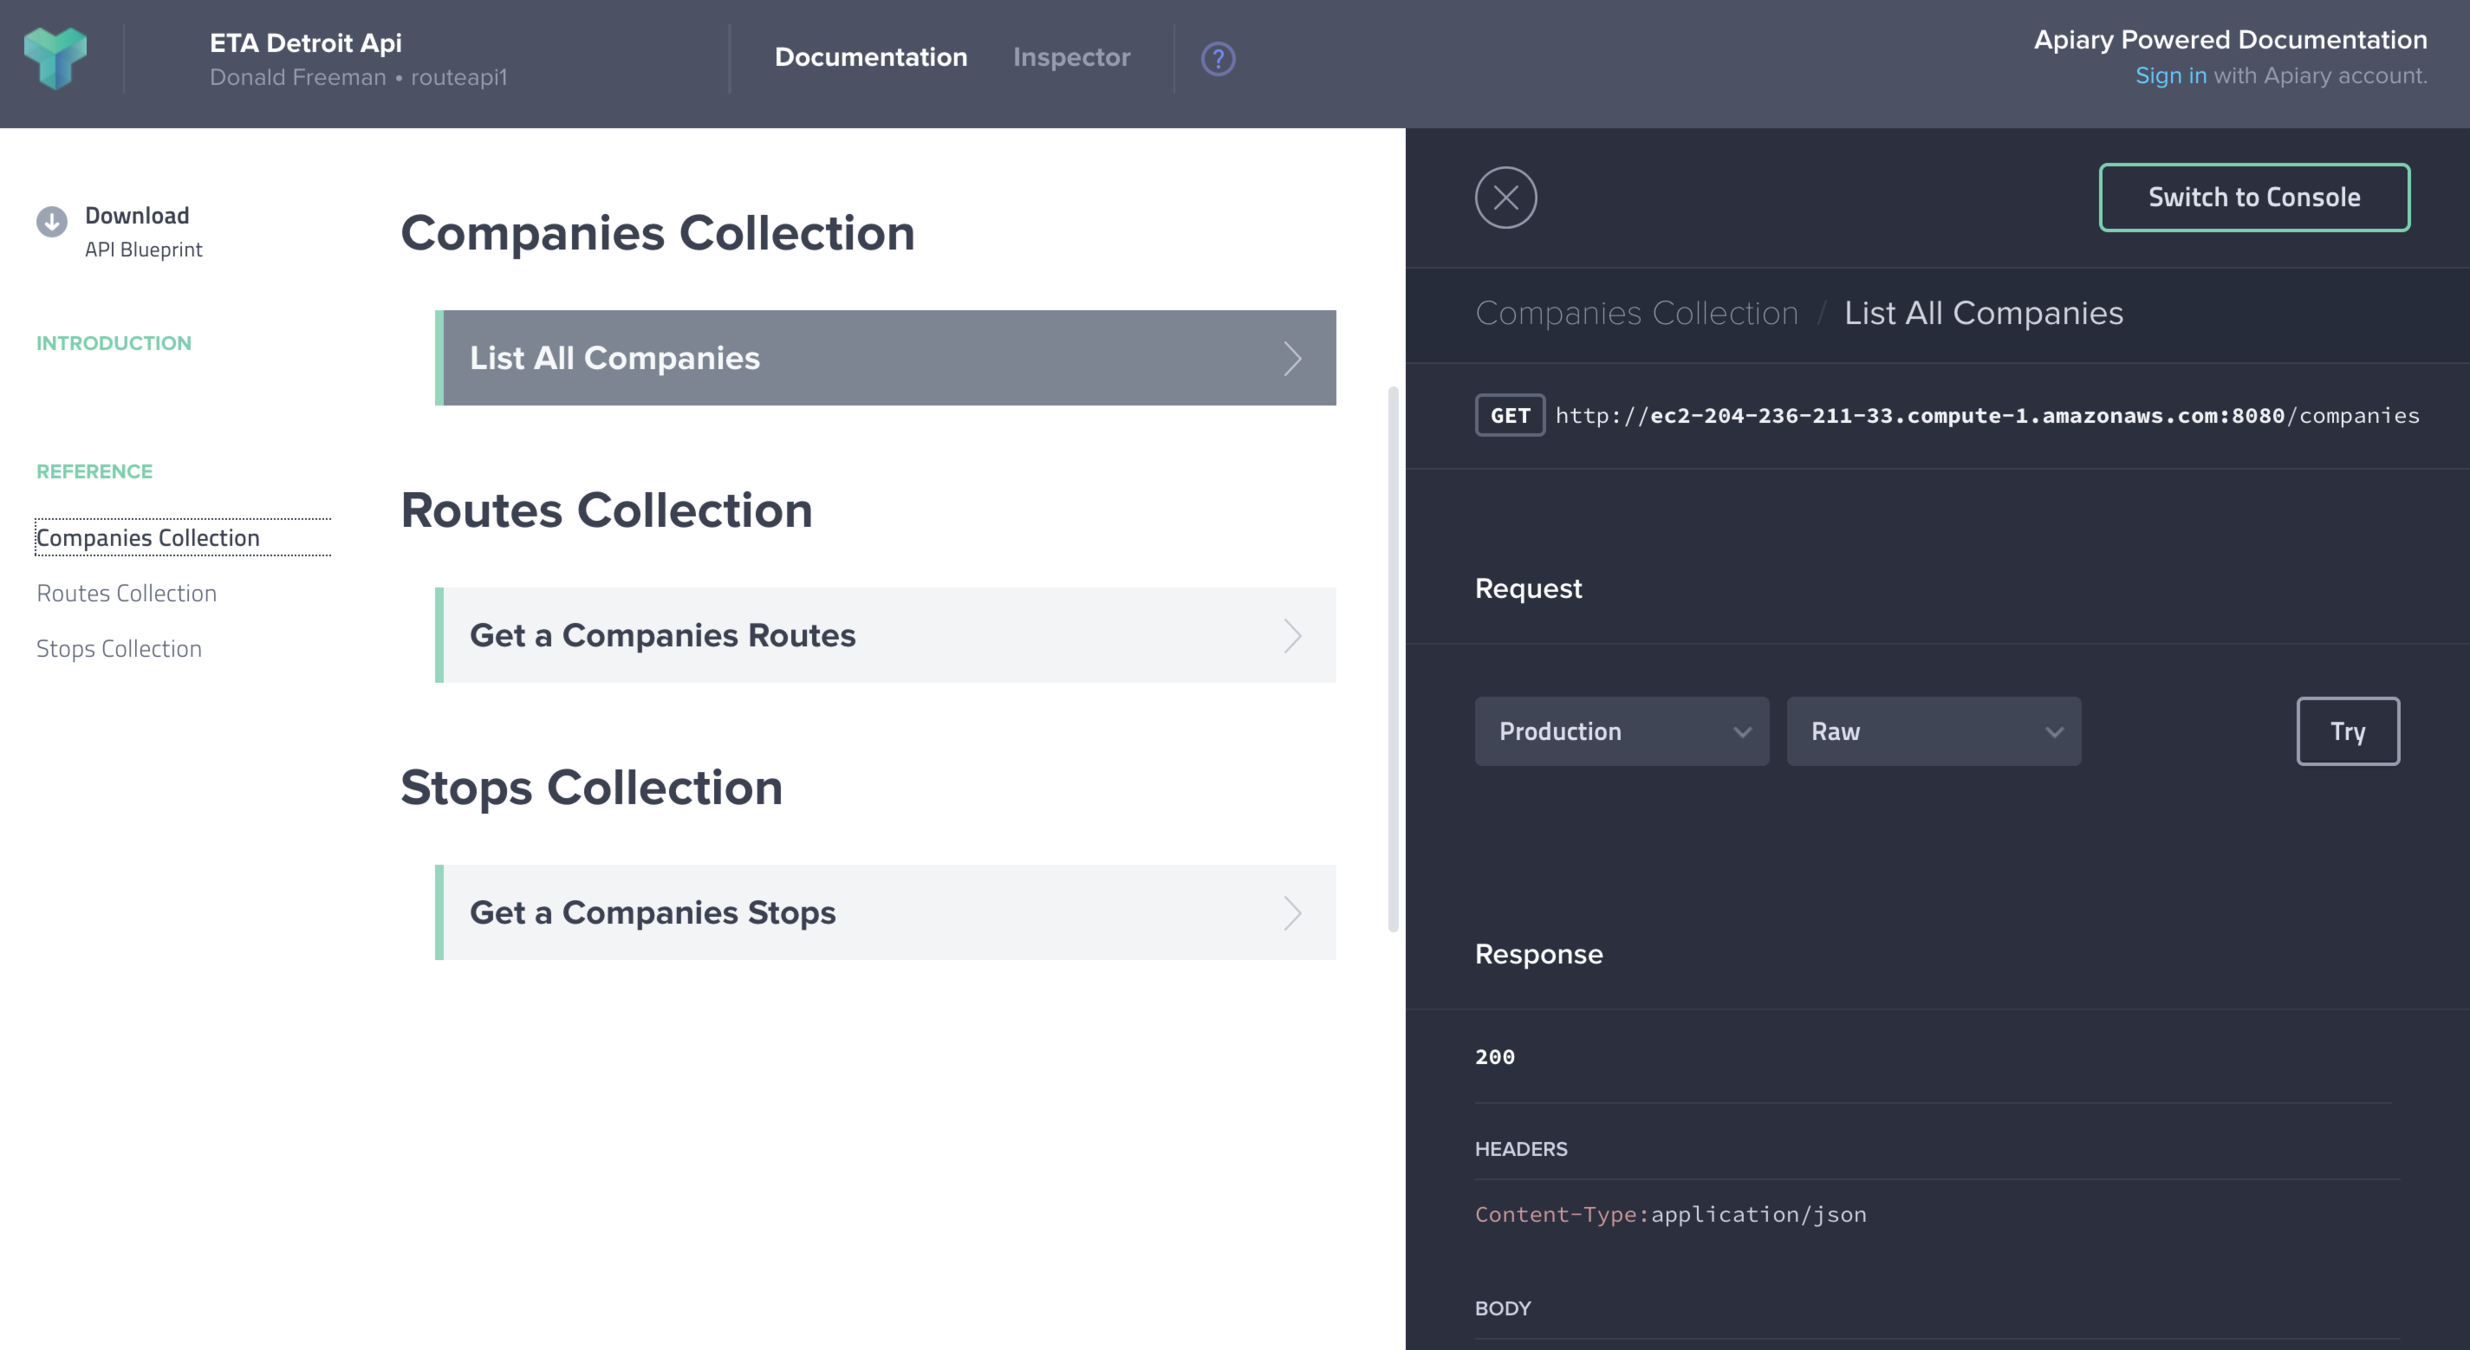
LAB 3 - Install POSTMAN
1. Download Postman from http://getpostman.com
2. Run Postman
3. Import the ETAJson.postman_collection.json
4. Run the tests
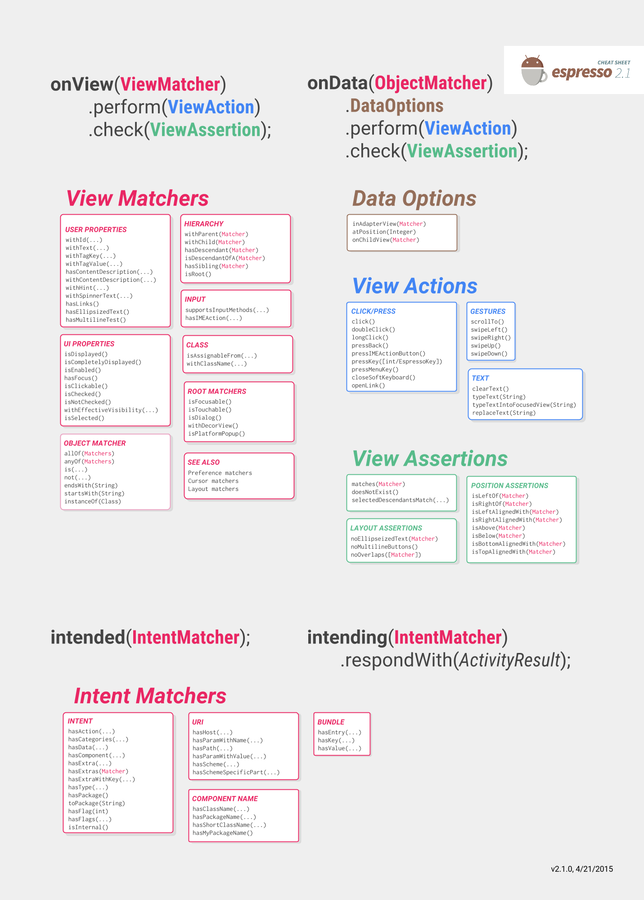
Espresso
- GUI Testing
- OnView
- OnData
- gradlew connectedCheck
@RunWith(AndroidJUnit4.class)
@LargeTest
public class MainActivityTest {
@Rule
public ActivityTestRule<MainActivity> activityTestRule
= new ActivityTestRule<> (MainActivity.class);
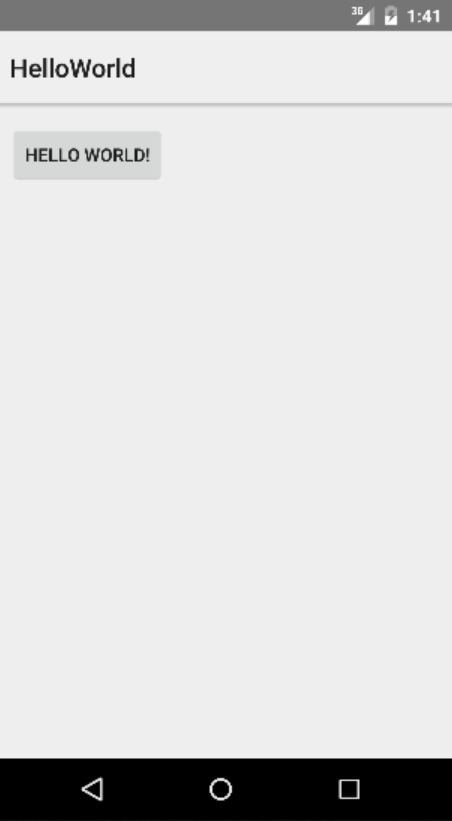
@Test
public void helloWorldTest() {
onView(withId(R.id.hello_world))
.check(matches(withText(R.string.hello_world)));
}
}@Test
public void helloWorldButtonTest(){
onView(withId(R.id.button))
.perform(click())
.check(matches(isEnabled()));
}
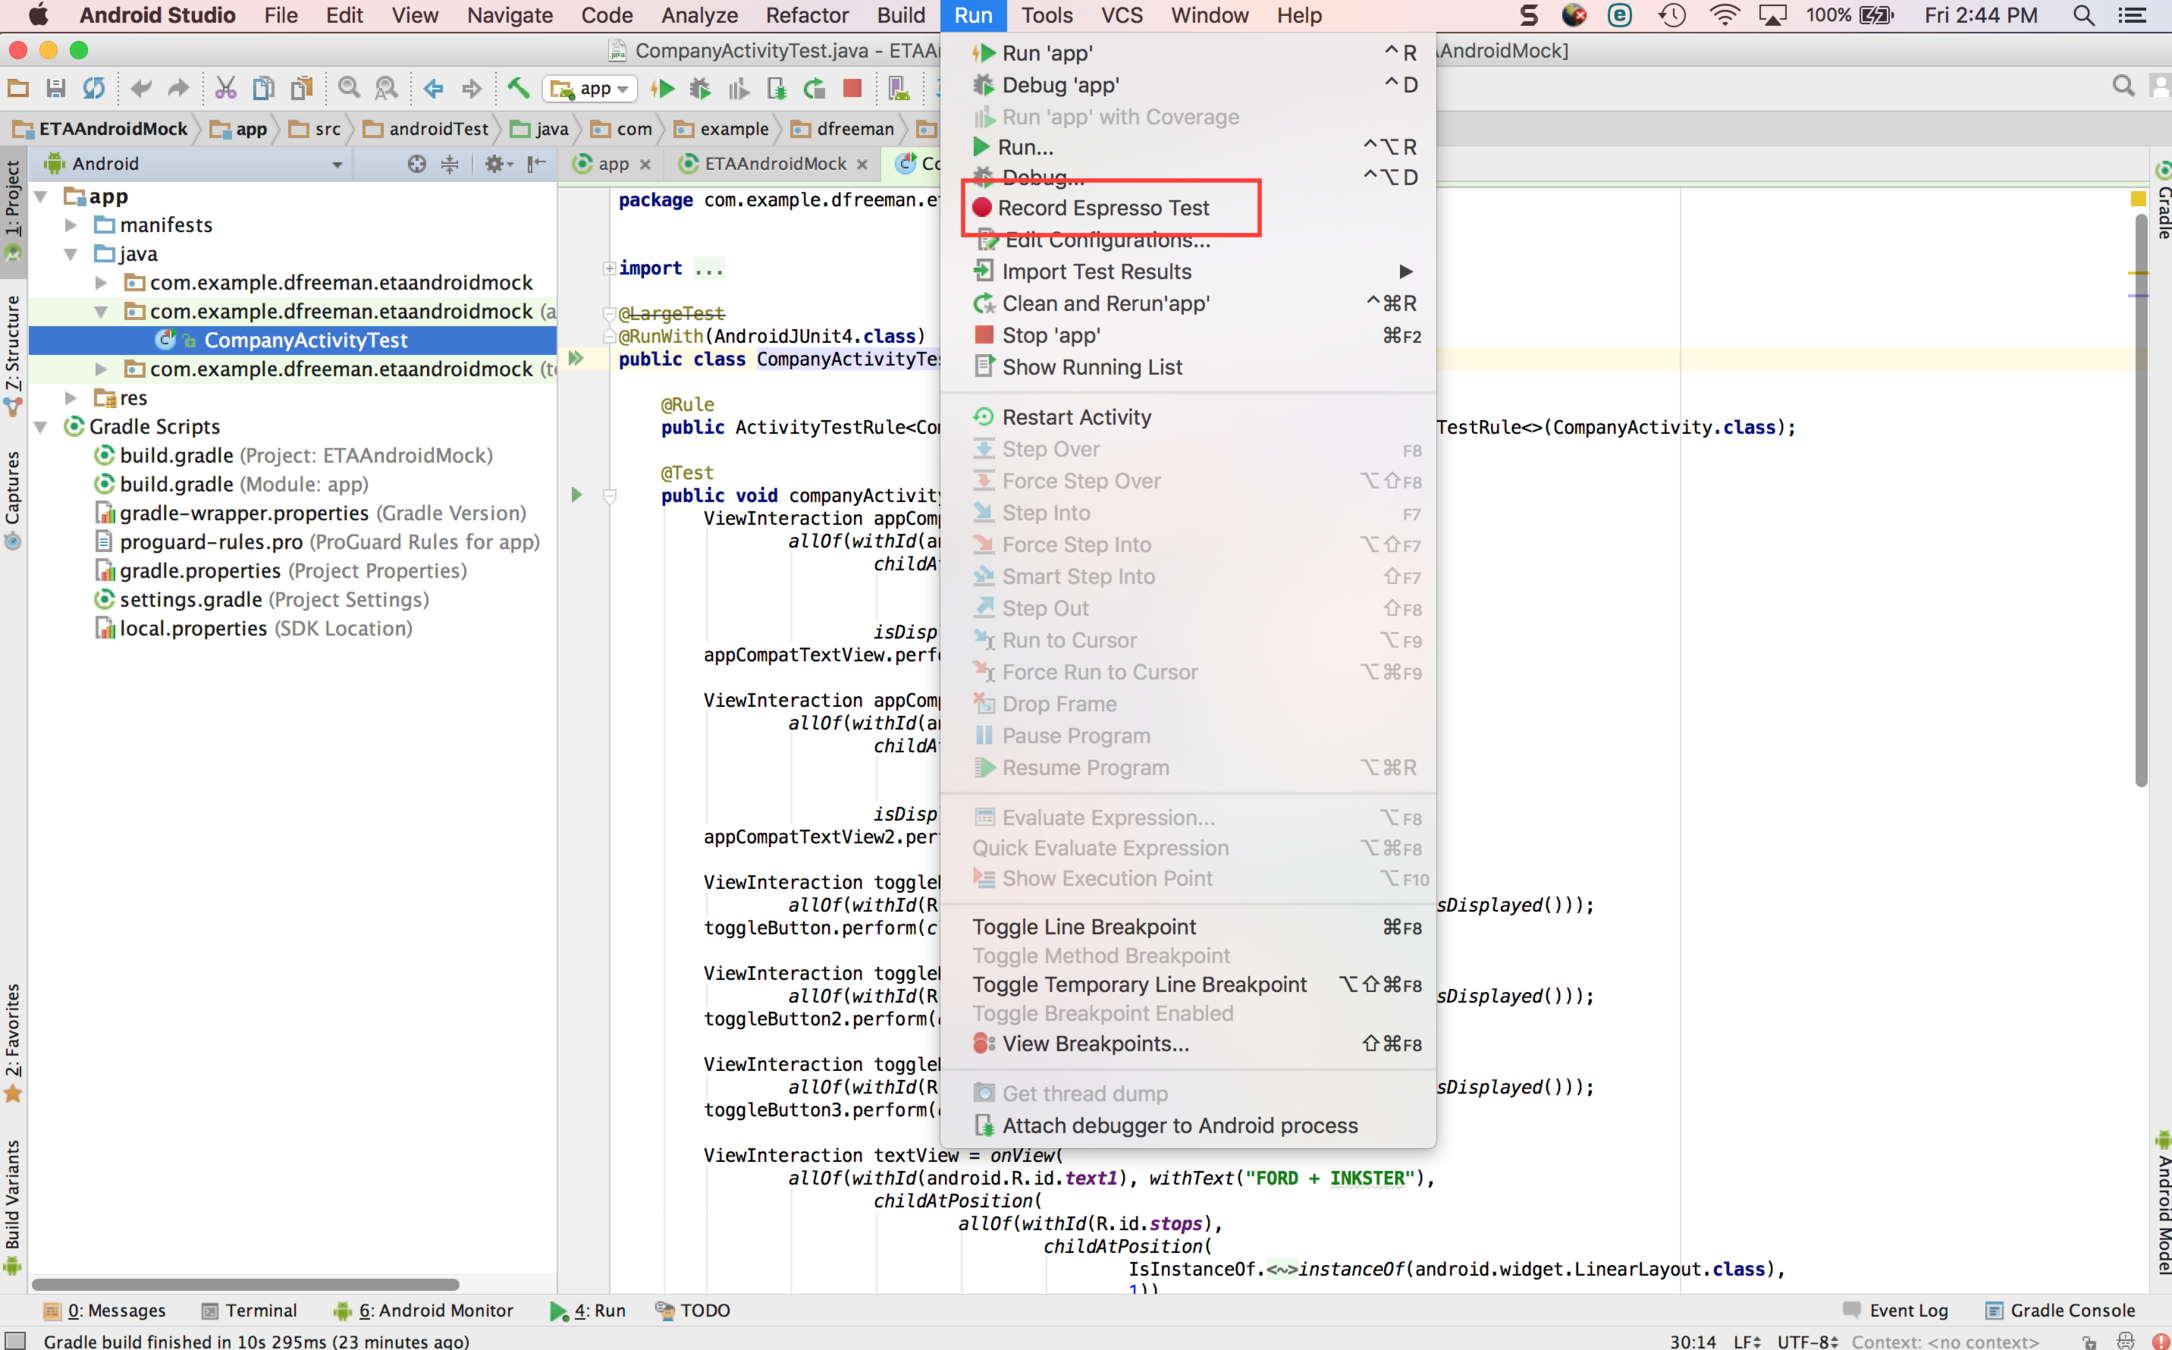
LAB 4 - RECORD ESPRESSO
MORE TOOLS - BUT WHY??
- F(ast)
- I(solated)
- R(epeatable)
- S(elf-verifying)
- T(imely) i.e. TDD not TAD

MockiTO TEMPLATE
    @Test
    public void test() throws Exception {

        // Arrange, prepare behavior
        Helper aMock = mock(Helper.class);
        when(aMock.isCalled()).thenReturn(true);

        // Act
        testee.doSomething(aMock);

        // Assert - verify interactions
        verify(aMock).isCalled();

    }
when(methodIsCalled).thenReturn(aValue);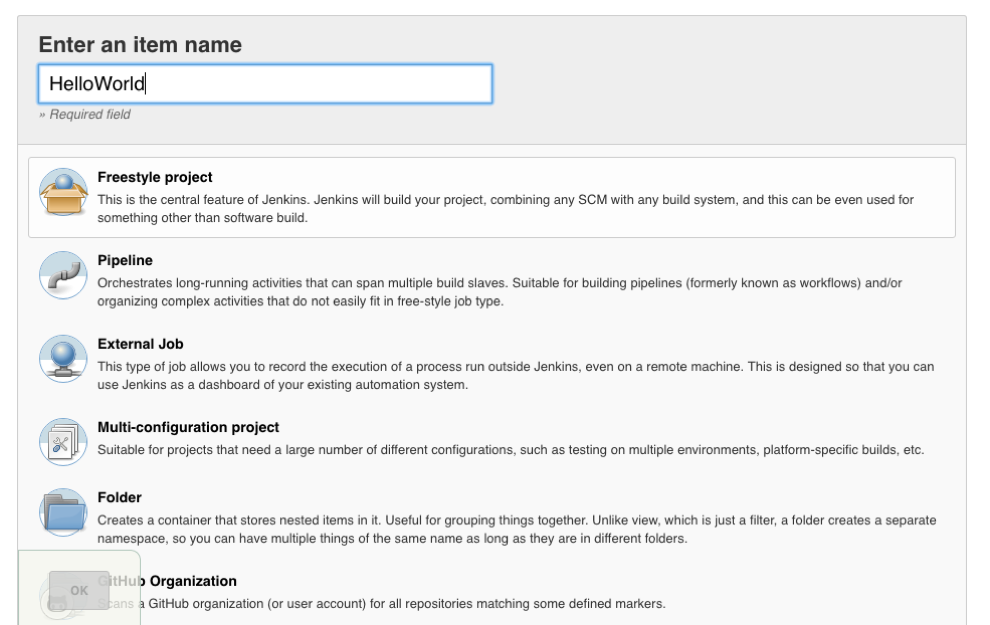

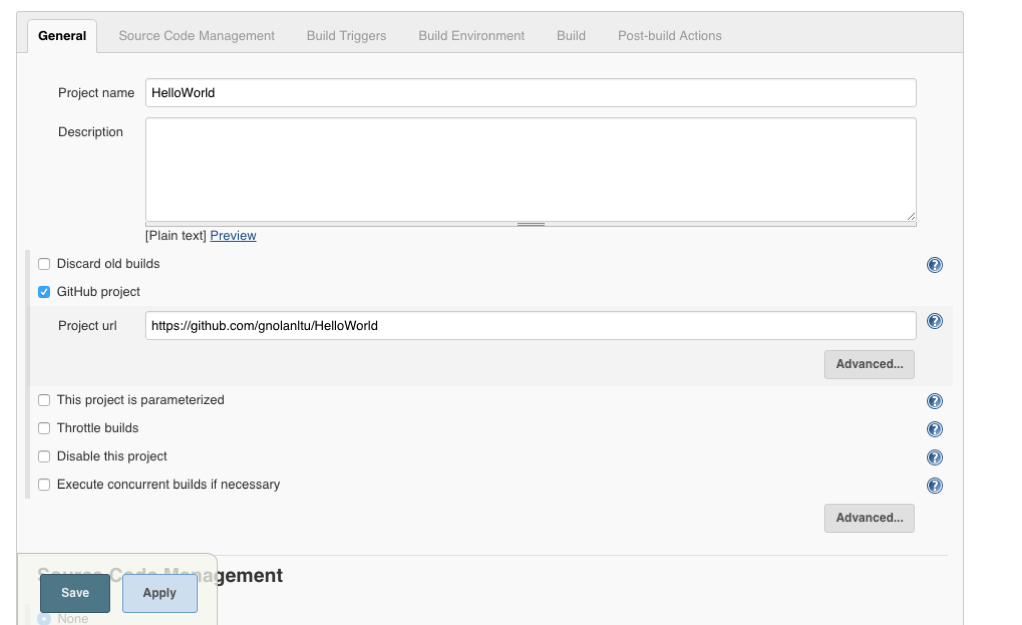
LAB 5 - Hello WOrld Jenkins
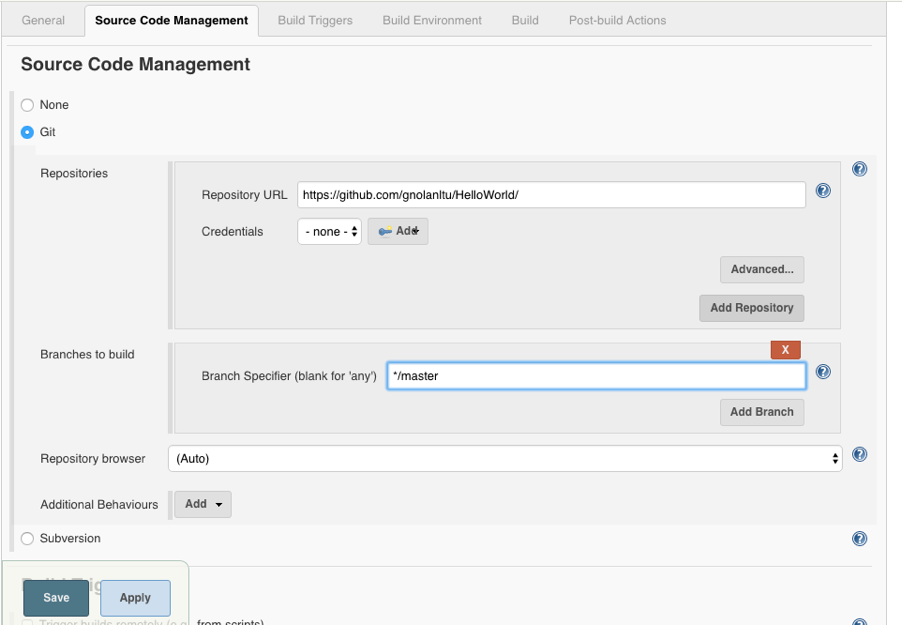
LAB 5 - Hello WOrld Jenkins
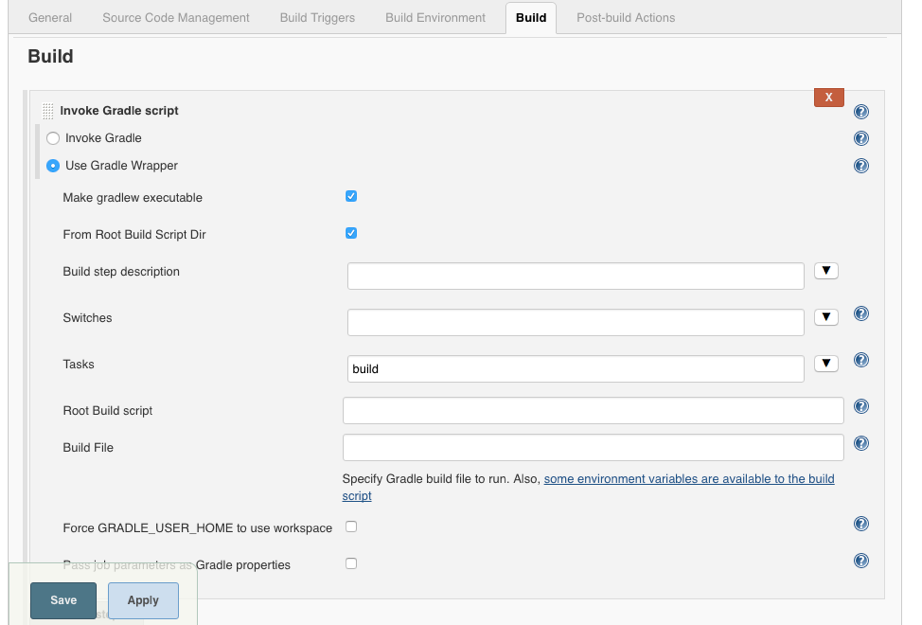
LAB 5 - Hello WOrld Jenkins
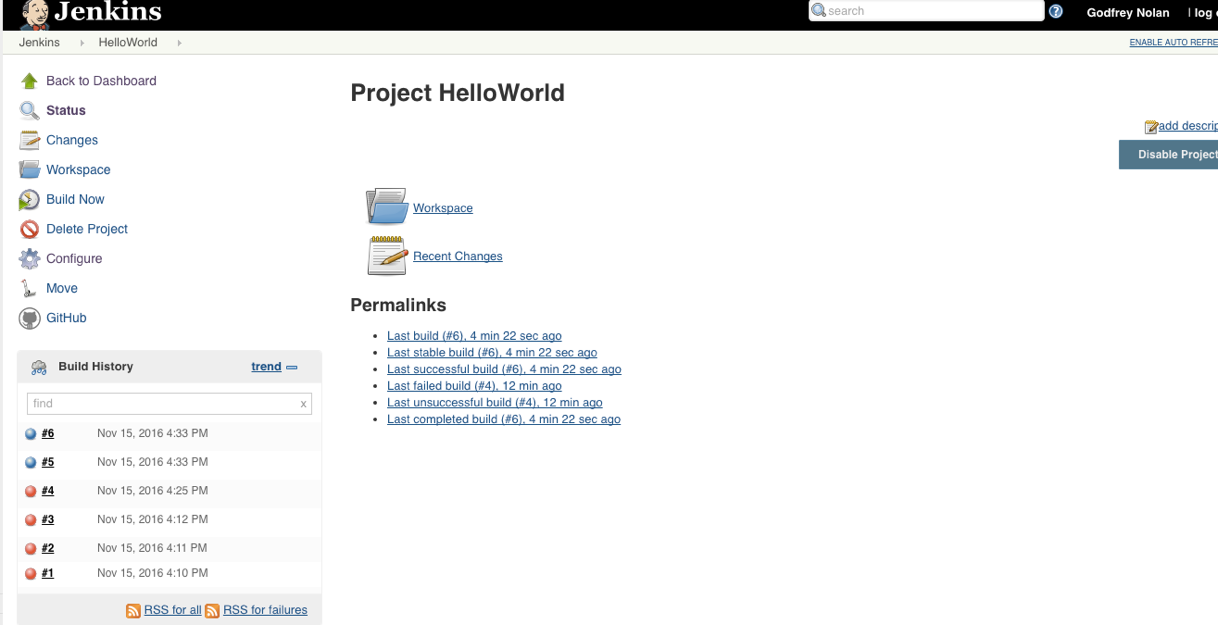
LAB 5 - Hello WOrld Jenkins

LAB 5 - Hello WOrld Jenkins
TROUBLE SHOOTING
- run gradlew build from the command line
- Add sdk.dir to local.properties
-
sdk.dir=/Users/Shared/Jenkins/Library/Android/sdk

LAB 6 - Install NEWMAN
1. Download nodejs from https://nodejs.org/en/download/package-manager
2. Install newman
npm install newman --global;
3. Run the tests
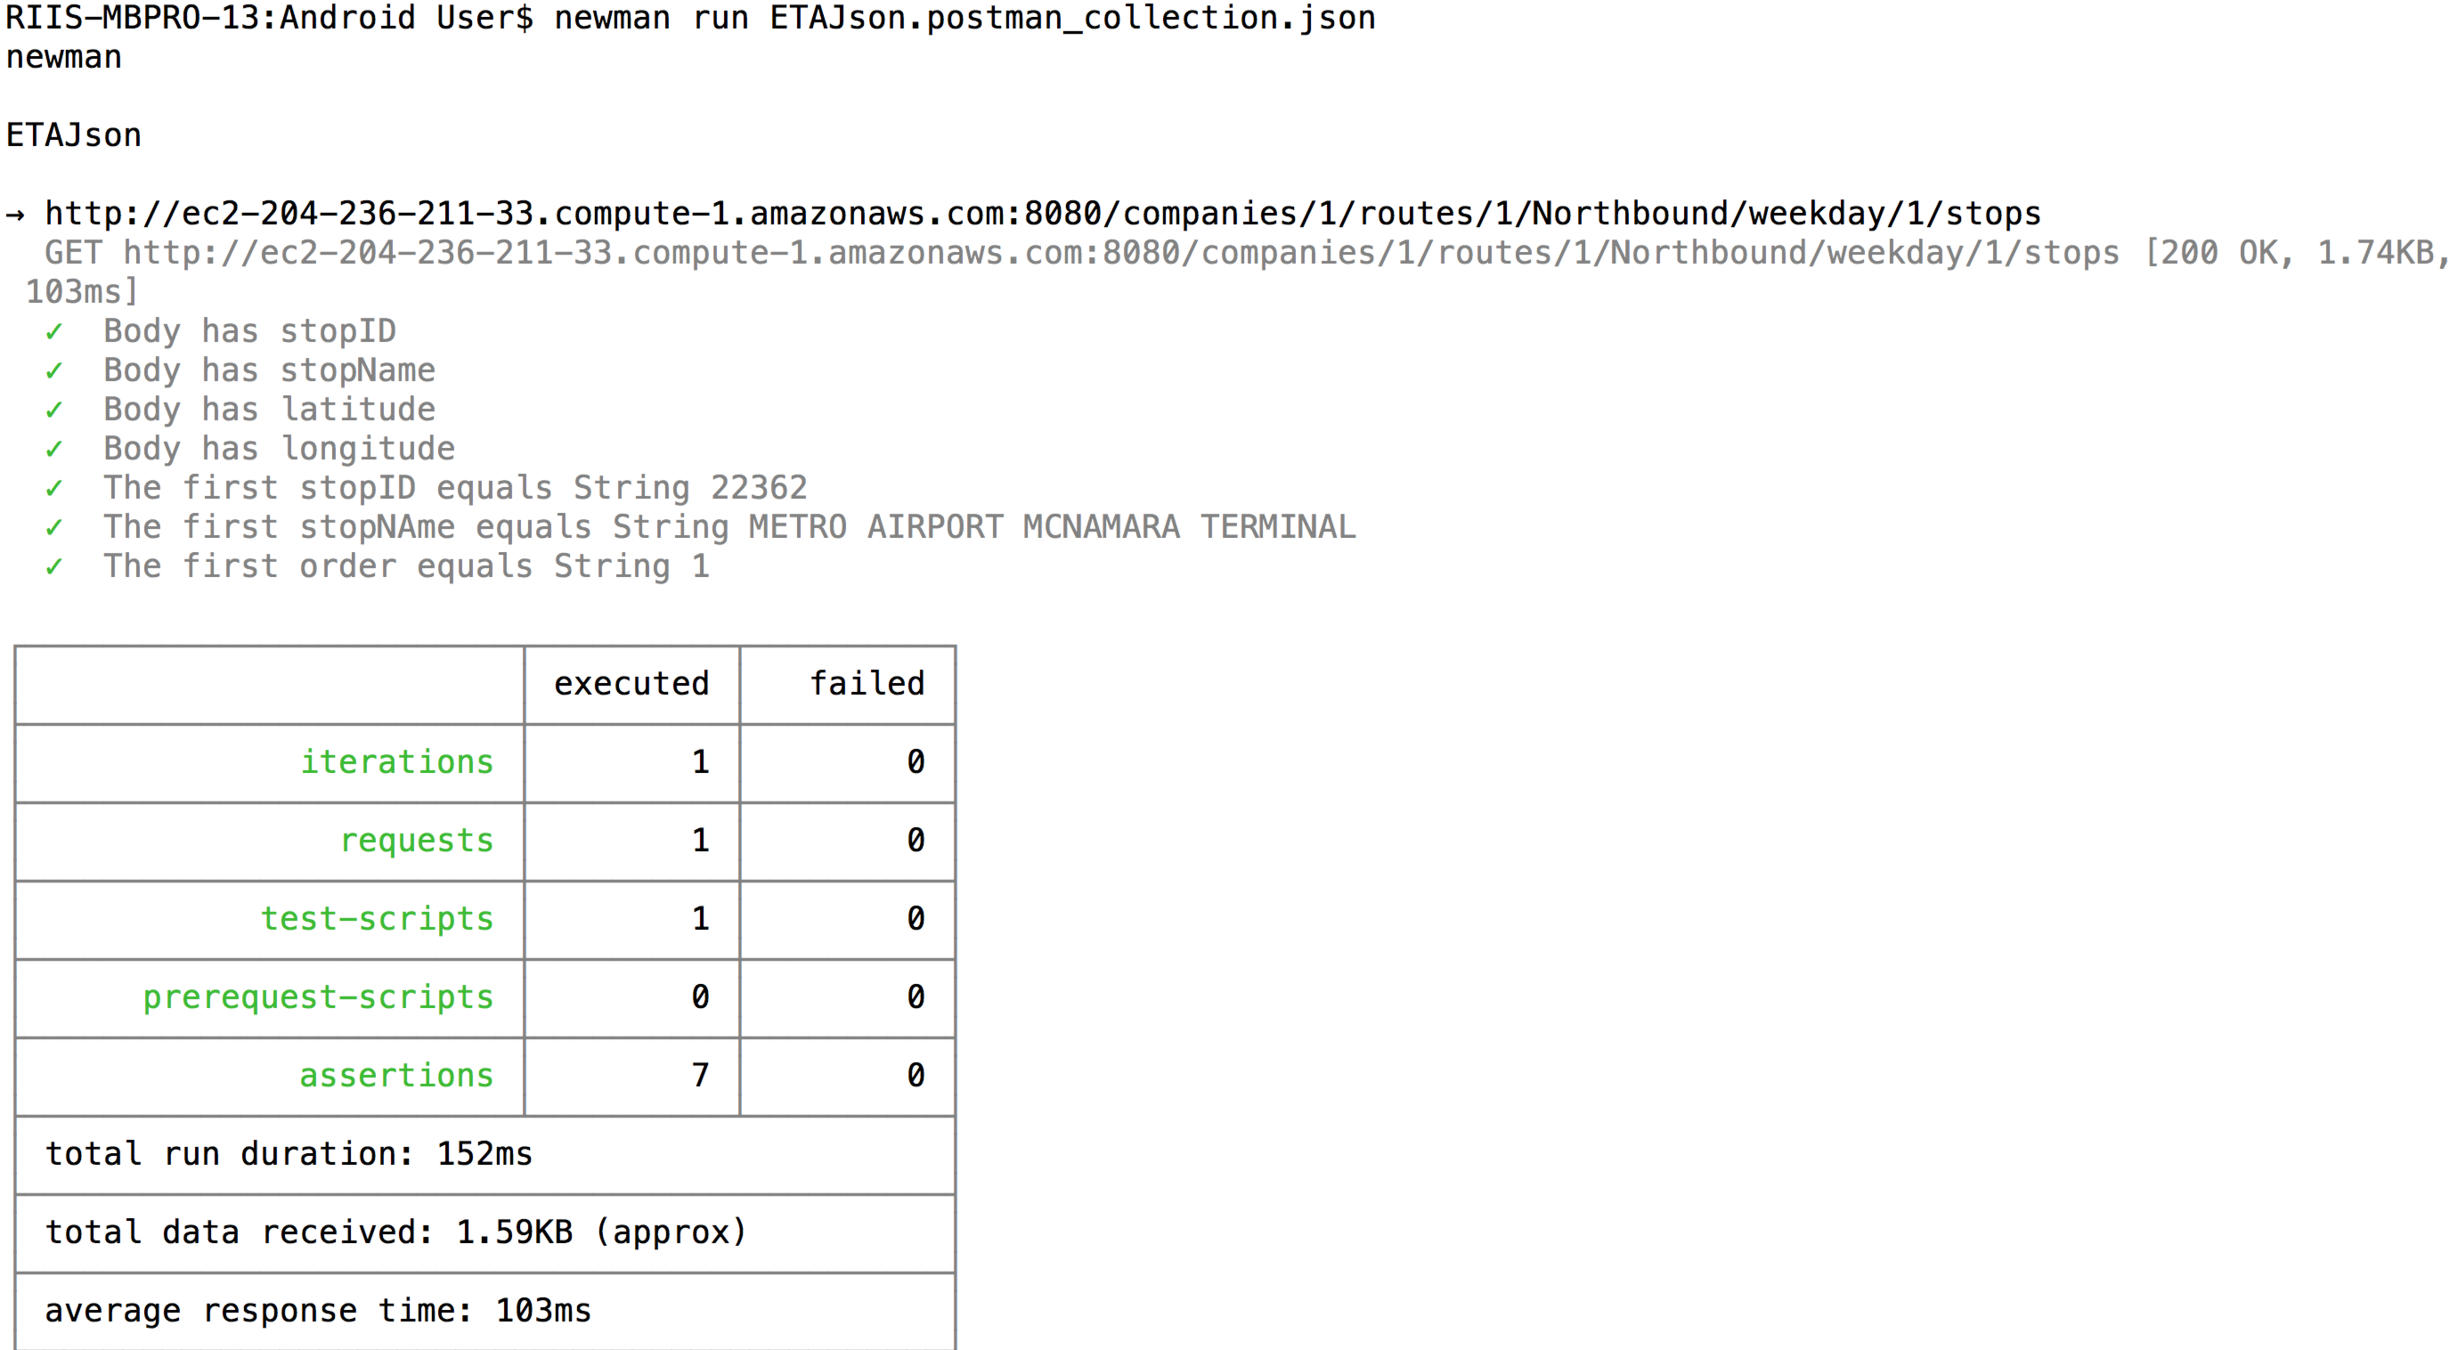
newman run ETAJson.postman_collection.json
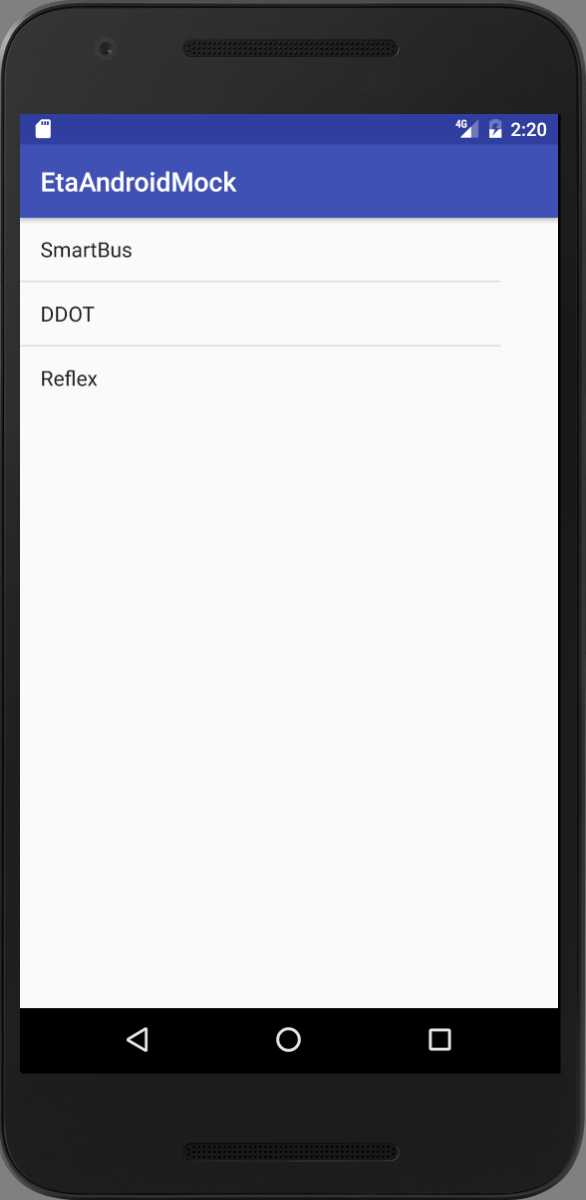
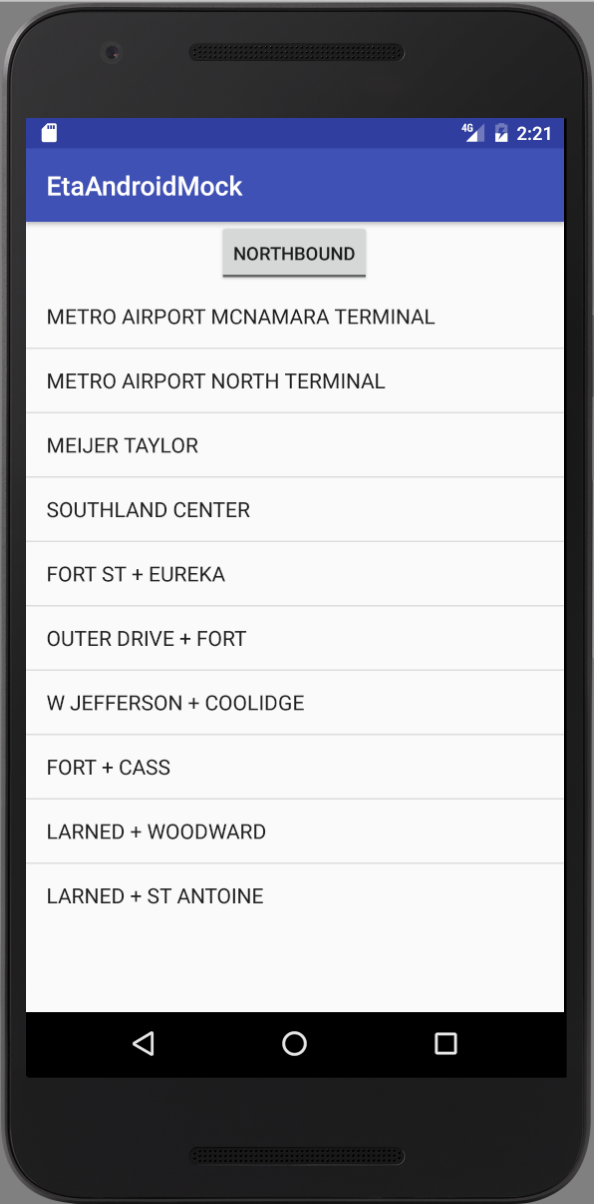
LAB 6 - ETA DETROIT Jenkins
LAB 6 - ETA DETROIT Jenkins
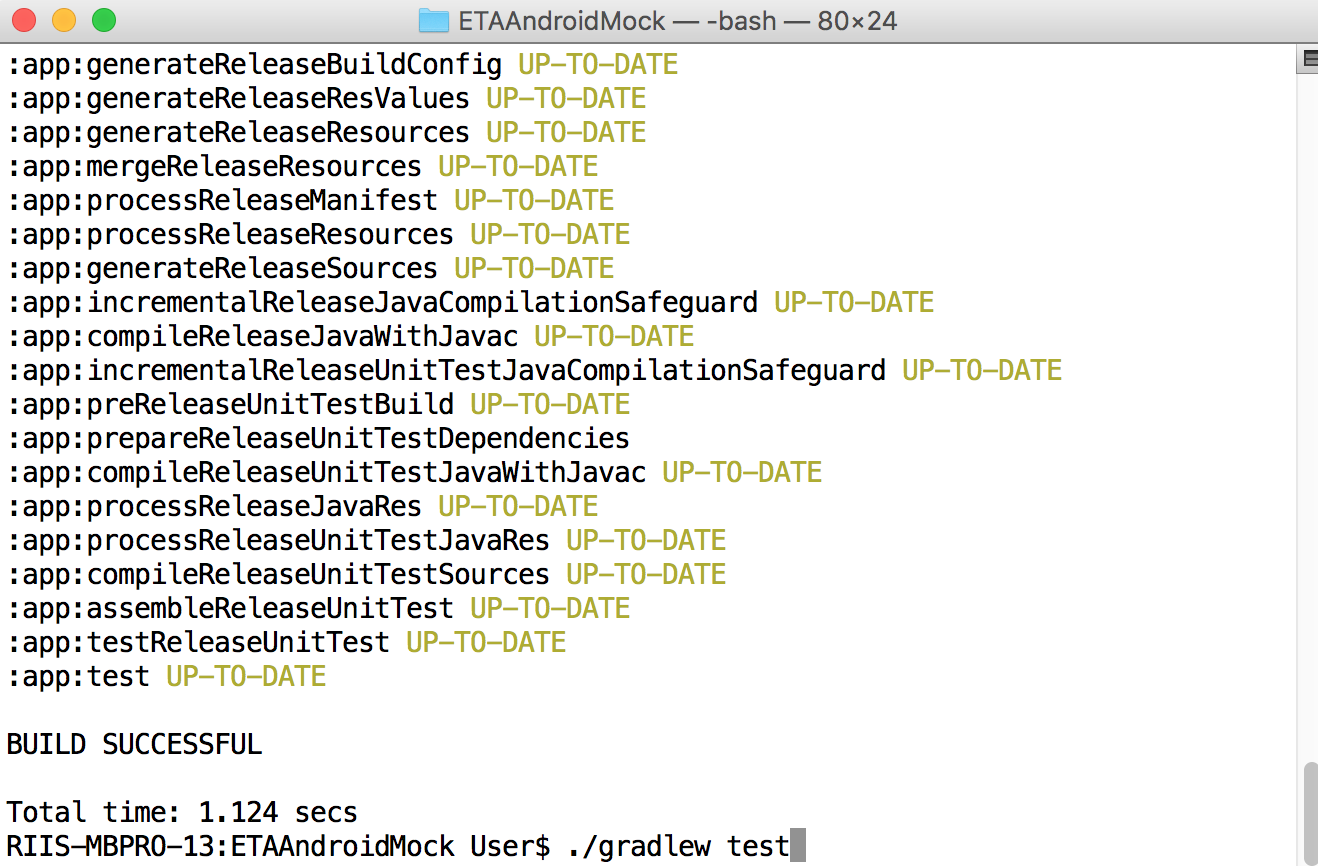
1. Run the unit tests
gradlew test
2. Run the API tests
newman run ETAJson_collection.json
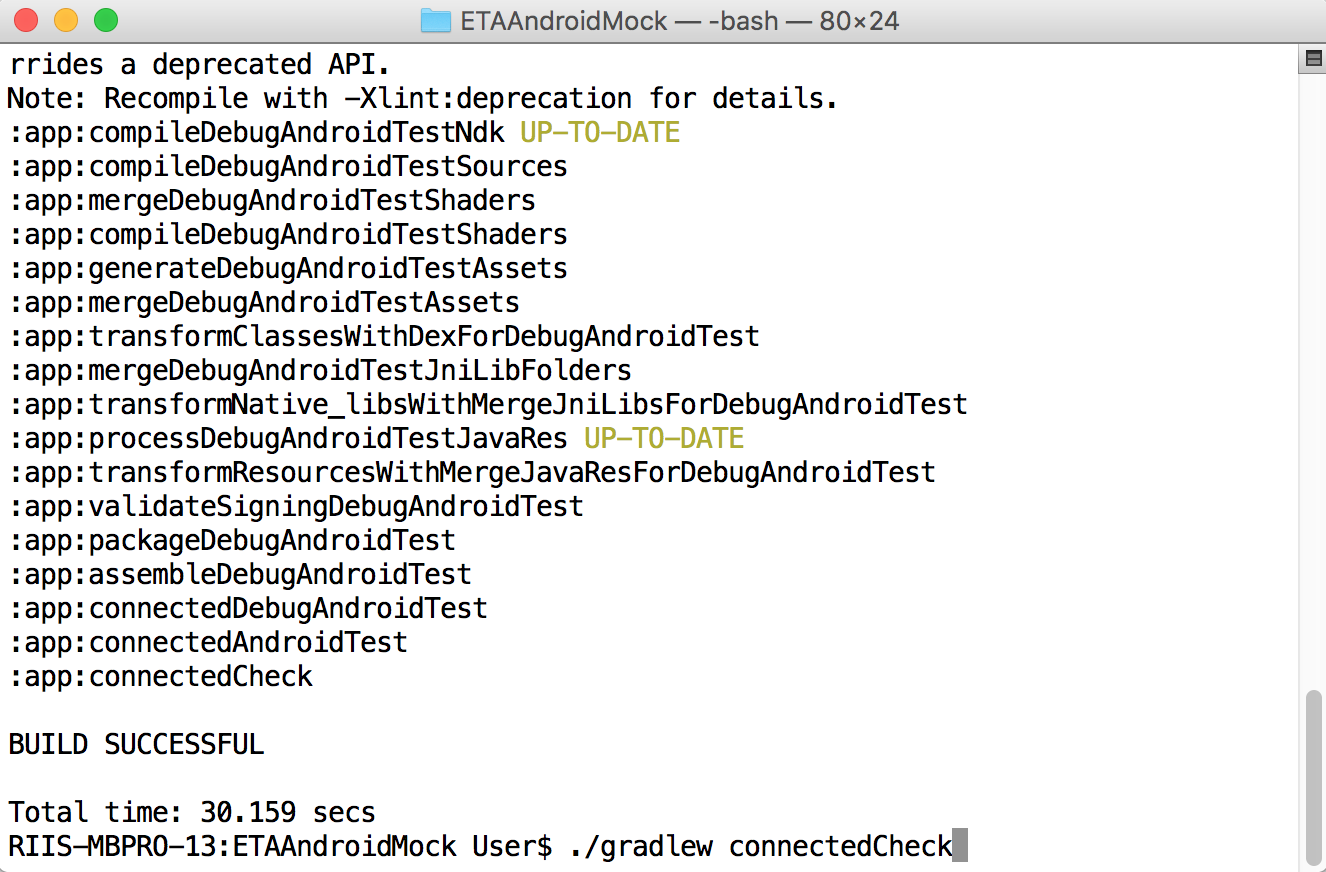
3. Run the UI tests
gradlew connectedCheck
4. Build the app
greadlew build
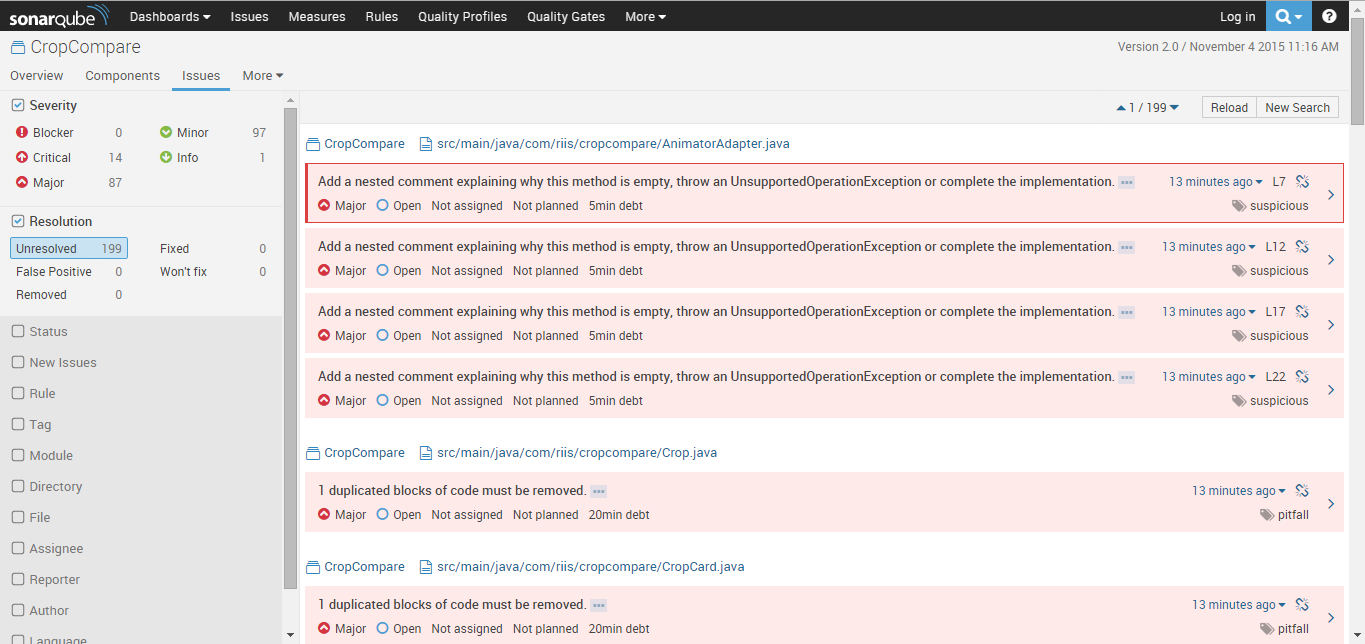
LAB 7 - SONARQUBE
1. Download SonarQube and unzip the SonarQube distribution into /etc/sonarqube
2. Download SonarQube scanner and install in /etc/sonar-scanner
3. Login to SonarQube on http://localhost:9090 with the default System
adminstrator credentials which are admin/admin
4. Go to Setting->Update Center->Available Plugins->Languages->Android, install the plugin
5. Once the plugin is installed go to click on Installed Plugins in the Update Center.
6. Download the SonarQube examples and unzip in /etc/sonar-examples
7. In one terminal on the CI server start the console
sudo /etc/sonarqube/bin/macosx-universal-64/sonar.sh console
8. In another terminal cd /etc/sonar-scanning-examples/sonarqube-scanner and
run the sonar-scanner as follows /etc/sonar-scanner/bin/sonar-scanner
9. Add sonar project properties to your root dir,
e.g. https://github.com/gnolanltu/EtaAndroid/blob/master/sonar-project.properties
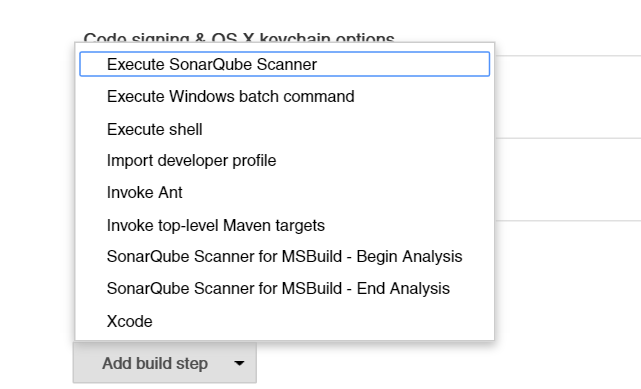
10. Add SonarQube and SonarScanner to Jenkins
LAB 7 - SONARQUBE
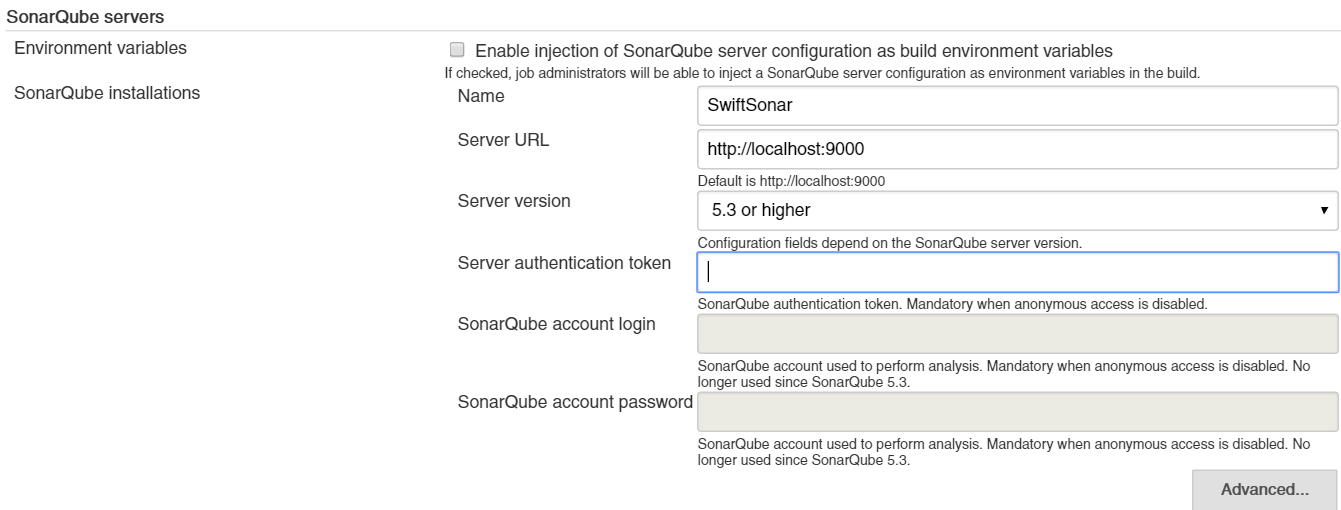
LAB 7 - SONARQUBE
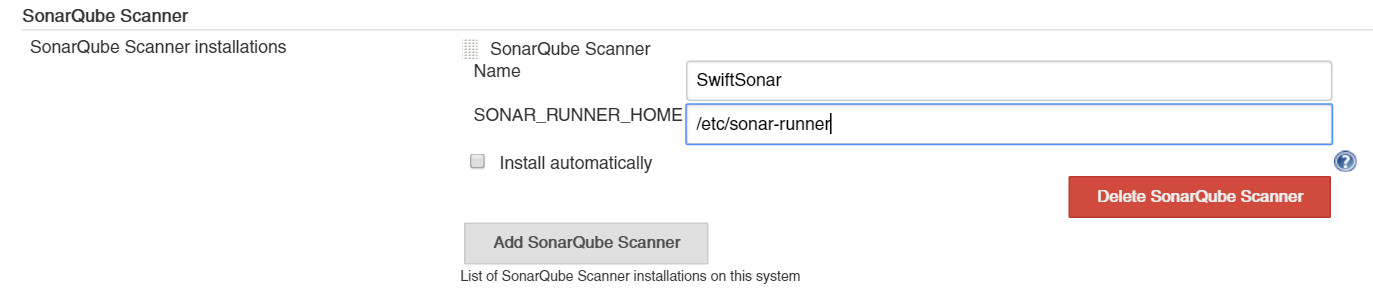
LAB 7 - SONARQUBE
TEST DRIVEN DEVELOPMENT (TDD)
- Unit testing vs TDD
- Why TDD
- Sample app
- Lessons learned
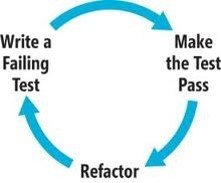
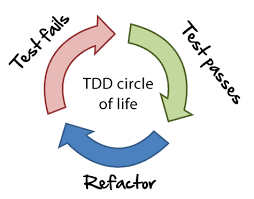
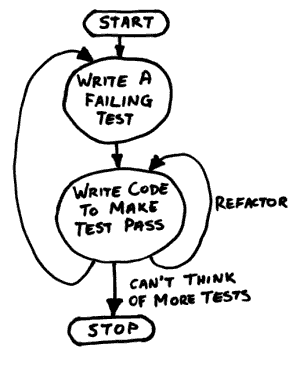
TEST DRIVEN DEVELOPMENT
- Write test first
- See it fail
- Write simplest possible solution
to get test to pass - Refactor
- Wash, Rinse, Repeat
TEST DRIVEN DEVELOPMENT
- Built in regression testing
- Longer life for your codebase
- YAGNI feature development
- Red/Green/Refactor helps
kill procrastination
TDD
You can't TDD w/o unit testing
TDD means writing the tests before the code
TDD is more painless than classic unit testing
Unit TESTING
You can unit test w/o TDD
Unit tests don't mandate when you write the tests
Unit tests are often written at the end of a coding cycle
STEPS
- Introduce Continuous Integration to build code
- Configure android projects for TDD
- Add minimal unit tests based on existing tests, add to CI
- Show team how to create unit tests
- Add testing code coverage metrics to CI, expect 5-10%
- Add Espresso tests
- Unit test new features or sprouts, mock existing objects
- Wrap or ring fence existing code, remove unused code
- Refactor wrapped code to get code coverage to 60-70%
(New refactoring in Android Studio)
CONTACT INFO
godfrey@riis.com
Agile Android Workshop
By godfreynolan


