Agile Swift
Godfrey Nolan
RIIS LLC
Agenda


Agile Testing Benefits
- Catch more mistakes
- Confidently make more changes
- Built in regression testing
- Extend the life of your codebase
- Better predicability & reliability
Agile Swift
Hello World
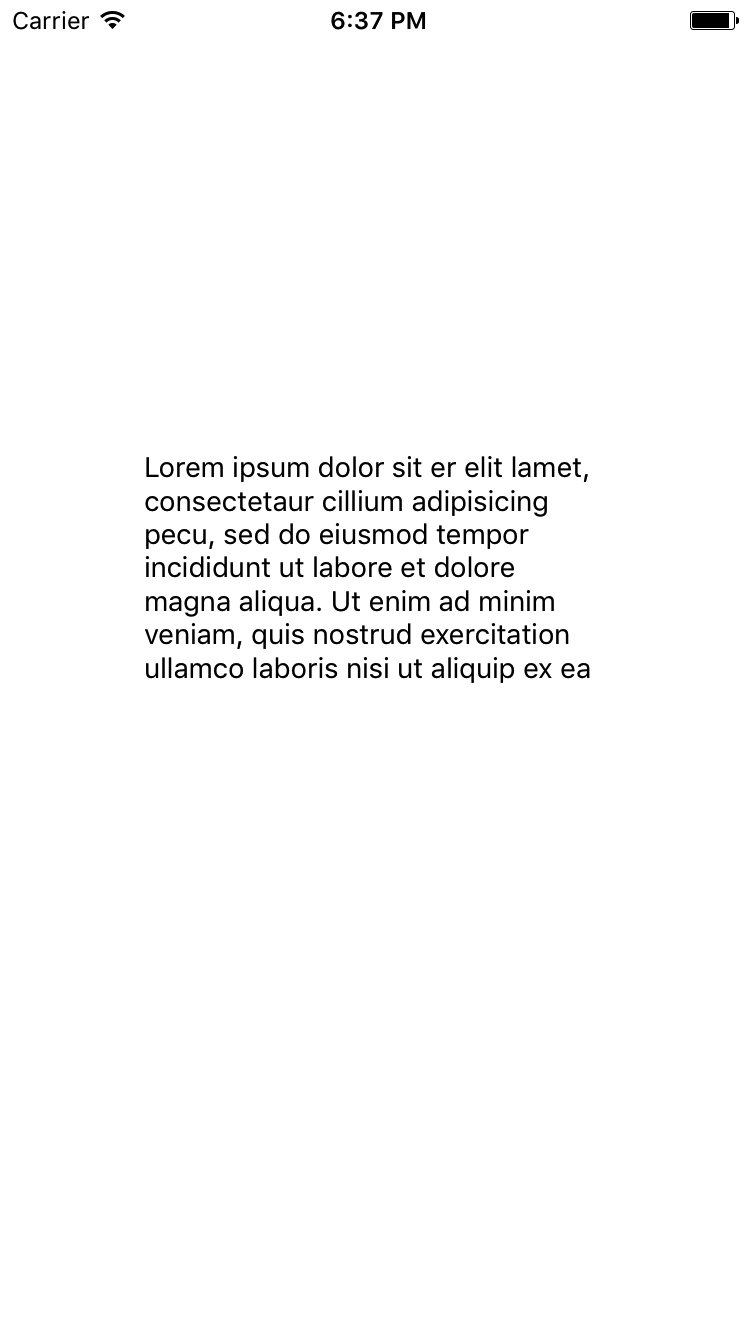
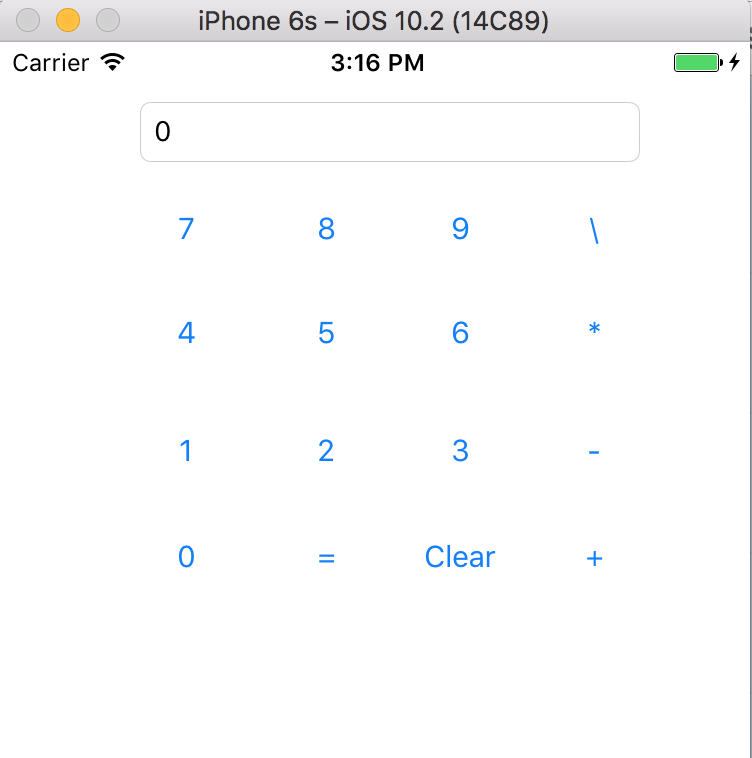
Lab 1 - HelloWorld
1. Open Xcode
2. Make sure Xcode is 8.x
3. Open Main.storyboard
4. Search for TextView in the Object Library
5. Drag over to Storyboard
6. Run
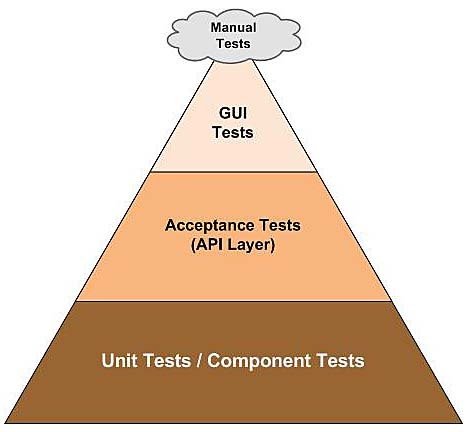
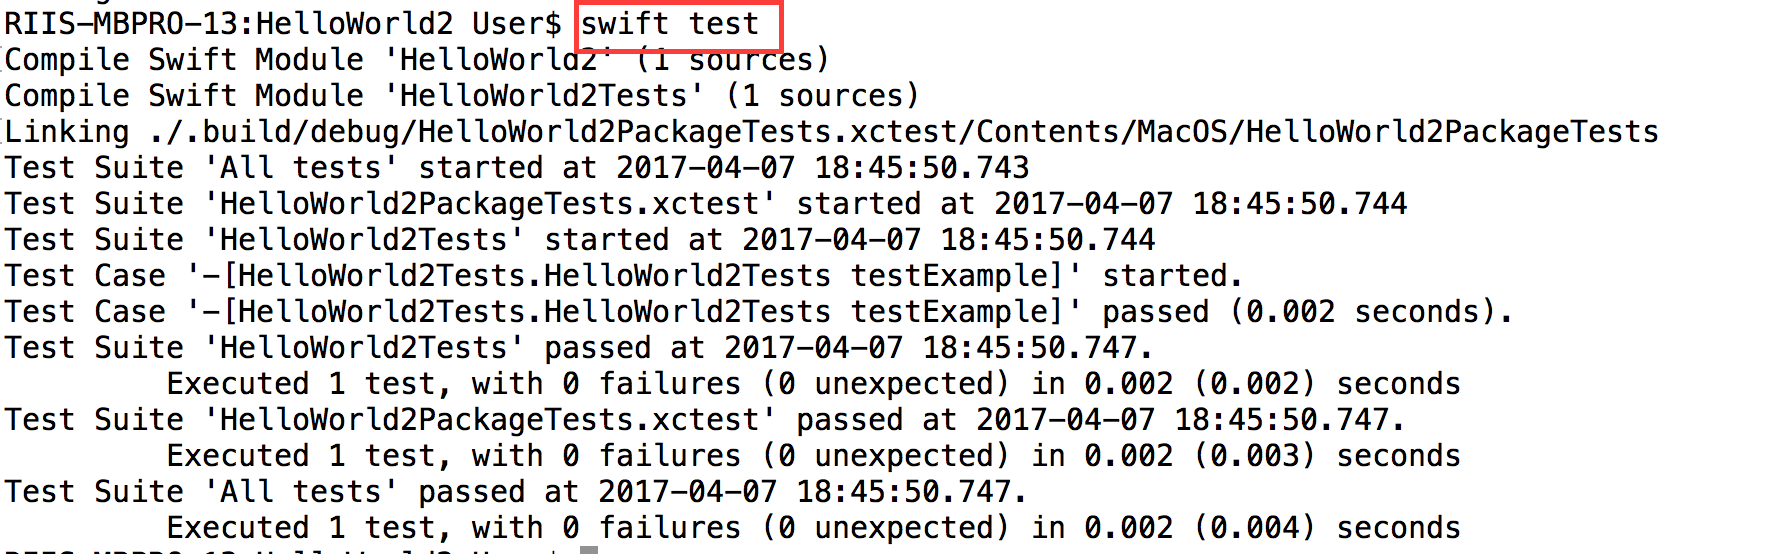
Swift Unit Test - XCTest
Swift Unit Test - XCTest

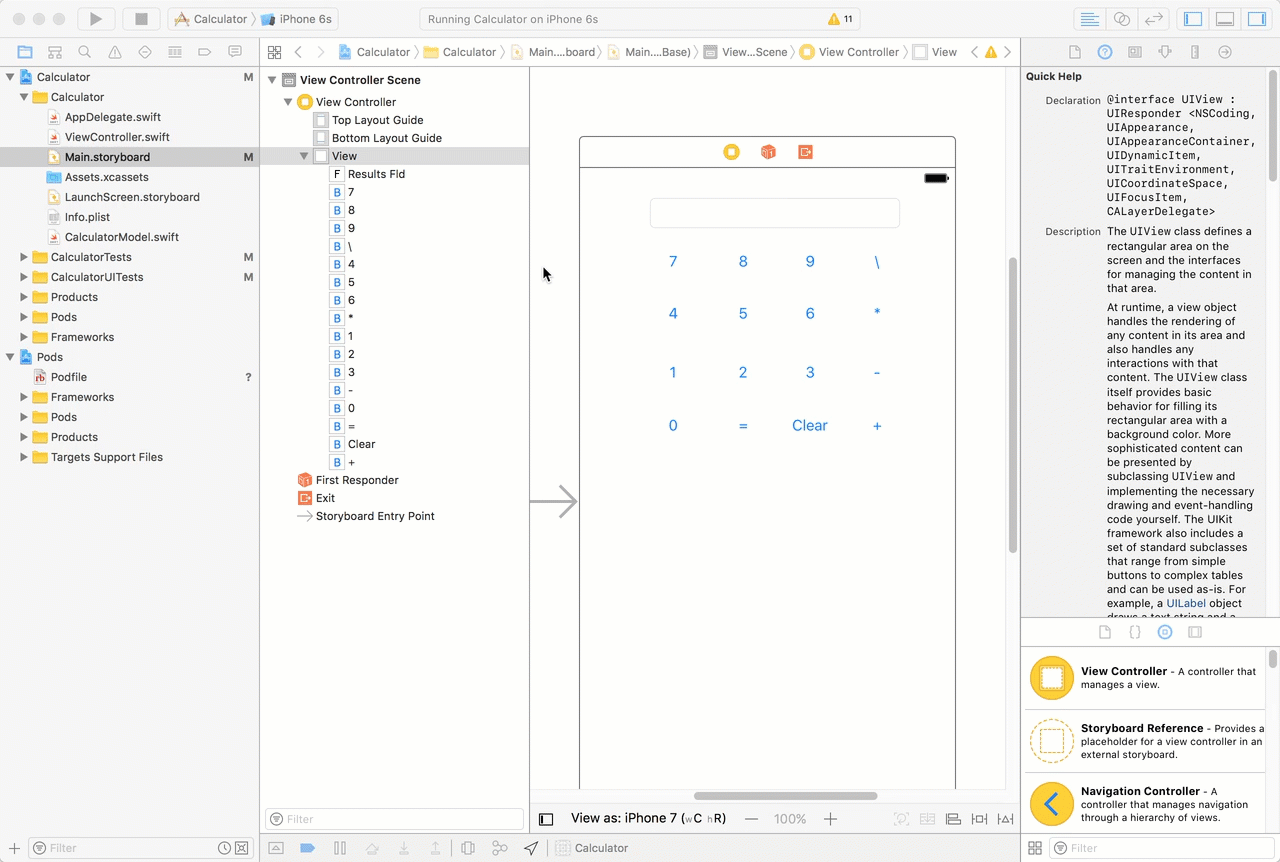
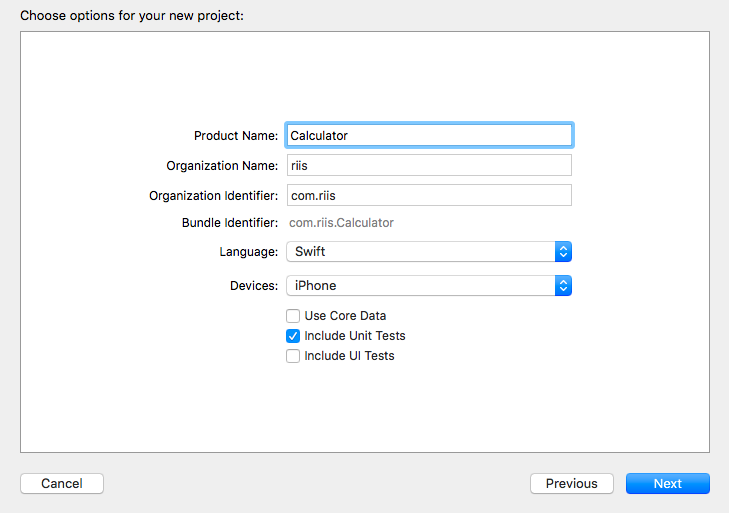
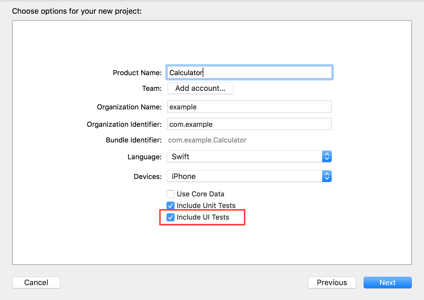
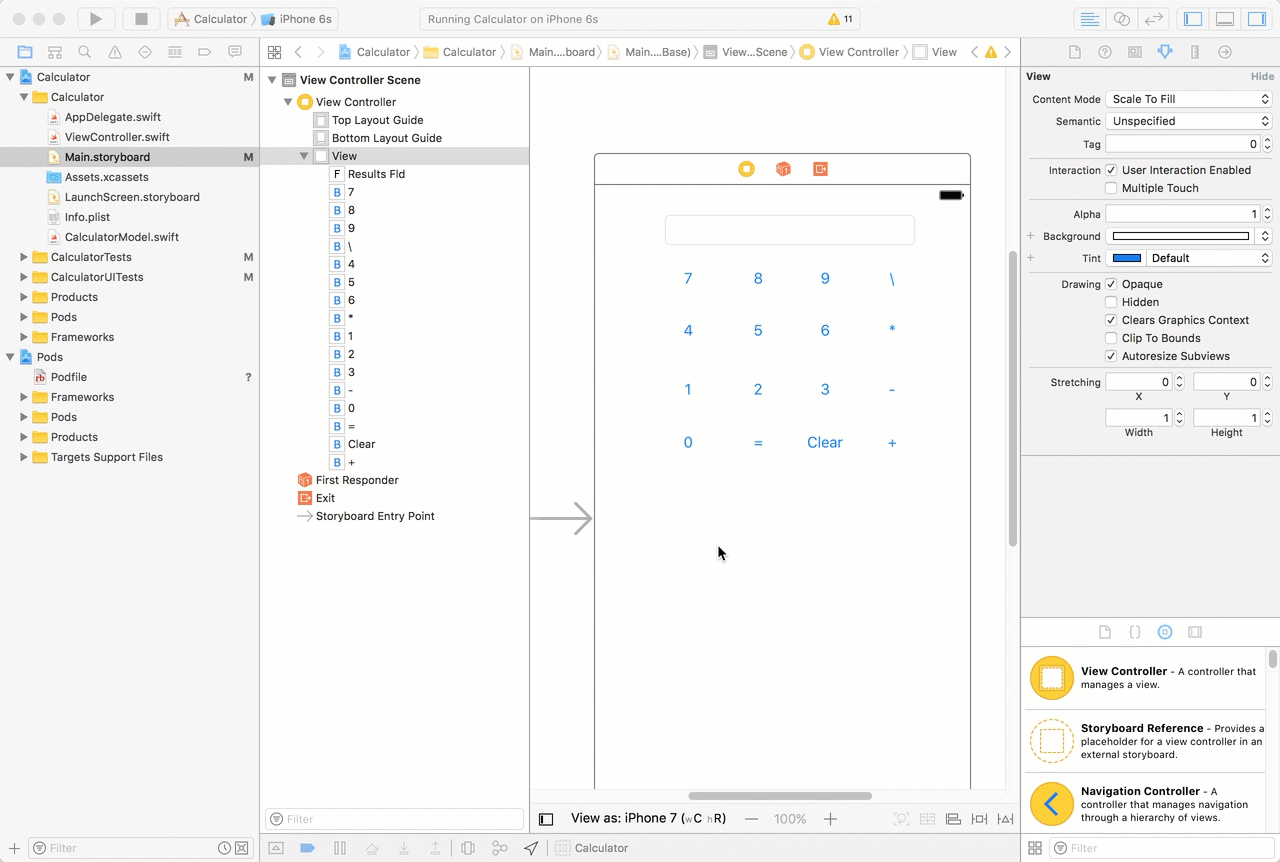
Lab 2 - Calculator
0. Download code from https://github.com/godfreynolan/CodeCraftsman
1. Open Calculator in iOS Folder
2. Click on Calculator Tests
3. Open CalculatorTests.swift
4. Run tests
5. Open Test Navigator
6. Run tests again
7. Open Report Navigator
8. View Logs->All Messages
9. Add more tests to CalculatorTests for sub, mul, div functions
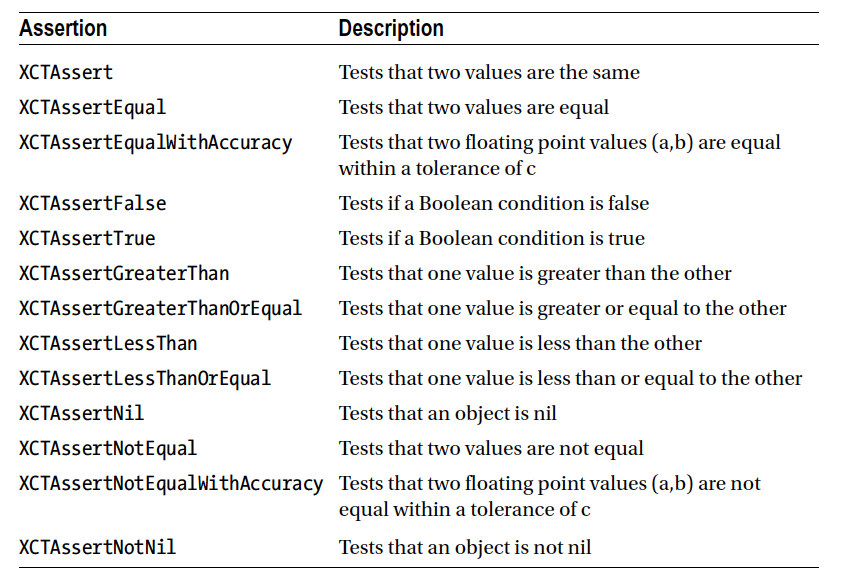
Unit Testing Assertions
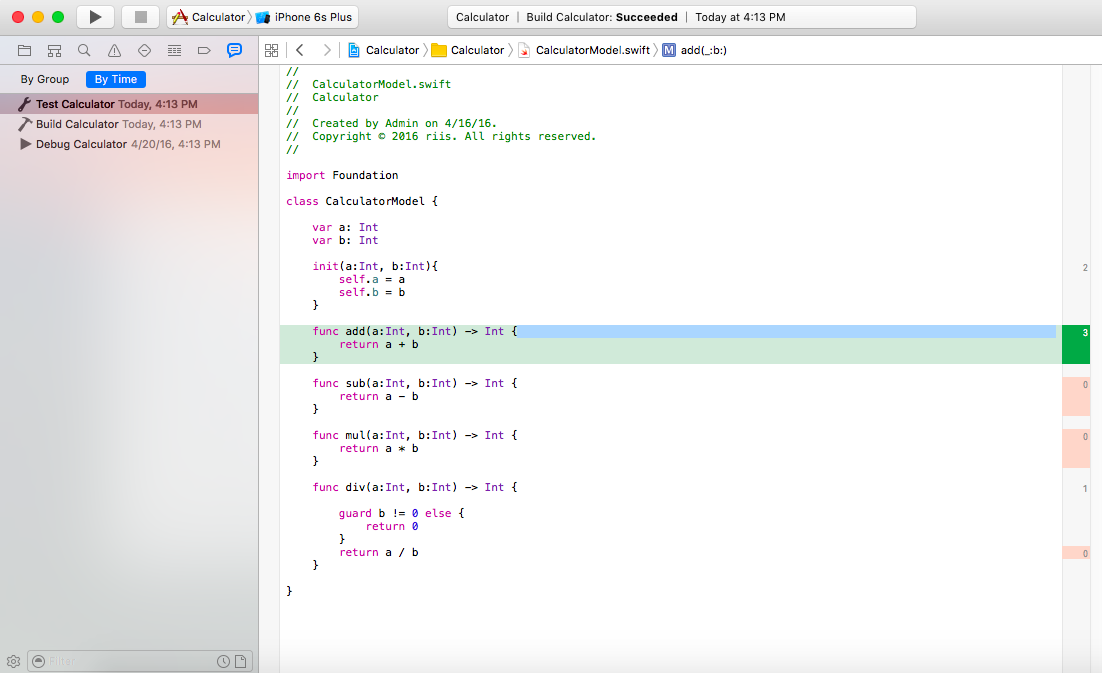
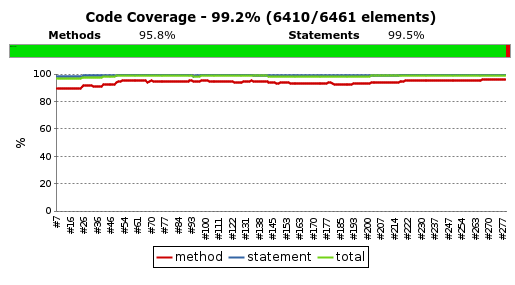
Unit Testing Code Coverage
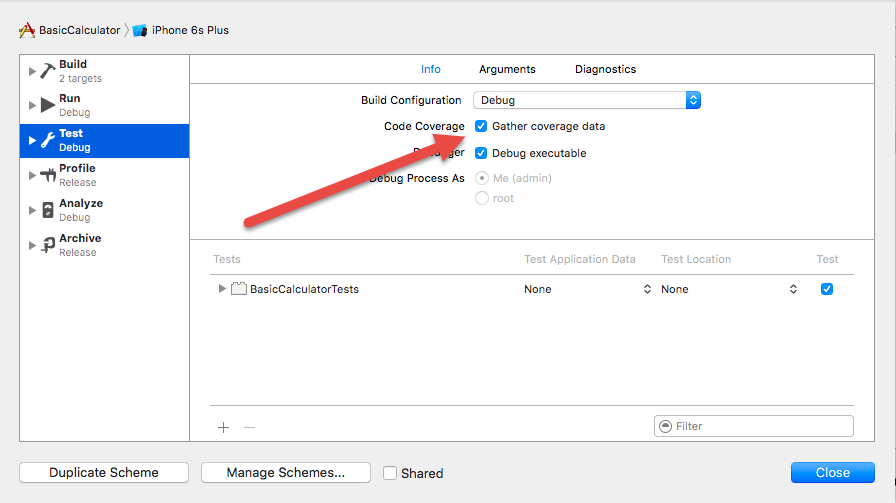
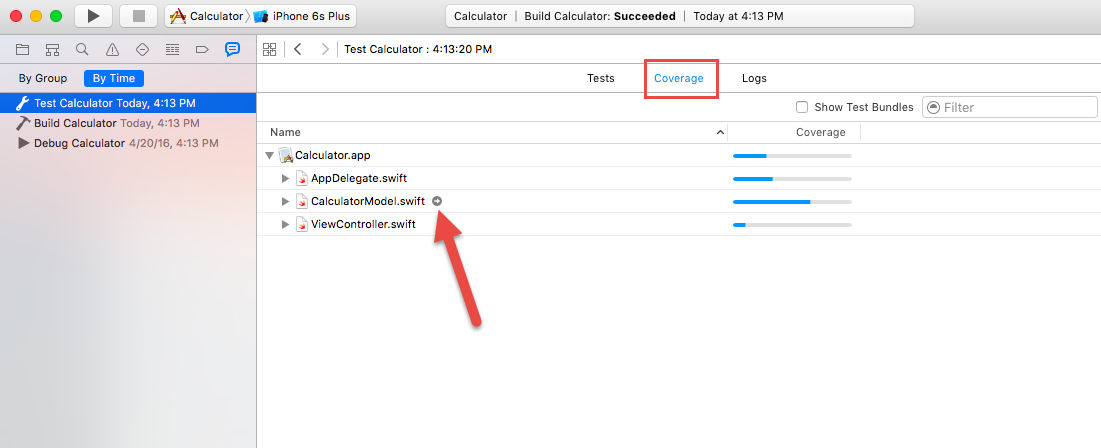
Unit Testing Code Coverage
Code Coverage Lab
1. Open Calculator in iOS Folder
2. Enable Code Coverage
3. Run tests
4. View Code coverage results
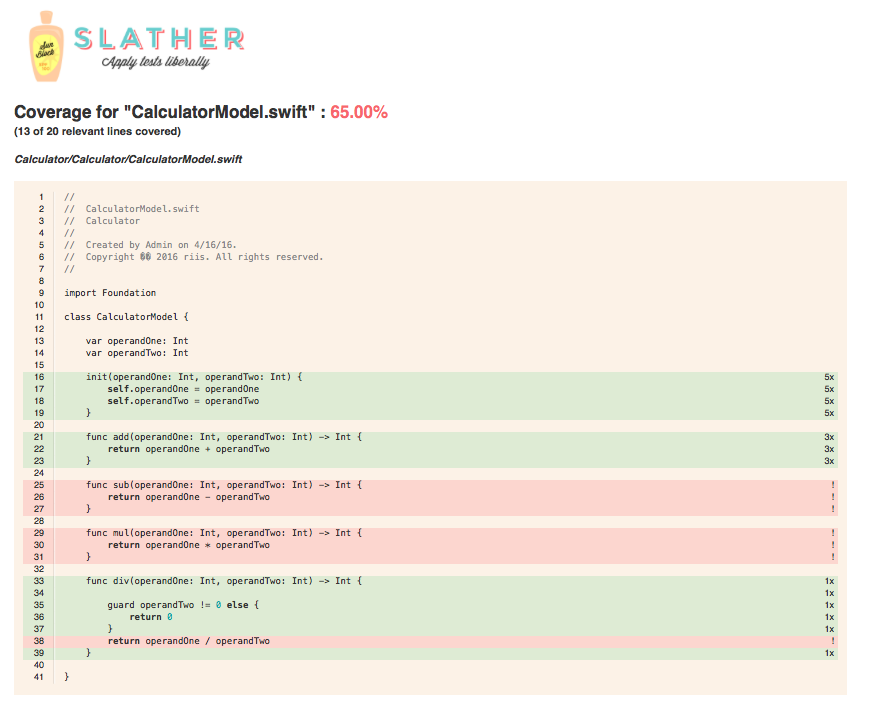
Unit Testing Code Coverage
$ brew install ruby

$ gem install slather

$ slather coverage --html --scheme XcodeSchemeName path/to/project.xcodeproj

$ slather coverage --html --scheme Calculator Calculator/Calculator.xcodeproj
Code Coverage Lab #2
1. Install slather
    brew install ruby
    gem install slather
2. From the dir above Calculator run
    slather coverage --html --scheme Calculator Calculator/Calculator.xcodeproj
3. Find the html output
Swift on other platforms
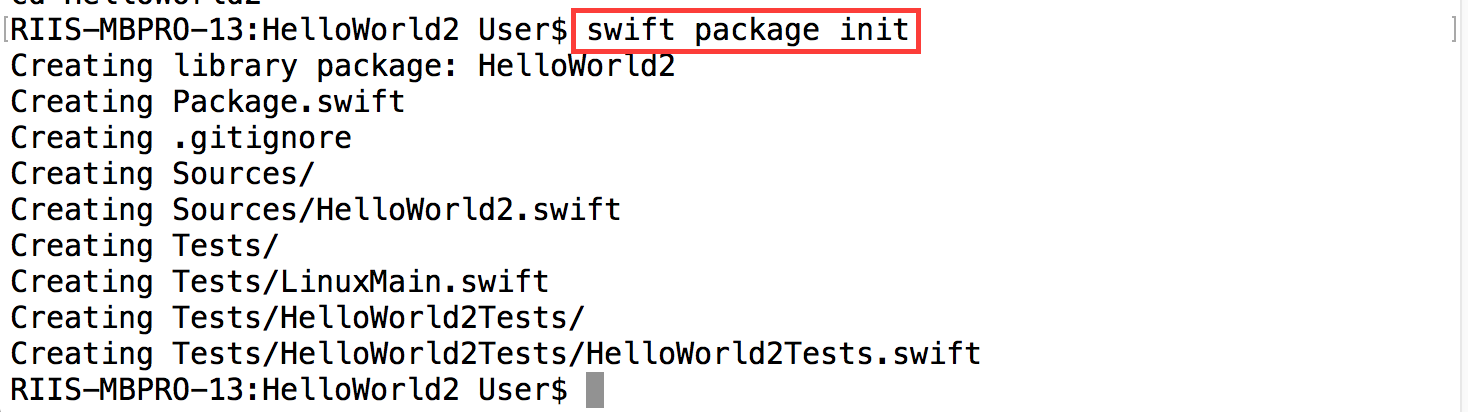
Swift on other platforms
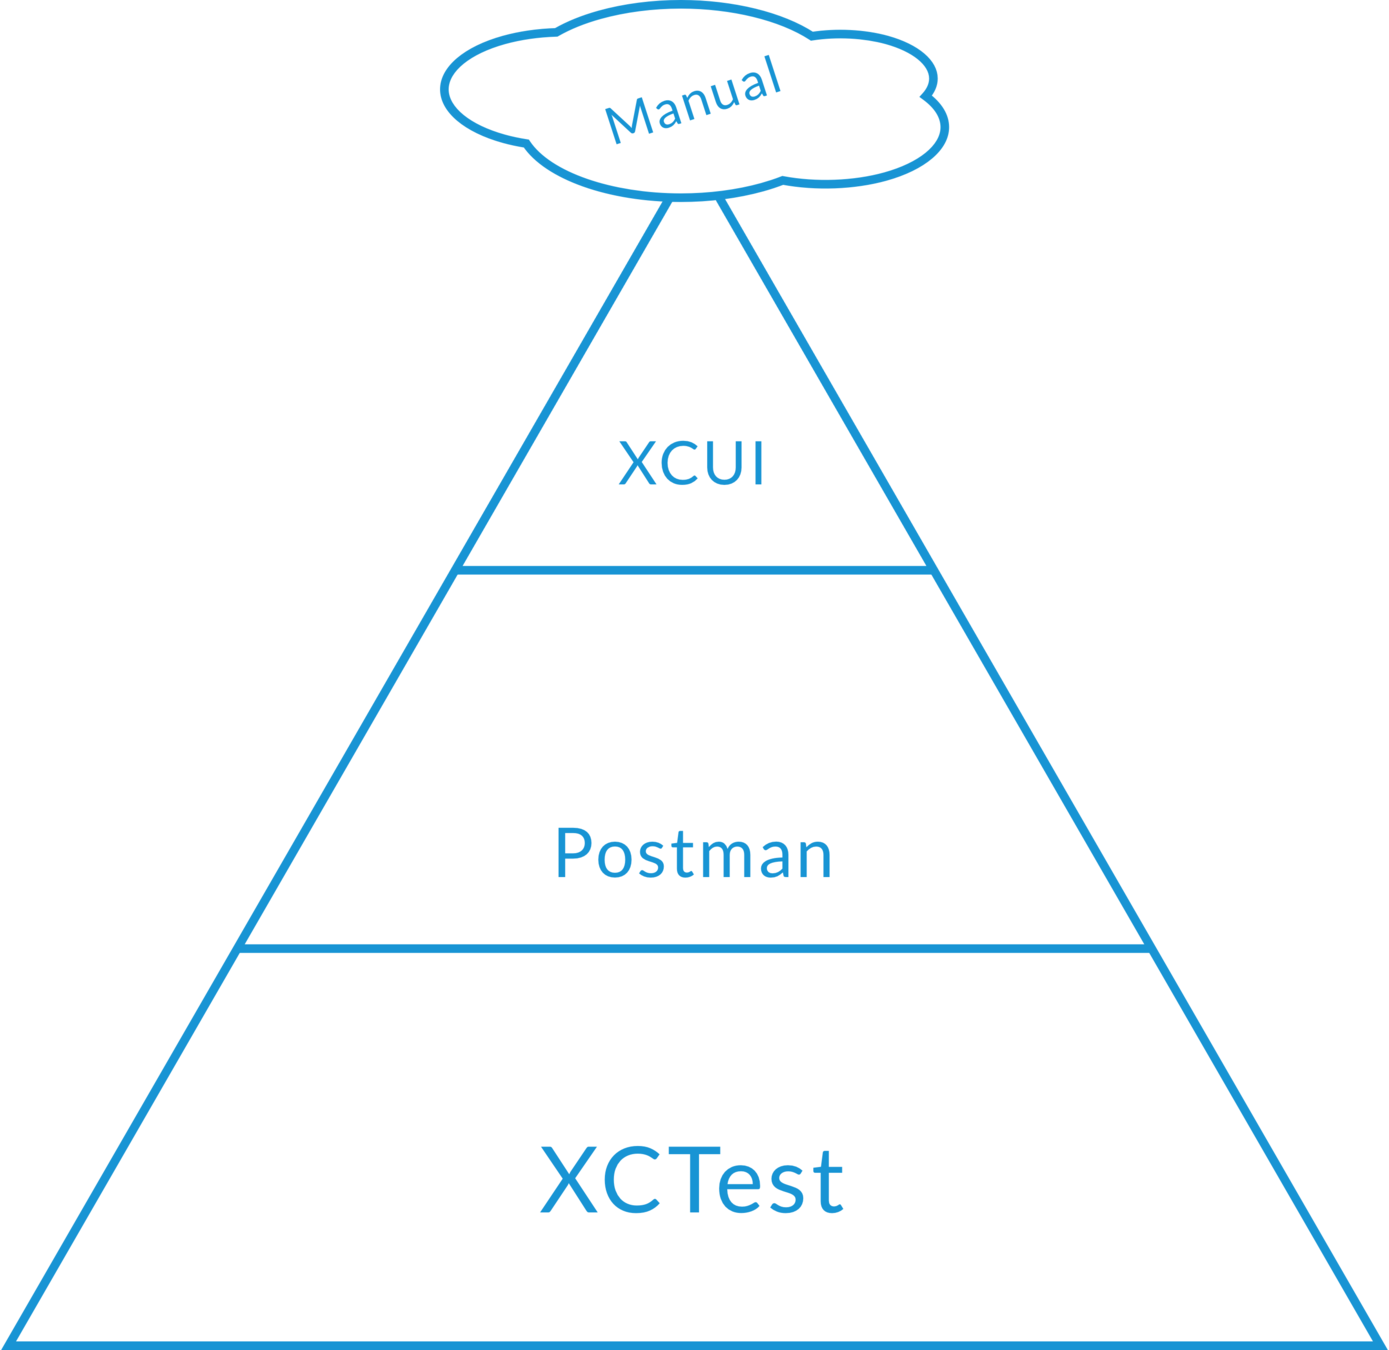
API Testing - Postman
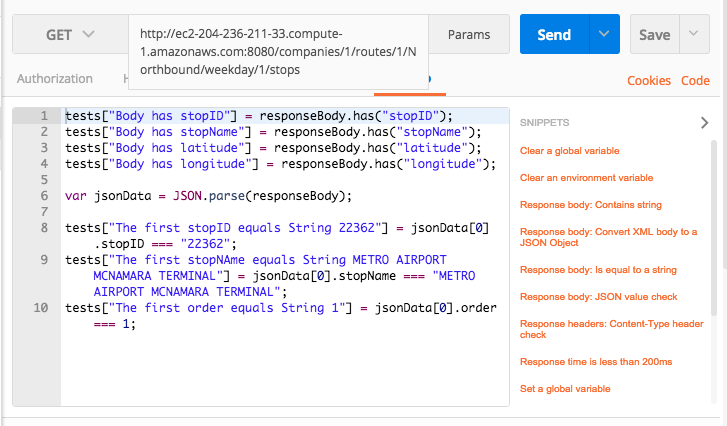
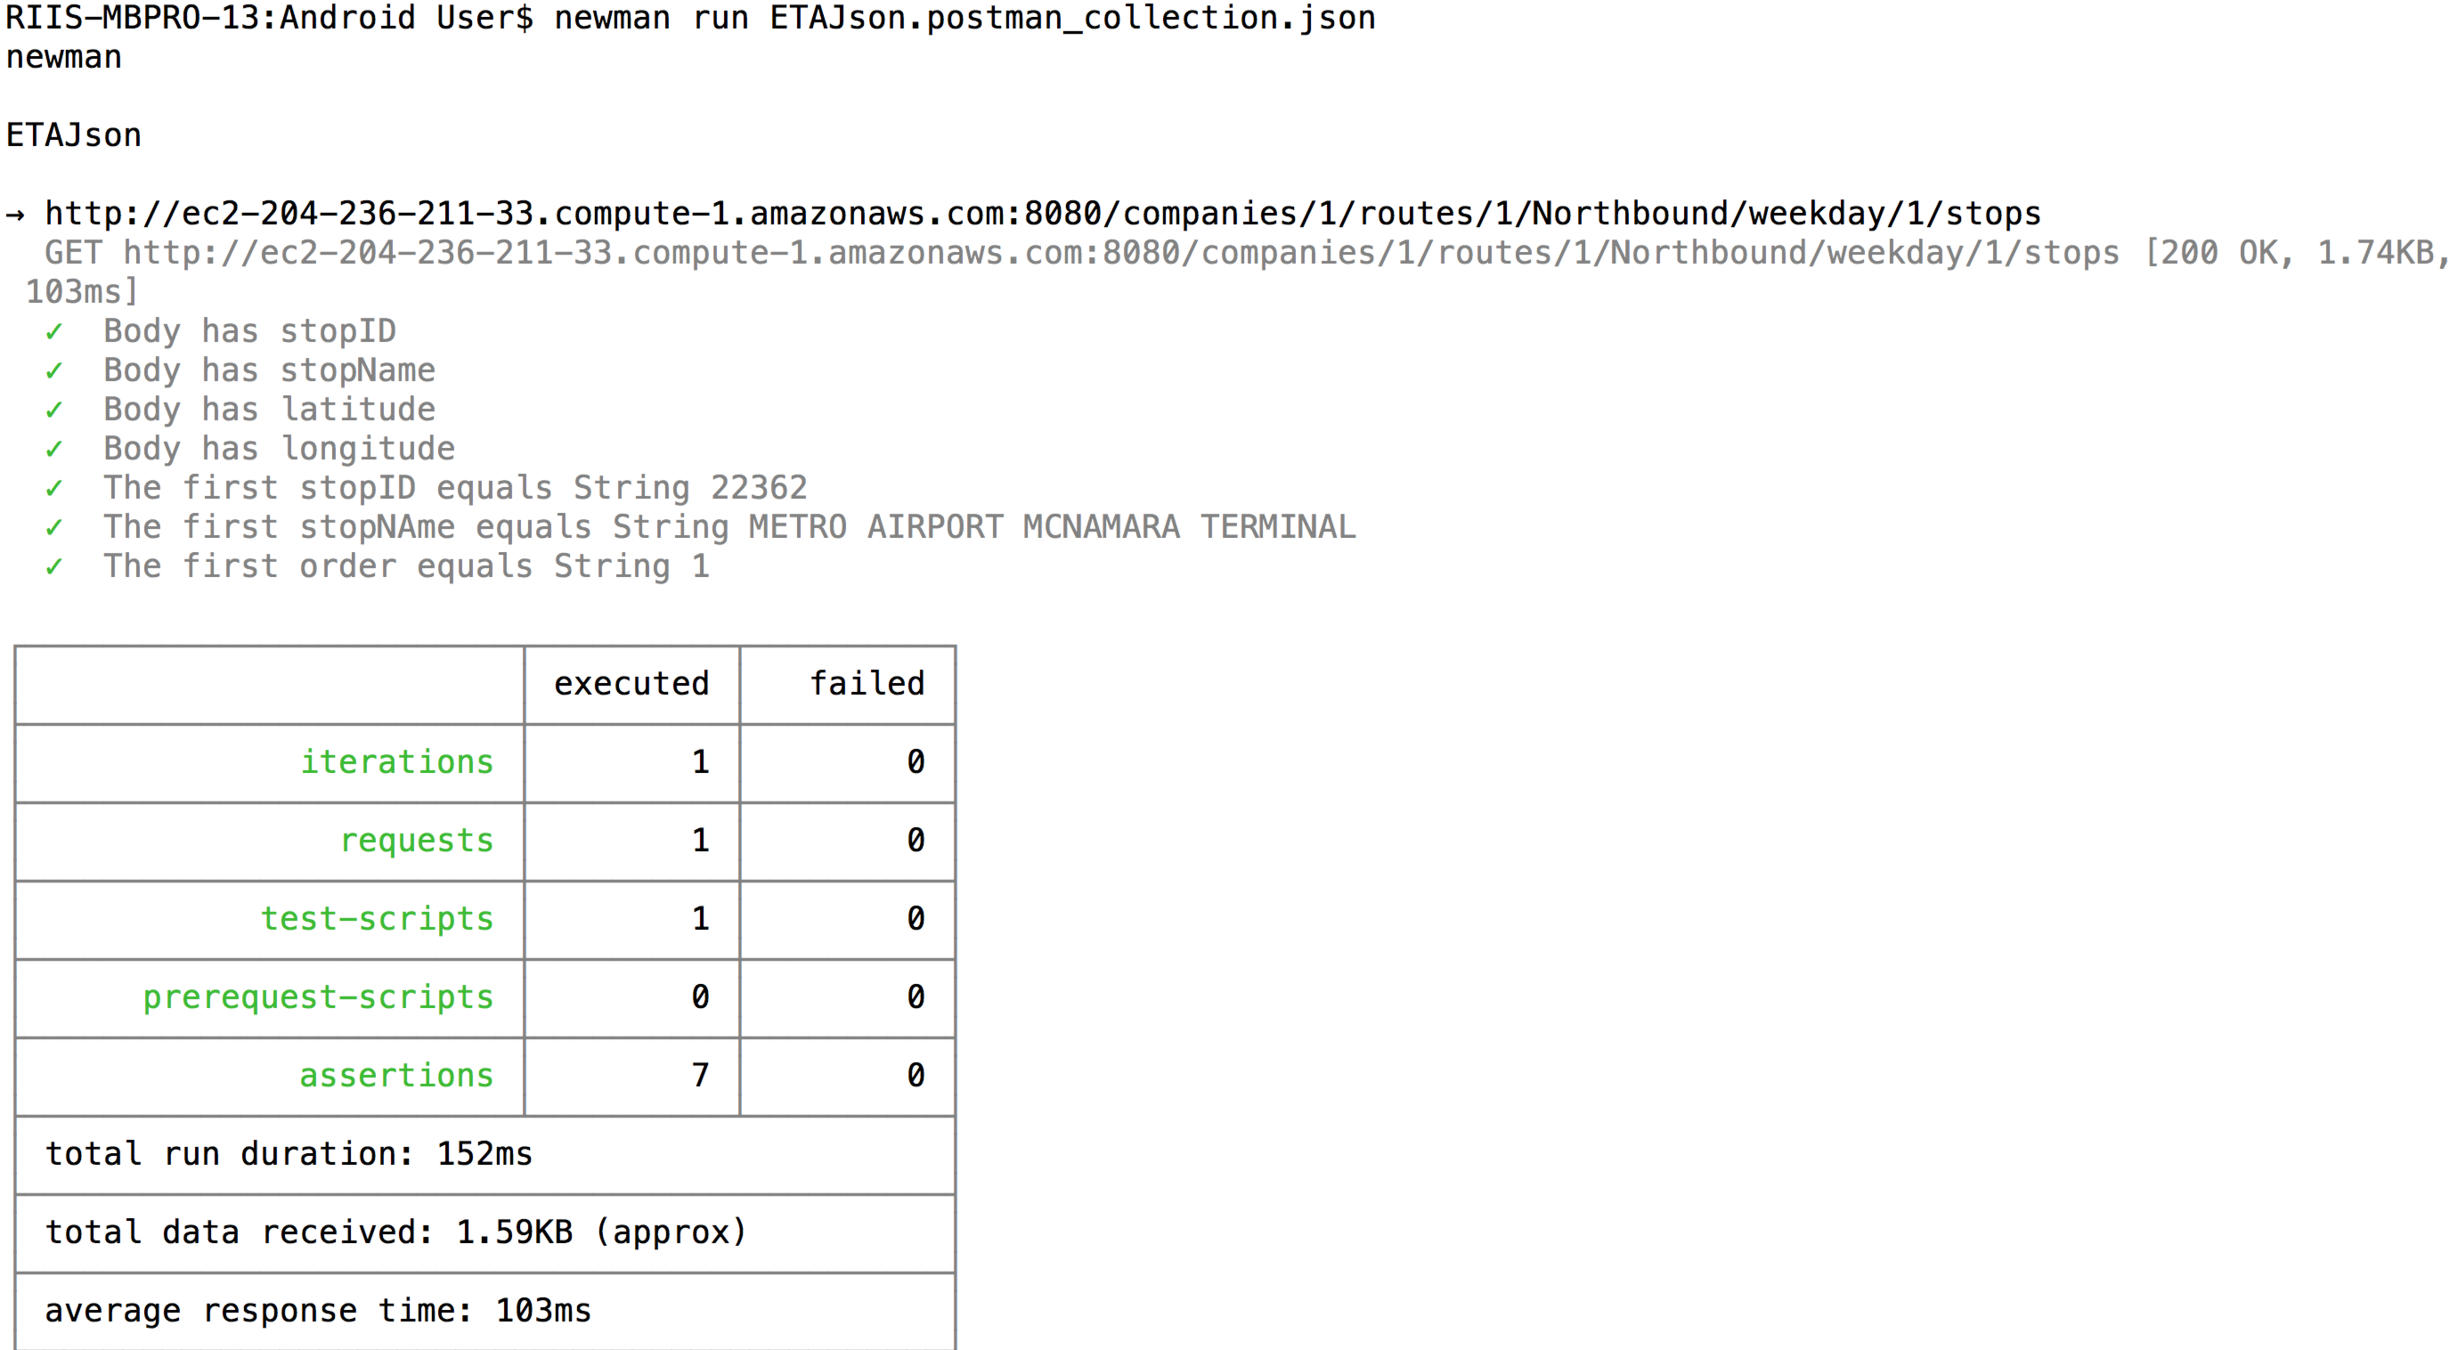
API Testing - Newman

API Testing - Newman
1. Download nodejs from https://nodejs.org/en/download/package-manager
2. Install newman
    npm install newman --global;
3. Run the tests
    newman run ETAJson.postman_collection.json
Swift GUI Testing - XCUI
Swift GUI Testing - XCUI
- User Interface Testing
- Two Options
- Recorded Tests
- Roll Your Own
Swift GUI Testing - XCUI
-
XCUIApplication
-
Launch the app
-
-
XCUIElementQuery
-
Find the XCUI Element to test
-
-
XCUIElement
-
Perform Test
-
Swift GUI Testing - XCUI
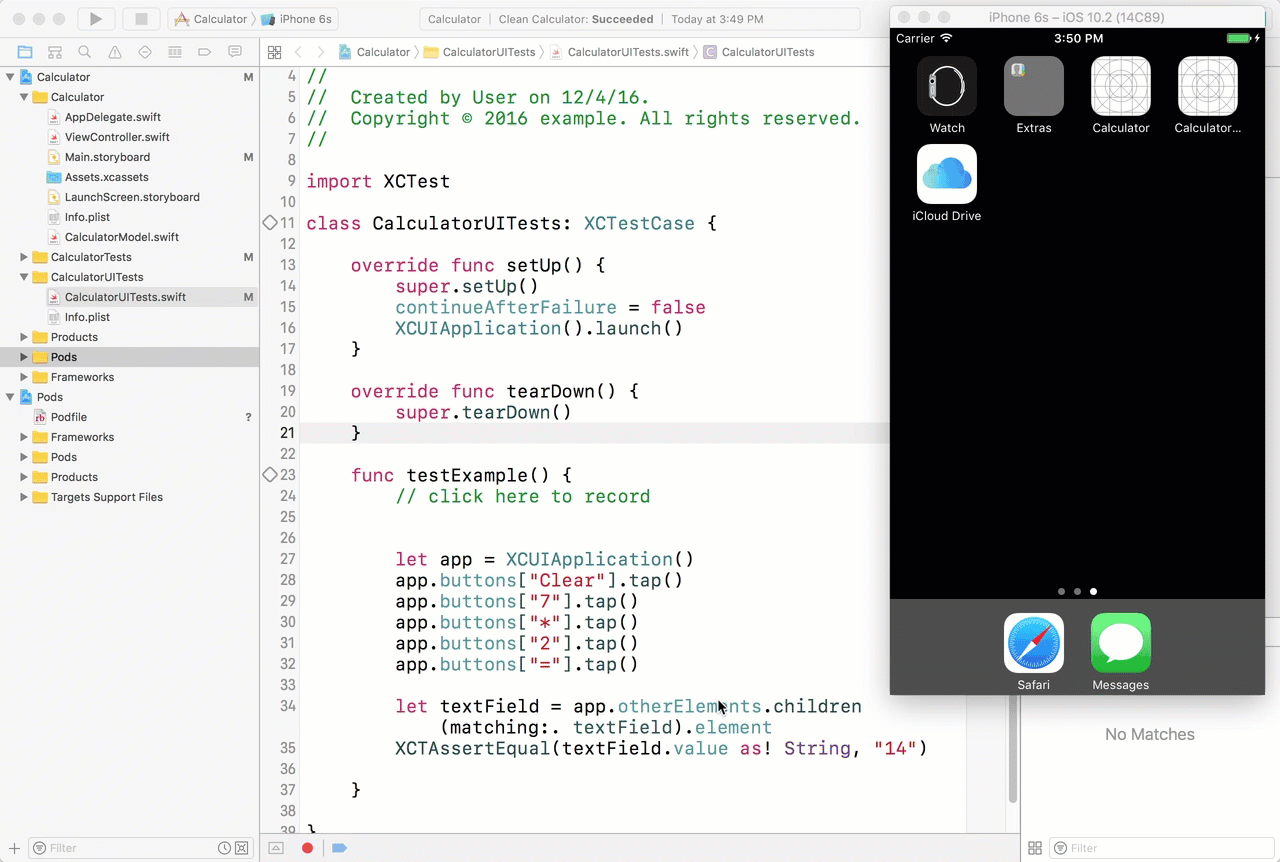
Swift GUI Testing Lab
1. Open Calculator project in xcode
2. Go to GUI Tests
3. Create new test file
4. record tests
5. Add assertion
6. Replay tests
Putting It All Together
Putting It All Together
Putting It All Together
1. Download the Jenkins Mac OS X native package from http://jenkins-ci.org.
2. Double click the .pkg file to install Jenkins.
3. Once done, your browser will open to http://localhost:8080 where Jenkins lives.
4. Make the Jenkins user an admin:
    sudo dseditgroup -o edit -a jenkins -t user admin
5. Add the Jenkins user to the developer group:
    sudo dscl . append /Groups/_developer GroupMembership jenkins
6. Make the Jenkins user automatically login when the computer is restarted
7. unload Jenkins as a Daemon:
    sudo launchctl unload /Library/LaunchDaemons/org.jenkins-ci.plist
8. move the .plist file, which defines how Jenkins will run, to the LaunchAgents folder:
    sudo mv /Library/LaunchDaemons/org.jenkins-ci.plist /Library/LaunchAgents/
9. Edit the plist file:
    sudo vim /Library/LaunchAgents/org.jenkins-ci.plist
    /* Remove the following lines */
    <key>SessionCreate</key
    <true />
10. reload the Launch Agent to restart Jenkins:
    sudo launchctl load /Library/LaunchAgents/org.jenkins-ci.plist
FIRST Principles
- F(ast)
- I(solated)
- R(epeatable)
- S(elf-verifying)
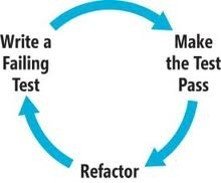
- T(imely) i.e. TDD not TAD
FIRST Principles - Fast

FIRST Principles - Fast
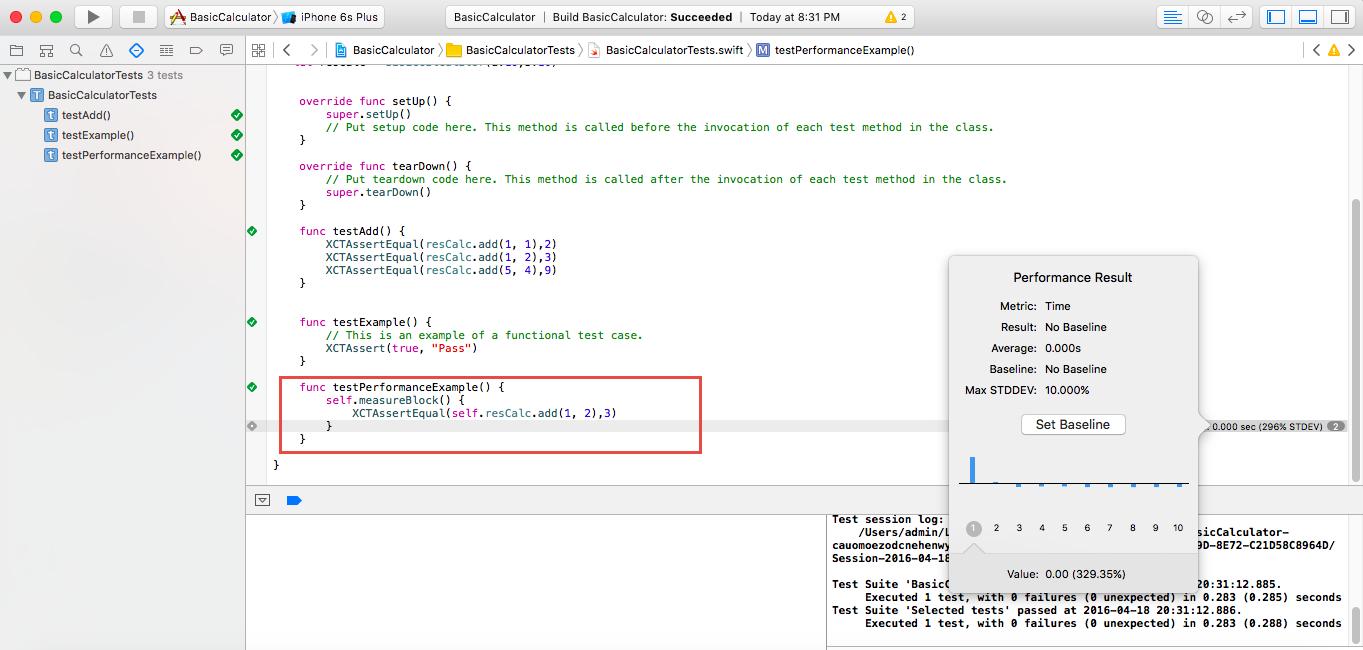
Performance Lab
1. Open Calculator project
2. Create new test file
3. Add assertion in Performance section
4. Test and measure speed.
FIRST Principles - Isolated
when(methodIsCalled).thenReturn(aValue);// Cuckoo
stub(mock) { stub in
when(stub.readWriteProperty.get).thenReturn(10)
}Isolated - Cuckoo
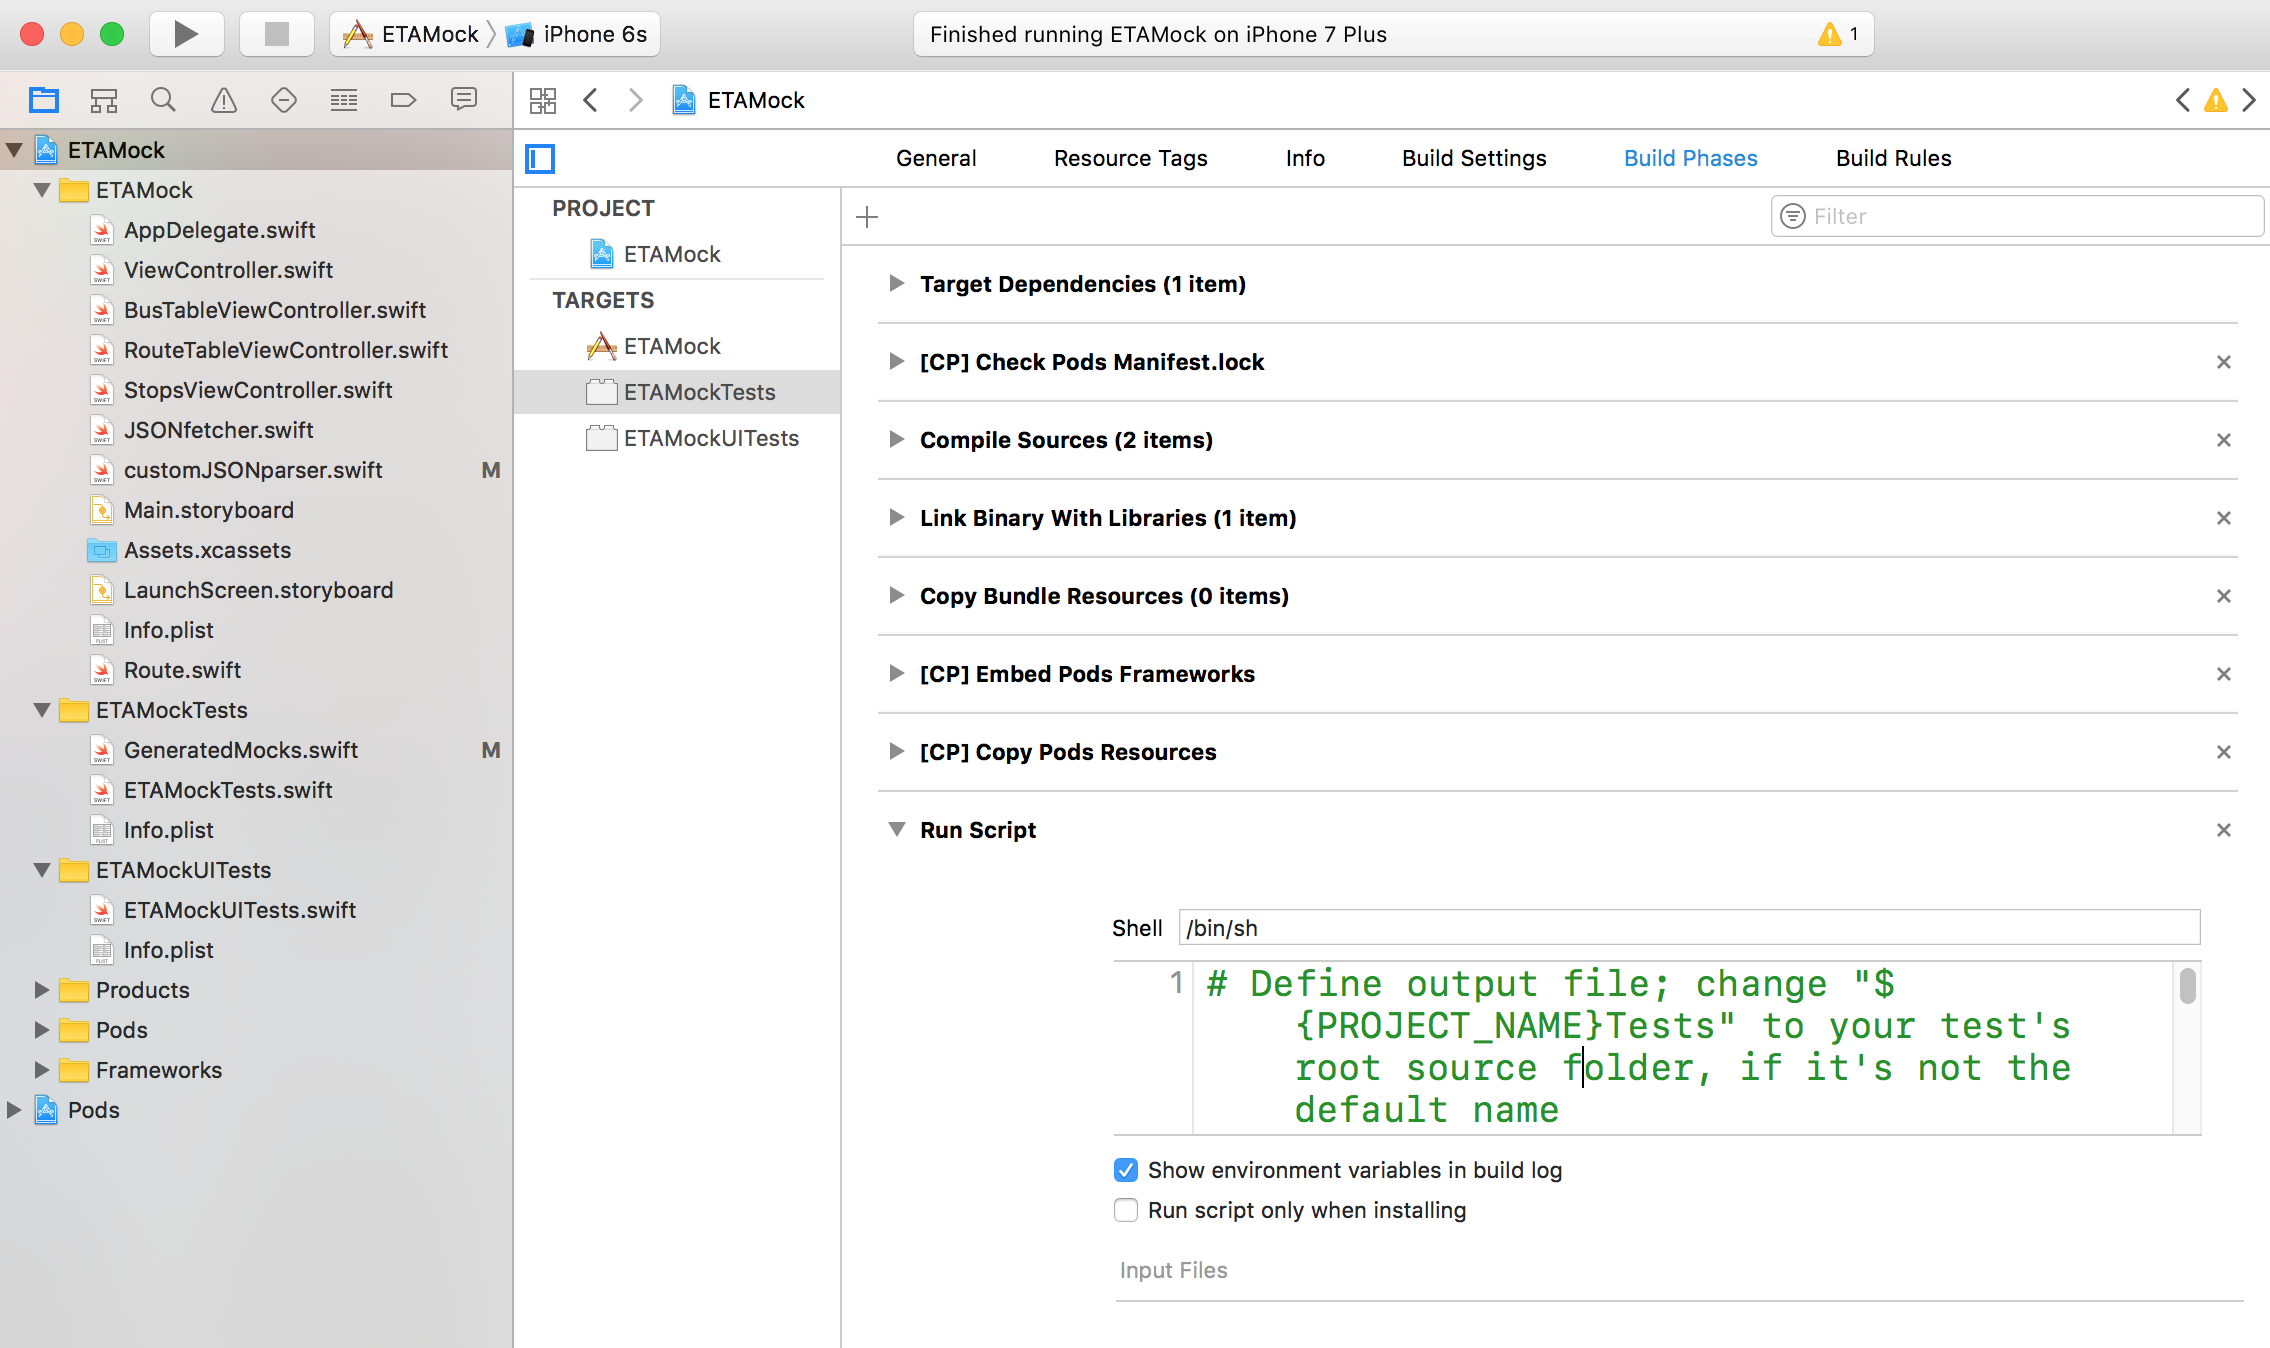
# Define output file; change "${PROJECT_NAME}Tests" to your test's
root source folder, if it's not the default name

OUTPUT_FILE="./${PROJECT_NAME}Tests/GeneratedMocks.swift"
echo "Generated Mocks File = ${OUTPUT_FILE}"

# Define input directory; change "${PROJECT_NAME}" to your project's root
source folder, if it's not the default name
INPUT_DIR="./${PROJECT_NAME}"
echo "Mocks Input Directory = ${INPUT_DIR}"

# Generate mock files; include as many input files as you'd like to create mocks for
${PODS_ROOT}/Cuckoo/run generate --testable "${PROJECT_NAME}" \
--output "${OUTPUT_FILE}" \
"${INPUT_DIR}/FileName1.swift" \
"${INPUT_DIR}/FileName2.swift" \
"${INPUT_DIR}/FileName3.swift"
# ... and so forth
Isolated - Cuckoo
FIRST Principle - Repeatable
FIRST Prin - Self-Verifying
FIRST Principles - Timely
Sample App

Sample App
Sample App - Unit Test
    func testParseRoutes() {
        let mock = MockJSONfetcher()

        stub(mock) { mock in
            when(mock.callApi(url: any(), completion: anyClosure())).then { url, closure in
                closure(self.testRouteJson)
            }
        }

        mock.callApi(url: url) { data in
            XCTAssertEqual(data, self.testRouteJson)
            let parser = customJSONparser(companyIndex: 1)
            let route = Route(name: "FORT ST-EUREKA RD",
                    direction1: "Northbound",
                        direction2: "Southbound", id: 1, routeId: "125")
            XCTAssertEqual(parser.getRoutes(fromJSONString: data), [route])
        }
    }
xcodebuild test -workspace ETAMock.xcworkspace -scheme ETAMock
-destination 'platform=iOS Simulator, name=iPhone 7 Plus'Sample App - Unit Test
# Define output file; change "${PROJECT_NAME}Tests" to your test's root source folder, if it's not the default name
OUTPUT_FILE="./${PROJECT_NAME}Tests/GeneratedMocks.swift"
echo "Generated Mocks File = ${OUTPUT_FILE}"

# Define input directory; change "${PROJECT_NAME}" to your project's root source folder, if it's not the default name
INPUT_DIR="./${PROJECT_NAME}"
echo "Mocks Input Directory = ${INPUT_DIR}"

# Generate mock files; include as many input files as you'd like to create mocks for
${PODS_ROOT}/Cuckoo/run generate --testable "${PROJECT_NAME}" \
--output "${OUTPUT_FILE}" \
"${INPUT_DIR}/JSONFetcher.swift"

# ... and so forth

# After running once, locate `GeneratedMocks.swift` and drag it into your Xcode test target group
0. sudo gem install cocoapods
1. git clone http://github.com/gnolanltu/ETAMock
2. View the podfile and see pod “Cuckoo” as a test target.
3. Run pod install.
4. Close the project and reopen the workspace.
5. Click on the project folder then choose Test Target ➤ Build Phases.
6. Click + and choose New Run Script Phase.
7. Add Listing to the Run Script section, making sure to modify the
input files that you want to mock.
8. Build the project.
9. Run the tests.
10. Drag and drop GeneratedMocks.swift into the test section.
11. Uncomment out your mocked tests
12. Run the mocked tests.Isolated - Cuckoo Lab
Sample App - API Test

Sample App - API Test
newman run ETAJson.postman_collectionSample App - API Test
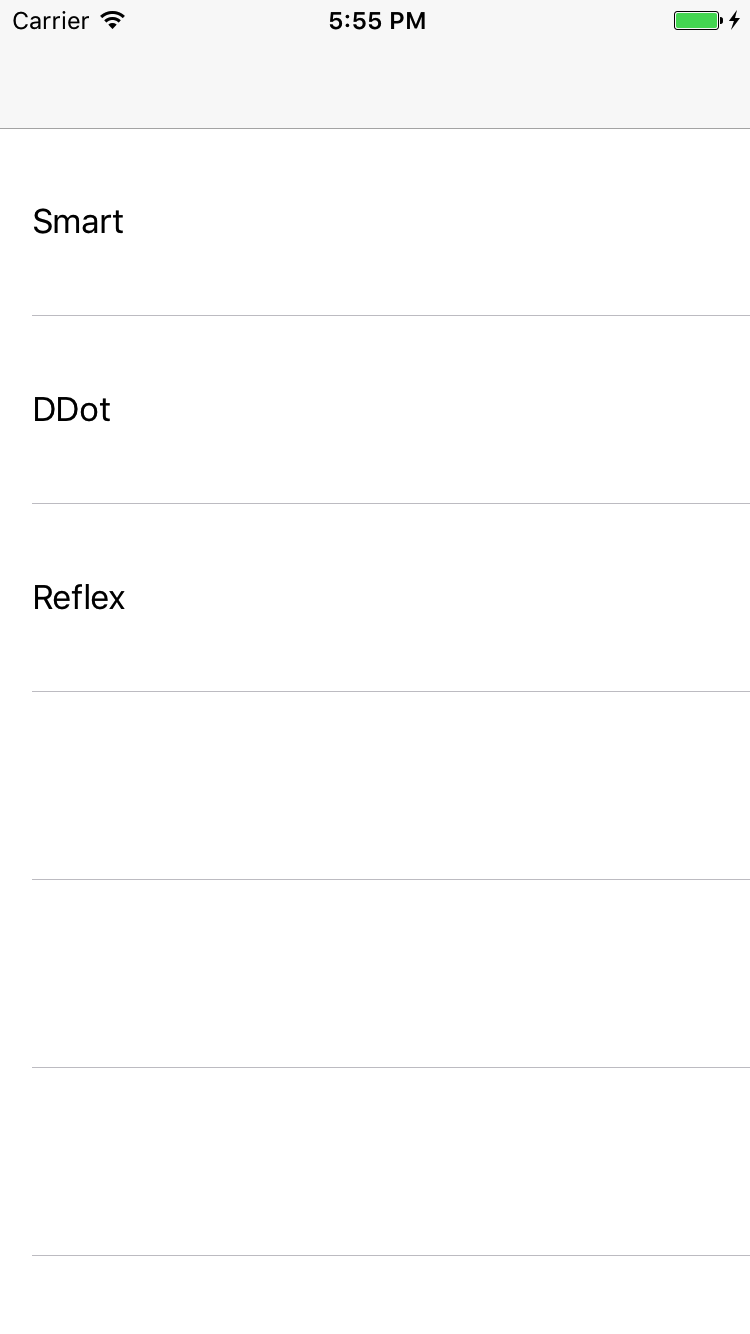
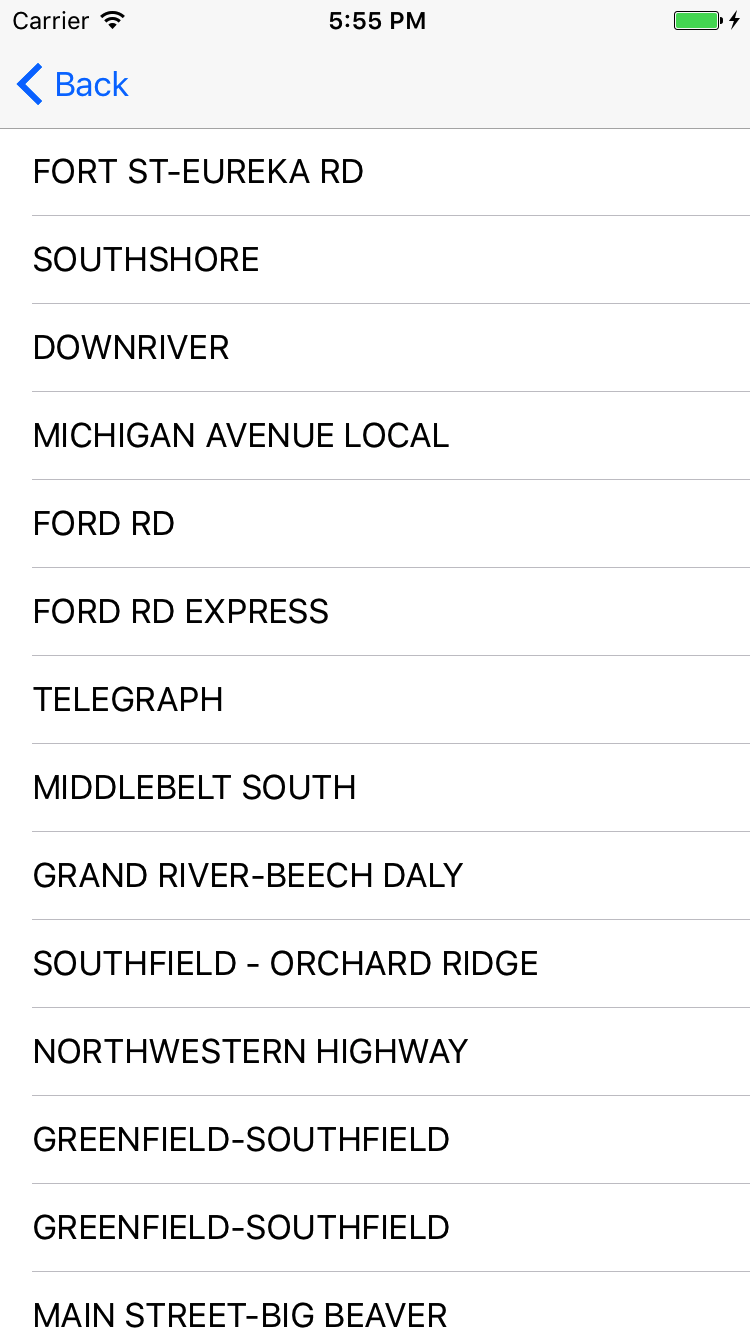
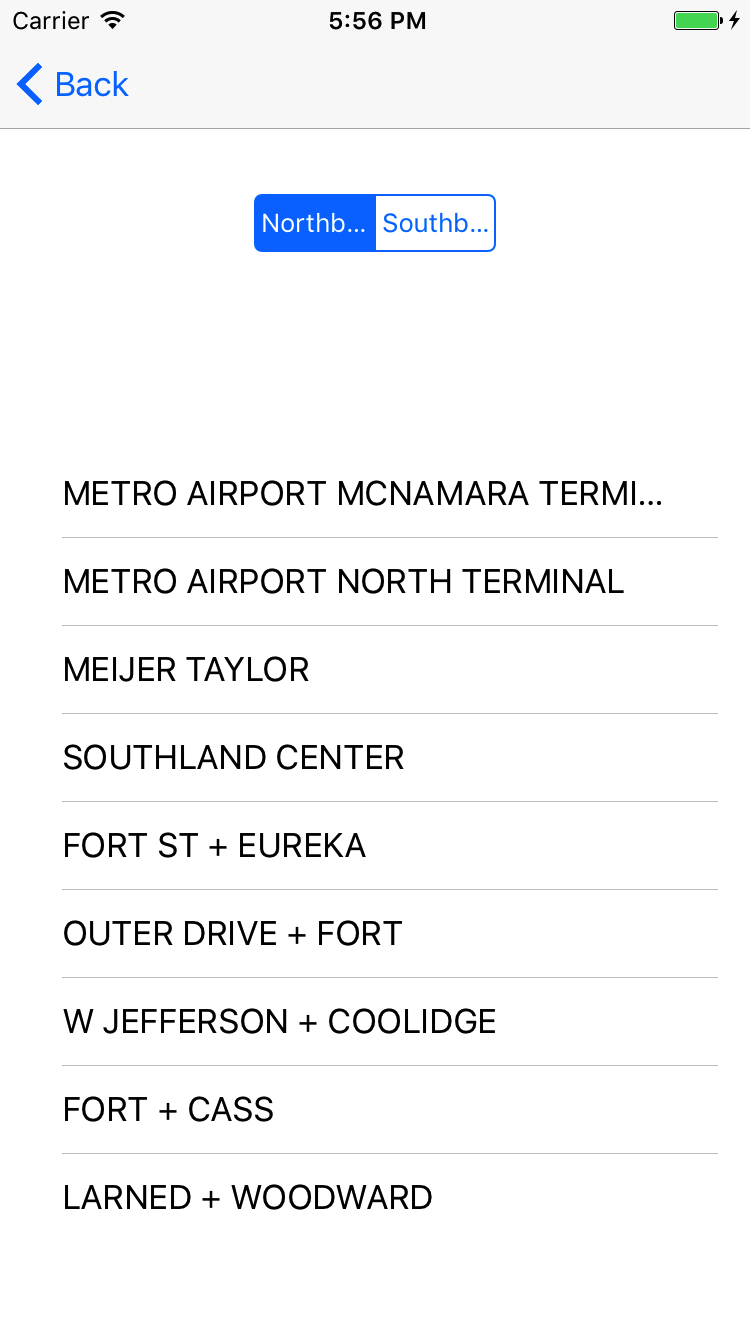
Sample App - GUI Test
    func testExample() {
        let app = XCUIApplication()
        let tablesQuery = app.tables
        tablesQuery.staticTexts["Smart"].tap()
        tablesQuery.staticTexts["SOUTHSHORE"].tap()
        app.buttons["Southbound"].tap()
        XCTAssert(tablesQuery.staticTexts["JEFFERSON + SOUTHFIELD"].exists)


        app.navigationBars["ETAMock.StopsView"].children(matching: .button)
                        .matching(identifier: "Back").element(boundBy: 0).tap()
        tablesQuery.staticTexts["MICHIGAN AVENUE LOCAL"].tap()
        app.buttons["Westbound"].tap()
        XCTAssert(tablesQuery.staticTexts["MICHIGAN + CASS"].exists)
    }
xcodebuild build -workspace ETAMock.xcworkspace -scheme ETAMock
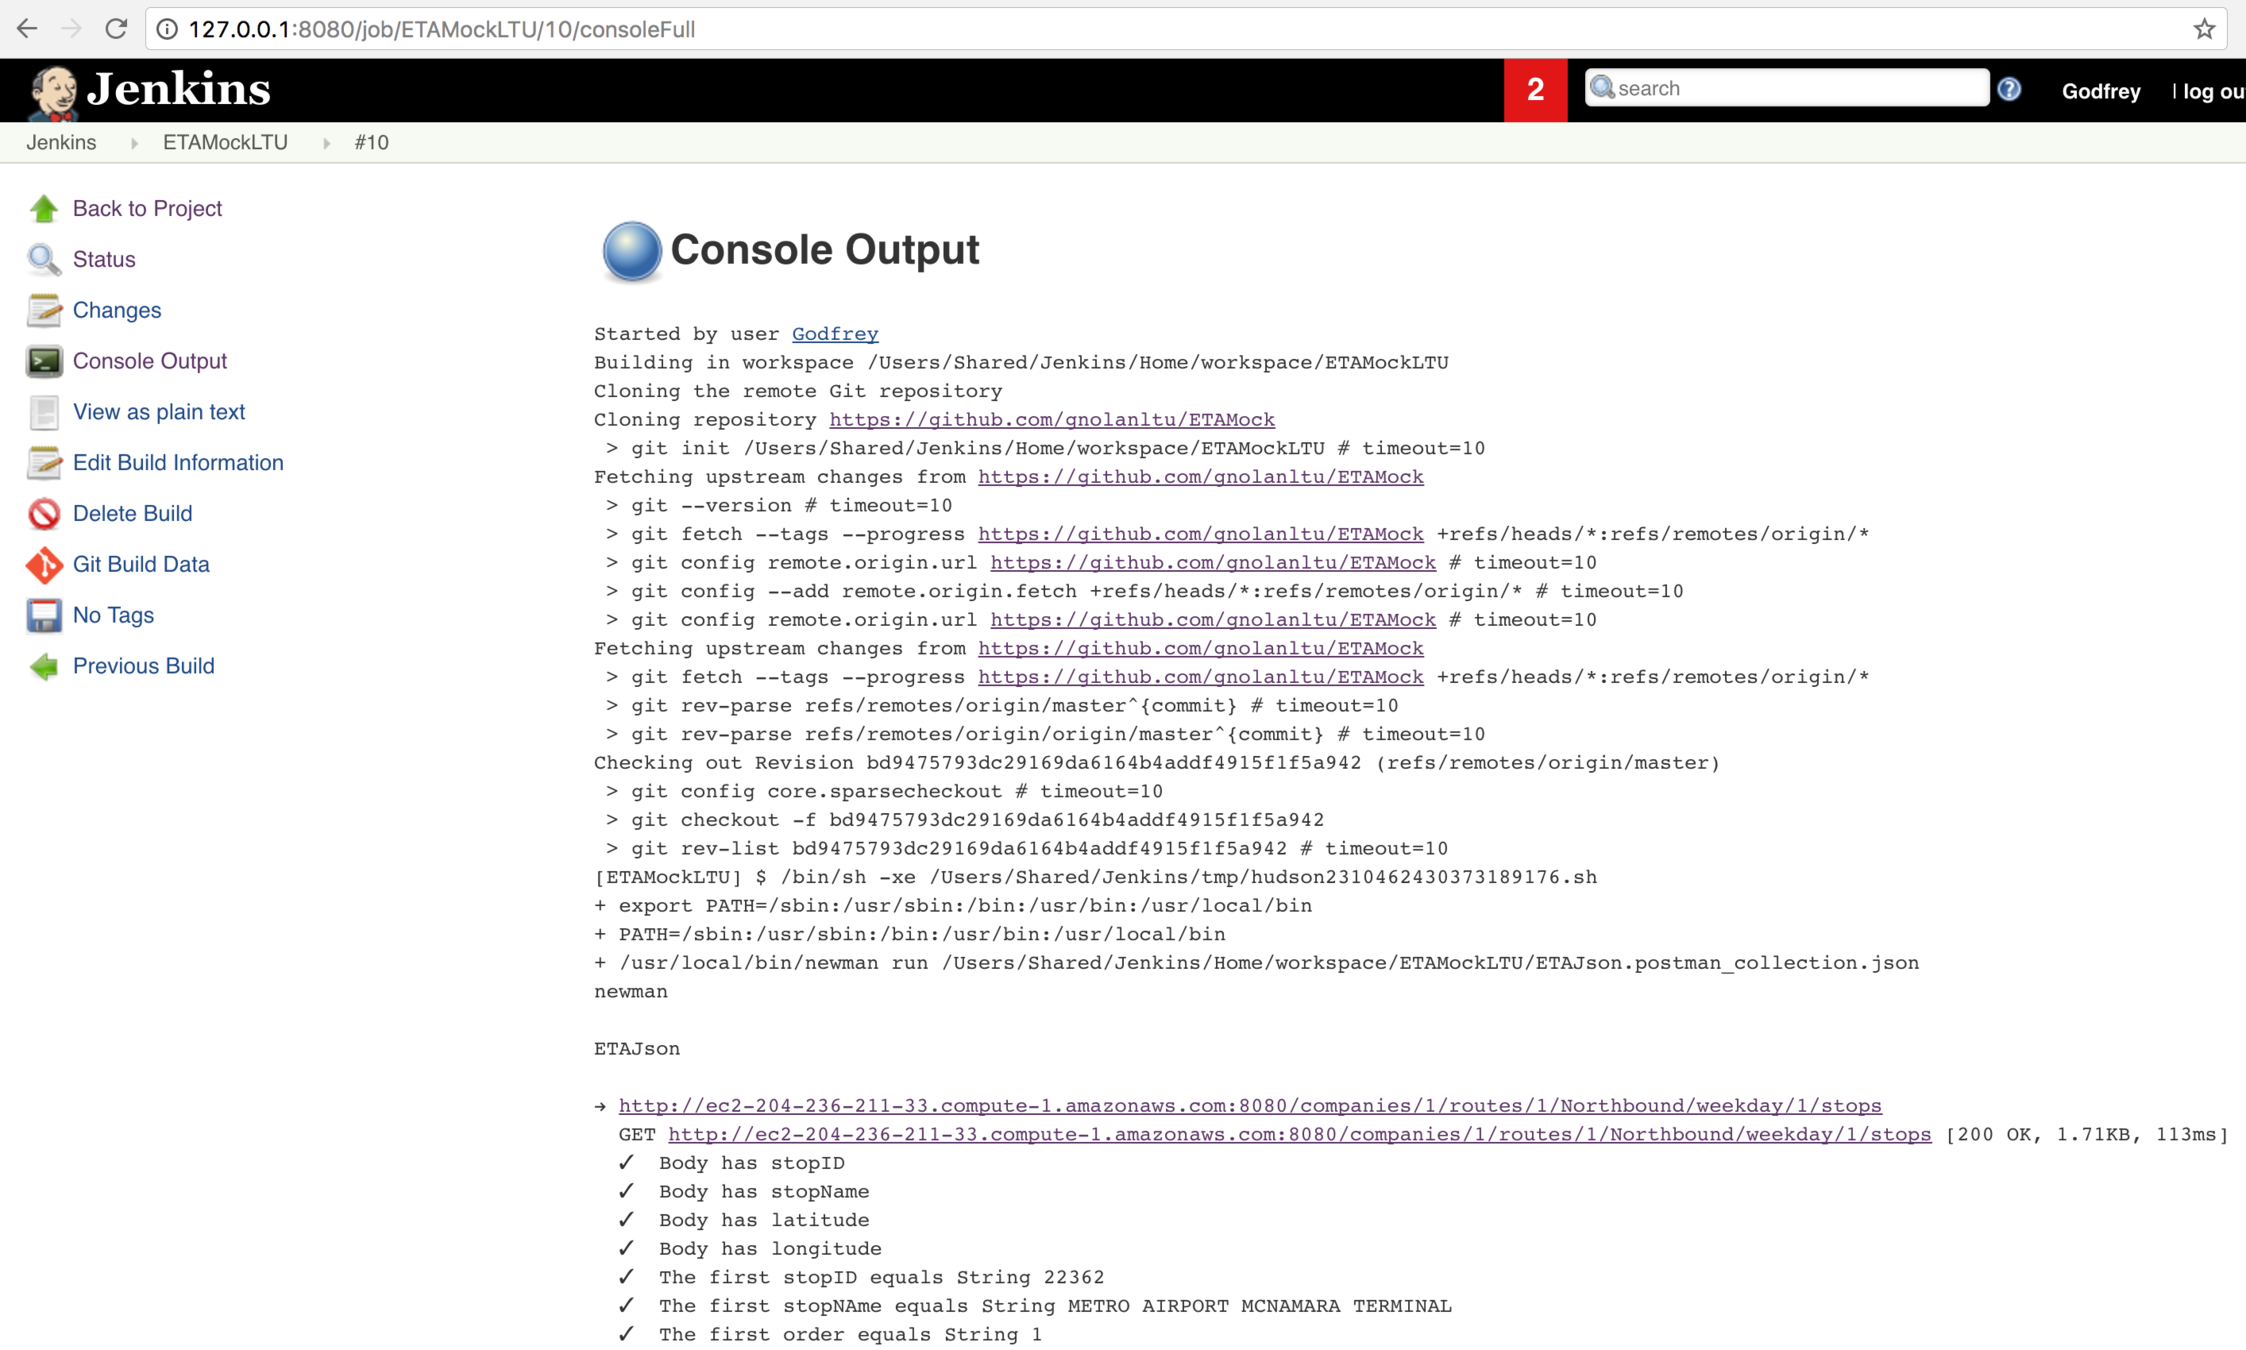
-destination 'platform=iOS Simulator, name=iPhone 7 Plus'Sample App - Jenkins
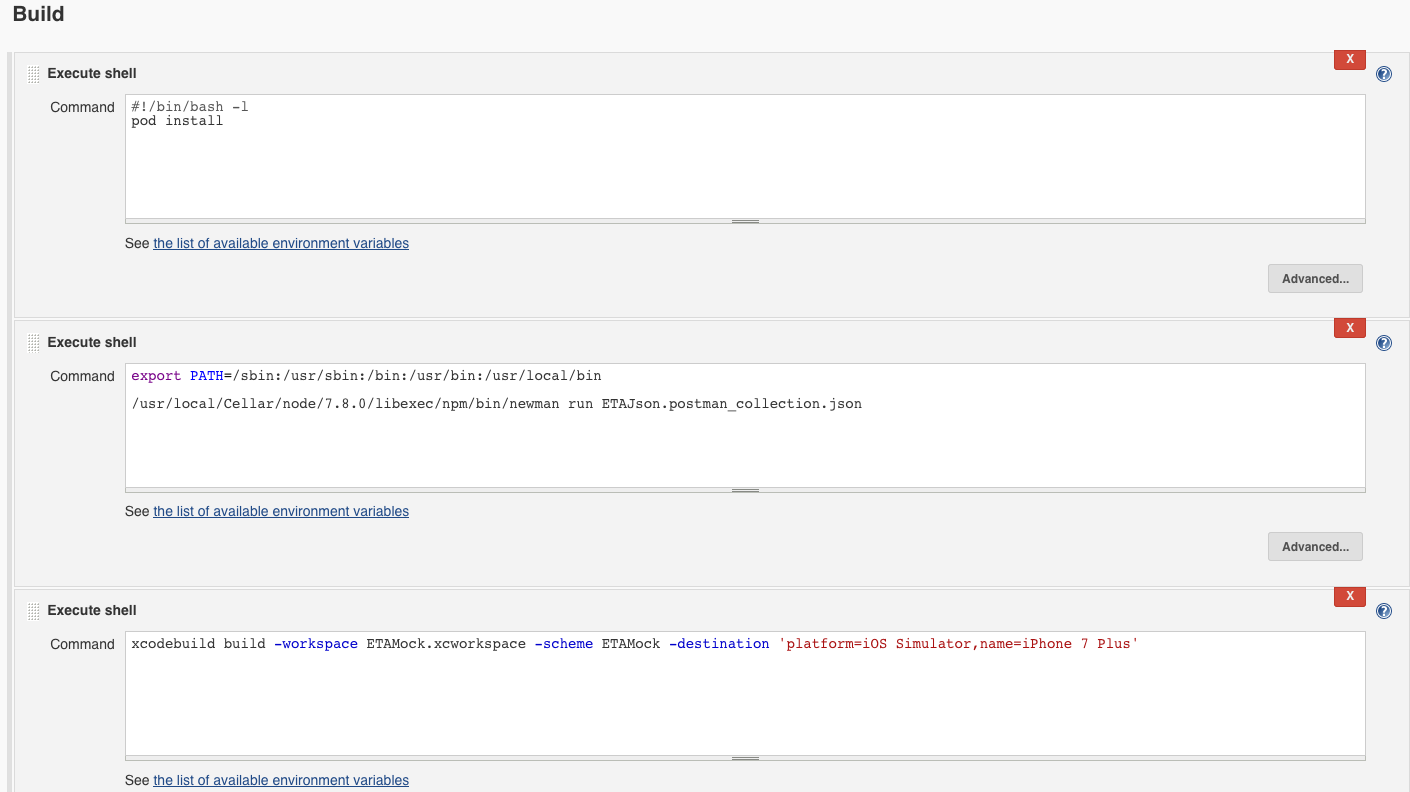
Sample App - Jenkins
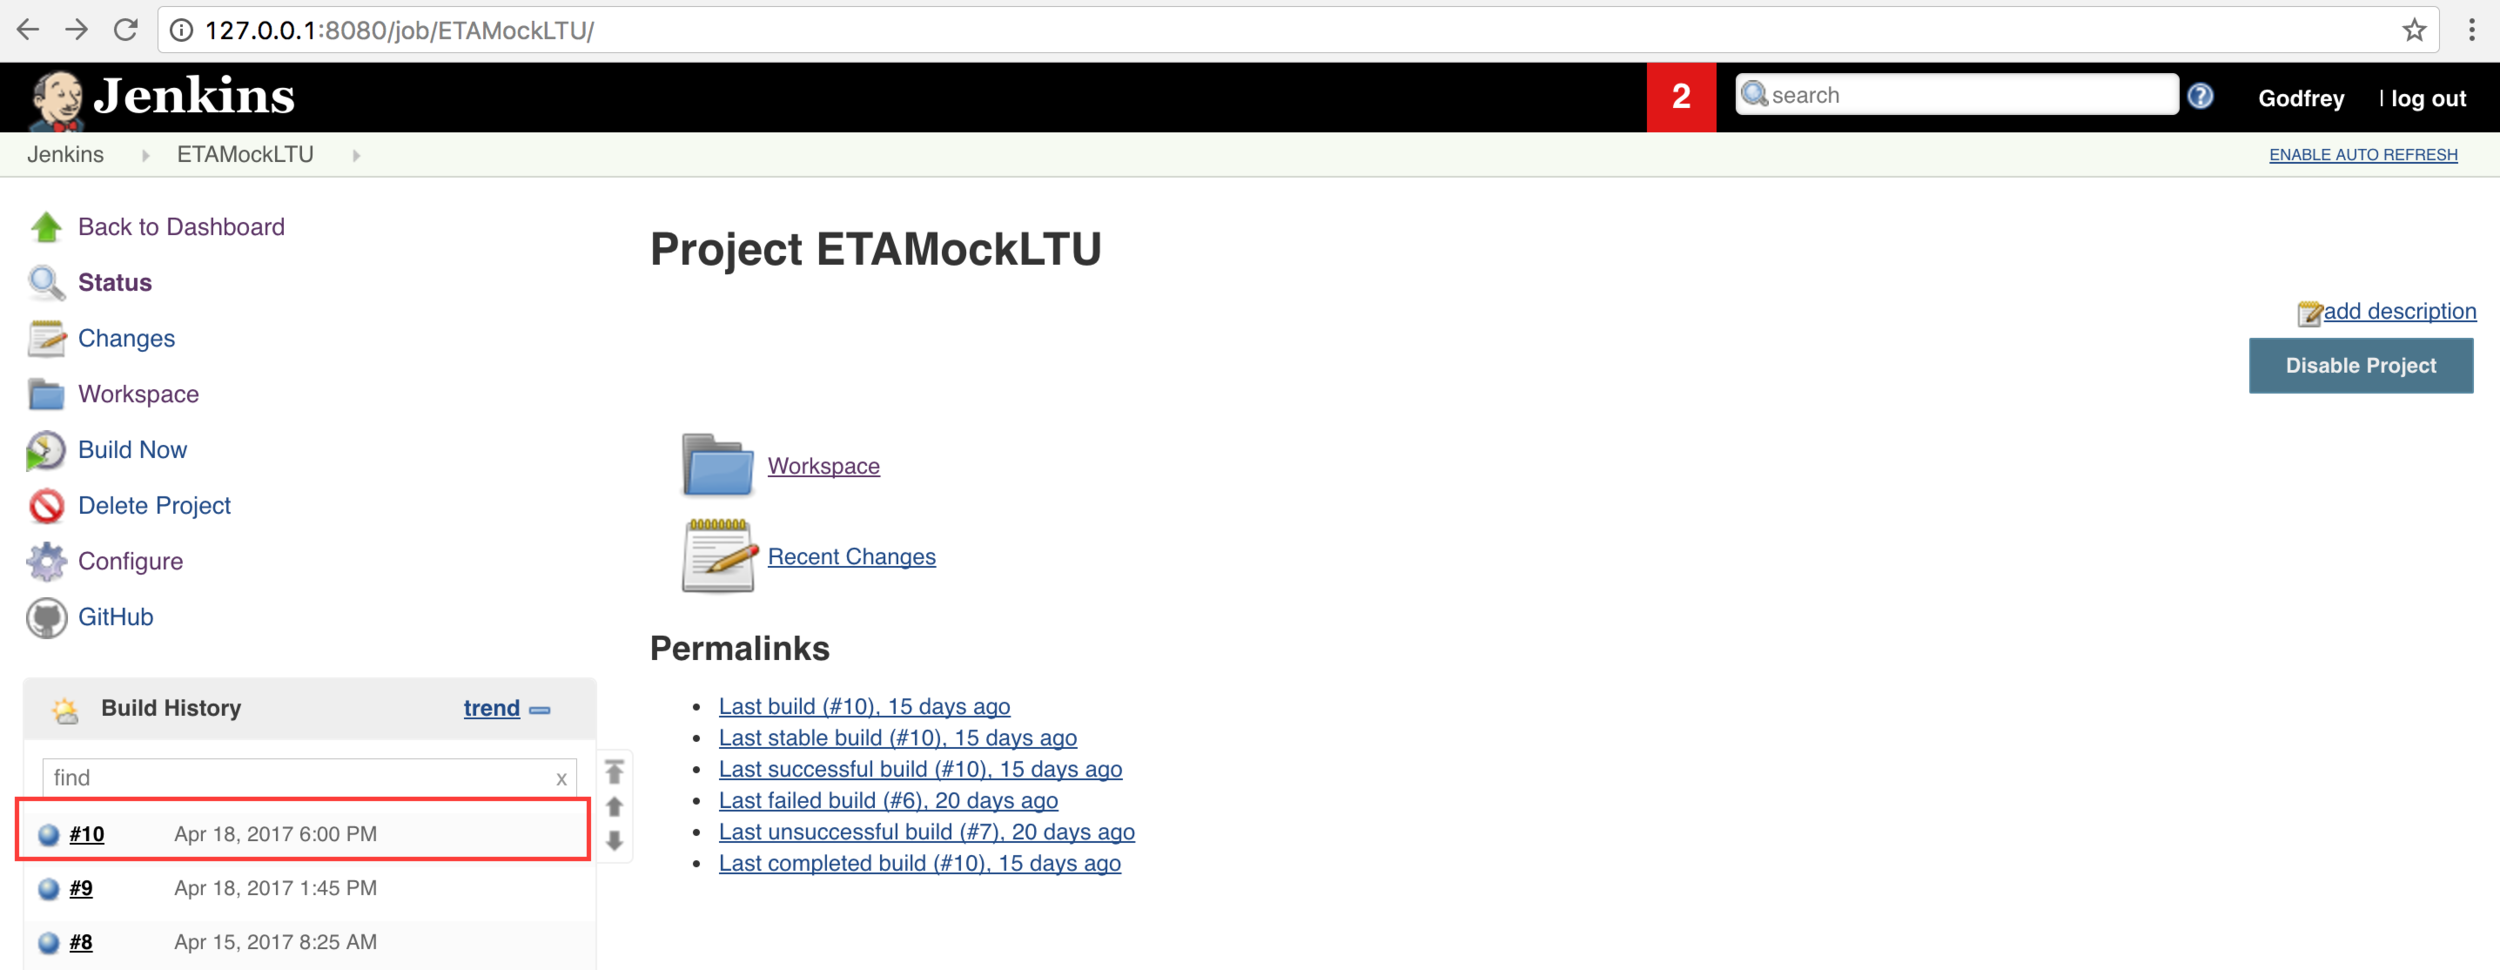
Sample App - Jenkins
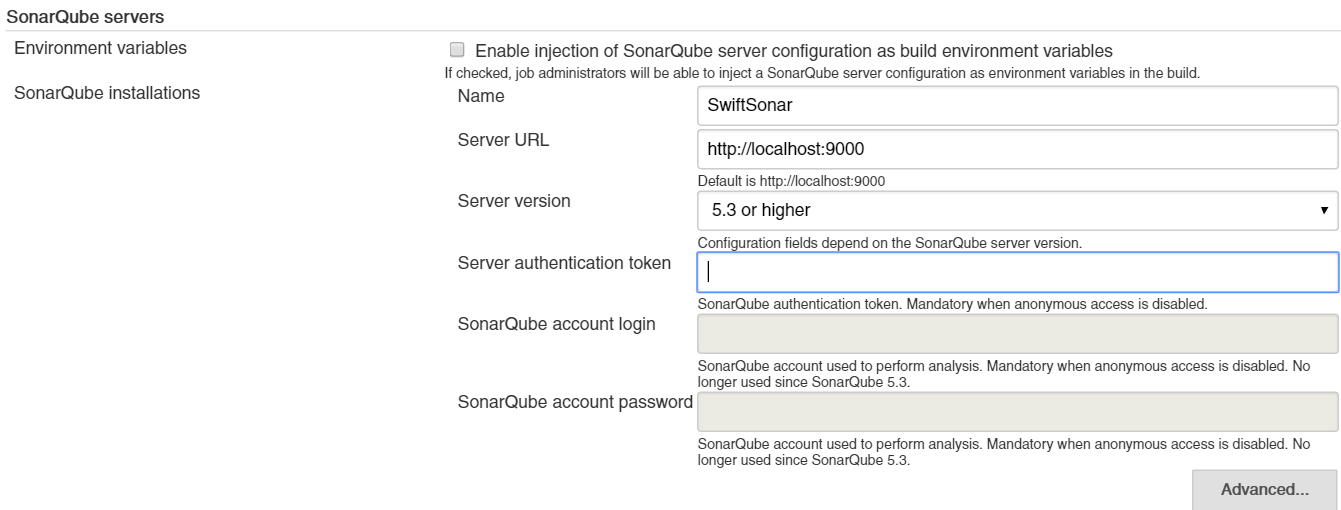
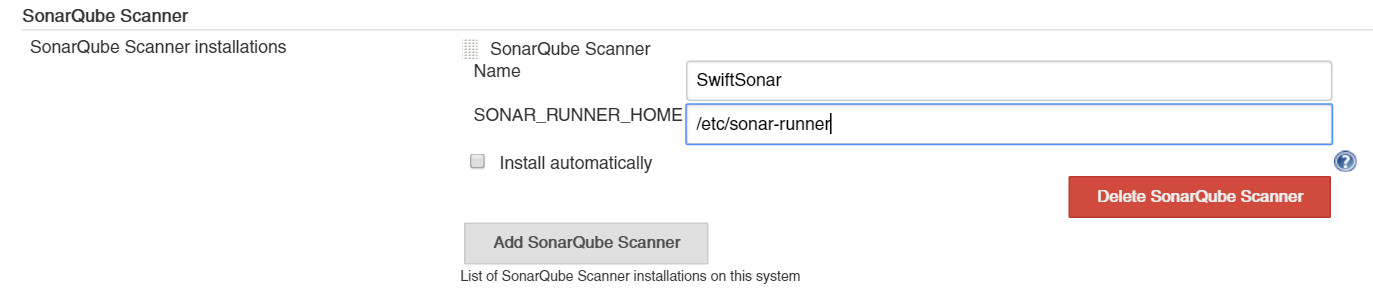
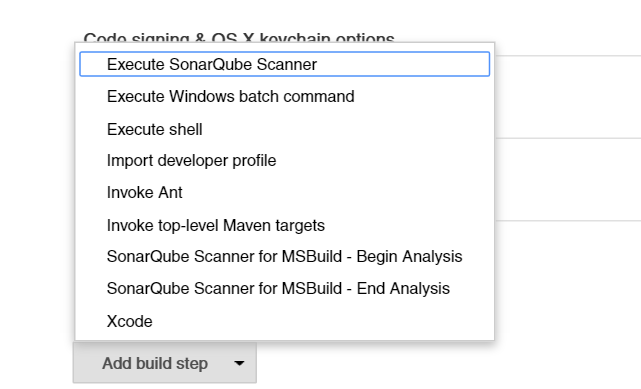
SonarQube - Jenkins
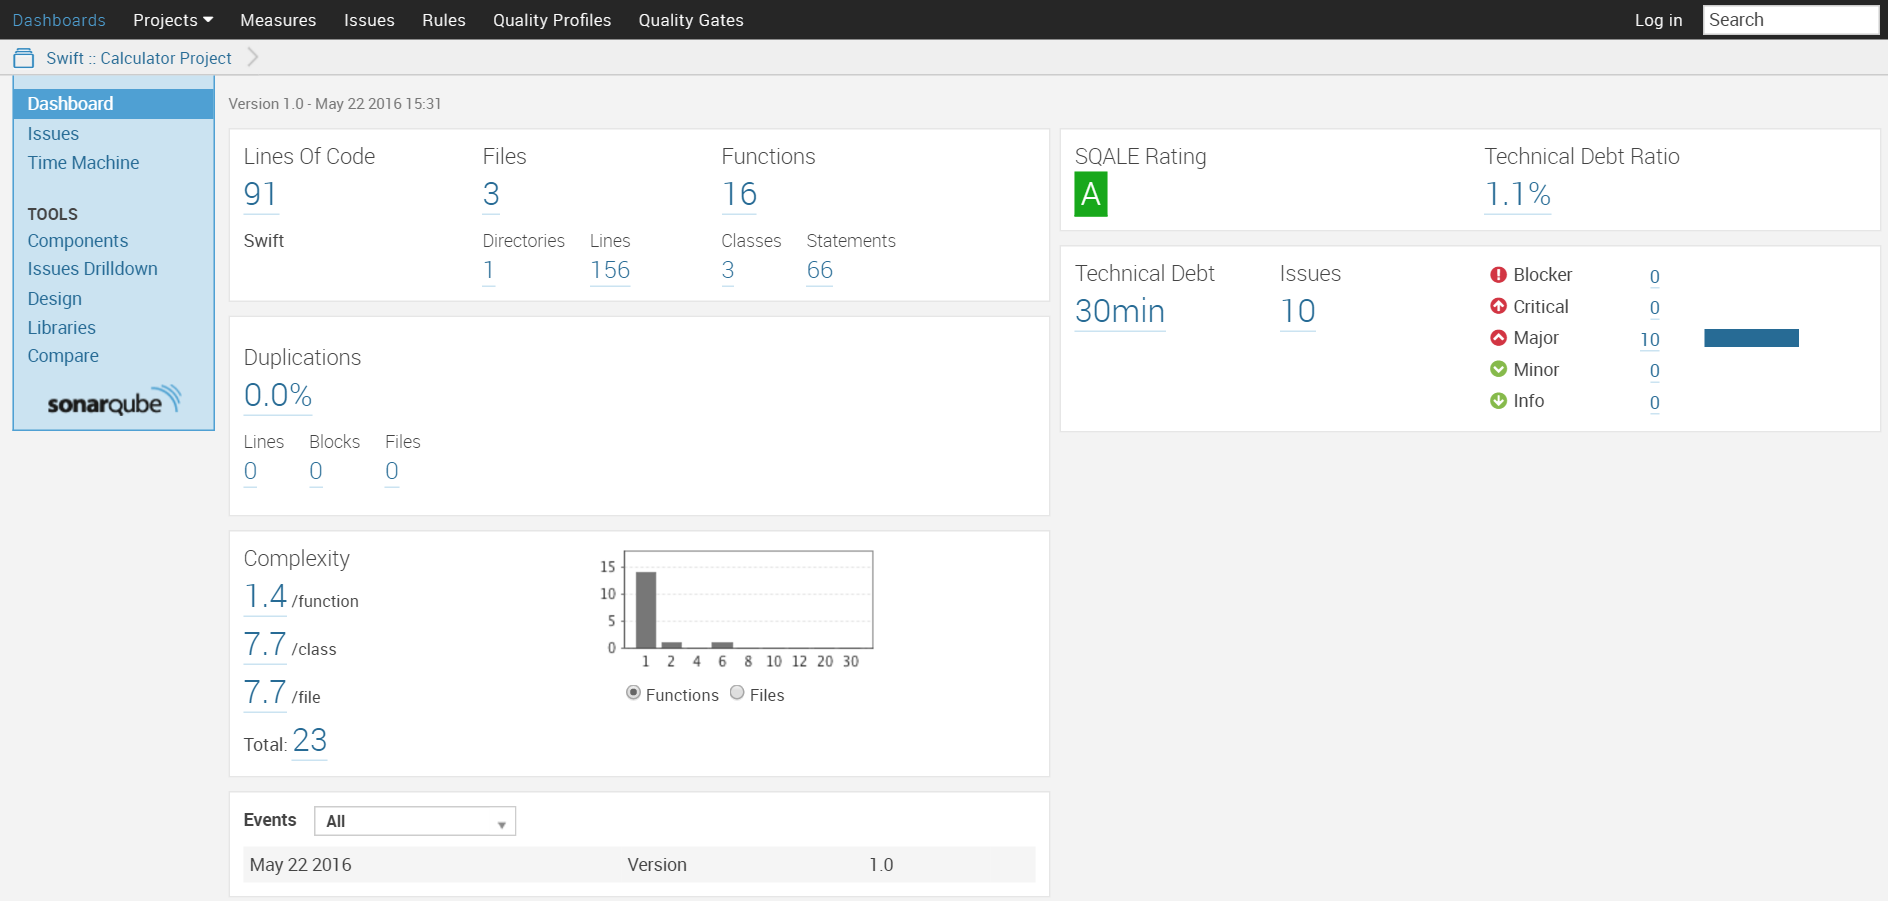
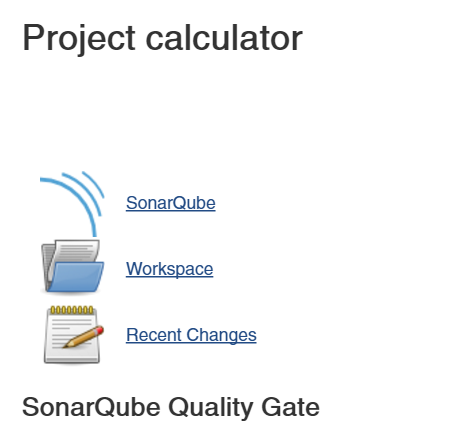
SonarQube - Jenkins
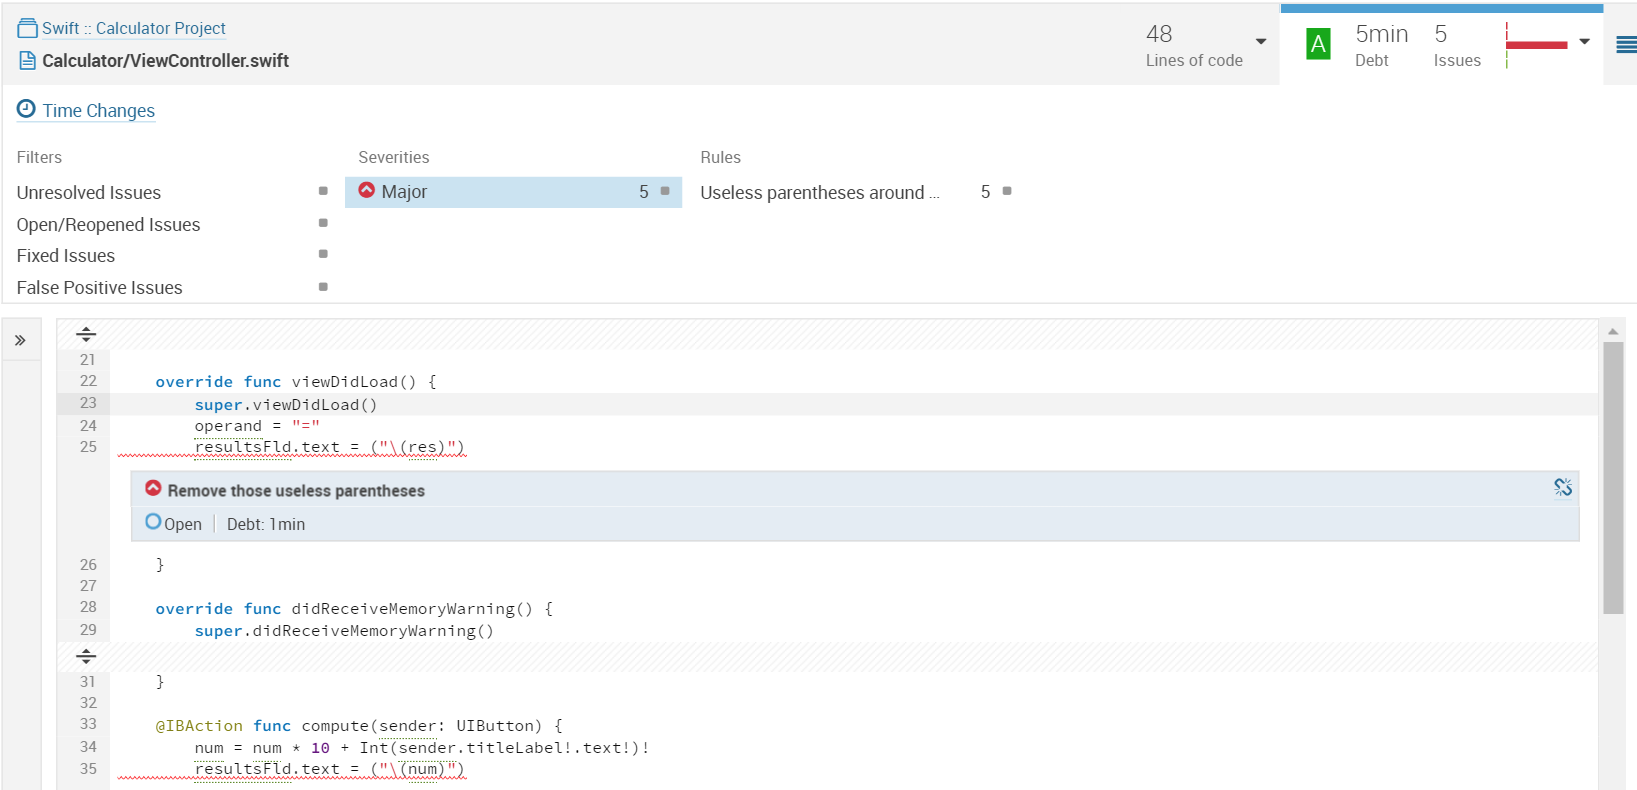
SonarQube - Jenkins
Fastlane
1. brew cask install fastlane
2. Run in SimpleETA project directory
    fastlane init
3. Answer questions
4. Run
    fastlane test
URLs
http://riis.com/blog
https://getpostman.com
https://github.com/postmanlabs/newman
https://github.com/Brightify/Cuckoo
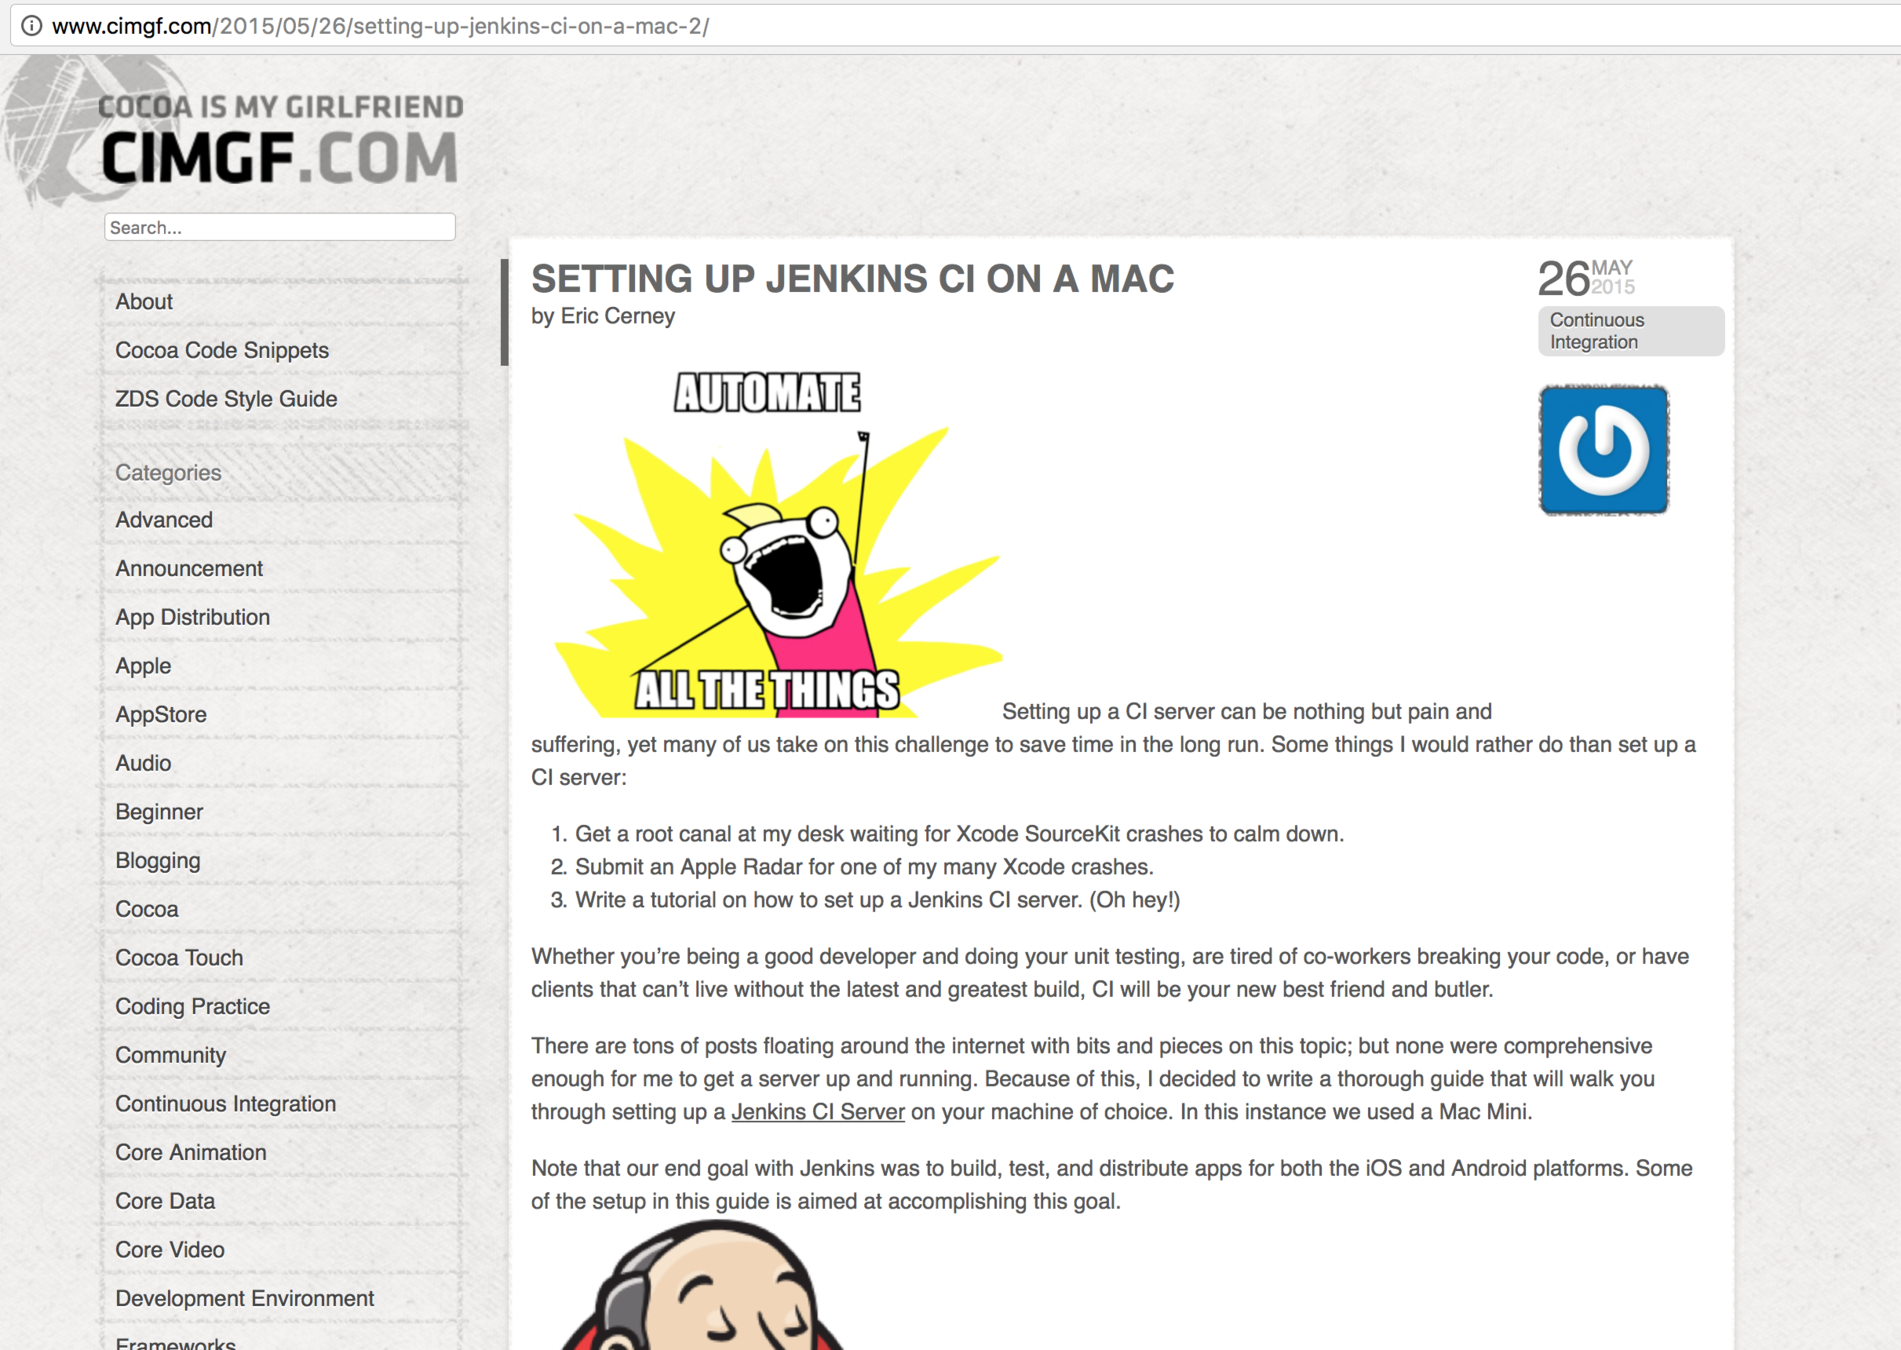
https://jenkins.io
http://www.cimgf.com/2015/05/26/setting-up-jenkins-ci-on-a-mac-2/
https://github.com/gnolanltu/ETAMock
https://sonarqube.org
https://github.com/fastlane/fastlane
CONTACT INFO
godfrey@riis.com
@godfreynolan
Agile Swift Workshop
By godfreynolan


