Sign In With Facebook

Omniauth!
The Omniauth gem allows your app's Users to sign in via their Facebook.

We can then access the User's name and image (so no need for Paperclip!).
Become a Facebook Developer
The first step is to visit developers.facebook.com
Once you're signed in (just your normal FB sign-in),
click on "Apps", and select "Add a New App".
Choose "Website".
Give your App a Name and a Category (I listed mine as "Education").
You should now have access to your APP ID and APP Secret.

It's Gem Time
In a new project, or an existing one without Devise,
add these the two Omniauth gems to your Gemfile:
gem 'omniauth'
gem 'omniauth-facebook', '1.4.0'
And then, of course, in your Terminal run...
$ bundle installCreating a User Model
$ rails g model User provider uid name oauth_token oauth_expires_at:datetimeLet's generate a model called "User"...
Notice that I only specified the data type for the last attribute?
If you don't specify a DT, the attribute will default to String.
(Yes: I've deliberately wasting your keystrokes this whole time!)
We created a database: don't forget to...

Complete the Model
class User < ActiveRecord::Base
    def self.from_omniauth(auth)
        where(auth.slice(:provider, :uid)).first_or_initialize.tap do |user|
        # if at the end of these slides you end up with an error message,
        # try replace the above line with this:
        # where(provider: auth.provider, uid: auth.uid).first_or_create do |user|
          user.provider = auth.provider
          user.uid = auth.uid
          user.name = auth.info.name
          user.oauth_token = auth.credentials.token
          user.oauth_expires_at = Time.at(auth.credentials.expires_at)
          user.save!
        end
    end

    # the following code pulls user avatars from FB:

    def largeimage
        "http://graph.facebook.com/#{self.uid}/picture?type=large"
    end

    def normalimage
        "http://graph.facebook.com/#{self.uid}/picture?type=normal"
    end
end
Fill in the user.rb model with the following code:
Application Controller
We'll need to add some code to our application_controller.rb:
class ApplicationController < ActionController::Base
  # Prevent CSRF attacks by raising an exception.
  # For APIs, you may want to use :null_session instead.
  protect_from_forgery with: :exception

  # add the code shown below:

  def current_user
    @current_user ||= User.find(session[:user_id]) if session[:user_id]
  end
  helper_method :current_user
end
Sessions Controller
Next, we need to create a new Controller.
This controller will have two actions - create and destroy - but we don't necessarily need views associated with those actions, and we'll be augmenting the routes, so it's up to you if you want to do:
$ rails g controller Sessions create destroyOr you can create the file (sessions_controller.rb) manually in Sublime.
Sessions Controller
However you went about creating it, let's now fill in sessions_controller.rb:
class SessionsController < ApplicationController
    def create
        user = User.from_omniauth(env["omniauth.auth"])
        session[:user_id] = user.id
        redirect_to root_url
    end

    def destroy
        session[:user_id] = nil
        redirect_to root_url
    end
end
Home Controller
So far, we don't actually have a page to visit to test this project out.
So let's just create a Home controller, with one page: Index.
$ rails g controller Home indexChange Your Routes
We'll need some custom routes for the Omniauth-related actions, and then let's set that page we just created (home/index.html.erb)
routes.rb
Rails.application.routes.draw do

  root 'welcome#index'

  match 'auth/:provider/callback', to: 'sessions#create', via: [:get, :post]
  match 'auth/failure', to: redirect('/'), via: [:get, :post]
  match 'signout', to: 'sessions#destroy', as: 'signout', via: [:get, :post]

end
Omniauth Initializer
Within the 'config' folder, and then within the 'initializers' folder, create a new file:
omniauth.rb
OmniAuth.config.logger = Rails.logger

Rails.application.config.middleware.use OmniAuth::Builder do
  provider :facebook, 'APP-ID-HERE', 'APP-SECRET-HERE'
end
In this file you will insert your APP ID and Secret we created way back in the beginning
Fresh-Brewed JavaScript
Up in our assets/javascripts folder, create a new file called
facebook.js.coffee
jQuery ->
  $('body').prepend('<div id="fb-root"></div>')

  $.ajax
    url: "#{window.location.protocol}//connect.facebook.net/en_US/all.js"
    dataType: 'script'
    cache: true


window.fbAsyncInit = ->
  FB.init(appId: '641667205923336', cookie: true)

  $('#sign_in').click (e) ->
    e.preventDefault()
    FB.login (response) ->
      window.location = '/auth/facebook/callback' if response.authResponse

  $('#sign_out').click (e) ->
    FB.getLoginStatus (response) ->
      FB.logout() if response.authResponse
    true
Of any of the pages presented in these slides, this is one you're gonna want to just copy-n-paste
Back at Home
<div id="user-widget">
  <% if current_user %>
    Welcome <strong><%= current_user.name %></strong>!
    <%= image_tag(current_user.normalimage) %>
    <%= link_to "Sign out", signout_path, id: "sign_out" %>
  <% else %>
    <%= link_to "Sign in with Facebook", "/auth/facebook", id: "sign_in" %>
  <% end %>
</div>
Now, either on home/index.html.erb, or just the application.html.erb view, add Sign In/Sign Out code:
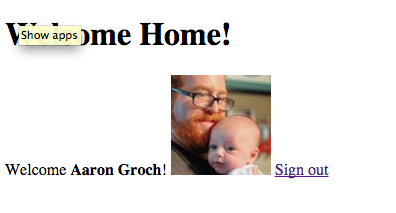
You'll see that once a User signs in through Facebook, we will display their name and FB profile pic.
One Last Step...
Let's go back to developers.facebook.com,
and on the left sidebar you'll see "Settings".
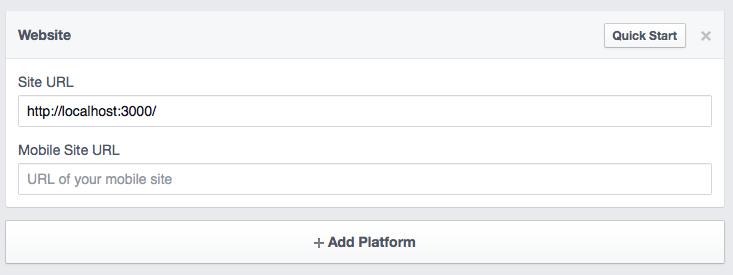
Click on '+Add Platform', choose 'Website', and add your URL.

We're just in development now,
so the URL will be either
http://0.0.0.0:3000or http://localhost:3000
Now It's Time
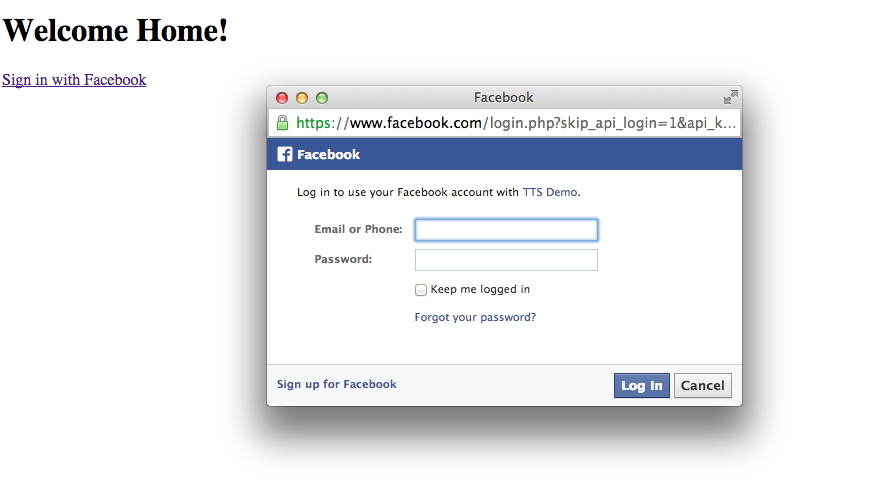
To Test It Out!

