0 to Production!
Workshop
Requirements
- github account
- heroku account
- JS basic knowledge
- computer with node.js (>=10)
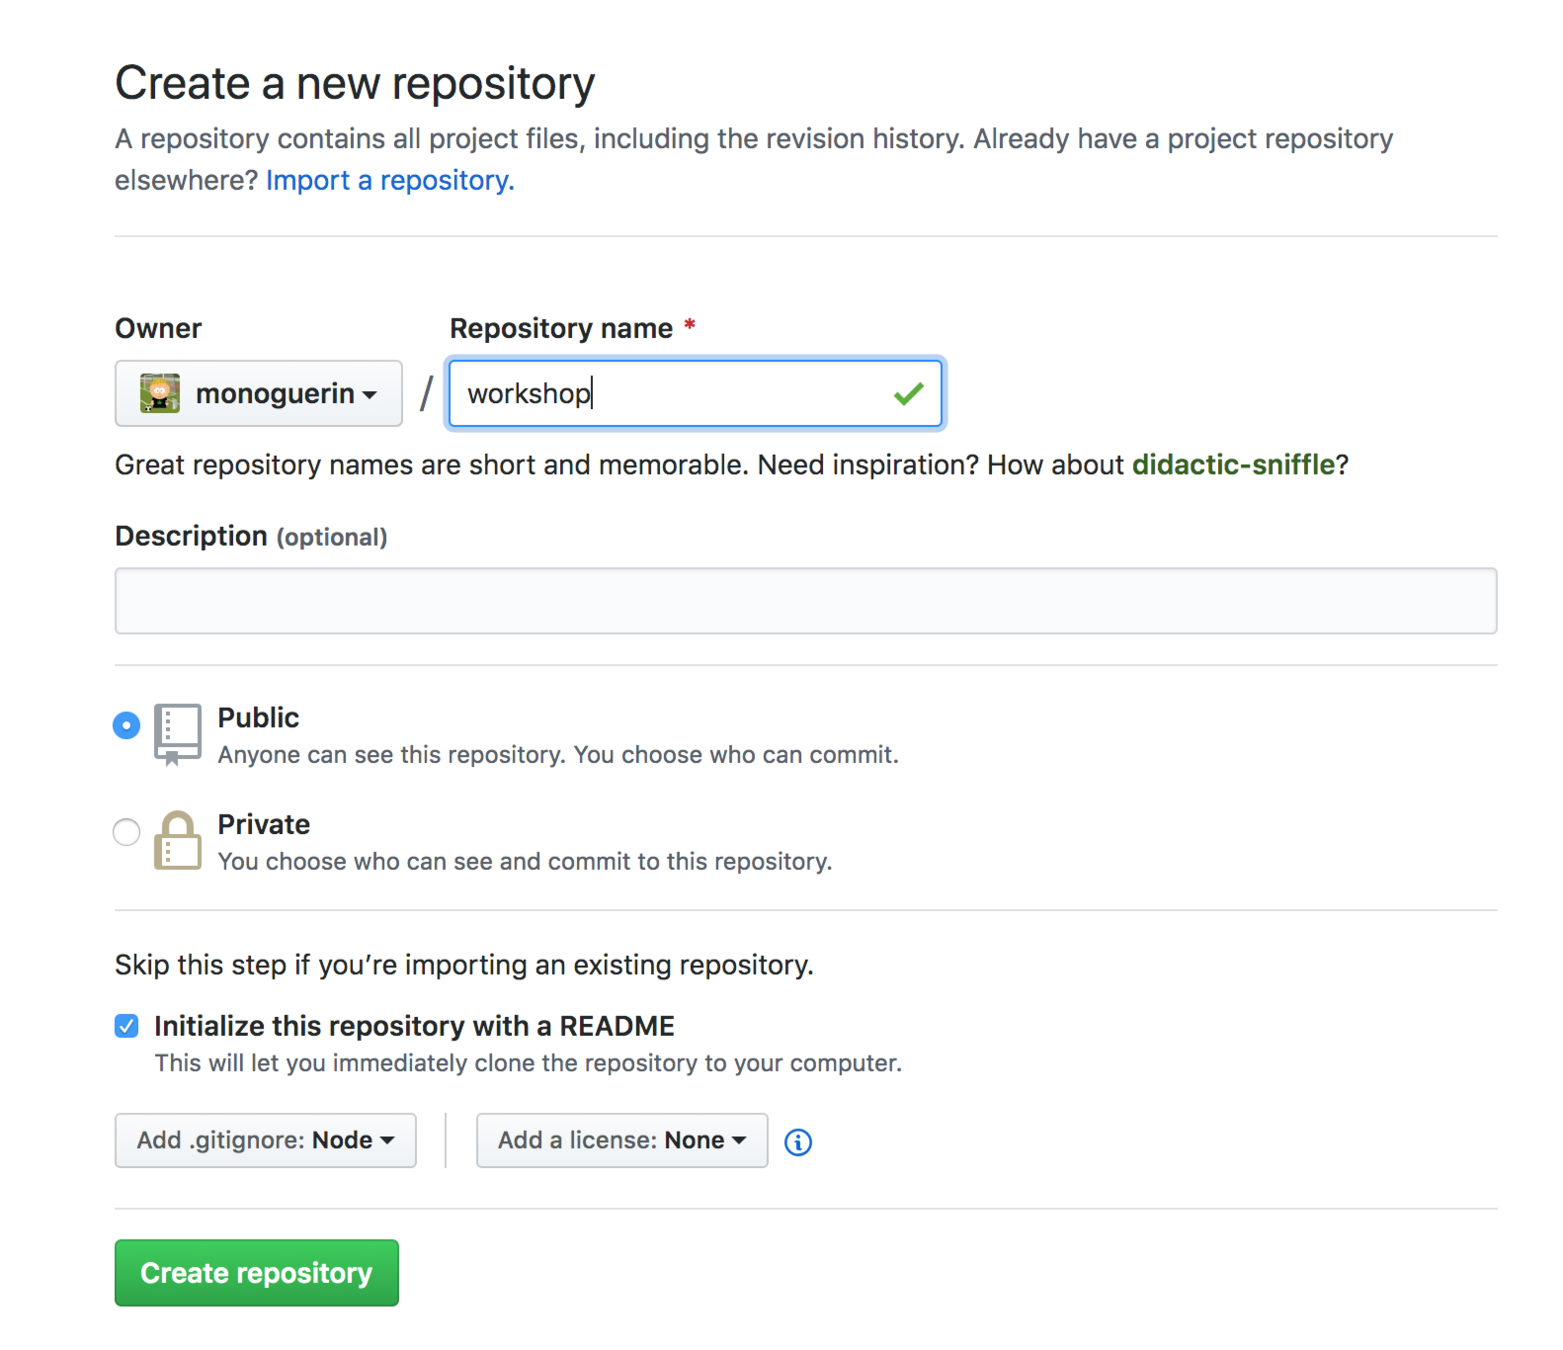
Let's create the repo
- Go to github.com
- Click the New button
- Fill the information needed
- Initialize with a README file
- Add .gitignore node
Create a new github repo
Now clone the repo
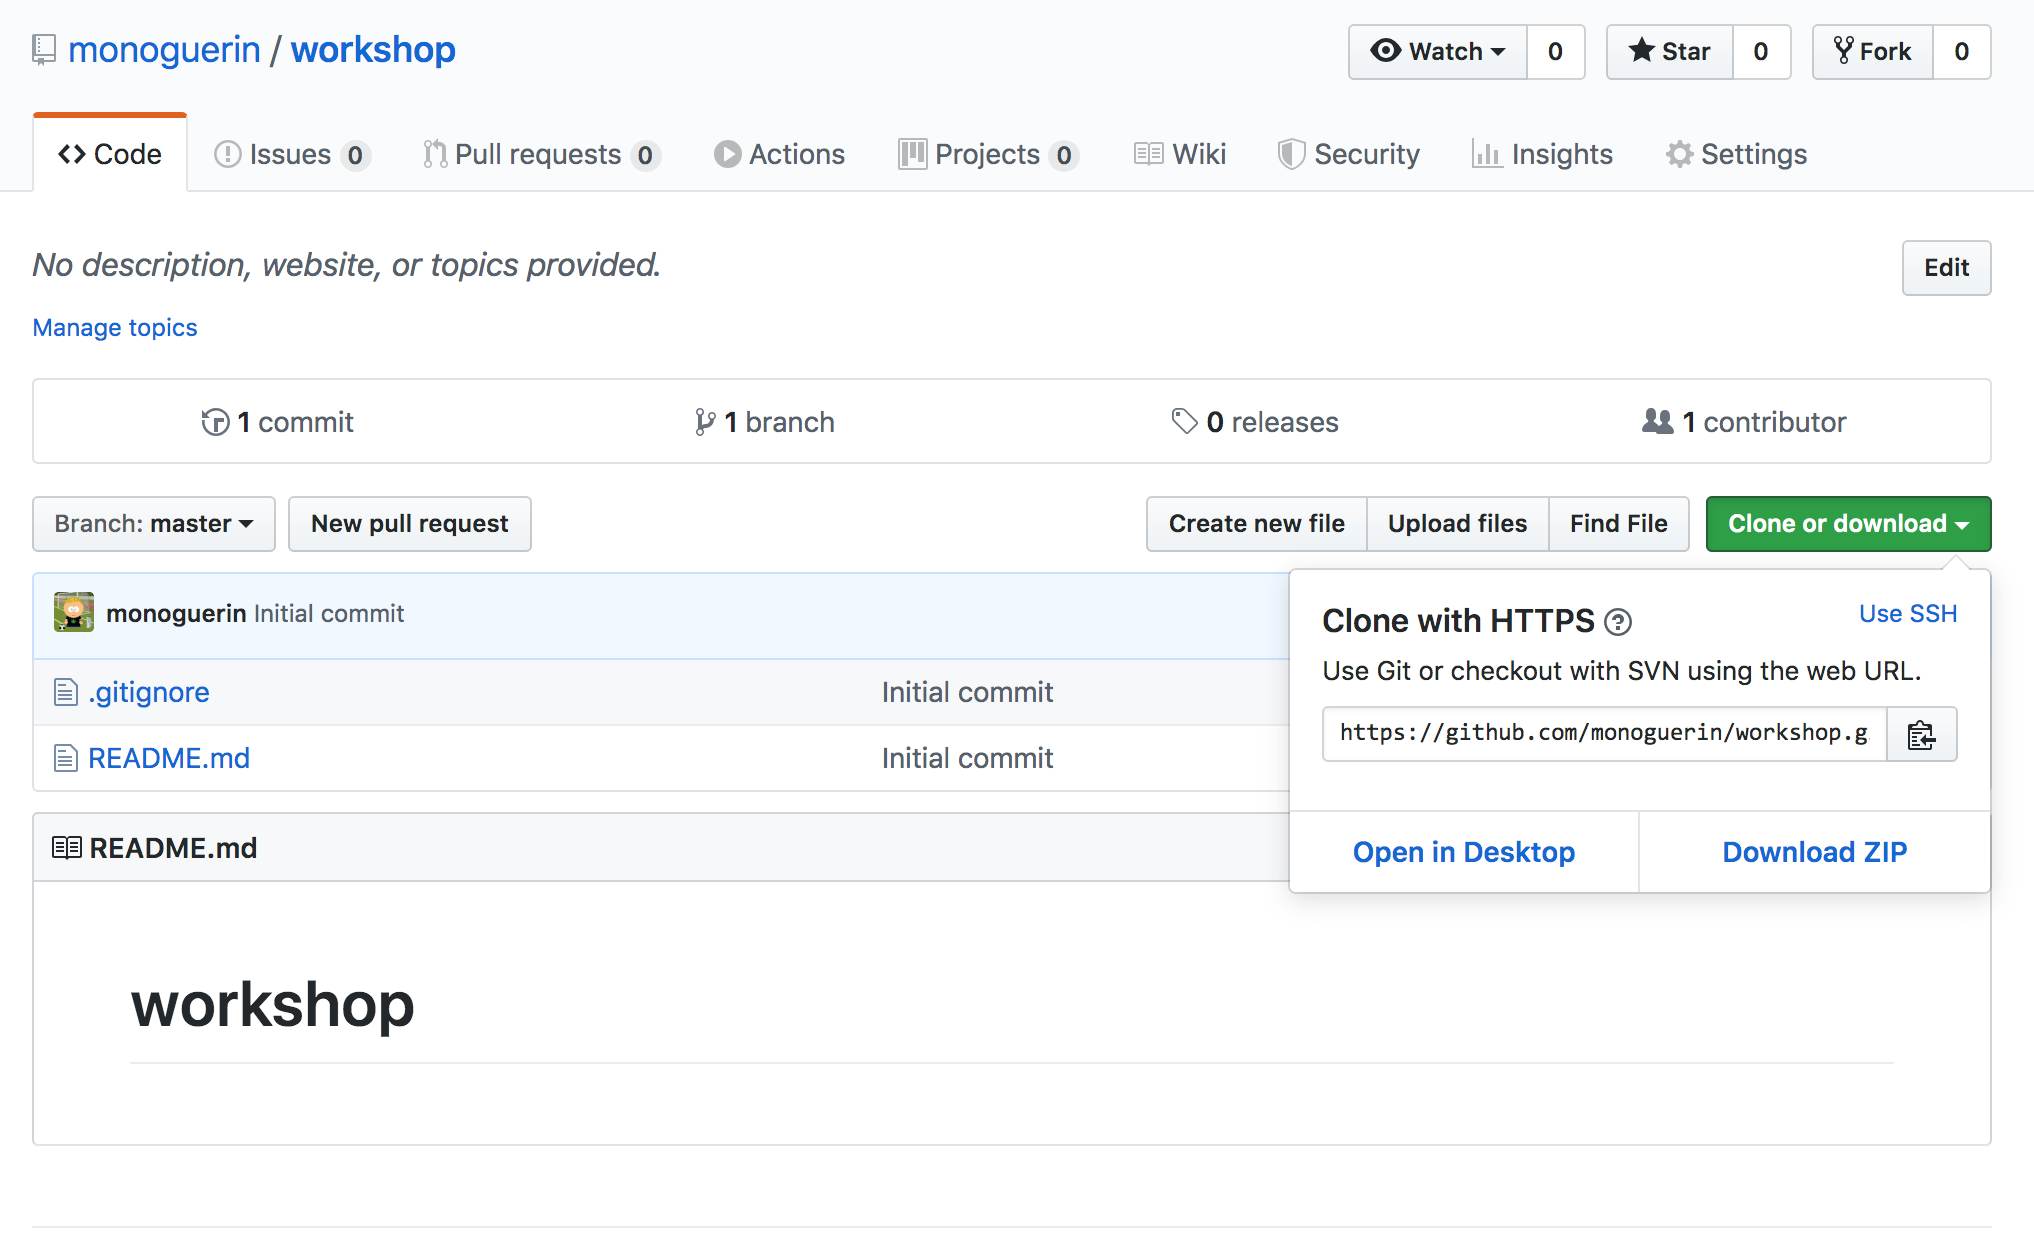
git clone https://github.com/monoguerin/workshop.git
cd workshop
Init Node
npm initThis will create a package.json file where the project information is stored including dependencies and running scripts
Install Next.js
npm install --save next react react-dom
Modify the scripts in the package.json
{
  "scripts": {
    "dev": "next",
    "build": "next build",
    "start": "next start"
  }
}
Create your first page
Create a folder called "pages" and a new file called "index.js" with the next content
import React from 'react';

function Home() {
  return <div>Welcome to Next.js!</div>;
}

export default Home;
Test it by running the next command
npm run devTry building and running locally too as a production build
npm run build
npm start
Let's configure eslint
npm install --save-dev eslint

// Config is broken so we need this
npm install inquirer@6.3

npx eslint --init
"rules": {
"react/jsx-filename-extension": [
1,
{
"extensions": [".js", ".jsx"]
}
]
}Add this rule to enable JSX in JS files
Ex. Create 2 more pages one "posts" and another called "account"
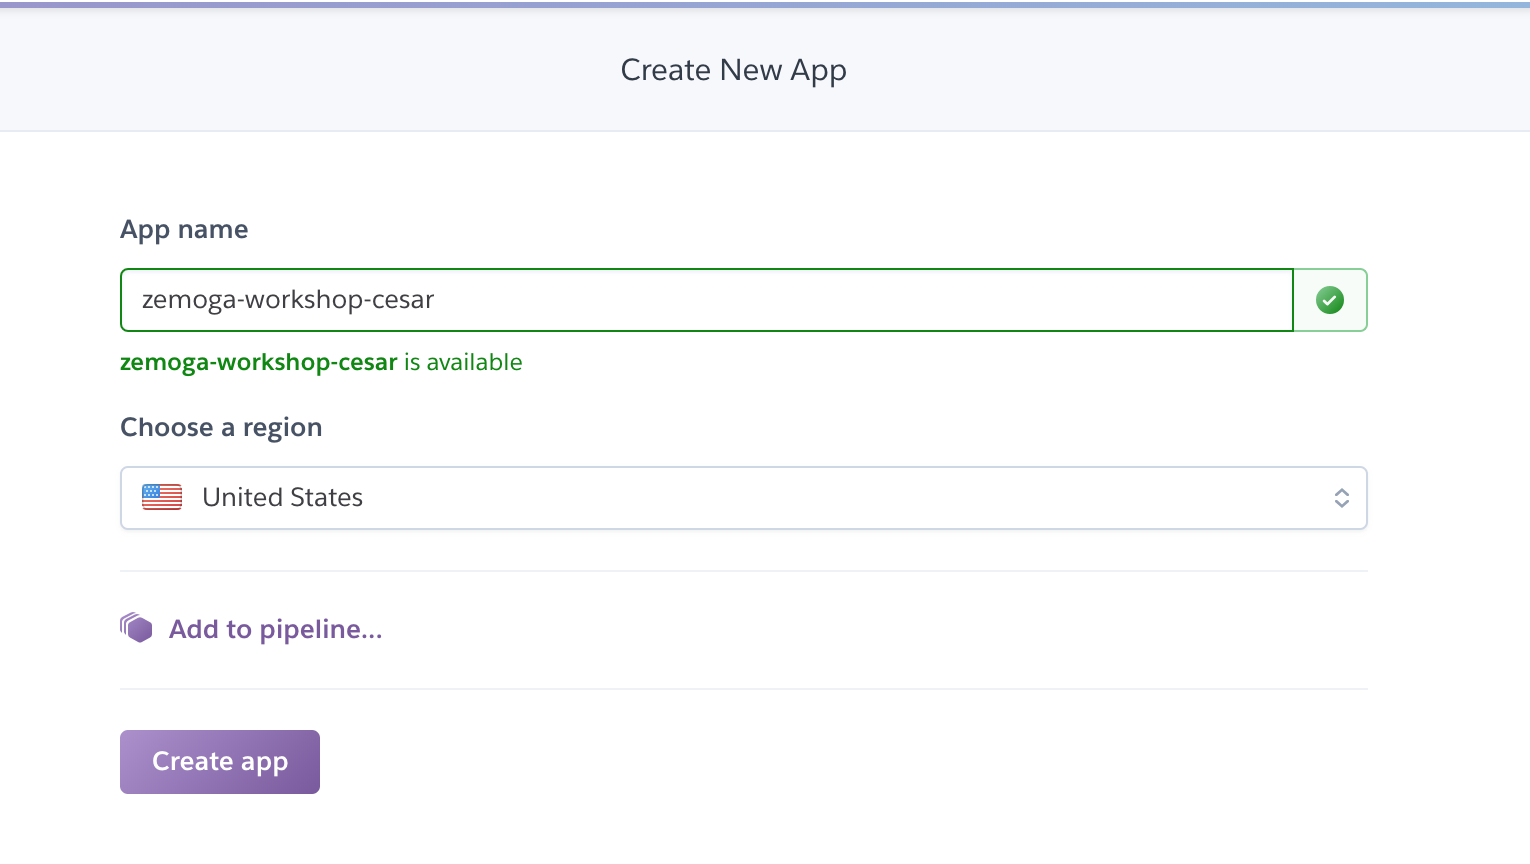
Push to master
Go to Heroku and create a new app
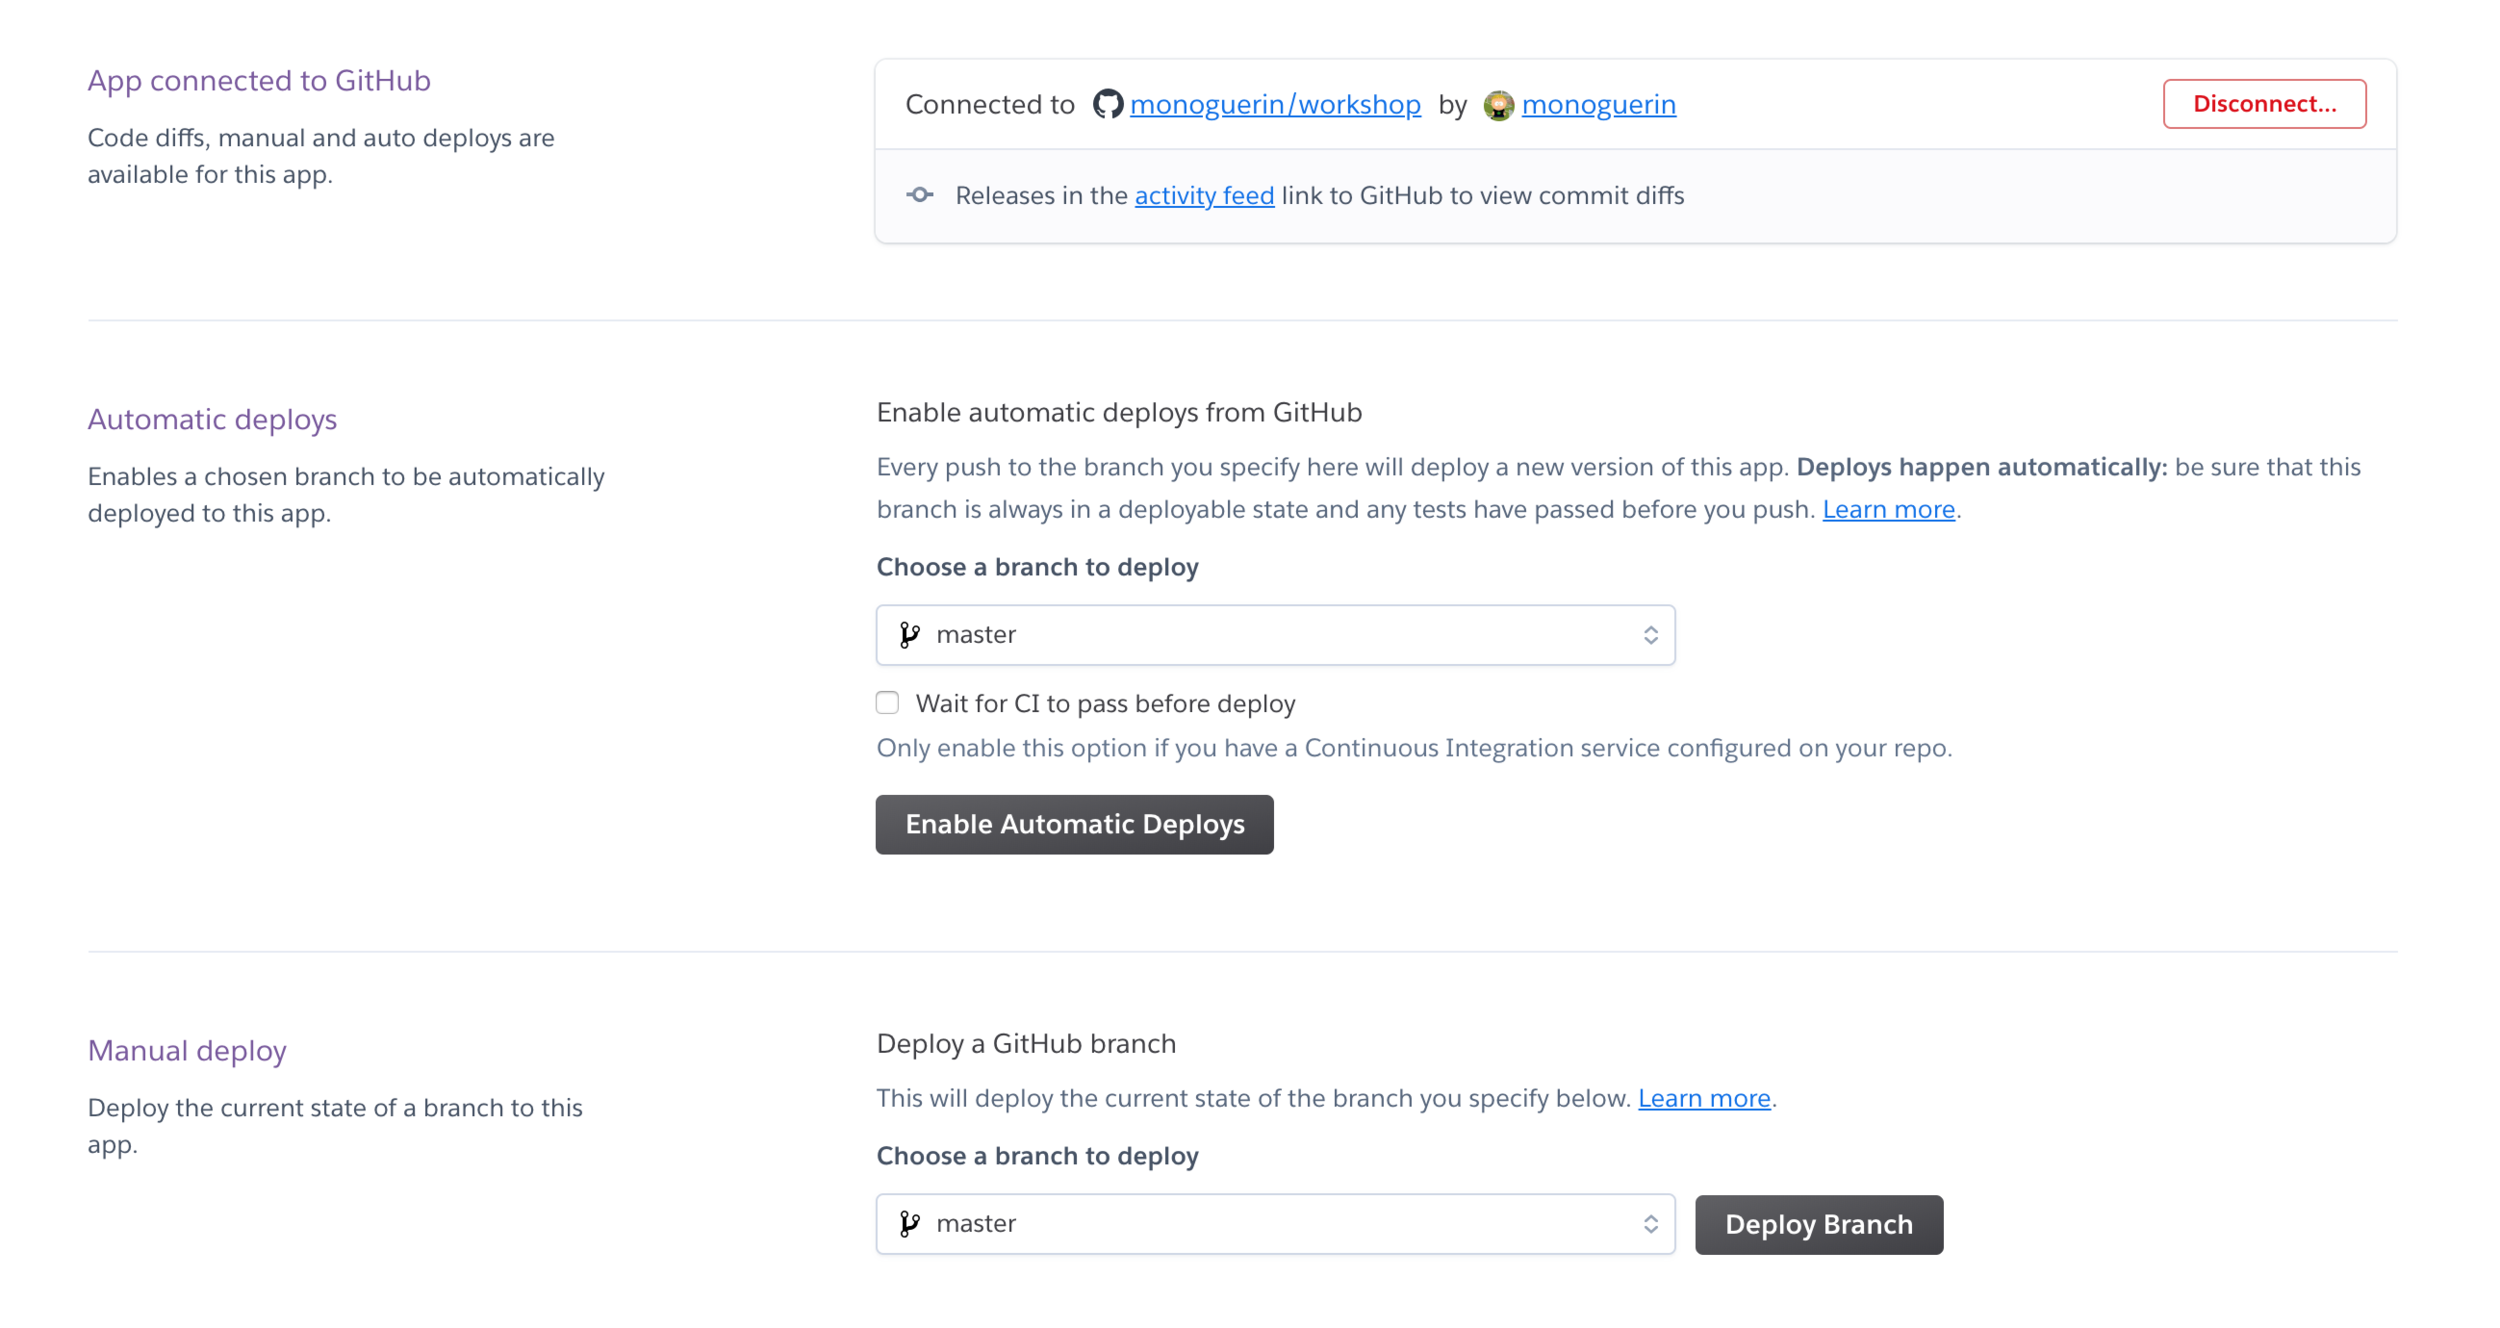
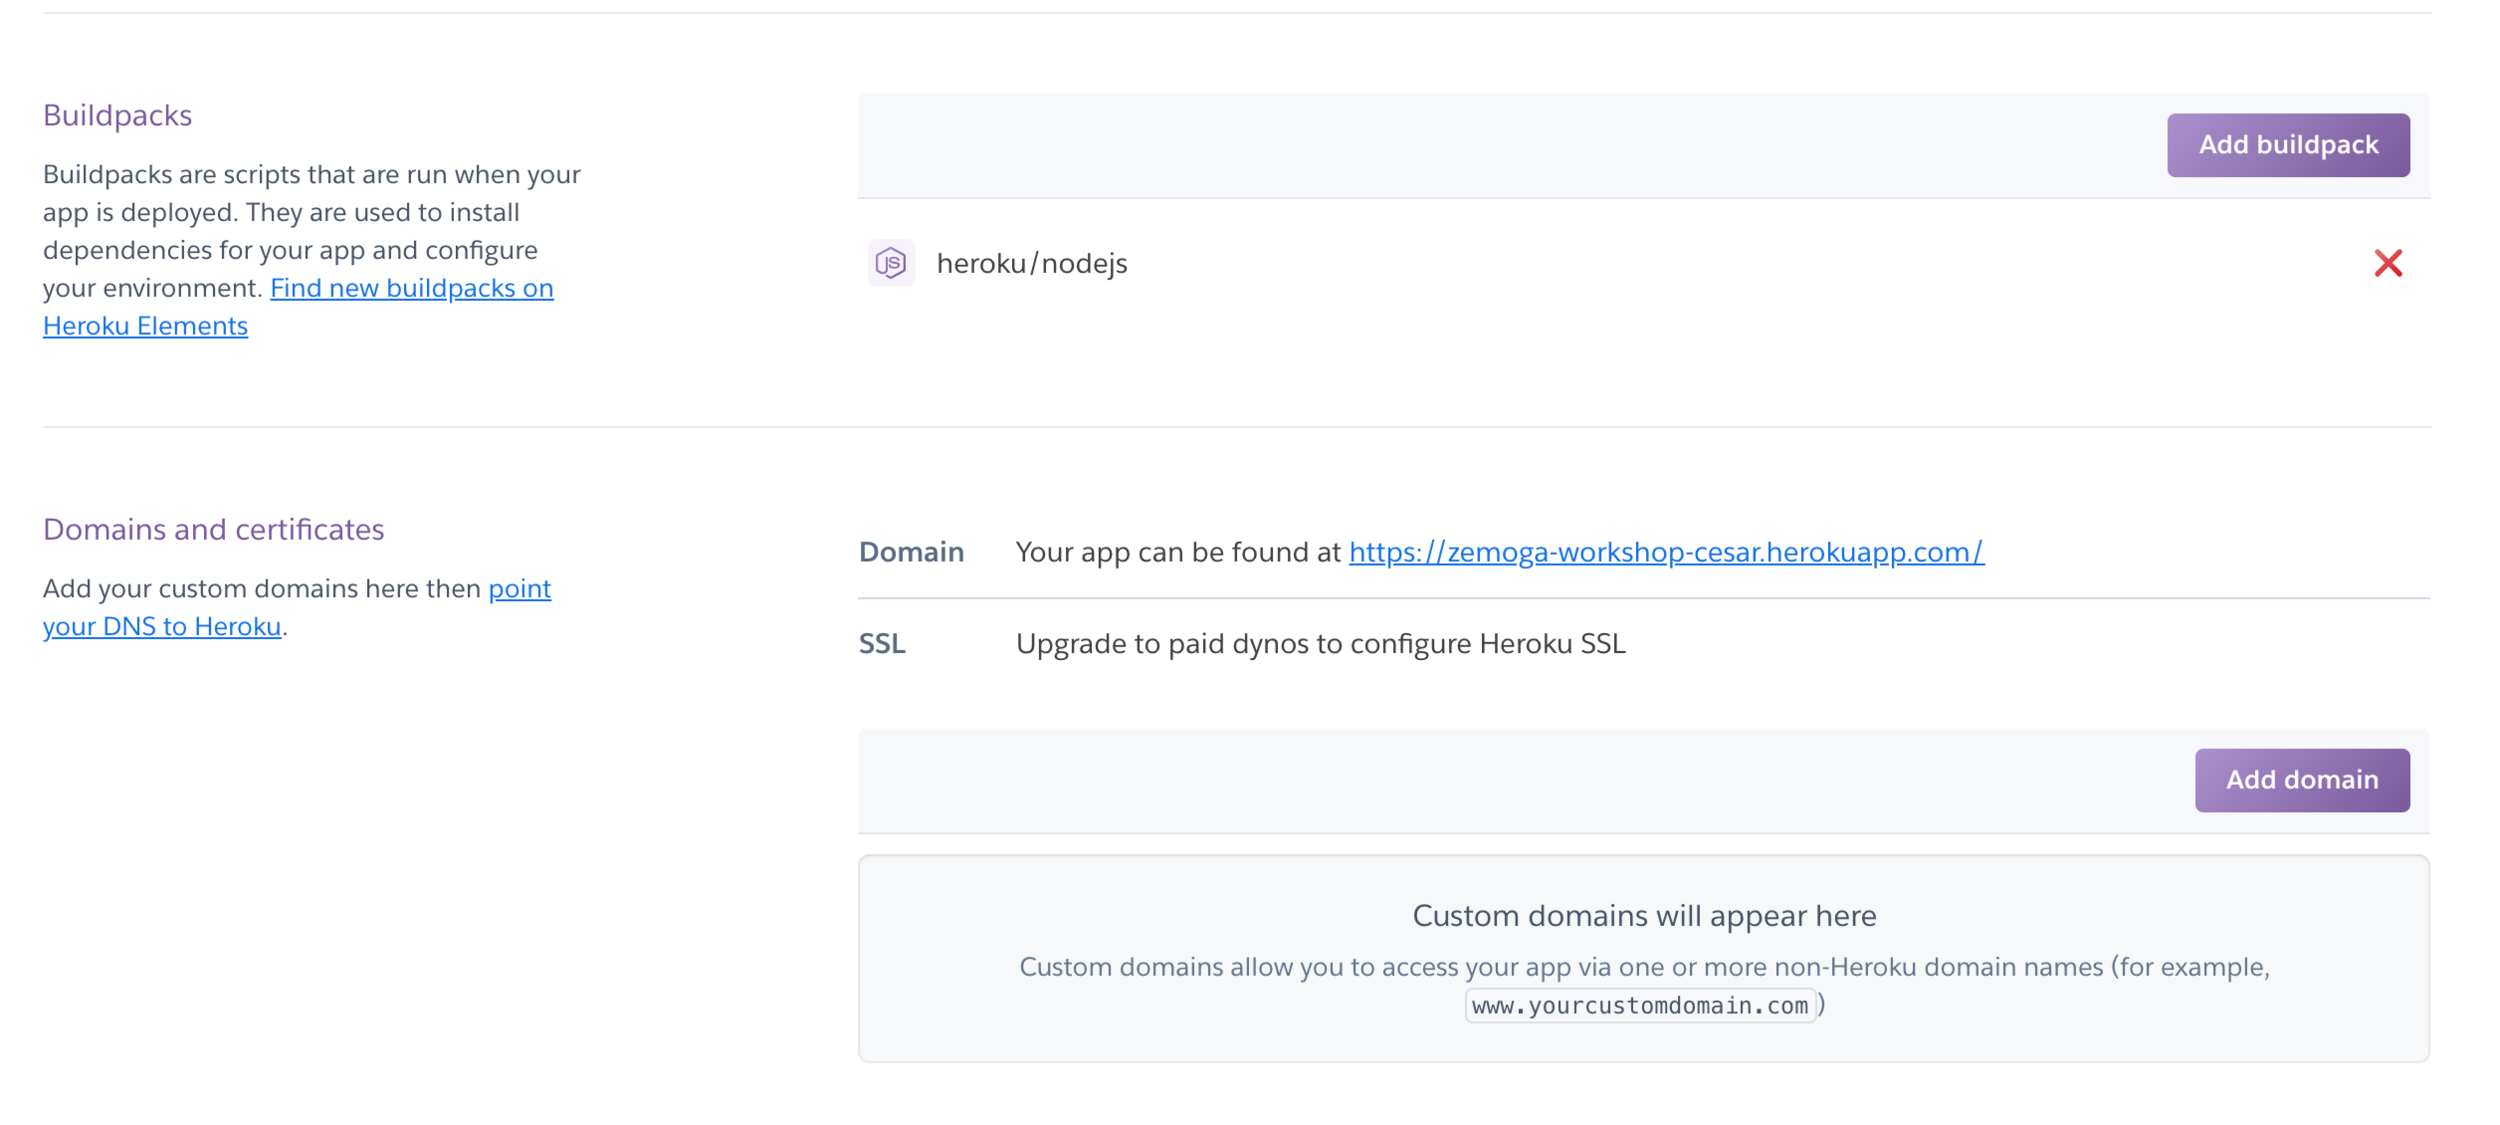
Adjust scripts to be run in Heroku
"scripts": {
    "dev": "next",
    "build": "next build",
    "heroku-postbuild": "npm run build",
    "start": "next start -p $PORT"
},
Push again 🔥
Install Material Library
Modify _document.js
Add a couple components to the page
Push to master
Push again 🔥🔥
Let's create our custom express server
npm install --save expressCreate a folder called "server" and an "index.js" file inside it
const express = require('express');
const next = require('next');

const dev = process.env.NODE_ENV !== 'production';
const app = next({ dev });
const handle = app.getRequestHandler();

app.prepare()
  .then(() => {
    const server = express();

    server.get('*', (req, res) => handle(req, res));

    server.listen(3000, (err) => {
      if (err) {
        throw err;
      }
      console.log('> Ready on http://localhost:3000');
    });
  })
  .catch((ex) => {
    console.error(ex.stack);
    process.exit(1);
  });
Adjust scripts to use our new express server
"scripts": {
    "dev": "node server",
    "build": "next build",
    "start": "NODE_ENV=production node server",
    "heroku-postbuild":"npm run build"
},
Ex. Create 2 GET routes one /test and another /posts
Push to master
Let's add our API
npm install --save express-graphql graphql-toolsCreate a basic Schema
const { makeExecutableSchema } = require('graphql-tools');

const schema = makeExecutableSchema({
  typeDefs: `
    type Post {
      id: Int!
      title: String
    }

    type Query {
      posts: [Post]
    }
  `,
  resolvers: {
    Query: {
      posts: () => [{
        id: 1,
        title: 'Mi titulo',
      }],
    },
  },
});

module.exports = schema;
Add middleware
const graphqlHTTP = require('express-graphql');
const schema = require('./api');

server.use('/graphql', graphqlHTTP({
      schema,
      graphiql: true,
}));
Test locally and push
Let's start using PM2 for server changes
npm install pm2Change package.json scripts
{
    "dev": "pm2 start server --watch",
}
Let's configure apollo client
npm install apollo-boost react-apollo graphql
Install dependencies
import ApolloClient from 'apollo-boost';

const client = new ApolloClient();

export default client;
Create a folder called "apollo" and a file inside called "client.js"
Let's test our client
import { gql } from "apollo-boost";

client
  .query({
    query: gql`
      {
        users {
            id
            name
            email
        }
      }
    `
  })
  .then(result => console.log(result));
Is it working?
Let's fix Server Side calls
Install isomorphic-fetch
npm install isomorphic-fetch es6-promise
Add polyfill to _app.js
import { polyfill } from 'es6-promise';

// ES6 Promise for using isomorphic fetch
polyfill();
Add fetch to client
import ApolloClient from 'apollo-boost';
import fetch from 'isomorphic-fetch';

const client = new ApolloClient({
  fetch,
});

export default client;
Test again
Let's fix the host and uri problem
const HOST = process.env.HOST || 'http://localhost:3000';


const client = new ApolloClient({
  uri: `${HOST}/graphql`,
  fetch,
});
Create a file called "appConfig.js" in the root folder
const PORT = process.env.PORT || 3000;

module.exports = {
  PORT,
  HOST: process.env.HOST || `http://localhost:${PORT}`,
};
appConfig.js
Fix paths and test again
Push to master 🔥
Let's create a Posts.js Component
{
    title: 'Post title 1',
    description: 'Lorem ipsum...',
    favorite: false
}
Create an Array of at least 6 posts with this Object structure
Let's create a Post component
Title
Description....
Delete
Post.js
Stateful vs Stateless
Change "Posts.js" to be a stateful component
Create a "removePost" method and attach it to the delete button in the Post component
class Posts extends React.Component {
  constructor(props) {
    super(props);
    this.state = {
      posts: POSTS,
    };
  }

  removePost(index) {
    const {
      posts,
    } = this.state;

    const newPosts = [
      ...posts,
    ];

    newPosts.splice(index, 1);

    this.setState({
      posts: [
        ...newPosts,
      ],
    });
  }

  render() {
    const {
      posts,
    } = this.state;

    return (
      <div>
        <h1>Hello, world!</h1>
        {posts.map(post => ({
          ...post,
          onClick: this.removePost.bind(this),
        })).map(Post)}
      </div>
    );
  }
}
Make it simpler with Hooks
UseState
UseCallback
const Posts = () => {
  const [posts, setPosts] = useState(POSTS);
  const removePost = useCallback((index) => {
    const newPosts = [
      ...posts,
    ];

    newPosts.splice(index, 1);

    setPosts(newPosts);
  }, [posts]);

  return (
    <div>
      <h1>Hello, world!</h1>
      {posts.map(post => ({
        ...post,
        onClick: removePost,
      })).map(Post)}
    </div>
  );
};
Create a custom hook with the hooks used before
const usePosts = (initialPosts) => {
  const [posts, setPosts] = useState(initialPosts);
  const removePost = useCallback((index) => {
    const newPosts = [
      ...posts,
    ];

    newPosts.splice(index, 1);

    setPosts(newPosts);
  }, [posts]);

  return {
    posts,
    removePost,
  };
};