Exodus:
Domain Migration
When it's time to move
A simple guide to transferring internet domains between registrars
What's Covered?
Domain Transfer & DNS
Email and hosting, owing to the vast array of possibilities, are beyond the scope of this slide deck.
Outbound Registrar: GoDaddy
Inbound Registrar: Google Domains
Step 1
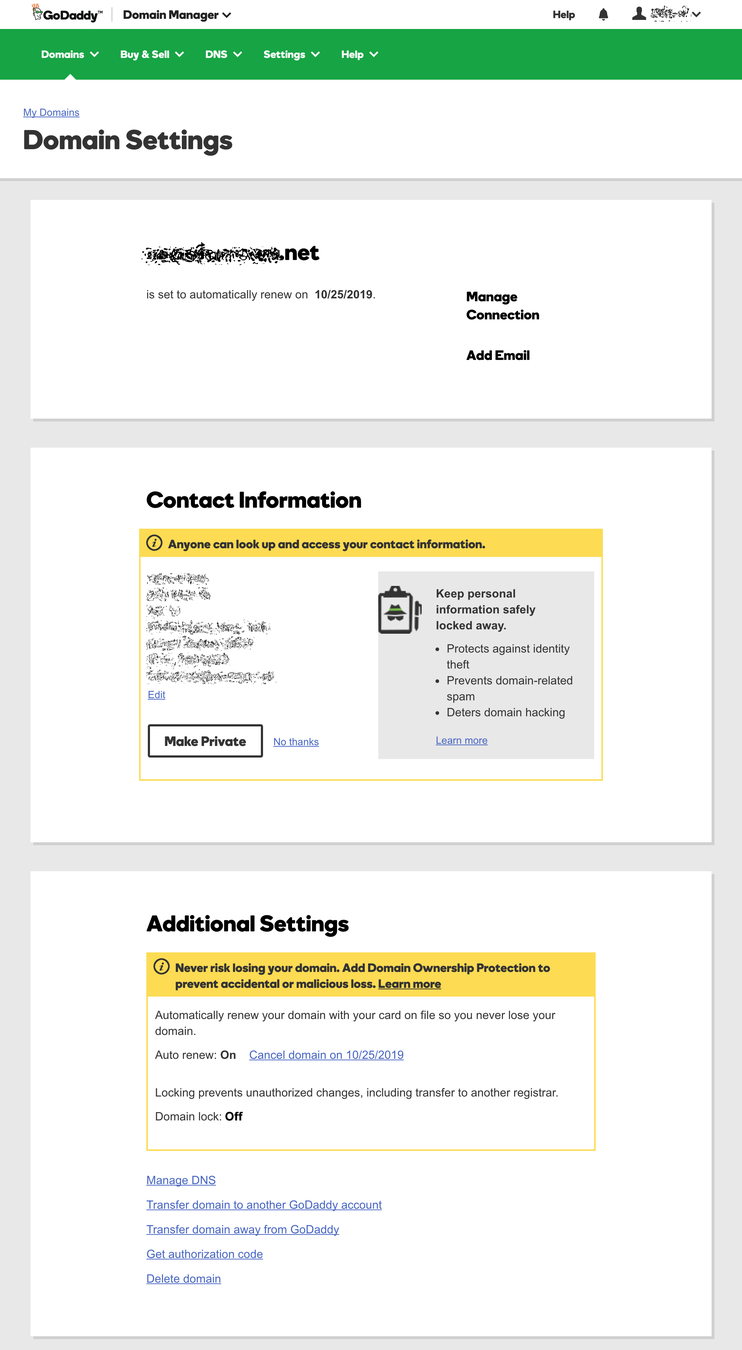
Unlock Domain

In GoDaddy's Domain Manager, choose the domain,
make sure your admin email is correct,
then unlock the domain.
Watch your email for the domain status notification from Godaddy, indicating that the domain is now unlocked.

Step 1
Unlock Domain
Step 2
Transfer Out
In GoDaddy's Domain Manager, choose the domain, scroll all the way down and click the link:
Transfer domain away from GoDaddy
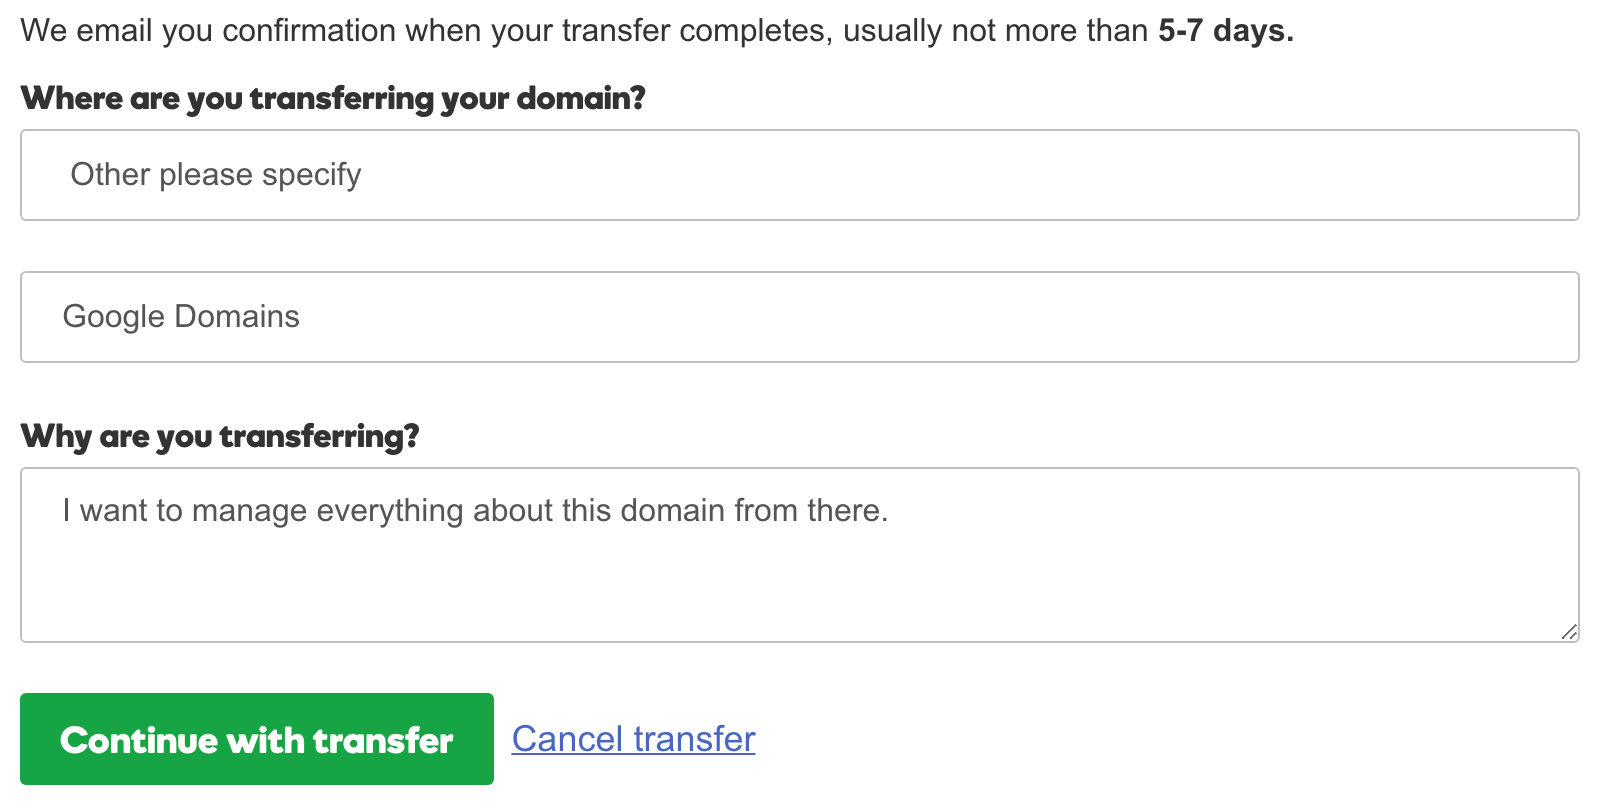
Tell GoDaddy where you're planning to move the domain and why.
They try their best to make this look hard. It isn't.
Step 2
Transfer Out
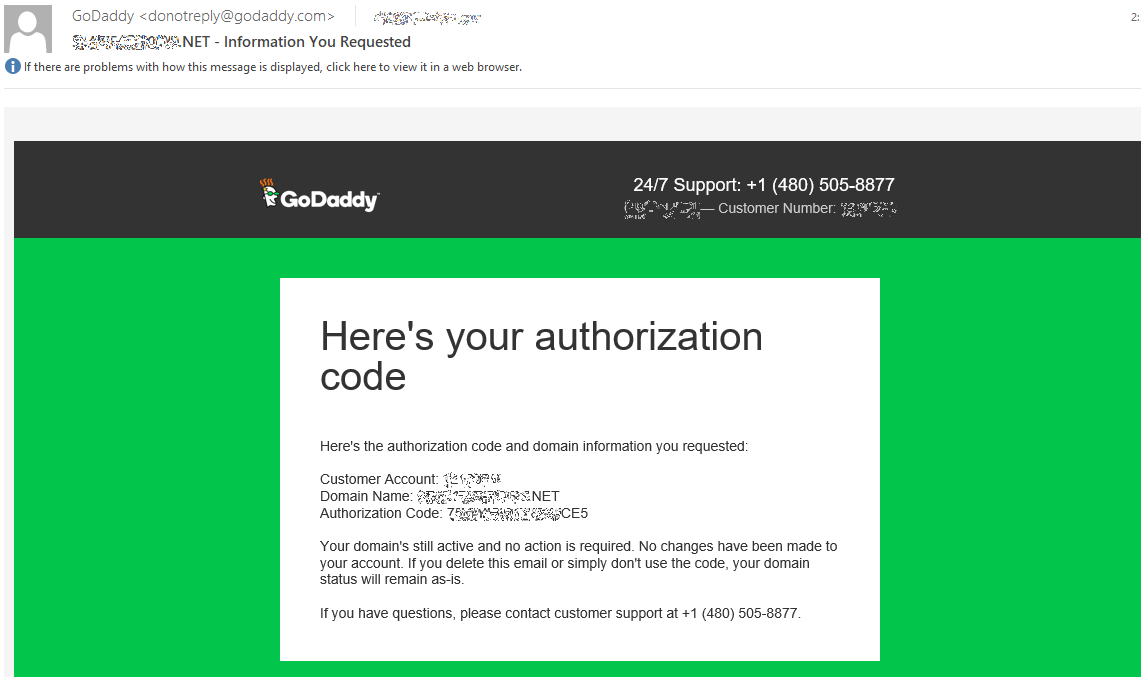
Watch your email for the authorization code from Godaddy.
Google will need this later.
Step 2
Transfer Out
Step 3
Transfer In
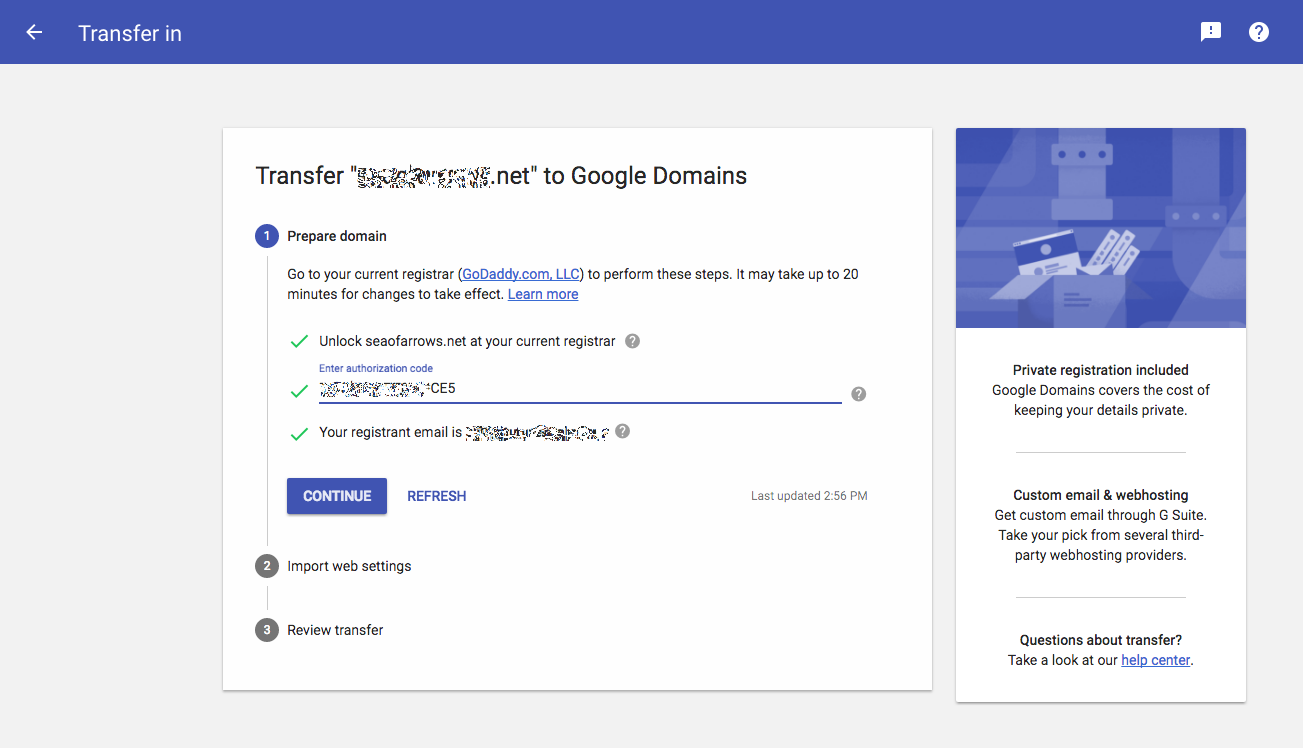
At Google Domains, click
Transfer In
enter your domain name, and click
Continue
Give Google the authorization code you received earlier from Godaddy.
Step 3
Transfer In
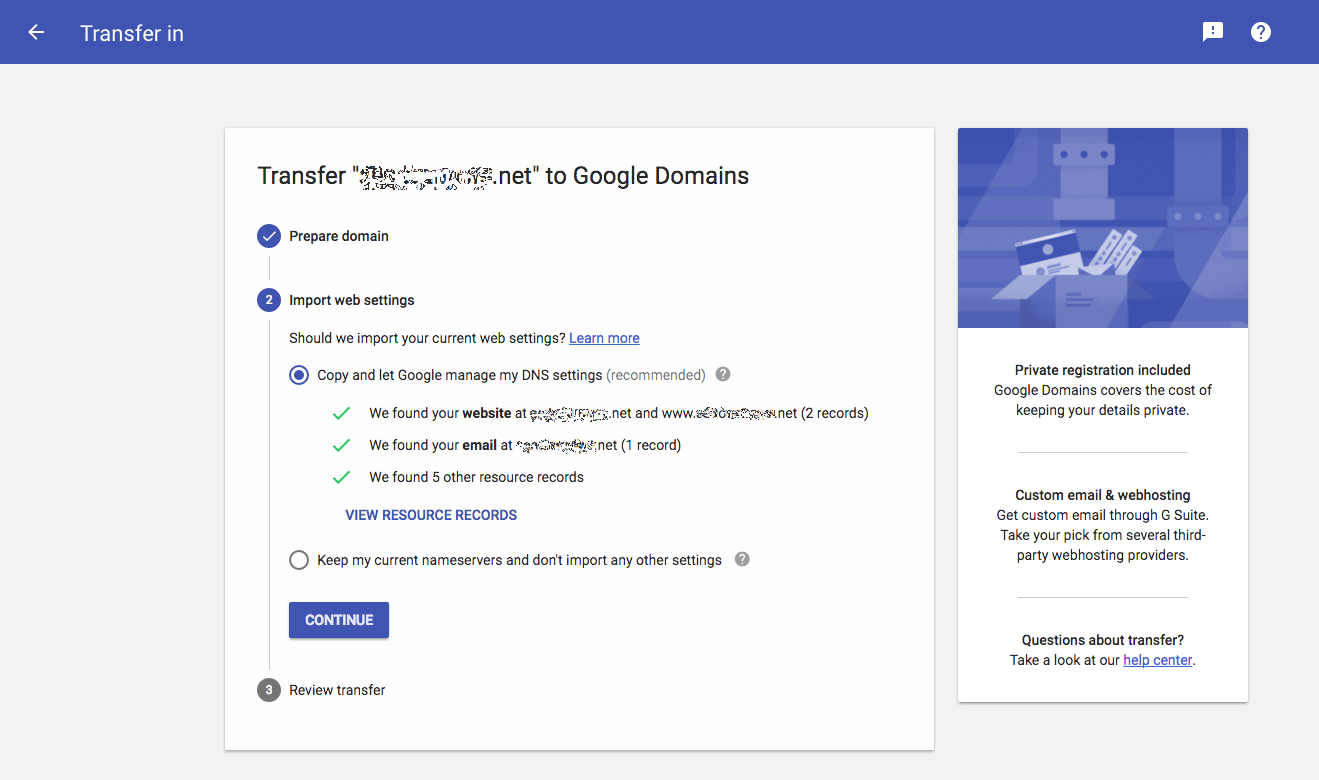
By default, Google will copy your existing DNS settings.
This is probably best. You can edit them later.
Step 3
Transfer In
Time to pay the ferryman.
Click the CHECK OUT button.
Step 3
Transfer In

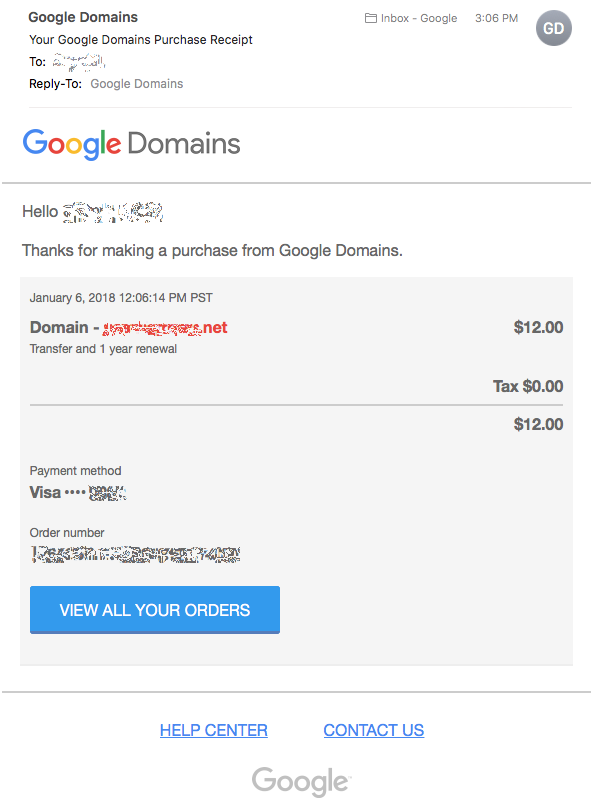
Watch your email for a confirmation from Google.
Click the Confirm Transfer Link.
Step 3
Transfer In
The page that opens reiterates everything in the confirmation email.
Click the Transfer Button.
Step 3
Transfer In
Step 4
Accept Transfer
Back at GoDaddy, choose Transfers from the Domains menu.
Then choose the domain(s) and click Accept/Decline
Choose 'Accept transfer' and click OK.
Step 4
Accept Transfer
Watch your email for a purchase receipt from Google and a domain transfer notice from GoDaddy.
Step 4
Accept Transfer
Step 5
Review & Customize
At Google Domains, choose My Domains from the menu.
Click a domain name for more...
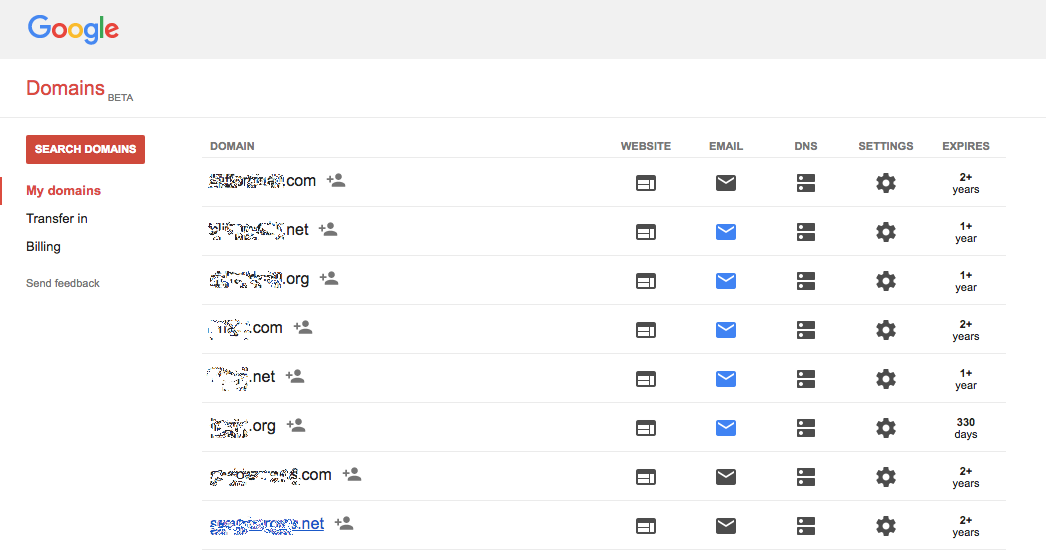
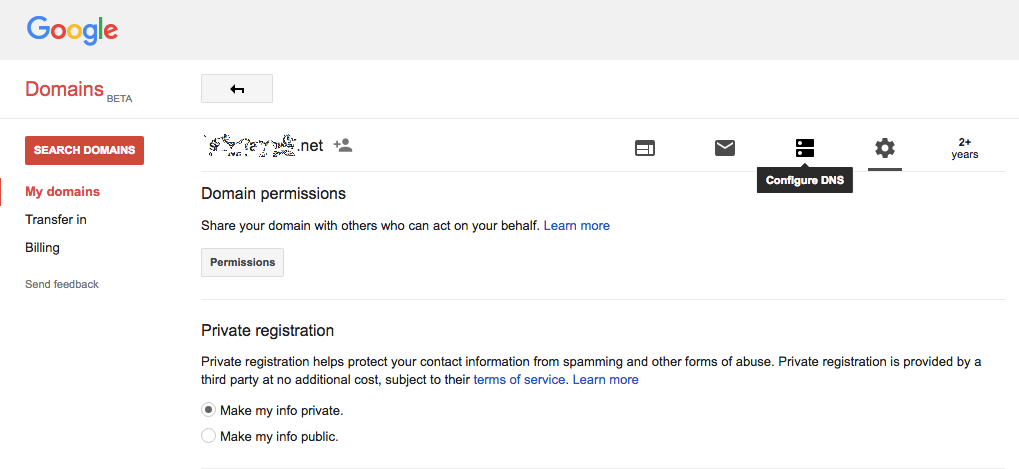
You can allow others to manage your domain and make your registration private.
Definitely make it private, it's free!
Step 5
Review & Customize
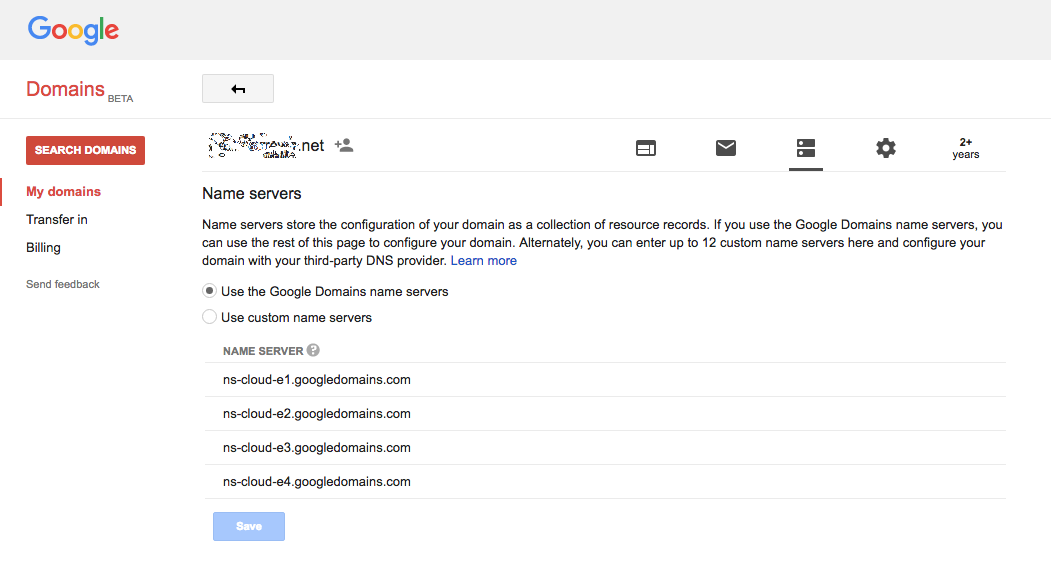
Review name servers.
You probably want to stick with Google's
Step 5
Review & Customize
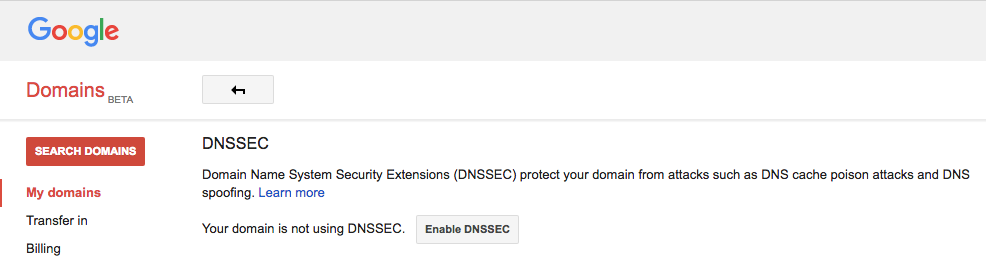
Enable DNSSEC.
Read up on why this is a good idea.
Step 5
Review & Customize
When you're ready to move your hosts and email, you can get rid of the old resource records and add new ones.
Step 5
Review & Customize

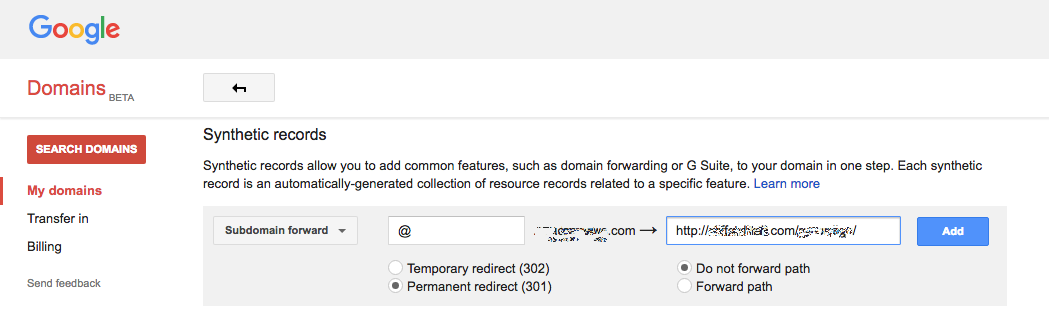
You can also forward subdomains or add features like G Suite.
Step 5
Review & Customize