網頁
網美班
| 第一堂 9/16 |
第二堂 10/21 |
第三堂 10/28 |
第四堂 11/18 |
第五堂 12/02 |
第六堂 12/30 |
|---|---|---|---|---|---|
| 初識網頁HTML | DC 常見標籤 |
常見標籤 HTML |
初識CSS | SAI教學 | CSS 總複習 |
課表
| 第一堂 2/24 |
第二堂 3/10 |
第三堂 3/31 |
第四堂 4/7 |
第五堂 4/21 |
第六堂 6/16 |
|---|---|---|---|---|---|
| 複習上學期的內容 | Box Model 定位方式 | 連結 清單 表格 媒體查詢 | 套用模板 架設網站 準備成發 | 準備成發 | 成發 |
網頁的組成


網頁的基本架構
網頁的樣式美觀、佈局排版
增添使用者與網頁的互動性效果

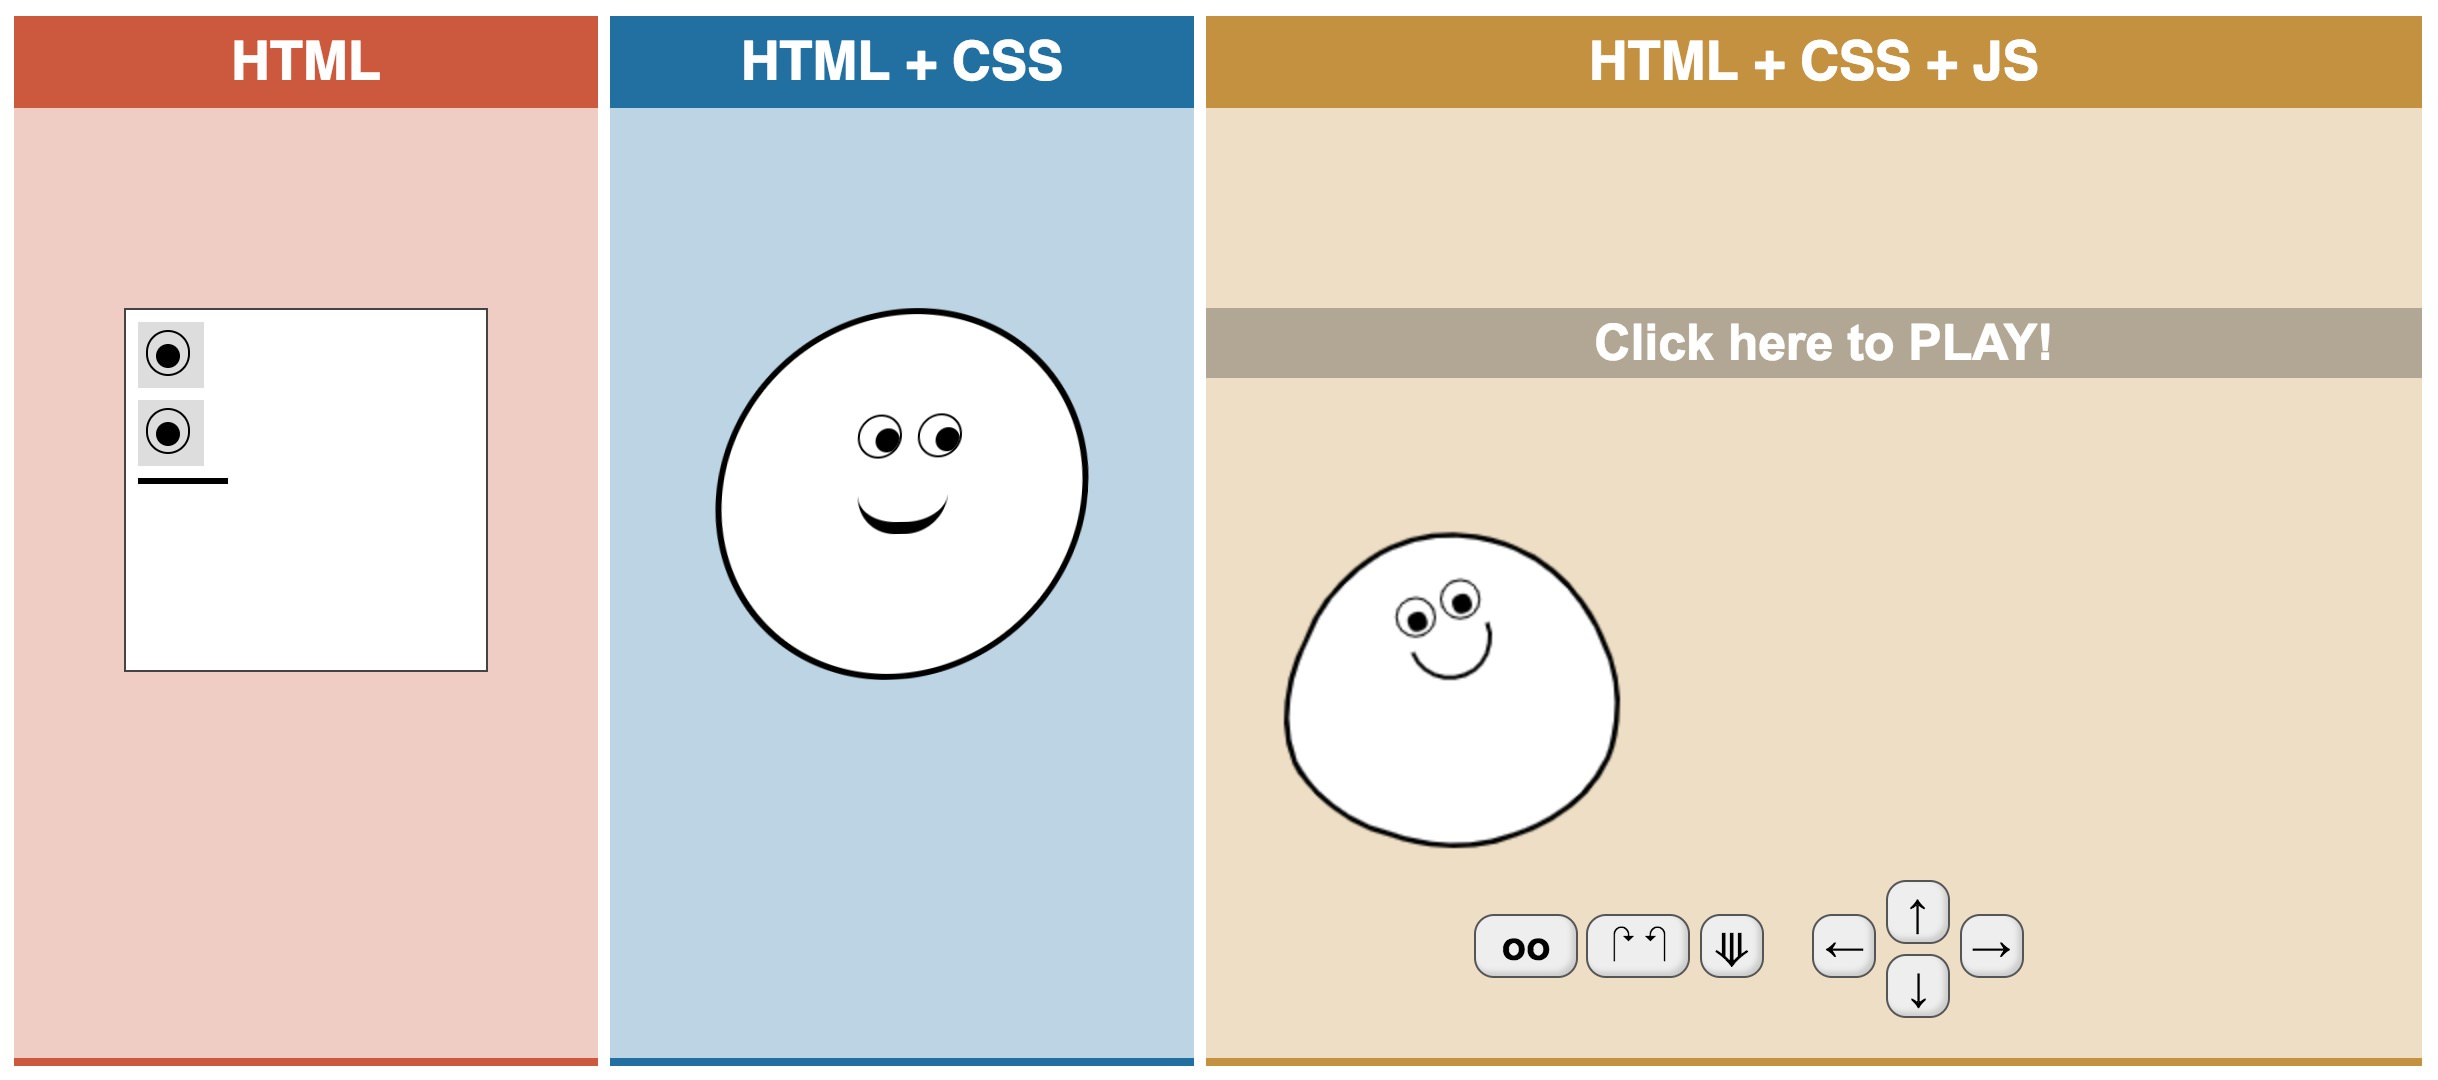
就類似....
HTML
什麼是HTML
什麼是HTML

全名Hyper Text Markup Language
是一種基礎技術
是標記語言不是程式語言
主要用途是定義網頁的內容


???
按下F12!
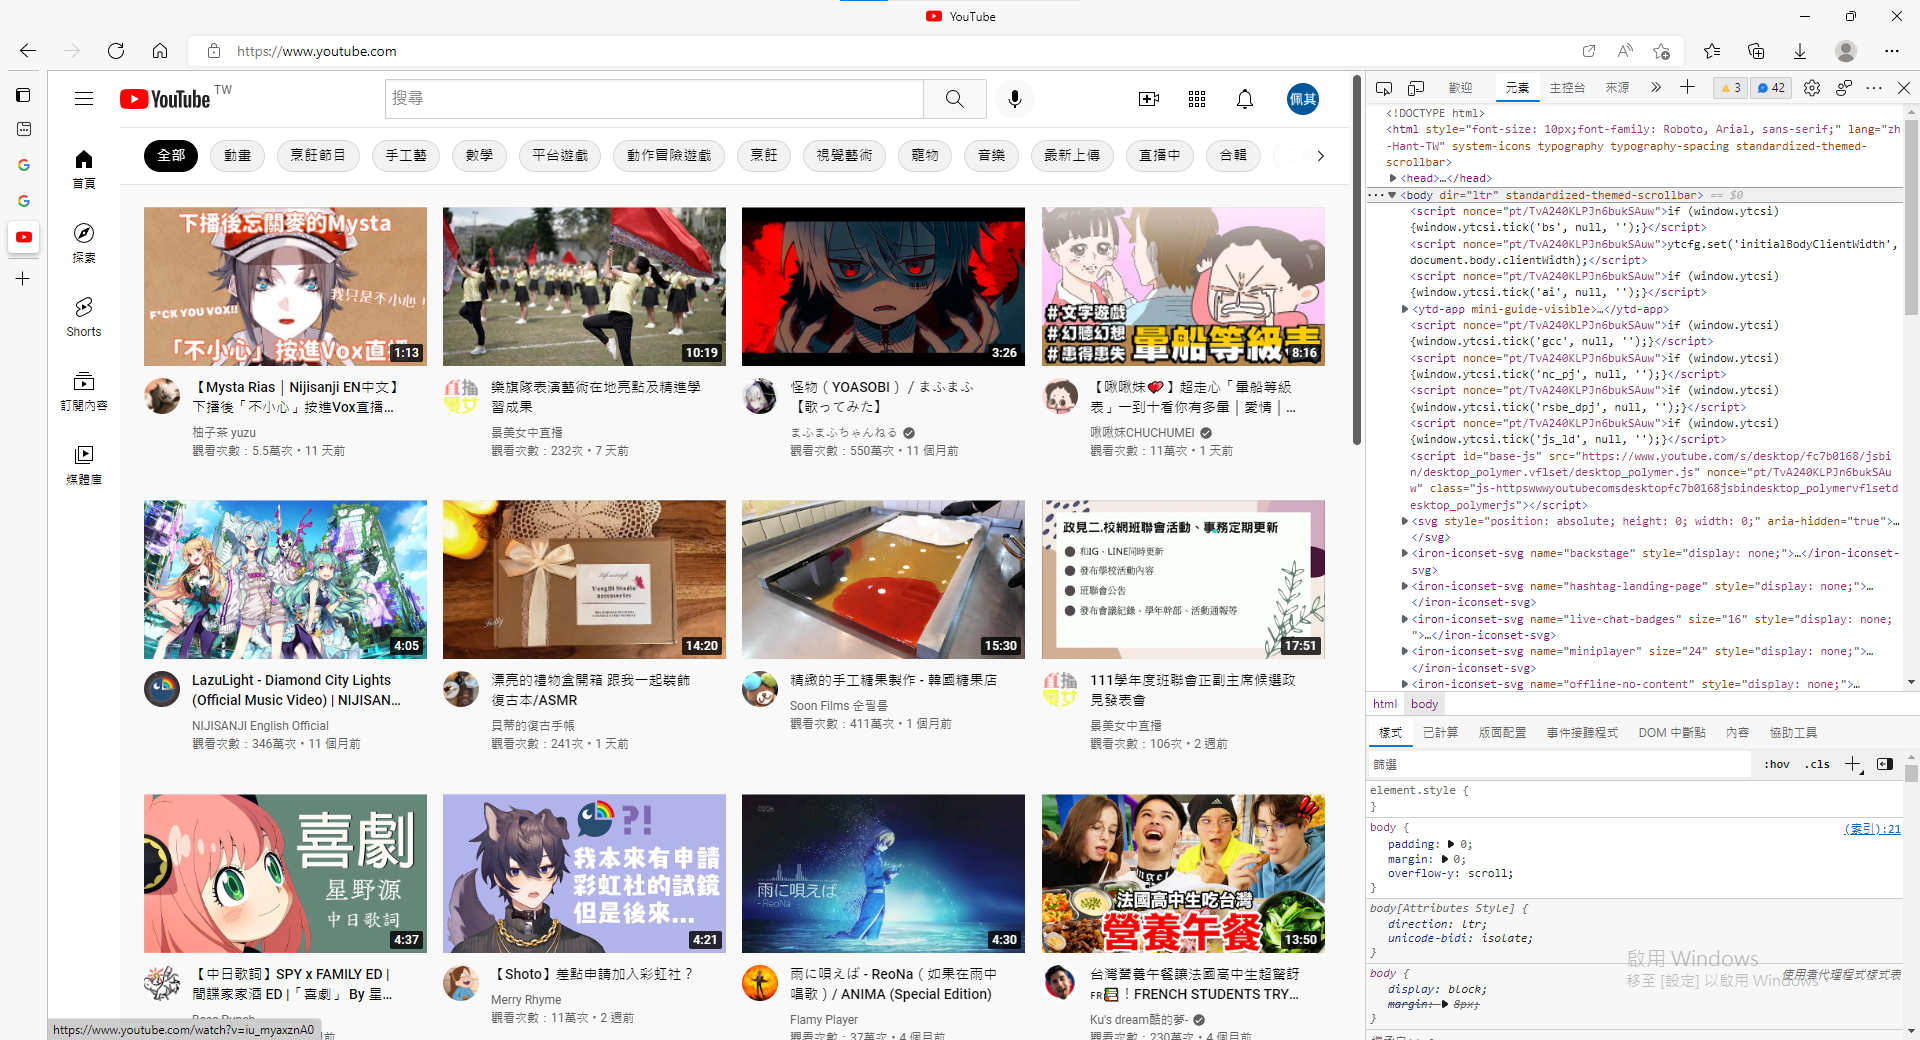
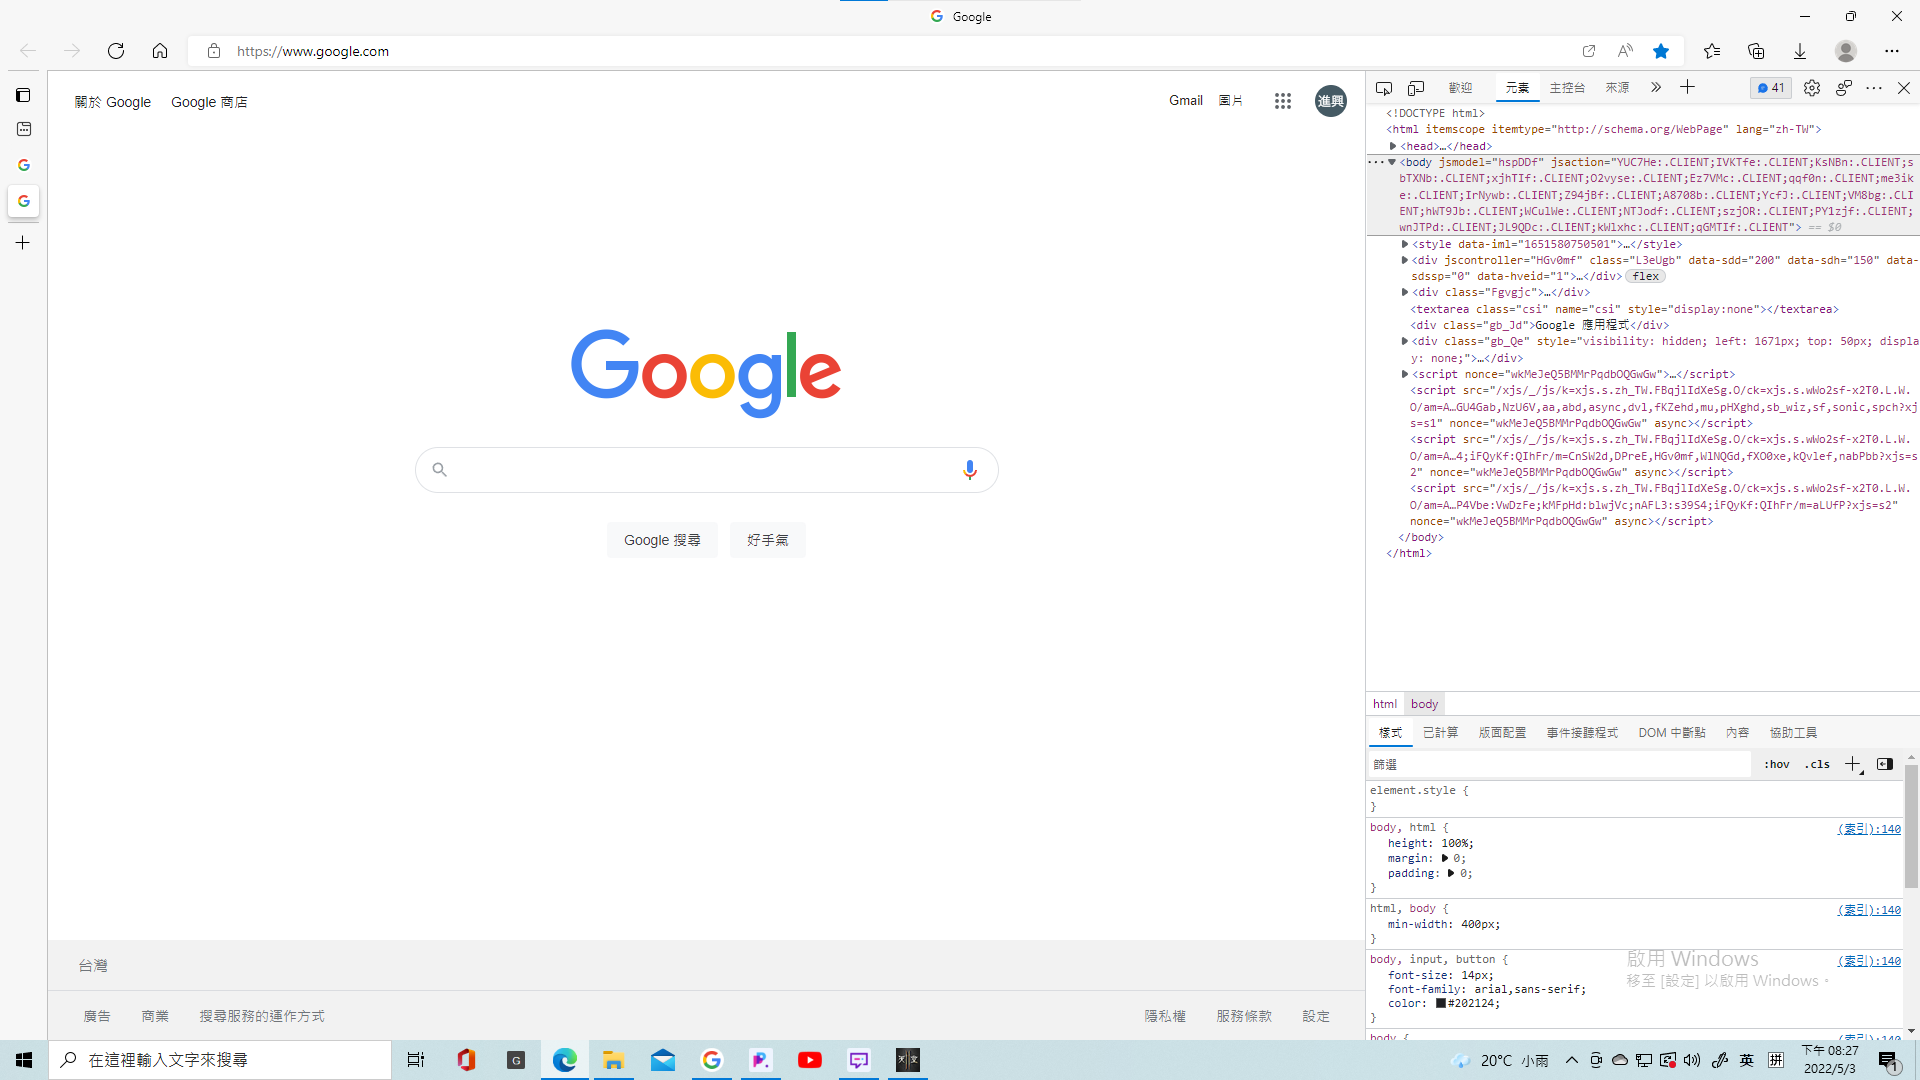

HTML
如何寫HTML
如何寫HTML

可以使用....
Visual Studio Code
這裡下載

使用步驟
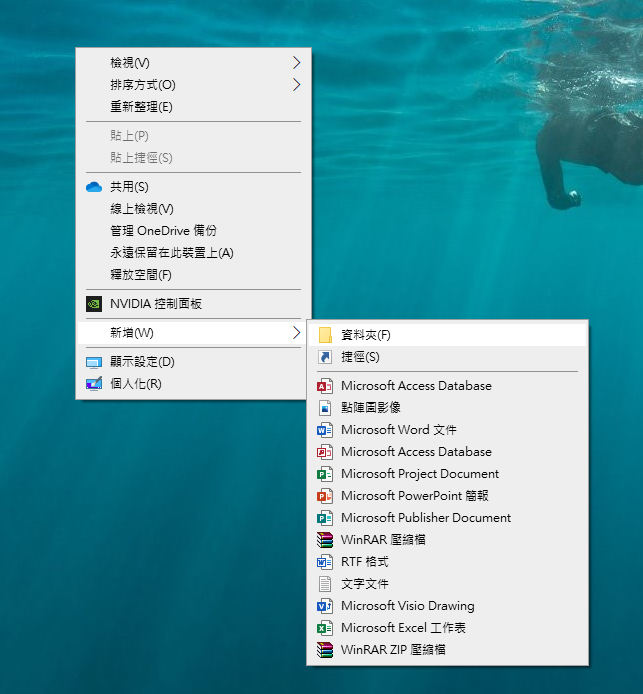

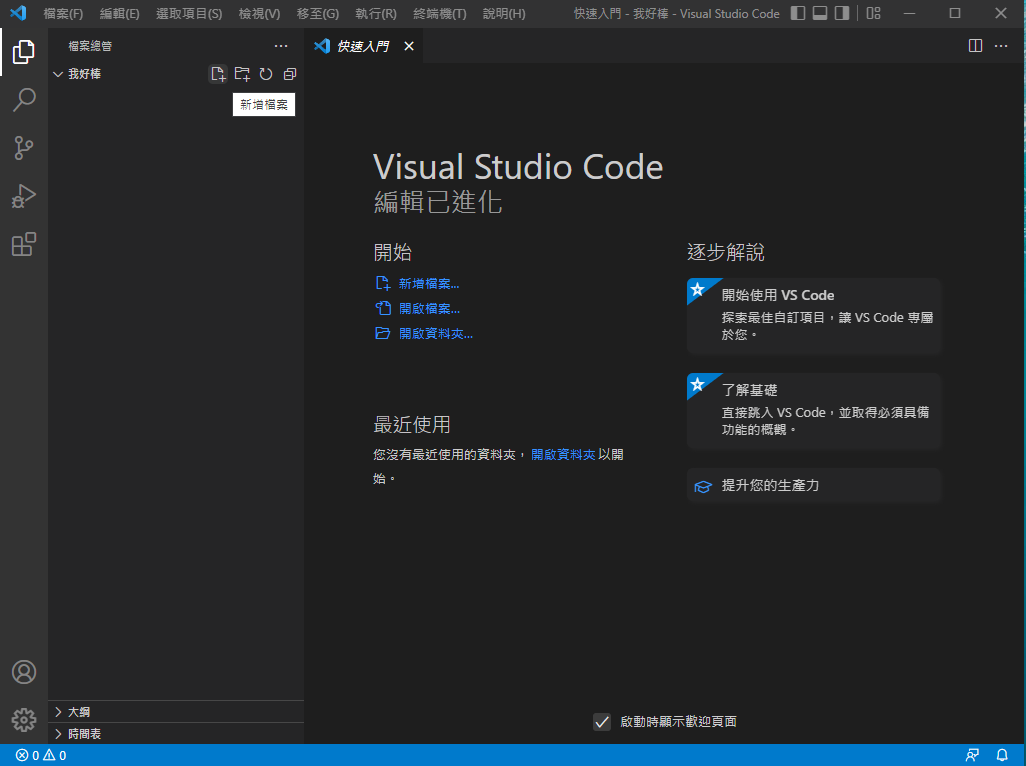
1. 新增資料夾
使用步驟
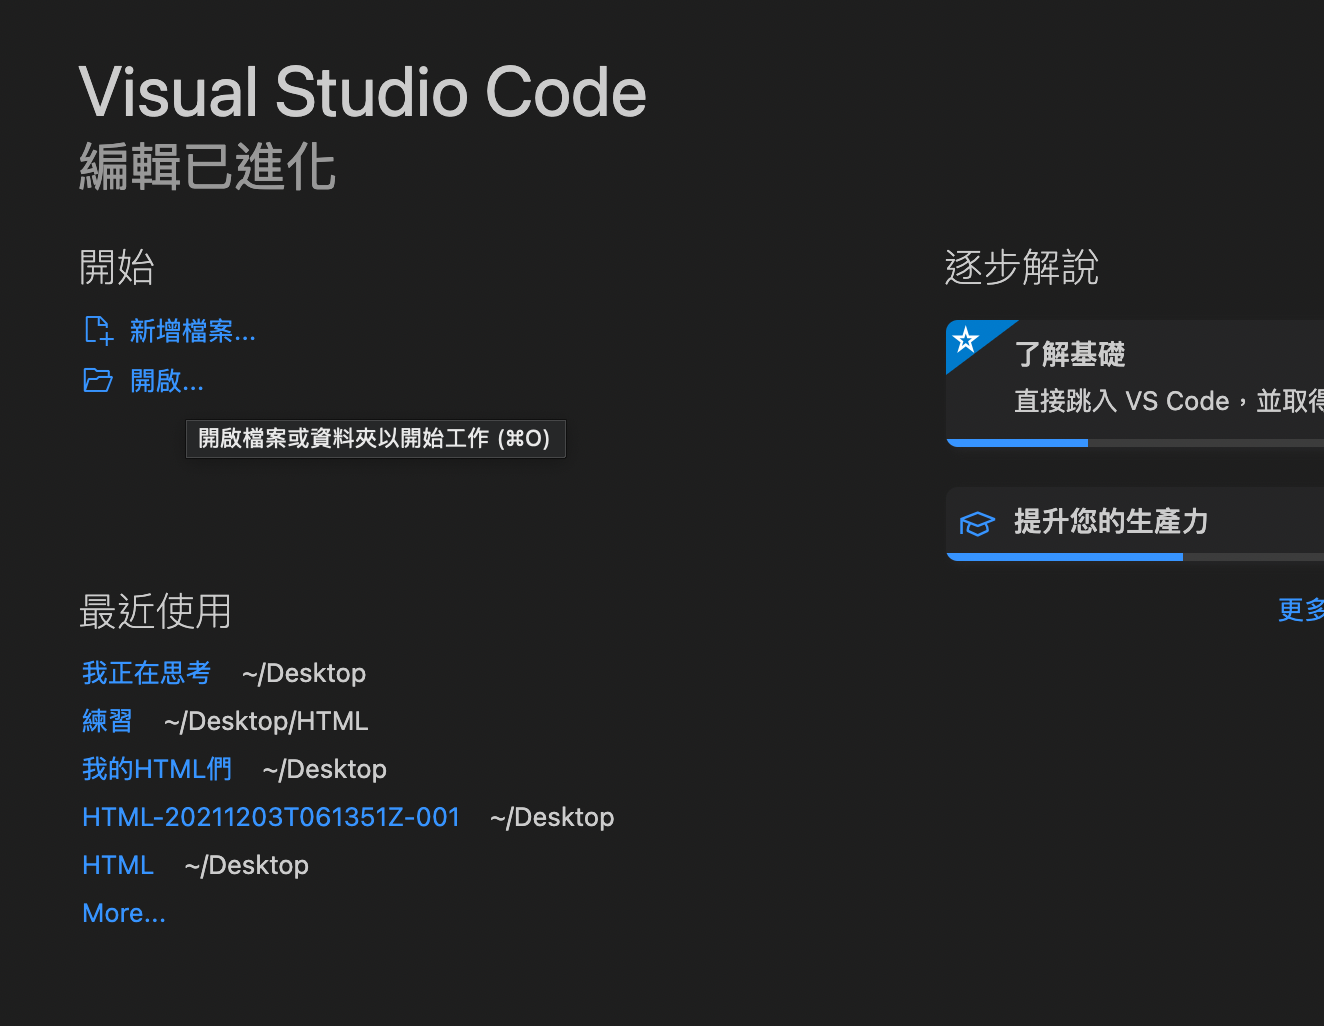
2. 打開VScode
點選剛建的資料夾
使用步驟
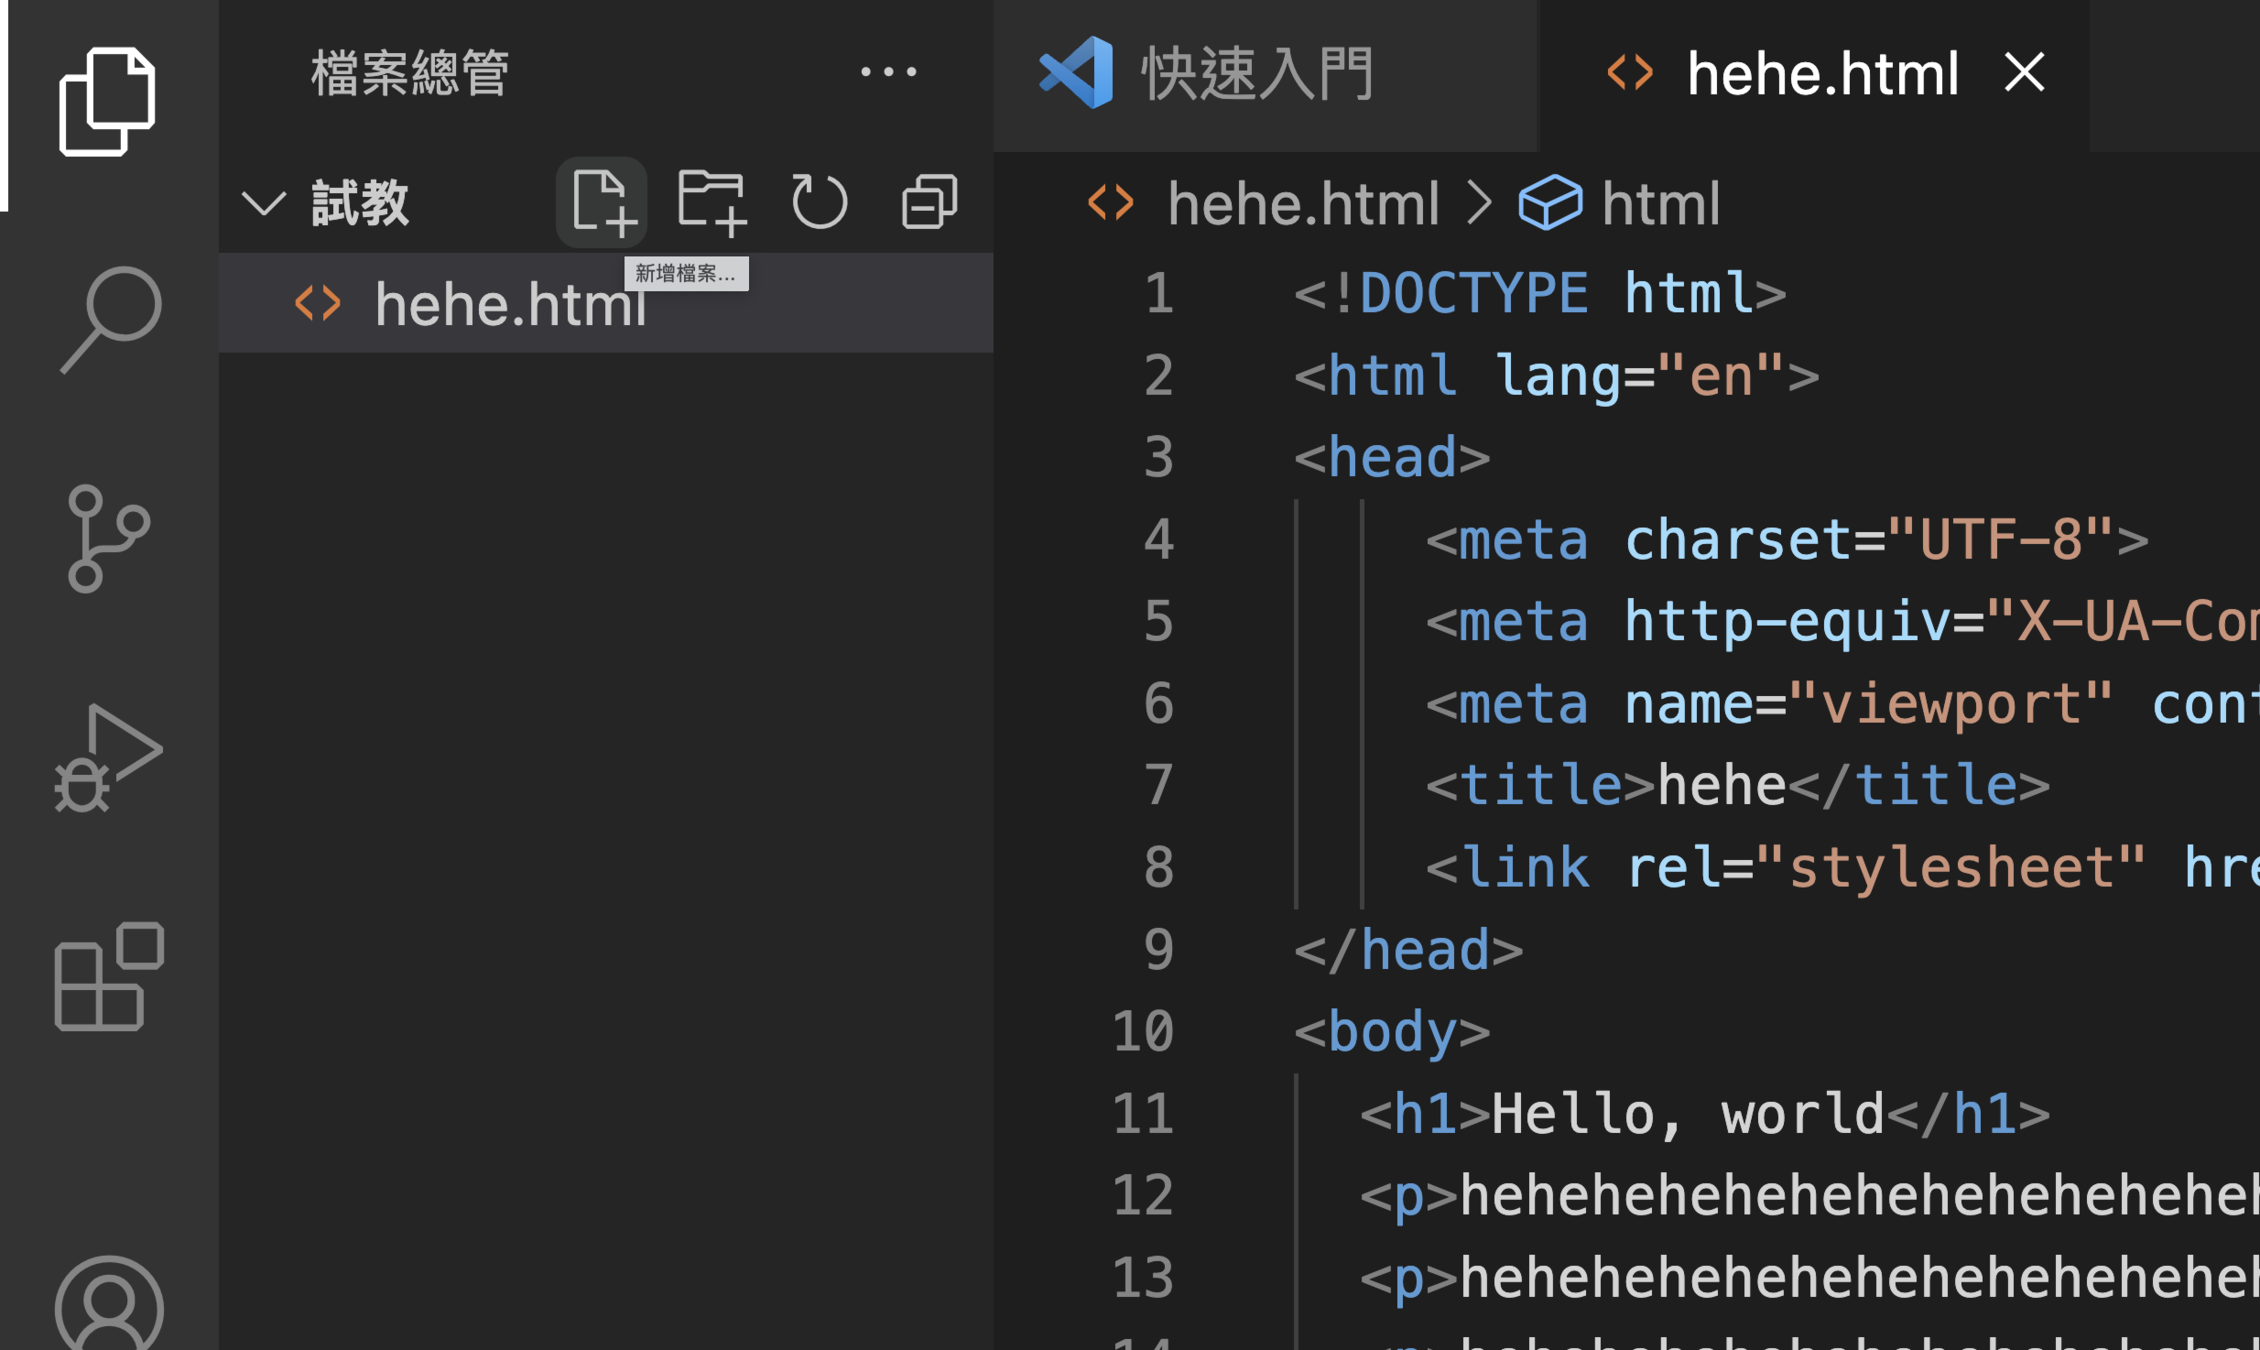
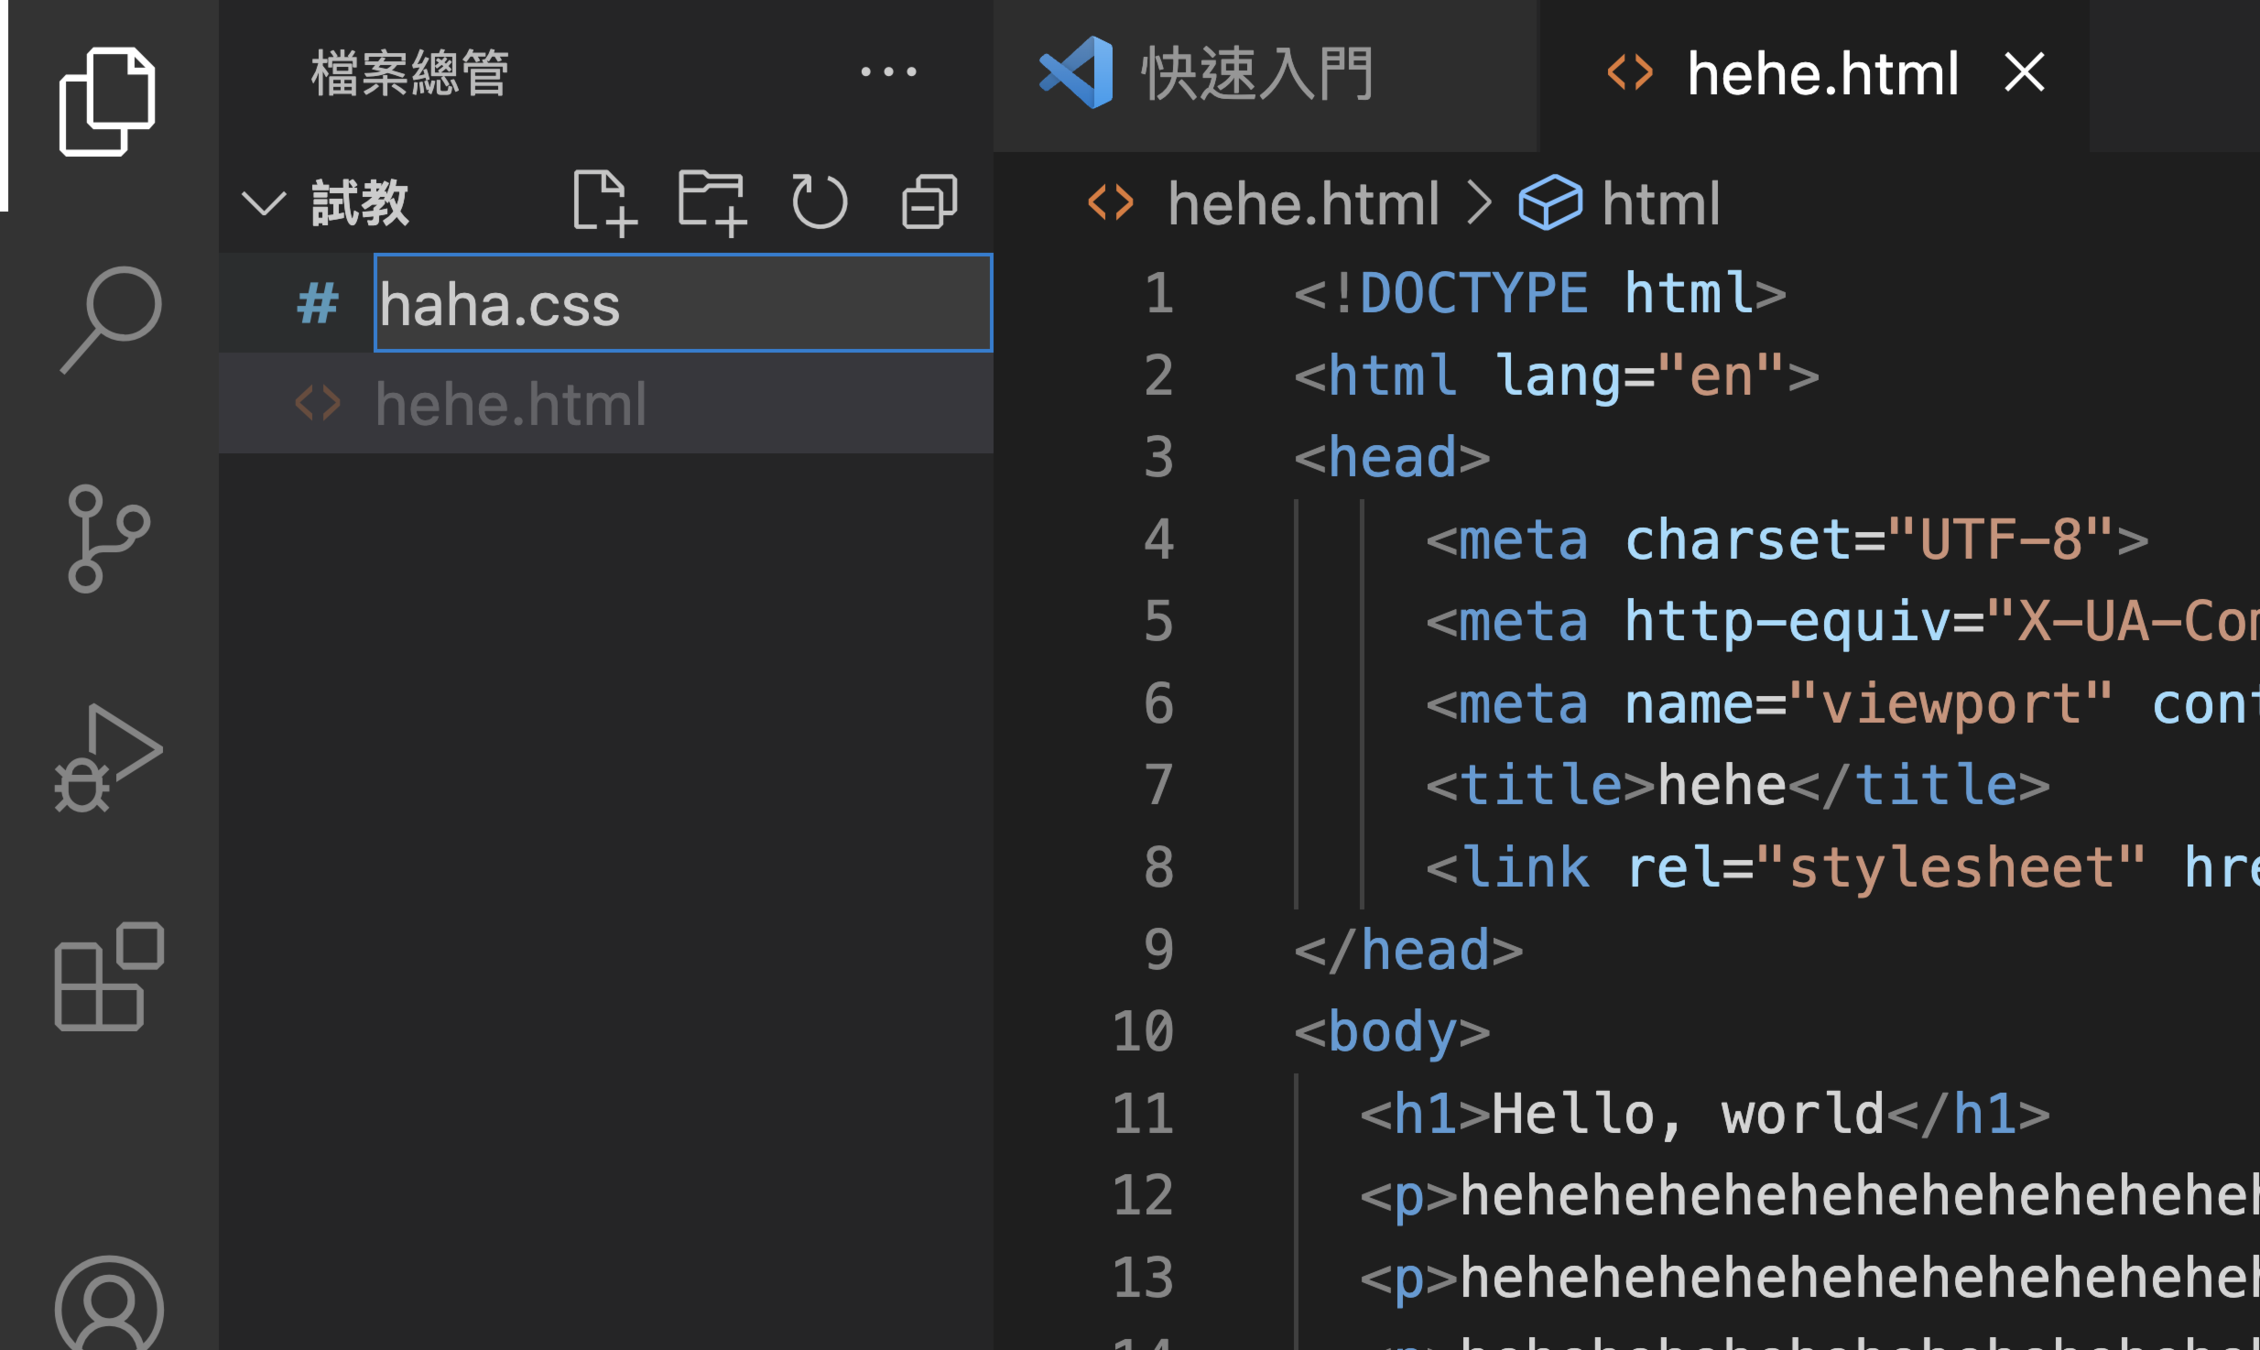
3. 按新增檔案
(檔案名稱後面記得加.html喔!)
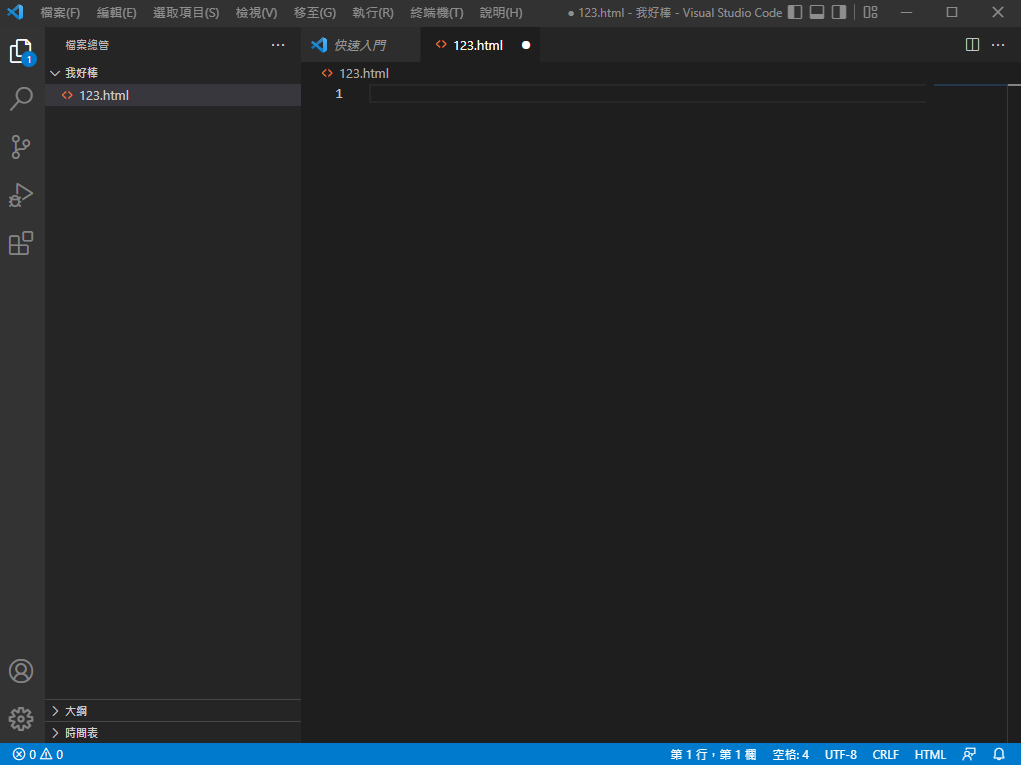
使用步驟
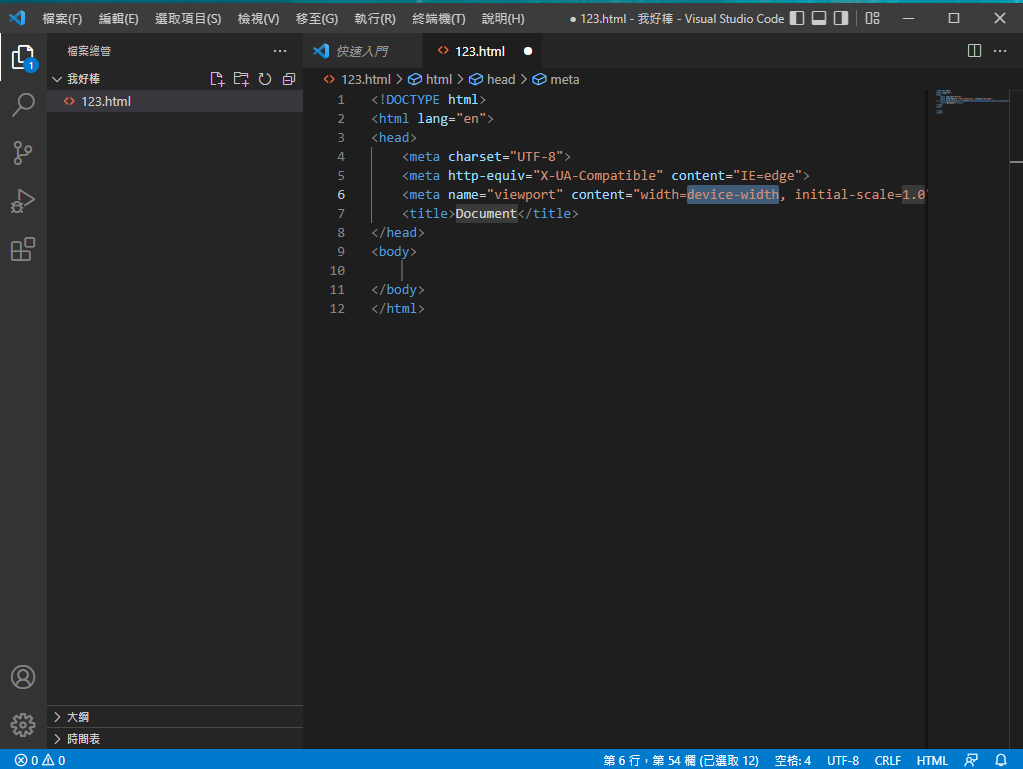
4. 按下快捷鍵!+ ENTER
就可以開始打了!
使用步驟


下載繁體中文
右下角Go Live打開網頁
(也可按右鍵開啟)
常用快捷鍵
| 起手式 | !+ Enter |
| 回上一步 | Control+Z |
| 儲存 | Control+ S |

把這串程式碼貼到你的VS code試試!
<!DOCTYPE html>
<html lang="en">
<head>
    <meta charset="UTF-8">
    <meta http-equiv="X-UA-Compatible" content="IE=edge">
    <meta name="viewport" content="width=device-width, initial-scale=1.0">
    <title>Document</title>
</head>
<body>
    <p>Hello world!</p>
</body>
</html>
(在按下Go Live之前記得要先儲存喔!)
HTML
了解HTML元素
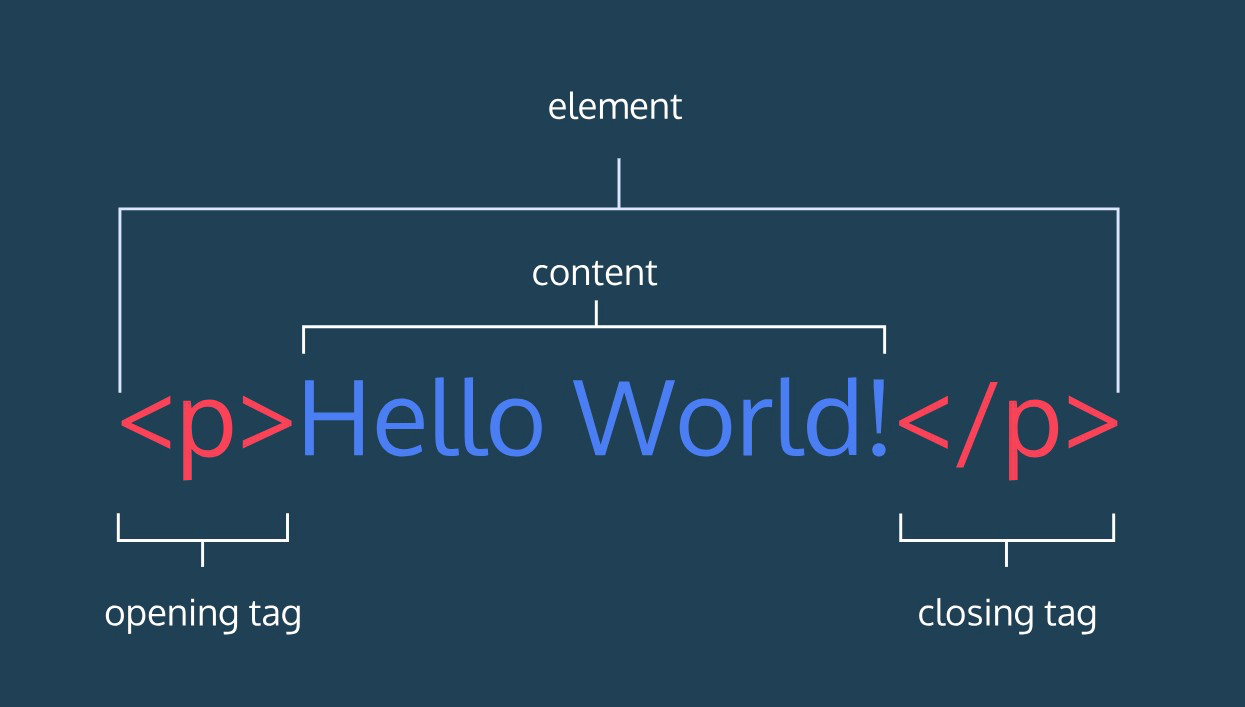
開頭標籤
結尾標籤
內容
以上三個加起來就是元素!
元素
但並不是所有的元素都有結尾標籤

HTML
HTML的結構
<!DOCTYPE html>
<html lang="en">
<head>
   <meta charset="UTF-8">
   <meta http-equiv="X-UA-Compatible" content="IE=edge">
   <meta name="viewport" content="width=device-width, initial-scale=1.0">
   <title>Document</title>
</head>
<body>

</body>
</html>
<!DOCTYPE html>:讓瀏覽器知道這個文件是HTML。
<html>:標定網頁原始碼的範圍。
・lang="en":設定元素的語系。
<head>:告訴瀏覽器網頁如何編碼、使用哪個關鍵字等。
<body>:標示HTML文件的主體。
<head>
   <meta charset="UTF-8">
   <meta http-equiv="X-UA-Compatible" content="IE=edge">
   <meta name="viewport" content="width=device-width, initial-scale=1.0">
   <title>Document</title>
</head>
<meta charset="UTF-8">:指定網頁所使用的編碼。<meta http-equiv=”X-UA-Compatible” content=”IE=edge”>:以最高級別的可用模式顯示內容。<title>:描述網頁的標題。
<head>
HTML
常見標籤
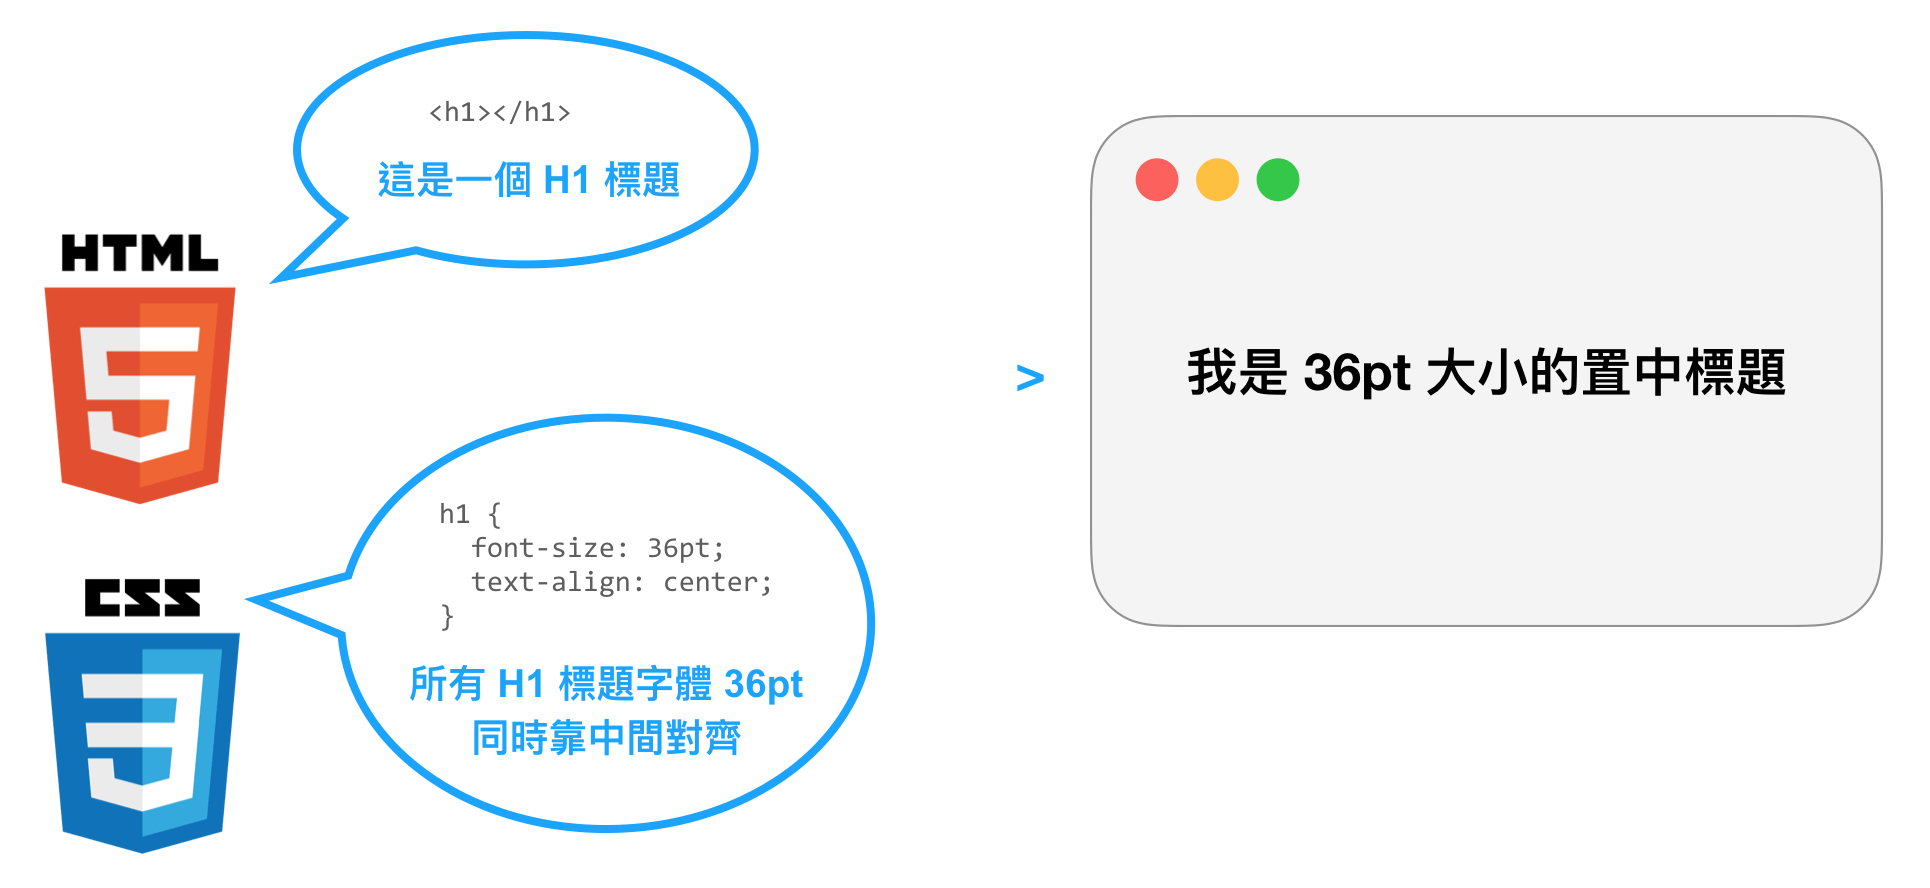
<h1>標題</h1>
<h2>標題</h2>
<h3>標題</h3>
<h4>標題</h4>
<h5>標題</h5>
<h6>標題</h6>
<p>段落段落段落段落段落段落</p>
<p>段落段落段落段落段落段落</p>段落 paragraph
標題 heading
換行 <br>
<p>YES</p>
<br>
<p>NO</p>
水平分隔線 <hr>
<p>NO</p>
<hr>
<p>YES</p>
插入圖片 <img>
<img src="1https://reurl.cc/mooExW" alt="Mysta" width="100%" height="100%">src:放網址
alt:圖片替代文字
width:圖片寬度
height:圖片高度

你可以把你要的圖片放到網頁的資料夾裡
這樣比較不會出問題!
插入連結 <a>
<a href="https://www.youtube.com/" target="_blank">這裡</a>href:放網址
target:指定在什麼地方打開連結
・_blank:在新視窗開啟
這裡:具有超連結功能的文字或圖片
插入影片 <iframe>
<iframe width="950" height="534" src="https://www.youtube.com/embed/DXhP49zlazU" title="YouTube video player" frameborder="0" allow="accelerometer; autoplay; clipboard-write; encrypted-media; gyroscope; picture-in-picture" allowfullscreen></iframe>
按右鍵

<dl>
  <dt>被定義的名詞</dt>
  <dd>解釋一</dd>
  <dd>解釋二</dd>
</dl>

<dl>
  <dt>beautiful</dt>
  <dd>美麗的,漂亮的</dd>
  <dd>美好的;極好的</dd>
</dl>
<ul>
<li>項目</li>
<li>項目</li>
<li>項目</li>
</ul>
<ol>
  <li>項目</li>
  <li>項目</li>
  <li>項目</li>
</ol>
有序清單 <ol>
無序清單 <ul>
定義清單
清單
- <dt>,<dd>要一起才完整
- <dt>下可有很多個<dd>
表格
<table>:表格
<tr>:橫列
<td>:直行
<th>:欄位標題
<table>
 <tr>
    <td>國家</td>
    <th>首都</th>
    <td>人口</td>
    <td>語言</td>
 </tr>
 <tr>
    <td>USA</td>
    <td>Washington D.C.</td>
    <td>309 million</td>
    <td>English</td>
 </tr>
 <tr>
    <td>Sweden</td>
    <td>Stockholm</td>
    <td>9 million</td>
    <td>Swedish</td>
 </tr>
</table>
表格
<table border="1">
  <caption>存錢計畫</caption>
  <tr>
    <th>日期</th>
    <th>金額</th>
  </tr>
  <tr>
    <td>2020-01-01</td>
    <td>$500</td>
  </tr>
  <tr>
    <td>2020-01-12</td>
    <td>$800</td>
  </tr>
  <tr>
    <td>2020-02-22</td>
    <td>$600</td>
  </tr>
</table>
caption:表格的標題
border:邊框
<table border="1">
  <tr>
    <th>項目</th>
    <th>金額</th>
  </tr>
  <tr>
    <td>iPhone 11</td>
    <td>$24,900</td>
  </tr>
  <tr>
    <td>AirPods</td>
    <td>$6,490</td>
  </tr>
  <tr>
    <td colspan="2">總金額: $31,390</td>
  </tr>
</table>
colspan
- 水平合併多行的儲存格
- colspan="2" 表示從這一行開始往右合併至下一行
- 後面幾列的 <tr> 中同樣位置的 <td> 就要省略不寫
表格-合併儲存格
rowspan
- 垂直合併多列儲存格
- rowspan="2" 表示從這一列開始往下合併至下一列
- rowspan="0" 表示儲存格從這一列開始合併到最後一列的意思。
<table border="1">
  <tr>
    <th>項目</th>
    <th>金額</th>
    <th>總金額</th>
  </tr>
  <tr>
    <td>iPhone 11</td>
    <td>$24,900</td>
    <td rowspan="2">$31,390</td>
  </tr>
  <tr>
    <td>AirPods</td>
    <td>$6,490</td>
  </tr>
</table>
<table border="1">
<tr>
<td>1</td>
<td>2</td>
<td>3</td>
<td>4</td>
</tr>
<tr>
<td>5</td>
<td rowspan="0">6</td>
<td>7</td>
<td>8</td>
</tr>
<tr>
<td>9</td>
<td>11</td>
<td>12</td>
</tr>
<tr>
<td>13</td>
<td>15</td>
<td>16</td>
</tr>
</table>表格-合併儲存格
<b>粗體</b>
<strong>強調粗體</strong>
<i>斜體</i>
<em>強調斜體</em>
<u>加底線</u>
<sub>上標</sub>
<sup>下標</sup>
<small>小字</small>
<s>刪除字</s>
<q>引用語</q>
<mark>螢光標記</mark>
<ruby>呵<rt>ㄏㄜ</rt></ruby>
常見文字格式
標註
註解 <!-- -->
 <!--我是註解,在網頁裡你看不到我~-->
<figure>
        <img src="https://memeprod.sgp1.digitaloceanspaces.com/user-wtf/1602699067420.jpg">
        <figcaption>貓貓梗圖</figcaption>
 </figure>
<figure>:用來標註圖片表格程式碼等。
<figcaption>:針對<figure>元素設定的內容做說明。
註解不會顯示在瀏覽器畫面
可以用來記錄程式的用途與結構
<input>
<input value="我的初始值"> <!--指定初始值-->
<br>
<input disabled> <!--將元件設定為禁用狀態-->
<br>
<input value="點我看看可否編輯" readonly> <!--將元件設為唯獨不可更改內容的狀態-->
<br>
<input placeholder="請輸入帳號"> <!--輸入的提示訊息-->
<br>
<input type="text"> <!--文字輸入欄位-->
<br>
<input type="password"> <!--密碼輸入欄位-->
<br>
<input type="checkbox"> <!--核取方塊-->
<br>
<input type="radio"> <!--選項按鈕-->
<br>
<input type="button"> <!--表單按鈕-->
<br>
<input type="range"> <!--數字範圍滑動選取欄位-->
<br>
<input type="color"> <!--顏色選擇器-->
<br>
<input type="date">
<input type="month"> <!--日期輸入欄位-->
<br>
<input type="number"> <!--數字輸入欄位-->
maxlength: 指定最多能輸入多少字。minlength: 指定最少需要輸入多少字。size: 一個數字指定欄位顯示寬度。max: 可以輸入的最大值。min: 可以輸入的最小值。step: 設定一個數字,用來控制數字元件一次跳動的幅度。
<button>
-
name:按鈕名稱。 -
type:按鈕的形式,有三種選項:-
submit:表單送出按鈕。 -
reset:表單內容重置按鈕。 -
button:沒任何特殊功能的一般按鈕。
-
<button type="button">Push Me</button>HTML
元素分類&巢狀規則
其實
元素又分成三種....
塊級元素
空元素
內聯元素
只有開始標籤而沒有結束標籤,通常用來在文件中插入、嵌入物件。
會從新的一行開始,能容納其他塊元素或內聯元素。
又稱行內元素,不換行。
(例如:<br>、<hr>、<img>)
(例如:<h1>~<h6>、<p>、<div>)
(例如:<em>、<i>、<b>)
巢狀規則
HTML存在許多種型別的標籤
有的標籤下面只允許特定的標籤存在
塊級元素可包含內聯元素或某些塊級元素,但內聯元素只能包含內聯元素。
有幾個特殊塊級元素只能包含內聯元素,不能包含塊級元素。
例如:<h1>~<h6>、<p>、<dt>
對齊、縮排很重要!

css
什麼是CSS
什麼是css
全名Cascading Style Sheets
意思是串接樣式表、階層樣式表
主要用途是定義網頁外觀

css
語法規則
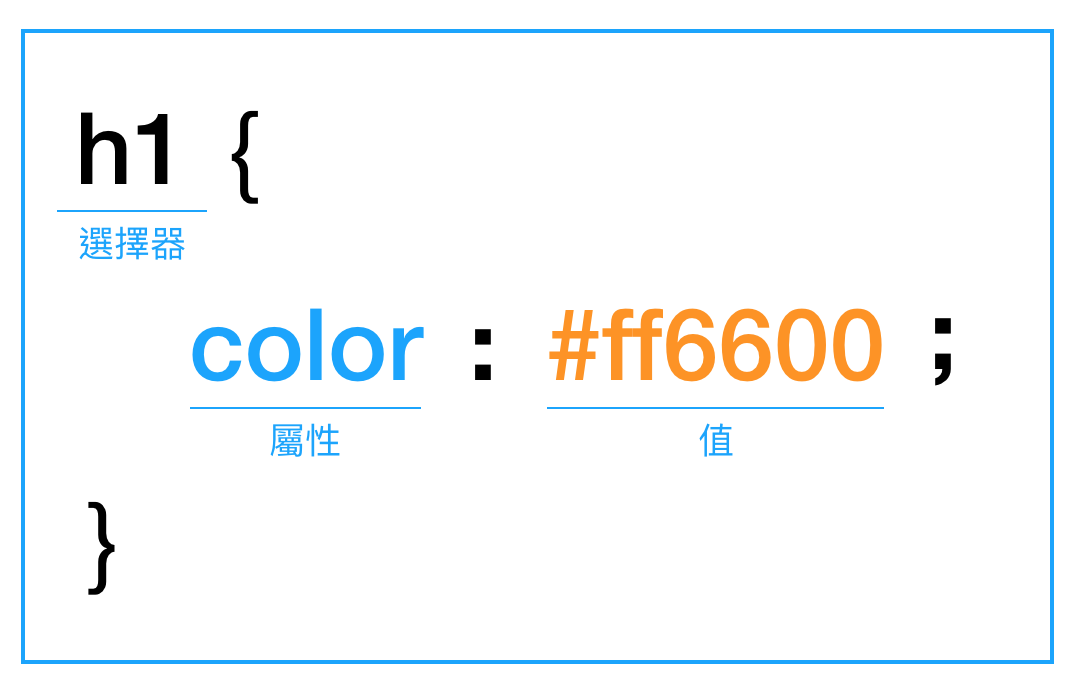
宣告
樣式規則
/*這是css的註解*/css
連結HMTL文件與CSS樣式表
內聯樣式
使用HTML元素的style屬性設定樣式表
<!DOCTYPE html>
<html lang="en">
<head>
    <meta charset="UTF-8">
    <meta http-equiv="X-UA-Compatible" content="IE=edge">
    <meta name="viewport" content="width=device-width, initial-scale=1.0">
    <title>hehe</title>
</head>
<body>
  <h1>Hello, world</h1>
  <p style="color:white;background:purple;">hehehehehehehehehehehehehehe</p>
  <p>hehehehehehehehehehehehehehe</p>
  <p>hehehehehehehehehehehehehehe</p>
</body>
</html>
只影響一個<p>
內部樣式表
在<head>元素裡使用<style>元素嵌入樣式表
<!DOCTYPE html>
<html lang="en">
<head>
    <meta charset="UTF-8">
    <meta http-equiv="X-UA-Compatible" content="IE=edge">
    <meta name="viewport" content="width=device-width, initial-scale=1.0">
    <title>hehe</title>
    <style>
      p{
      	  color:white;
          background:purple;
      }
    </style>
</head>
<body>
  <h1>Hello, world</h1>
  <p>hehehehehehehehehehehehehehe</p>
  <p>hehehehehehehehehehehehehehe</p>
  <p>hehehehehehehehehehehehehehe</p>
</body>
</html>
影響所有的<p>
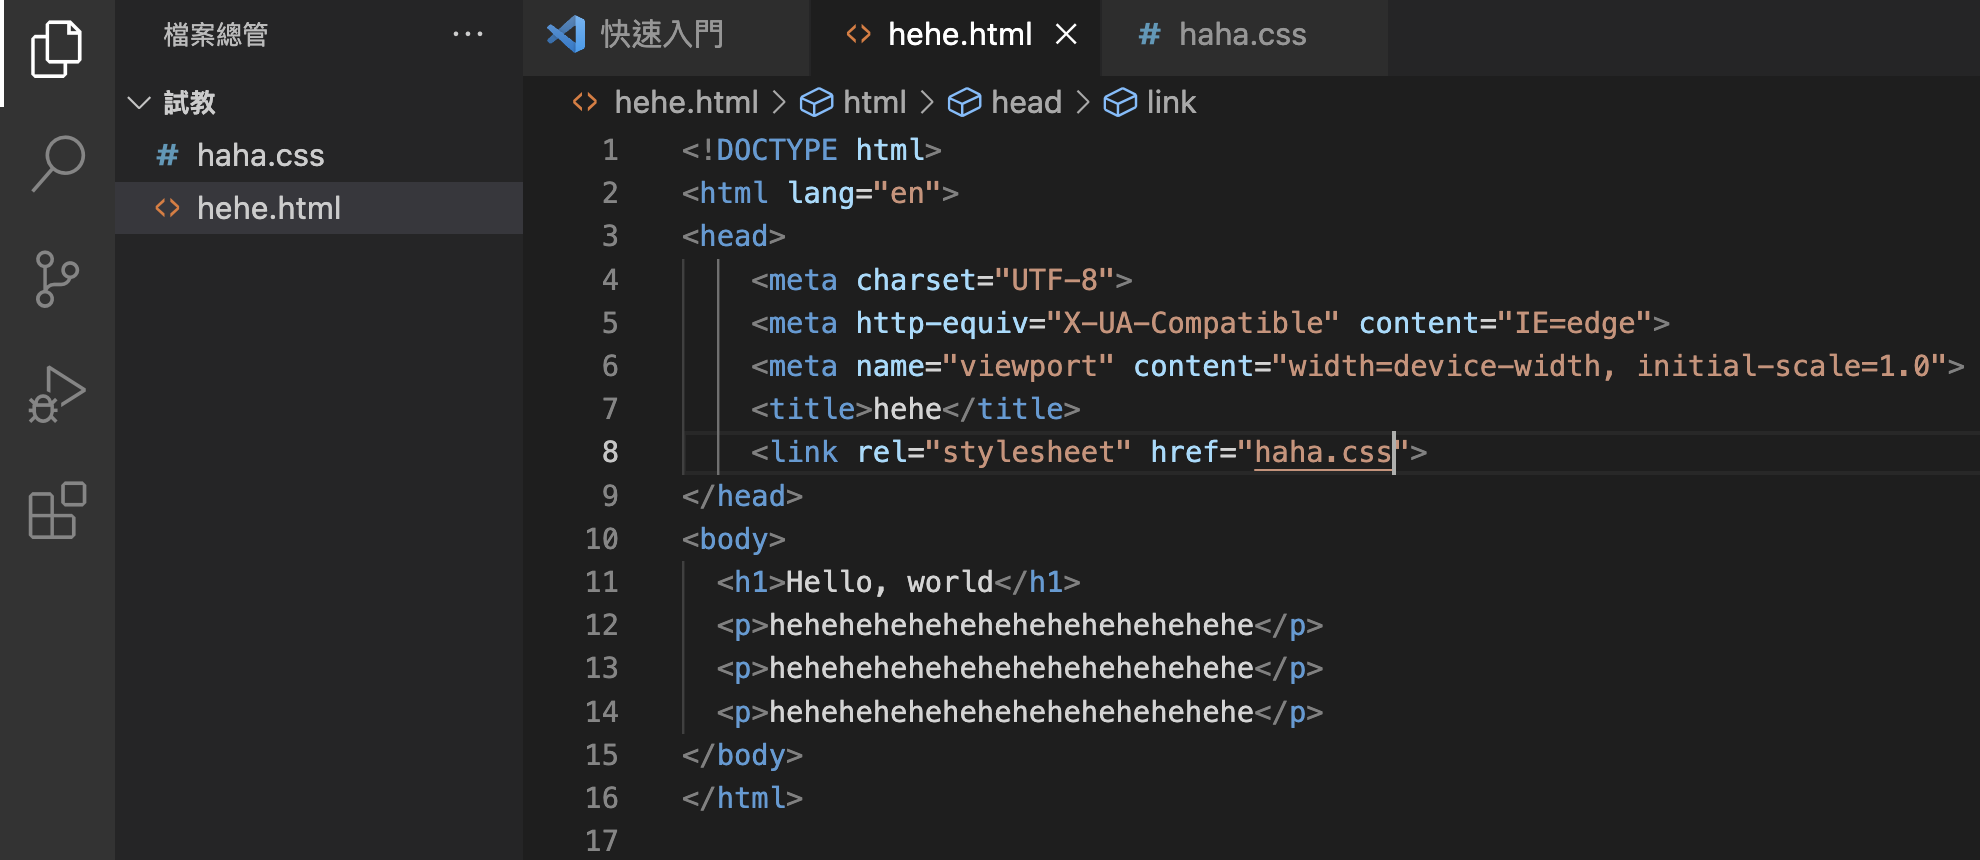
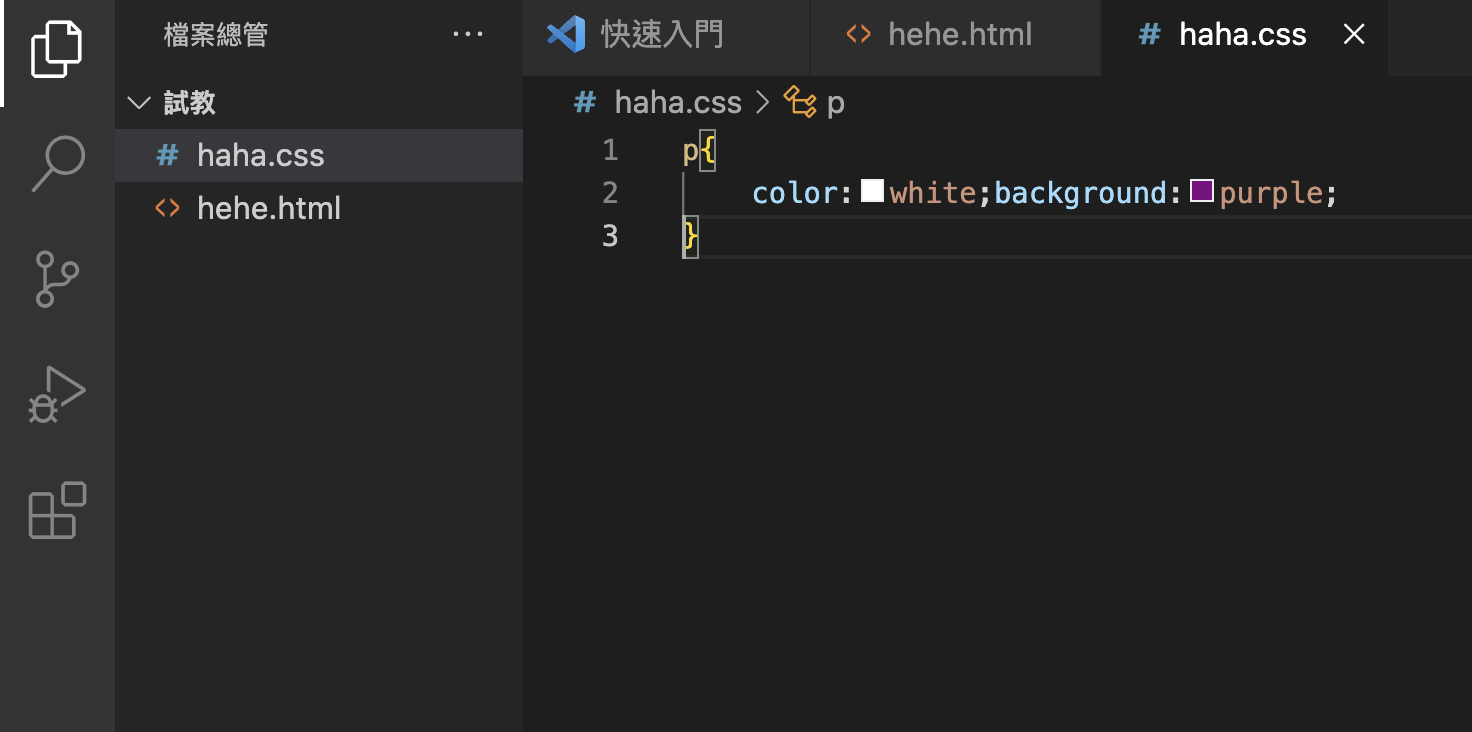
外部樣式表
將外部樣式表連結至HTML文件(比較推薦!!)
<!DOCTYPE html>
<html lang="en">
<head>
    <meta charset="UTF-8">
    <meta http-equiv="X-UA-Compatible" content="IE=edge">
    <meta name="viewport" content="width=device-width, initial-scale=1.0">
    <title>hehe</title>
    <link rel="stylesheet" href="你的檔案.css">
</head>
<body>
  <h1>Hello, world</h1>
  <p>hehehehehehehehehehehehehehe</p>
  <p>hehehehehehehehehehehehehehe</p>
  <p>hehehehehehehehehehehehehehe</p>
</body>
</html>
影響所有的<p>
外部樣式表

讀取順序
內聯樣式>內部樣式表>外部樣式表
也可以......
<!DOCTYPE html>
<html lang="en">
<head>
    <meta charset="UTF-8">
    <meta http-equiv="X-UA-Compatible" content="IE=edge">
    <meta name="viewport" content="width=device-width, initial-scale=1.0">
    <title>hehe</title>
    <style>
      @import url(你的檔案.css);
    </style>
</head>
<body>
  <h1>Hello, world</h1>
  <p>hehehehehehehehehehehehehehe</p>
  <p>hehehehehehehehehehehehehehe</p>
  <p>hehehehehehehehehehehehehehe</p>
</body>
</html>
css
選擇器
class選擇器(class selector)
ID選擇器(ID selector)
選擇器是用來設定要套用樣式規則的對象。
- 以隸屬於指定類別的HTML元素做為要套用樣式規則的對象。
- 其命名格式為「.XXX」。
- 以符合指定id(識別字)的HTML元素作為要套用要是規則的對象。
- 其命名格式為「#XXX」。
.happy{
  color: red;
}
#sadge{
  color: red;
}
Class和ID差在哪裡?
Class 跟 ID最大的不同
就在於 CSS的ID 選擇器在一個 HTML 文件中只能被使用一次
可是 Class 選擇器在一個 HTML 文件中可以被使用多次。

div 元素
span 元素
將內容分為不同的區域,而每一個區域可以根據 CSS 中的宣告而有自己的樣式。
和div很像,但span可以涵蓋更細層的元素。所以可以用 <span> 來調整單一文字的樣式。
<div class="happy">
  <h1>Hello, world</h1>
  <p>hehehe</p>
  <p>hehehe</p>
  <p>hehehe</p>
</div>
<p>哈哈哈<span class="sadge">哈囉</span>哈哈哈哈</p>可搭配class、ID、style等屬性。

(HTML)
css
顏色
色彩屬性
- 色彩名稱
- rgb(rr, gg, bb)
- #rrggbb(十六進位表示法)
h3{
    color: #FF0000;
}
h2{
color:(100%, 0%, 0%);
}h1{
color: red;
}- rgba(rr, gg, bb, alpha)
- hsl(hue, saturation, lightness)
- hsla(hue, saturation, lightness, alpha)
透明度
0.0~1.0
完全透明~完全不透明
飽和度(色彩的純度)
0%~100%
值越高顏色越飽和
亮度(色彩的明暗度)
0%~100%
值越高色彩就越明亮
<h1 style="color: hsla(240, 100%, 50%, 0.3) ;">天氣真好</h1>色相
css
背景
背景
background-image:設定背景圖片
background-color:設定背景顏色
background-image:url(圖檔名稱)background-repeat:設定背景圖片重複排列的方式
- repeat:水平及垂直方向重複排列並填滿指定元素。
- no-repeat:不重複排列。
- repeat-x:在水平方向重複排列。
- repeat-y:在垂直方向重複排列。
- space:水平及垂直方向重複排列,調整圖片間距。
- round:水平及垂直方向重複排列,同時調整圖片大小。
background-color:bluebackground-attachment 設定圖片是否隨著內容捲動
- scroll:會隨內容捲動。
- fixed:固定圖片,不會隨內容捲動。
背景
background-position:背景圖片起始位置
- 長度:使用px、pt、pc、em、ex、in、cm、mm等度量單位(水平 垂直)。
- 百分比:使用區塊寬度與高度百分比設定背景圖片,例如0% 0% 為左上角、100% 100% 為右下角、50% 50%為正中間。
- left | center | right | top | center | bottom:
center center
center bottom
center top
left top
left bottom
left center
right top
right bottom
right center
背景
background-size:設定背景圖片大小
-
長度|百分比|auto:使用px、pt、pc、em、ex、in、cm、mm等度量單位或百分比設定背景圖片的寬和高(寬 高)。
-
contain:背景圖片大小剛好符合HTML元素的區塊範圍。
-
cover:背景圖片大小覆蓋整個HTML元素的區塊範圍。
background-clip:設定背景色彩或背景圖片的顯示區域
background-origin:設定背景色彩或背景圖片的顯示位置基準點

如果同時要設定很多個屬性,屬性之間用空白隔開即可。
若要設定多張背景圖,用逗號隔開即可。
!
背景
漸層屬性:
- linear-gradient():設定線性漸層
2. repeating-linear-gradient(): 設定重複線性漸層
background:linear-gradient(0deg, blue, pink )(和線性漸層寫法一樣)
- 角度:使用度數設定線性漸層的角度,例如90deg(90度)表示由左往右,0deg(0度)表示由下往上
- 方向:可以使用to left(由右往左漸層)、to top、to top right等。
- 色彩停止點:色彩的值與位置,例如yellow 0%表示起點為黃色,orange 100%表示終點為橘色。
語法:linear-gradient(角度|方向, 色彩停止點1, 色彩停止點2,…)
背景
漸層屬性:
3. radial-gradient():設定放射性漸層
4. repeating-radial-gradient(): 設定重複放射漸層
(和放射漸層寫法一樣)
background:radial-gradient(at right, white, lightgreen)
- 形狀:漸層形狀可以是circle(圓形)或ellipse(橢圓形)。
-
大小:使用下列設定值設定漸層大小。
- 長度:以度量單位設定圓形或橢圓形的半徑。
- closest-side:從圓形或橢圓形的中心點到區塊最近邊的距離當作半徑。
- farthest-side:從圓形或橢圓形的中心點到區塊最遠邊的距離當作半徑。
- closest-corner:從圓形或橢圓形中心點到區塊最近角的距離當作半徑。
- farthest-corner:從圓形或果橢圓形的中心點到最遠角的距離當作半徑。
- 位置:在at後面加上left、right、bottom、center設定的漸層位置。
語法:linear-gradient(角度|方向, 色彩停止點1, 色彩停止點2,…)
css
文字
color:設定文本顏色。
font-size:設定文字大小。
font-family:設定文字字型。
font-style:設定文字樣式。
font-weight:設定文字粗細。
font-variant:設定文字變化。
line-height:設定行高。
- 長度
- 百分比
| 度量單位 | 說明 |
|---|---|
| px | 像素 |
| pt | 點,1pt=1/72英吋 |
| in | 英吋 |
| cm | 公分 |
| mm | 毫米 |
- italic:斜體
- 絕對粗細:bold表示加粗,有100~900九個等級。
- 相對粗細:bolder表示更粗,lighter表示更細。
- small-cap:小型大寫字。
- 數字:設定幾倍行高
- 長度
- 百分比

text-indent:首行縮排
text-align:文字對齊方式
text-spacing:字母間距
word-spacing:文字間距
text-transform:大小寫轉換方式
white-space:空白字元
text-shadow:文字陰影
- left
- right
- center(置中)
- justify(左右對齊)
- capitalize:單字的第一個字母大寫
- uppercase:全部大寫
- lowercase:全部小寫
- full-width:全形
- 水平位移
- 垂直位移
- 模糊
- 色彩
<h1 style="text-shadow: 12px 8px 5px orange, -12px -8px 3px orange;">哈哈哈哈哈哈</h1>css
Box Model
Box Model就是CSS將每個HTML元素看成一個矩形方塊,稱為Box。

- 邊界:在框線之外。
- 框線:加在留白外緣的線條。
- 留白:環繞在網頁四周的部分。
- 內容:網頁上的資料。
邊界重疊
指當有兩個垂直邊界接觸在一起時,只會留下較大的那個邊界作為兩者間距。
重疊
邊界屬性
留白屬性
margin-top:60%
/*可用長度|百分比|auto*/padding-right:30pt屬性速記
- 一個值:上/下/左/右
- 兩個值:上/下 左/右
- 三個值:上 左/右 下
- 四個值:上右下左
margin: 1cm 0.5cm框線屬性
- hidden(隱藏)
- dotted(點線)
- dashed(虛線)
- solid(實線)
- double(雙線)
border-bottom-style:dotted- groove(3D立體內凹)
- ridge(3D立體外凸)
- inset(內凹)
- outset(外凸)
border-color
border-right-color:greenborder-width
border-top-width:thick設定HTML元素的框線寬度,有thin(細)、medium(中)、thick(粗)和「長度」等設定值。
屬性速記
border: solid 10px hotpinkborder-top: style|width|color
border-style
框線屬性
設定HTML元素的框線圓角,只設定一個長度時表示圓角的半徑,設定4個值,即依序由左上、右上、右下、左下來表示弧半徑為多少(使用長度或百分比即可)。
css
定位方式
-
區塊層級:元素的內容在瀏覽器中會另起一行,例如<div><p><h1>等,而CSS針對這類元素所產生的矩形方塊稱為Block Box。
-
行內層級:元素的內容不會另起一行,例如:<span><i><b><img>等,而CSS針對這類元素所產生的矩形方塊稱為Inline Box。
兩者皆由內容、留白、框線與邊界所組成。
position
設定Box的定位方式。
- static:正常順序(預設值)。
- relative:相對定位。
- absolute:絕對定位。
- fixed:固定定位。
top、right、bottom、left
設定Block Box的上下左右的位移量,可以放長度、百分比、auto(自動、預設值)等設定值。
top: 15%; right: 20%; bottom: 30%; left: 40%;float
float屬性可以將一個正常順序中的元素放在容器的左側或右側,而容器裡面的其他元素會環繞在該元素旁邊。
img{
    float: left;
}
正常順序
相對順序
position: relative;
top: 30px;
left: 30px
top 30px
left 30px

css
連結、清單、表格
連結
| a:link | 尚未瀏覽的超連結。 |
| a:visited | 已經瀏覽的超連結。 |
| a:hover | 指標移到但尚未點選的元素。 |
| a:active |
點選的元素。 |
| text-decoration |
隱藏底線。 |
清單
list-style-type
設定清單的項目符號與編號類型。
list-style-type:lower-roman| decimal-leading-zero | 前面冠上零的阿拉伯數字。 |
| lower-roman | 小寫羅馬數字。 |
| upper-roman | 大寫羅馬數字。 |
| loewr-alpha、lower-latin | 小寫英文字母。 |
| upper-alpha、upper-latin | 大寫英文字母。 |
| loewr-greek | 小寫希臘字母。 |
- disc(預設值):實心圓點。
- circle:空心圓點。
- square:實心方塊。
- none:不顯示項目符號。
- 編號:
清單
list-style-image
list-style-position
設定項目符號與編號位置。
設定圖片項目符號的圖檔名稱。
list-style-image:url(圖檔名稱)list-style-position:inside- outside(預設值):項目符號與編號位於項目文字區塊的外部。
- inside:項目符號與編號位於項目文字區塊的內部。

清單速記
屬性之間用空白間隔開即可。
ul{
    list-style:url(圖檔名稱) upper-romen;
}
設定表格標題位置,top表示位於表格上方,bottom表示位於表格下方。
caption-side
caption-side:topborder-collapse
設定表格框線模式。
- separate:框線分開,表格與儲存格之間的框線會分隔開來(預設值)。
- collapse:框線重疊,表格與儲存格之間的匡喜愛會重疊在一起。
border-collapse:separate表格

可以配合之前教的框線屬性讓表格更好看喔!
設定在「框線分開」模式下,是否顯示或隱藏空白儲存格的框線及背景。
empty-cells
empty-cells:show- show:顯示(預設值)。
- hide:隱藏
表格
border-spacing
設定在「框線分開」模式下的表格框線間距。
border-spacing:10pxtable-layout
設定表格版面編排方式。
- auto:自動,表示儲存格的寬度取決於其內容的長度。
- fixed:固定,表示儲存格的寬度取決於表格的寬度、欄的寬度及框線。
table-layout:fixedcss
媒體查詢
媒體查詢
- all:全部裝置。
- screen:螢幕(例如瀏覽器)。
可以針對不同的媒體類型量身訂做不同的樣式。

@media screen and (max-width: 480px){
    body{background: hotpink;}
}
@media screen and (min-width: 481px) and (max-width: 768px){
body{background: orange}
}當可視區域小於等於480像素時(例如手機),就將網頁背景設定為亮粉色。
當可視區域介於481~768像素時(例如平板電腦),就將網頁背景設成橘色。
媒體查詢
@media screen and (min-width: 769px){
    body{background: deepskyblue;}
}
<link rel="stylesheet" type="text/css" href="M.css" media="screen and (min-width:481px) and (max-width:768px)">當可視區域大於等於769像素時(例如桌機或筆電),就將網頁背景設成深天空藍色。
當可視區域介於481~768像素時(例如平板電腦),就套用M.css樣式表。
媒體查詢
css
網站發布

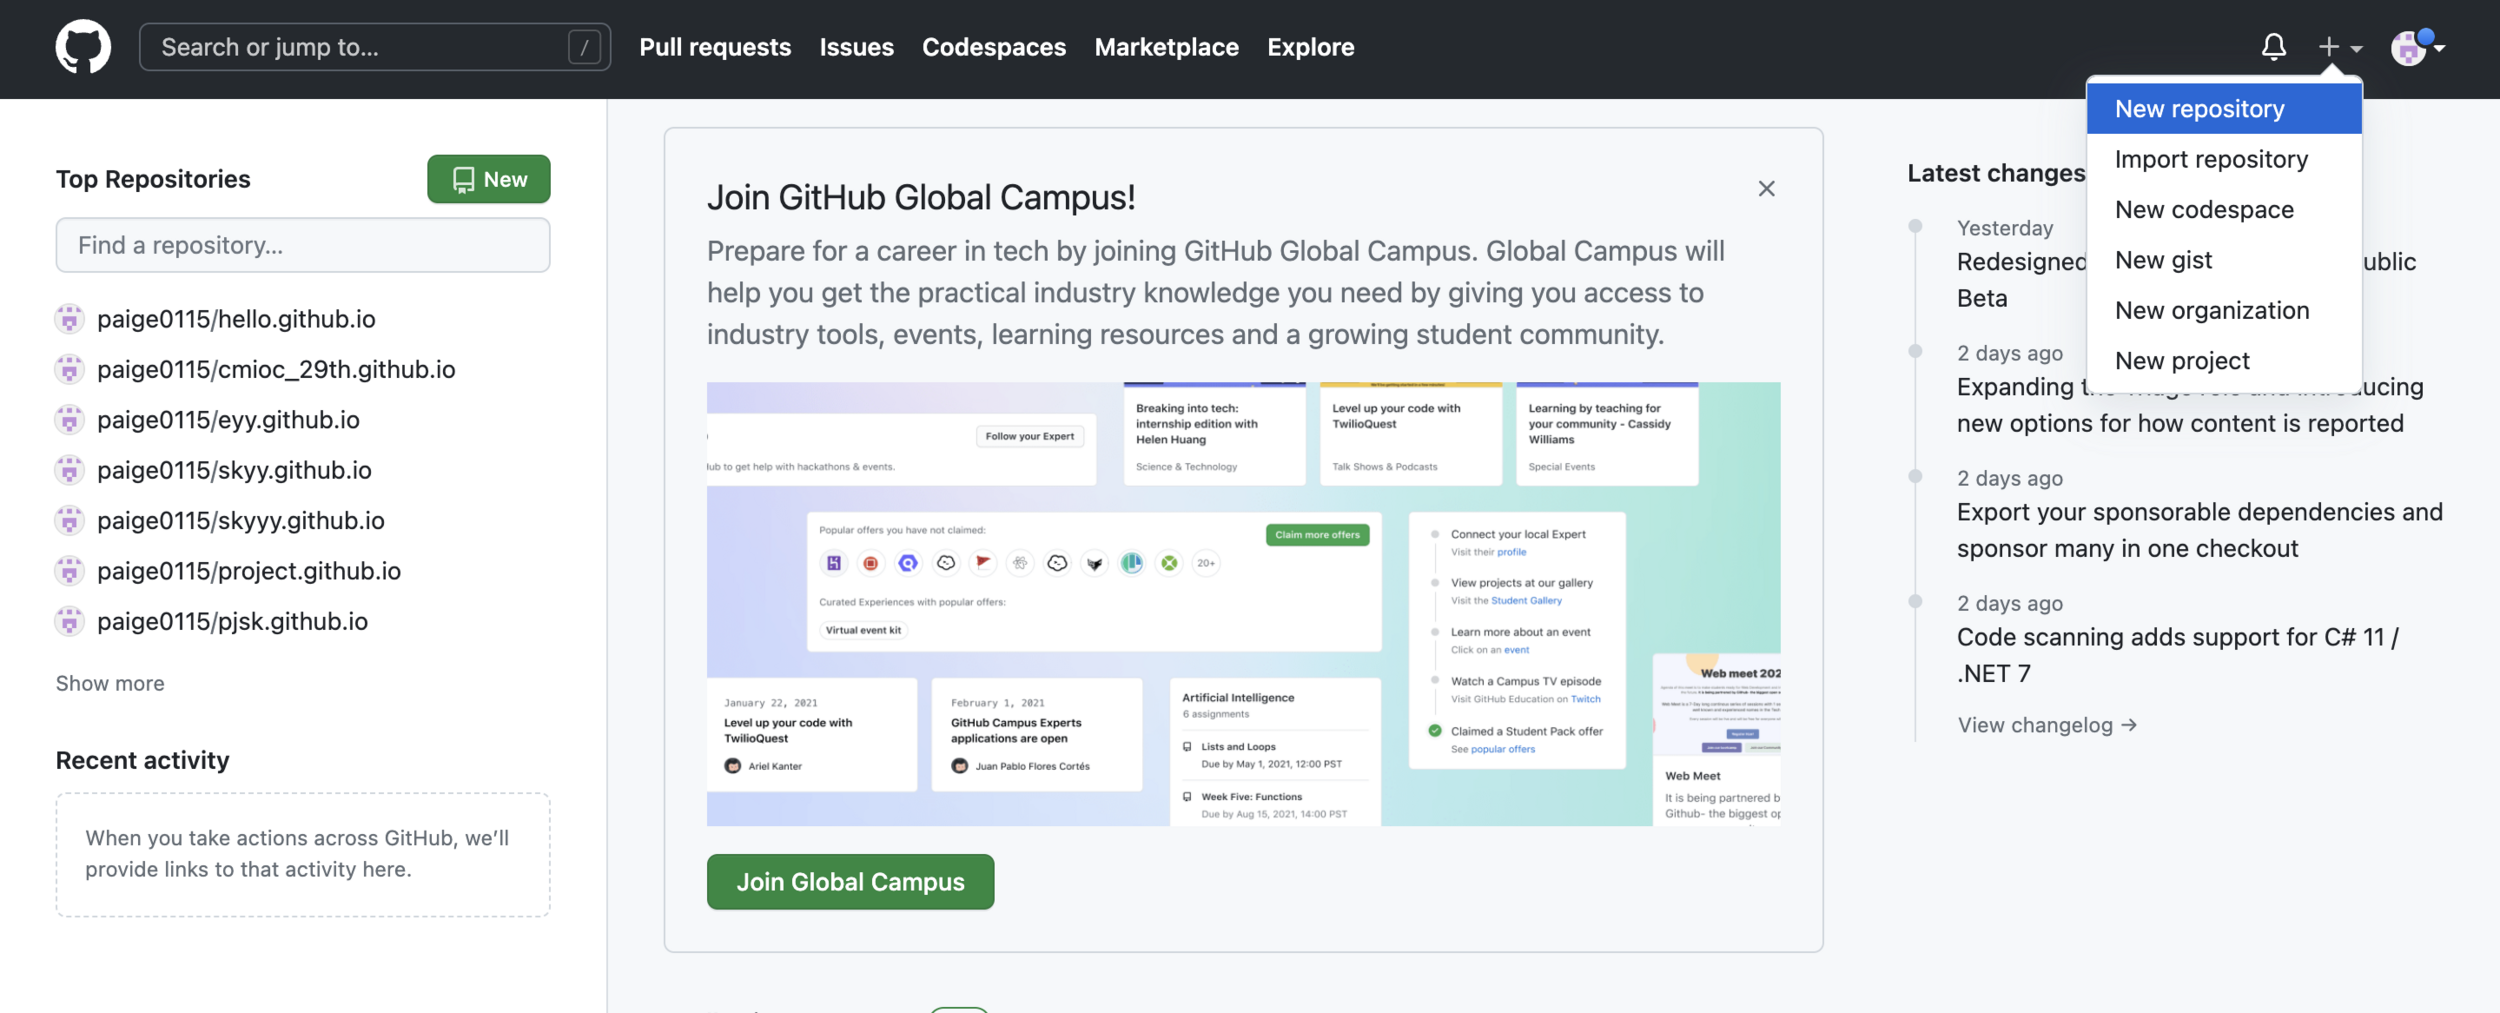
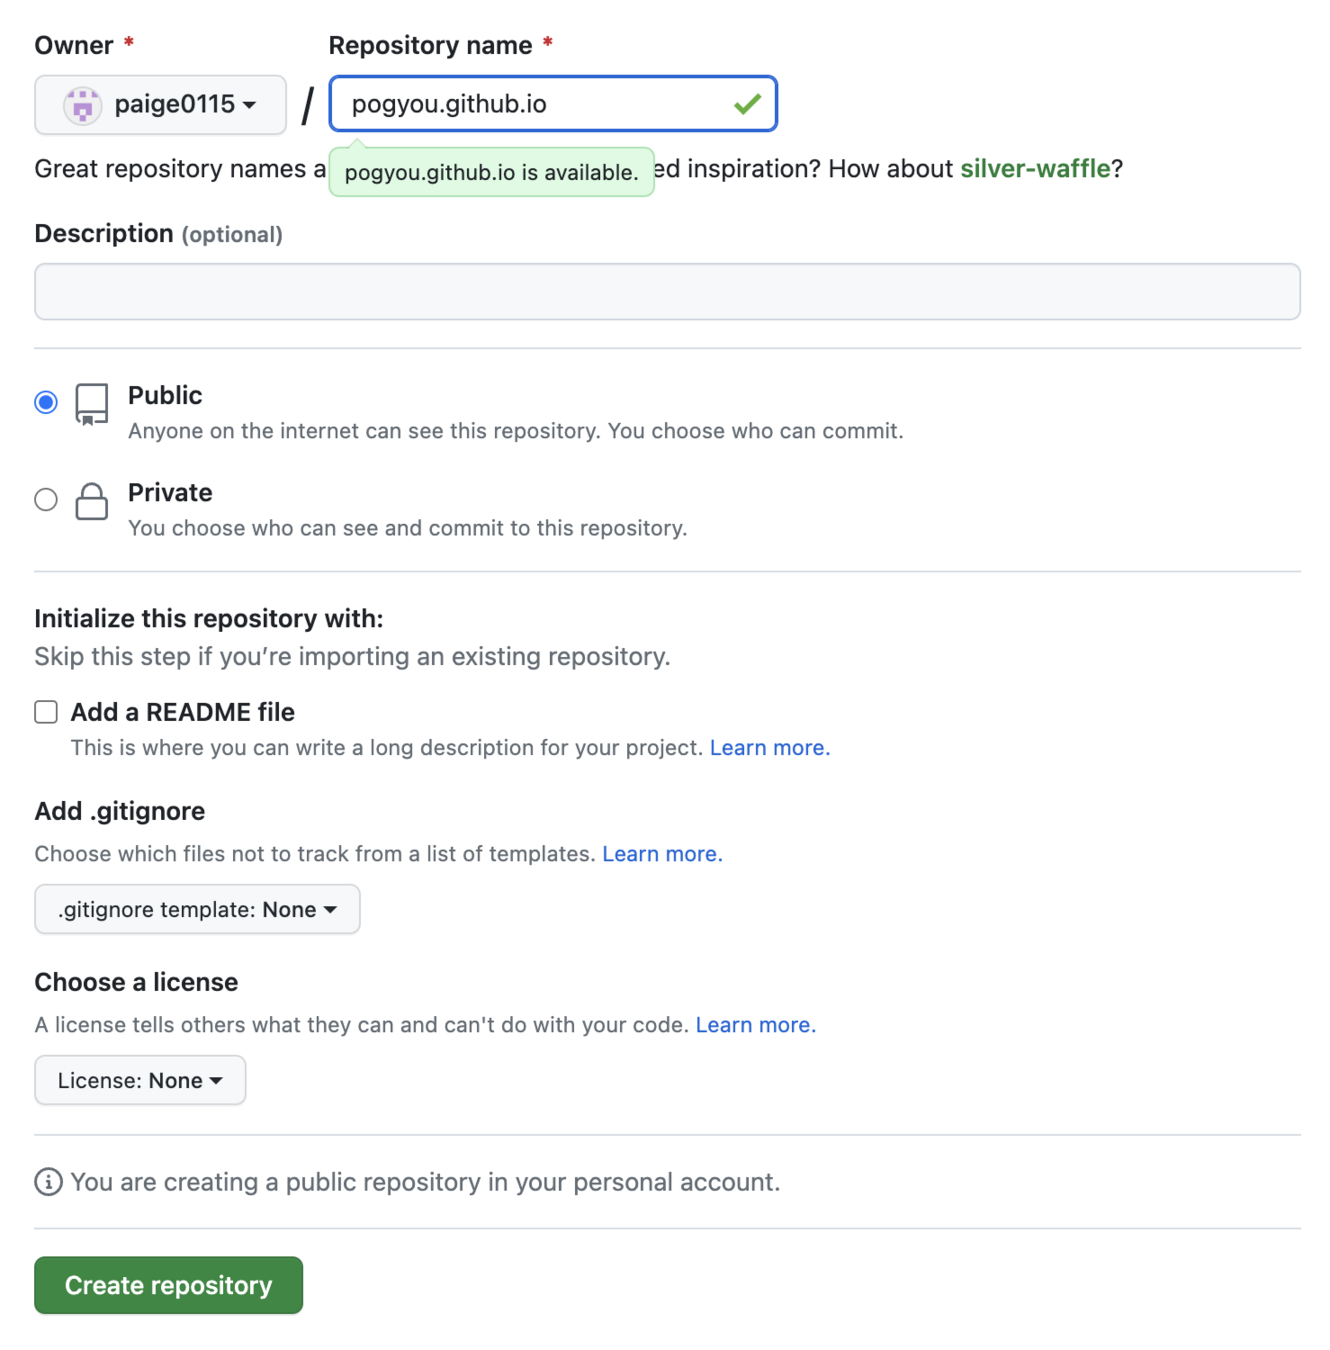
在這裡打你想要的內容加上.github.io
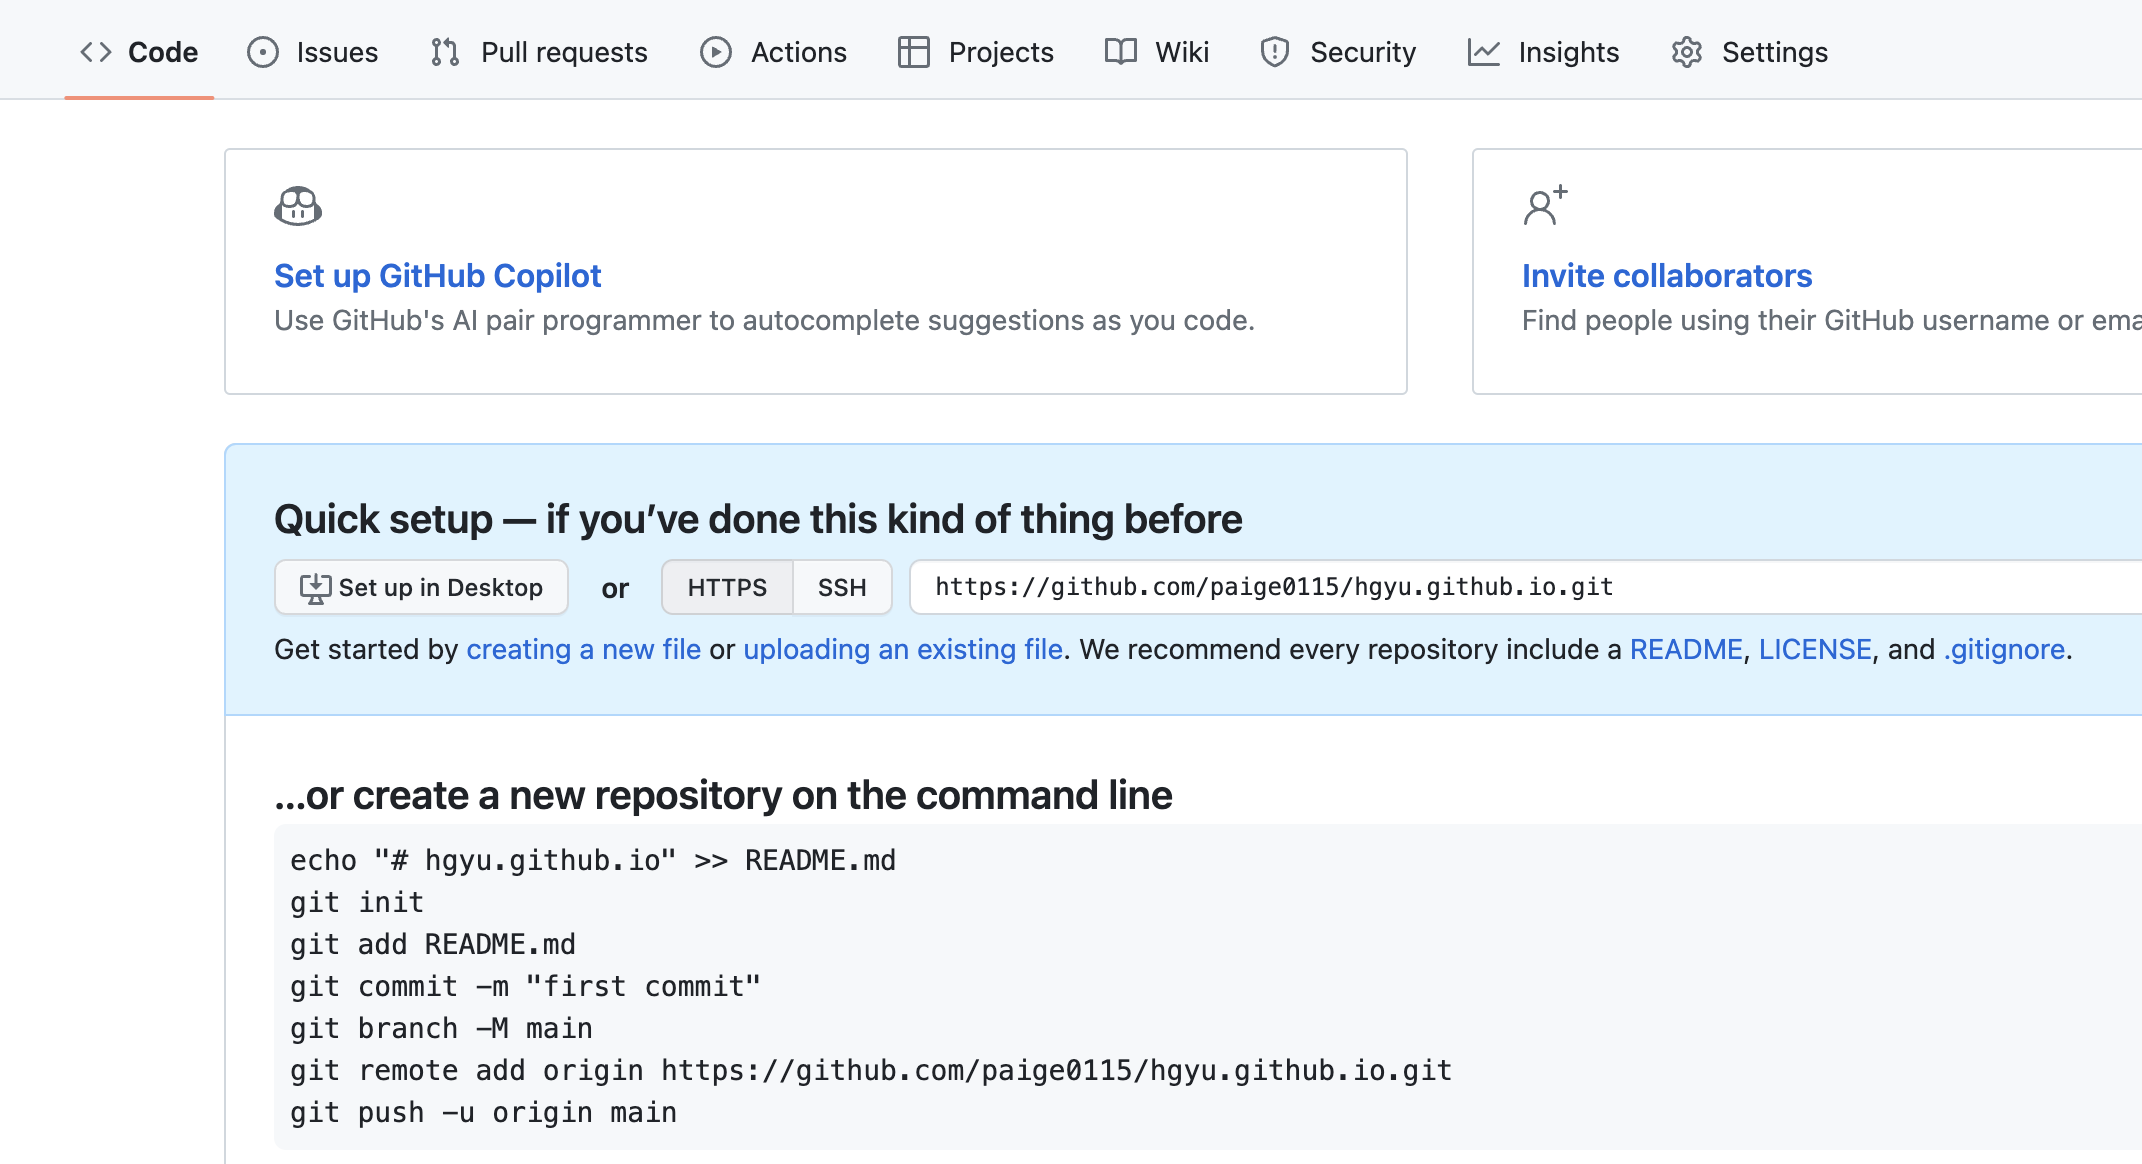
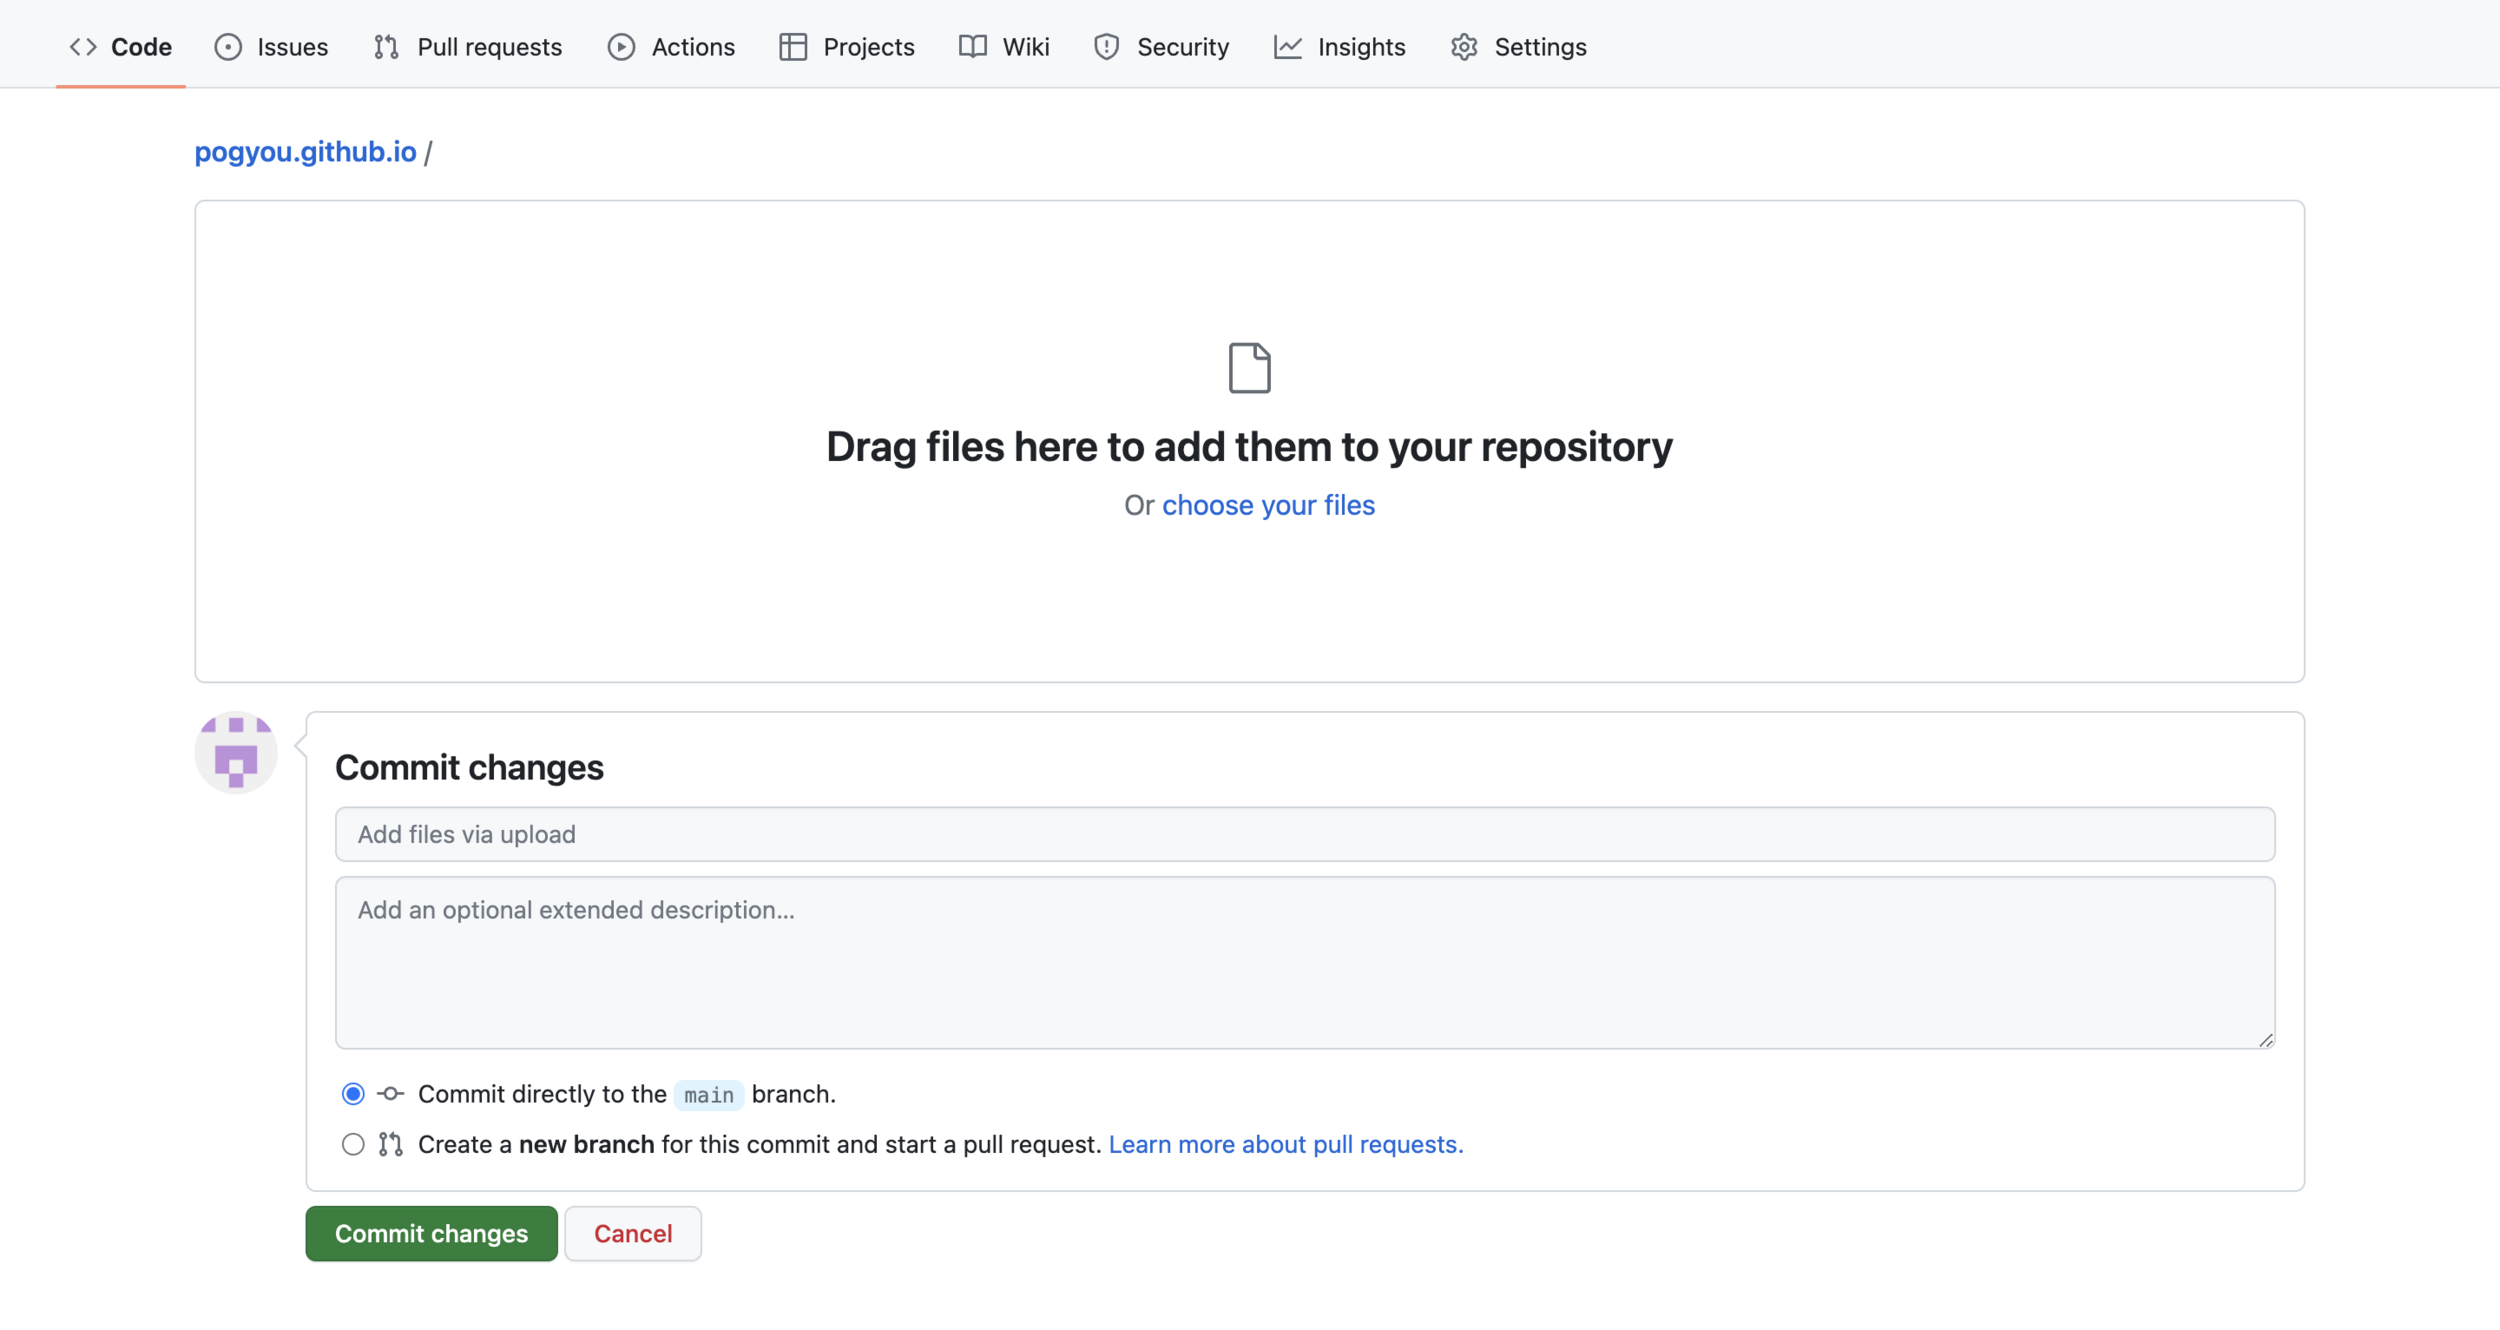
把資料夾拉進這裡
在這裡隨便打一串內容
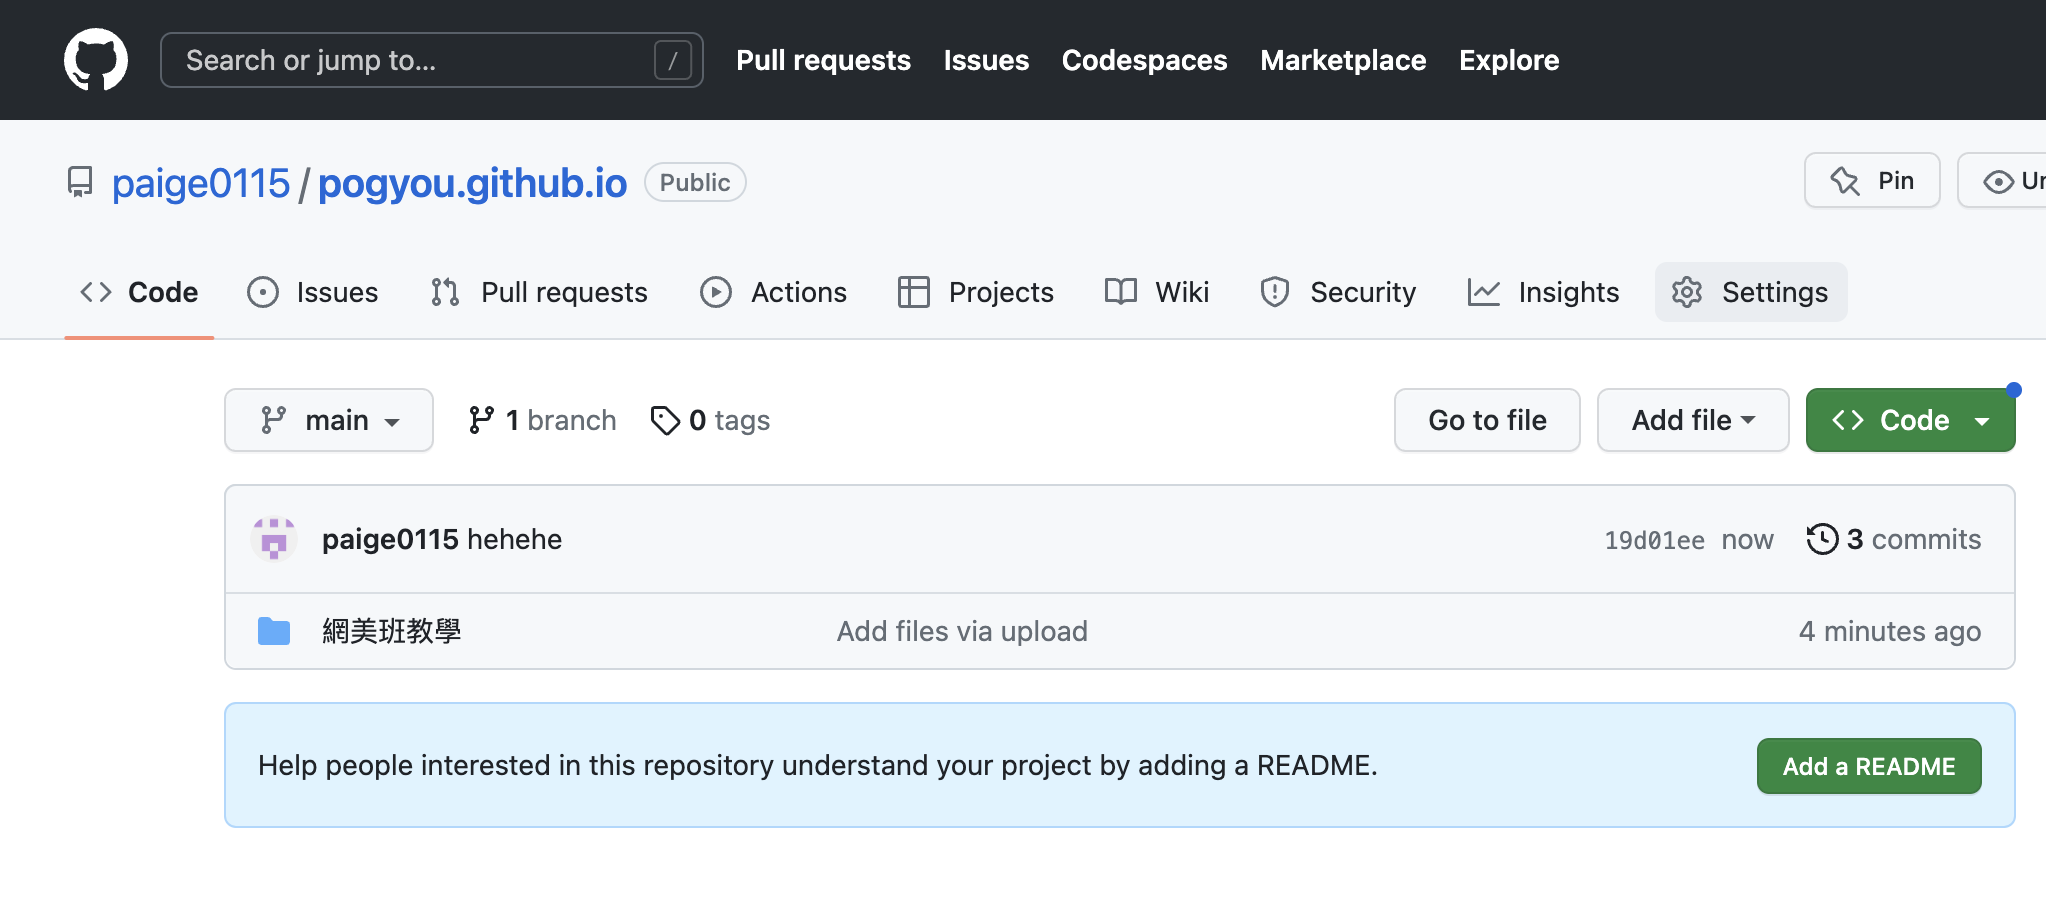
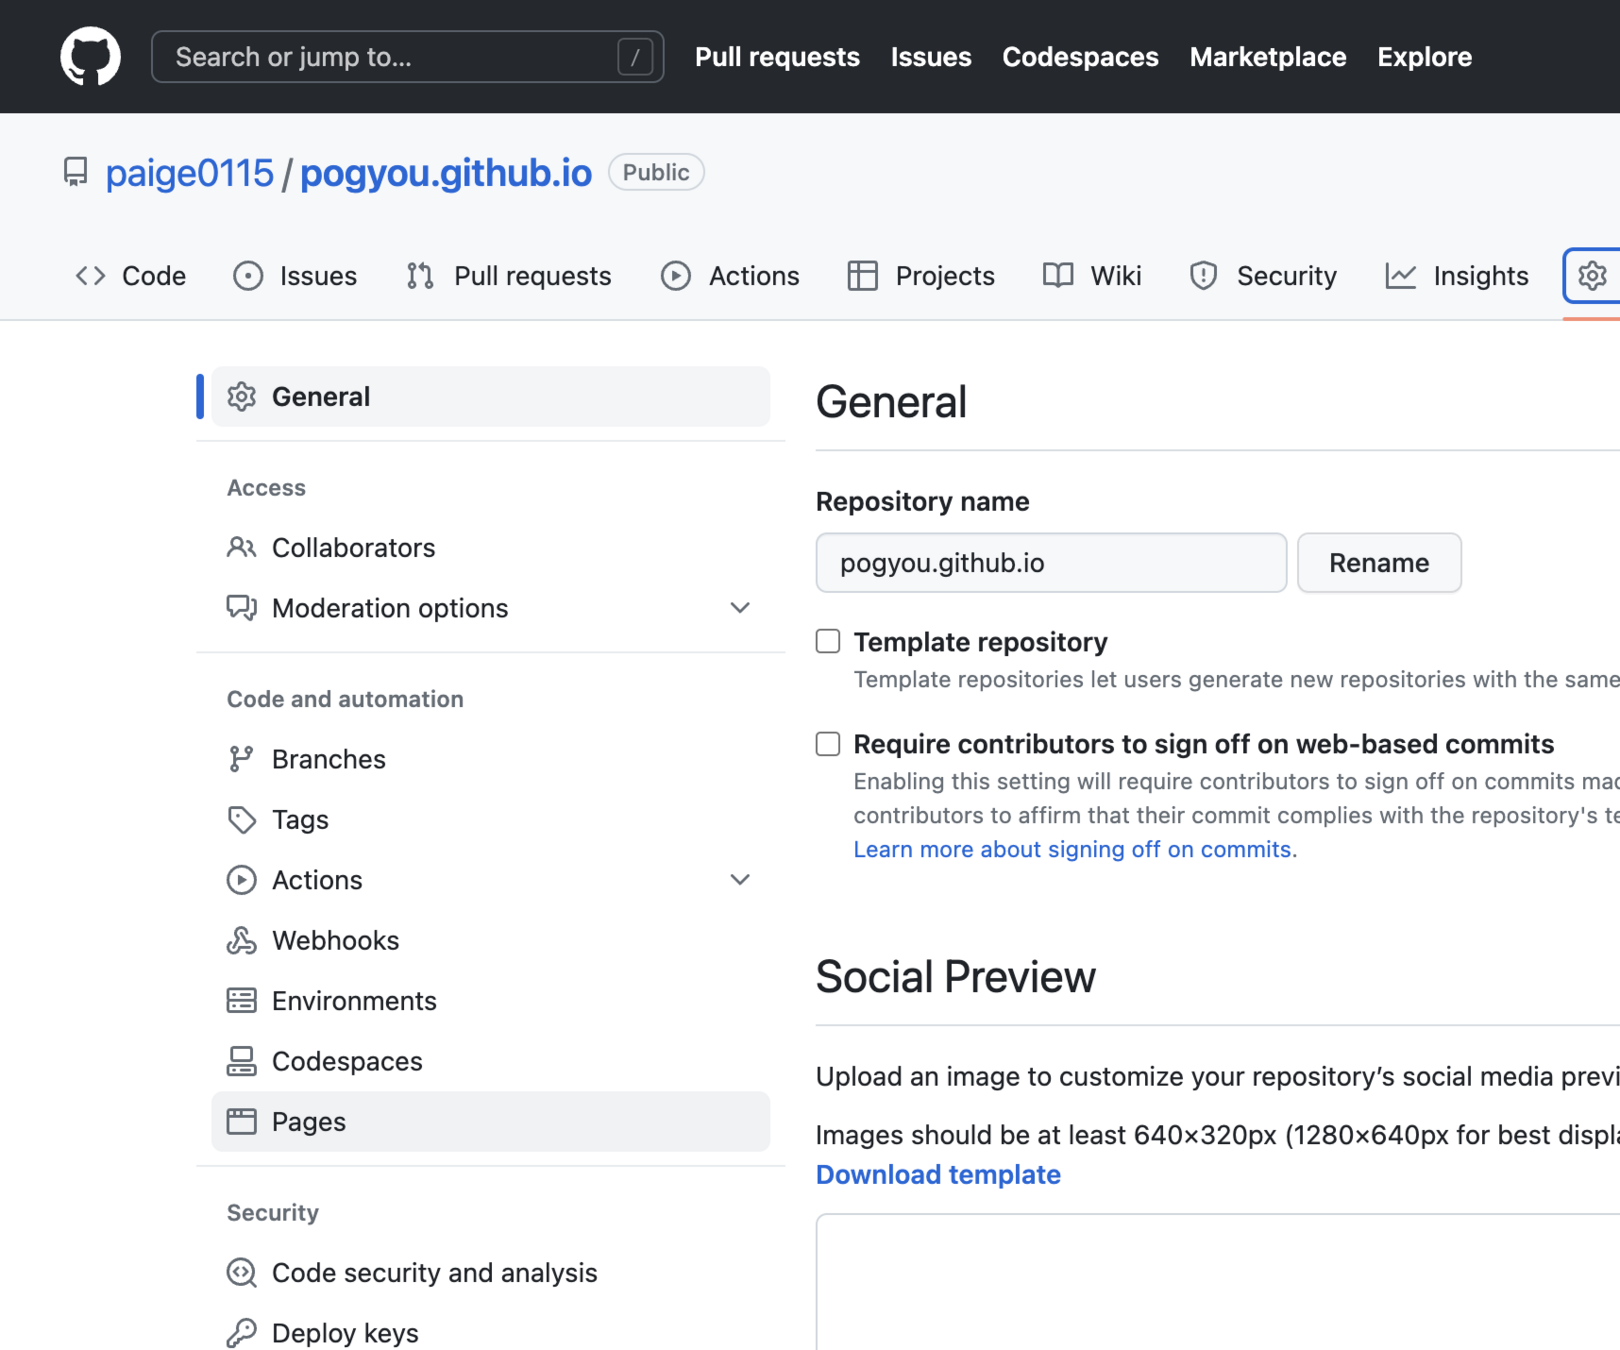
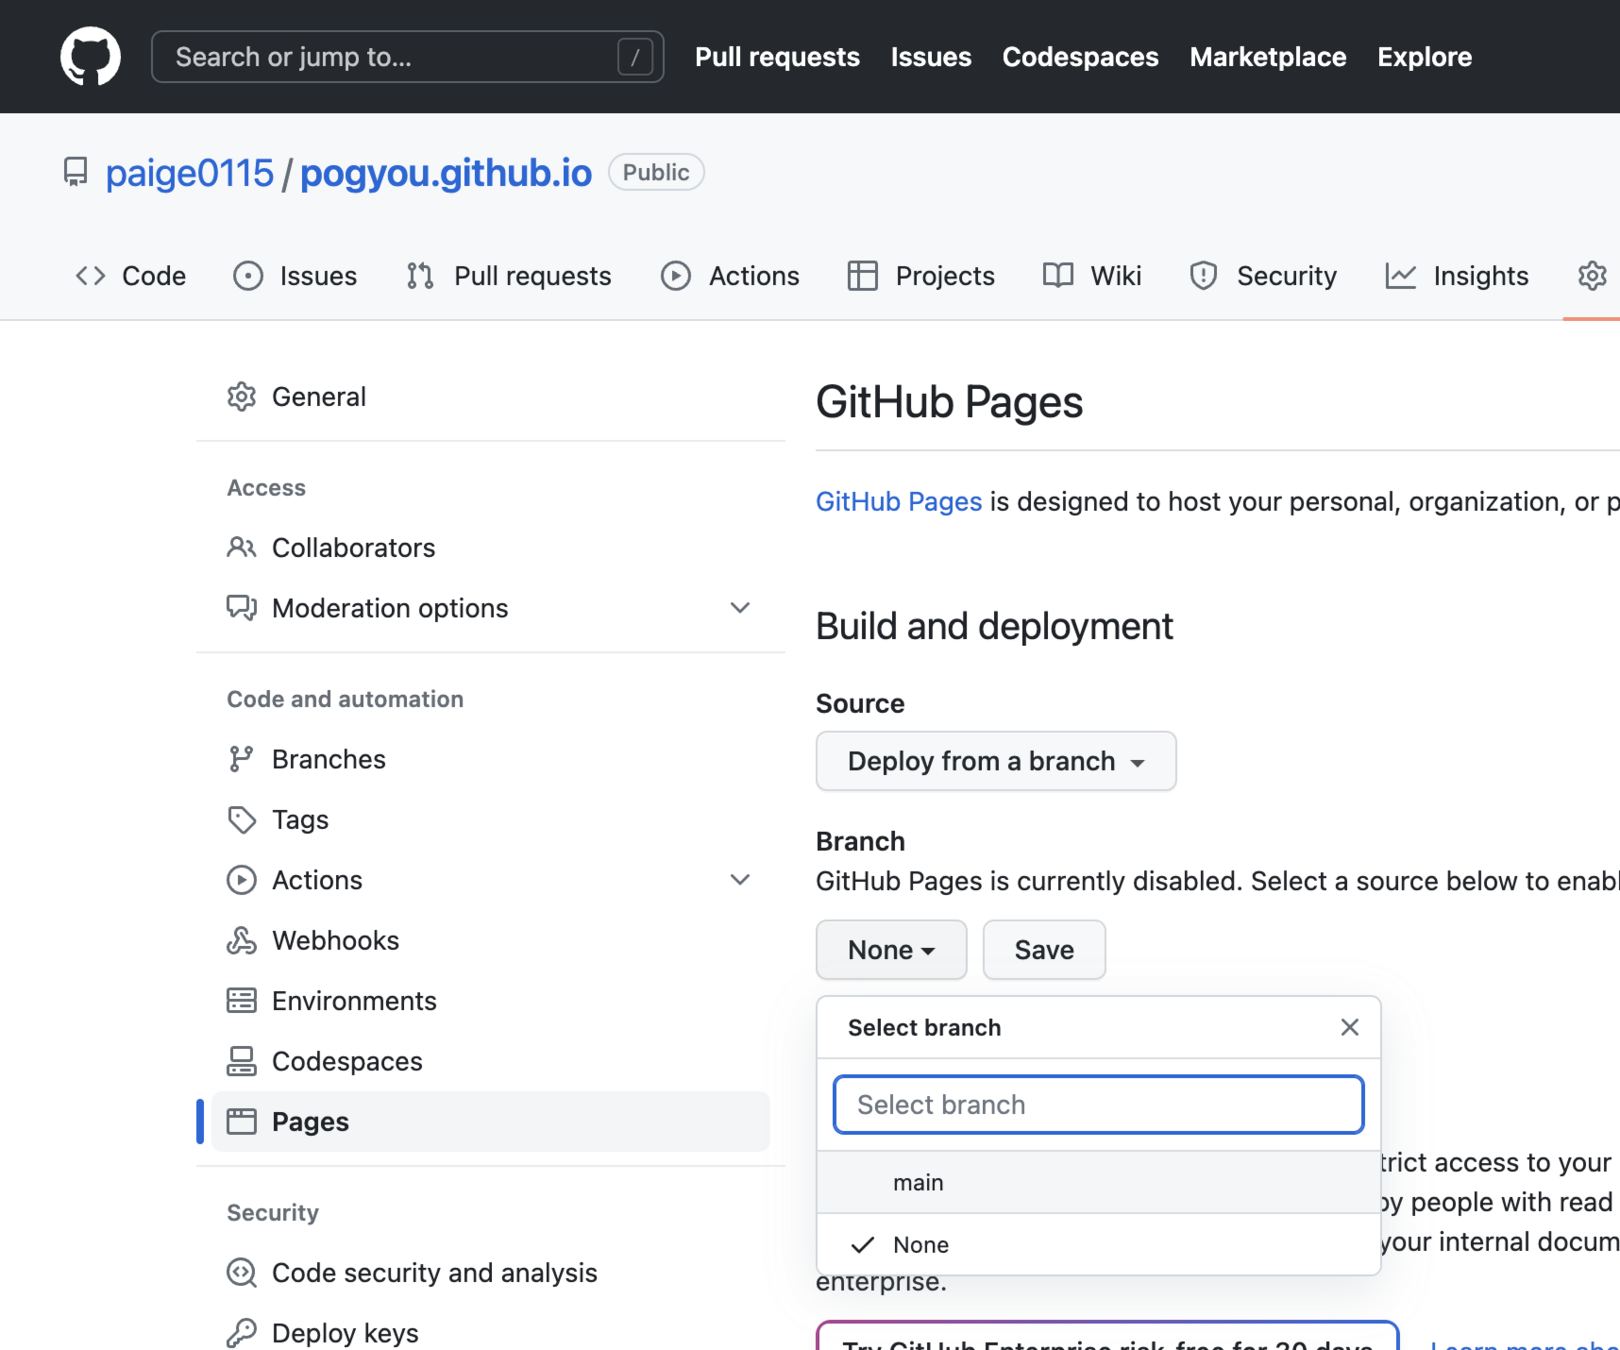
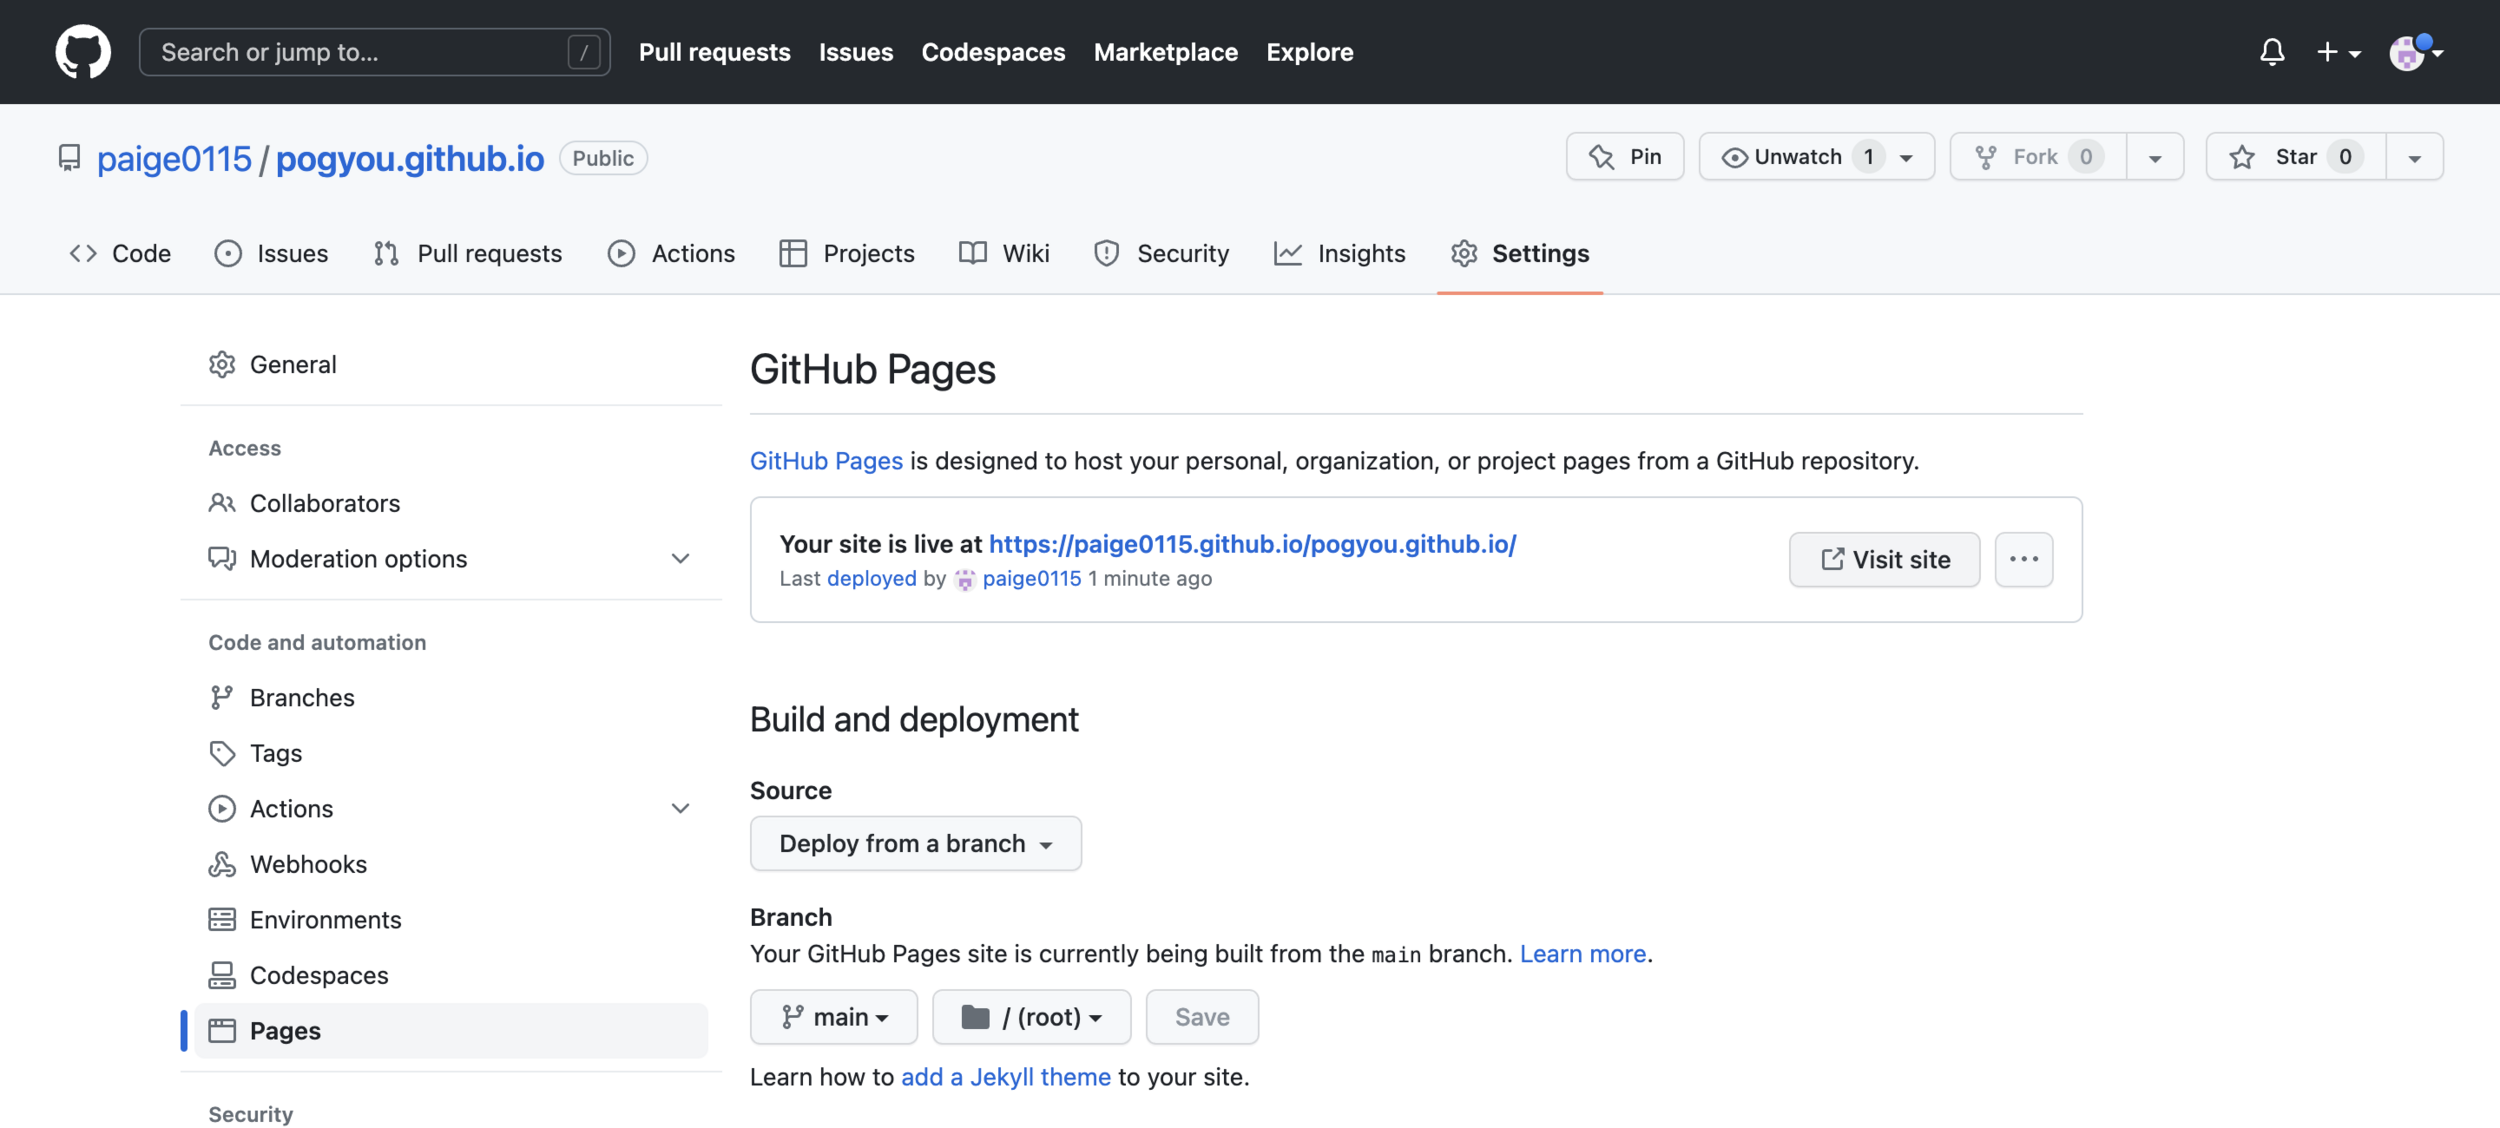
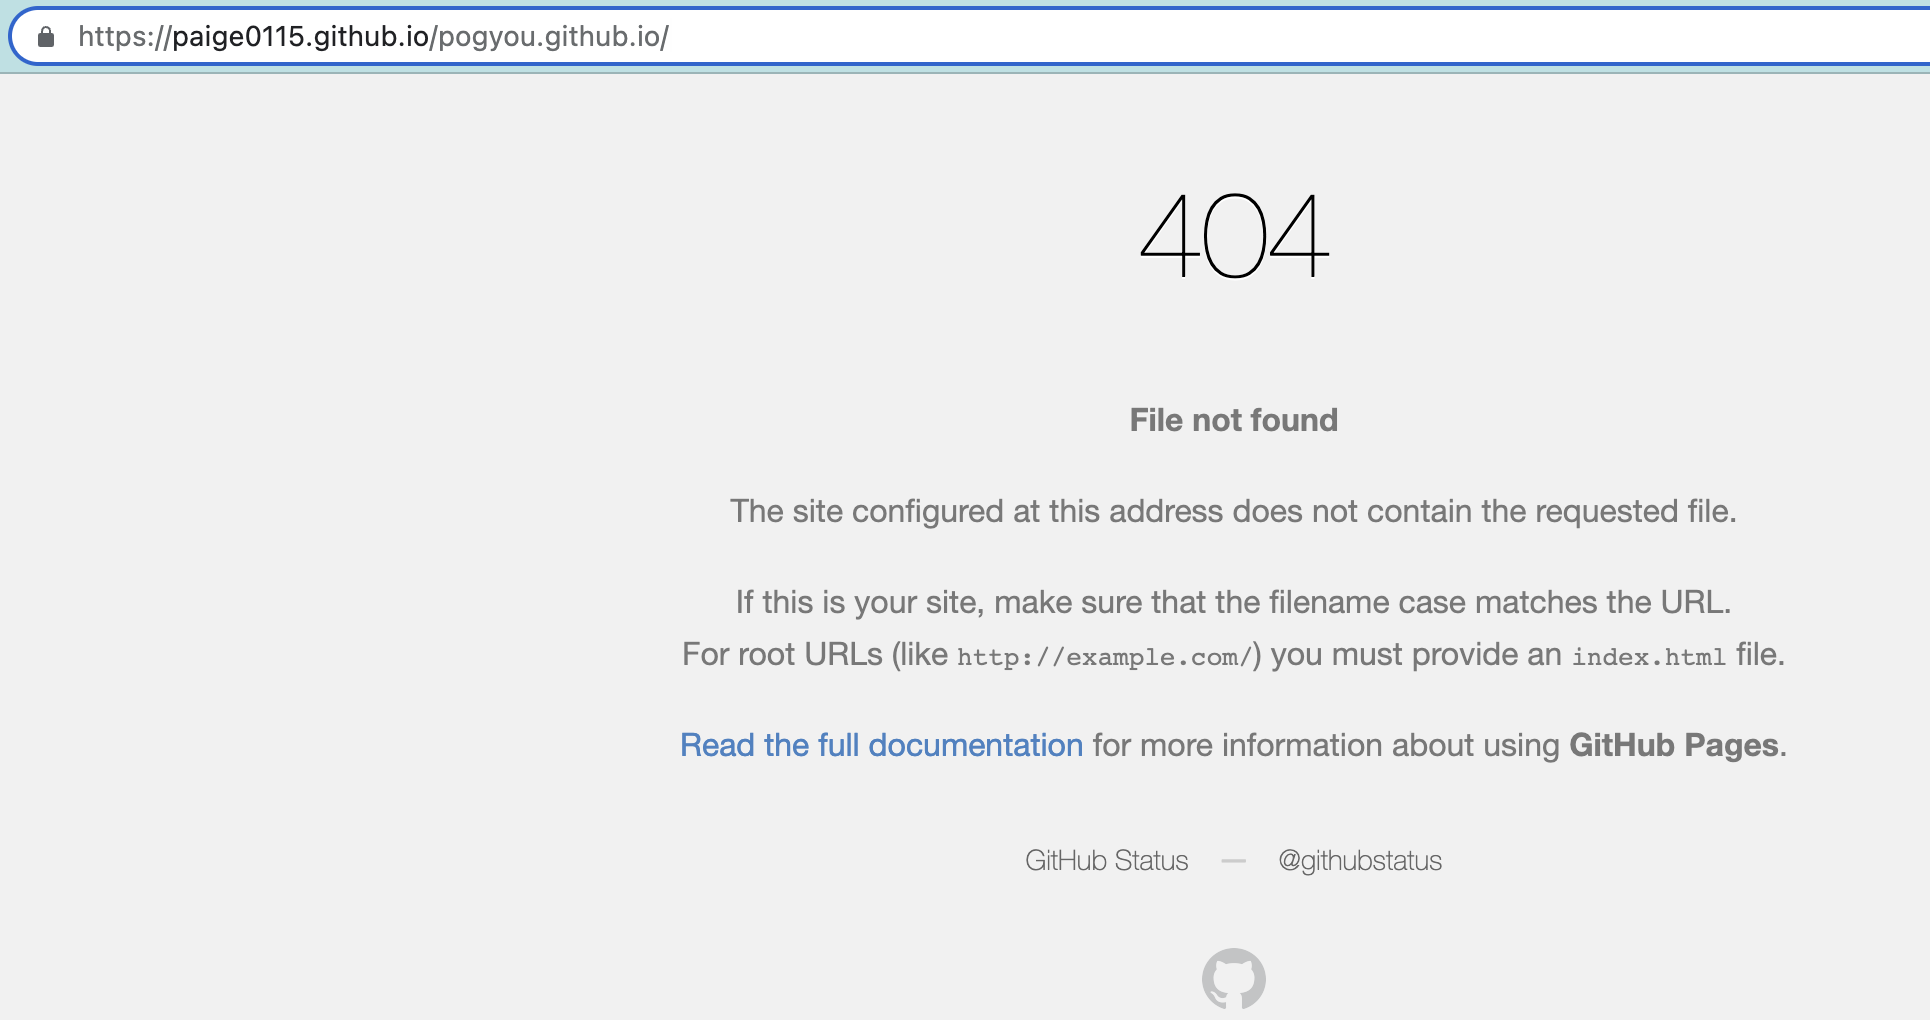

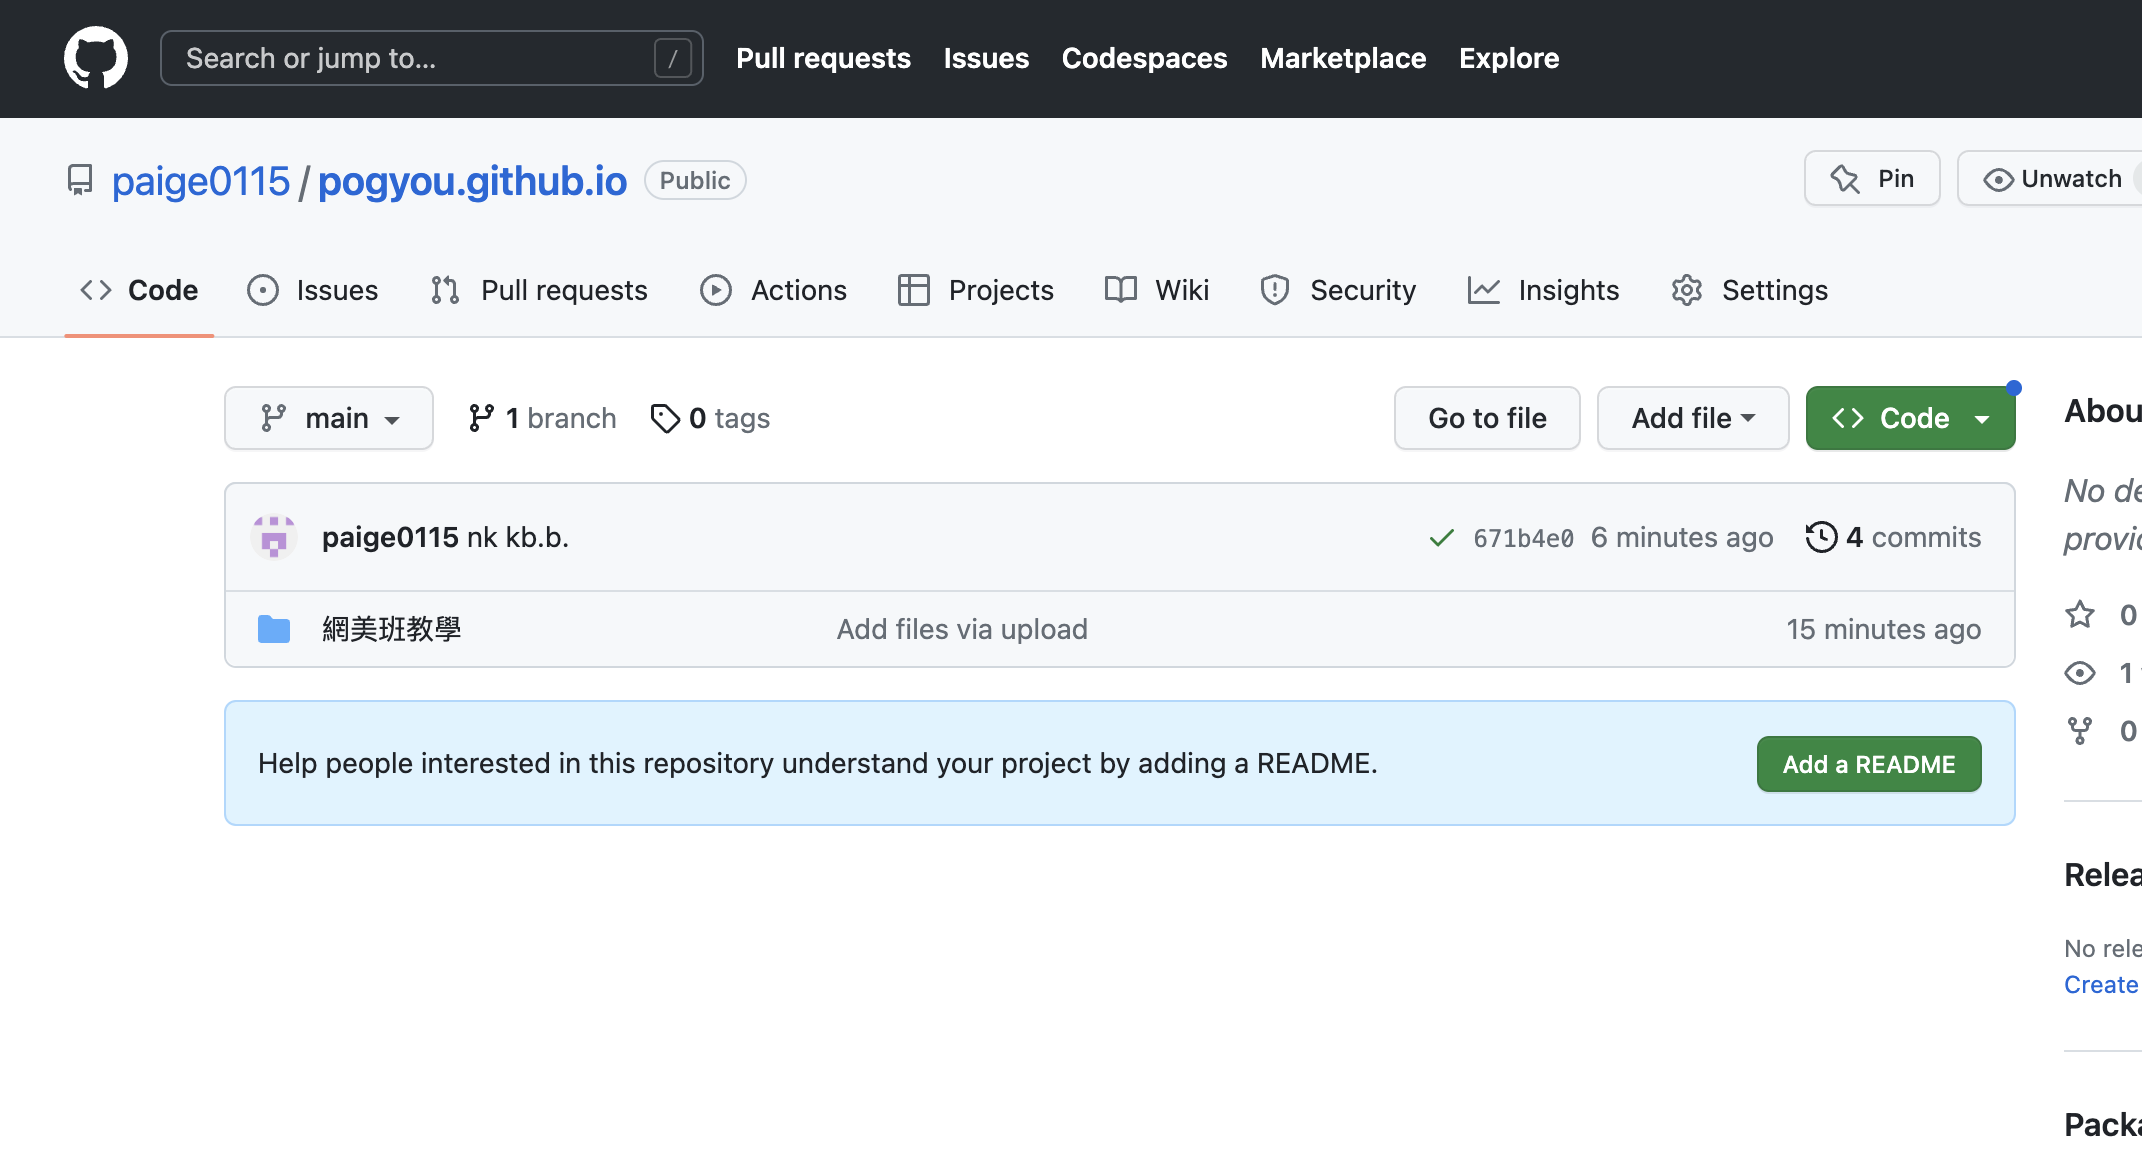
資料夾名稱/首頁檔案名稱
忘記的話可以來這裡查看
(或直接看你的資料夾)
css
其他(?)

模板
可以共編的