Hacking React Native
Building a Native IOS Imgur Browser in JavaScript

Getting Started
- cd to working directory
- react-native init myApp
- cd myApp
- open myApp.xcodeproj

Project Setup
- npm install react-native-device --save
- create app folder in root directory
- create data folder in app directory
- create the following files in app directory:
- entry.js
- drilldown.js
- data/api.js

Project Setup
- visit https://api.imgur.com/
- sign up
- copy client_id , or have client_id available for reference

IMGUR Api
Open index.ios.js

Add NavigatorIOS to React destructuring statement.
var {
  AppRegistry,
  StyleSheet,
  Text,
  View,
  NavigatorIOS
} = React;
In index.ios.js

return (
  <NavigatorIOS
    style={{flex:1}}
    ref="nav"
    initialRoute={{
      component: entry,
      title: 'Imgur Viewer'
    }} />
);
Replace existing render code with the following:
Require entry component below React require statement.
var entry = require('./app/entry');Open entry.js

Copy or type code below into entry.js
var React = require('react-native');

var {
  StyleSheet,
  Text,
  View,
  TouchableHighlight,
  NavigatorIOS,
  ScrollView
} = React;

var ImgurViewer = React.createClass({
	render: function() {
		return(
			<View>
                            <Text
                            style={{marginTop:66}}>
                            Hello From ENTRY Component
                            </Text>
                        </View>
		)
	}
});

module.exports = ImgurViewer
Refresh IOS Simulator

You should see the following:

Open data/api.js

var rootUrl = 'https://api.imgur.com/3/';
var apiKey = '7eb03b39c91e55f';

module.exports = {
	get: function(url) {
		return fetch(rootUrl + url, {
			headers: {
				'Authorization': 'Client-ID ' + apiKey
			}
		})
		.then(function(response) {
			return response.json()
		})
	}
};
Copy or type code below into api.js
Replace apiKey with your client id
Open entry.js

var React = require('react-native');
var API = require('./data/api');
var Device = require('react-native-device');
Update required modules / components:
In entry.js

  getInitialState: function() {
    return {
      topics: []
    }
  },

  componentWillMount: function() {
      API.get('topics/defaults')
      .then(function(data) {
        this.setState({
          topics: data.data
        })
      }.bind(this))
  },
Add the following in the React Class, before render function:
In entry.js

console.log(this.state.topics)

var self = this;

var topics = this.state.topics.map(function(topic, key) {
  return (
    <View>
      <TouchableHighlight onPress={console.log(topic.id)} underlayColor="#f1f1f1" style={[styles.drilldown, {width:Device.width}]}>
        <View>
          <Text style={{fontSize:20, color: '#0098e6'}}>{topic.name}</Text>
          <Text>{topic.description}</Text>
        </View>
      </TouchableHighlight>
    </View>
  )
})

return (
    <View style={[styles.container]}>
      <ScrollView>
        {topics}
      </ScrollView>
    </View>
);
Update render function to the following:
In entry.js

var styles = StyleSheet.create({
  container: {
    alignItems: 'center',
    flex: 1,
    justifyContent: 'center',
  },
  welcome: {
    fontSize: 20,
    textAlign: 'center',
    margin: 10,
  },
  instructions: {
    textAlign: 'center',
    color: '#333333',
    marginBottom: 5,
  },
  drilldown: {
    padding:15,
    paddingBottom:20,
    borderBottomWidth:1,
    borderBottomColor: '#e3e3e3'
  }
});
Add the following object before module.exports:
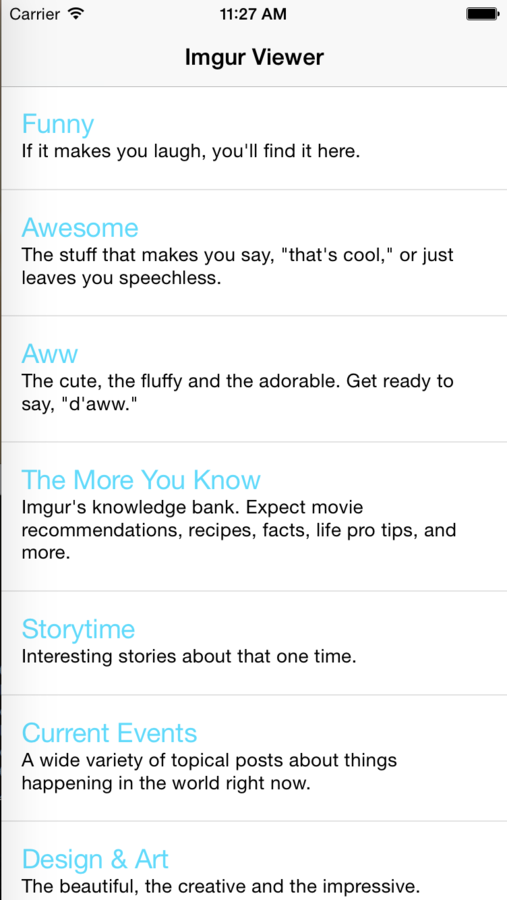
Refresh IOS-Simulator

You should see the following:

Open drilldown.js

var API = require('./data/api');
var Device = require('react-native-device');

var React = require('react-native');
var {
  StyleSheet,
  Text,
  View,
  TouchableHighlight,
  NavigatorIOS,
  ScrollView,
  Image
} = React;

var DrillDown = React.createClass({
    render: function() {
        return(
            <View><Text style={{marginTop:66}}>HELLO FROM DRILLDOWN</Text></View>
        )
    }
});

module.exports = DrillDown;
Copy or type code below into drilldown.js
Open entry.js

var DrillDown = require('./drilldown');Add drilldown component to entry.js
Create function to navigate to drilldown:
_getTopicFromId: function(topicName, topicId) {
    this.props.navigator.push({
        component: DrillDown,
        title: topicName,
        passProps: {
          id: topicId
        }
    });
  },
Add click handler to TouchableHighlight:
onPress={self._getTopicFromId.bind(this, topic.name, topic.id)} Refresh IOS-Simulator

Click on topic, then you should see the following screen:

Open drilldown.js

Add the following functions in DrillDown class, before render function:
  getInitialState: function() {
    return {
      images: []
    }
  },

  componentWillMount: function() {
    API.get('topics/' + this.props.id)
      .then(function(json) {
        this.setState({
          images: json.data
        })
      }.bind(this))
  },

  getImageUrl: function(id) {
  	var link = 'http://i.imgur.com/' + id + 'h.jpg';
  	return link
  },
In drilldown.js

Update render function to the following:
var self = this;

var content = this.state.images.map(function(image) {
  return (
    <View key={image.id} style={{borderBottomColor: '#0098e6', borderBottomWidth:3}}>
      <Text style={{padding:20,fontSize:16, color: '#494949'}}>{image.title}</Text>
      <View >
        <Image
            source={{uri: self.getImageUrl(image.id)}}
            style={{width:Device.width, height:300}} />
      </View>
    </View>
  )
});

return(
  <ScrollView >
          {content}
  </ScrollView>
)
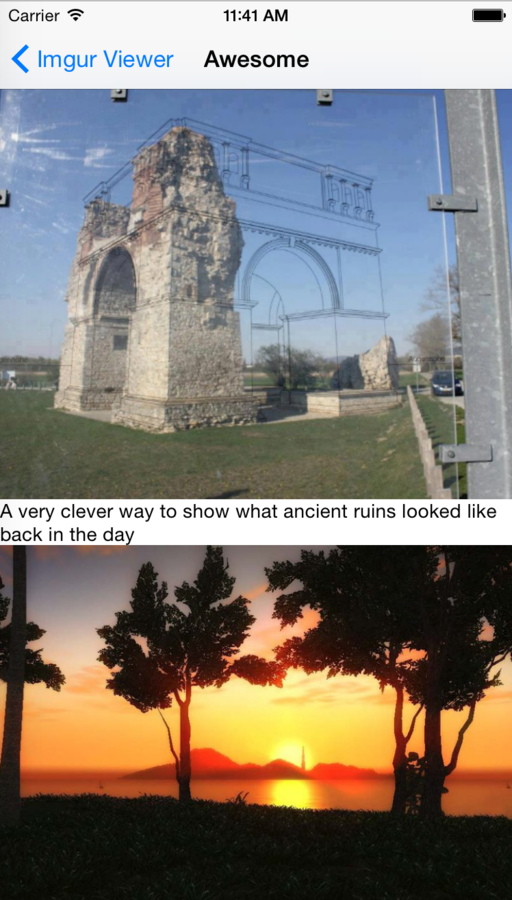
Refresh IOS-Simulator

Click on a topic, you should see the following:

Thank you!

Follow me @dabit3
Nader Dabit
ABOUT ME:
Developer at School Status
Follow SchoolStatus @schoolstatusapp
Download completed app HERE
dabit3@gmail.com