Getting to Know Alloy - Part 3
by
David Plummer
for
Clearly Innovative, Inc.
Overview
- List Views (first look)
- $ Scope
Review Exercise (10 min)
Create a new project called class3#your_name#. Turn the project into a repo and invite me to it. Make sure to follow the steps outlined in the previous lesson.
Review Exercise (10 min)
I've invited you all to a project call class3invitation. Pull the project down and perform the steps necessary to run it using either the iPhone simulator or Android emulator. I should be able to see the app running on your monitors.
List Views
A list view works very much like a table view.
TableView <---> ListView
TableViewSection <---> ListSection
TableViewRow <---> ListItem
List View
View
Style
Controller

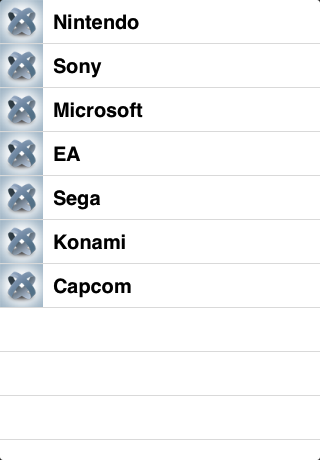
List View - Output

What's the benefit of a list view?
Table views can cause more trouble performance-wise than list views, especially when handling rows with media content.
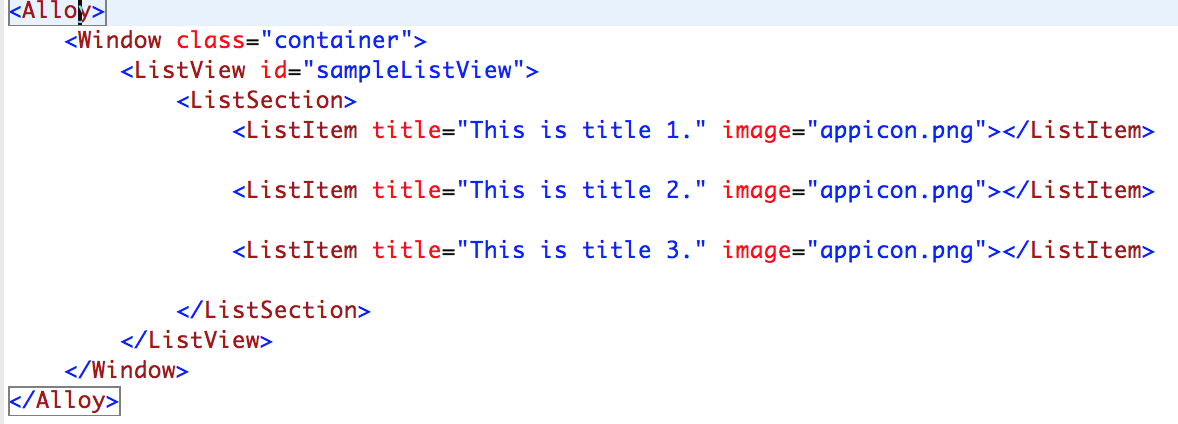
Populating a list view
Most of the time, you'll populate list views with data from a data structure like an array. To accomplish this, you must:
- Create or fetch a data store that will populate your list items.
- Create the items that will be used to render the list items.
- Store the created items in the list section(s) you want.
- Store the list section(s) in the list view.
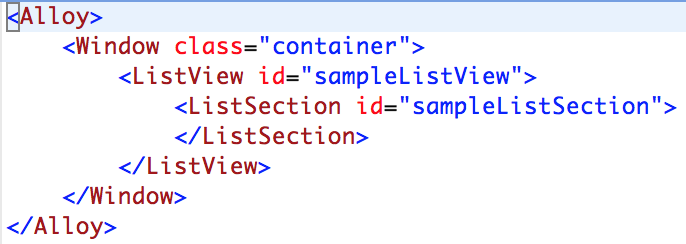
Starting structure
Populating a list view
1. Create or fetch a data store that will populate your list items.
2. Create the items that will be used to render the list items.
var gameCompanies = [{
properties : {
image : "appicon.png",
title : "Nintendo"
}
}, {
properties : {
image : "appicon.png",
title : "Sony"
}
}, {
properties : {
image : "appicon.png",
title : "Microsoft"
}
}, {
properties : {
image : "appicon.png",
title : "EA"
}
}, {
properties : {
image : "appicon.png",
title : "Sega"
}
}, {
properties : {
image : "appicon.png",
title : "Konami"
}
}, {
properties : {
image : "appicon.png",
title : "Capcom"
}
}];
var gameCompanies = [{
properties : {
image : "appicon.png",
title : "Nintendo"
}
}, {
properties : {
image : "appicon.png",
title : "Sony"
}
}, {
properties : {
image : "appicon.png",
title : "Microsoft"
}
}, {
properties : {
image : "appicon.png",
title : "EA"
}
}, {
properties : {
image : "appicon.png",
title : "Sega"
}
}, {
properties : {
image : "appicon.png",
title : "Konami"
}
}, {
properties : {
image : "appicon.png",
title : "Capcom"
}
}]; Populating a list view
3. Store the created items in the list section(s) you want.
$.sampleListSection.setItems(gameCompanies); Populating a list view
4. Store the list sections in the list view.
$.sampleListView.setSections([$.sampleListSection]); Output
$ Scope
The $ scope represents all resources that exist in a controller. Everything you put in the $ scope can be publicly accessed by other controllers. Also, anything that is assigned an id in the .xml view can be accessed in the $ scope with $.#idName#
Why use the $ scope?
There are times when it helps to pass one controller to another controller. You can accomplish this with the $ scope.
Passing data from one controller to another controller
When you create a controller, you have the ability to pass data to that controller. The data you pass is stored in an array called arguments. This array only exists in the controller the moment the controller is created.
Afterwards, it's destroyed, so it's important that you use the data in it or store it in a local variable inside of the controller being created.
Passing information to a controller
code from controllerOne

code from controllerTwo

Inside of controllerTwo, the valueFromControllerOne variable will now have a value of 55.
Passing a controller
You don't have to pass one value at a time. If you wanted to, you could pass a JSON object, an array, or even an entire controller like this:
Alloy.createController("controllerName",{ parentController : $ });
...and then retrieve the data from inside of controllerName like this:
var parentController = arguments[0].parentController;
Exercise (20 min.)
Create the following mockup:
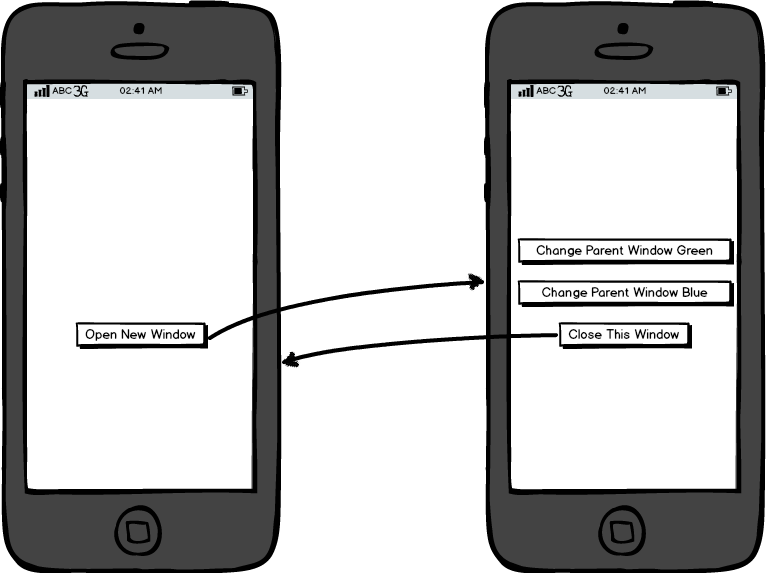
Pass the controller from the first window to the second window. Use the buttons in the second window to change the backgroundColor of the parent window.
Optional
Add a function to the second controller that creates a button and attaches it to the main window. This button should create a new window and open it when clicked.
Homework 1
Study the Ti.App.Properties documentation at http://docs.appcelerator.com/titanium/3.0/#!/api/Titanium.App.Properties.
See if you can build a login interface. The interface should consist of:
- a login window (window A)
- an account creation window accessible from the login window (window B)
- an account editing page that lets you update the account data (window C)
- a logout button to return to the start window
- windows A & B should go to window C when an account has been created or a user has successfully logged in
After creating the interface, see if you can figure out how to store the user data in Ti.App.Properties and call it when you need it to populate the fields in your interface. The data for the created account can be stored in Ti.App.Properties. For now, you can let a new account overwrite the old account. Post the assignment to bitbucket and include me as a contact. Make sure the bitbucket repo is called homework3_1#your_name#. Submit what you have even if it's incomplete.
Due: 9/22 by 11:59pm
Homework 2 (Optional)
Create the following interface:
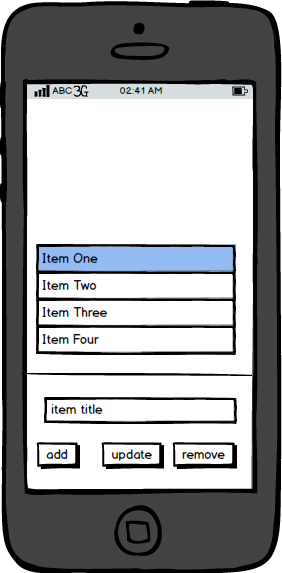
Homework 2 (Optional)
Share this project with me via bitbucket and call it homework3_2#your_name#
Resources
List Views
http://docs.appcelerator.com/titanium/3.0/#!/api/Titanium.UI.ListView
List Sections
http://docs.appcelerator.com/titanium/3.0/#!/api/Titanium.UI.ListSection
List Items
http://docs.appcelerator.com/titanium/3.0/#!/api/Titanium.UI.ListItem
Backbone
http://backbonejs.org/