A Quick Intro to TDD
With Node.js and Mocha
Victor Aponte
Front-end Dev @ Wells Fargo
gh: FunnyDewd
@FunnyDewd
Why I test...
Then, one day...
TDD
T.D.D.
(Test Dat! Dammit!)
BDD
B.D.D.
(Blame Dat Developer)
but seriously...
Many types of Testing
Unit Testing
(This is where TDD/BDD usually comes in.)
Integration testing
Others
- Component Integration
- Systems Integration
- Stress Testing (load testing)
- Quality Assurance Testing
- User Acceptance Testing
- ... and many more ...
Unit Testing Styles:
-
TDD - Test Driven Development
-
BDD* - Behavior Driven Development
*BDD can be used to drive integration tests also.
BDD Style:
describe("User Registration", function() {describe("While validating the registration info", function() {it("should make sure the email address is valid", function() {// assert that email is valid});it("should verify the email doesn't already exist", function() {// assert that email doesn't exist}); ...});describe("While creating the user's database record", function() {it("should save successfully in the database", function() {// assert the database record was saved}); ...});});
BDD Is Narrative
Describe User Registration
  While validating the registration info
   - it should make sure the email address is valid
   - it should verify the email doesn't already exist
     ...
  While creating the user's database record
   - it should save successfully in the database
     ...
Ok, but what kind of tests should I write??
What you should be testing:
- Input/Output
- Error Handling
- Modules/Functions
- State changes
- Constructors
- API Usage
- Memory Leaks
- Performance
What you shouldn't be testing:
- Third party libraries/frameworks (like mongoose)
- Remote services (like twitter, github api)
- External services (mongodb, SSH)
- Other libraries and modules you write yourself
Remember: These should be done during integration testing.
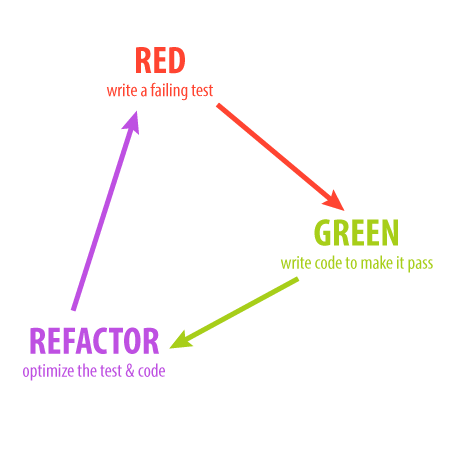
TDD/BDD Workflow

Mocha.js
- Test runner originally built for node.js
- Supports TDD & BDD styles (+ others)
- Does not come with an assertion library
- Supports synchronous & asynchronous tests
- Global variable leak detection
- Displays slow tests
- Built-in file watcher
- Drop-in support for continuous integration servers
Installing Mocha on Node:
npm install mocha -gthe -g flag is to install mocha as a global node module
Setting up the test runner (optional):
> cd my-node-project> mkdir test> mocha init
Node Trick:
To run a "local" install of mocha:
> ./node_modules/.bin/mochaNode modules that have an executable get a link to that command in the node_modules/.bin directory.
Writing your first mocha test:
var assert = require('assert'); // built-in node libdescribe("My Mocha Smoke test", function() {it("should add 2 numbers", function() {assert.equal(2 + 2, 4, "2 + 2 = 4, dang it!");});});
test/tests.js
- the describe() block is used to group individual specs, at least one describe block is required
- the it() block sets up the code for a single test (spec)
- the assert module contains a series of matchers which perform the comparison
Running your tests:
> mocha
which returns:
  ․

  1 passing (3ms)
you can switch the reporter with:
> mocha --reporter spec
which gives you:
  My Mocha Smoke test
    ✓ should add 2 numbers


  1 passing (4ms)
Running tests continuously:
> mocha -wGetting Help:
> mocha -hThe mocha.opts file:
The mocha.opts file (located in the test/ directory) lets you customize your default experience. All your command-line switches go there:
Here's a sample:
--watch--color--reporter spec--growl--timeout 5000--slow 1000--recursive
Mocha BDD methods:
- describe('description of test group', function(){// code})
- it('description of test spec', function(){//code})
- before(function(){ // code })
- beforeEach(function(){ // code })
- afterEach(function(){ // code })
- after(function(){ // code })
Setup & Teardown:
- use before() & beforeEach() to run code before all tests in the describe() block and each test, respectively
- use afterEach() and after() to run code after each test and all tests, respectively.
- The flow is: before() -> beforeEach() -> it() -> afterEach() -> after()
Controlling test execution:
Both the .describe() and .it() can use one of the following to control how tests run:
- .skip - tells mocha to skip this particular block
- .only - causes mocha to run the individual block and skips all others
 var assert = require('assert'); // built-in node lib

describe("My Mocha Smoke test", function() {
  it("should add 2 numbers", function() {
    assert.equal(2 + 2, 4, "2 + 2 = 4, dang it!");
  });

  it.only("should subtract 2 numbers", function(){
    assert.equal(2 - 2, 0, "2 - 2 = 0, thanks");
  });
});Asynch tests in mocha
Mocha provides a done callback function that lets it know when an asych test is complete:
it("should wait 1 second before finishing", function(done){
  setTimeout(function(){
    // la dee dah! We can do something here I guess.
    assert.ok(true, "I love mocha in the morning");
    // ok, we're done, let mocha know.
    done();
  }, 1000);
});


