Citrix XenDesktop
Instructional Guide
Presented By:
Hamid Salehian
Table of Content
-
XenDesktop Architecture
- XenDekstop Components
- Installing XenDesktop
-
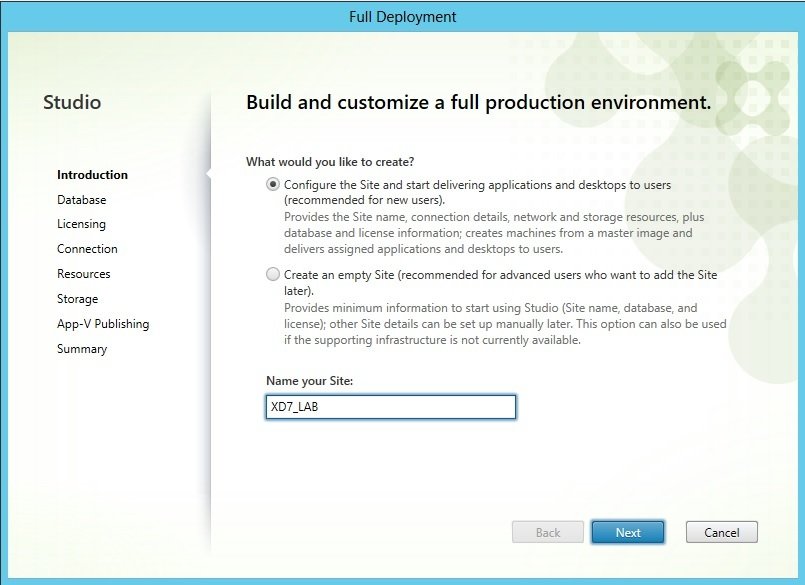
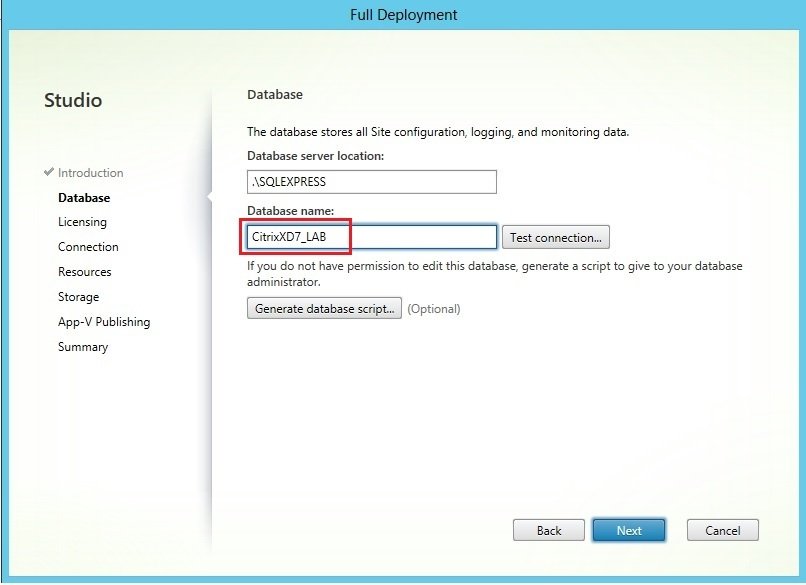
Setup XenDesktop Site
- Connecting to Hypervisor
- Delivering Virtual Desktops
- Install VDA
- VDA on Linux
- Setup Machine Catalog
- Setup Delivery Group
- Setup StoreFront
- Install VDA
Citrix XenDesktop Architecture

Concept and Terminology
Master Image: Virtual hard disk that is pre-installed and configured with the OS, applications and the virtual delivery agent (VDA)
Provisioning Method: Mechanism which automatically creates a specified number of virtual machines from a pre-defined master image such MCS and PVS
Machine Catalog: single manageable entity, which specifies a collection of similar physical or virtual machines.
Delivery Group: Collection of users,with similar requirements, are given access to a common group of resources through machine catalogs.
Components
Delivery Controller: It is the server that centrally manages the XenDesktop site and manage the hypervisor resources, the user authentication and access, the broker between the user requests and their virtual desktops and applications
Studio: It is the management console that is made available for the XenDesktop
License Server: It stores the licenses of all of the Citrix products and allocates the licenses to each user’s session requests from the controller.
Virtual Delivery Agent (VDA): Communicates only with the delivery and It has a smaller footprint as it consists of the components that are needed for delivering the hosting sessions.
StoreFront: IIS web application that lets you create stores of desktops and applications that the users can access over the web.
Director: Web-based portal that lets the support/helpdesk teams access the real-time status update information of delivered machines.
Components
Provisioning Services (PVS): VM provisioning technologies that employs streaming of the master image to the user device and it can be run on hard disk-less devices as well. When PVS is used as a provisioning method, the delivery controller communicates with PVS for the VM provisioning.
Machine Creation Services (MCS): VM provisioning technologies includes a collection of services which automatically creates virtual machinesrom a master image on demand. MCS uses the snapshot copying for creating new VMs as clones.
NetScaler Gateway: It is a networking device to let the users access the resources from the external world, which is outside of your corporate intranet firewall.
Receiver: It is the only client side component is installed on user devices.Users can access their assigned applications, desktops, Remote PCs, web sites, and any other resources.
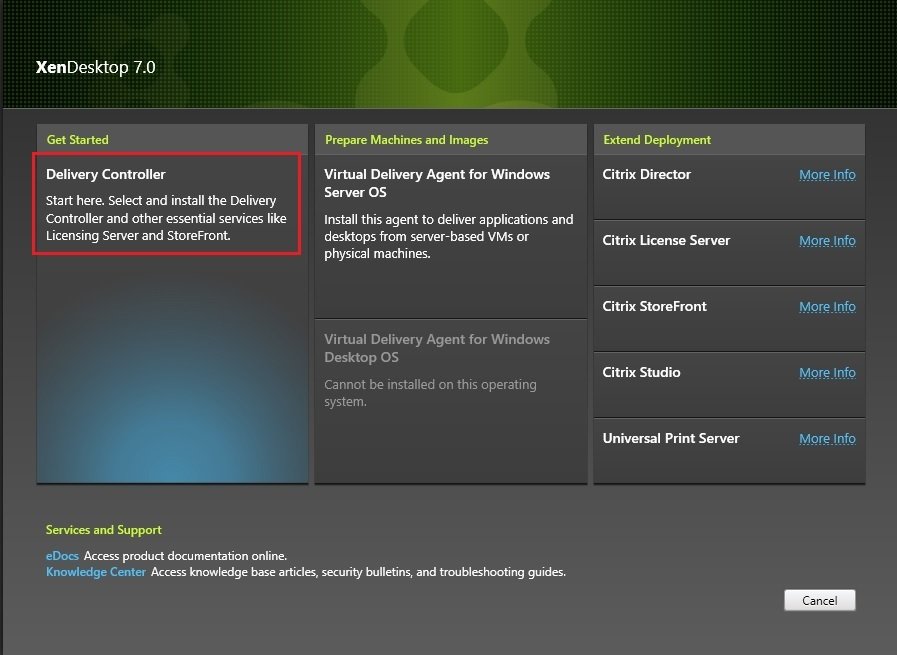
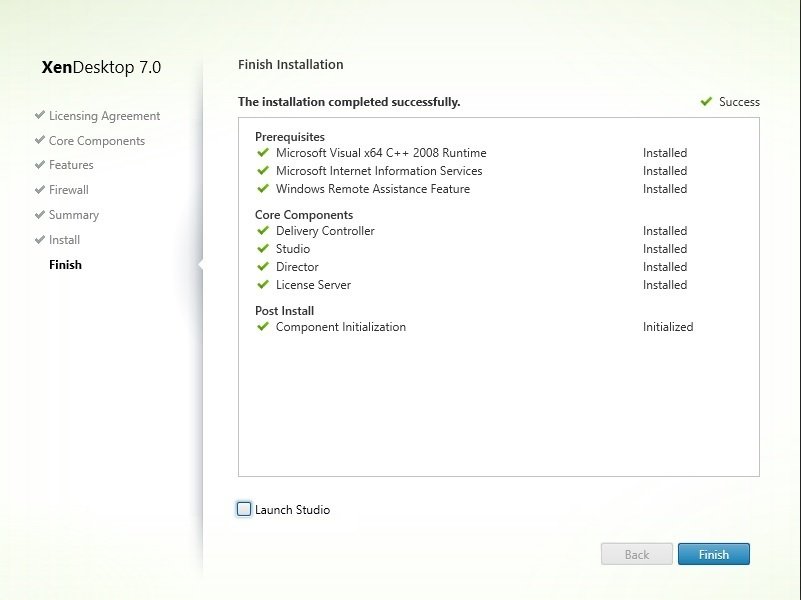
Install XenDesktop
My Lab Environment
Hardware:
- Intel Corei5 32 GB RAM
- 2 x Samsung SSD 500GB
Software:
- VMWare ESXi 5.5 /Citrix XenServer 6.2
- Citrix XenDesktop 7.6
- Microsoft Windows Server 2012 Datacenter
- Microsoft Windows SQL Server 2008 Enterprise
Virtual Machines Configs
DDC:
- 2 x vCPU
- 8GB RAM
- 40GB Storage
- Windows Server 2012 R2 Standard
SFP:
- 2 x vCPU
- 2GB RAM
- 40GB Storage
- Windows Server 2012 R2 Standard
PDC:
- 2 x vCPU
- 8GB RAM
- 40GB Storage
- Windows Server 2012 R2 Standard
Install XenDesktop
1st - Review software requirements available in Citrix documentation:
http://docs.citrix.com/en-us/xenapp-and-xendesktop/7-8/system-requirements.html
2nd - Add Active Directory, DNS, DHCP, Certificate Authority feature on PDC
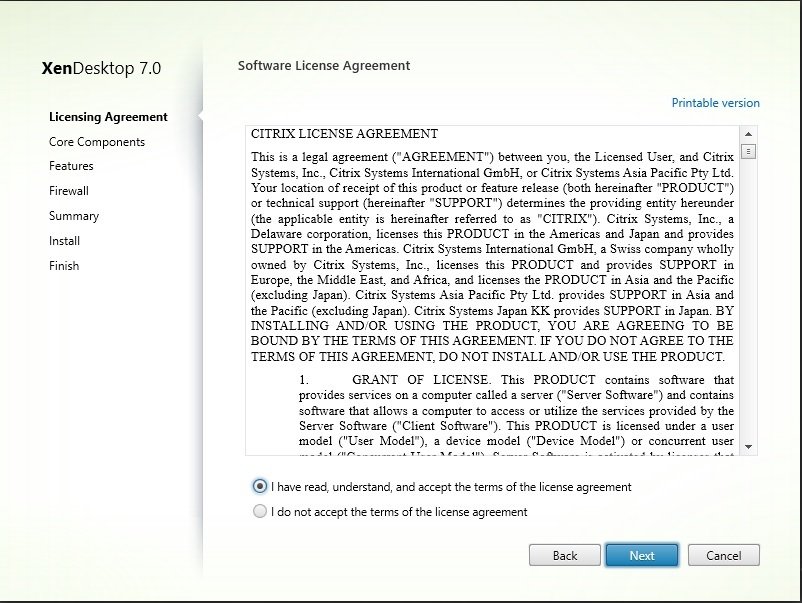
3rd - Follow the instruction based on Citrix Docs as follows
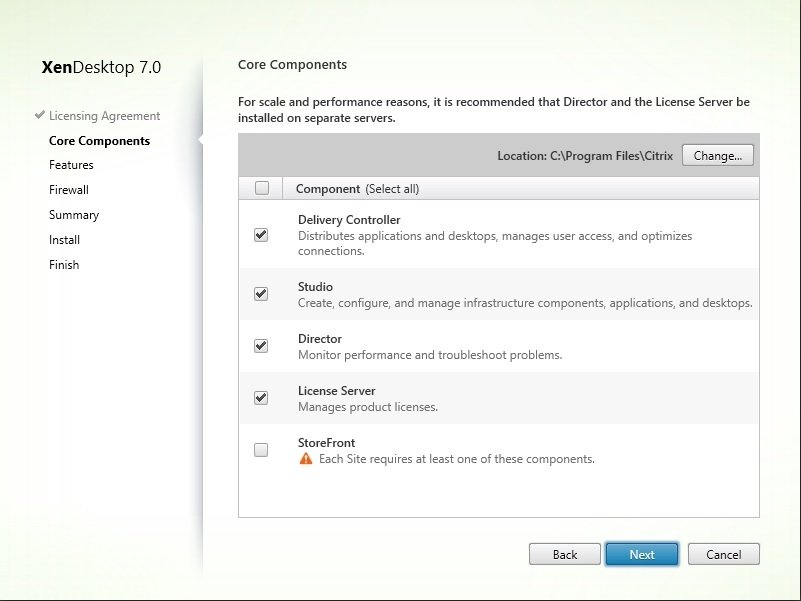
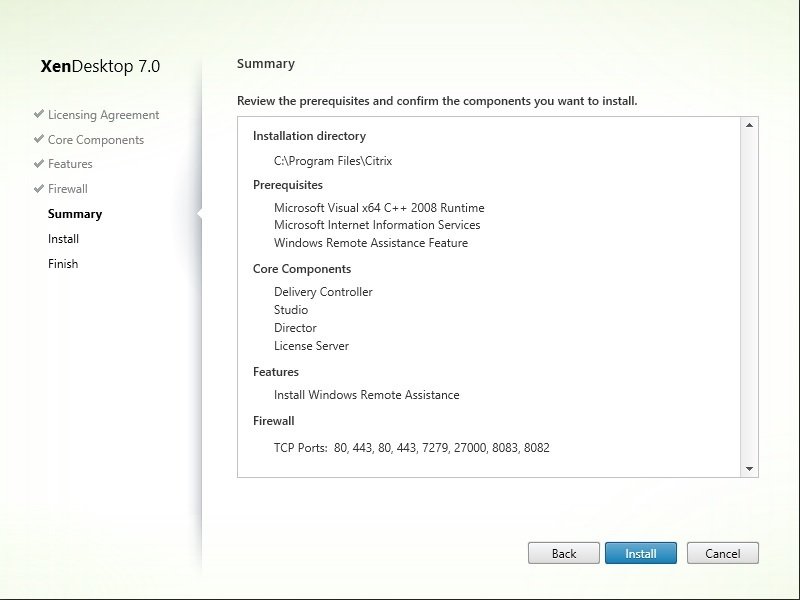
4th - Install all component except StoreFront on DDC
5th - Install StoreFront on SFP
Note : It's better to review Prepare Installation Document on Citrix Documents although this is not have any issues http://docs.citrix.com/en-us/xenapp-and-xendesktop/7-8/system-requirements.html
Caution
- All this instruction is just for lab environment and for production environment its prefered to install all component and Windows Services with HA on different Machine as follow document:
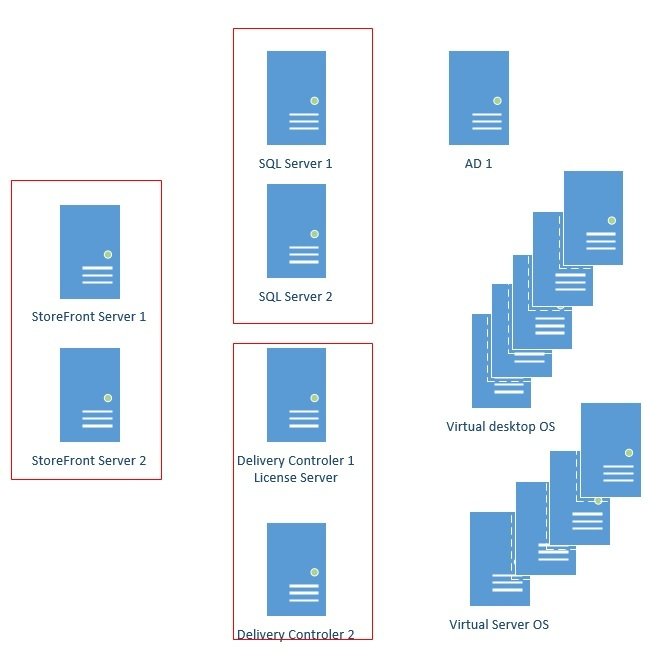
https://docs.citrix.com/content/dam/docs/en-us/solutions/assess/downloads/XAXD_Disaster_Recovery.pdf
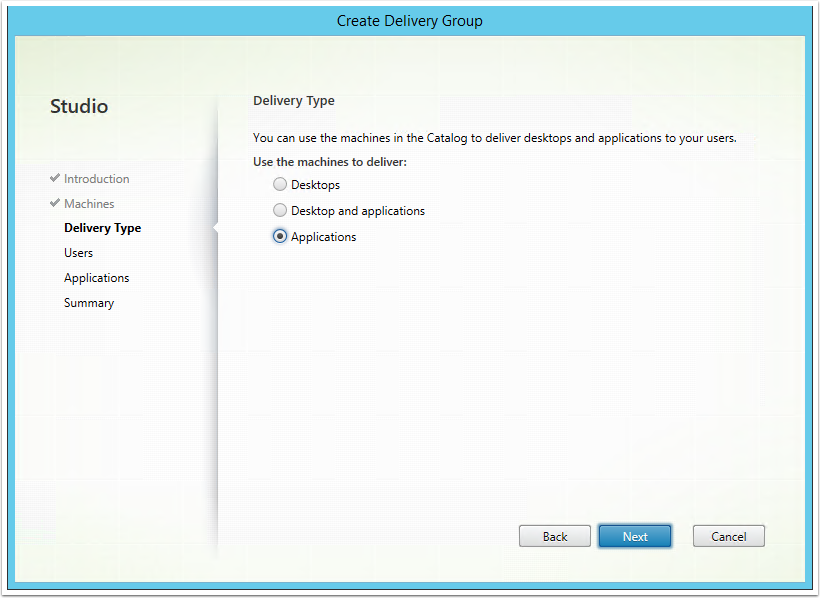
let's do some delivery stuff
To deliver Desktop follow steps are required

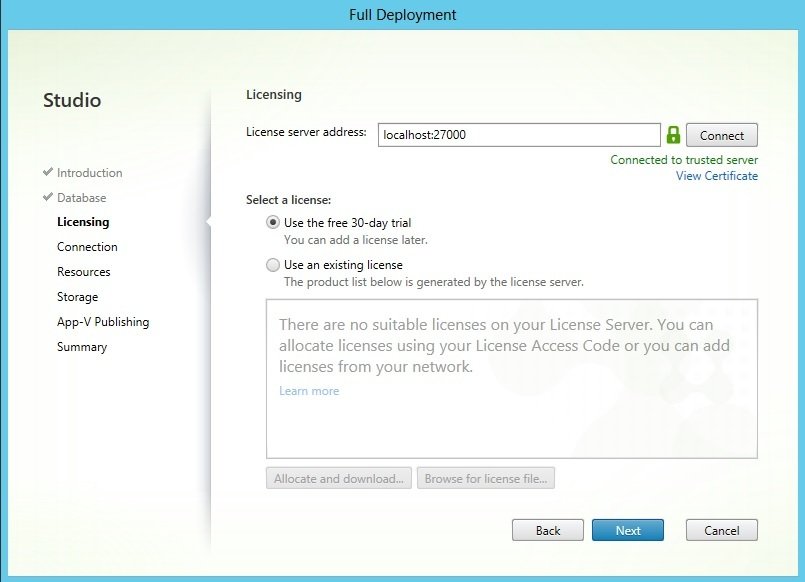
Licensing Problem
Connect it later
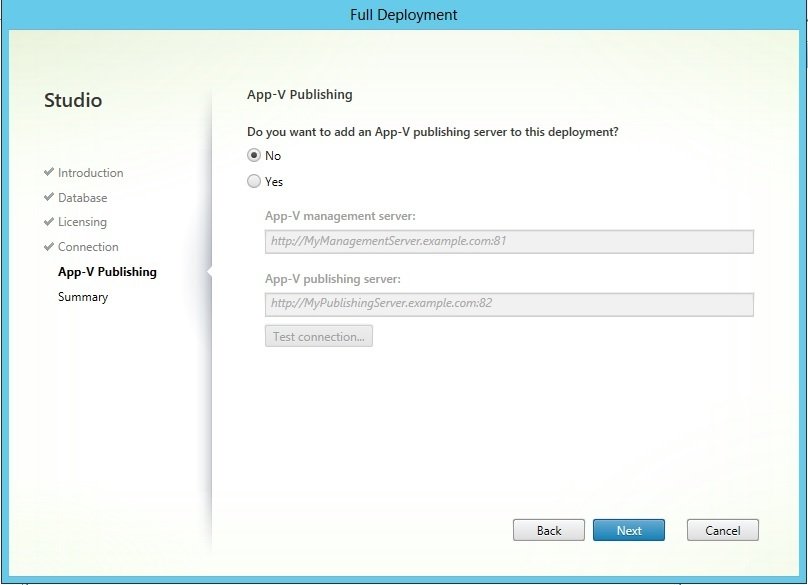
APP-V Publishing
This software retrieves virtual applications, publishes the applications on the client, and automatically sets up and manages virtual environments at runtime on Windows devices.
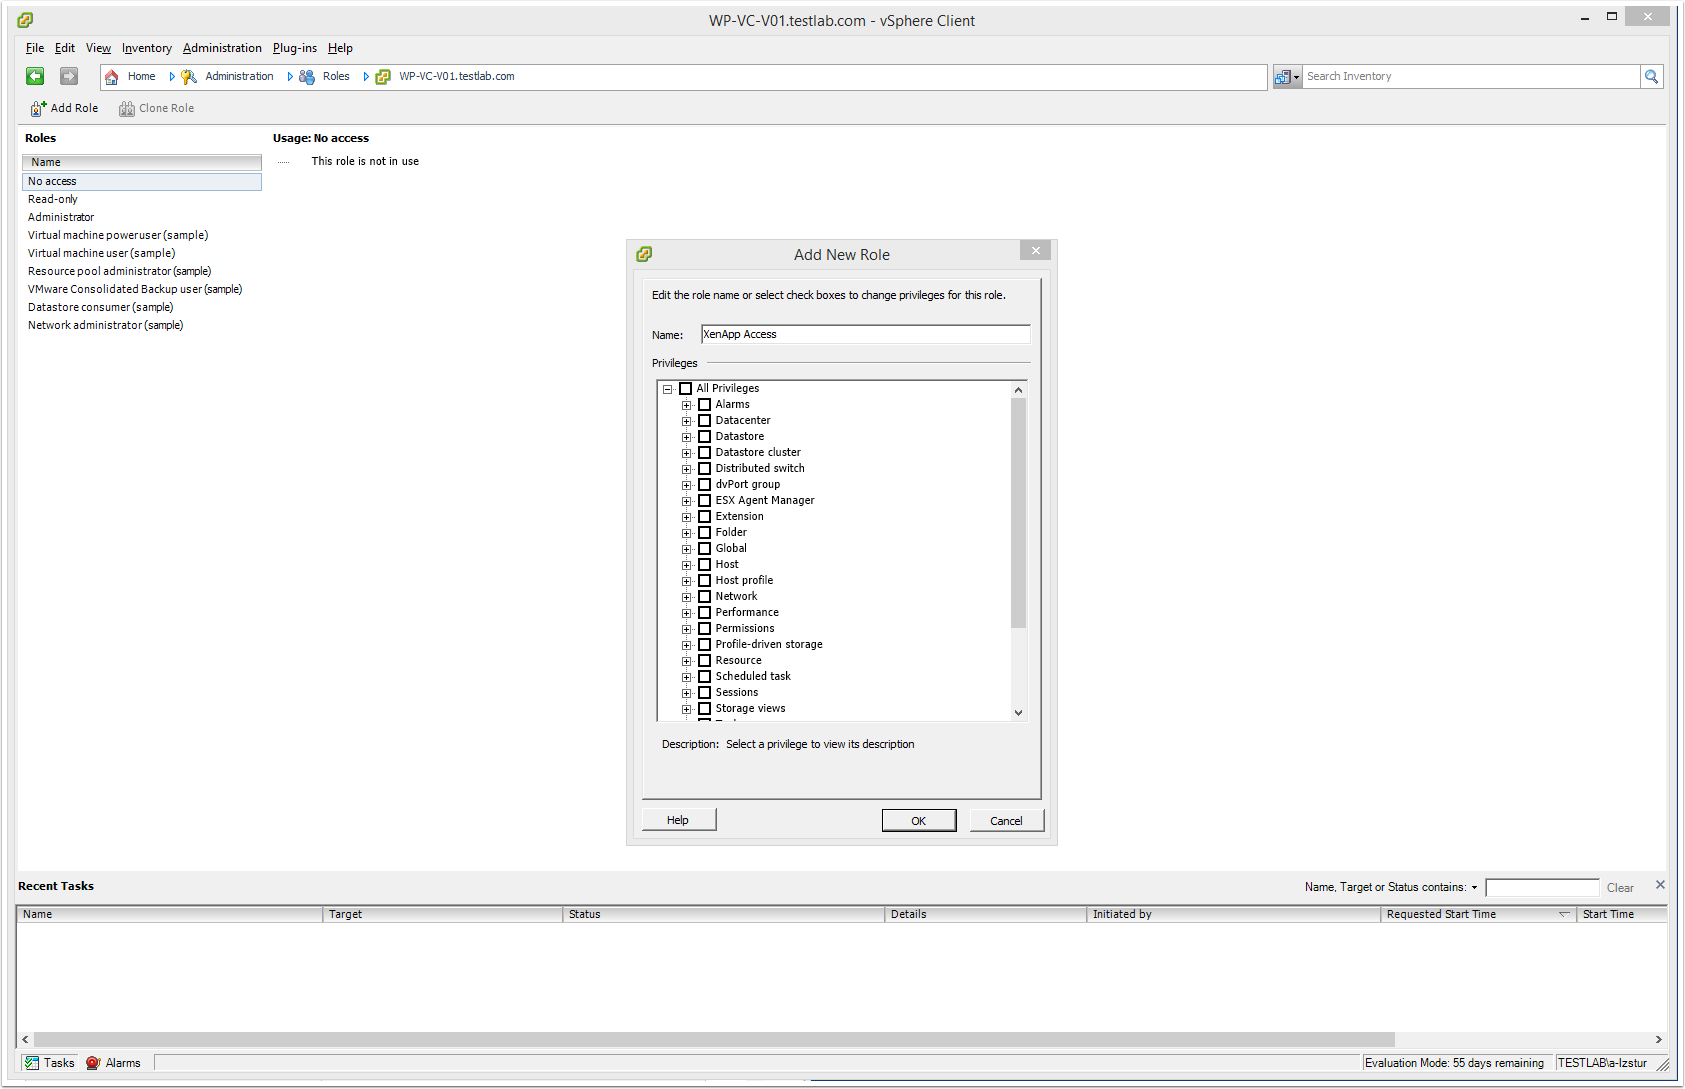
- Log into VMware vCenter Client with admin rights
- Navigate to Home >> Administration >> Roles
- Create a new Security Role for XenApp Access
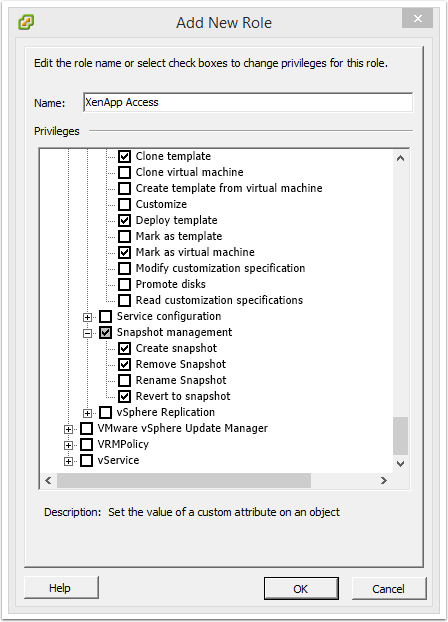
4. Configure the XenApp security role with the permissions required by Citrix XenApp server.
Note: You can find the details of the permissions required here:
http://support.citrix.com/proddocs/topic/xenapp-xendesktop-76/xad-install-prep-host-vmware.html
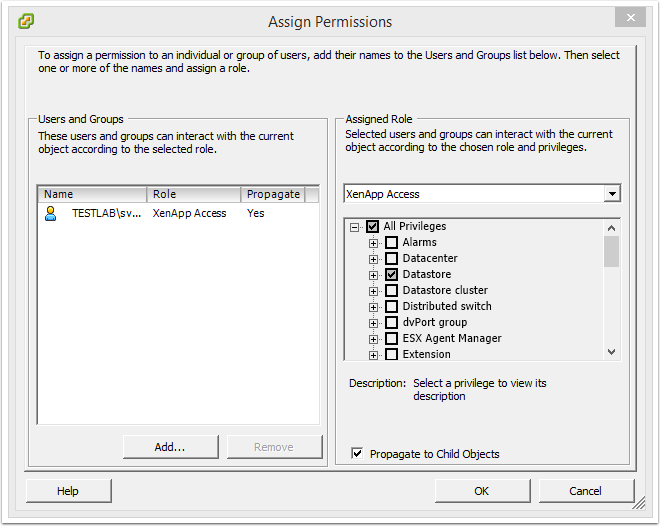
5. Navigate to Home >> Inventory >> Hosts & Clusters >> vCenter >> Permissions tab
6. Assign XenApp Access security role to XenApp Service Account
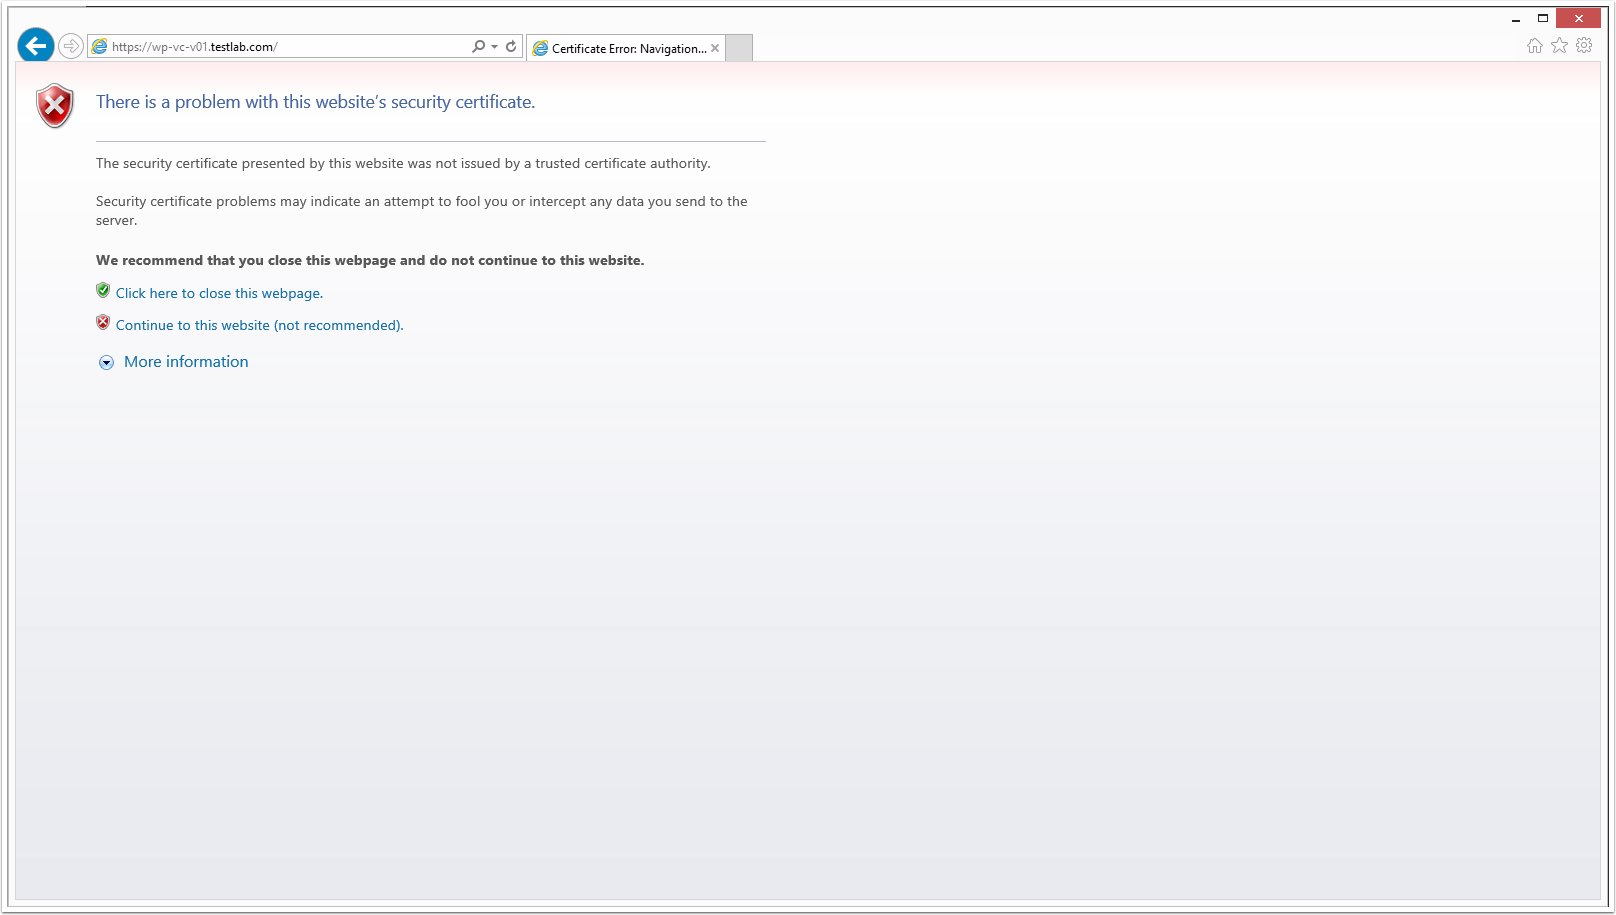
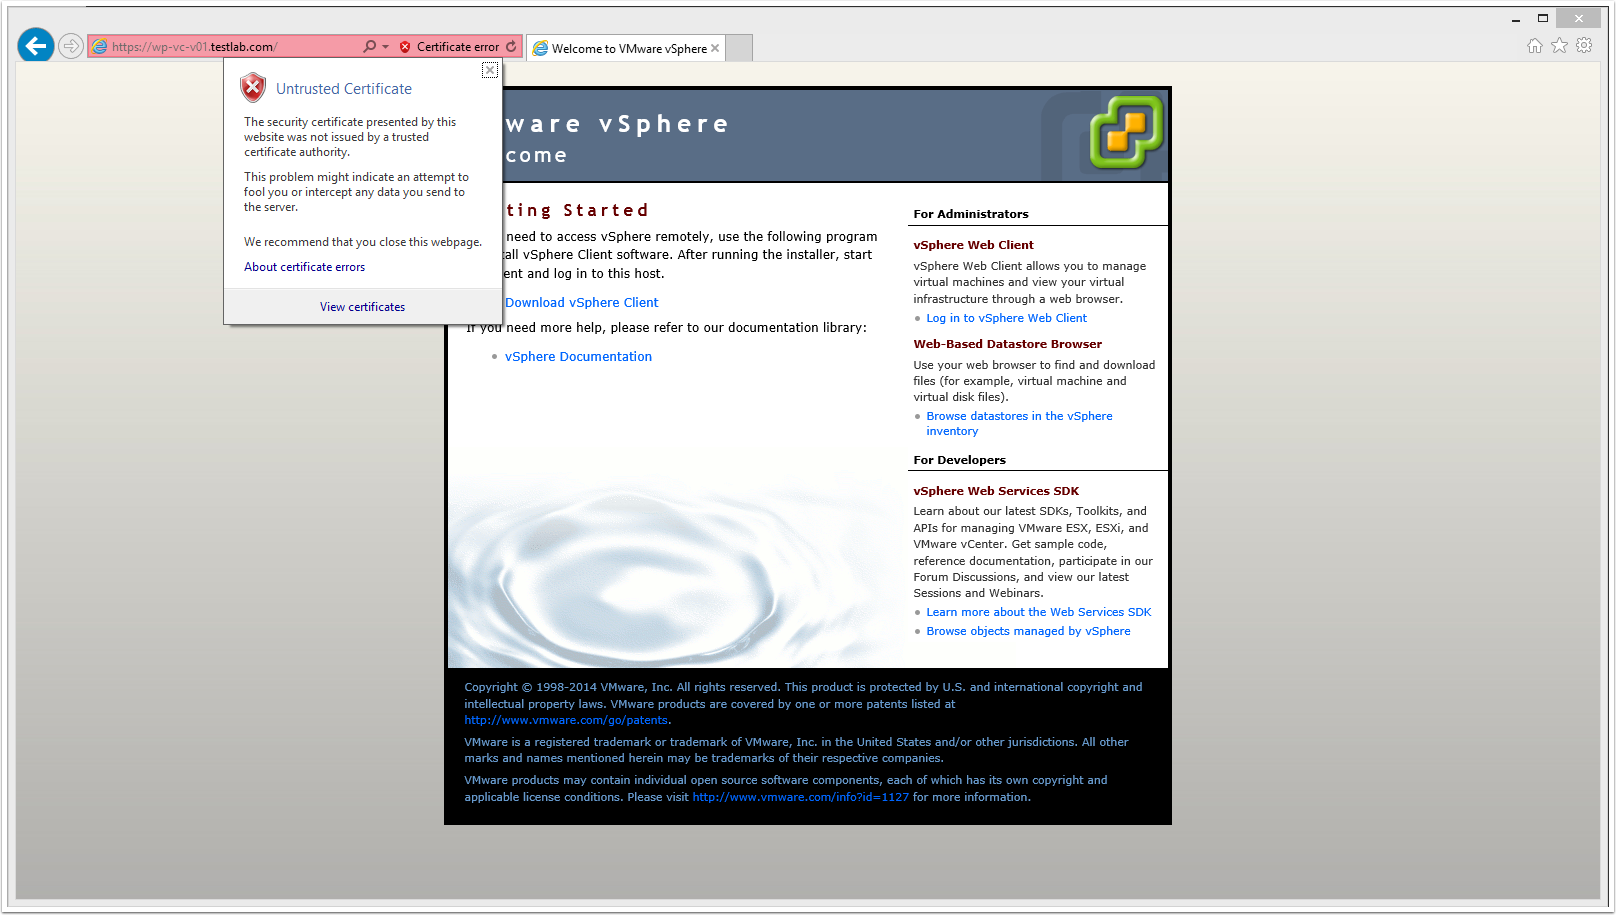
7. Connect to VMware vCenter URL (https://your-vcenter-ip)
8. From the address bar click on Certificate Error and select View Certificates
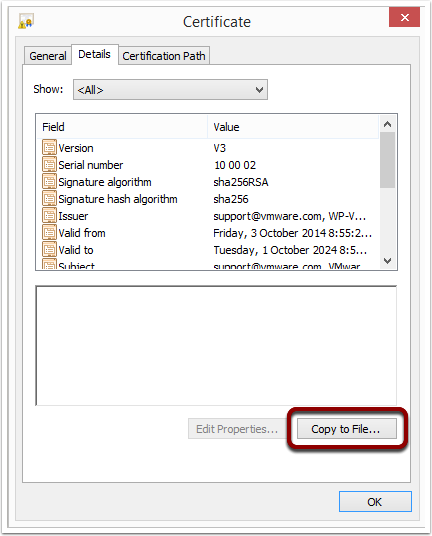
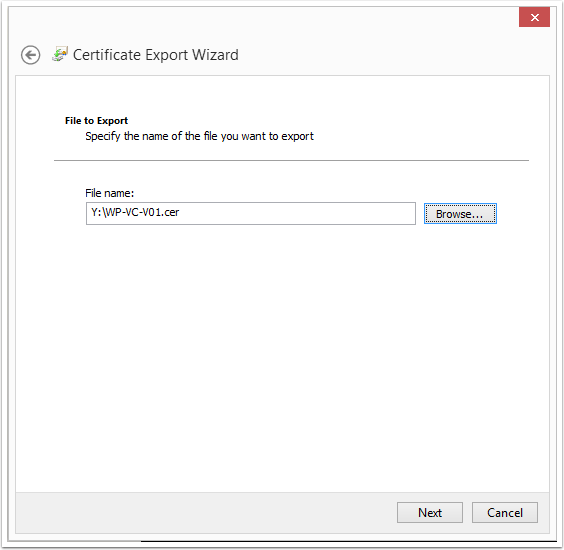
9. From the Certificate Properties window, click the Details tab and click Copy to File
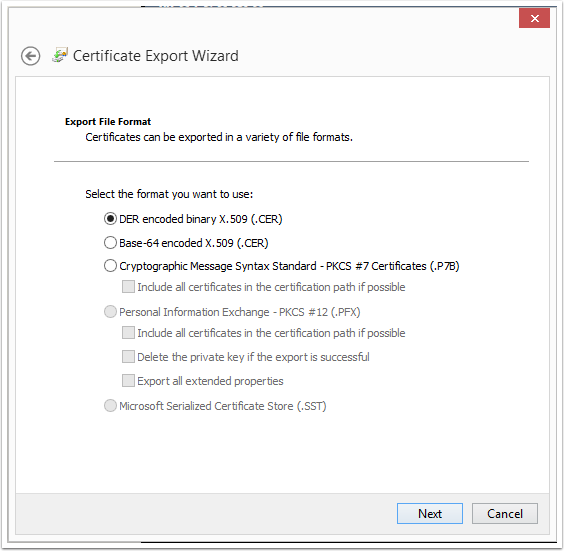
10. Select the "DER encoded binary X.509 (.CER)" option and click Next
11. Store the certificate on the local disk and click Next
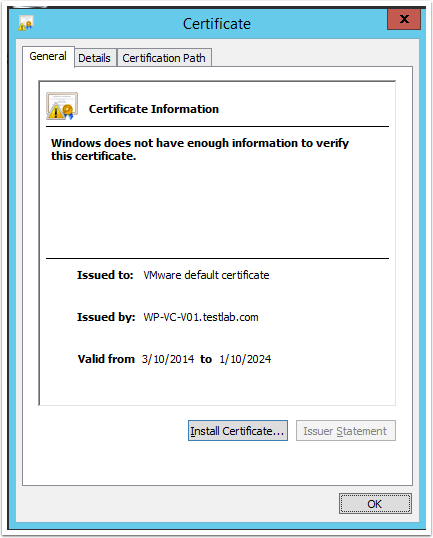
12. Navigate to the saved location and double click on the certificate to view the properties window. From here click Install Certificate
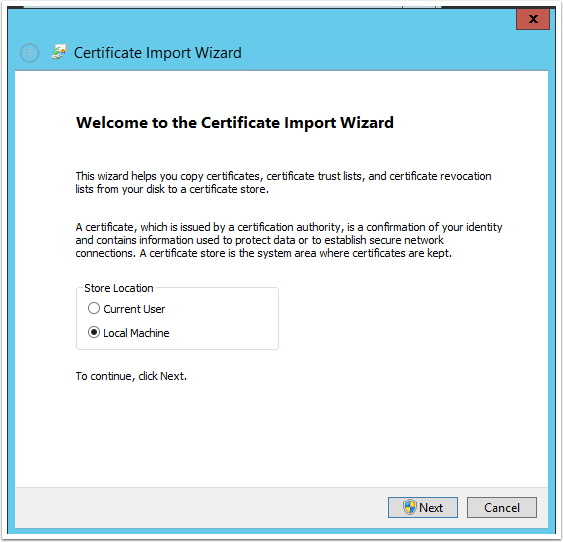
13. Select Local Machine and click Next
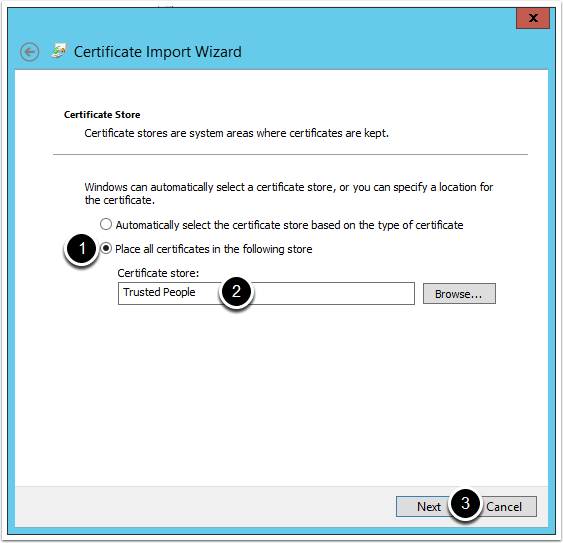
14. From the Certificate Store screen, complete the following:
1. Select the "Place all certificates in the following store" option
2. From the browse button select Trusted People
3. Click Next
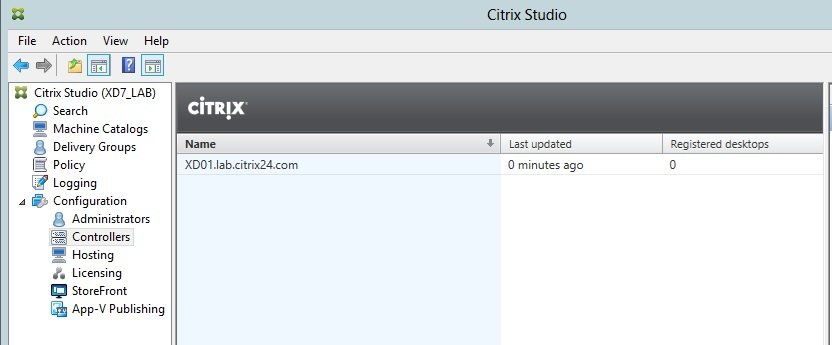
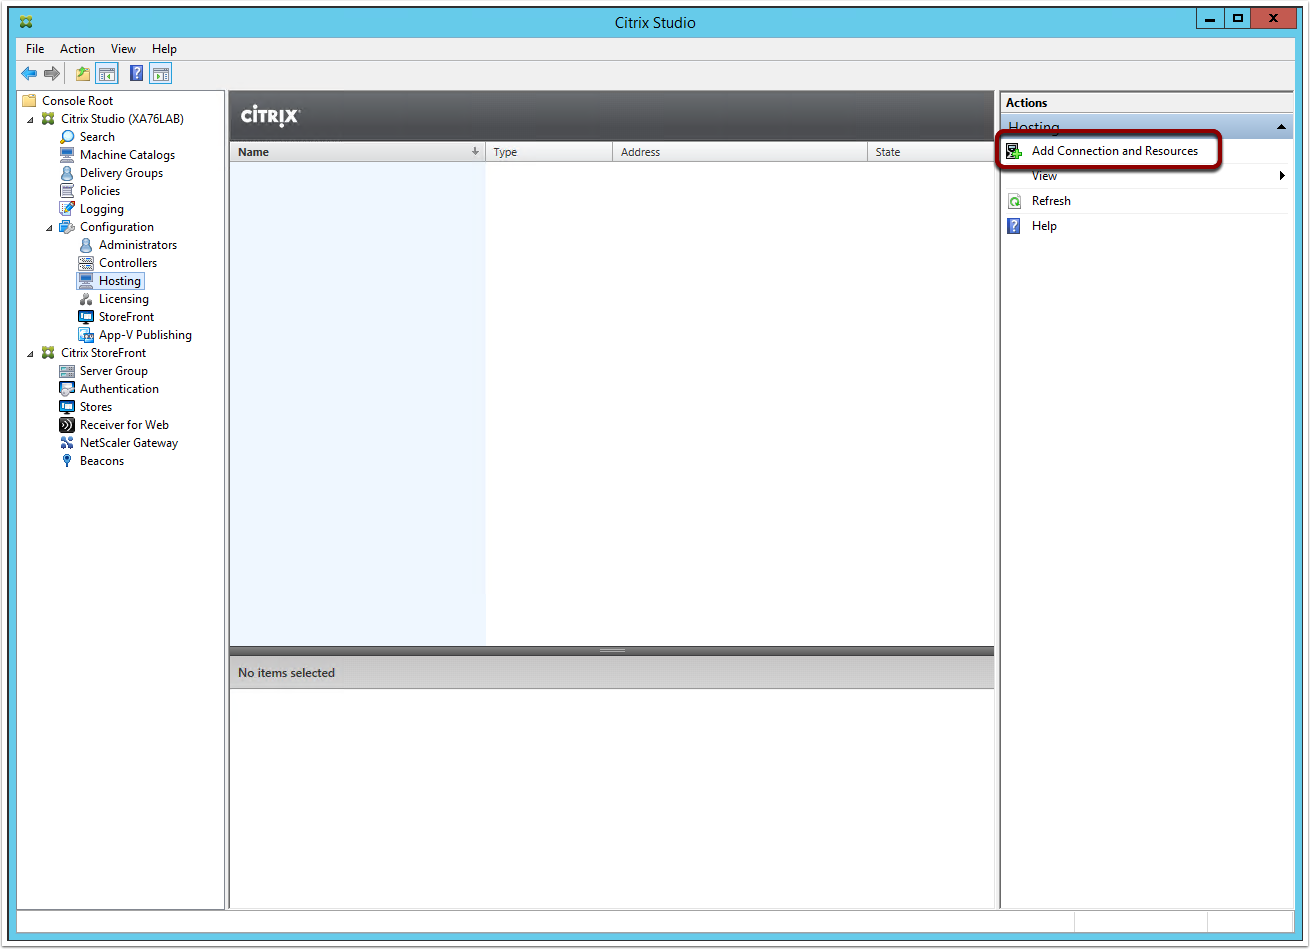
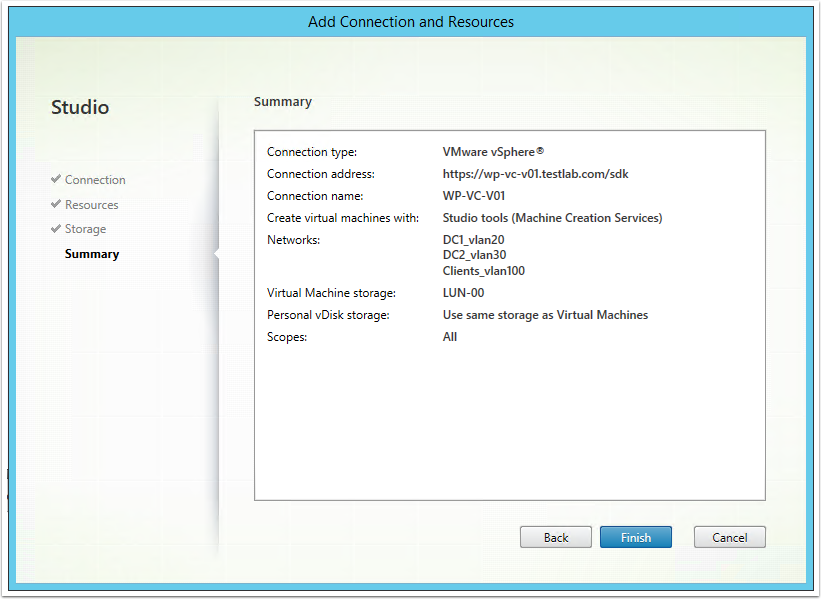
15. Launch Citrix Studio >> Configuration >> Hosting >> Add Connections and Resources
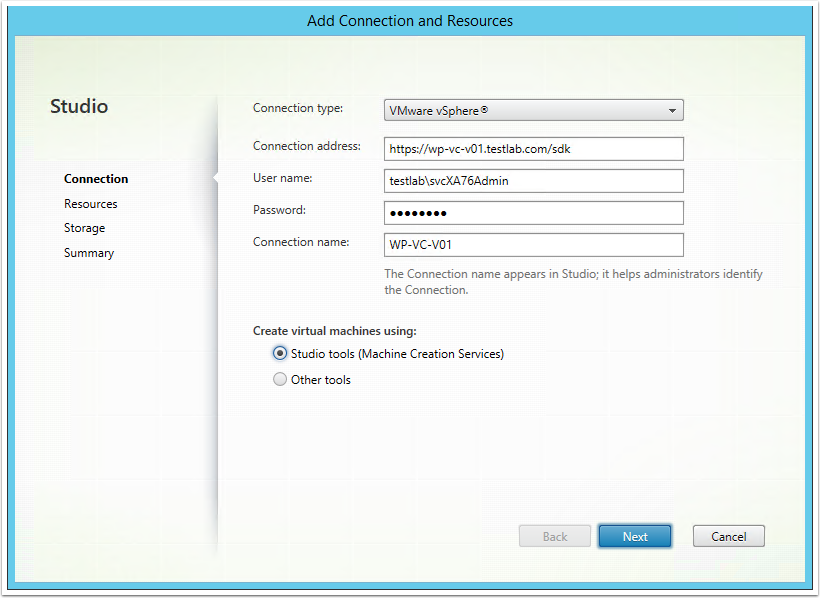
16. From the Connection screen, complete the information as per the screenshot below and then click Next
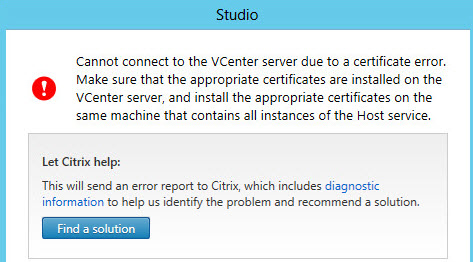
####Important####
If any previous step taken wrong this error will appear.
17. From the Resources sreen, complete the following:
1. Enter a name for the resources
2. Select a cluster where new VMs will be provisioned
3. Select the Networks that can be used by Citrix VMs
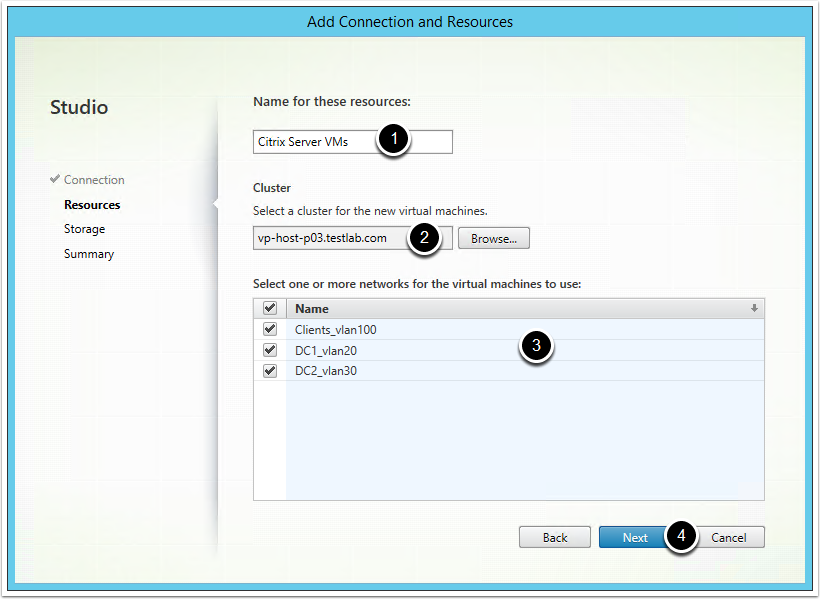
Note: The information provided here is used for when deploying servers \ desktops via MCS
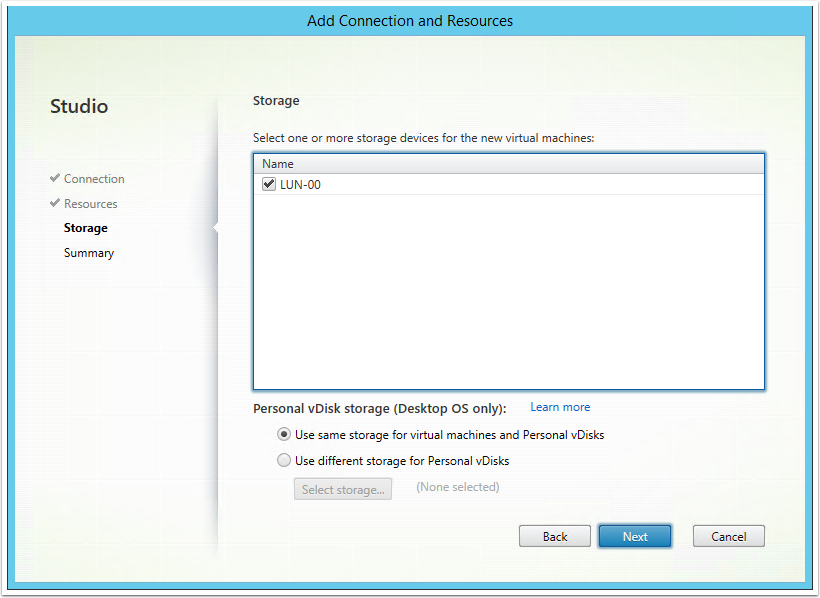
18. Select the Datastores you want to allow Citrix to use and click Next
pow.. Finish
Install VDA
What Comes Easy won't Last,
what lasts won come Easy
Let's Start with the Easy One
VDA on Windows
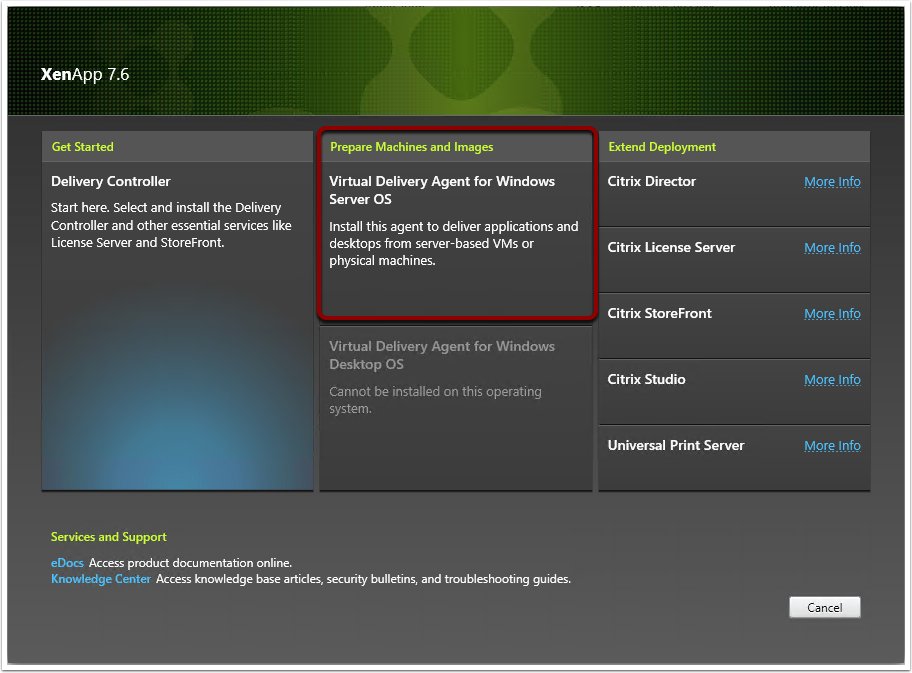
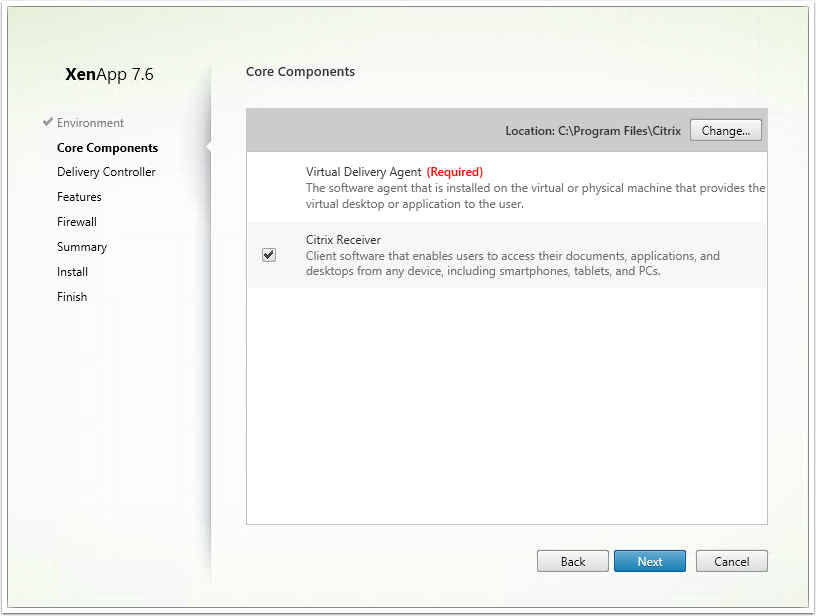
1. Click on Virtual Delivery Agent for Windows OS to commence the VDA installation
2. Select "Enable Connections to a Server Machine" and click Next

3. Click Next
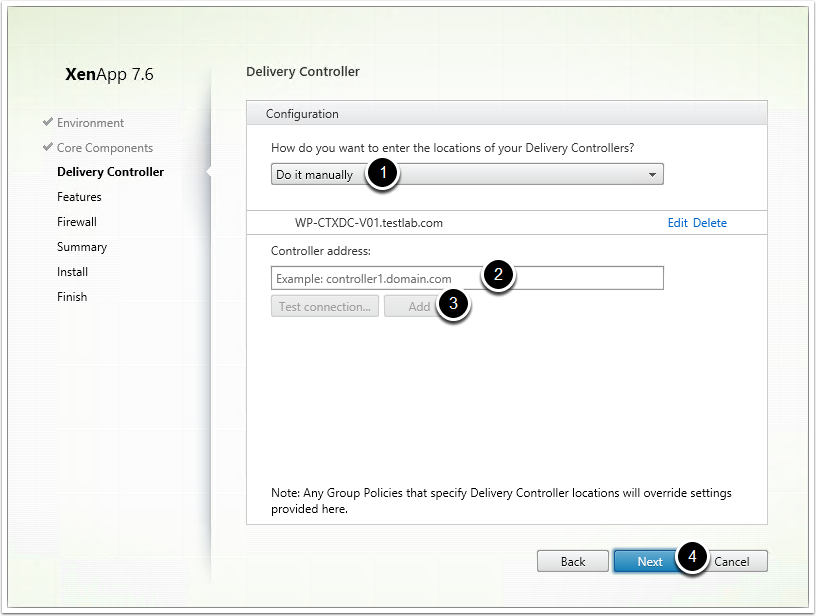
4. From the Delivery Controller screen, complete the following:
1. Select the "Do it Manually" option
2. From the Controllers Address field, enter the FQDN of a Citrix Delivery Controller
3. Click on Test Connection and then if successful click on Add
4. Click Next
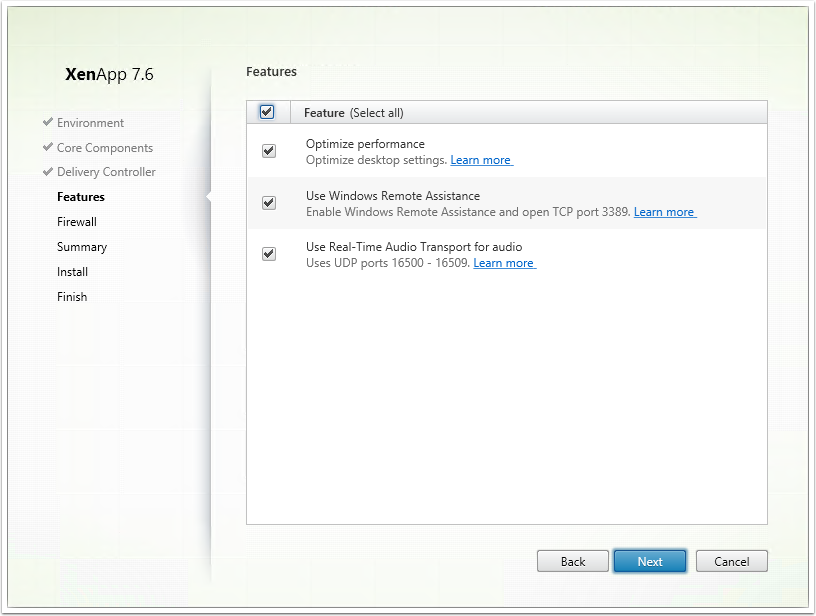
4. Ensure all options are selected and click Next
5. Click Next

6. Click Install
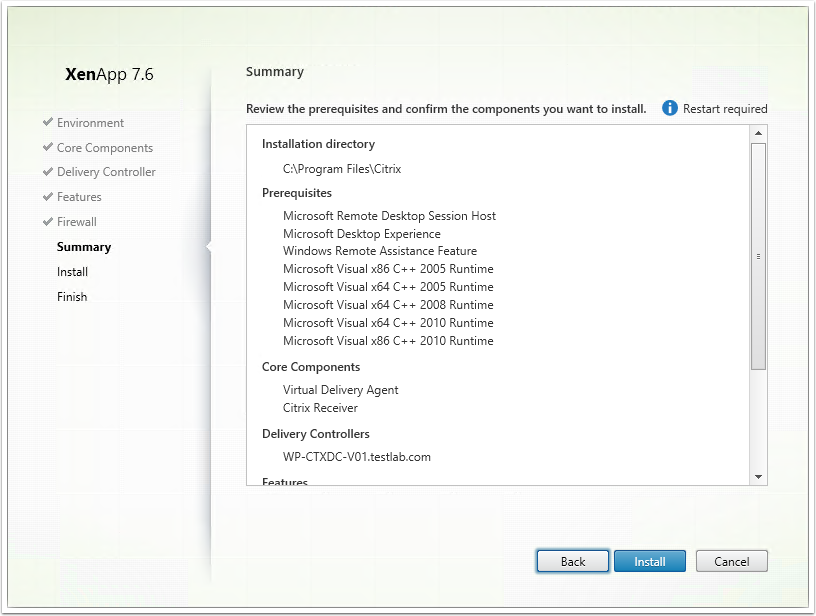
Note : During the installation, the server will need to reboot
Your Windows Machine is Ready to Deliver
VDA on Linux
The Hardest Part
- Download Hotfix CTX142438
- On Delivery Controller open PowerShell
- Run Command
- Set-ExecutionPolicy Unrestricted
- Locate and change to the folder containing the script you download
-
Run Command
- .\Update-BrokerServiceConfig.ps1
Update Delivery Controller Configuration
Prepare Linux Machine for VDA Installation
Assign Loopback Address to Hostname
1. Open /etc/hosts file
- vim /etc/hosts
2. Change the following line
- 127.0.0.1 hostname-fqdn hostname localhost localhost.localdomain
localhost4 localhost4.localdomain4
Verify Changes
- hostname -f
- nslookup domain-controller-fqdn
- ping domain-controller-fqdn
- nslookup delivery-controller-fqdn
- ping delivery-controller-fqdn
Disable Network Proxy Authentication Popup
- Create the file /etc/polkit-1/localauthority/30-site.d/20-no-show-proxy-dialog.pkla
- Add the following content:
- [No Show Proxy Dialog]
Identity=unix-user:*
Action=org.freedesktop.packagekit.system-network-proxy-configure
ResultAny=no
ResultInactive=no
Install OpenJDK
- sudo yum -y update java-1.7.0-openjdk
Adding the following line to ~/.bashrc
- export JAVA_HOME=/usr/lib/jvm/java
Install other packages
- sudo yum -y install openmotif
- sudo yum -y install redhat-lsb-core
- sudo yum -y install ImageMagick
Install PostgreSQL
- sudo yum -y install postgresql-server postgresql-jdbc
- sudo /sbin/service postgresql initdb
Start PostgreSQL
- sudo /sbin/chkconfig postgresql on
- sudo /sbin/service postgresql start
Verify PostgreSQL
- sudo -u postgres psql -c 'show data_directory'
Add Linux Machine to Windows Domain
-
sudo yum -y install samba-winbind
-
sudo yum -y install samba-winbind-clients
-
sudo yum -y install krb5-workstation
-
sudo yum -y install authconfig
-
sudo yum -y install oddjob-mkhomedir
Enable Winbind Daemon to Start on Boot
- sudo /sbin/chkconfig winbind on
Configure Winbind Authentication
-
sudo authconfig \
--disablecache \
--disablesssd \
--disablesssdauth \
--enablewinbind \
--enablewinbindauth \
--disablewinbindoffline \
--smbsecurity=ads \
--smbworkgroup=domain \
--smbrealm=REALM \
--krb5realm=REALM \
--krb5kdc=fqdn-of-domain-controller \
--winbindtemplateshell=/bin/bash \
--enablemkhomedir --updateall
Where REALM is the Kerberos realm name in upper-case and domain is the short NetBIOS name of the domain
Configure Winbind Authentication (Cont.)
Open /etc/samba/smb.conf and add the following entries under the [Global] section,
-
kerberos method = secrets and keytab
winbind refresh tickets = true
The system keytab file /etc/krb5.keytab is required by the Linux VDA to authenticate and register with the Delivery Controller.
The kerberos method setting above will force Winbind to create the system keytab file when the machine is first joined to the domain.
Join Windows Domain
-
sudo net ads join REALM -U user
Where REALM is the Kerberos realm name in upper-case, and user is a domain user with permissions to addcomputers to the domain
Configure PAM for Winbind
Open /etc/security/pam_winbind.conf and add or change the following
entries under the [Global] section:
- krb5_auth = yes
- krb5_ccache_type = FILE
- mkhomedir = yes
- sudo /sbin/service winbind restart
Verify Domain Membership
- sudo net ads testjoin
- sudo net ads info
Verify Kerberos Configuration
- sudo klist -ke
Run the Kerberos kinit command to authenticate the machine with the domain controller using these keys:
- sudo kinit -k MACHINE\$@REALM
Verify User Authentication
- wbinfo --krb5auth=domain\\username%password
- ssh localhost -l domain\\username
- id -u
Install Linux VDA
-
sudo rpm -i XenDesktopVDA-1.1.0.240-0.x86_64.rpm
Configure Linux VDA
-
sudo /usr/local/sbin/ctxsetup.sh
Configure for Dedicated Desktops (VDI mode)
-
sudo /usr/local/bin/ctxreg create \
-k "HKLM/System/CurrentControlSet/Control/Citrix/WinStations/tcp" \
-t "REG_DWORD" \
-v "StackSessionMode" \
-d "0" \
--force
To restore the default hosted shared desktop delivery model:
- sudo /usr/local/bin/ctxreg delete \
-k "HKLM/System/CurrentControlSet/Control/Citrix/WinStations/tcp" \
-v "StackSessionMode" \
--force
Start Linux VDA
- sudo /sbin/service ctxhdx start
- sudo /sbin/service ctxvda start
HoOray.... :-)
Now you can deliver linux

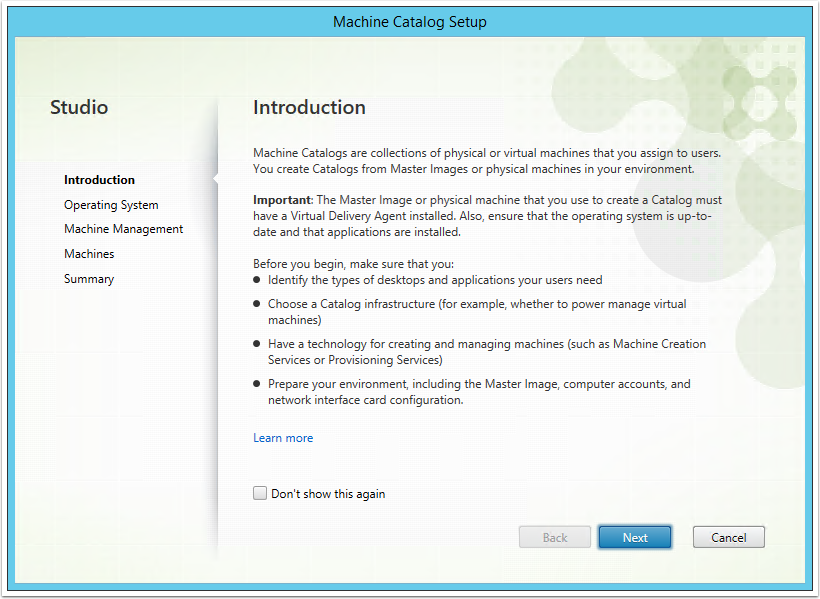
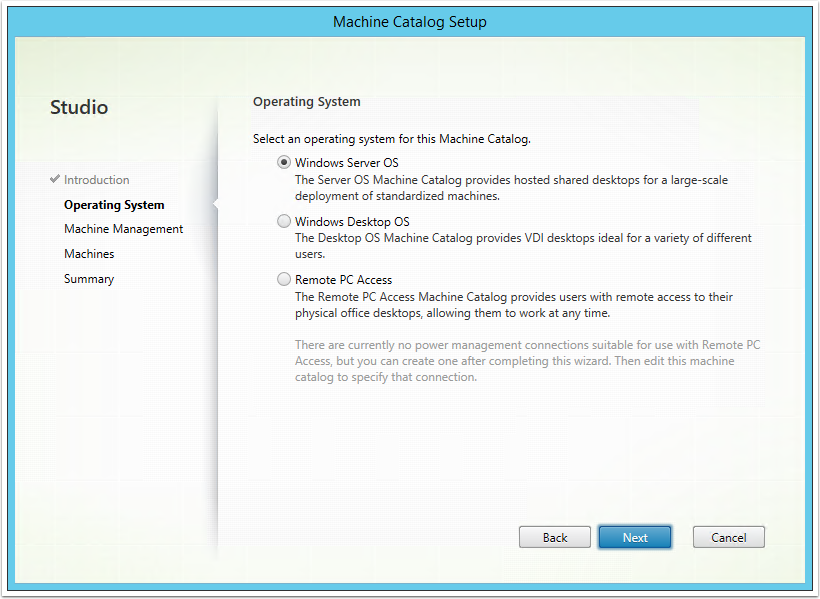
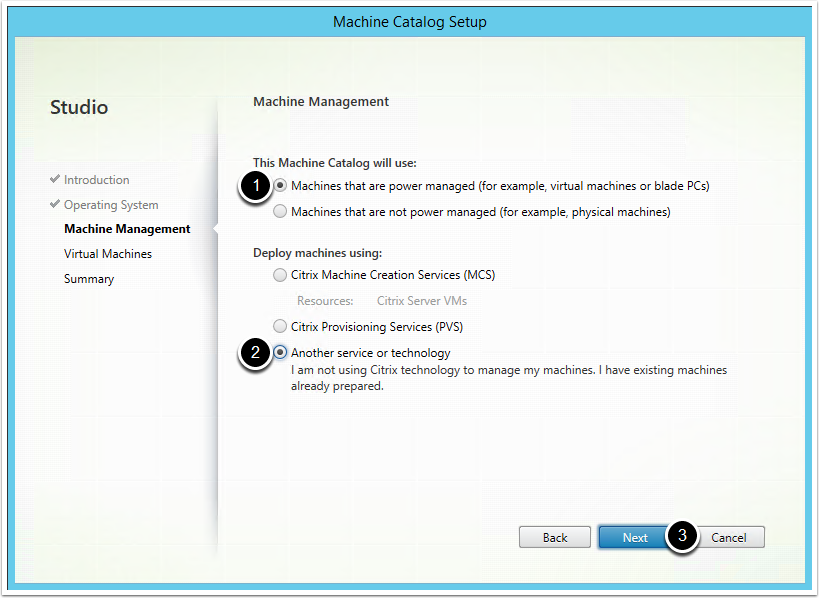
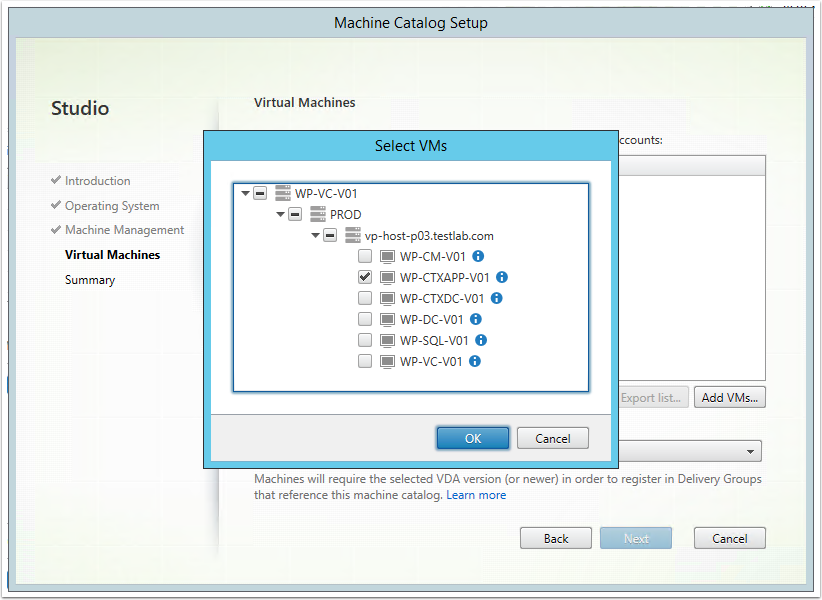
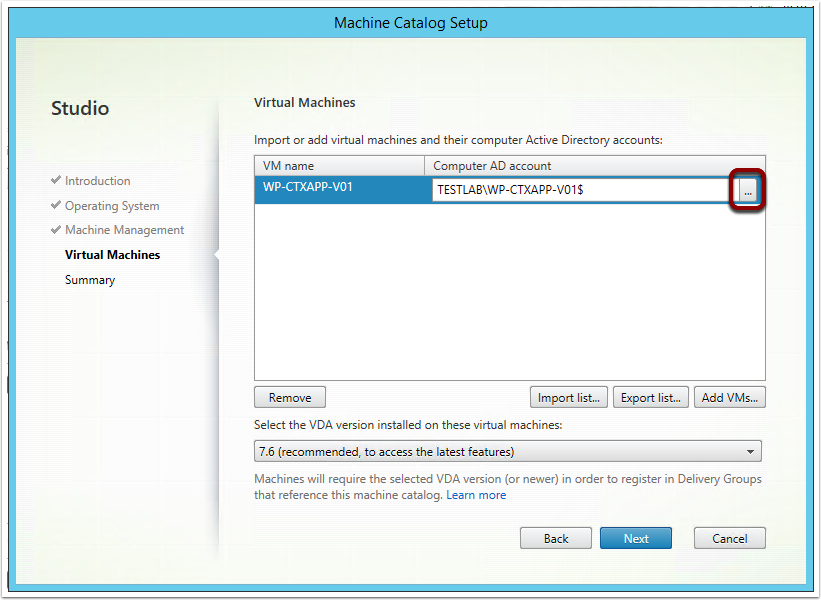
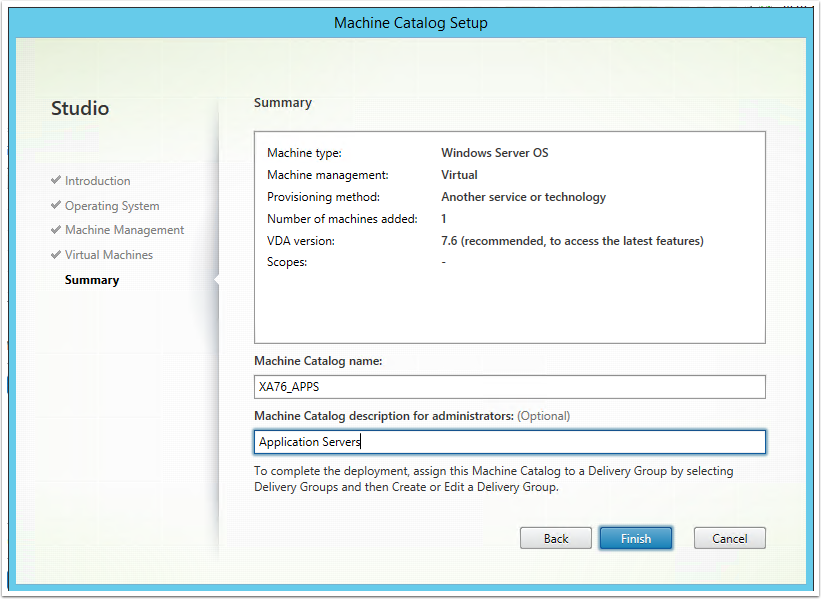
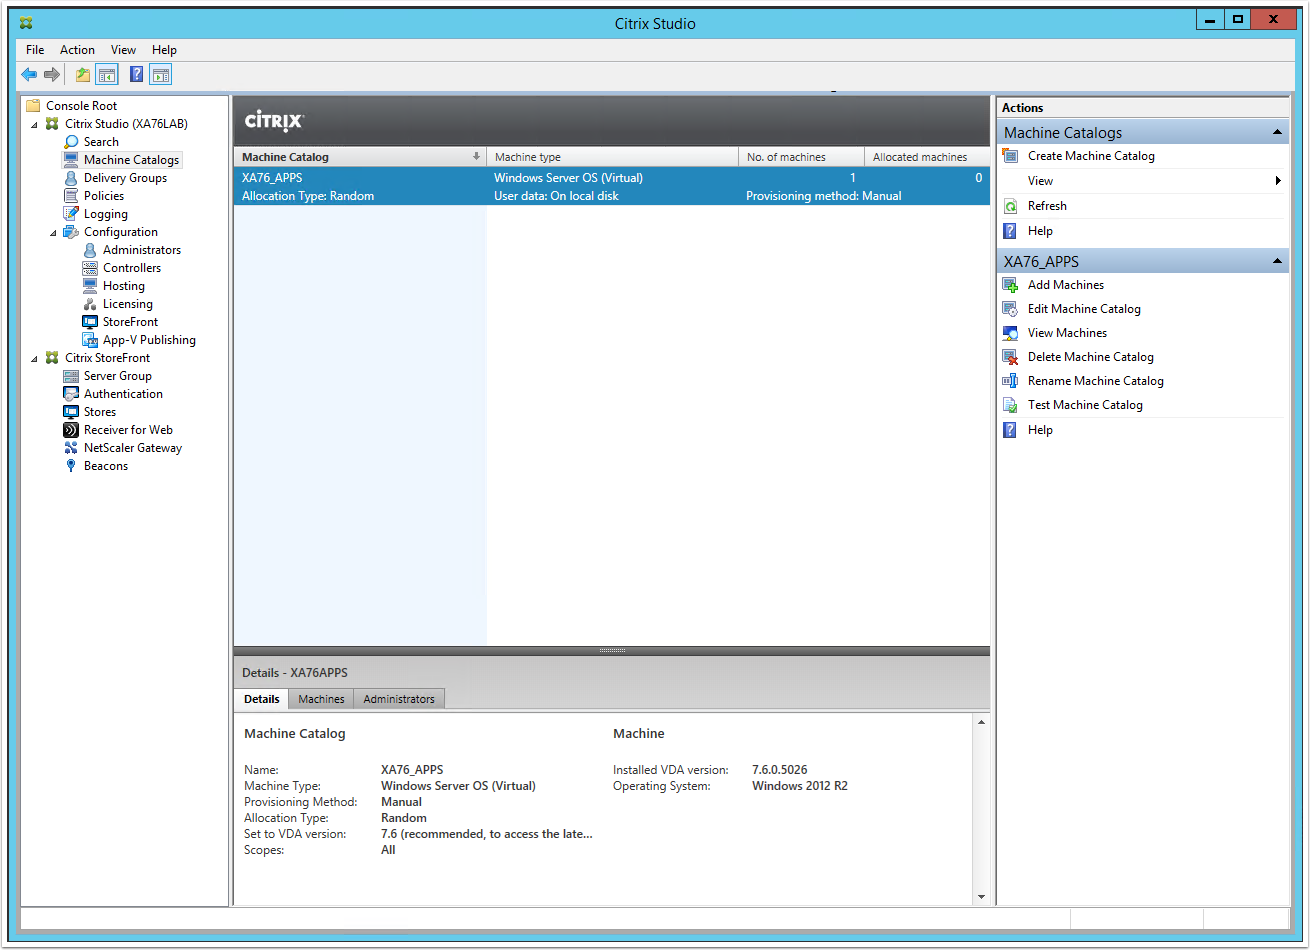
From the Citrix Studio root window, click on "Create a new Machine Catalog" link
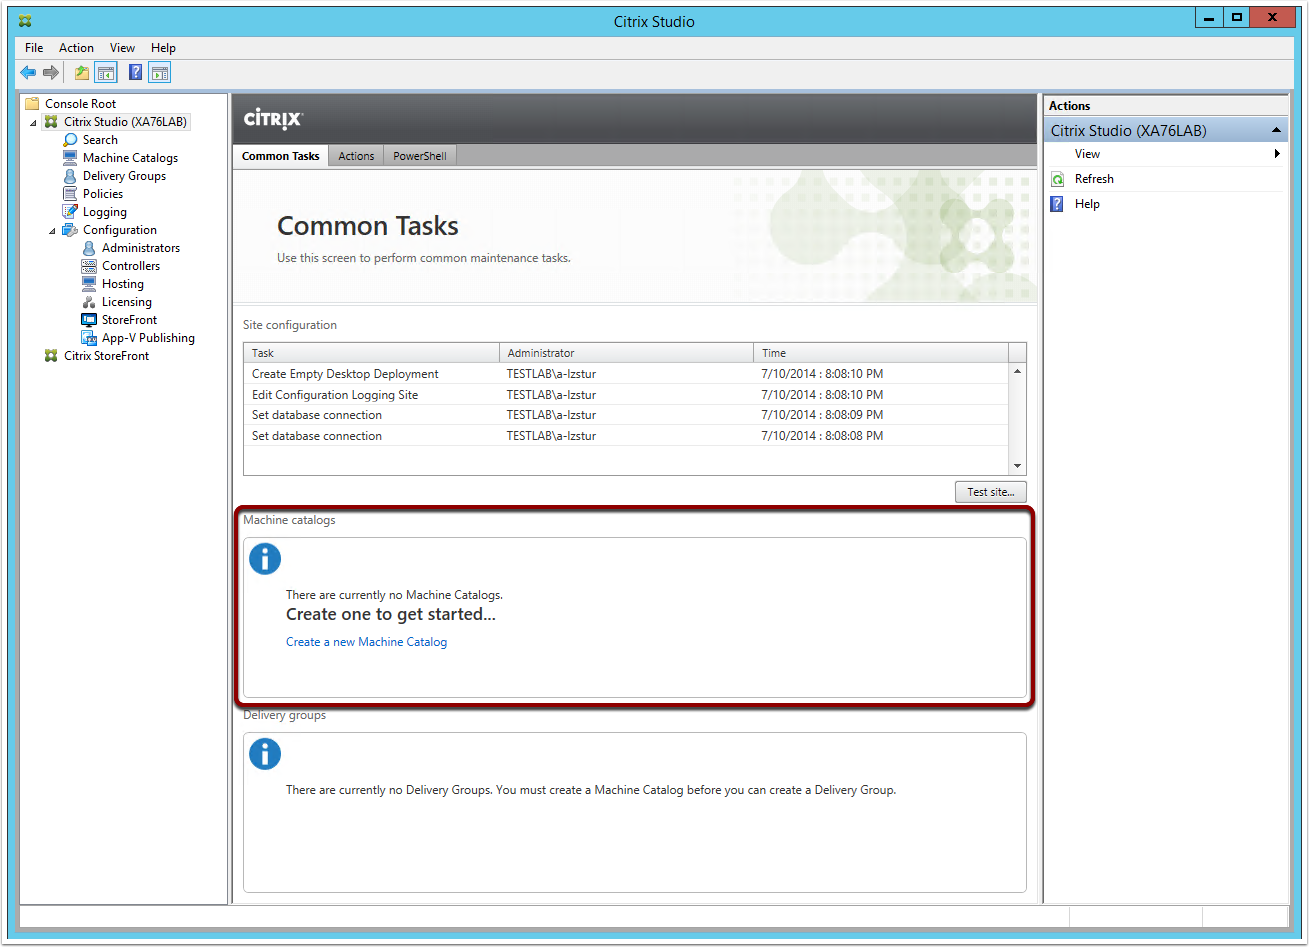
Note: Alternatively you can create a new Machine Catalog from the corresponding section in the Main Menu
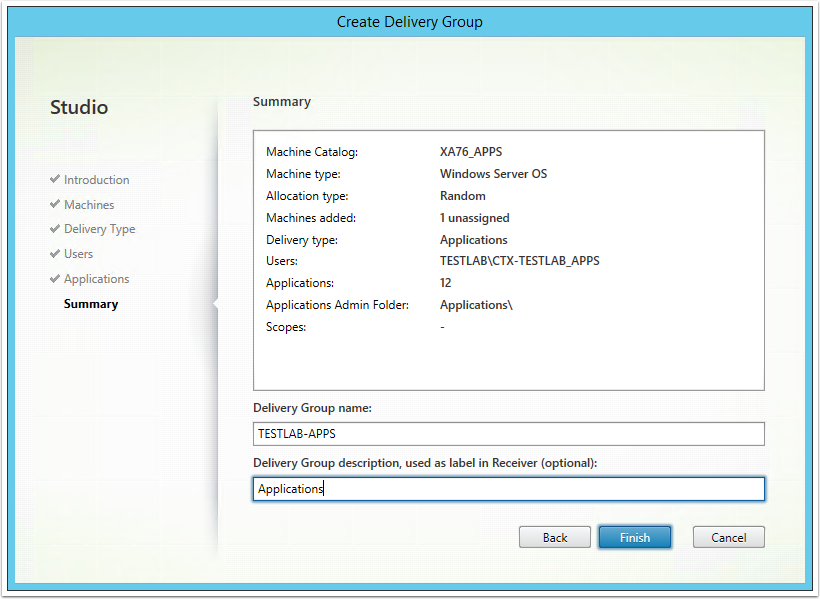
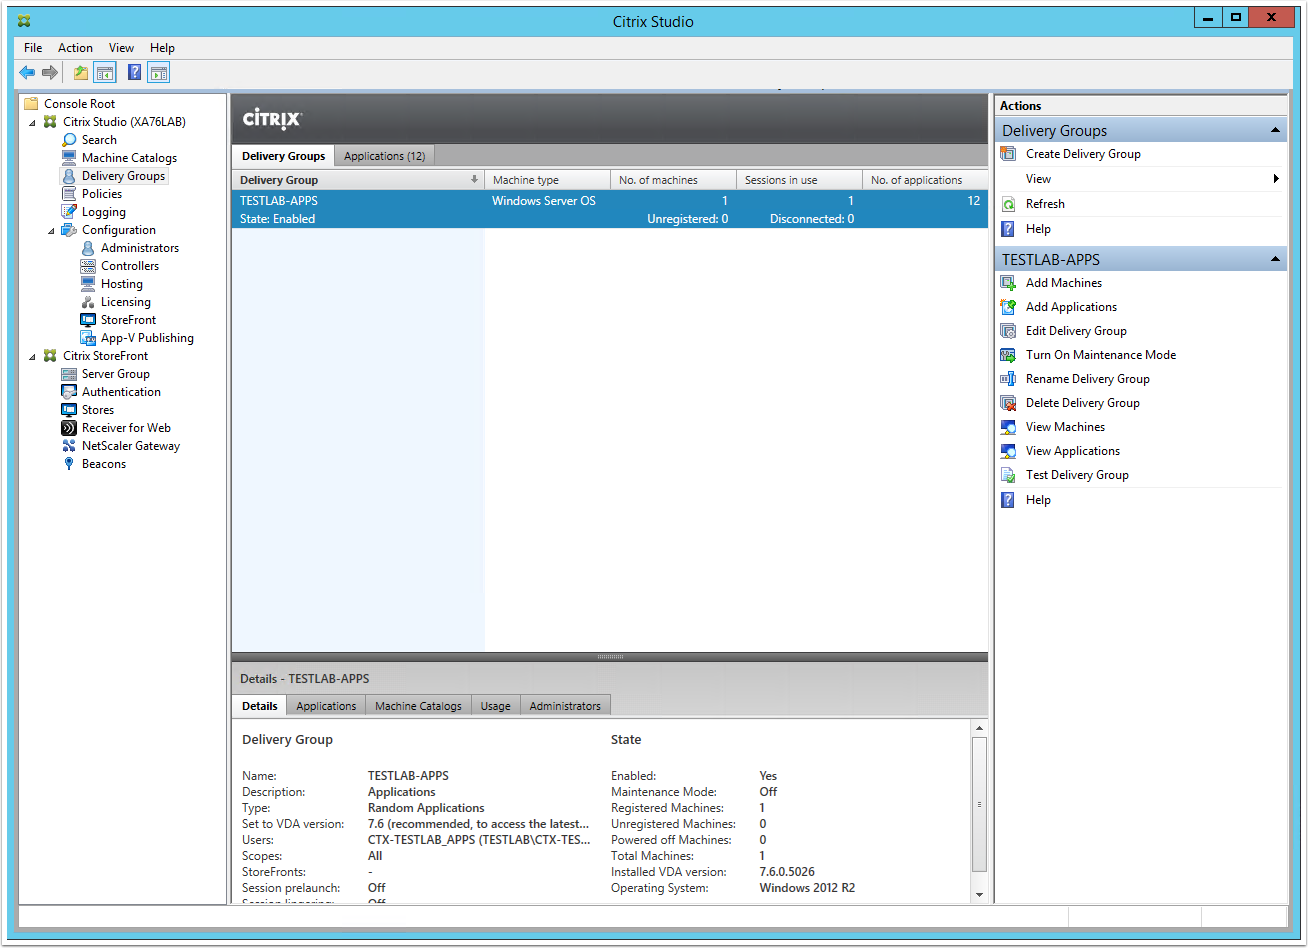
Install Delivery Group
From the Citrix Studio root window, click on "Create a new Delivery Group" link
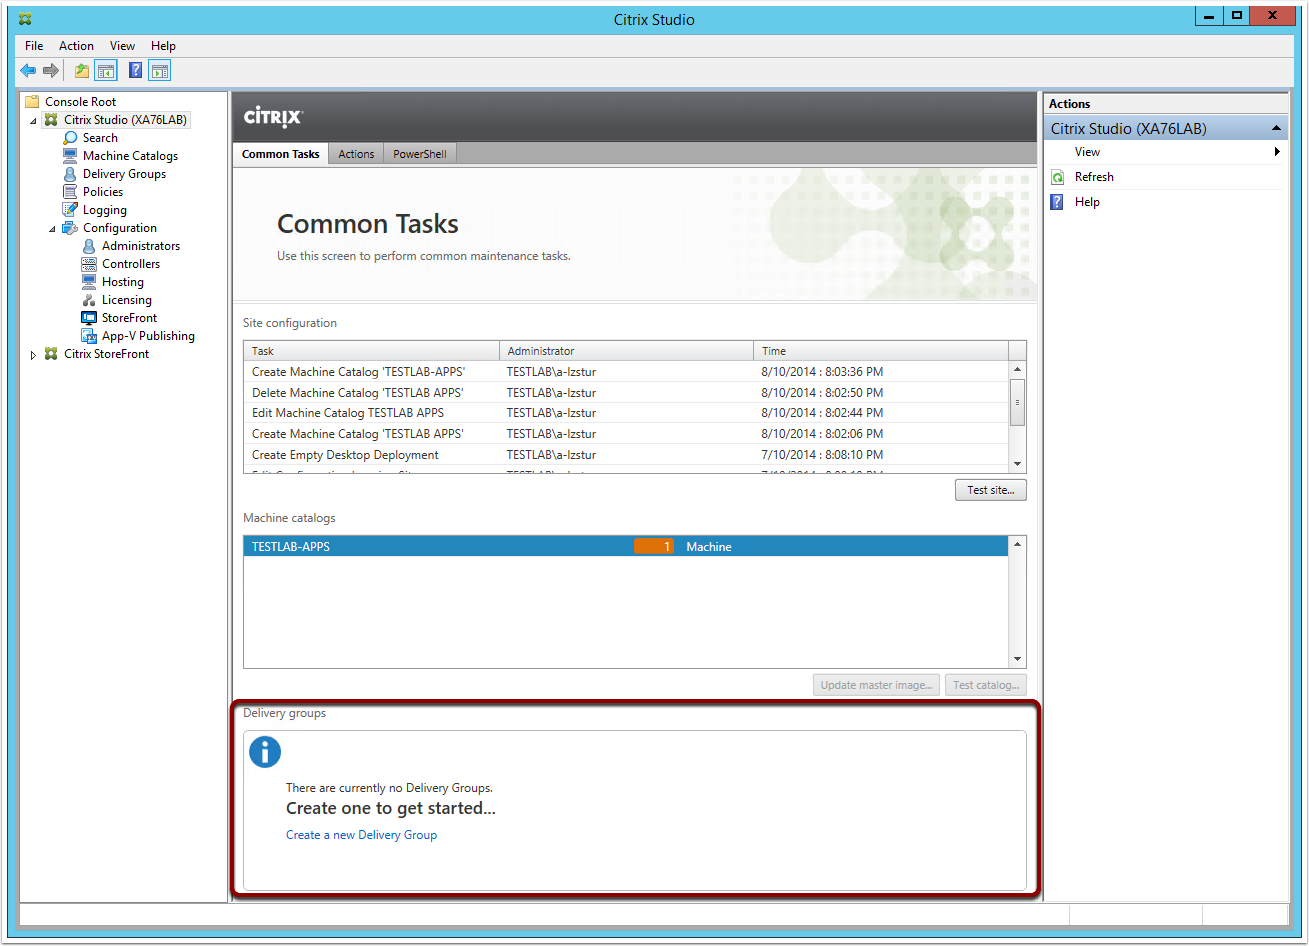
Note: Alternatively you can create a new Delivery Group from the corresponding section in the Main Menu
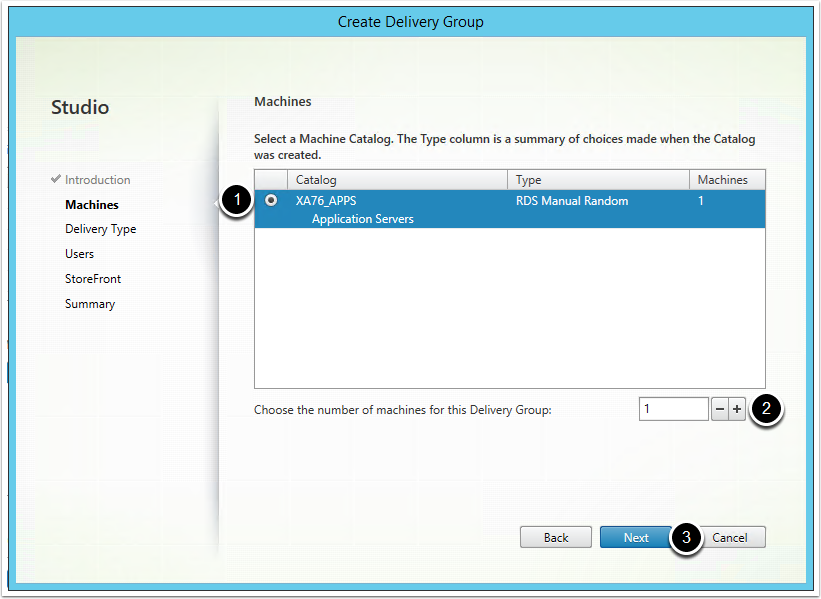
From the Machines screen, complete the following steps:
1.Select the Machine Catalog you want to add into the Delivery Group (in this example we only have one)
2. Chose the number of machines from the Machine Catalog that will be used in the Delivery Group
3. Click Next
Setup StoreFront
Launch Citrix Studio >> Citrix StoreFront >> Create a Store
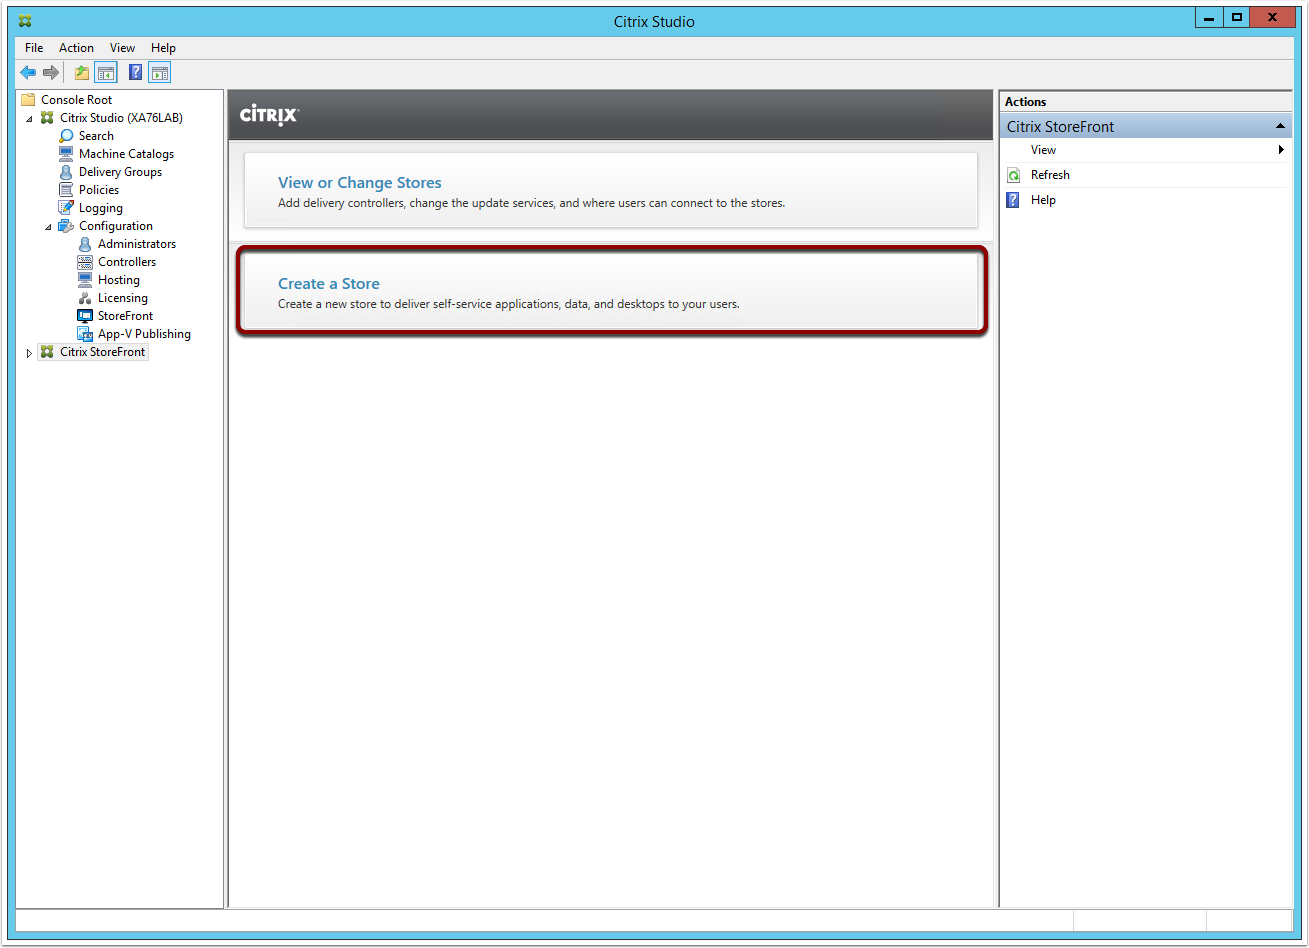
Note: You can also create a Citrix Store via the Citrix StoreFront Management Console


1. Ensure XenApp 7.5 (or later) is selected
2 .Click on Add and enter the name of the Citrix Delivery Controller (repeat for all controllers)
3. Set the appropriate transport type as per the site URL type (default is HTTP)
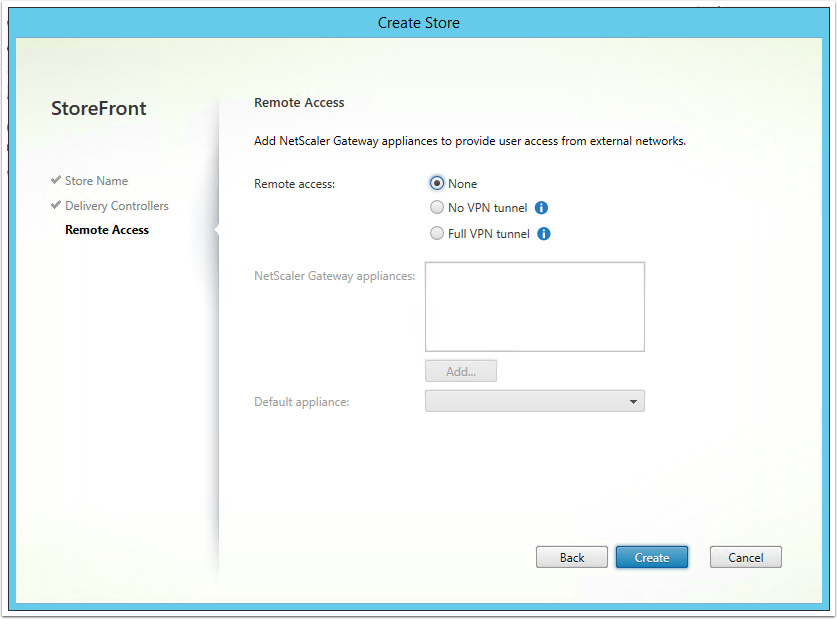
NetScaler Gateway is for external delivering so just click Create
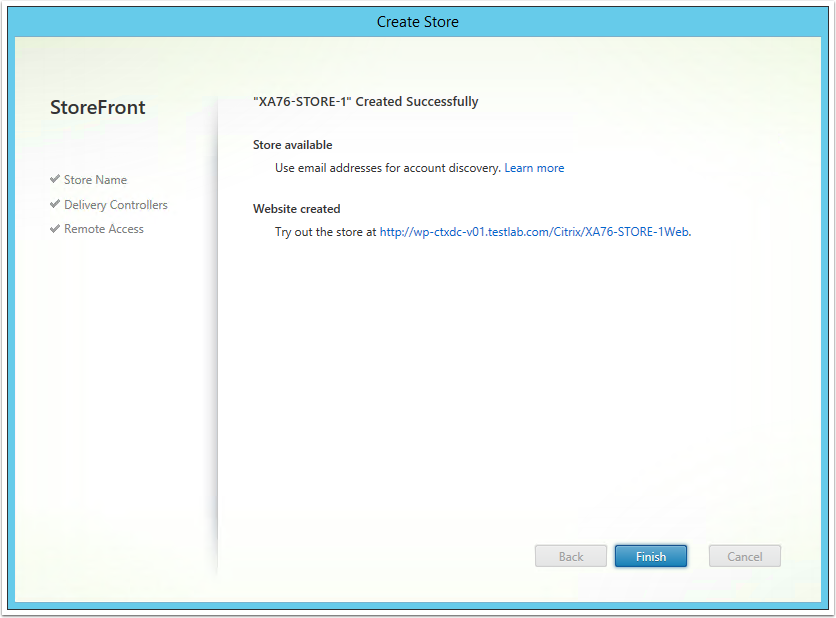
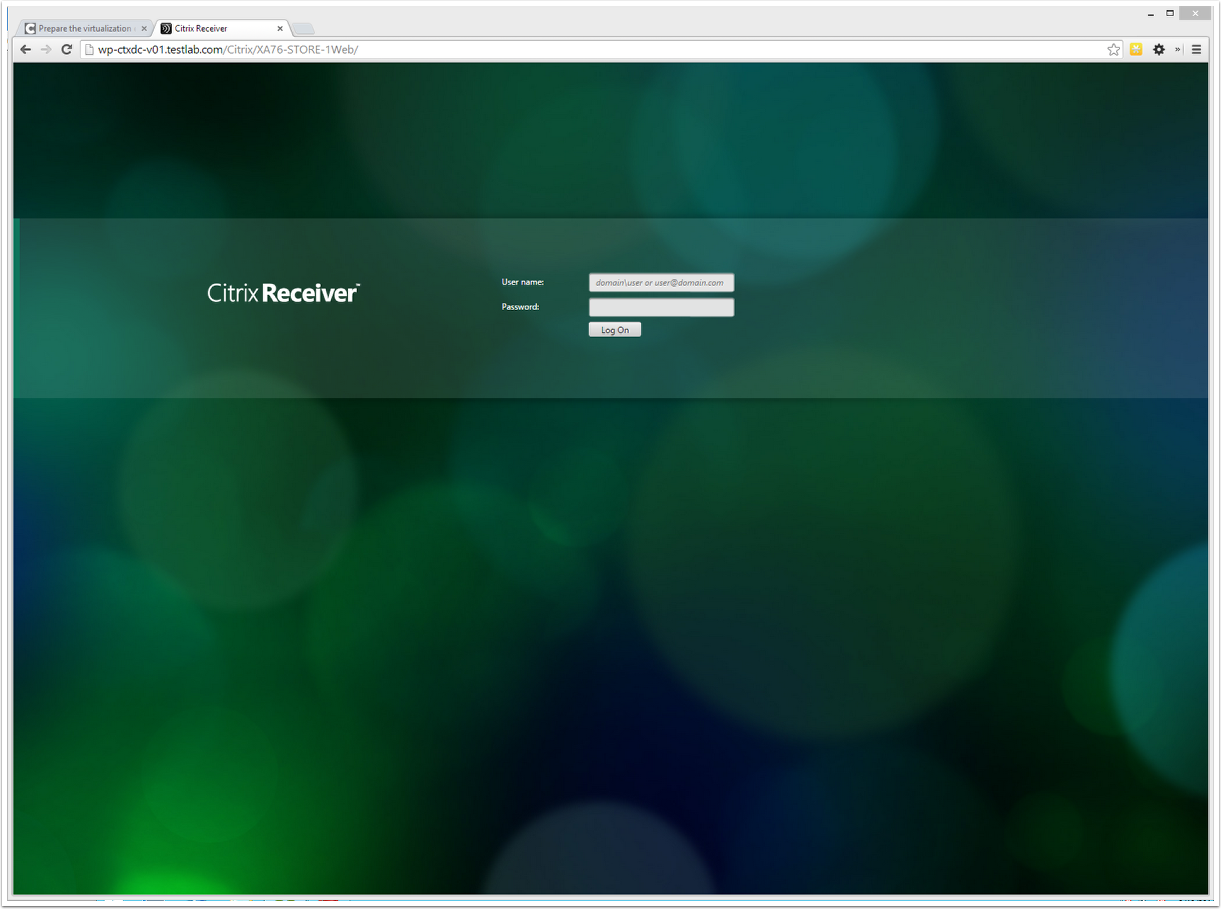
Navigate to your Citrix Store’s URL
Good Job ;)
Reference
-
Mastering Citrix XenDesktop - Pack Publishing - Govardhan Gunnala, Daniele Tosatto
- Linux Virtual Desktop Installation Guide for Redhat Enterprise Linux - Citrix Doc
- Optimizing Citrix ® XenDesktop ® for
High Performance - Packt Publishing - Craig Thomas Ellrod - http://9to5it.com/citrix-xendesktop
- http://blog.citrix24.com/xendesktop-7-part-2-configure-site/
- https://docs.citrix.com/en-us/xenapp-and-xendesktop/
- https://docs.citrix.com/en-us/xenapp-and-xendesktop/7-8/install-configure/appv.html