Redux
with
React

(obligatory)
Redux Core Principles
1. Application state is stored in a single state tree called the store
2. You can only change state by dispatching actions (plain objects that describe what occurred)
3. Reducers are pure functions that output new versions of state in response to actions
Redux Core Principles
1. Store
2. Actions
3. Reducers

What is the store?
The store is the place where application state lives. If you think of Redux like a "middle-end" (i.e. a layer between the frontend UI and backend server), then the Redux store is like the middle-end's database.

What are Actions, Action Creators, and Constants?
An action is a JavaScript object that describes a change to application state. It's a plain object that usually looks like this:
{
   type: FETCH_DATA_SUCCESS,  // by convention, every action has a type
   payload: data  // payload is optional and the key can be called whatever
}
An action creator is simply a function that returns (creates) an action
function fetchDataSuccess(data) {
    return {
       type: FETCH_DATA_SUCCESS,
       payload: data
    }
}
Constants are simply the types in variable form:
export const FETCH_DATA_SUCCESS = 'FETCH_DATA_SUCCESS';What is a reducer?
A reducer is a pure function that has two inputs:
- the current state (from the store, or a default state)
- an action (to describe a state change)
The reducer gets called for you every time you dispatch an action.
The reducer is just a regular function with a bunch of conditionals to handle different state changes, usually implemented by a switch statement.
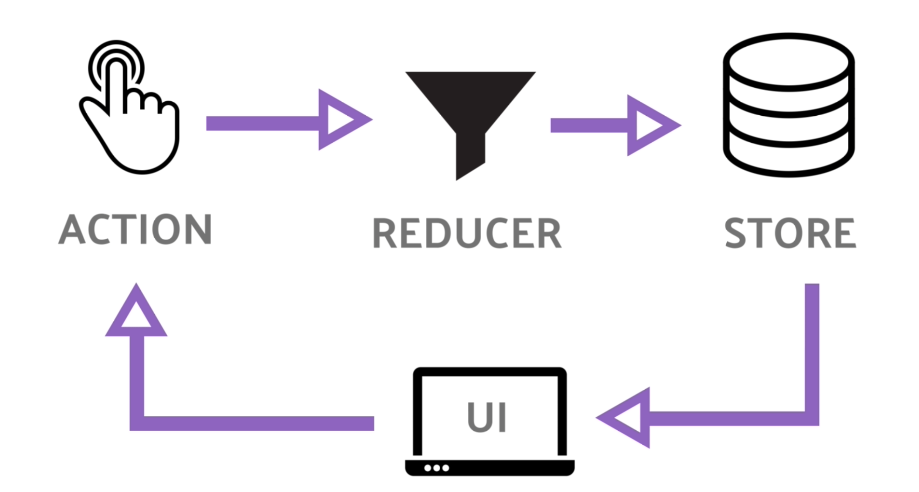
Redux in a Nutshell

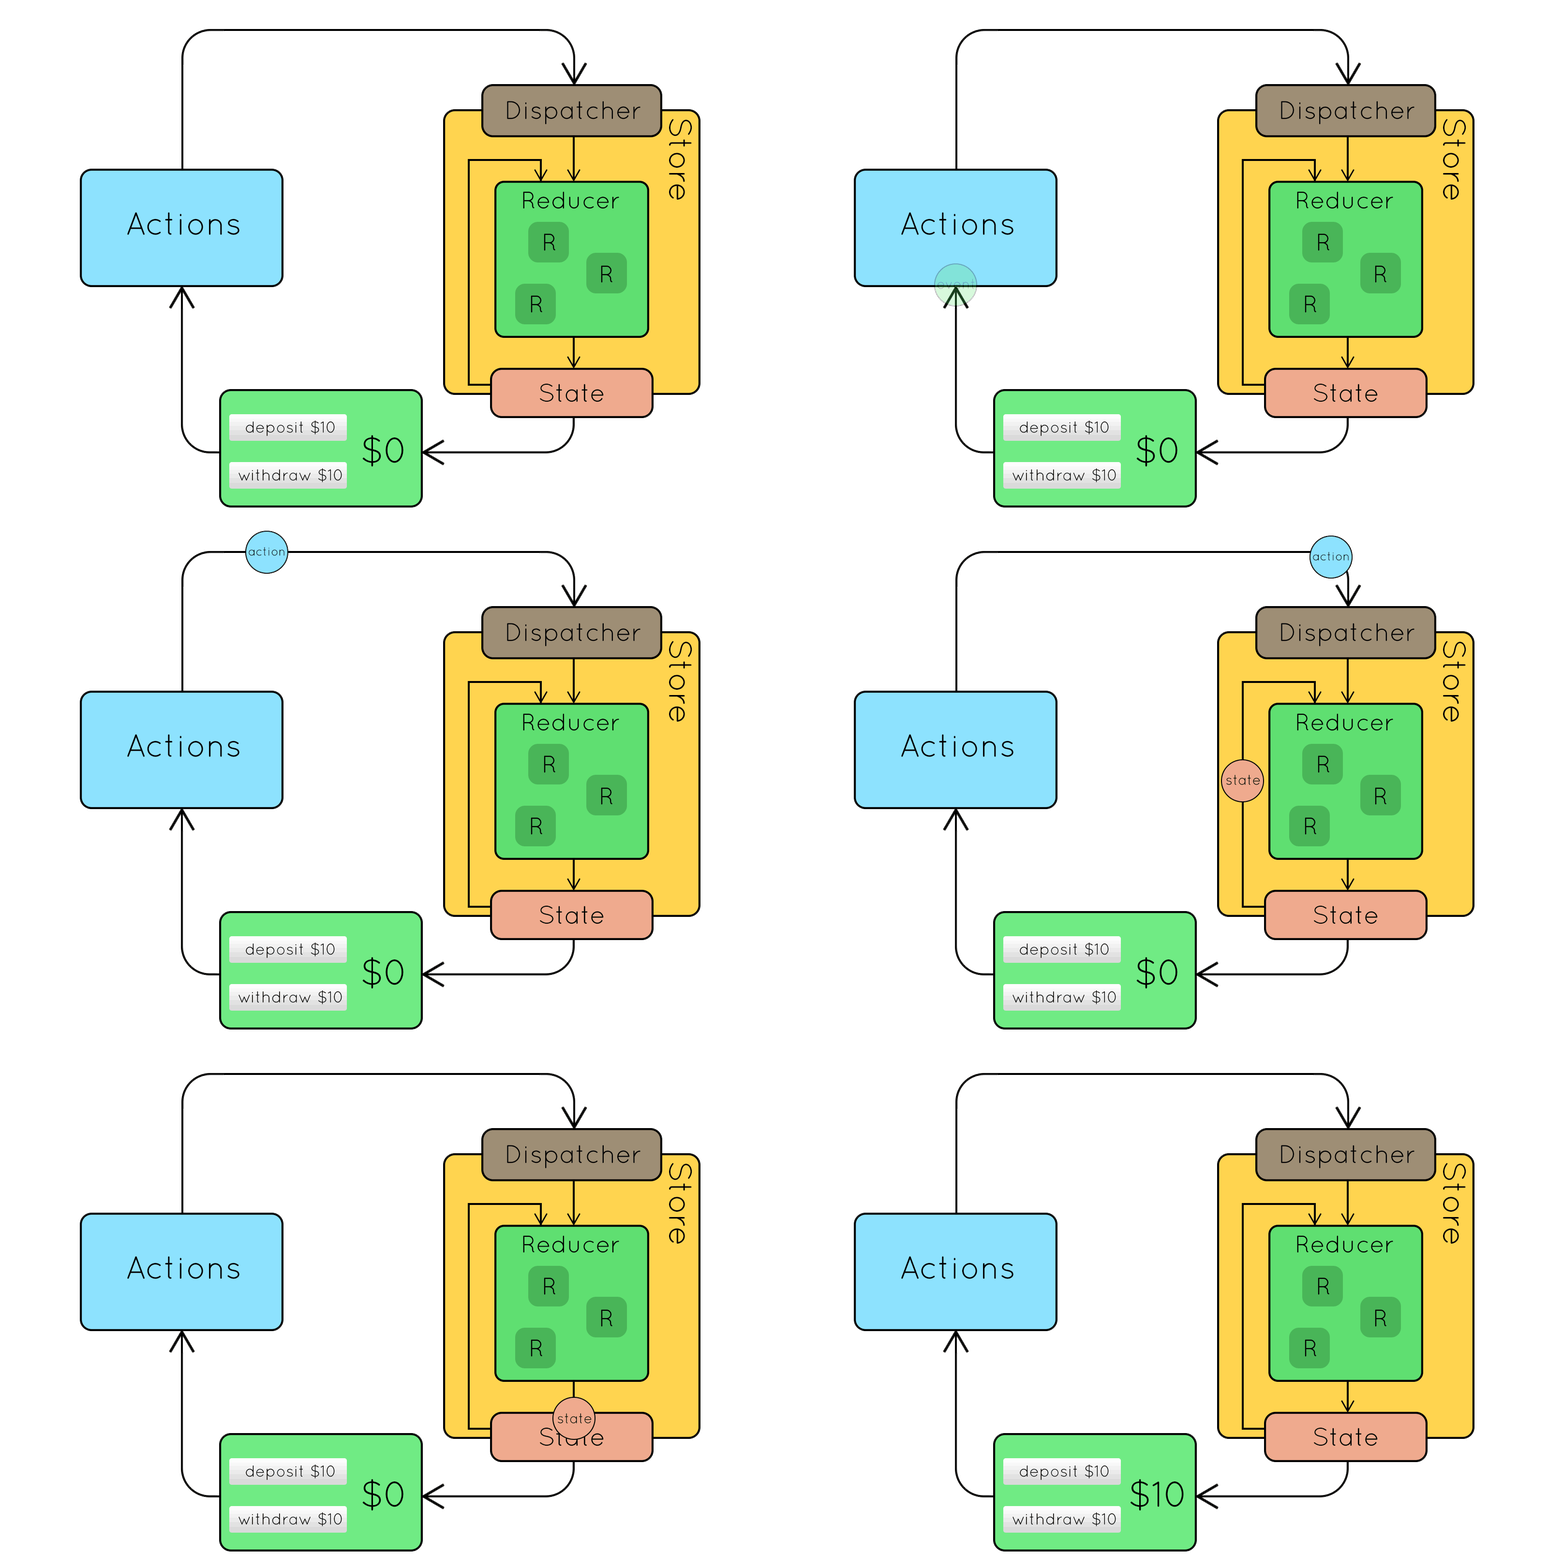
Redux in a Cooler Looking Nutshell

Example App
The rest of the presentation will draw examples from this repository => https://github.com/hueter/react-redux-data-flow
Redux + React
Redux and React can be used together to improve (and/or complicate) your React state management
React traditionally restricts state to live on stateful components, meaning it can be challenging to pass state around when you have lots of children that require it.
Passing state through components that do not need it and simply pass it on is called data "tunneling".
React...

React/Redux Note!
That being said, you can (and probably should) still use both systems!
A common way to divide concerns is for React to manage all UI state (form input, modal open/closed, etc). while Redux manages business logic.

Setup Redux with React
1. Start by building your reducer and specifying default state. The reducer should be done first both for clarity and so that you have something to configure the store with.
2. Configure the store and wrap the <App /> or root component with <Provider store={store}>
3. Start building action types (constants) and action creators to describe the ways your application state can evolve.
4. Build containers (connected components) to wrap React components (display or "dumb" components).
0. npm install redux react-redux
What are Containers?
Containers, also known as "connected components", are the crux of using React + Redux together.
Containers are a special class of component that can subscribe to Redux state, dispatch actions to change Redux state, or both.
They are implemented using the connect() function from the 'react-redux' package as Higher Order Components (HOCs).
// connect wraps NormalReactComponent with Redux-linked methods to return a HOC (container)
export default connect(mapStateToProps, mapDispatchToProps)(NormalReactComponent);
Rule of Thumb for Containers
Containers generally should not be responsible for UI logic. Their purpose is to import React components, and enhance their functionality by connecting to Redux.
class BoxContainer extends Component {

   render() {
    // oh no we're adding styles and a div around box :-(
    return (
      <div style={{ color: 'blue', backgroundColor: 'white' }}>
        <Box {...props} />
      </div>
    );
  }
}
How to Convert a React App to a Redux App!
This repository has instructions on how to convert a To-Do List app that is pure React into a Redux app!
https://github.com/hueter/react-redux-todo