Android UI Testing
Ian Munene
Instructor/Software developer @moringaschool
Twitter: @ianthe_ninja
Github: iantheninja
Android UI Testing
Android applications run on devices with limited memory, CPU power, and power supply
Android UI Testing
Therefore, they can always be negatively impacted by external factors like connectivity, general system utilization, etc.
Local Testing
Android UI Testing
We'll use Robolectric unit testing framework to test our app locally
Configuration
Android UI Testing
Let’s start with a simple test using our MyRestaurants app
To get started, configure your app to use the 'org.apache.http.legacy' library
build.gradle(Module: app)
Android UI Testing
android {
  ...
    useLibrary 'org.apache.http.legacy'
  ...

  repositories {
      mavenCentral()
      jcenter()
  }
  ...
}

dependencies {
    ...
    testCompile 'org.robolectric:robolectric:3.0'
    testCompile 'org.robolectric:shadows-support-v4:3.0'
}
Creating Test Classes e.g.
Android UI Testing
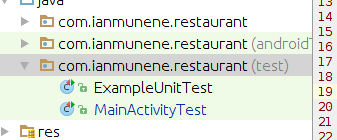
Navigate to java/com.yourpackagename.myrestaurants(test), right click on the test package name (example highlighted above), and create a new class called MainActivityTest:
com.ianmunene.myrestaurants(test)/MainActivityTest.java
Android UI Testing
Add the above annotation to our test class to allow our code to be run natively in the JVM instead of on an Android device
@Config(constants = BuildConfig.class, sdk = Build.VERSION_CODES.LOLLIPOP)
@RunWith(RobolectricGradleTestRunner.class)
public class MainActivityTest {

}
com.ianmunene.myrestaurants(test)/MainActivityTest.java
Android UI Testing
Remember, each time a class name appears red, it means the class needs to be imported. You can do this by clicking on the red and underlined class name, and pressing Alt + Enter. After importing all classes, your MainActivityTest file should look like this:
com.ianmunene.myrestaurants(test)/MainActivityTest.java
Android UI Testing
package com.ianmunene.myrestaurants;

import android.os.Build;

import org.junit.runner.RunWith;
import org.robolectric.RobolectricGradleTestRunner;
import org.robolectric.annotation.Config;

@Config(constants = BuildConfig.class, sdk = Build.VERSION_CODES.LOLLIPOP)
@RunWith(RobolectricGradleTestRunner.class)

public class MainActivityTest {
}
com.ianmunene.myrestaurants(test)/MainActivityTest.java
Android UI Testing
Before we write our first test, we'll also want to configure our test class so it knows which Activity we will use to write our tests:
com.ianmunene.myrestaurants(test)/MainActivityTest.java
Android UI Testing
package com.ianmunene.myrestaurants;

import android.os.Build;

import org.junit.Before;
import org.junit.runner.RunWith;
import org.robolectric.Robolectric;
import org.robolectric.RobolectricGradleTestRunner;
import org.robolectric.annotation.Config;

@Config(constants = BuildConfig.class, sdk = Build.VERSION_CODES.LOLLIPOP)
@RunWith(RobolectricGradleTestRunner.class)

public class MainActivityTest {
    private MainActivity activity;

    @Before
    public void setup() {
        activity = Robolectric.setupActivity(MainActivity.class);
    }
}
the actual tests
Android UI Testing
For our first test, we will assert that the text in our MainActivity's TextView is equal to “MyRestaurants”.
Now to our actual test
Android UI Testing
We are finally ready to write our first test:
...

@Config(constants = BuildConfig.class, sdk = Build.VERSION_CODES.LOLLIPOP)
@RunWith(RobolectricGradleTestRunner.class)

public class MainActivityTest {
    private MainActivity activity;

    @Before
    public void setup() {
        activity = Robolectric.setupActivity(MainActivity.class);
    }

    @Test
    public void validateTextViewContent() {
        TextView appNameTextView = (TextView) activity.findViewById(R.id.appNameTextView);
        assertTrue("MyRestaurants".equals(appNameTextView.getText().toString()));
    }
}
main points
Android UI Testing
- click alt + Enter, select Static import method... and select the first option to import it. This should add the line import static junit.framework.Assert.assertTrue; to the top of your file.
- All JUnit tests require the @Test annotation before the method declaration.
- activity.findViewById returns the appNameTextView which we will cast as type TextView.
- Inside of assertTrue() we test to see that the text from our appNameTextView is equal to “MyRestaurants”
running tests
Android UI Testing
Right click on the test file and select Run 'MainActivityTest'
your test should fail without the test view set to "MyRestaurants" in your main activity or pass if it has been set.
UI Testing Basics with Espresso
Android UI Testing
Next, let’s learn the basics of instrumentation testing in Android. We will use Espresso; a UI test framework that creates automated tests that run on an actual device or emulator. Instrumentation tests are meant to simulate the actions of a user and allow us to test the app through the stages of the android activity lifecycle.
Configuring Espresso
Android UI Testing
First, we’ll add the necessary configurations and dependencies to our build.gradle file:
apply plugin: 'com.android.application'

android {
    ...

    defaultConfig {
        ...
        testInstrumentationRunner "android.support.test.runner.AndroidJUnitRunner"
    }
    ...
}

dependencies {
    ...
    androidTestCompile('com.android.support.test.espresso:espresso-core:2.2') {
        exclude group: 'com.android.support', module: 'support-annotations'
    }
    androidTestCompile('com.android.support.test:runner:0.3') {
        exclude group: 'com.android.support', module: 'support-annotations'
    }
}
Creating Test Classes and Rules
Android UI Testing
Next, let’s create a new test class called MainActivityInstrumentationTest inside our java/com.ianmunene.myrestaurants (androidTest) package.
NB: please check to confirm you are creating it in the androidTest package
We'll place the following annotation within this file, and import all necessary classes.
MainActivityInstrumentationTest.java
Android UI Testing
package com.ianmunene.myrestaurants;

import android.support.test.rule.ActivityTestRule;

import org.junit.Rule;

public class MainActivityInstrumentationTest {

    @Rule
    public ActivityTestRule<MainActivity> activityTestRule =
            new ActivityTestRule<>(MainActivity.class);

}
The code in @Rule tells our device which activity to launch before each test. Here, we're instructing the instrumentation tests to launch the MainActivity before each test.
Writing Instrumentation Tests with Espresso
Android UI Testing
Now we are ready to write our first test. Include the @Test block detailed below. Multiple methods will appear red. This is normal, continue following to the next section to address importing these methods appropriately.
MainActivityInstrumentationTest.java
Android UI Testing
public class MainActivityInstrumentationTest {

    ...

    @Test
    public void validateEditText() {
        onView(withId(R.id.locationEditText)).perform(typeText("Nairobi"))
                .check(matches(withText("Nairobi")));
    }
}
Importing Static Methods
Android UI Testing
You will notice that multiple methods included in this block of code will be red. Each of these are static methods from Espresso that need to be imported, similar to the manner in which we import classes. Click on each, select Alt + Enter, and select "import static method..." from the resulting menu.
Once complete, your file should have these imports and annotations:
Importing Static Methods
Android UI Testing
...

import android.support.test.rule.ActivityTestRule;

import org.junit.Rule;
import org.junit.Test;

import static android.support.test.espresso.Espresso.onView;
import static android.support.test.espresso.action.ViewActions.typeText;
import static android.support.test.espresso.assertion.ViewAssertions.matches;
import static android.support.test.espresso.matcher.ViewMatchers.withId;
import static android.support.test.espresso.matcher.ViewMatchers.withText;

public class MainActivityInstrumentationTest {

    @Rule
    public ActivityTestRule<MainActivity> activityTestRule =
            new ActivityTestRule<>(MainActivity.class);

    @Test
    public void validateEditText() {
        onView(withId(R.id.locationEditText)).perform(typeText("Portland"))
                .check(matches(withText("Portland")));
    }

}
Anatomy of an Espresso Instrumentation Test
Android UI Testing
- onView() specifies that we want to interact with a view
- withId() is a ViewMatcher method that allows us to find specific views by ID
- typeText() is a ViewAction method that allows us to type the specified text into our EditText
- matches() is a ViewAssertion method that validates the specific properties of the given view
Running Instrumentation Tests
Android UI Testing
Let’s run our test and make sure it passes. Right click on the class name and select Run ‘MainActivityInstrume…’. Because this is an instrumentation test, the emulator will open, the “Nairobi” text will appear in the locationEditText, and the progress indicator will notify us that our test passed. Hooray!
Contact Infor
Android UI Testing
ian@moringaschool.com
santaclaus@moringaschool.com