
What is Angular Directives ?
A directive modifies the DOM by changing the appearance, behavior, or layout of DOM elements. Directives just like Component are one of the core building blocks in the Angular framework to build applications.
Or other hand,Directives are acts as a HTML markers on any DOM element (like as an attribute or element name or comment or CSS based style class) which instructed Angular’s HTML compiler to attach a specified behaviour on that particular DOM element or to transform that DOM element.
Why Directives Required?
-
Reusability — In an Angular application, the directive is a self-sufficient part of the UI. As a developer, we can reuse the directive across the different parts of the application. This is very much useful in any large-scale applications where multiple systems need the same functional elements like search box, date control, etc.
-
Readability — Directive provides much more readability for the developers to understand the production functionality and data flow.
- Maintainability — One of the main use of directive in any application is the maintainability. We can easily decouple the directive from the application and replace the old one with a new one directives.
@Directive Metadata
-
selector — The selector property is used to identify the directive within the HTML template. Also, with the help of this property, we can initialize the directive from the DOM elements
-
inputs — It is used to provide the set of data-bound input properties of the directives.
-
outputs — It is used to enumerates any event properties from the directives.
-
providers — It is used to inject any provider type like service or components within the directives.
-
exportAs — It is used to define the name of the directives which can be used to assign a directive
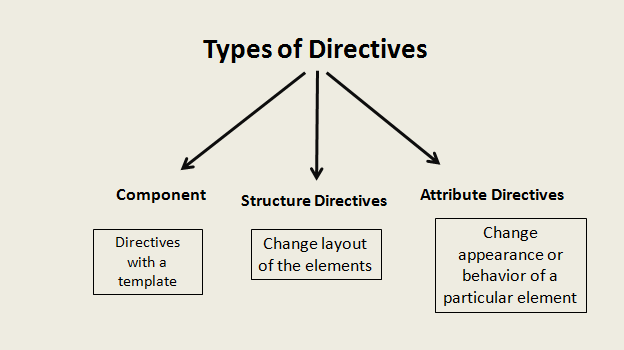
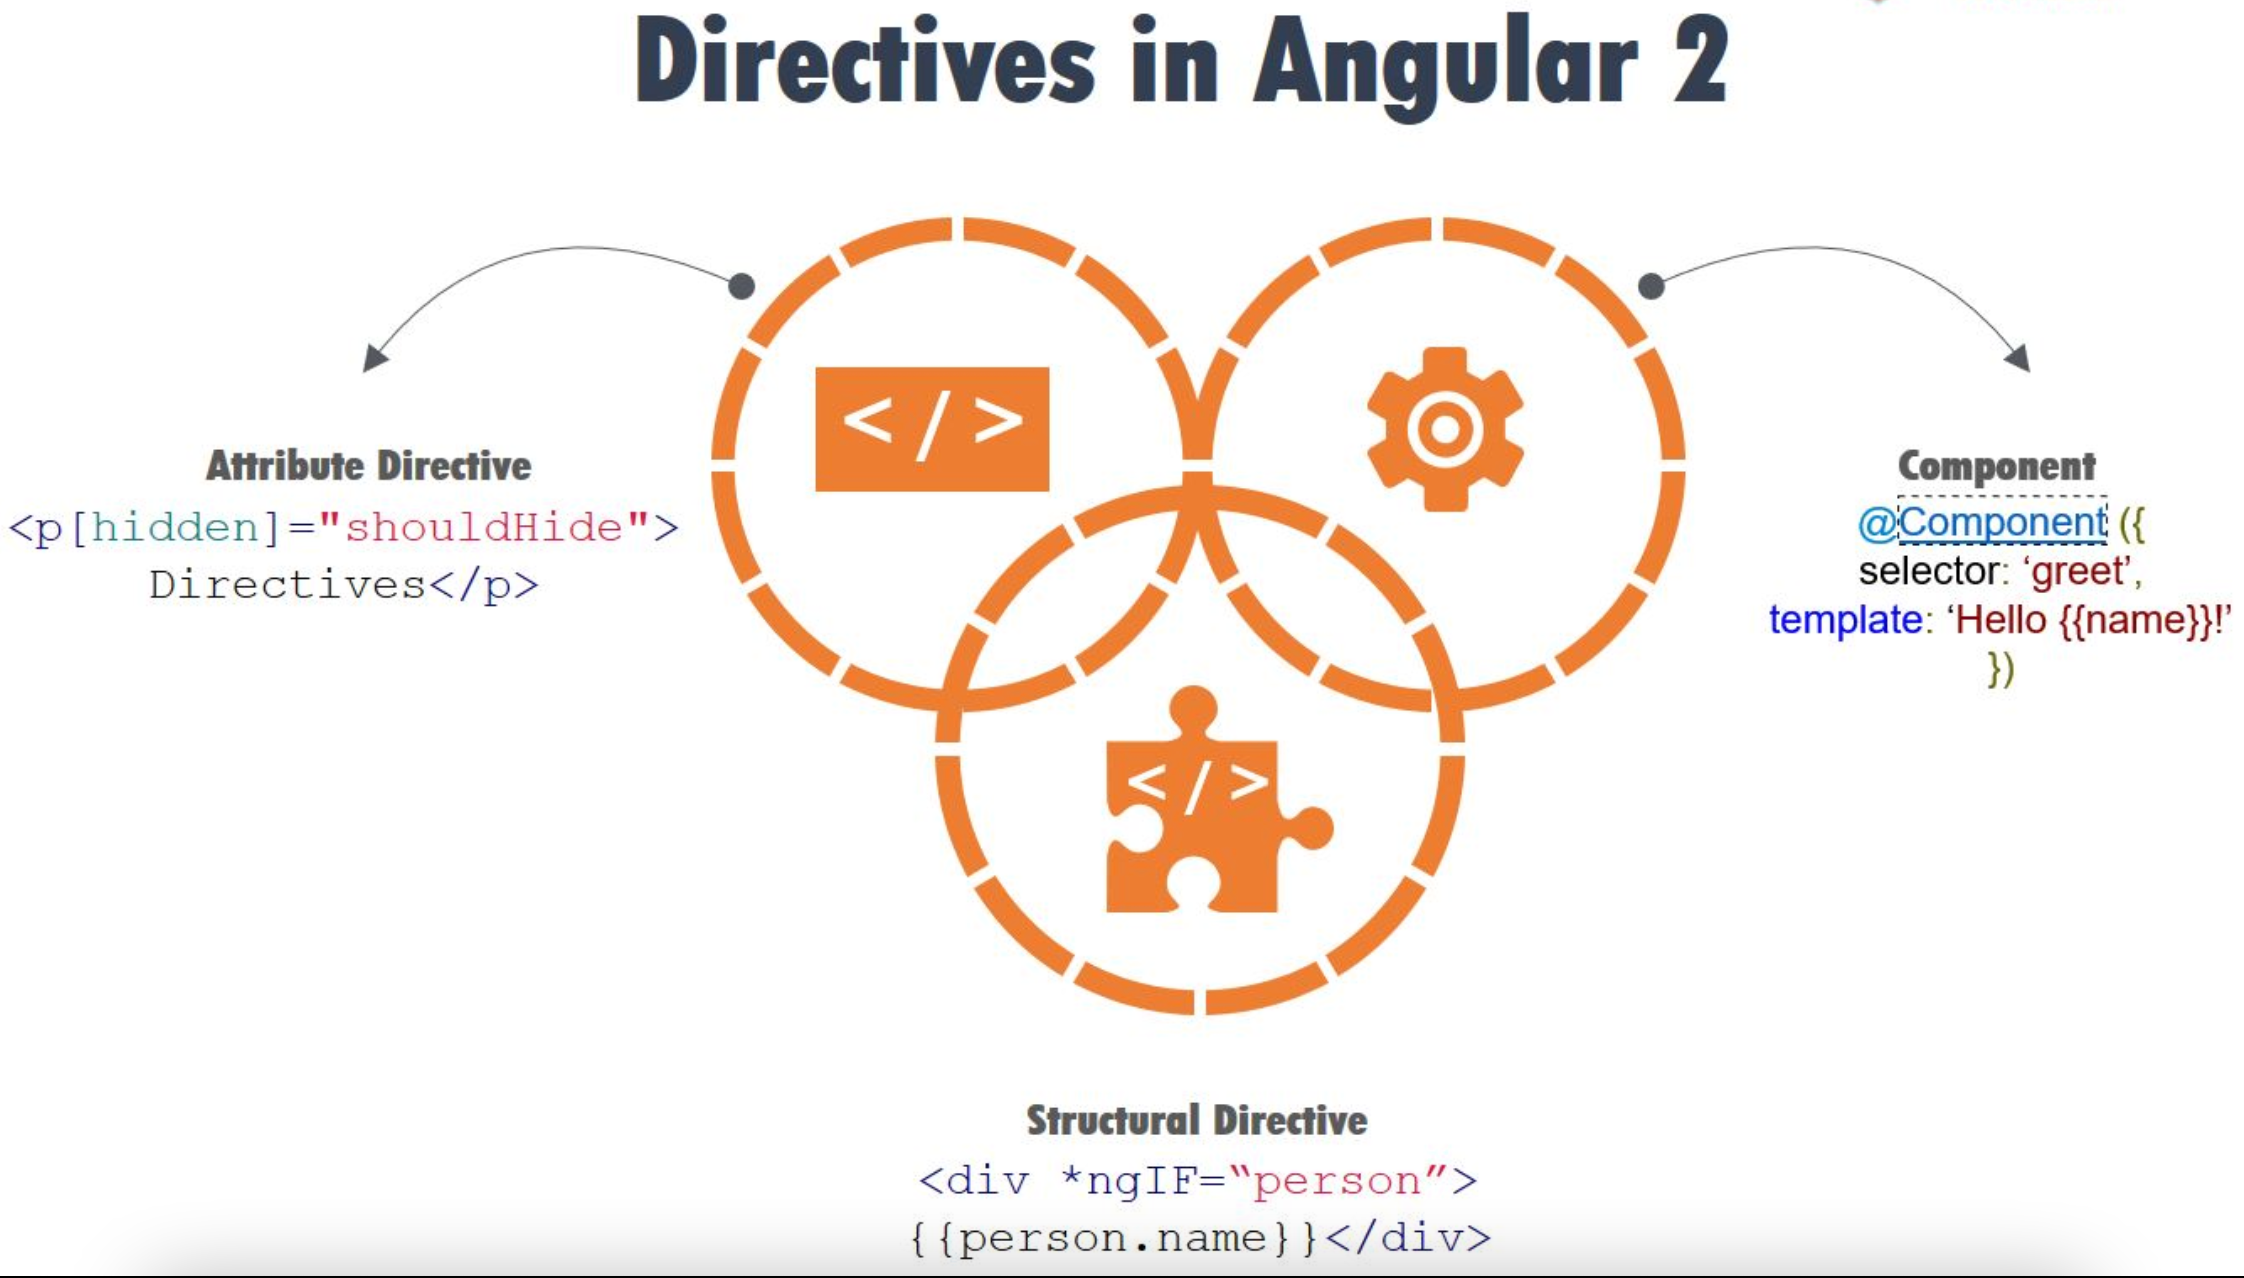
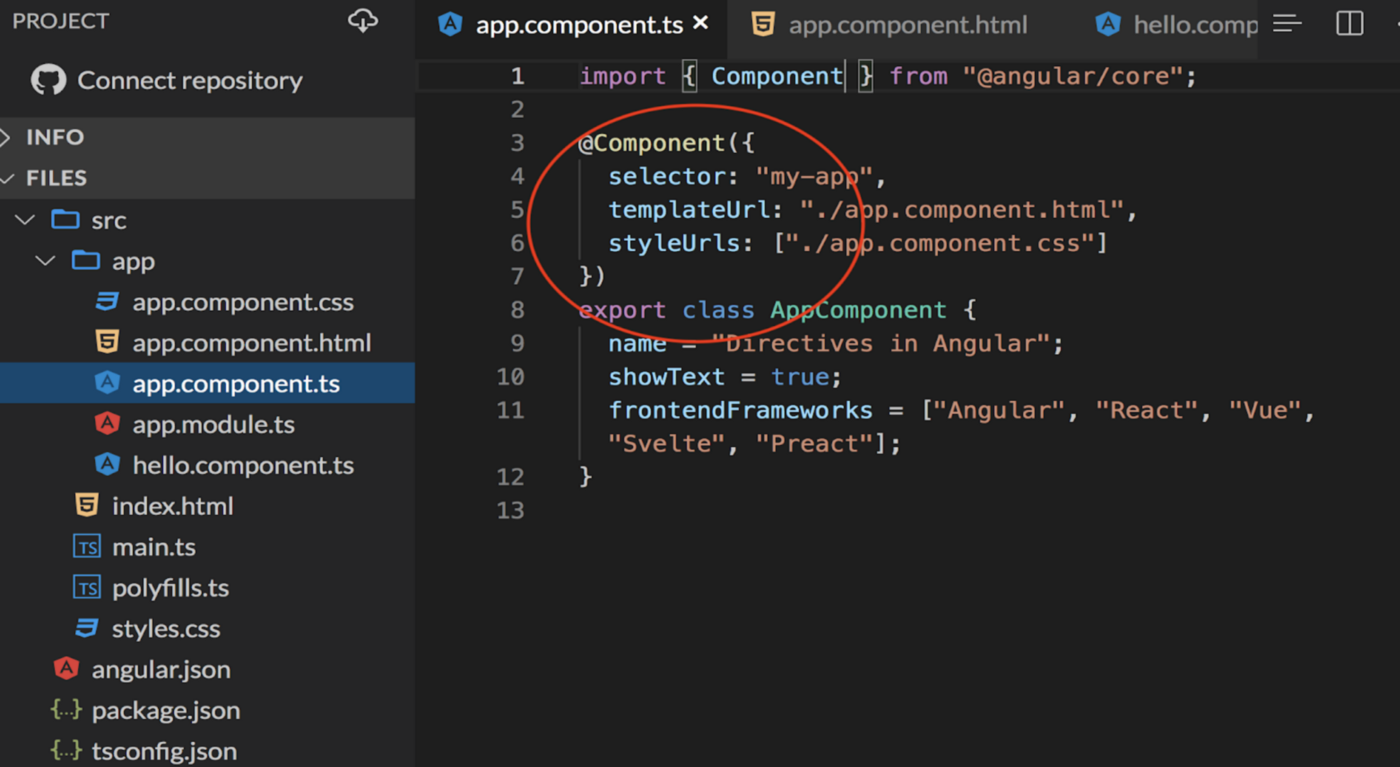
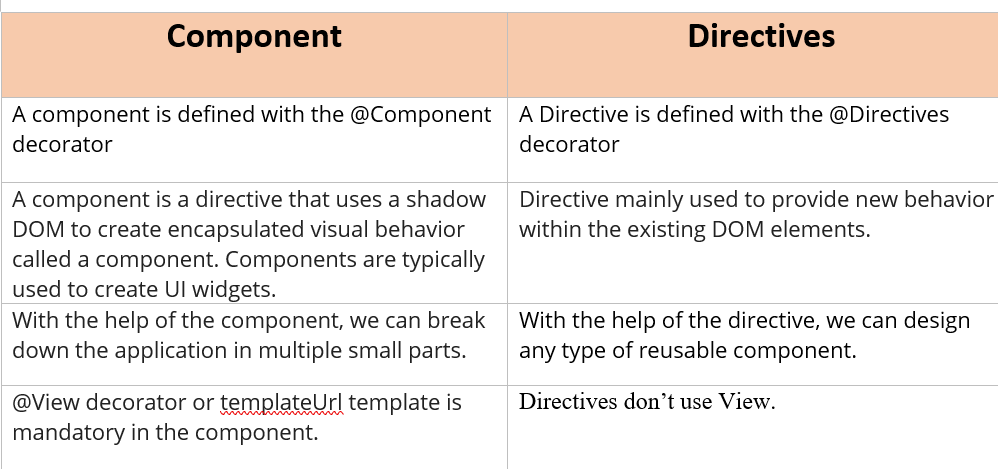
Component Directives
These are a special kind of directive that has their own template, which has a ‘@Component’ decorator . We can define a component view with its companion template. A template is HTML that tells Angular how to render the component. Whenever we create a component, that is nothing but a directive. And we all know that Angular is all about components. And each component consists of a HTML template , CSS and TS file.
What is an Attribute Directive?
Attribute directives are mainly used for changing the appearance or behavior of a component or a native DOM element. Attribute directives actually modify the appearance or behavior of an element. These directives actually act as a simple HTML attribute for any HTML tag.
In-Build Attributes Directives are
-
ngClass — ngClass directive changes the class attribute that is bound to the component or element it’s attached to.
- ngStyle — ngStyle is mainly used to modify or change the element’s style attribute. This attribute directive is quite similar to using style metadata in the component class.
In the example below we have used the directive ngStyle to give the element a background color, padding and font size.

Next, in the example below we have used another attribute directive ngClass. As you can see in the template file, we have added ngClass and defined some stylings for that class in the css file.

What is Structural Directive?
Structural directives are mainly used to change the design pattern of the UI DOM elements. In HTML, these directives can be used as a template tag. Using this type of directives, we can change the structure of any DOM elements and can redesign or redecorate those DOM elements.
In-Build Structural Directives are
-
ngIf
-
ngFor
- ngSwitch
In the below example, we have assigned a boolean variable to the *ngIf directive. If the return value is true, then that particular div with text ‘Yes, I can be seen’ will be rendered in the browser.

Using *ngIf dynamically renders text on the page based on a given condition.
Another commonly used structural directive is *ngFor. The *ngFor directive is used to output an array of data onto the page.
As you can see, we have used the ngFor directive to loop over the`frameworks` array to display each value.

Custom Directive
To create attribute directives, we always need to use or inject the below objects in our custom attribute directive component class. To create an attribute directive, we need to remember the below topics:
-
Import required modules like directives, ElementRef, and renderer from the Angular core library.
-
Create a TypeScript class.
-
Use the @Directive decorator in the class.
-
Set the value of the selector property in the @directive decorator function. The directive will be used, using the selector value on the elements.
-
In the constructor of the class, inject ElementRef and the renderer object.
-
You need to inject ElementRef in the directive’s constructor to access the DOM element
- You need to call the renderer’s setElementStyle function. In this function, we need to pass the instance of the current DOM element with the help of ElementRef as a parameter and setting the behavior or property of the current element.
ElementRef- While creating a custom attribute directive, we inject ElementRef in the constructor to access the DOM element. ElementRef provides access to the underlying native element. With the help of ElementRef, we can obtain direct access to the DOM element using its nativeElement property. In that case, ElementRef is behaving just like a service. That’s all we need to set the element’s color using the browser DOM API.
HostListener — Sometimes we may need to access the input property within the attribute directive so that, as per the given attribute directive, we can apply a related attribute within the DOM Element. To trap user actions, we can call different methods to handle user actions. We need to use this method to perform any user action. For that purpose, we need to decorate the method with @HostListener method.

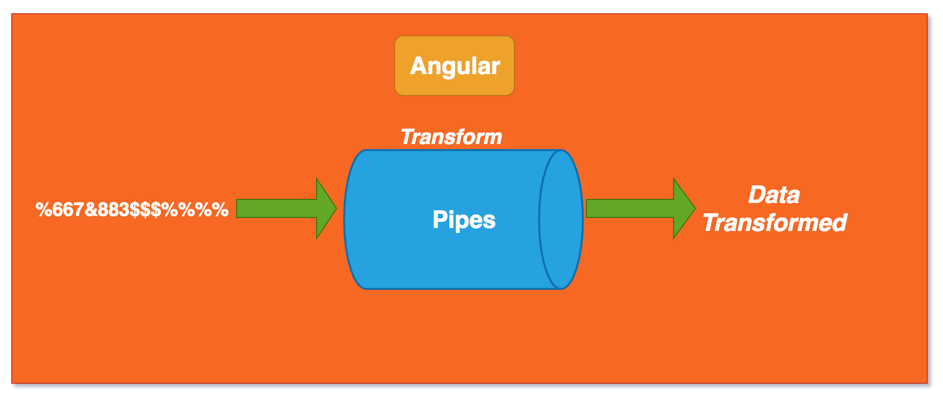
Pipes in Angular
Pipes are an Angular feature that allow you to transform output inside your template. They transform your data once they are rendered on your screen.
Angular Pipes give you the flexibility to transform data in the view without changing the actual data values themselves.
Use Angular pipes by declaring the variable, followed by the pipe symbol “|” inside the HTML template.
Example syntax for adding a pipe: {{ myVariable | pipeName }}
Useful Built-in Pipes in Angular
- Async Pipe
- Currency Pipe
- Date Pipe
- Slice Pipe
- Decimal Pipe
- Json Pipe
- Percent Pipe
- LowerCase Pipe
- UpperCase Pipe
Async Pipe
Never .subscribe() again, | async instead
async pipe receives the Observable we define on the template, subscribes to it, and every time it receives a new emission of data it triggers the ChangeDetection cycle to update the view accordingly.
More important, async pipe implements the ngOnDestroy event and unsubscribes from your observable.
data$: Observable<Person[]>
ngOnInit(){
  this.data$ = this.service.data$
}
<p *ngFor="let item of data$ | async">item.name<p>
Pure vs Impure Pipes
When writing a custom pipe in Angular you can specify whether you define a pure or an impure pipe:
@Pipe({
name: 'filterPipe',
pure: false/true <----- here (default is `true`)
})
export class FilterPipe {}
Pure pipe
A pure pipe is only called when Angular detects a change in the value or the parameters passed to a pipe
@Pipe({
name: 'filterPipe',
pure: true
})
export class FilterPipe {}
Impure pipe
An impure pipe is called for every change detection cycle no matter whether the value or parameter(s) changes.
@Pipe({
name: 'filterPipe',
pure: false
})
export class FilterPipe
Pure & impure Pipes
Pure pipes are the pipes which are executed only when a “PURE CHANGE” to the input value is detected.
So impure pipe executes every time irrespective of source has changed or not. which leads to bad performance. thats why it is not recommended to use pipes for filtering data.