Writing Rust CLI Applications
Jean-Marcel Belmont

Senior Software Engineer
What is a cli anyway?
A command-line interface or command language interpreter (CLI), also known as command-line user interface, console user interface[1] and character user interface (CUI), is a means of interacting with a computer program where the user (or client) issues commands to the program in the form of successive lines of text (command lines). A program which handles the interface is called a command language interpreter or shell (computing).
According to wikipedia:

clis are for hackers right
Who needs clis I have my IDE
I press F5 and boom I am golden!!!

Let the CLI Cookoff begin!!
CLI program that computes a sum in Rust.
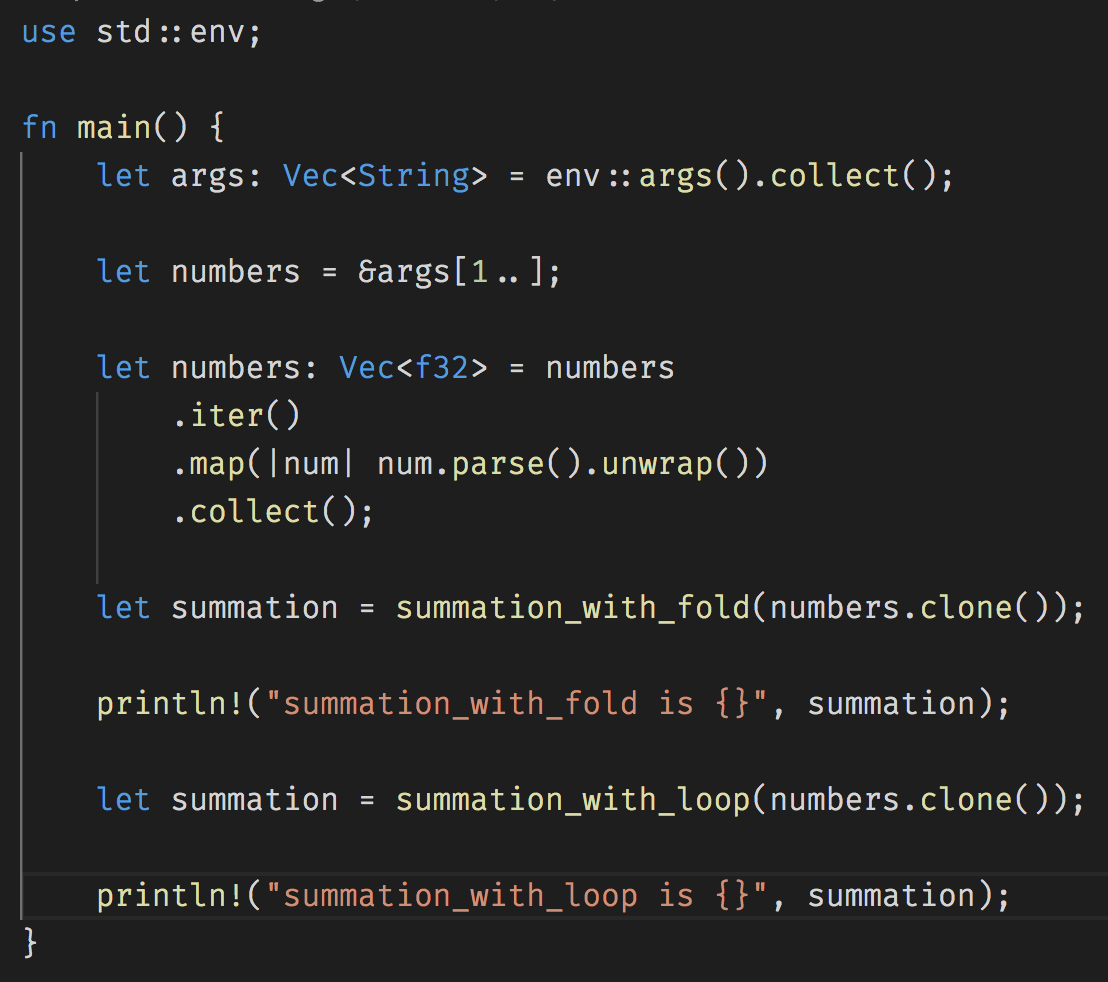
Rust has several different ways to iterate through collections!
We can use a for in loop with Rust.
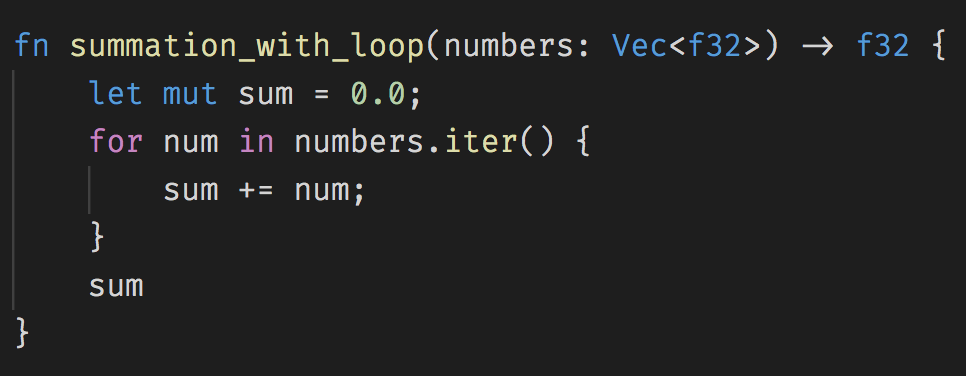
Notice that we didn't put a return statement here!
sum is an expression and will return.
We can use iterator methods to do the same action
fold is an iterator method that applies a function, producing a single, final value.
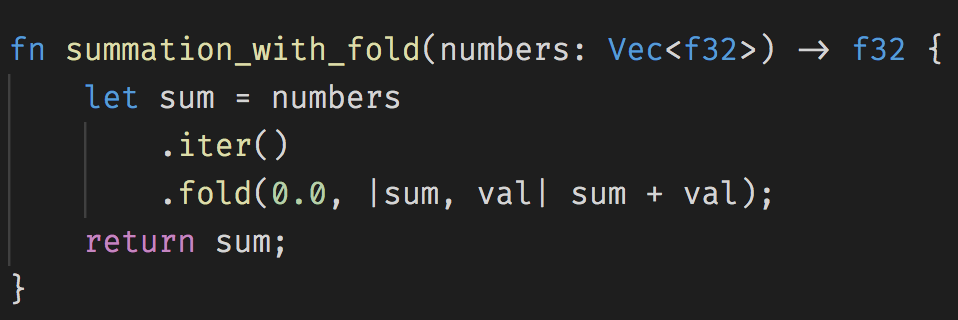
Notice here that we used the explicit return statement here!
Using the return statement like this is not considered idiomatic.
Demo!


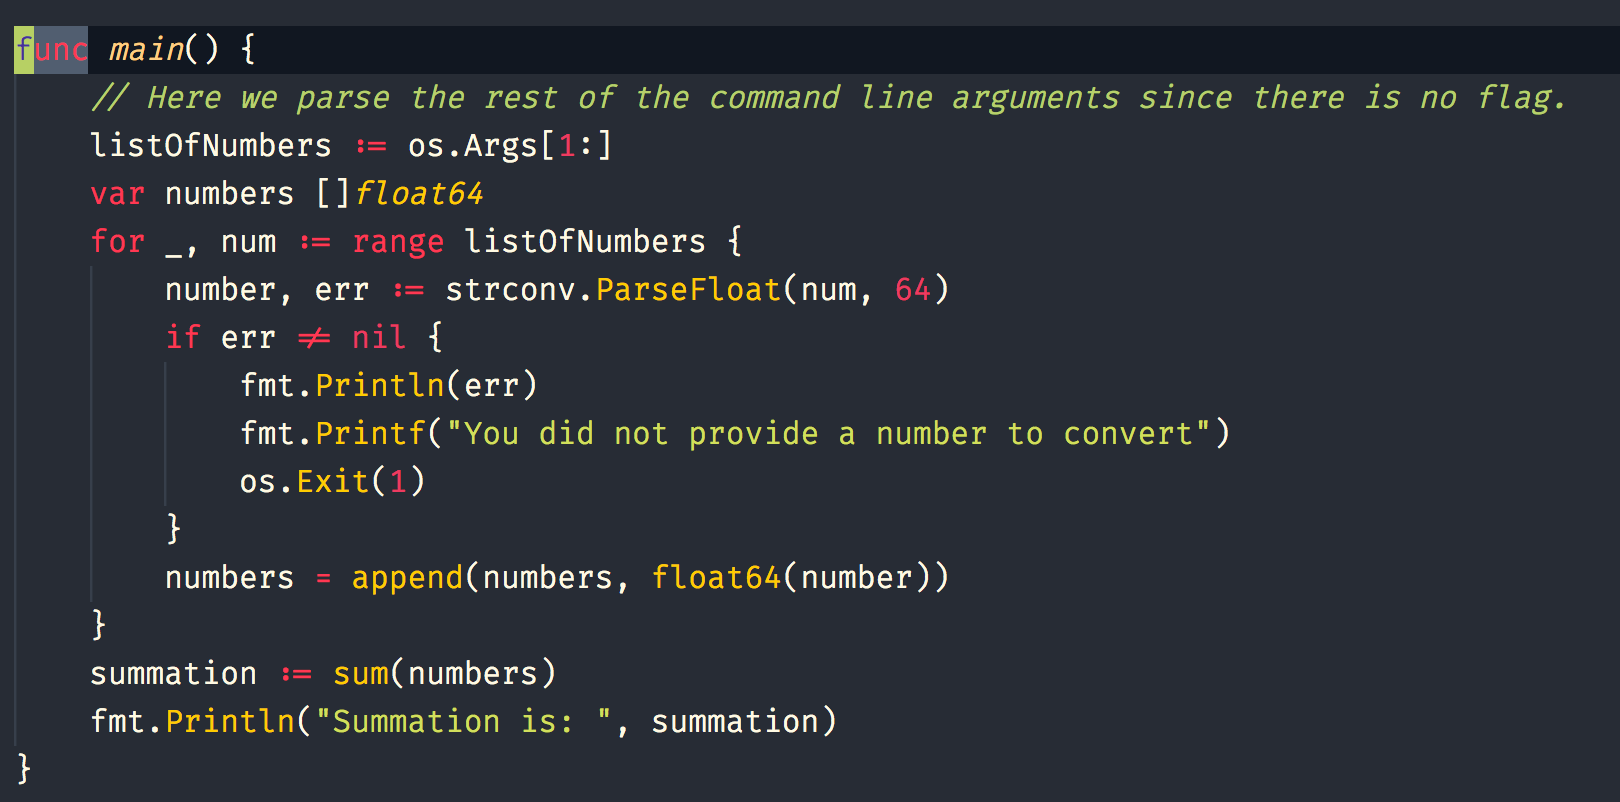
Same summation program in Golang
CLI program that computes sum in Golang
Here is a sum function for the Go Program
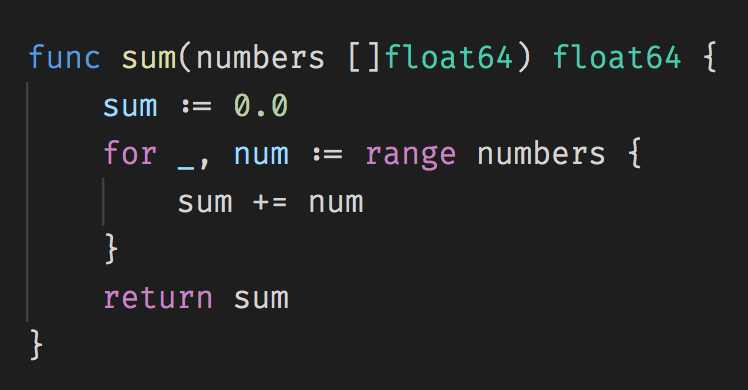
In Go you will typically use a for loop to iterate through collections.
Run sum program in go with this command

Here we pass in our arguments after we run the main.go program

Alternatively you can build your program and then run the binary!
Demo!


Making an HTTP Request
Let us write a Rust Script that makes an HTTP Request
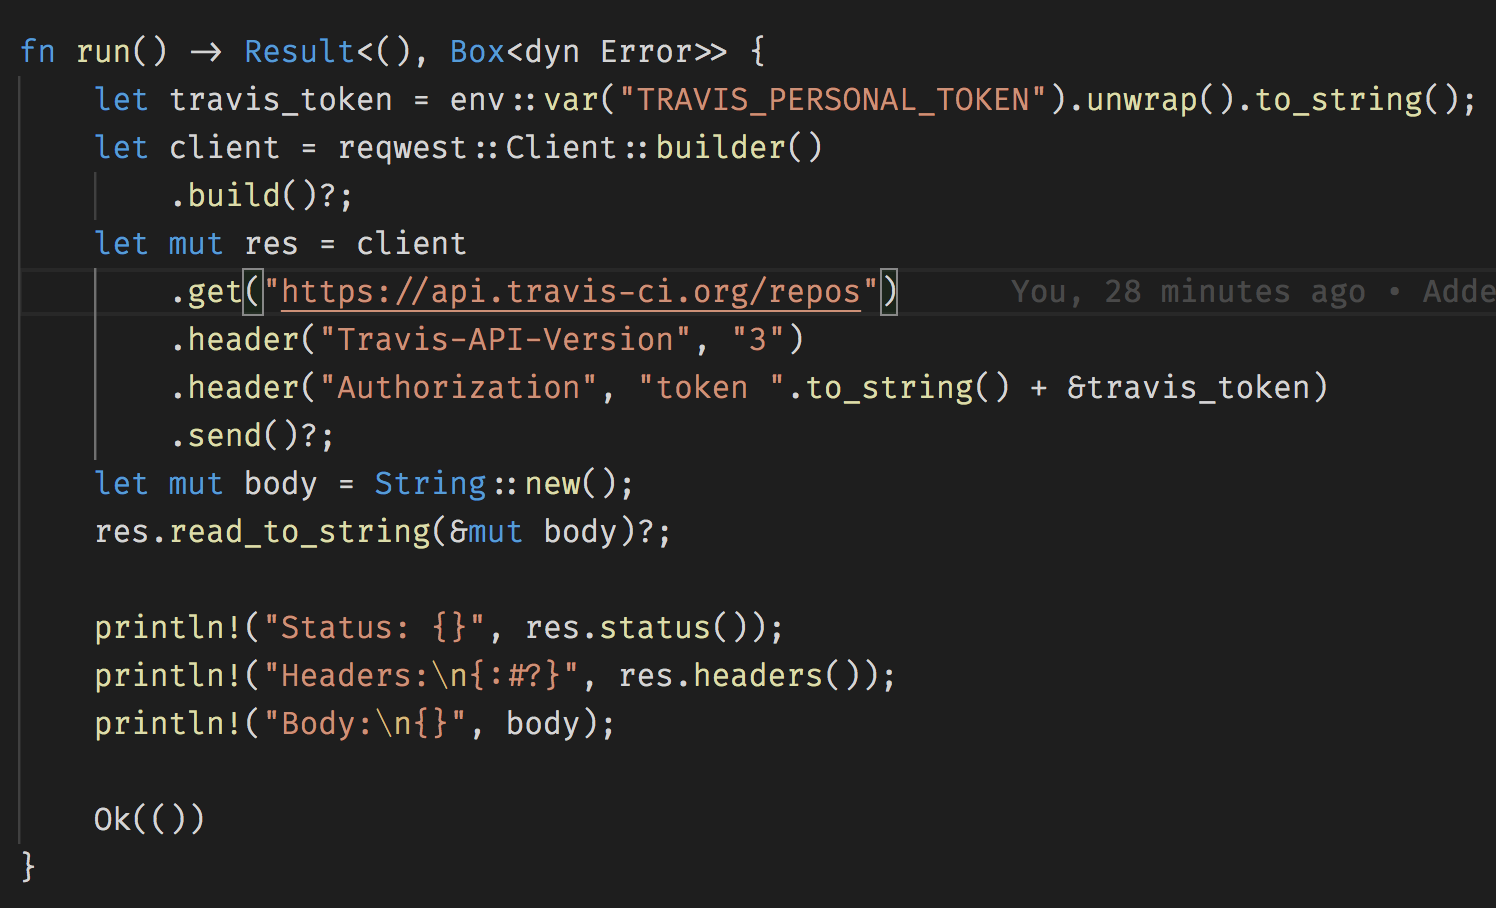
Here we use the reqwest library to make an HTTP request
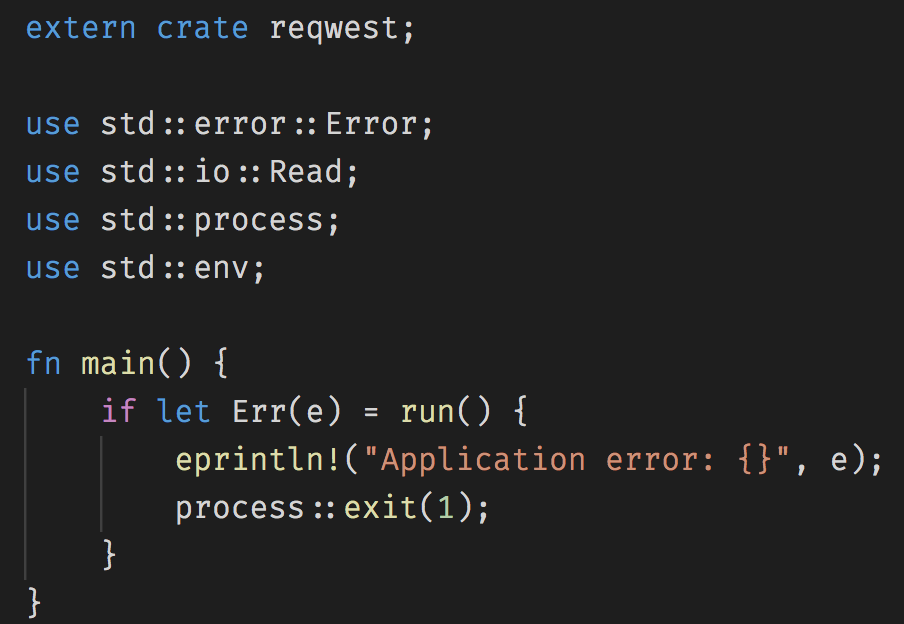
Here is the main program
Here I put a sleep so that I could quickly copy the standard output of this command!
The tee command will spit out standard output and create a file for us in one go.

Demo this script!!

Same Program with Golang

Golang has a standard library that you can use to make http calls!
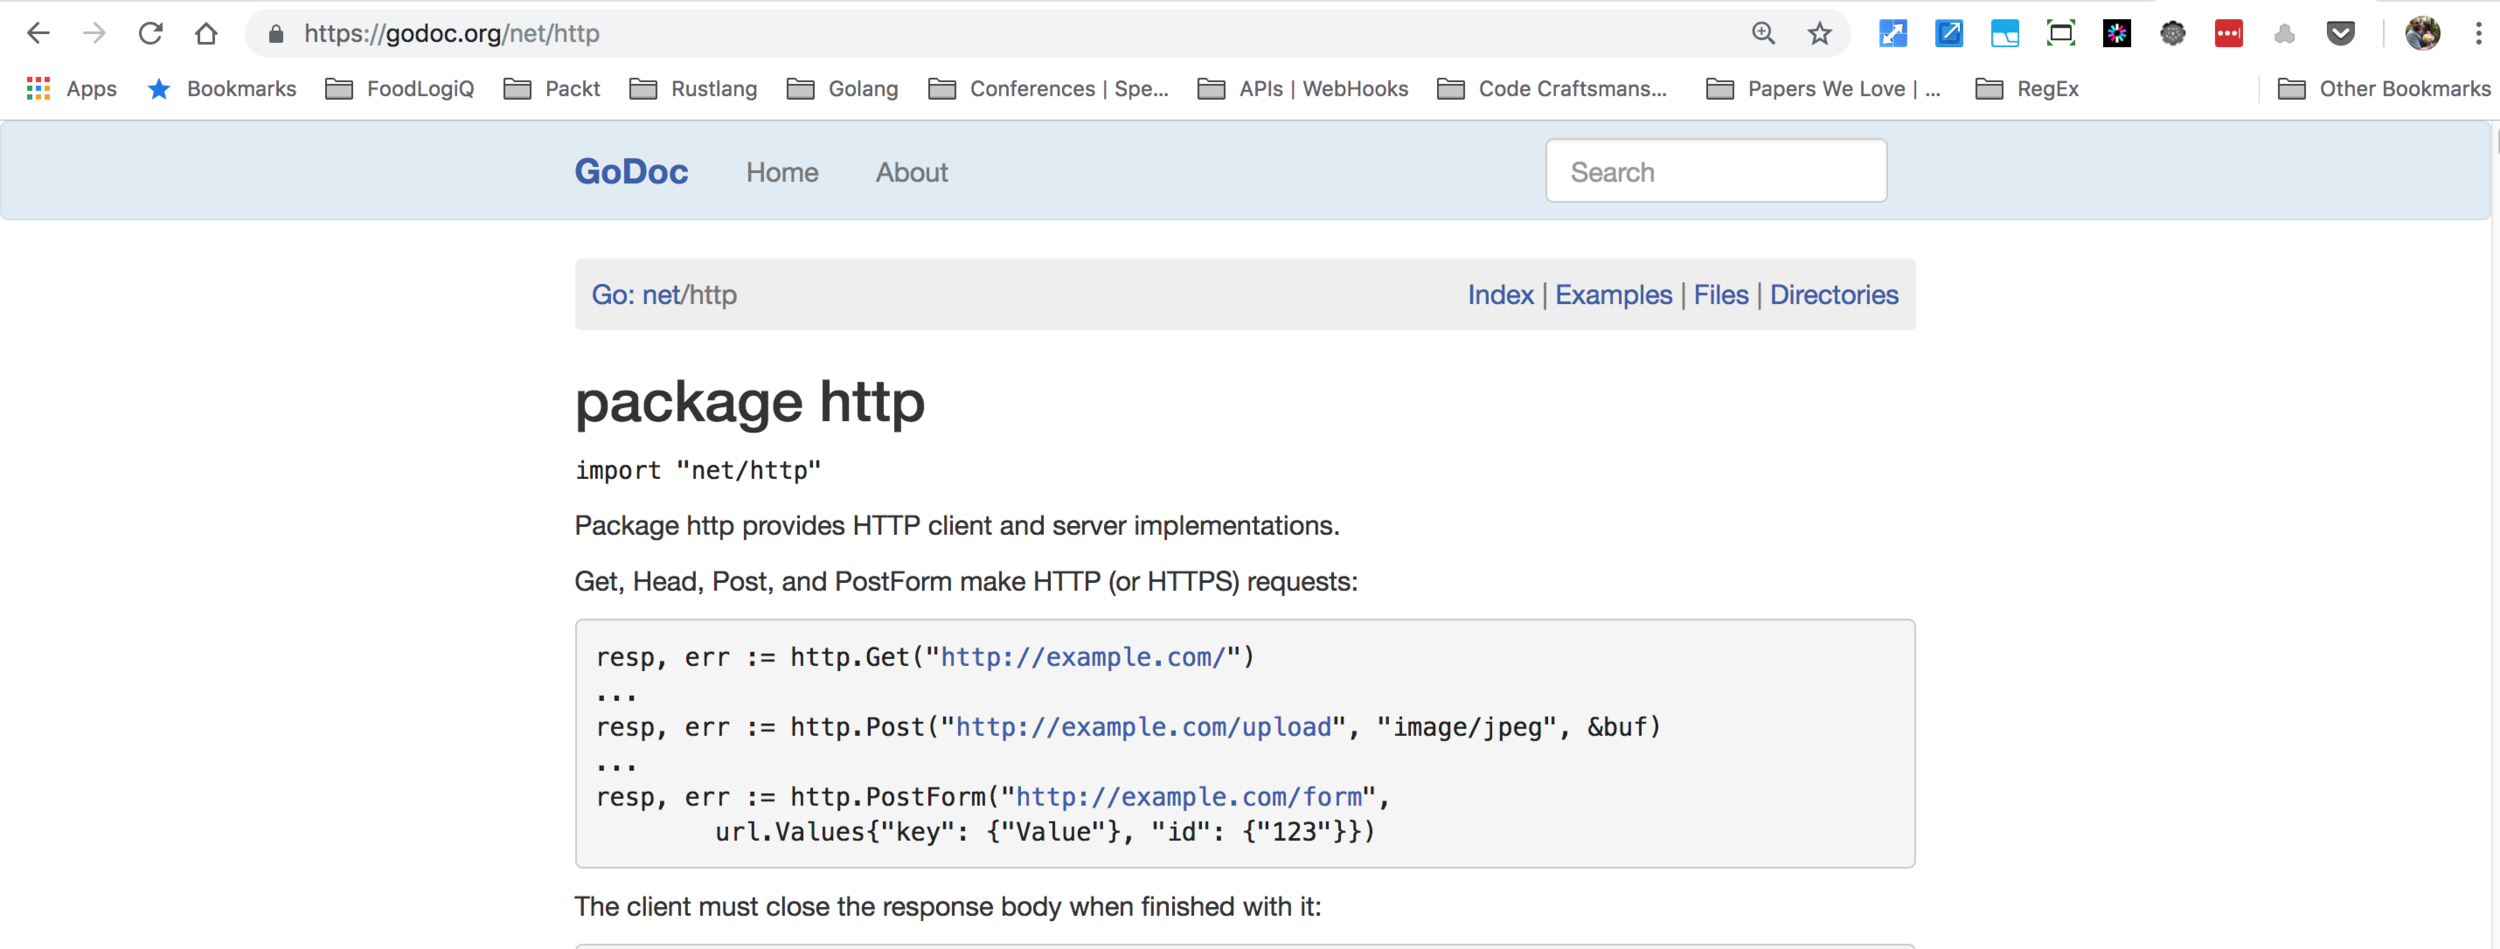
No 3rd Party Libraries needed
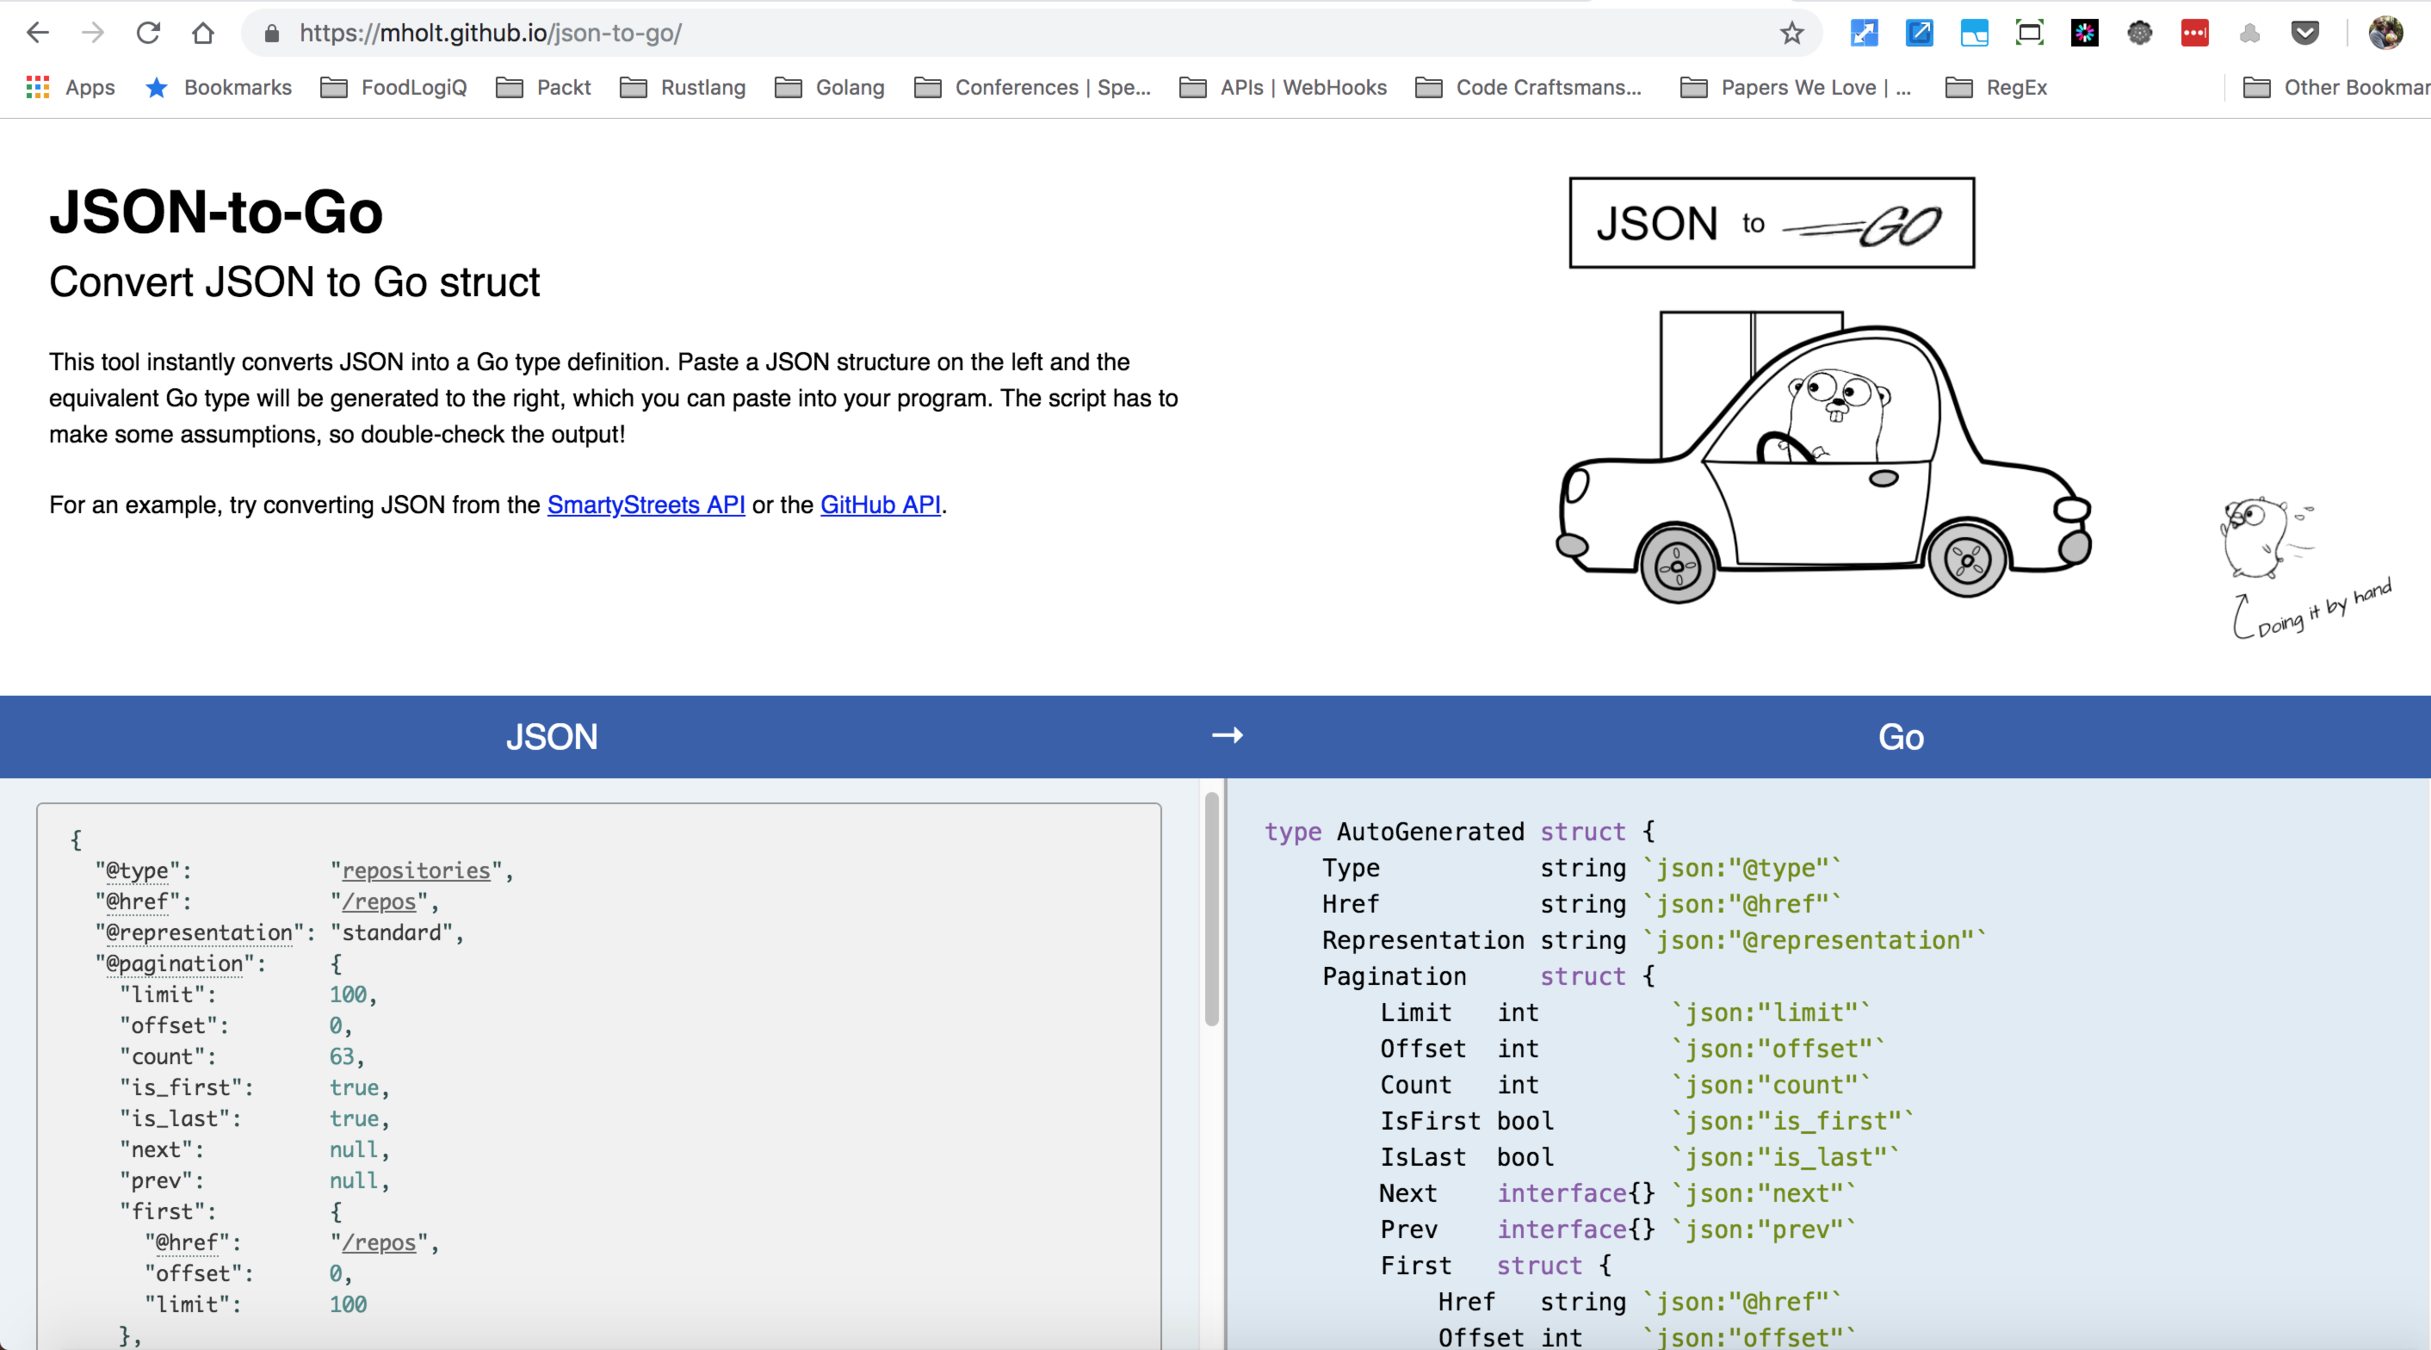
You can use this handy online tool to convert json schemas into Go Structs
Here is the main program that makes an http request to Travis CI API.
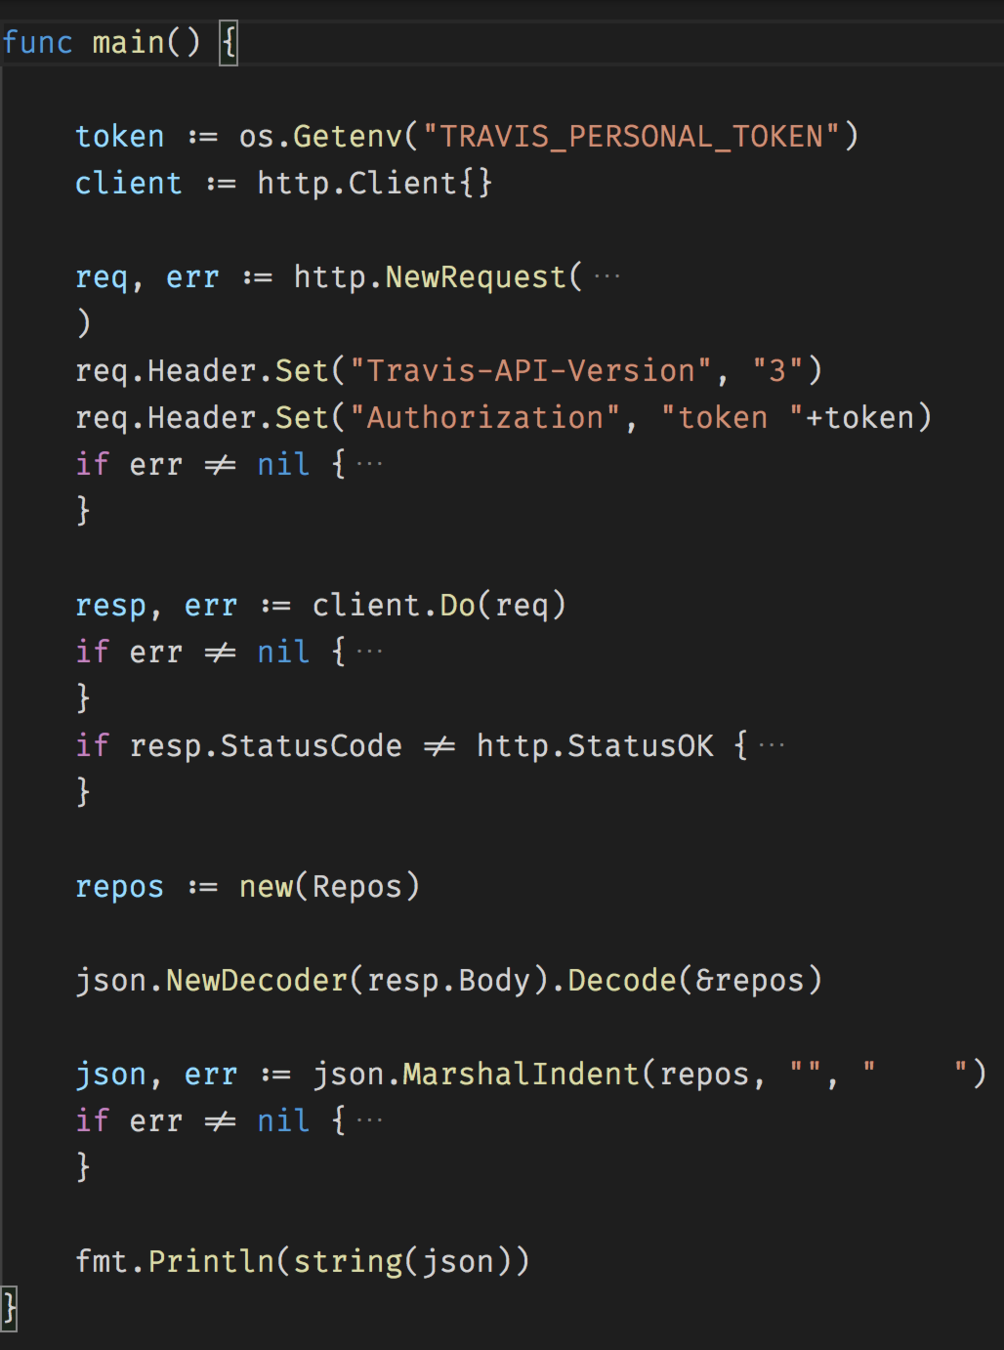
Here is the rest of the program
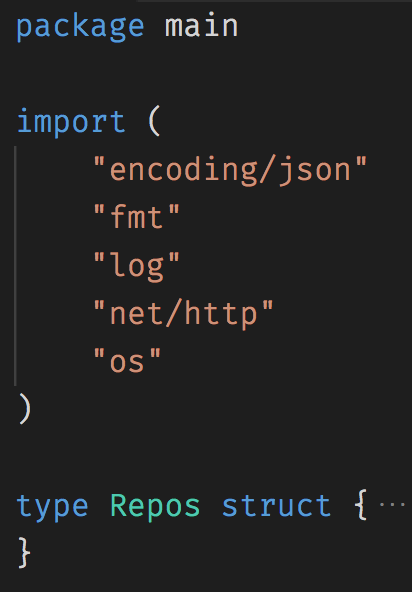
Notice here that I renamed the Autogenerated Name to Repos
Demo Time!!!


Lets Test our Rust CLI programs!!
Changing the structure of the summation program for testing

Here we supply an option of --lib to cargo and it generates a lib.rs
Notice that cargo generated a test for us in a file called lib.rs
We will break apart the 2 summation functions from the main.rs into the lib.rs
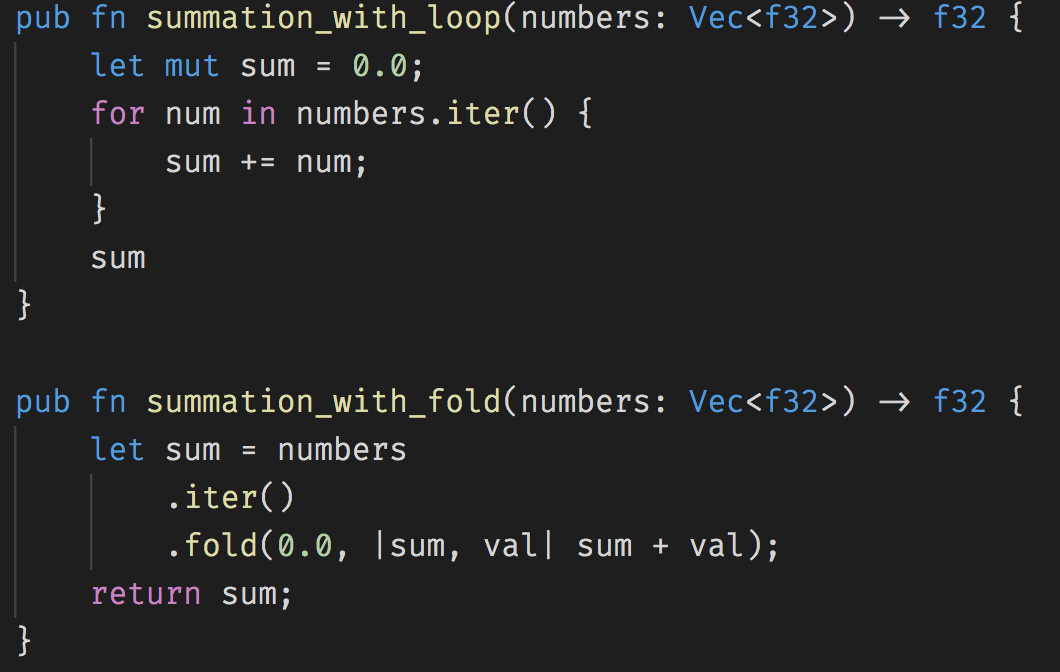
Notice here that we add pub for public visibility
Notice here that we now use our lib as an internal crate!
We call our public method with the crate name now.
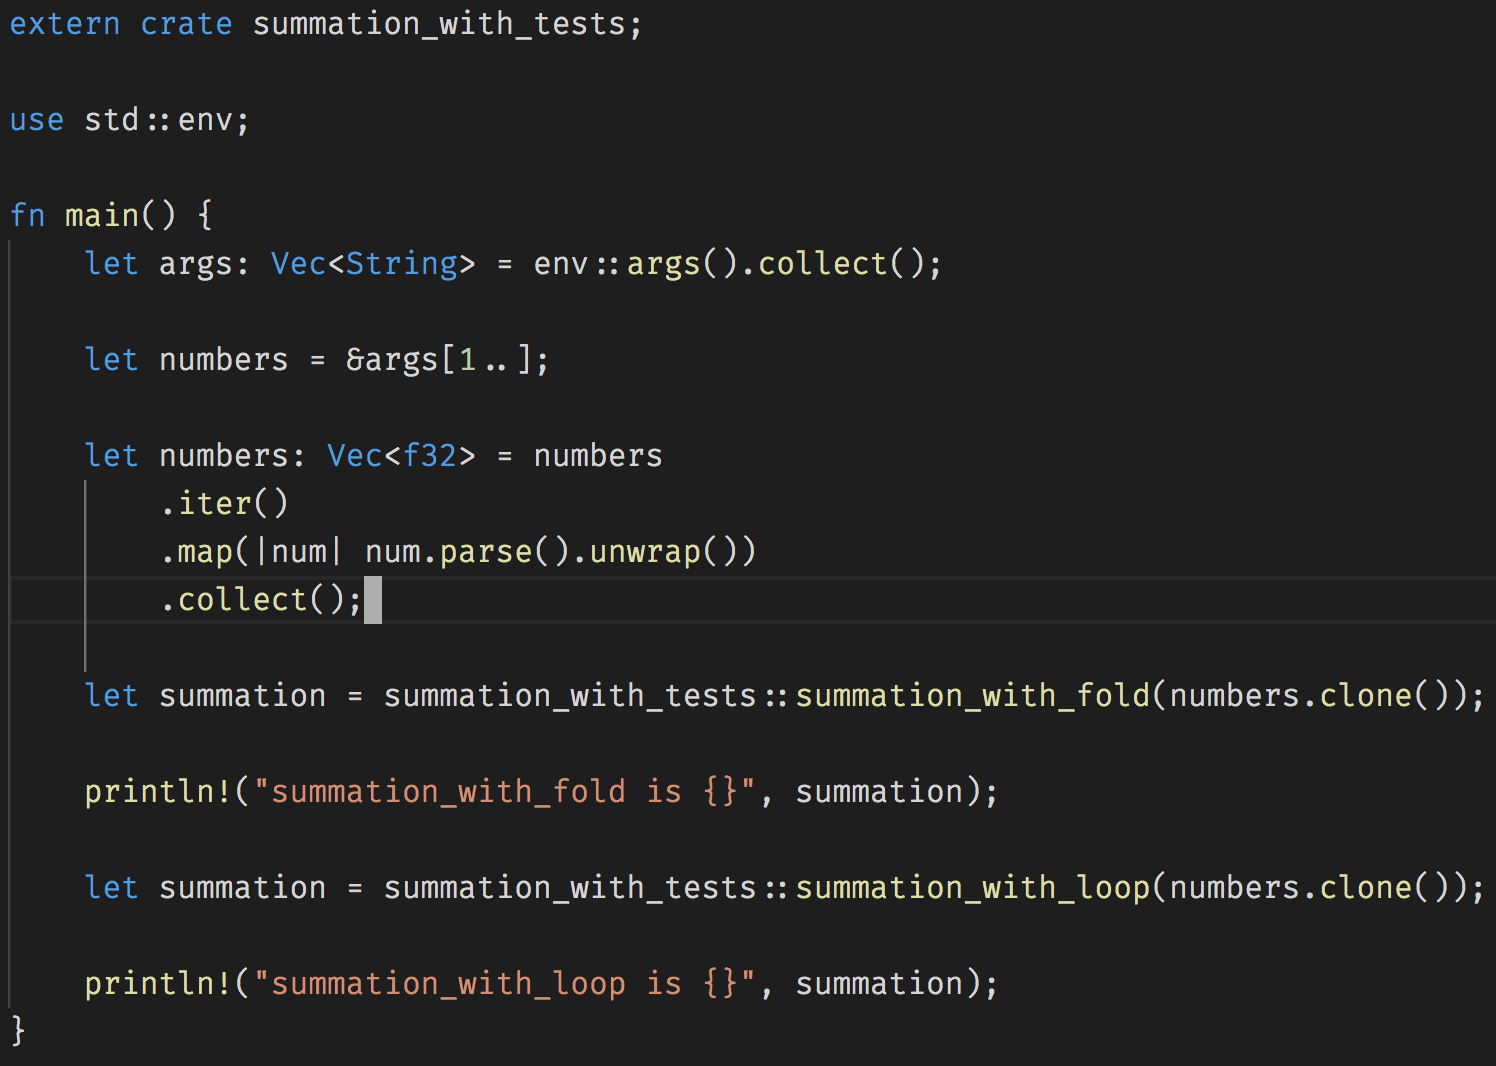
We add the following annotation to create our unit test cases.

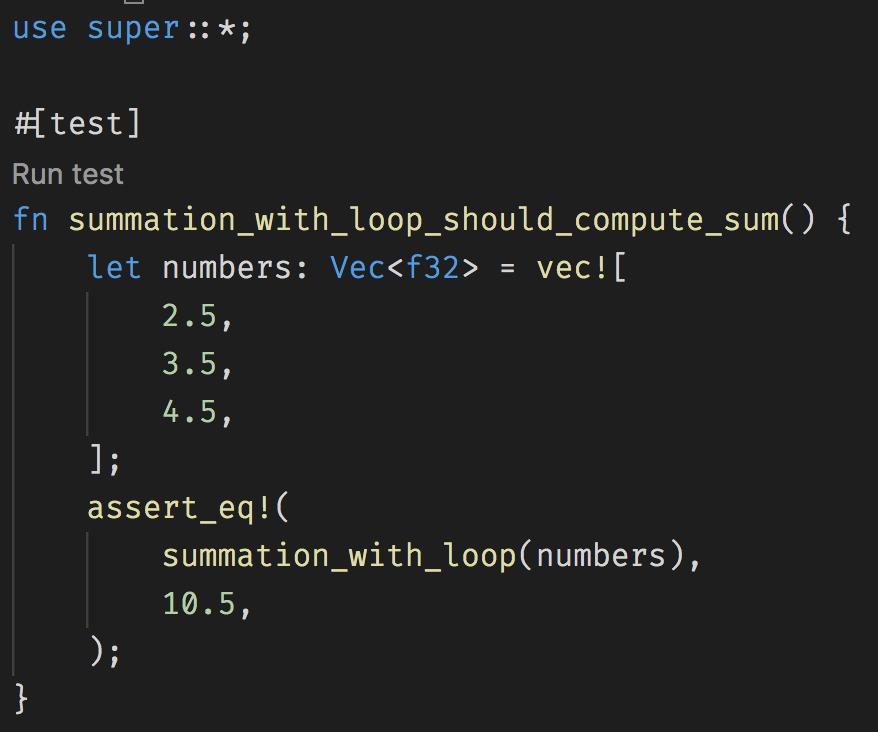
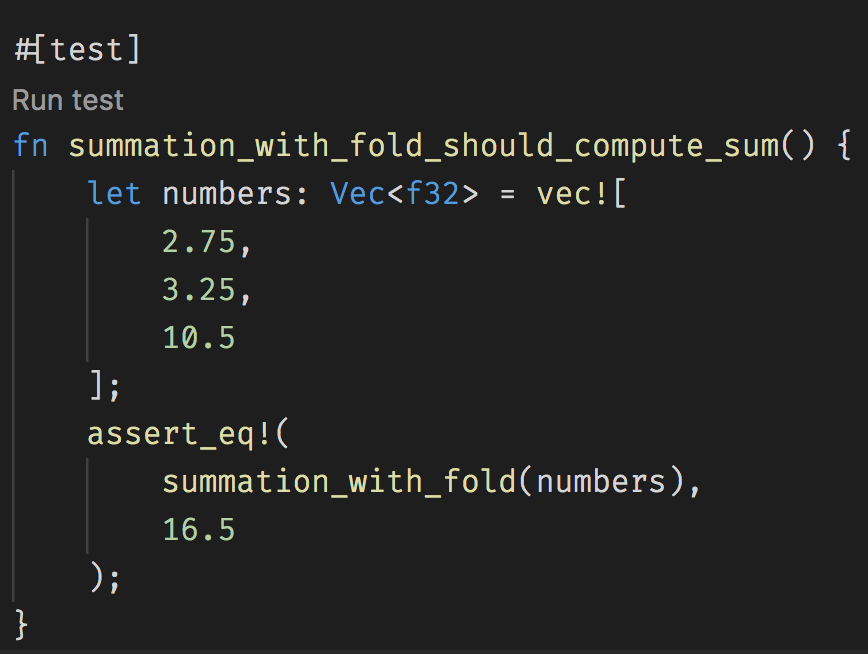
Now we can unit test our cli program by issuing the cargo test command
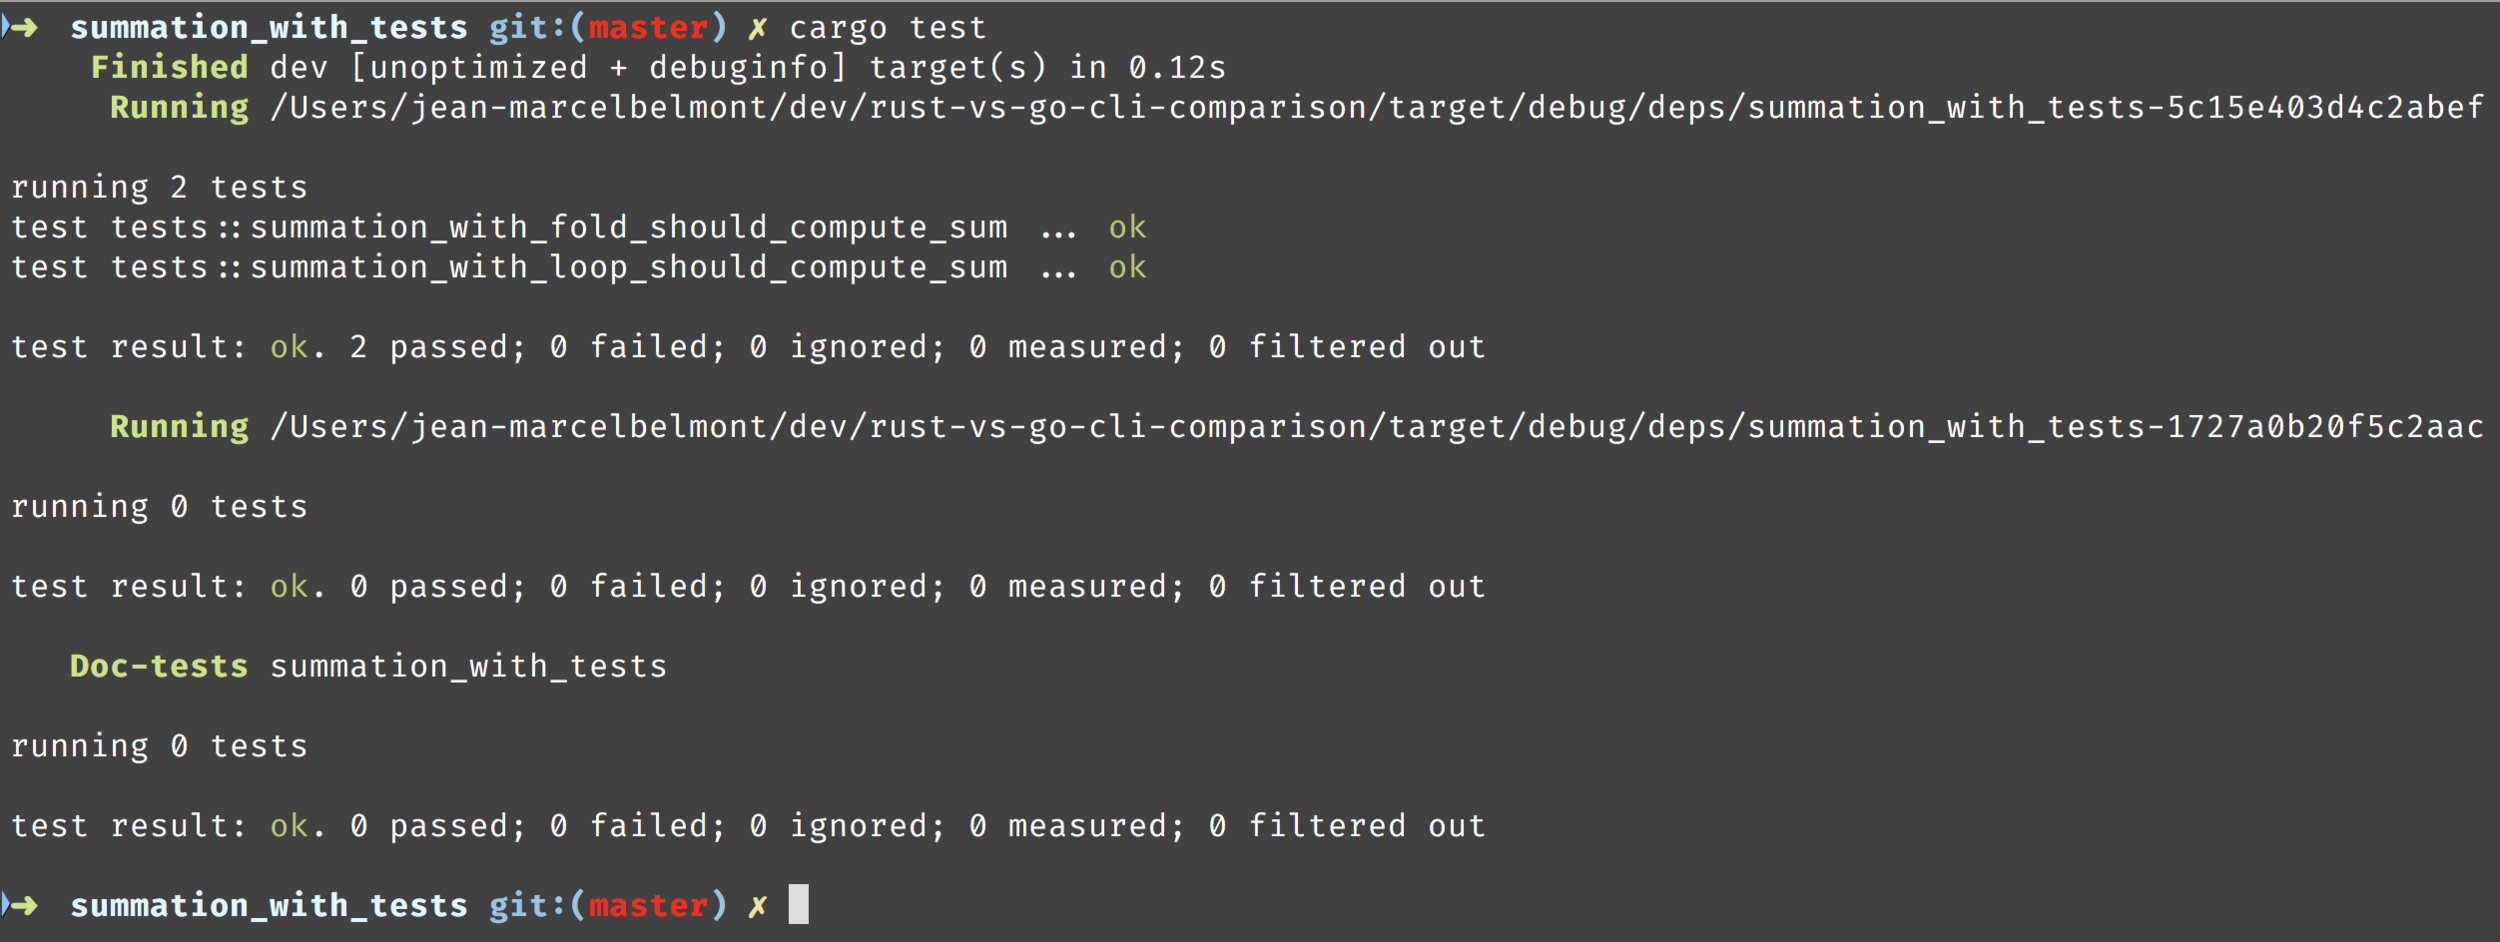
Notice here that both of our unit test cases run when we run cargo test!
Demo Building average cli program!


Testing with Golang
Let us unit test our summer cli program

We simply create a file with _test.go to write tests in Golang
We import the testing package into main_test.go
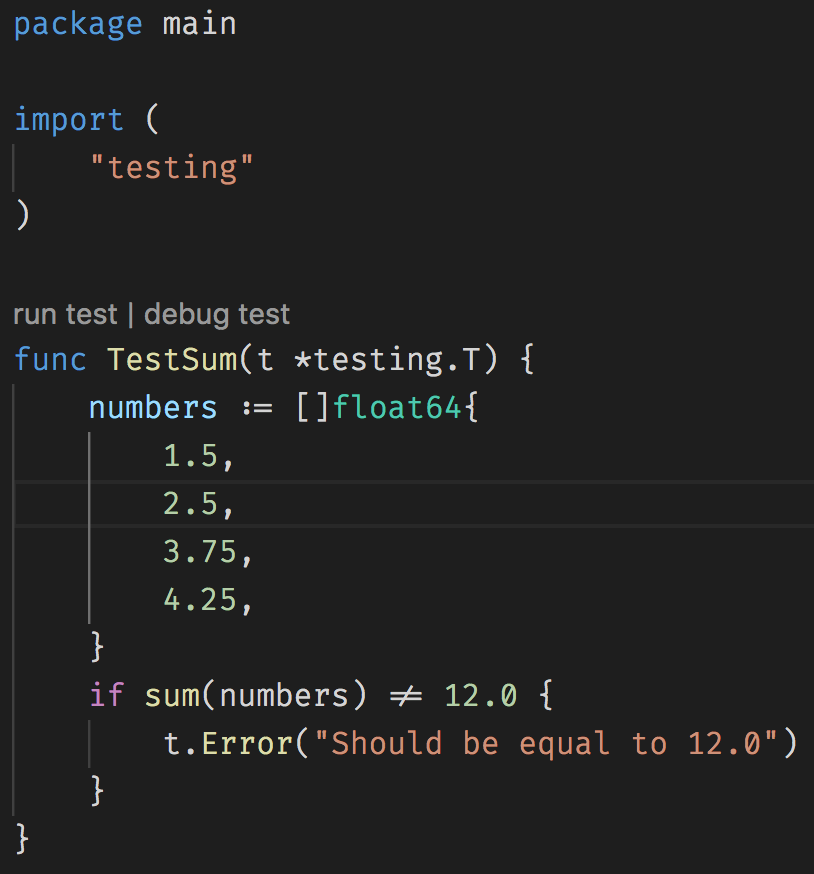
Notice here that we assert numbers should not equal 12.0.
Let us run the Go Test file


Hacking with the Rust clap library
Using Clap to build Robust Clis in Rust

Clap has many features to build robust features
Using Clap to build Robust Clis in Rust
let matches = App::new("Calculator")
        .subcommand(SubCommand::with_name("add")
            .about("Sum some numbers")
            .version("0.1")
            .author("Jean-Marcel Belmont")
            .arg(Arg::with_name("numbers")
                .multiple(true)
                .help("the numbers to add")
                .required(true)))
        .subcommand(SubCommand::with_name("subtract")
            .about("Subtract some numbers")
            .version("0.1")
            .author("Jean-Marcel Belmont")
            .arg(Arg::with_name("numbers")
                .multiple(true)
                .help("the numbers to subtract")
                .index(1)
                .required(true)))
Here we use subcommands to build a calculator cli application
Here we run the binary executable to run our simple calculator cli application
Notice that each subcommand performs a different calculation.

Also notice that we are using the binary executable here.
It is created upon successful `cargo run` and/or `cargo build`.
Demo!!!

Let us look at the cobra

No not the movie Cobra with Slyvester Stallone!
Let us look at the Golang CLI Library.
Here we create a cli application with cobra init command!
We then create a symbolic link to it in this directory

Here we initialize a cobra yaml file for common info!

Now we finally create our main calculator logic.

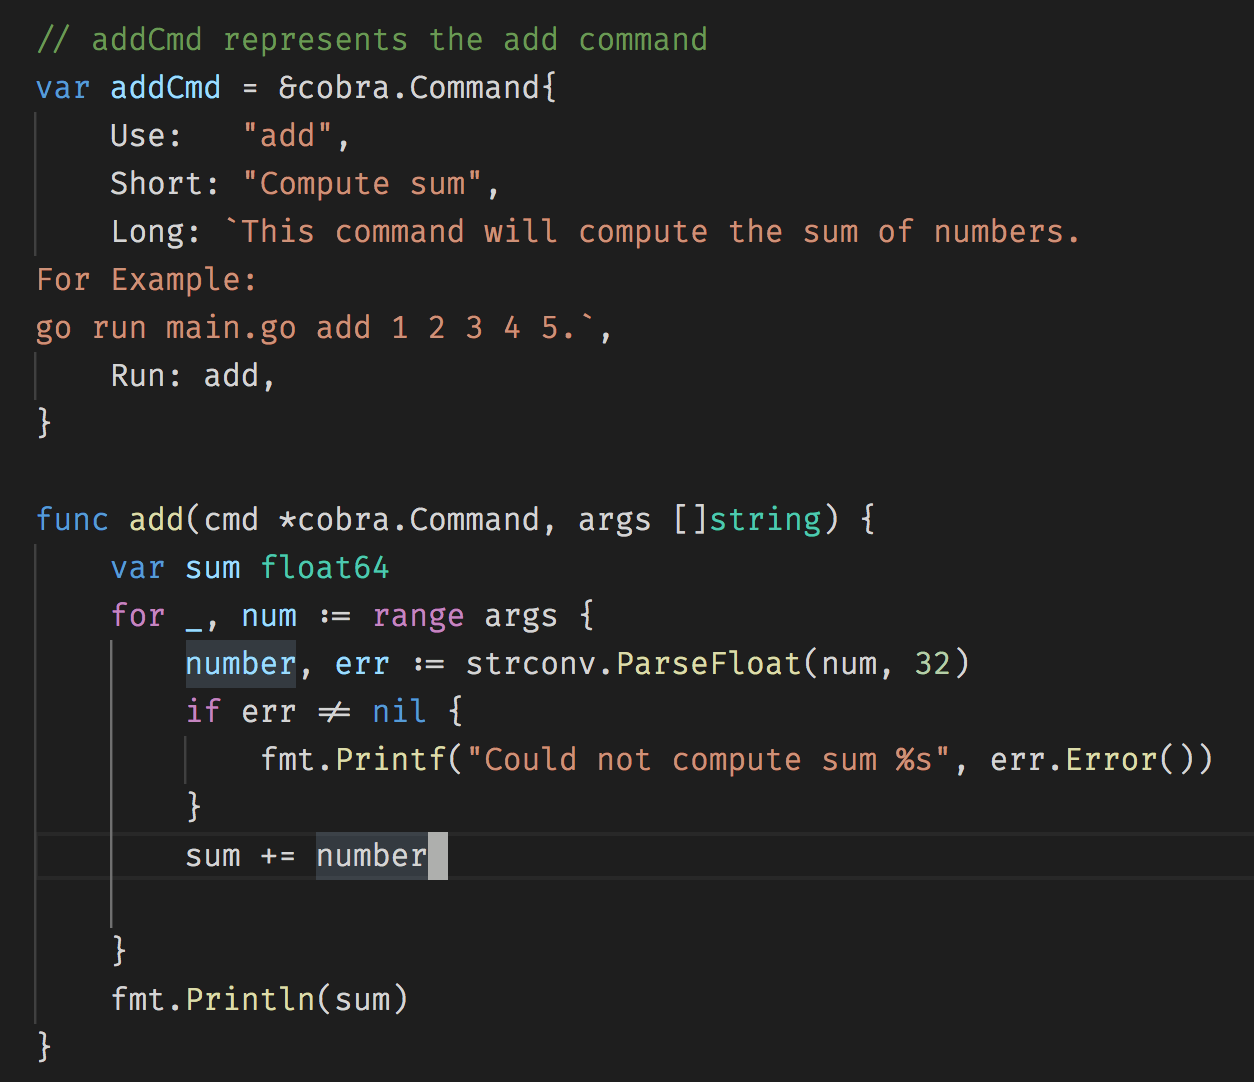
Here is bulk of the logic for add, subtract, multiply, and divide
We have a cobra.Command and supply our function to run!

The first command runs the add subcommand.
The second command builds the binary executable.
The third command runs the binary executable and runs the subtract subcommand.
Each command afterwards is demonstrating the other subcommands in the calculator program.
Demo!!!


Let's Check off parsing, serialization, and deserialization of our Rust Bucket List Next
Data Serialization, Deserialization and Parsing in Rust CLIs
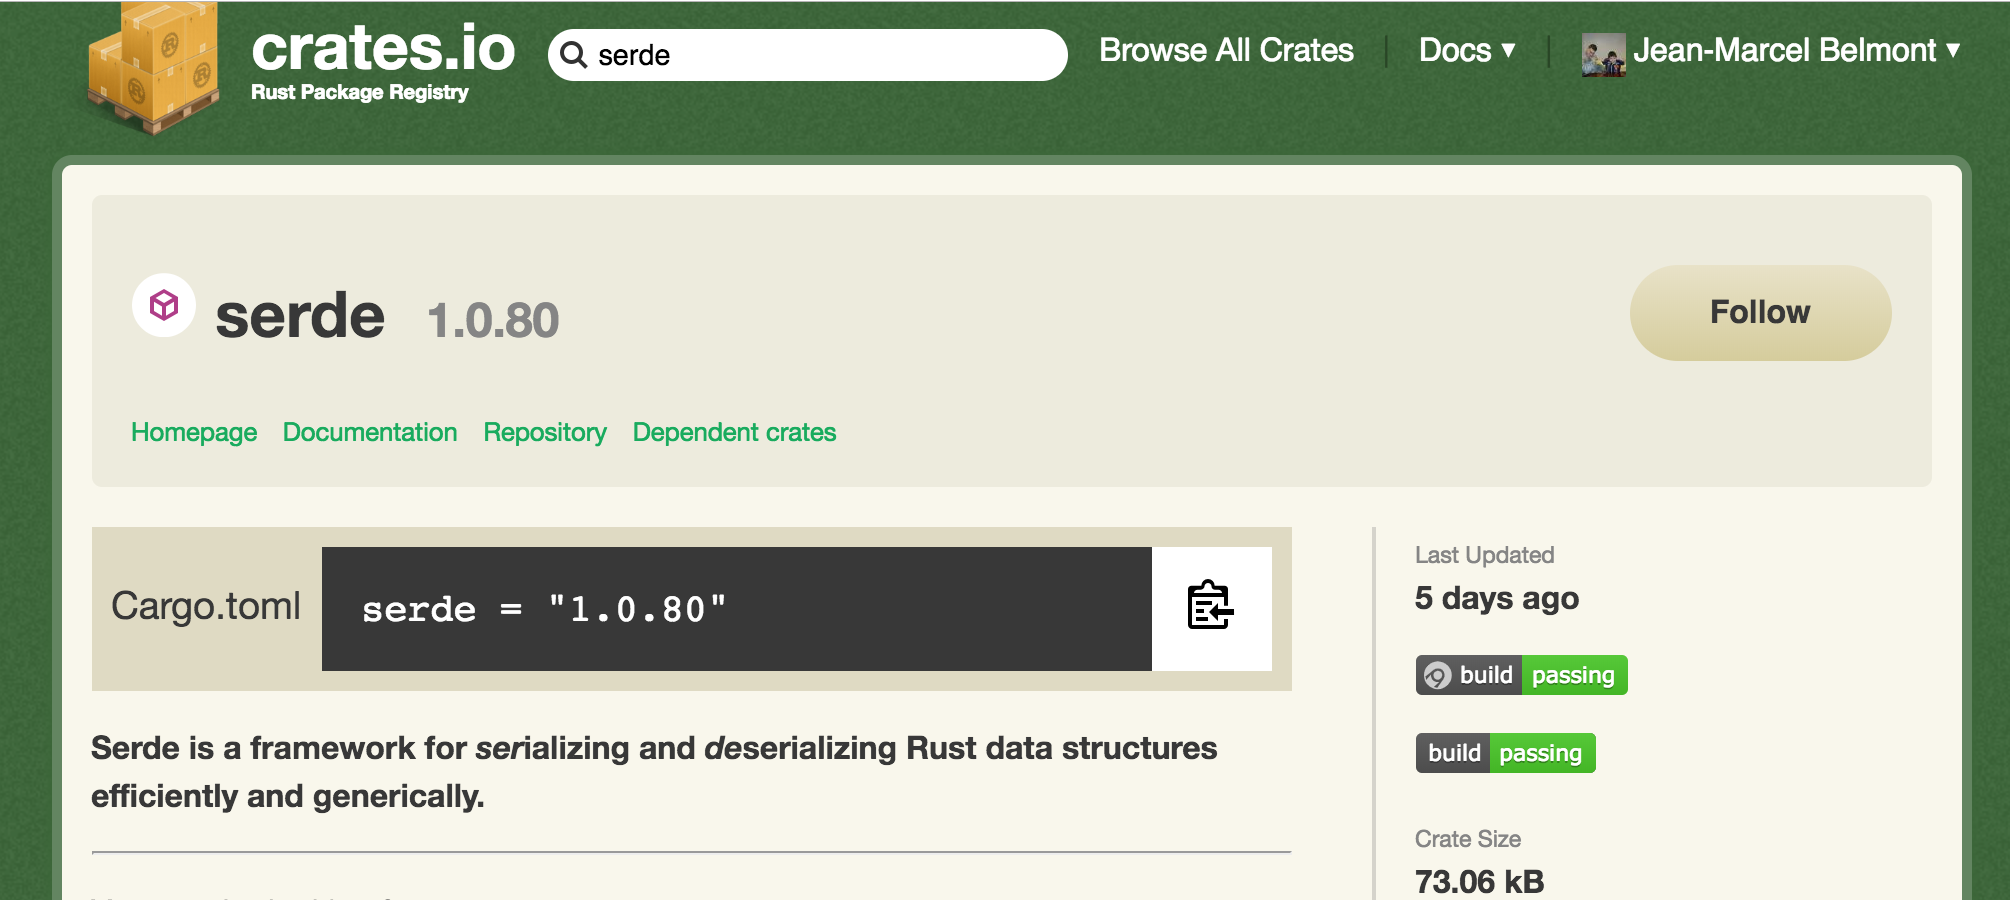
The serde crate
The serde book

We will write a command line application in Rust.
It will base64 decode a json web token to standard output
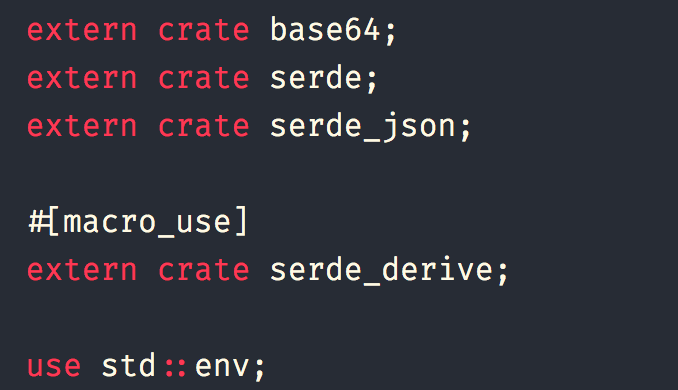
Use statements
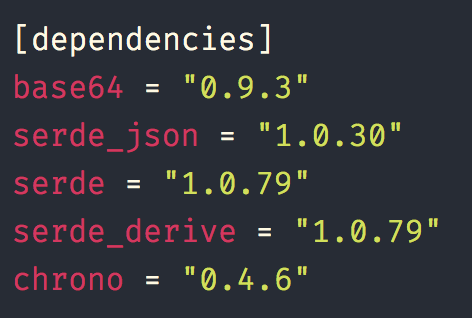
Library Dependencies
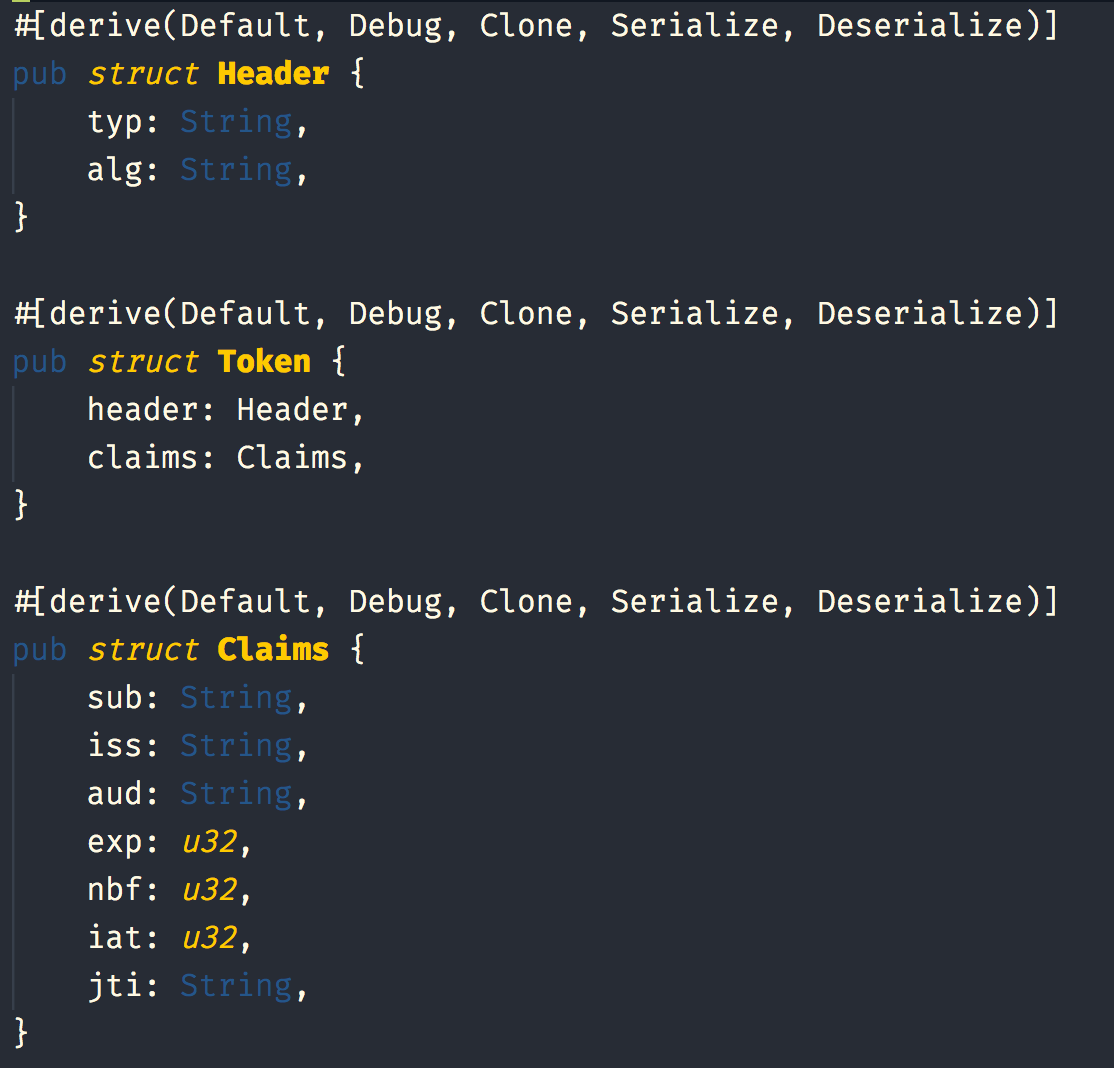
Here are 3 Structs and notice that the Token struct has both the Header and Claims struct embedded in it.
The new methods for the Claims and Headers structs instantiate a new Claims and Header instance.
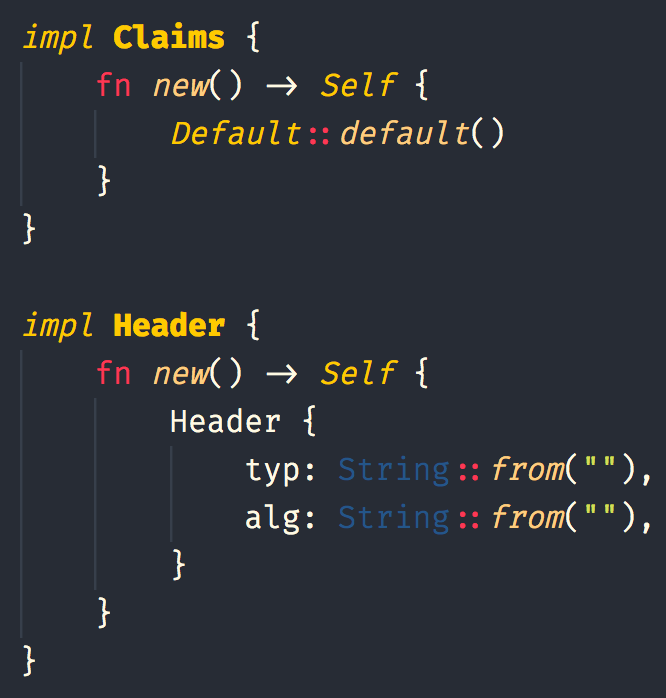
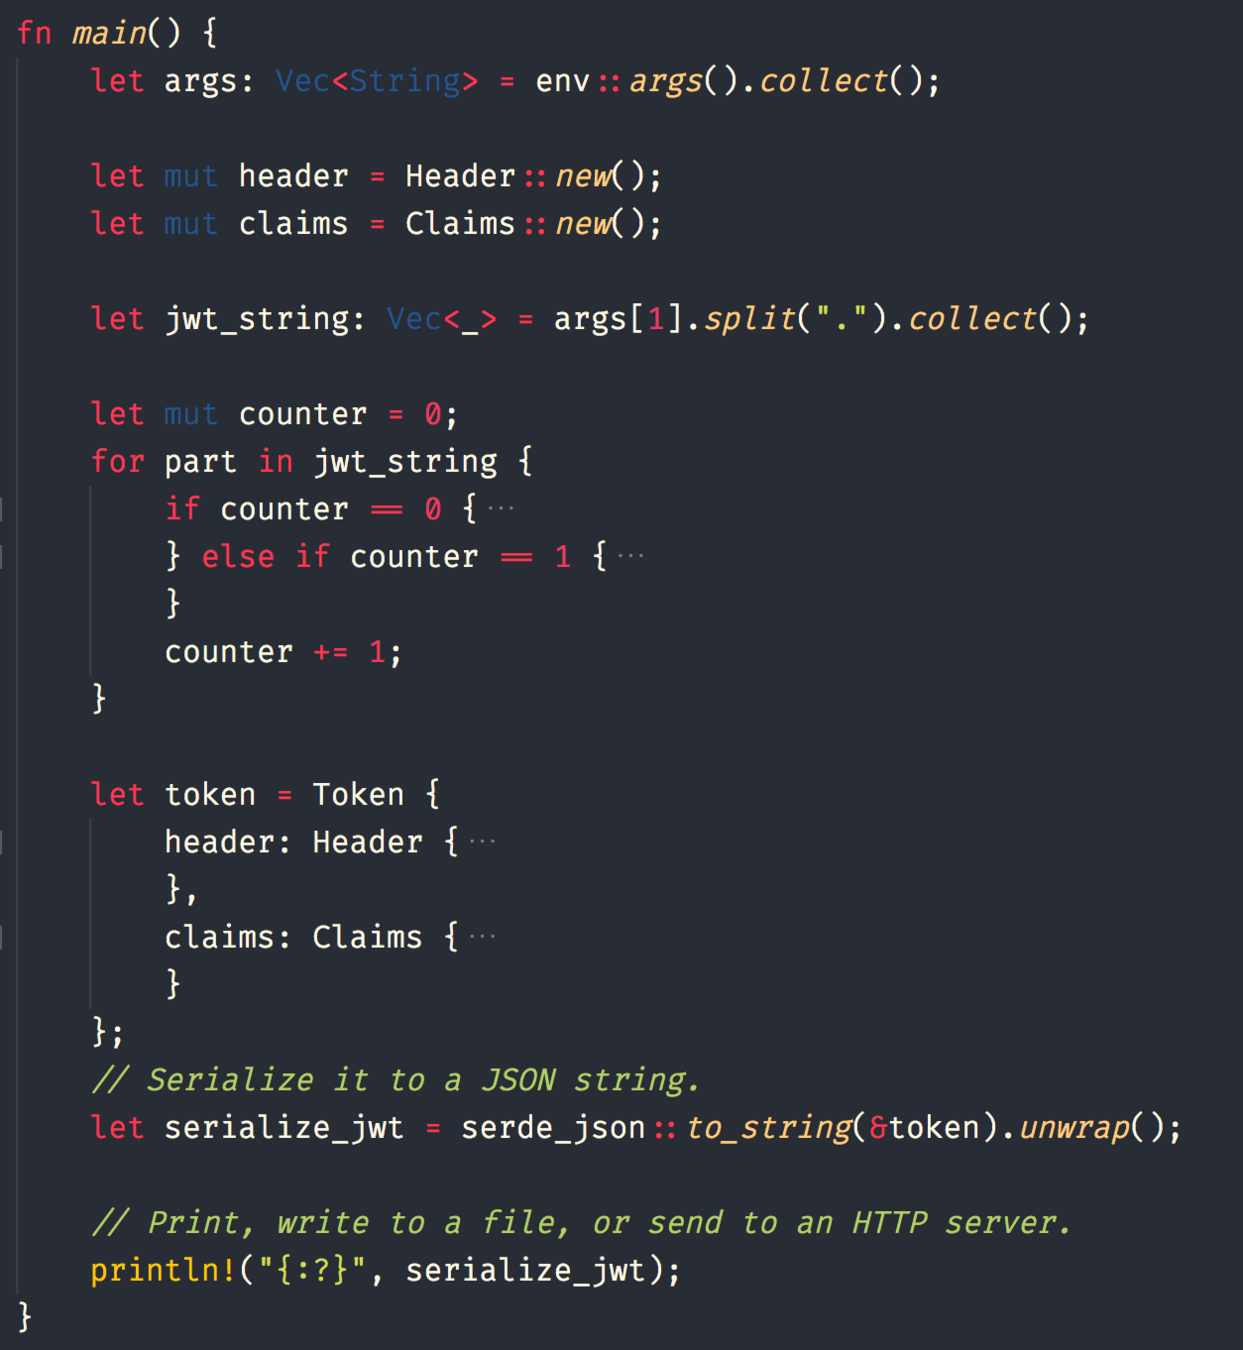
Here is the main program.
Demo!!!

Having some ascii fun now in the command line

Having some ascii fun now in the command line

This C program generates ascii characters to standard output.
./ascii_table | sed "s;.;\'&\'\,;g" | pbcopyThis shell command replaces the output with double quotes and a comma and copies standard output to system clipboard

The main rust program just prints some ascii characters to standard output for fun!!

Time to shred some web scraping waves!!
Here are our dependencies for the Web Scraping project:
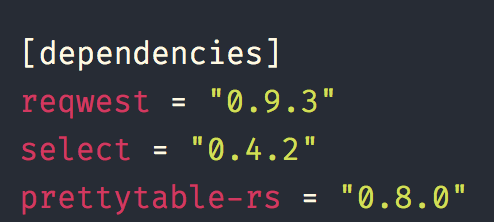
Here is our use and crate statements:
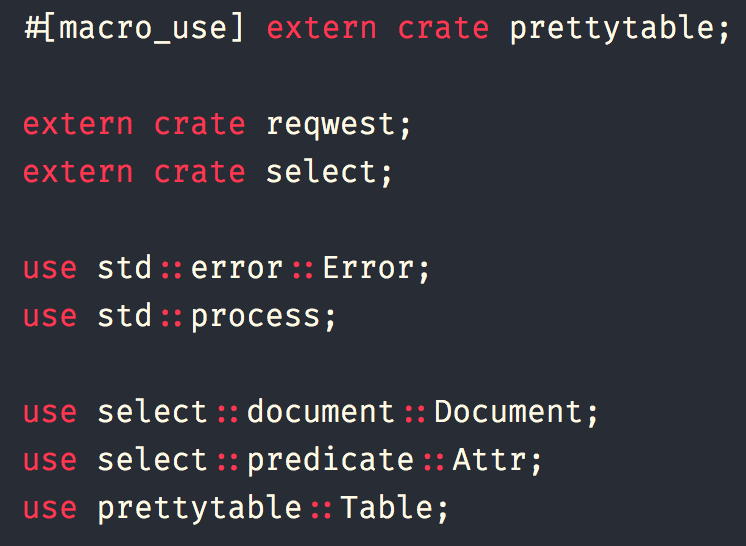
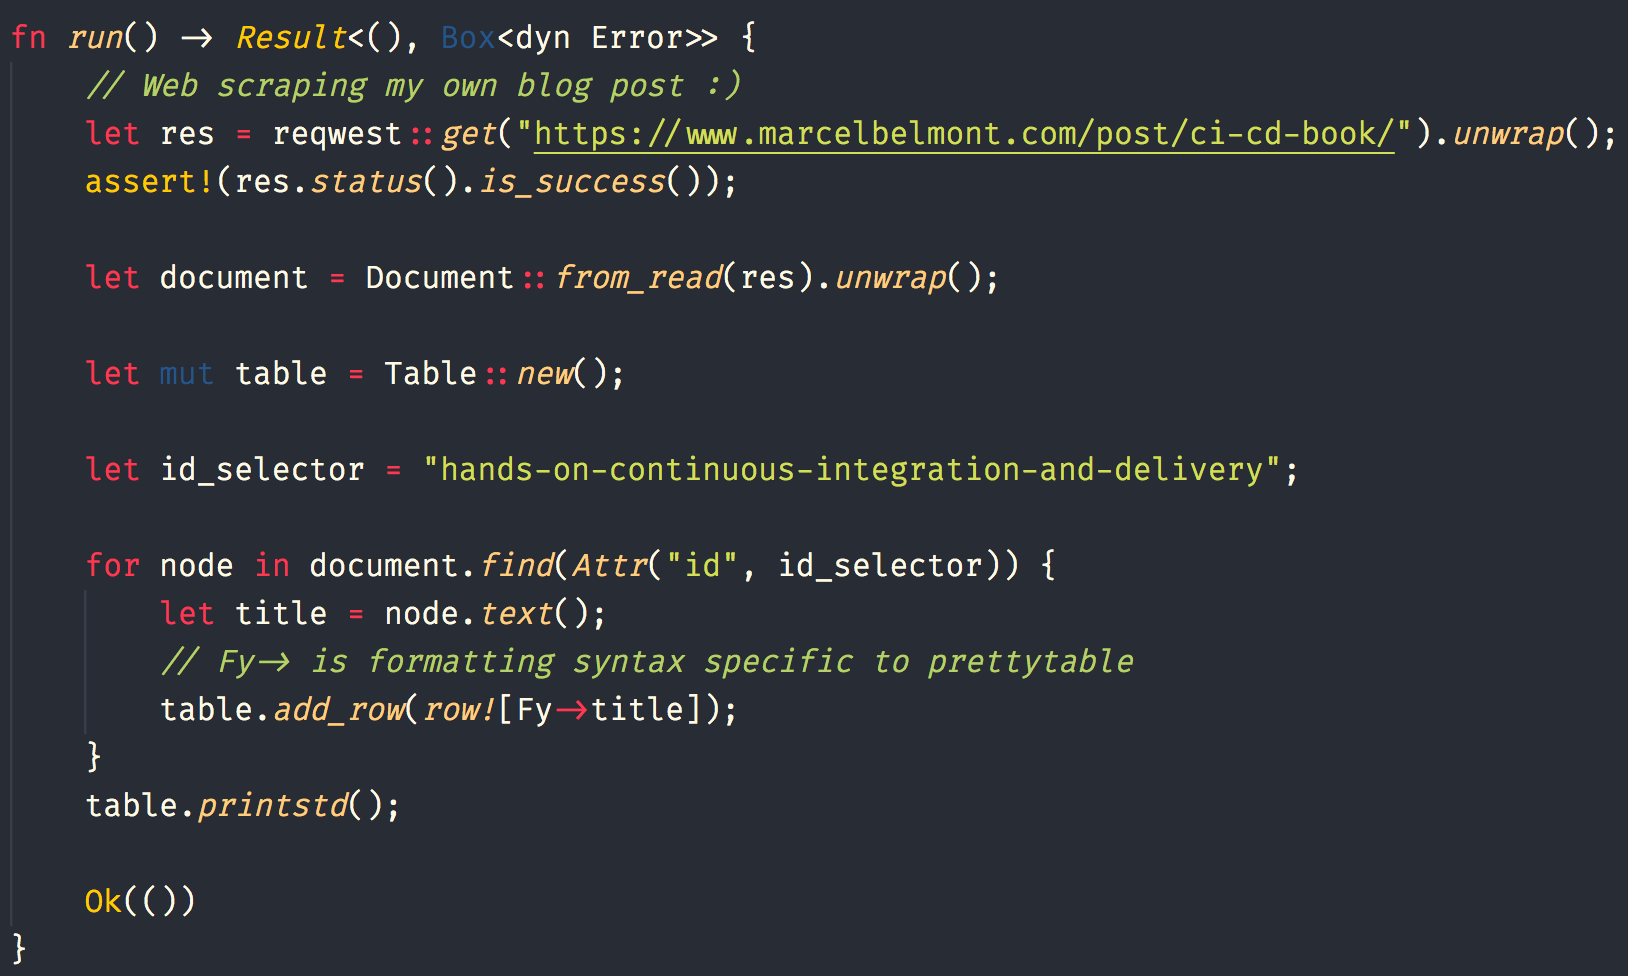
Here is the main logic for the Web Scraping Project
Here is the main function:

Notice that we ran the run() function and wrap it in a `if let` statement which will print error and exit if there is an error.
Demo!!

Debugging Rust Applications

Printing values with println! macro in Rust
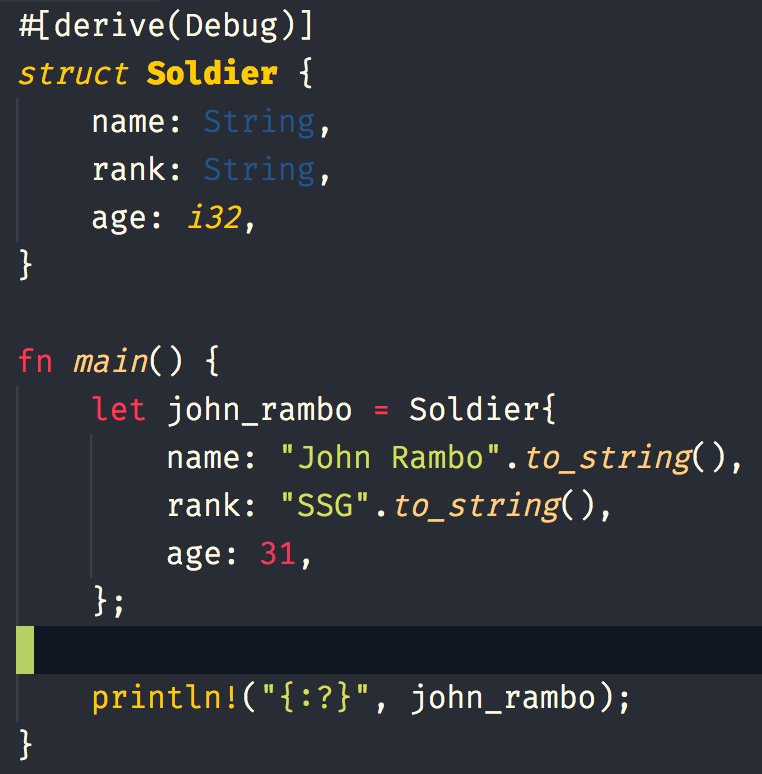
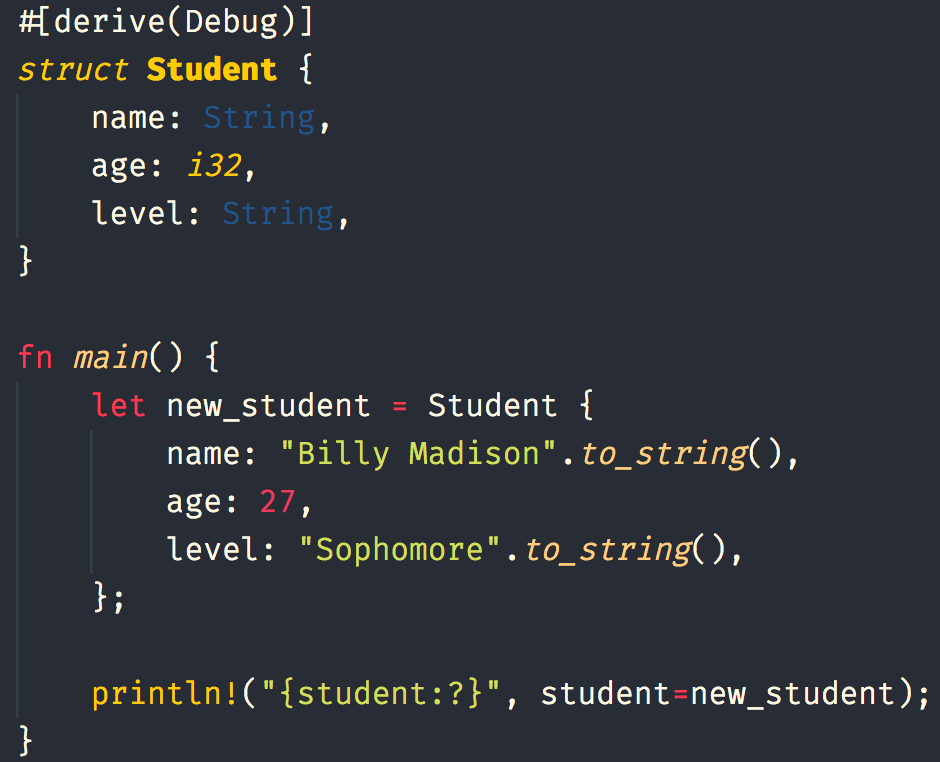
Printing with named value
Pretty Print with println("{:#?}", something);

Debugging Rust applications with rust-lldb.
There are 2 debuggers that come prebundled with cargo:
If you are working on Mac OS X it is easier to use rust-lldb
You can use gdb in Mac OS X but it requires extra steps:
First install gdb, easiest way is via homebrew package manager
Next you will need to codesign gdb, if you are interested follow the steps in this CODESIGN-GIST
For the purposes of this demo we will use rust-lldb

Here we start rust-lldb using the compiled binary executable

Notice here that we run the main.rs file by issuing the command run
Let us set a breakpoint in lldb

This is the short form version of setting a breakpoint

This is the longer but more powerful way to set breakpoint
Let us run our program with breakpoint set

Notice here that lldb stopped in line 6 which is our breakpoint!
We issued command "frame variable args" to see variable
Note that the commands for printing: p (simple types), po (objects), and pa (arrays) don't work as well with Rust.
The frame command is used to examine current stack frame and has various subcommands such as variable which work better!
Step over with lldb

Resume/Continue execution of program
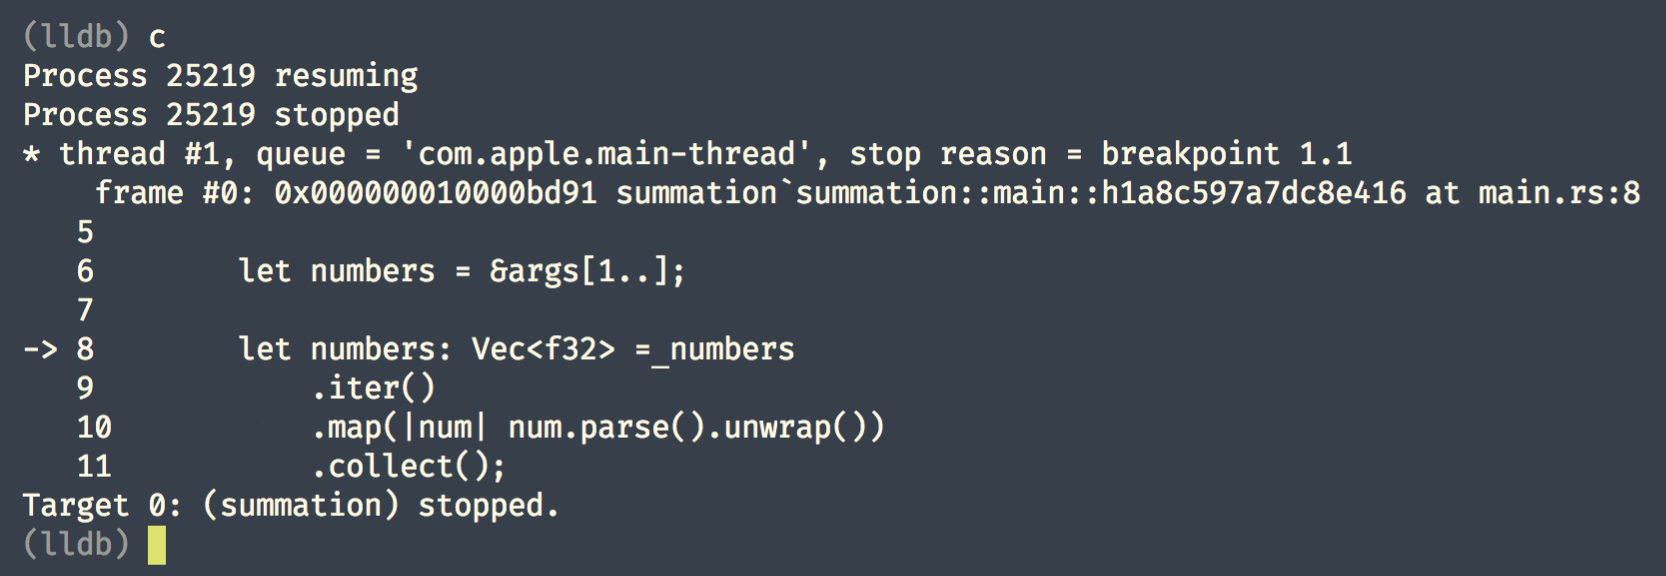
Notice here that we continued until the next breakpoint!
List breakpoints

Delete all breakpoints

Delete specific breakpoint(s)

First do Instruction level single step, stepping over calls

Next actually step into function


Next let us step over and then print value of variable
Step out of the function
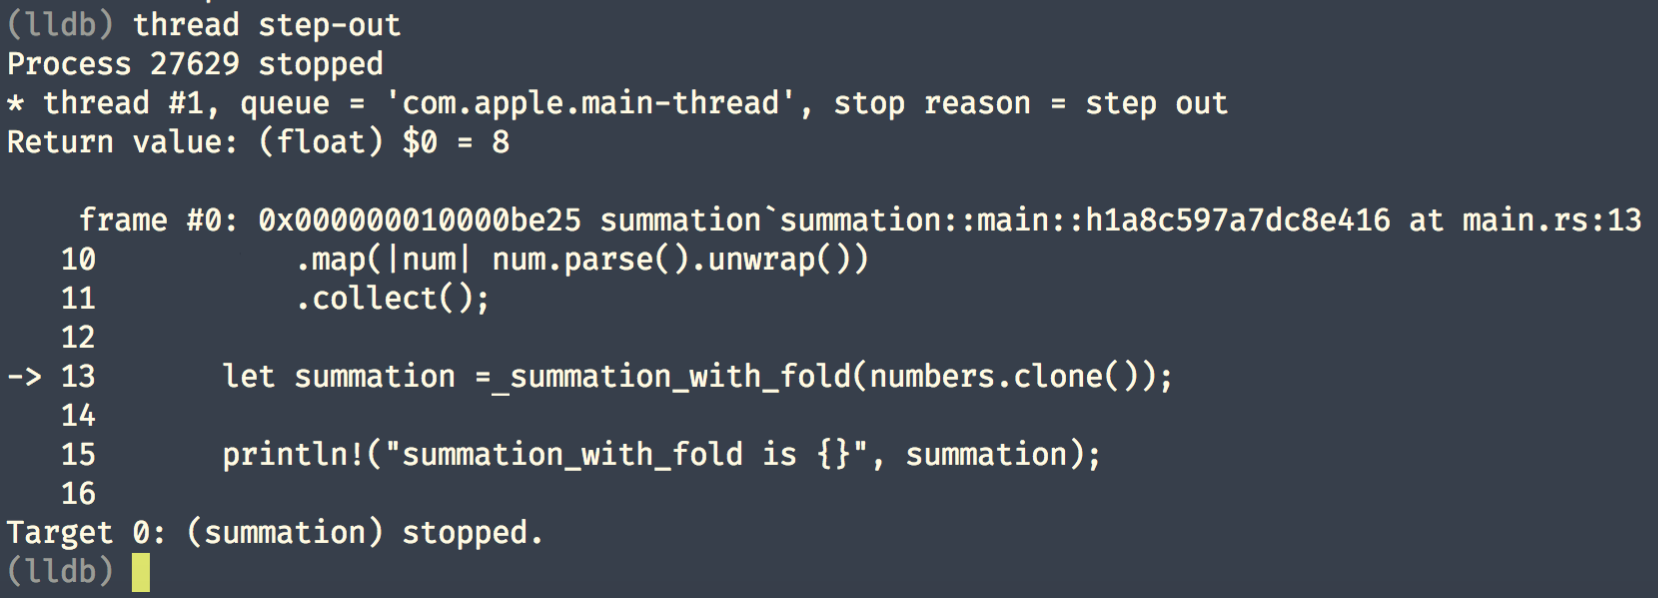
Get stack frame information and continue execution

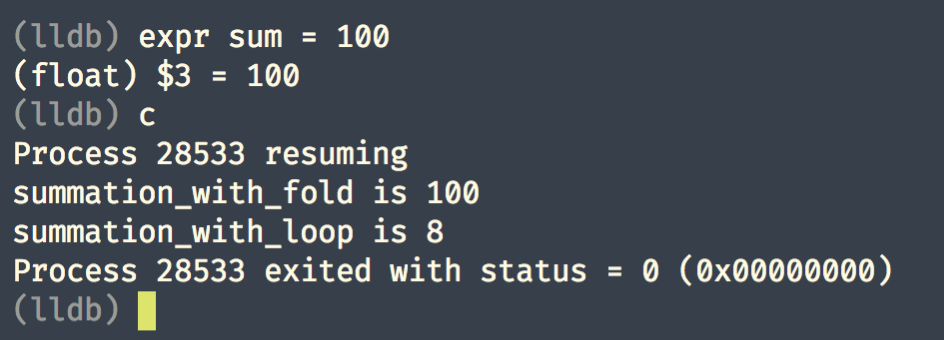
Use expression to set values in running program
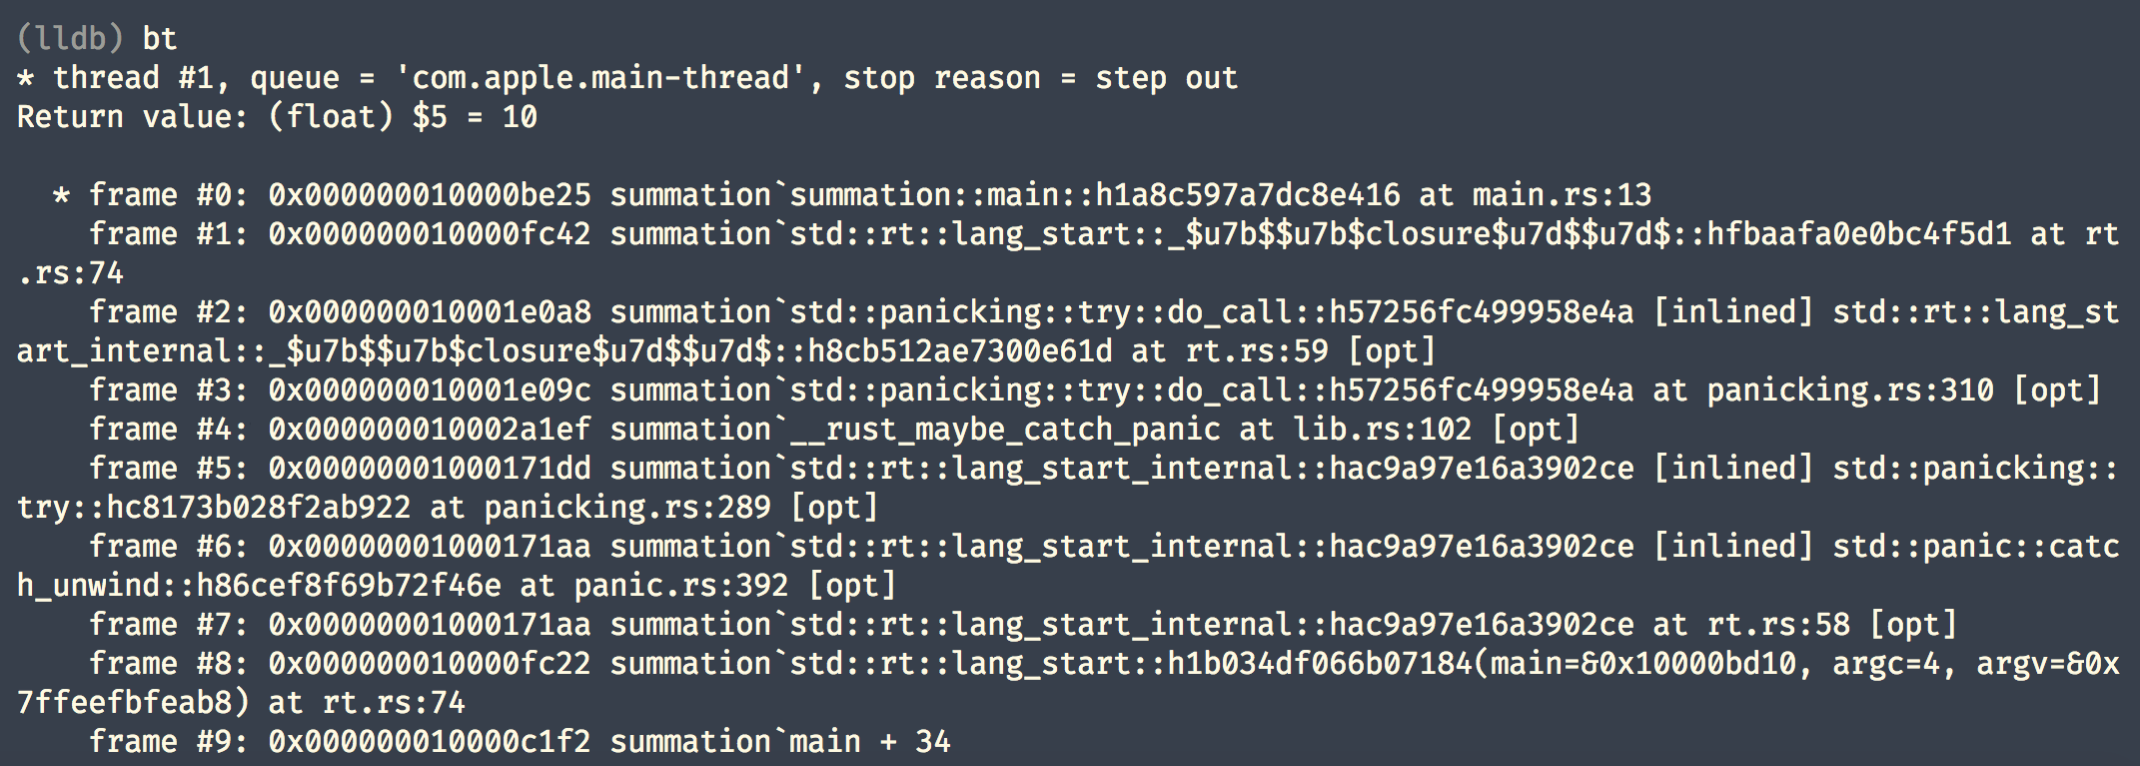
Print back trace information
Kill lldb session

Questions?

How to find me:
jbelmont @ Github
jbelmont80 @ Twitter
Personal website @ marcelbelmont.com
Jean-Marcel Belmont @ LinkedIn
Checkout my new book titled Hands On Continuous Integration with Jenkins, Travis, and Circle CI