:: Intel Galileo ::
Kit de desarrollo certificado por Arduino
@_JuraseC @NodeBotsMX
Arduino Intel Galileo
- Arduino con esteroides
- Es el primer Arduino basado en un procesador Intel
- Plataforma certifacada por el programa de Arduino
- Compatible a nivel de pines I/O, con los shields de Arduino UNO
- Corre un "firmware" mucho más avanzado que Arduino UNO
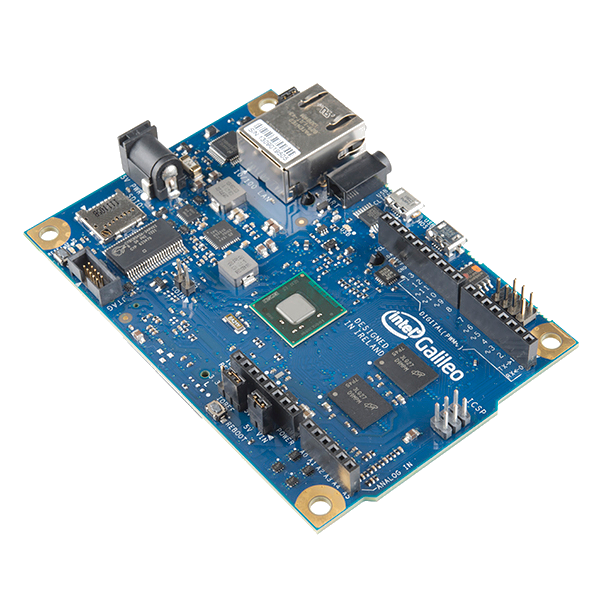
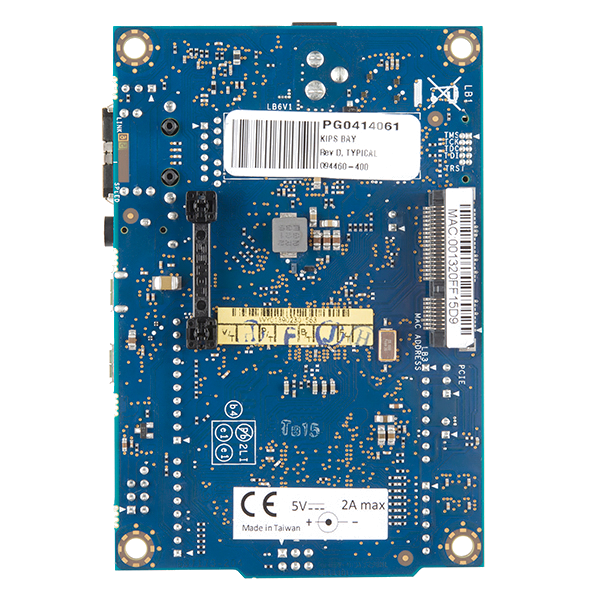
Componentes

Para más información aquí
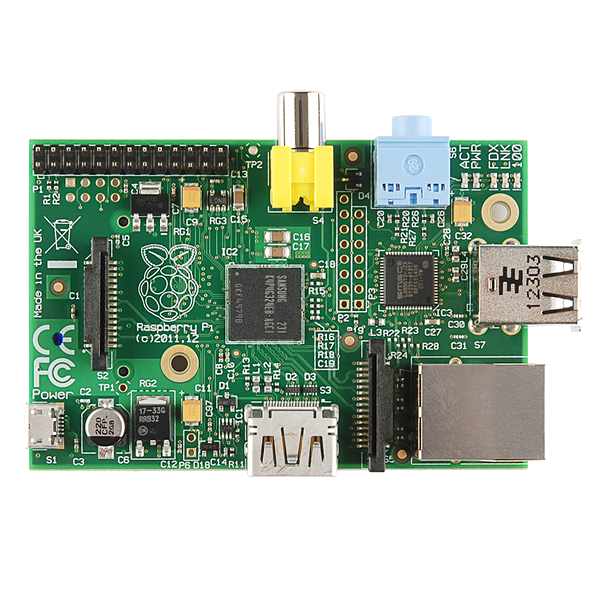
Galileo vs Raspberry Pi
Tabla comparativa a detalle aquí
Raspberry Pi es mejor para la manipulación de los medios, tales como fotos o de vídeo, y Galileo es una excelente opción si el proyecto que requiere sensores (además de una memoria decente y potencia de procesamiento), monitoreo ó aplicaciones en tiempo real (Galileo tiene un reloj tiempo real RTC) RPi podría ser utilizada como una cámara de seguridad en red ó como un media server, RPi carece de un convertidor de analógico a digital, por lo tanto, si se necesita el uso de sensores analógicos no será tan fácil de implementar. Galileo podría ser utilizado para desarrollar "smart things" con una gran cantidad de sensores, tales como relojes, control de la salud, ó simplemente ser una computadora personal de bajo costo corriendo Linux.
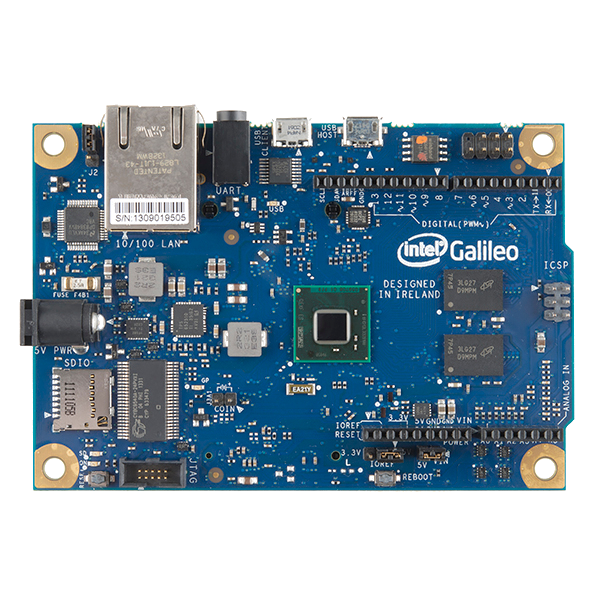
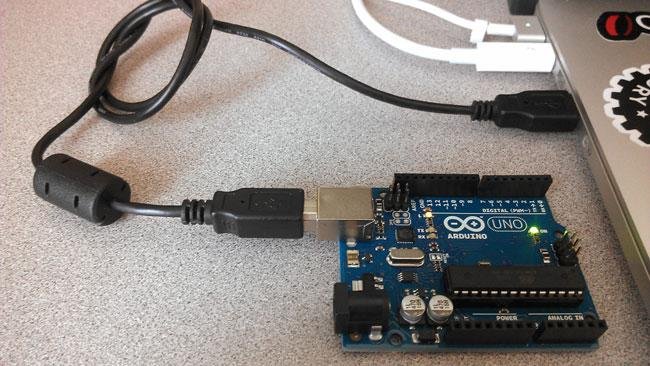
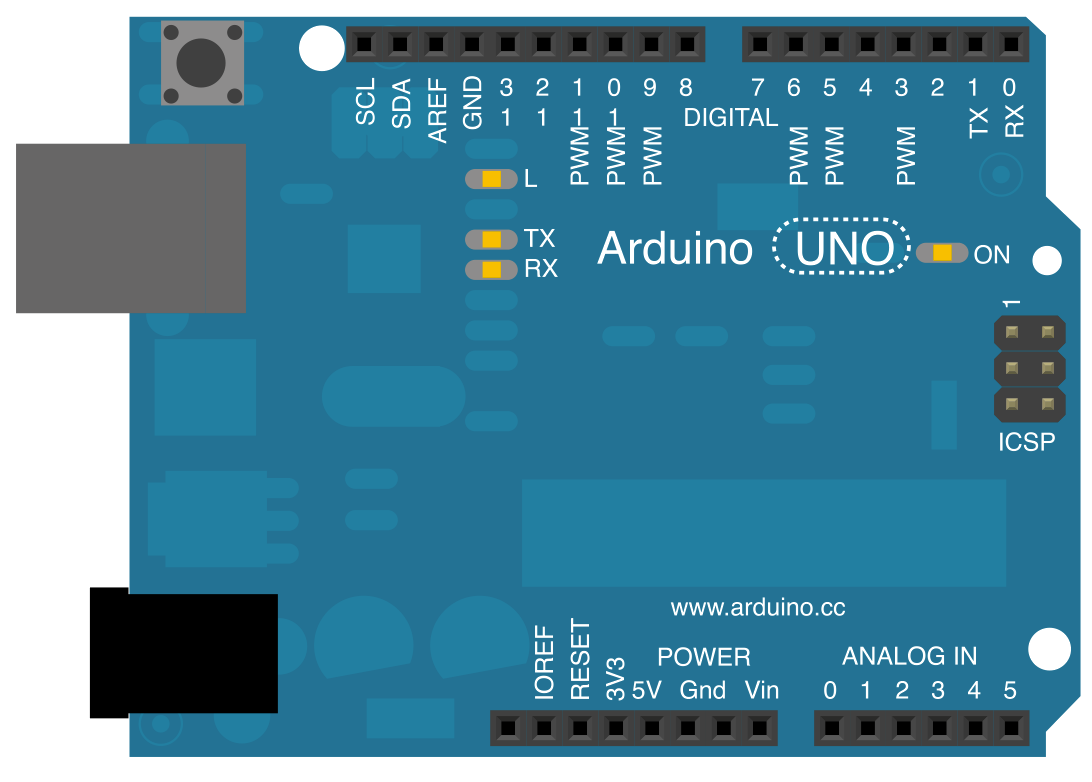
Galileo estilo Arduino UNO
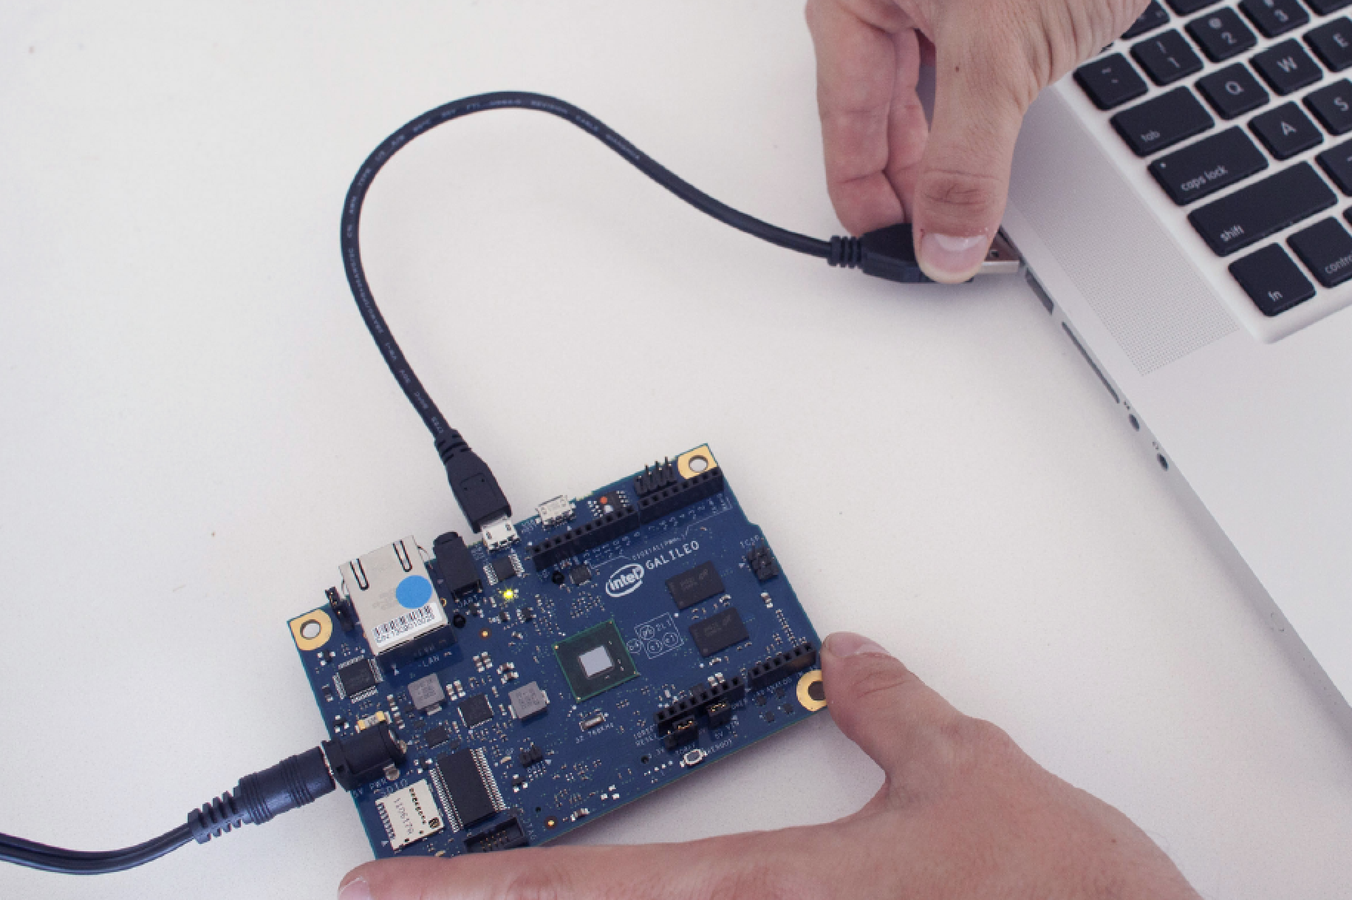
Fuente: Getting Started with Intel Galileo Mar. 2014 Ebook
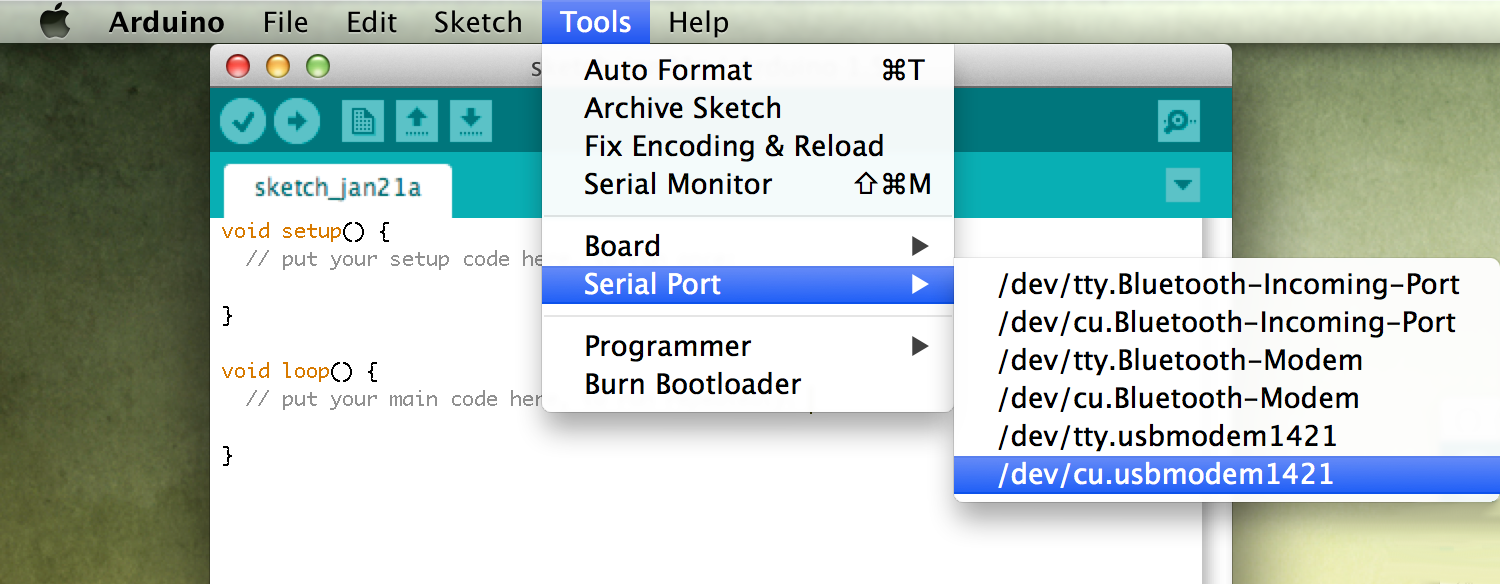
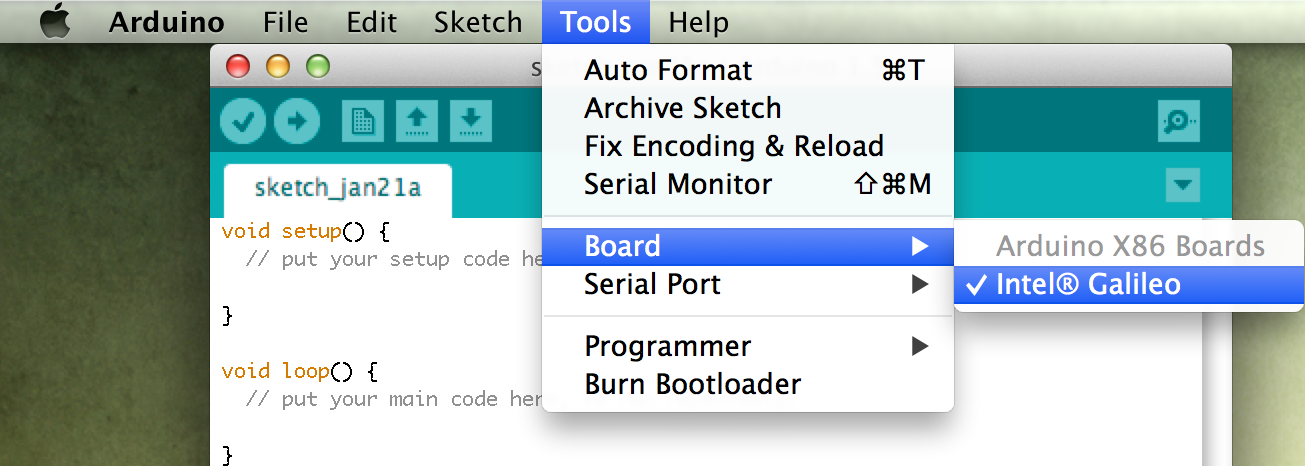
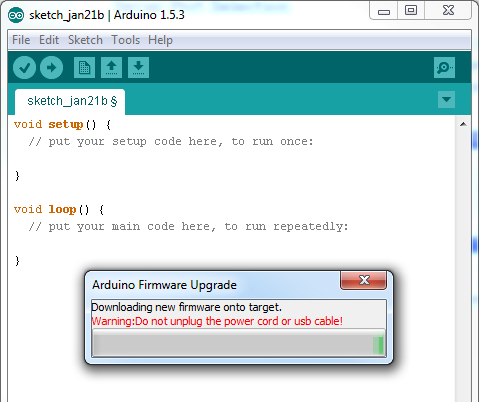
Actualización del firmware
Para actualizar el firmware desde los diferentes S.O. soportados por el IDE de arduino galileo, consultar aquí
1
2
3
Fuente: https://learn.sparkfun.com/tutorials/galileo-getting-started-guide
Tradicional Hello world
/*
  Blink
  Turns on an LED on for one second, then off for one second, repeatedly.

  This example code is in the public domain.
 */

// Pin 13 has an LED connected on most Arduino boards.
// give it a name:
int led = 13;

// the setup routine runs once when you press reset:
void setup() {
  // initialize the digital pin as an output.
  pinMode(led, OUTPUT);
}

// the loop routine runs over and over again forever:
void loop() {
  digitalWrite(led, HIGH);   // turn the LED on (HIGH is the voltage level)
  delay(1000);               // wait for a second
  digitalWrite(led, LOW);    // turn the LED off by making the voltage LOW
  delay(1000);               // wait for a second
}
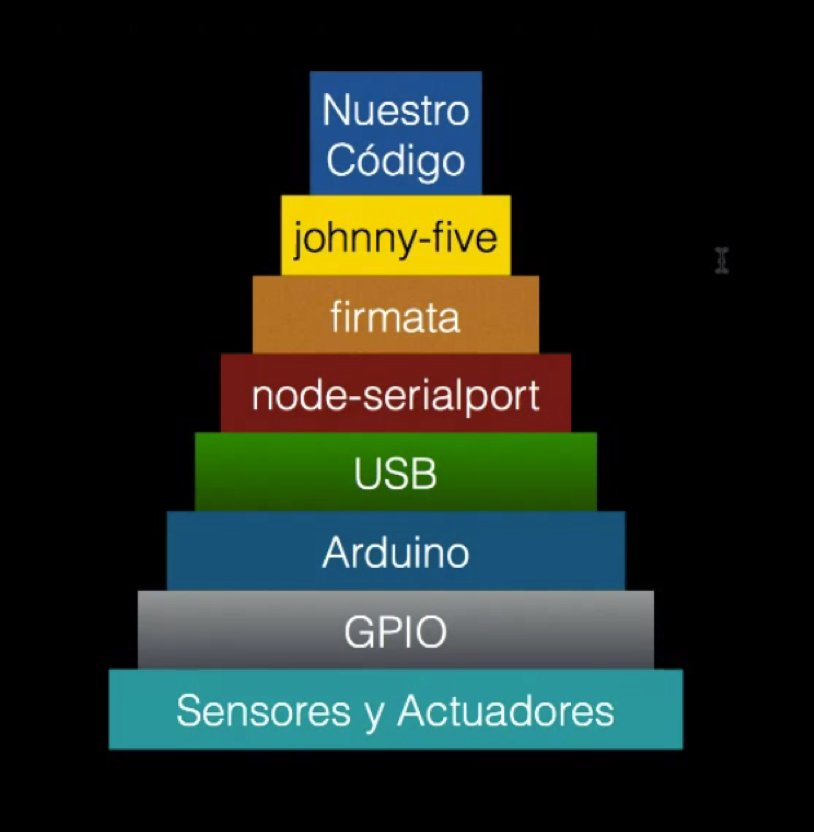
Node + Serialport + Firmata = NodeBots con un modelo Cliente/Servidor

Fuente: https://blog.safaribooksonline.com/2013/07/16/javascript-powered-arduino-with-johnny-five/
NodeBots con Johnny-Five
johnny-five@0.8.11 node_modules/johnny-five
├── ease-component@1.0.0
├── descriptor@0.1.0
├── colors@0.6.2
├── es6-shim@0.18.0
├── nanotimer@0.3.1
├── lodash@2.4.1
├── firmata@0.3.3 (browser-serialport@1.0.6)
├── galileo-io@0.3.1 (graceful-fs@2.0.3, es6-promise@1.0.0, remapped@0.2.1)
└── serialport@1.4.6 (bindings@1.2.1, sf@0.1.7, async@0.9.0, nan@1.3.0, optimist@0.6.1)
var five = require("johnny-five"),
board = new five.Board({}),
myLed;
board.on("ready", function() {
myLed = new five.Led({
pin: 13
});
myLed.strobe();
});

JavaScript en un ambiente con soporte completo de Node
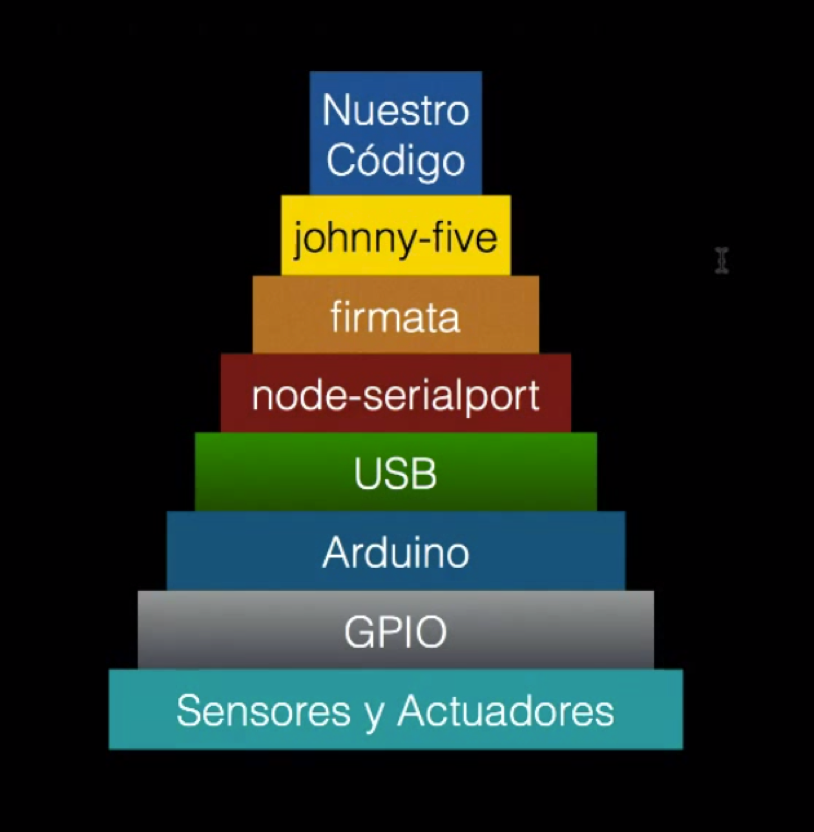
Galileo-IO
Layer
https://communities.intel.com/docs/DOC-22226
IntelGalileo, más poder con Linux
- WiFi drivers
- Python
- Node.js
- SSH
Descargar imagen de Linux:
Más información en:
https://learn.sparkfun.com/tutorials/galileo-getting-started-guide/bigger-linux-image
Instalación de Johnny-Five
root@dhcppc1:~# date 201409270900
date: invalid date '090020140927'
root@dhcppc1:~# date 201409270900.0
Sat Sep 27 09:00:00 UTC 2014
root@dhcppc1:~# npm install johnny-five
npm http GET https://registry.npmjs.org/johnny-five
npm http 200 https://registry.npmjs.org/johnny-five
npm http GET https://registry.npmjs.org/johnny-five/-/johnny-five-0.8.11.tgz
npm http 200 https://registry.npmjs.org/johnny-five/-/johnny-five-0.8.11.tgz
.
.
.
npm http GET https://registry.npmjs.org/galileo-io/-/galileo-io-0.3.1.tgz
npm http 200 https://registry.npmjs.org/descriptor/-/descriptor-0.1.0.tgz
Failed to execute '/usr/bin/node rebuild --name=serialport --configuration=Release --module_name=serialport --version=1.4.6 --major=1 --minor=4 --patch=6 --runtime=node --node_abi=v8-3.11 --platform=linux --target_platform=linux --arch=ia32 --target_arch=ia32 --module_main=./serialport --host=https://node-serialport.s3.amazonaws.com/ --module_path=/home/root/node_modules/johnny-five/node_modules/serialport/build/serialport/v1.4.6/Release/v8-3.11-linux-ia32 --remote_path=./serialport/v1.4.6/Release/ --package_name=v8-3.11-linux-ia32.tar.gz --staged_tarball=build/stage/serialport/v1.4.6/Release/v8-3.11-linux-ia32.tar.gz --hosted_path=https://node-serialport.s3.amazonaws.com/serialport/v1.4.6/Release/ --hosted_tarball=https://node-serialport.s3.amazonaws.com/serialport/v1.4.6/Release/v8-3.11-linux-ia32.tar.gz' (1)
npm WARN optional dep failed, continuing serialport@1.4.6
johnny-five@0.8.11 node_modules/johnny-five
├── ease-component@1.0.0
├── descriptor@0.1.0
├── colors@0.6.2
├── es6-shim@0.18.0
├── nanotimer@0.3.1
├── lodash@2.4.1
├── temporal@0.3.8
├── firmata@0.3.3 (browser-serialport@1.0.6)
└── galileo-io@0.3.1 (graceful-fs@2.0.3, es6-promise@1.0.0, remapped@0.2.1)
root@dhcppc1:~#
Programación de GPIO
Básicamente, la programción de GPIO es por medio de configuración de archivos.
root@clanton:~# echo -n "37" > /sys/class/gpio/export
root@clanton:~# echo -n "out" > /sys/class/gpio/gpio37/direction
root@clanton:~# echo -n "0" > /sys/class/gpio/gpio37/value
Ejemplo: Configuración del pin 37 "A0", para lectura analógica
Links de interés
MS Windows en Intel Galileo: http://ms-iot.github.io/content/IBoughtAGalileo.htm
Imagen de Linux, IDE https://communities.intel.com/docs/DOC-22226
¿Preguntas?

Happy Hacking!
@_JuraseC
