while you wait

Nicolas Feer
- Go to slides.com/lewagoncph to find this slideshow
- Install Google Chrome & Sublime Text 2
- Go to the Noun Project and create a profile.
Wifi name: Rocketlabs
Password: Apollo11
the wagon
Nicolas Feer
- Started two years ago in Paris
- Over 400 students
- Present in 10 cities in 6 countries
- 9 week bootcamp to learn how to make a web app:
Ruby, Ruby on Rails, SQL, HTML, CSS, Javascript
GET STARTED CODING FOR THE WEB
An introduction to HTML, CSS & JavaScript
Nicolas Feer
workshop Outline
- Free tools setup
- Live-code demo (I code, you don't)
- Your turn (you code, I don't)
Ask for help when needed & have fun!
Why DIY
because you can :
- start immediately
- operate freely & independently
- test & adjust design continuously
- add & optimize content on the fly
setup free Tools
to build a website :
- Install Google Chrome (web browser)
- Install Sublime Text 2 (text editor)
working with sublime
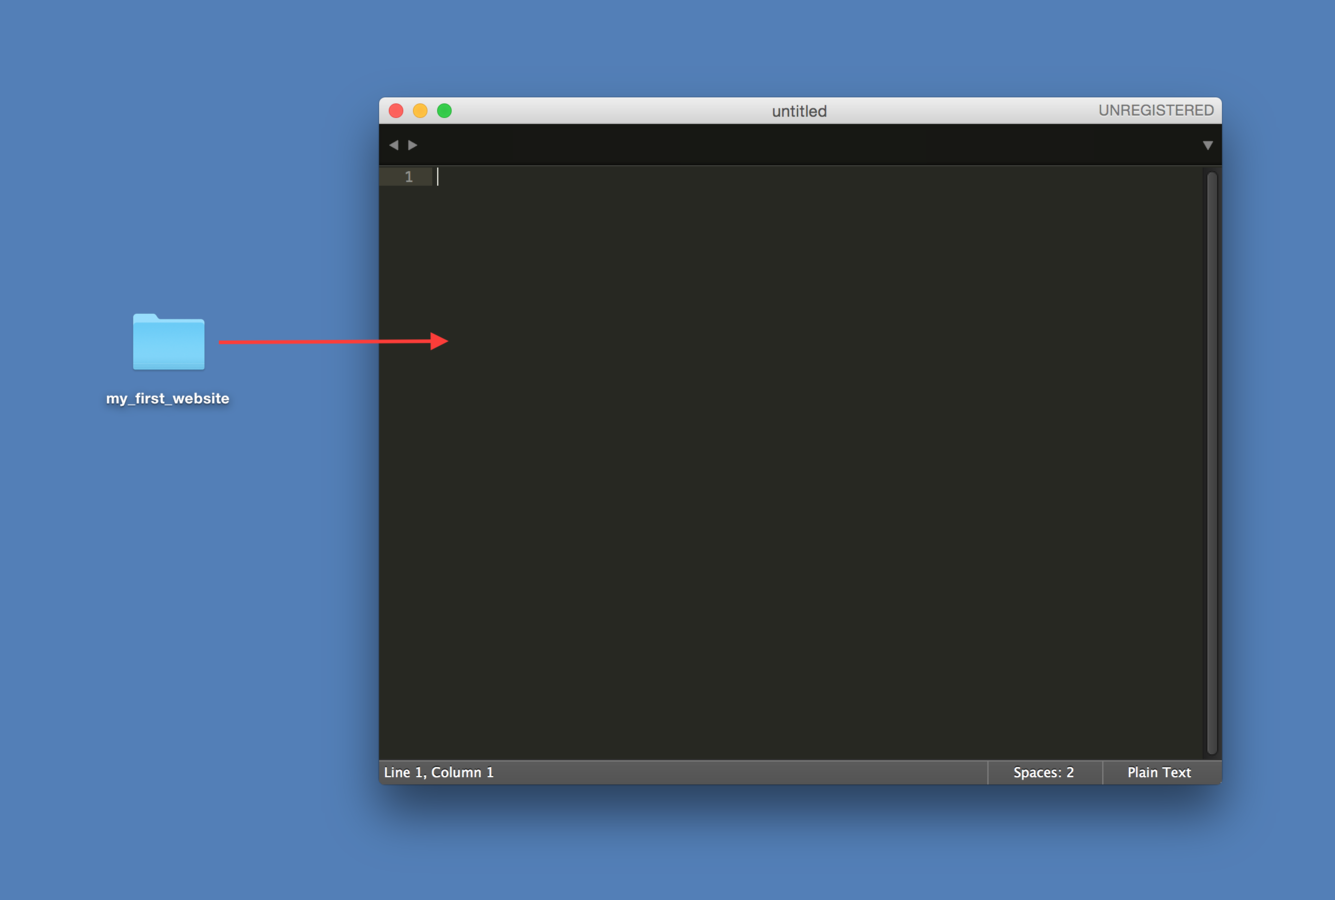
- On your desktop, create a folder named my_first_website
- Open Sublime Text and a new black window will be displayed
- Drag & drop my_first_website folder into the SublimeText window
your first website
- In SublimeText, right-click on my_first_website folder
- Add a new HTML file named index.html
- Add a new CSS file named style.css
- Add a new JavaScript file named application.js
- Open your HTML file in the browser
- Now don't move! You're ready to code!
Front-end languages


content
+ structure
design
behavior
HTML is a markup language.
It structures the content of a web page.
Cause in order to design and animate its elements,
we have to organize them first
html skeleton
<!DOCTYPE html>


<!-- end of file -->
html skeleton
<!DOCTYPE html>
<html>


  <!-- your content (text, images,...)
  and all the other html tags
  to structure this content goes here -->


</html>
<!-- end of file -->
html skeleton
<!DOCTYPE html>
<html>
  <head>

    <!-- intelligence (meta-data) -->

  </head>
  <body>

    <!-- stuff to be displayed on your web page -->

  </body>
</html>
<!-- end of file -->
html skeleton
<!DOCTYPE html>
<html>
  <head>
    <title>My first web page</title>
    <!-- text appearing in the tab + used by Google in its search results -->
    <meta charset="utf-8"/>
    <!-- to display properly the special characters -->
  </head>
  <body>

    <!-- stuff to display in the page -->

  </body>
</html>
<!-- end of file -->
html skeleton
<!DOCTYPE html>
<html>
  <head>
    <title>Hello world</title>
    <!-- Text appearing in the tab + used by Google in its search results -->
    <meta charset="utf-8"/>
    <!-- To display properly the special characters -->
  </head>
  <body>
    <h1>Hello buddies!</h1>

    <!-- Stuff to display in the page -->

  </body>
</html>
<!-- end of file -->
html syntax
<element_name attribute_name="attribute_value">element_content</element_name>
opening tag
closing tag
-------------------------------------------
---------------
html syntax

result => Le Wagon
QUIZ:
- What is the element name?
- What is the element content?
- What are the 2 attributes (name and value)?
html elements
<h1>[...]</h1>  <!-- Only one per page! SEO important -->

<h2>[...]</h2>

<h3>[...]</h3>

<h4>[...]</h4>

<h5>[...]</h5>

<h6>[...]</h6>
titles
html elements
<p>
  Lorem ipsum dolor sit amet, consectetur adipiscing elit.
  But the painful truth resilience at all by any law
  inventor worse for them or just leave offices
  there is nothing, which is an impediment to the time to follow?
</p>
paragraphs
html elements
<h2>Shopping List</h2>
<ul>
  <li>Milk</li>
  <li>Butter</li>
</ul>

<h2>World Cup 2014</h2>
<ol>
  <li>Germany</li>
  <li>Argentina</li>
  <li>Netherlands</li>
  <li>Brazil</li>
</ol>
lists
html elements
<img src="logo.png" alt="Le Wagon logo"/>images
icons resources
graphical icons
You can get these icons both in :
- PNG format = with a transparent background
- SVG format = perfectly resizable and customisable!
html elements
<a href="http://www.lewagon.org" target="_blank">Le Wagon</a>links
YOur TURN - HTML
<!DOCTYPE html>

<html>
  <head>


  </head>
  <body>


  </body>
</html>

<!-- end of file -->
Setup your web page's overall html structure
YOur TURN - HEAD
  <head>
    <title>Hello world</title>
    <!-- text appearing in the tab + used by Google in its search results -->
    <meta charset="utf-8"/>
    <!-- to display properly the special characters -->
  </head>
Setup your web page's head
YOur TURN - BODY
<body>

  <h1>My playground app</h1>
  <p>A toy app to play with HTML and CSS</p>


<h2>Fast</h2>
  <p>A fast app, <strong>very fast</strong> app</p>
<img src="#" alt="quick">

  <h2>Simple</h2>
  <p>A simple app, <strong>very simple</strong> app</p>
<img src="#" alt="simple">

  <p>This page was coded by me!</p>

</body>
Setup your web page's body
YOur TURN - NOUN PROJECT
- Go to the Noun Project to find good images
- Create a user if you haven't already
- Copy the images to your project folder
- Rename them to short self-explanatory names
- Add them to your img tags' src attribute like so
<img src="rocket.png">html elements
resources
CSS is used to add some style properties
to specific HTML elements
css power
What would this website workuper.com look like without any CSS ?

LET'S FIND OUT!
css power
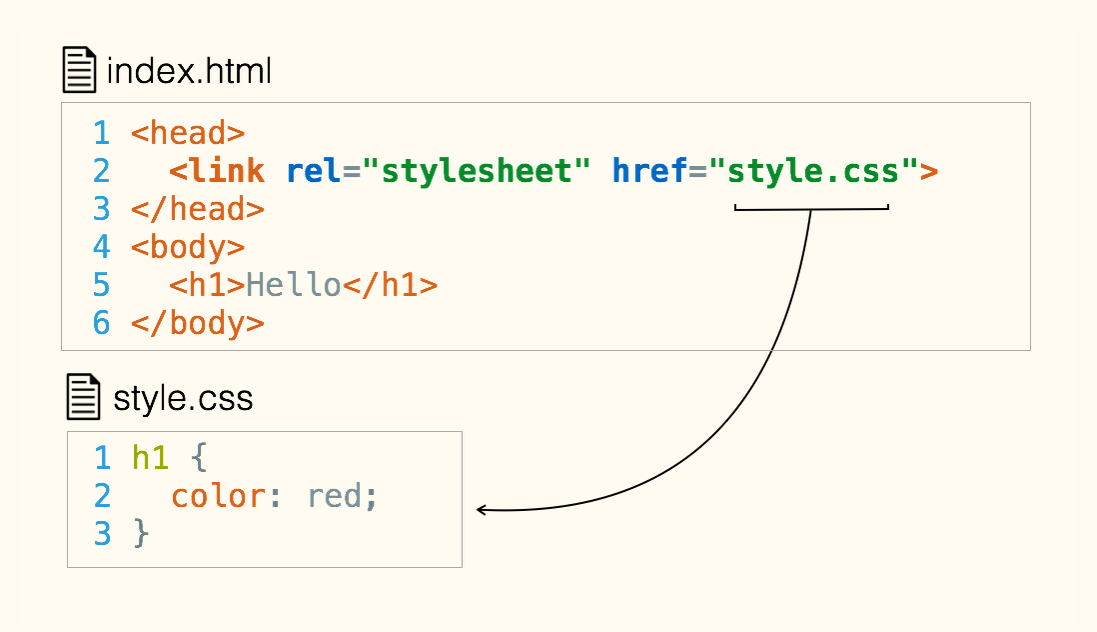
css link
For your CSS stylesheet to be taken into account, you need to
add a link to it in the head of the HTML document
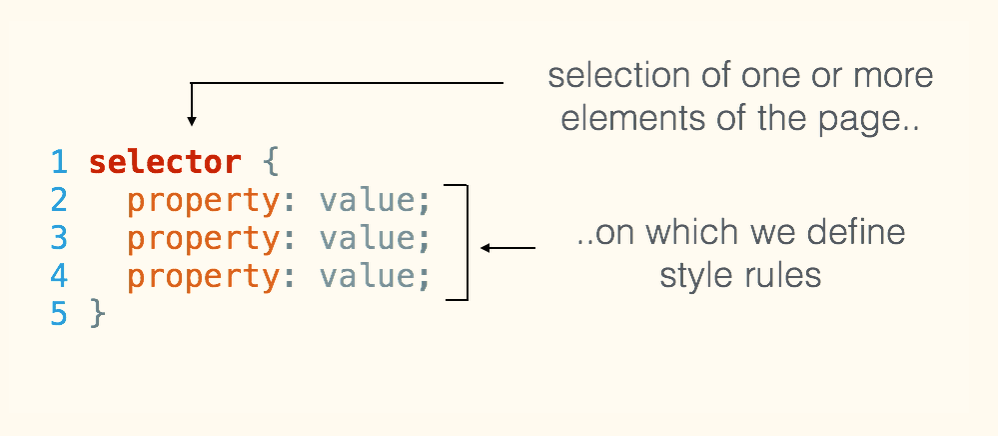
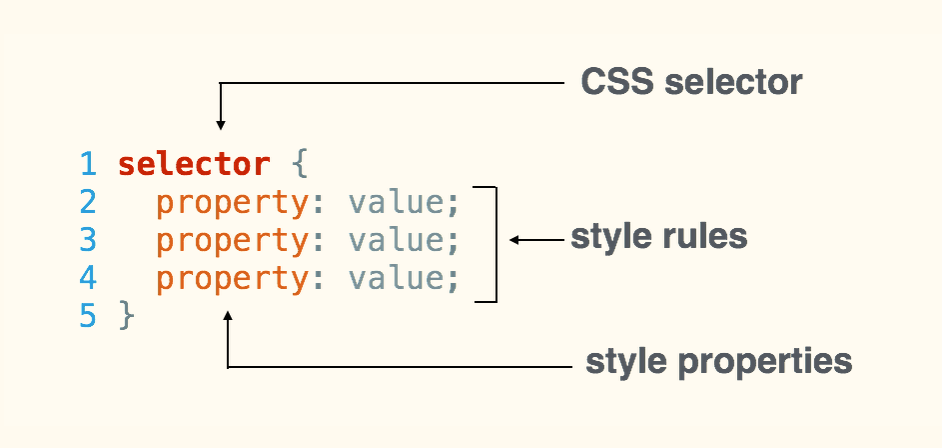
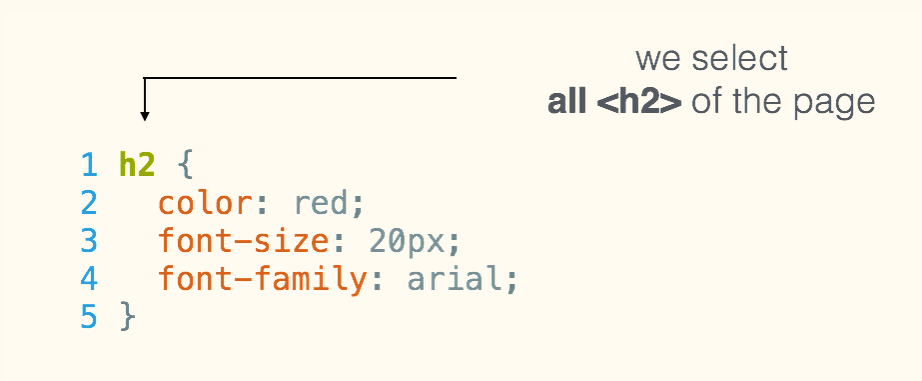
css syntax
css syntax
css syntax
css properties
/* syntax 1 : color name in English */

body {
  color: orange;
}
color
css properties
/* syntax 2 : hexadecimal color reference */

body {
  color: # FFA500;
}
color
css properties
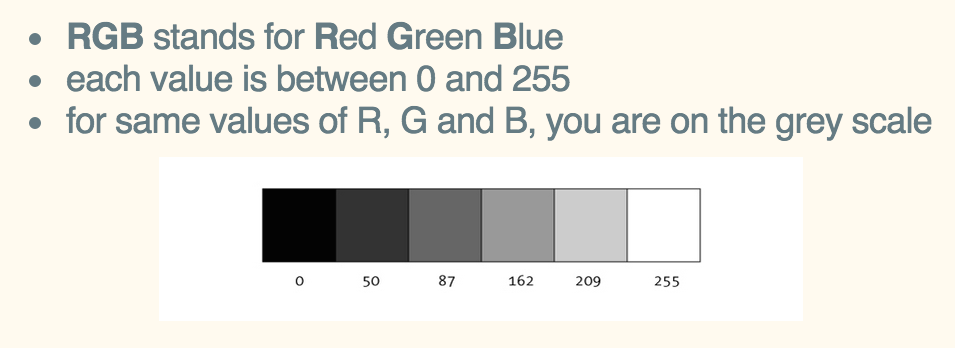
/* syntax 3-a : RGB color reference */

body {
  color: rgb(255, 165, 0);
}
color
css properties
/* syntax 3-b : RGBA color & opacity reference */

body {
  color: rgba(255, 165, 0, 0.8);
}
color
RGBA has a 4th parameter: opacity
(which may vary between 0 and 1)
css properties
color tools
- Choose a good color scheme with Coolors
- Add & use the ColorZilla plug-in to pick nice colors on-the-fly
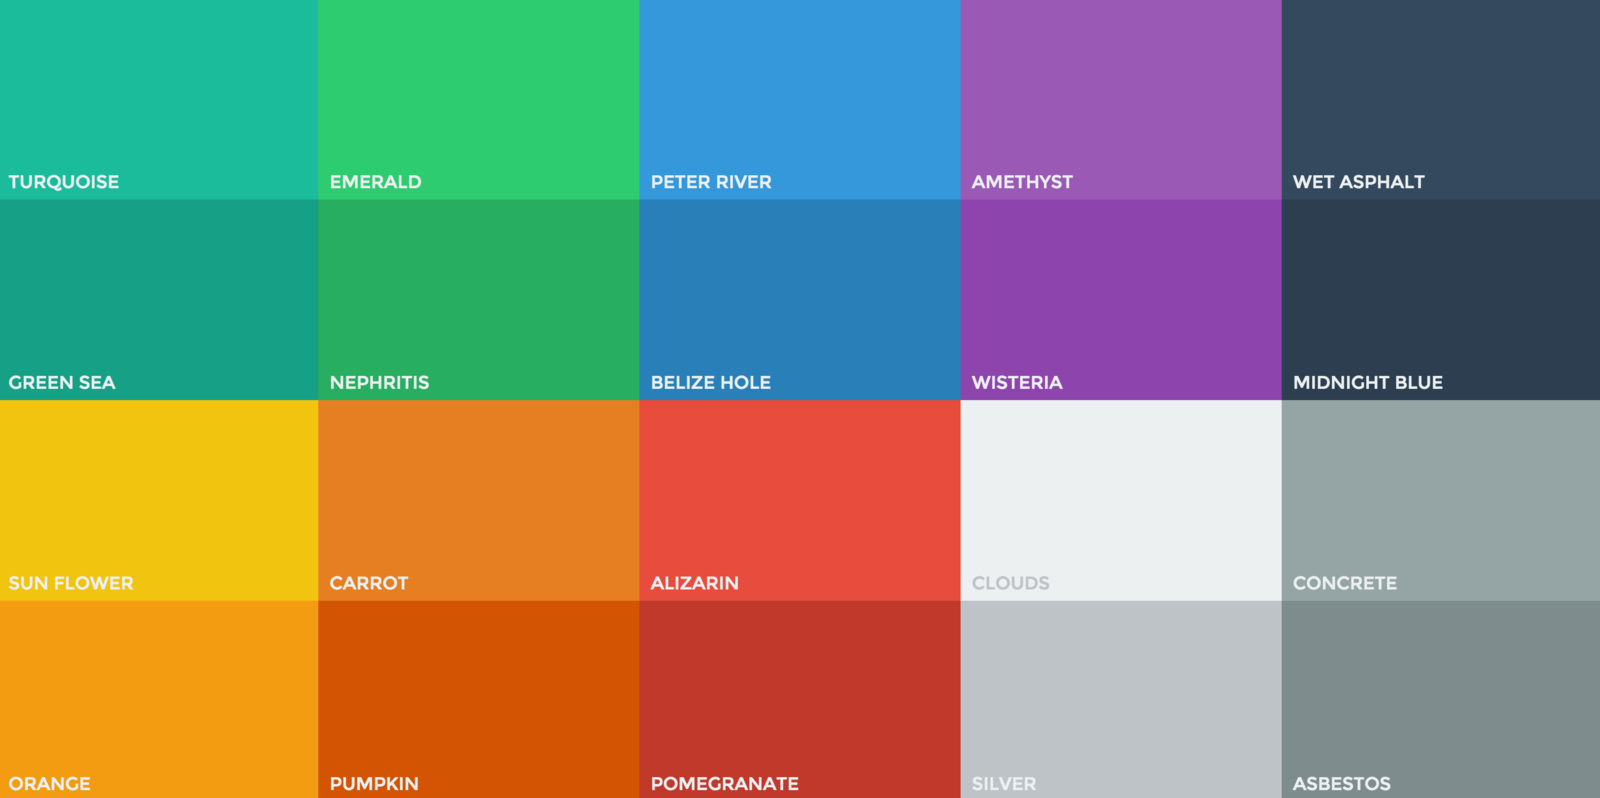
- You can pick them among the trendy flat colors
css properties
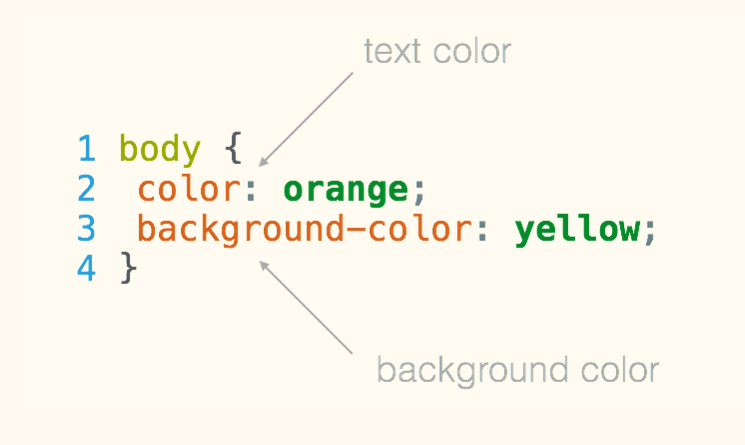
text color vs
background color
css properties
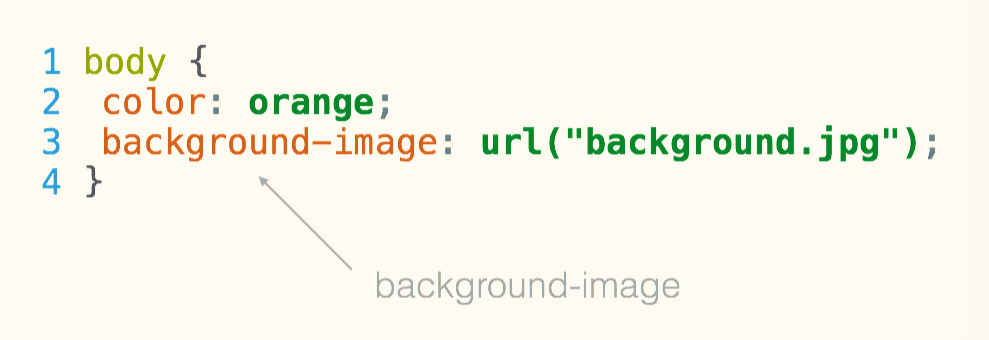
background image
css properties
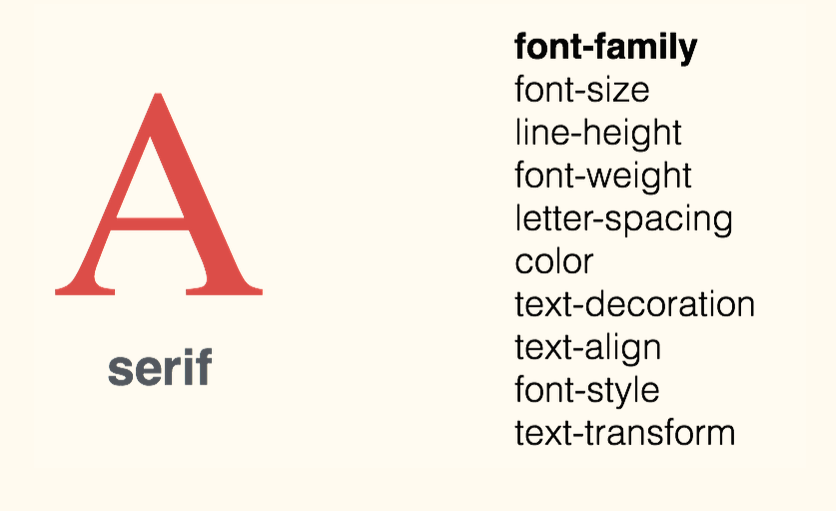
fonts - family (1)
css properties
fonts - family (2)
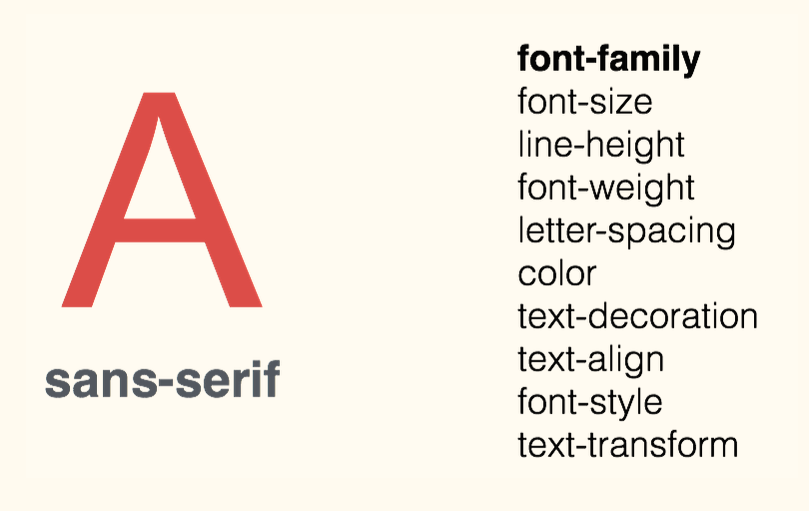
css properties
fonts - family (3)
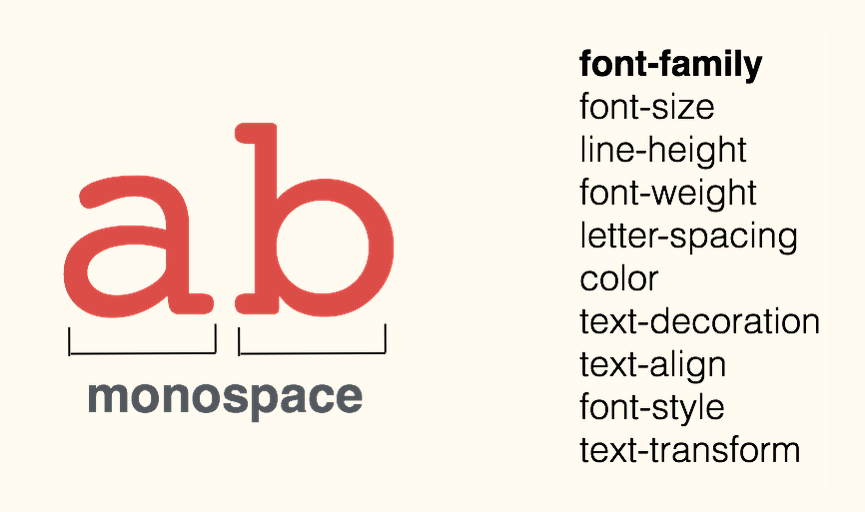
css properties
fonts - size & spacing
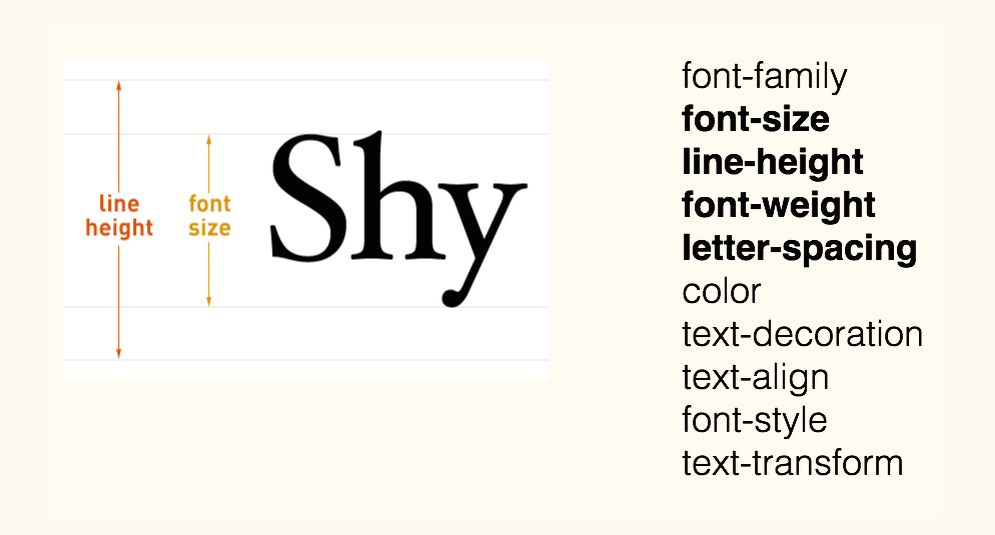
css properties
fonts - color
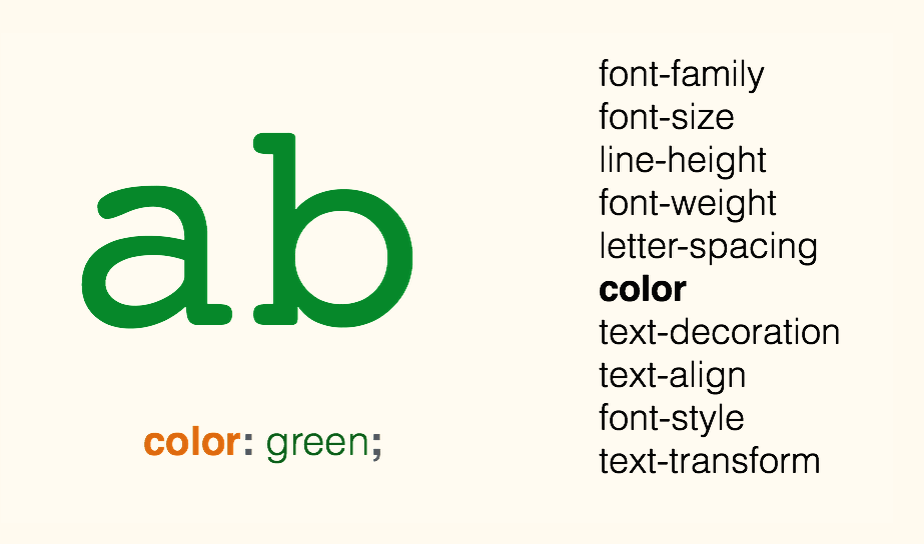
css properties
fonts - decoration
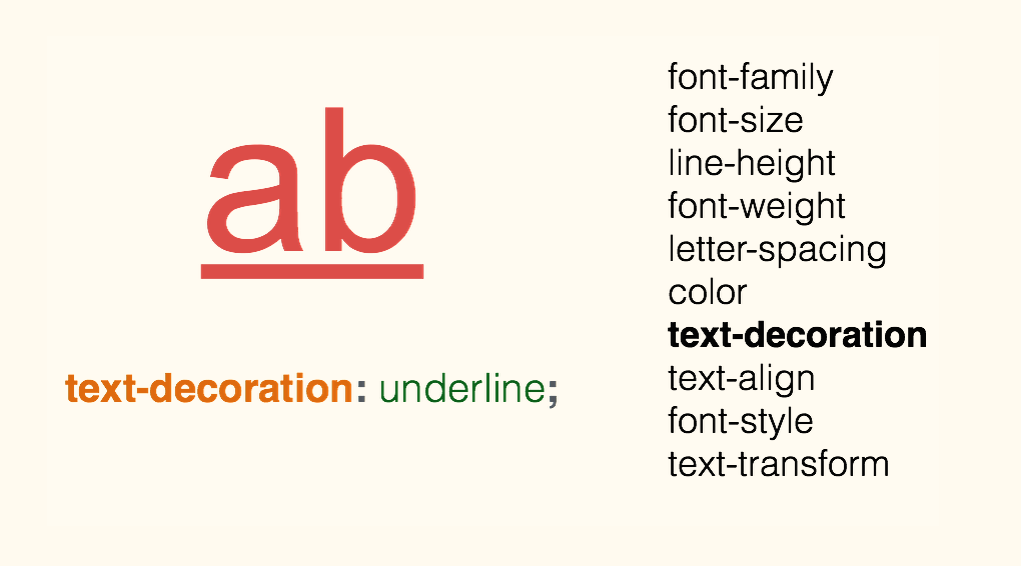
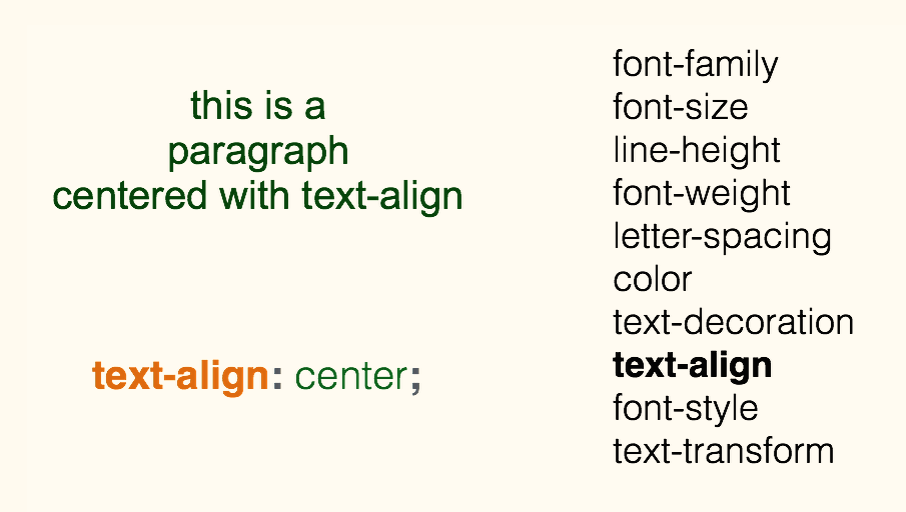
css properties
fonts - alignment
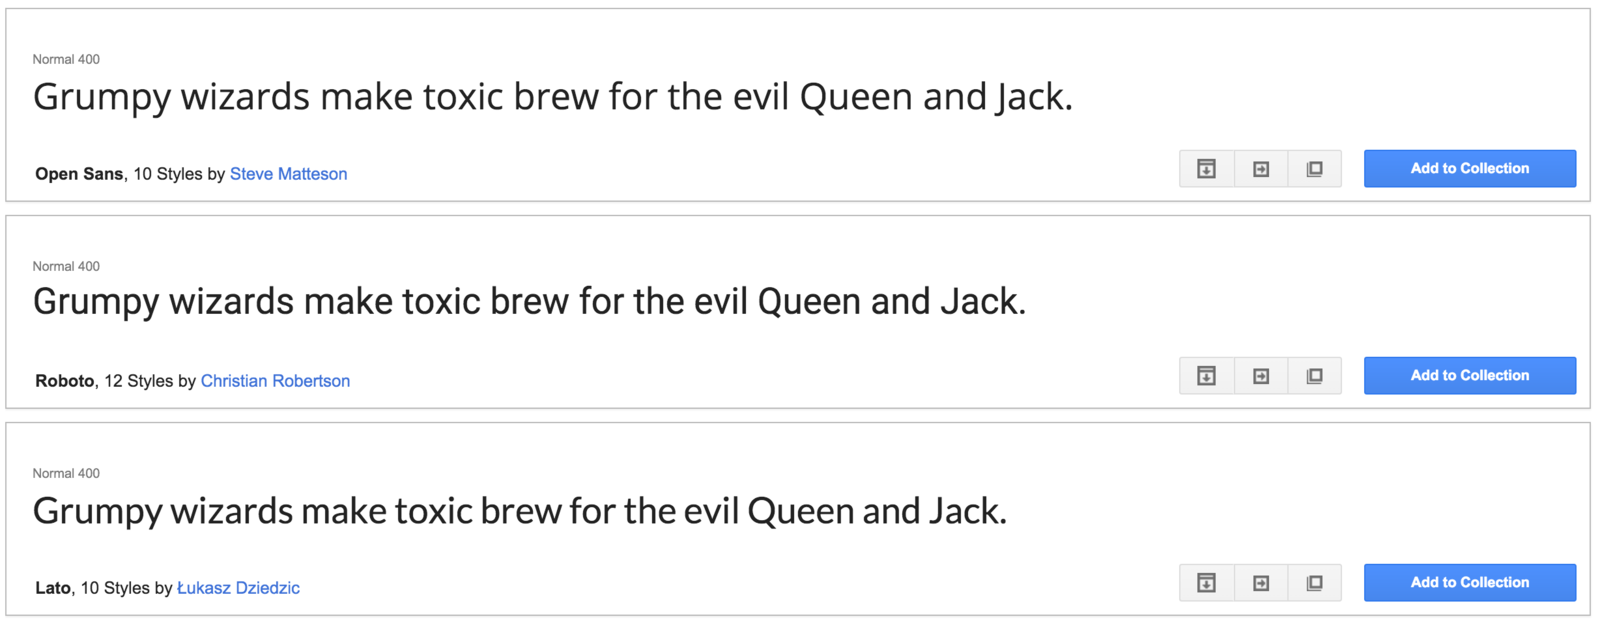
GOOGLE FONTS
Google Fonts is a collection of beautiful web fonts that Google makes available for anyone for free
Your TURN - head
<link href="style.css" rel="stylesheet">Your TURN - CSS
body{
  margin: 0px;
  color: green;
  background: rgb(245,245,245);
}
h1 {
  font-family: courier;
  color: rgb(212,57,43);
}
p {
  font-size: 30px;
  line-height: 20px;
}
Your TURN - CHALLENGE
- Change text colors to black
- Change paragraph sizes to 16px
- Go to Google Fonts to use:
Montserrat for h1
Open Sans for body - Use Coolors to find a nice color for h1
icons resources
<link
    rel="stylesheet"
    href="https://maxcdn.bootstrapcdn.com/font-awesome/4.4.0/css/font-awesome.min.css">
textual icons
- A font for icons (hence, to change their color, size, etc. => use CSS!)
- Paste the following code into the <head> section of your HTML file
- Then choose icons from the Font Awesome set
- And integrate each of them in your html file, where you want each of them to be displayed, by adding the <i>...</i> tag provided by Font Awesome
<h1><i class="fa fa-cutlery"></i> MY RESTAURANT</h1>Your TURN - HEAD
<link rel="stylesheet" href="https://maxcdn.bootstrapcdn.com/font-awesome/4.5.0/css/font-awesome.min.css">
Your TURN - BODY
<ul>
    <li>
      <a href="#"> <i class="fa fa-facebook"></i> </a>
    </li>
    <li>
      <a href="#"> <i class="fa fa-twitter"></i> </a>
    </li>
    <li>
      <a href="#"> <i class="fa fa-youtube"></i> </a>
    </li>
    <li>
      <a href="#"><i class="fa fa-pinterest"></i></a>
    </li>
</ul>
<p>This page was coded by me!</p>
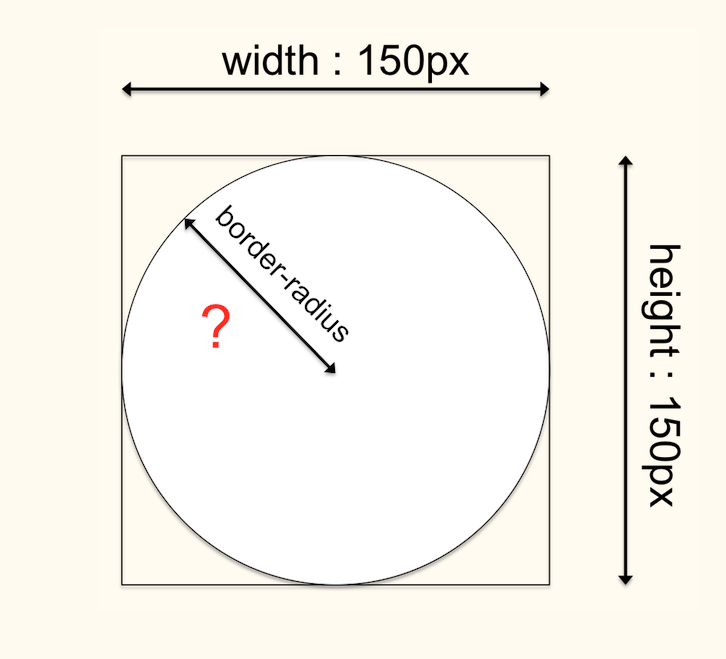
css properties
picture size & shape
Your TURN - CSS
img {
  width: 100px;
}
html elements
divisions and box model
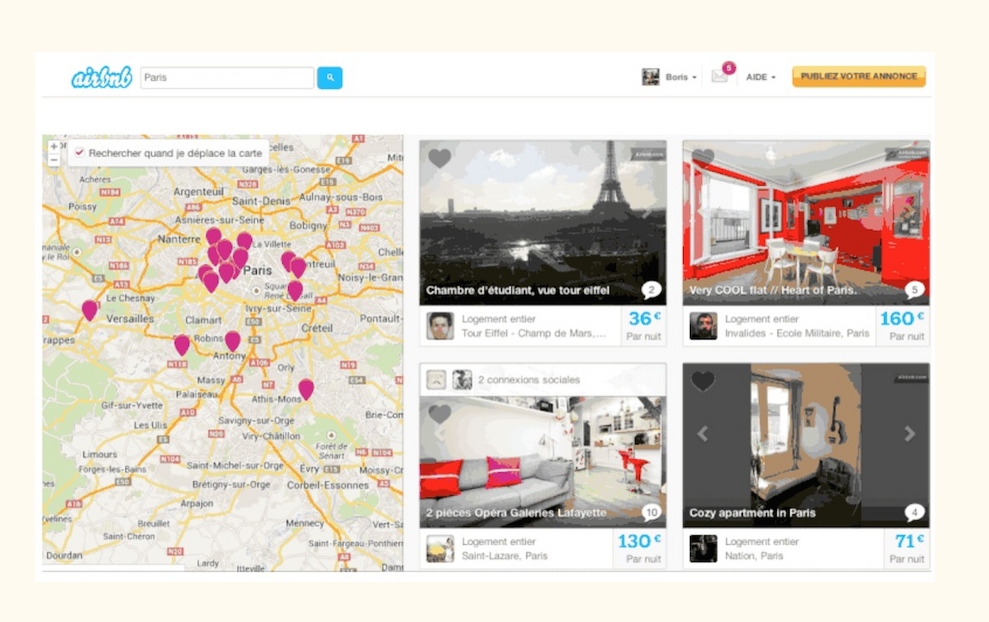
Any modern website...
html elements
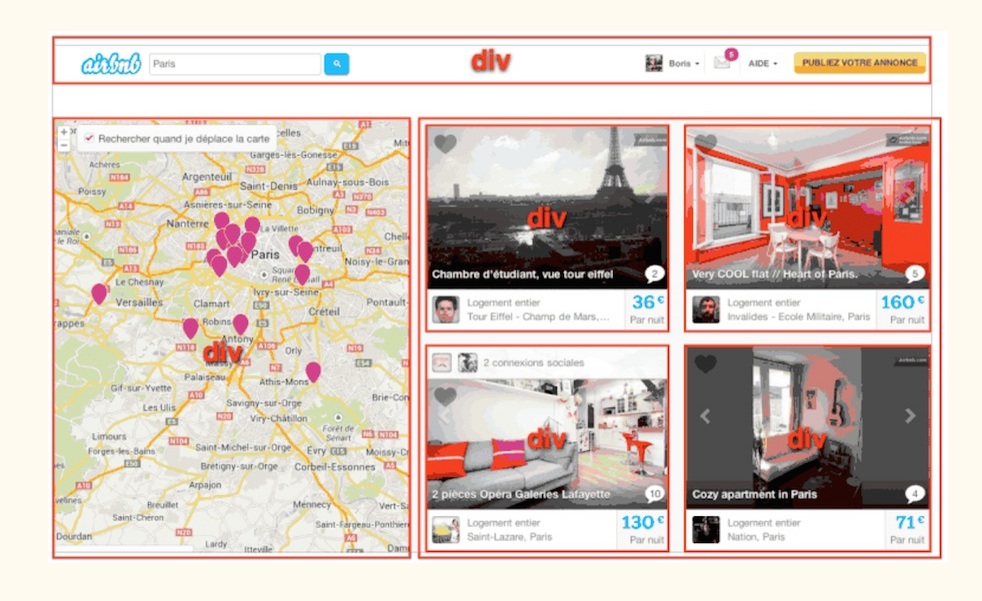
... is made of <div>
divisions and box model
html elements
=> structure your HTML code with <div> elements,
to group all the contents that fits together
divisions and box model
Your TURN - BODY
<div>
  <h1>My Playground App</h1>
  <p>A toy to play with HTML and CSS</p>
</div>

<div>
  <h2>Fast</h2>
  <img src="fast.png" alt="A rocket">
  <p>A fast app, <strong>very fast app</strong> </p>
</div>

<div>
  <h2>Simple</h2>
  <img src="simple.png" alt="A cloud">
  <p>A simple app, <strong>very simple</strong> app</p>
</div>
Add a div around your footer too!
id and class
Name your html tags
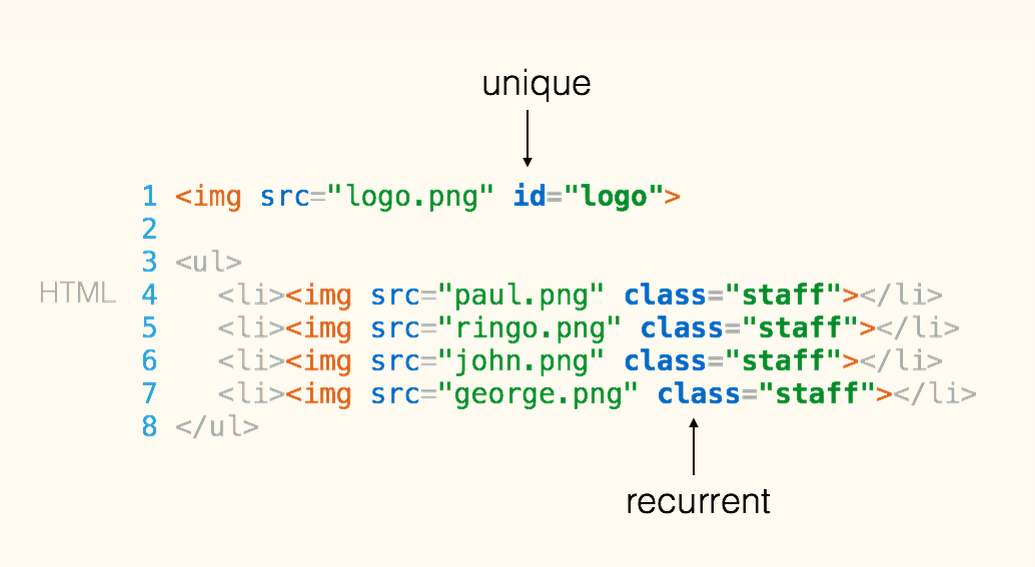
in your HTML file
CSS PROPERTIES
the box model
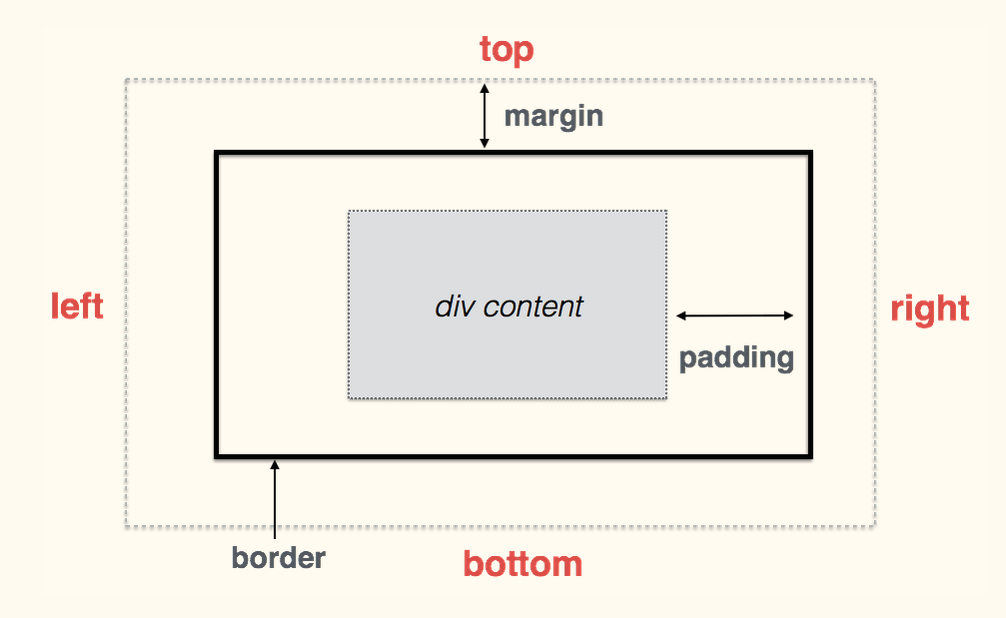
CSS PROPERTIES
syntax and shorcuts
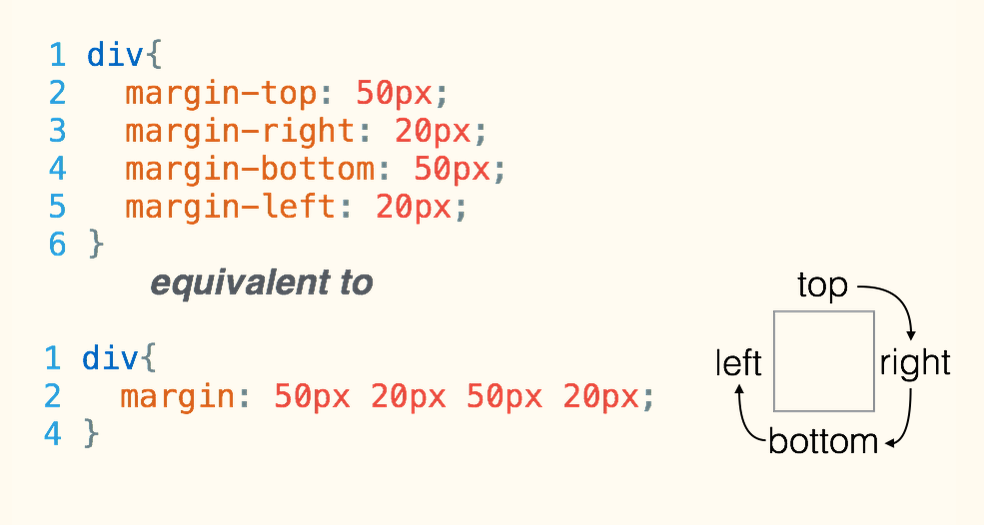
css properties
div{
  border-top: 1px solid red;
  border-right: 2px dotted black;
  border-bottom: 1px dashed green;
  border-left: 2px dotted black;
}
borders
divisions and box model
div{
  background: white;
  border: 1px solid lightgrey;
  padding: 20px;
  margin: 30px;
}
you can make the box structure more visible
by adding some CSS rules on this <div>
css properties
id and class
Name your html tags
To add some style only to :
- a specific unique html element, use the id attribute
- a specific set of html elements, use the class attribute
Your TURN - CHALLENGE
- Add an id tag "header" to your header
- Add class tags "feature" to your features
- Add an id tag "footer" to your footer
Your TURN - CSS
#header {
  text-align: center;
  background-image: url("http://lorempixel.com/1300/1000");
  background-size: cover;
  padding: 150 0 500 0;
  color: white;
  text-shadow: 1px 1px 3px black;
}

.feature {
  padding: 50px;
  font-weight: 300px;
}
BOOTSTRAP

SETUP
- Create a new index.html file
- Copy/paste our boilerplate code
https://github.com/lewagon/bootstrap-boilerplate - Add the link to your style.css file after the link to Bootstrap
- Copy/past your title and Google Fonts link
- Copy/paste your <body> into the new page
SEMANTIC SCHEME
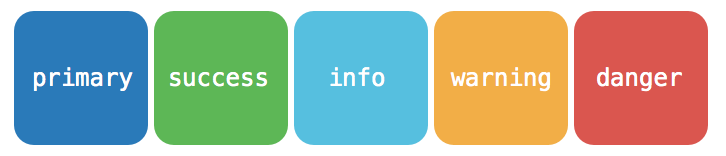
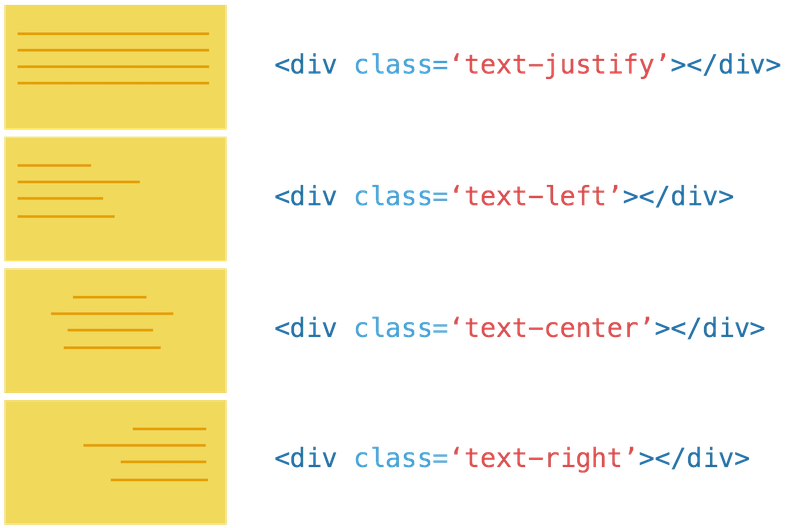
TEXT CLASSES
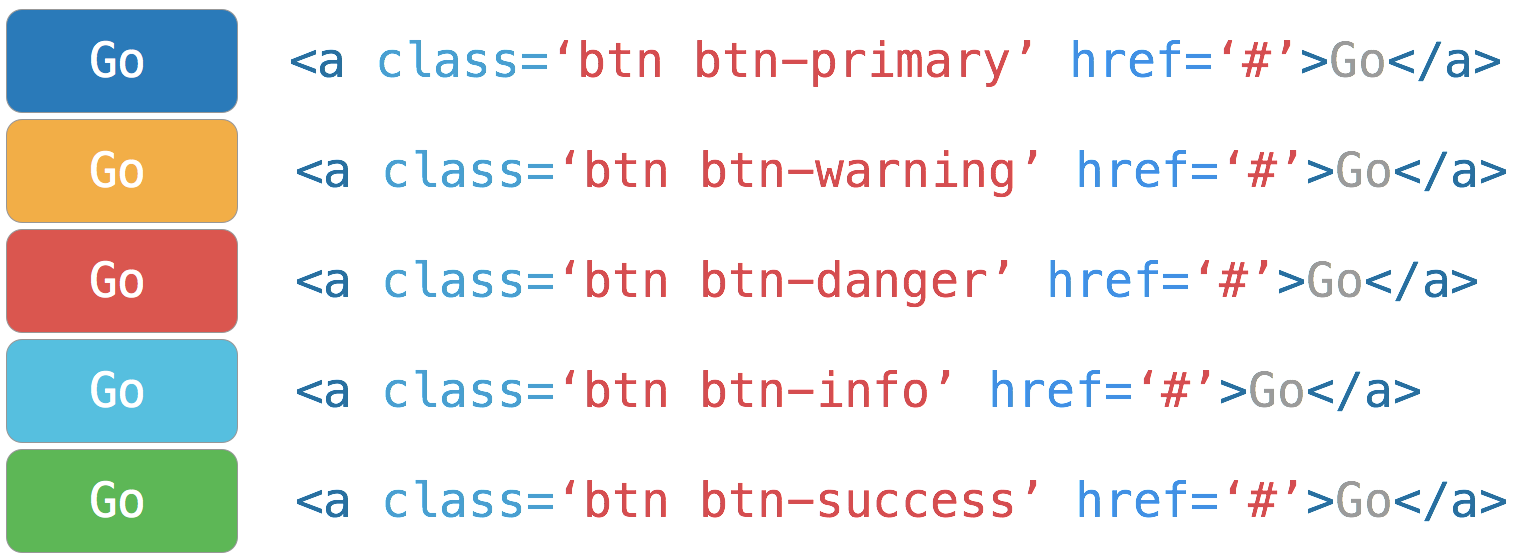
BUTTON CLASSES
LIST CLASSES
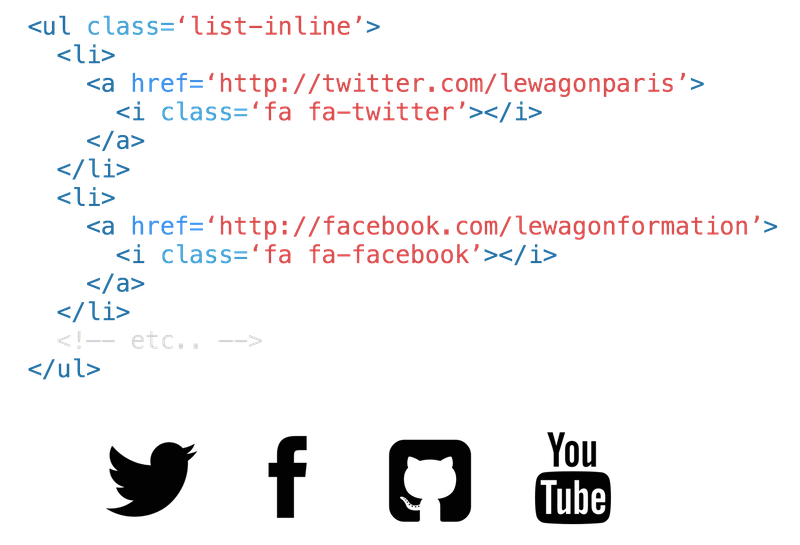
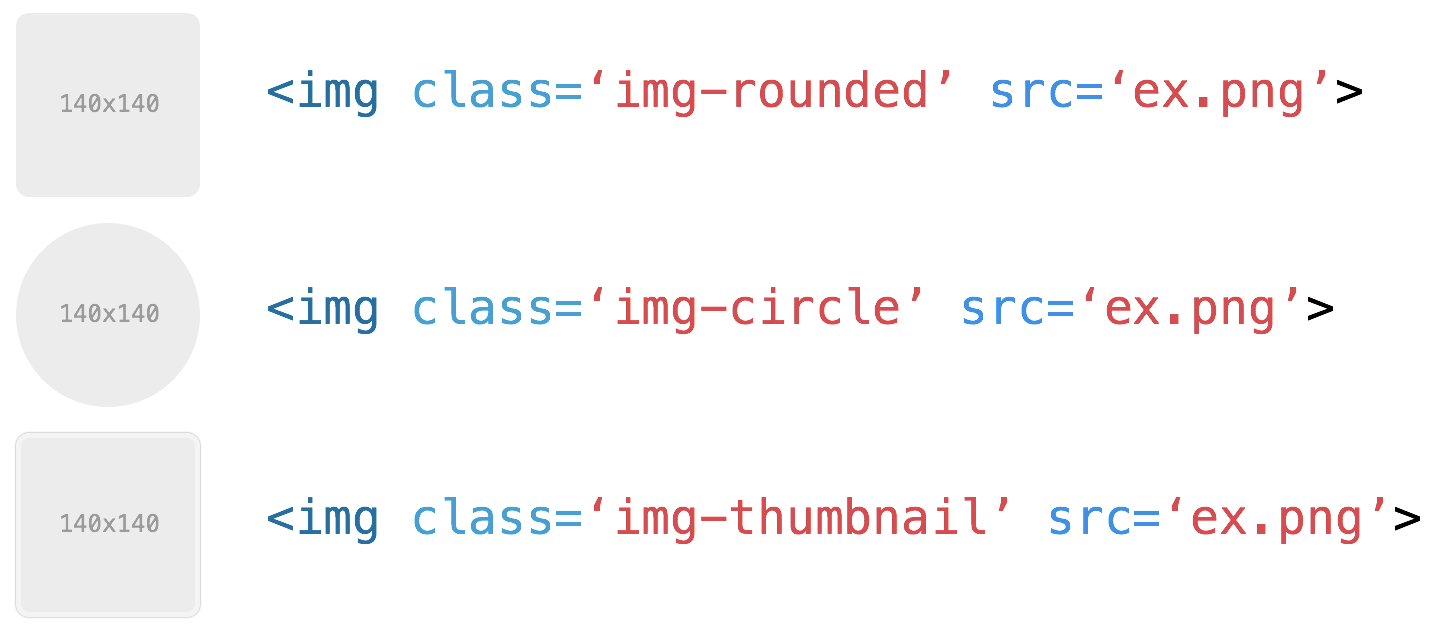
IMage classes
YOUR TURN - BODY
- Add a "text-center" class to your feature divs
- Add a "list-inline" class to your social list <ul>
- Add <button>Sign Up</button> under your h1
- Add the "btn btn-primary" classes to your sign up button
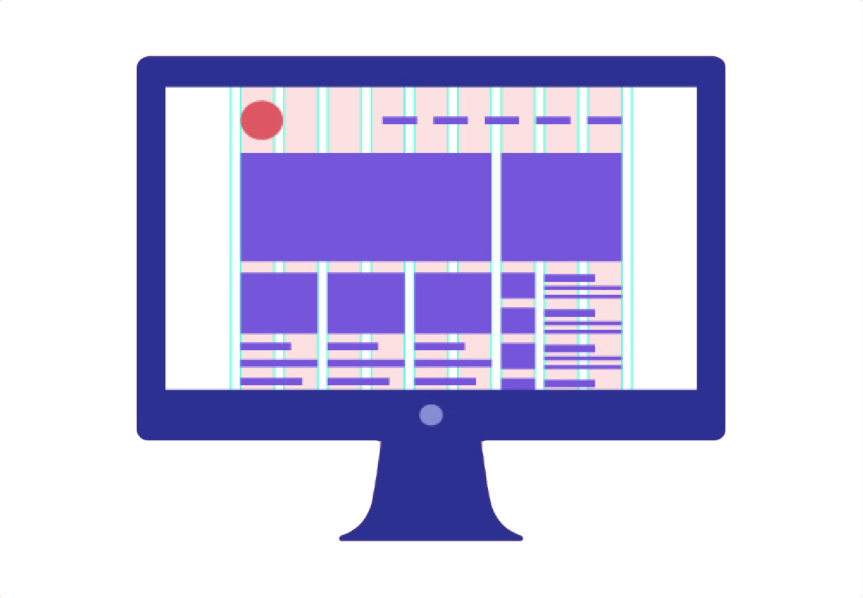
GRID SYSTEM
How does it work?
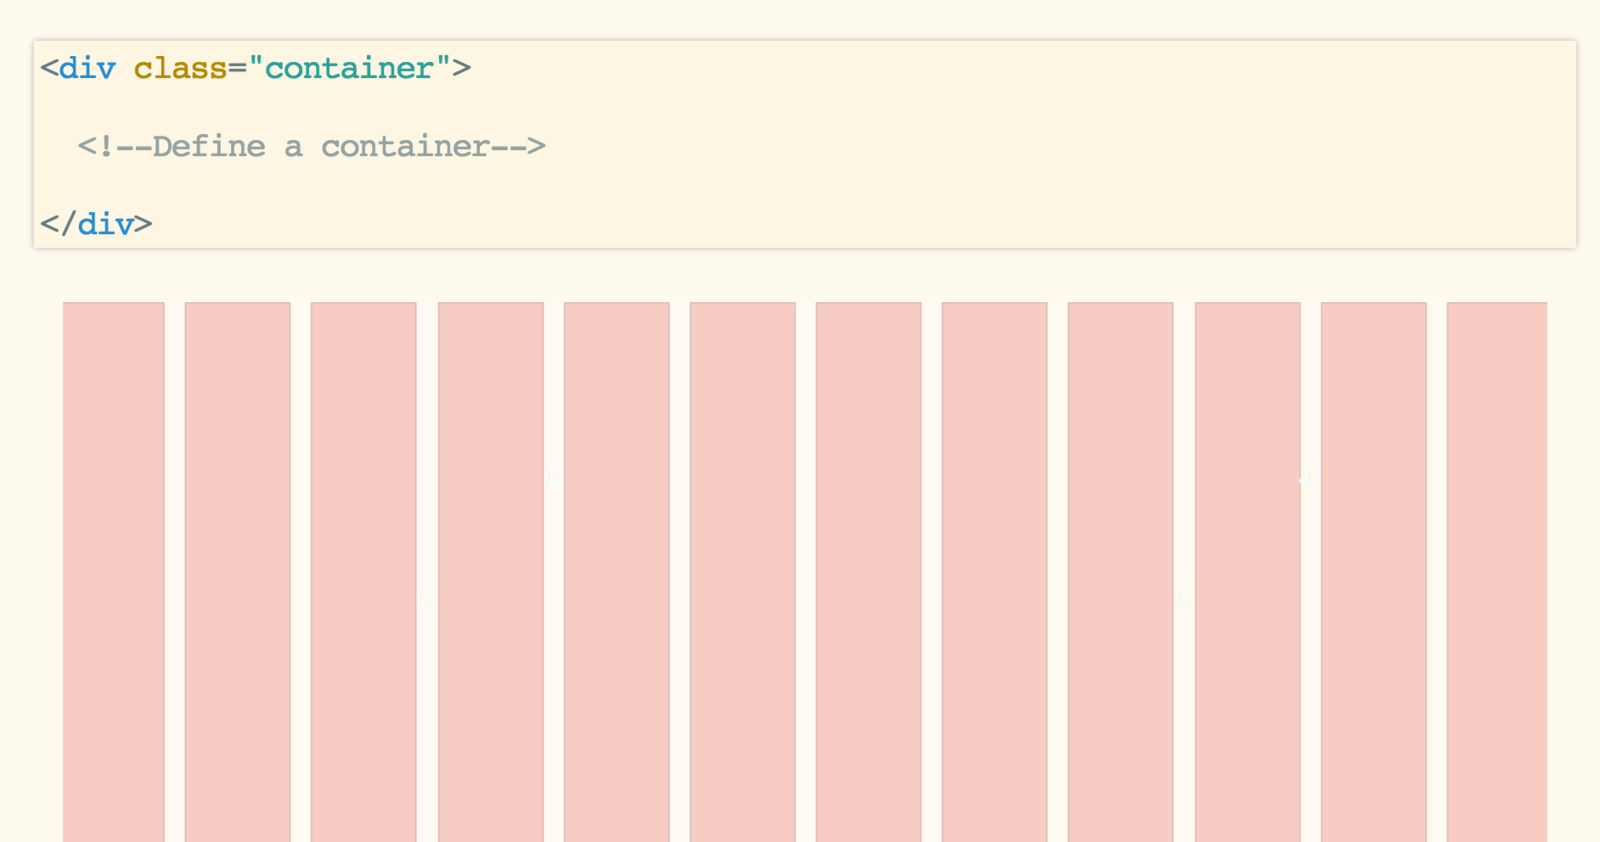
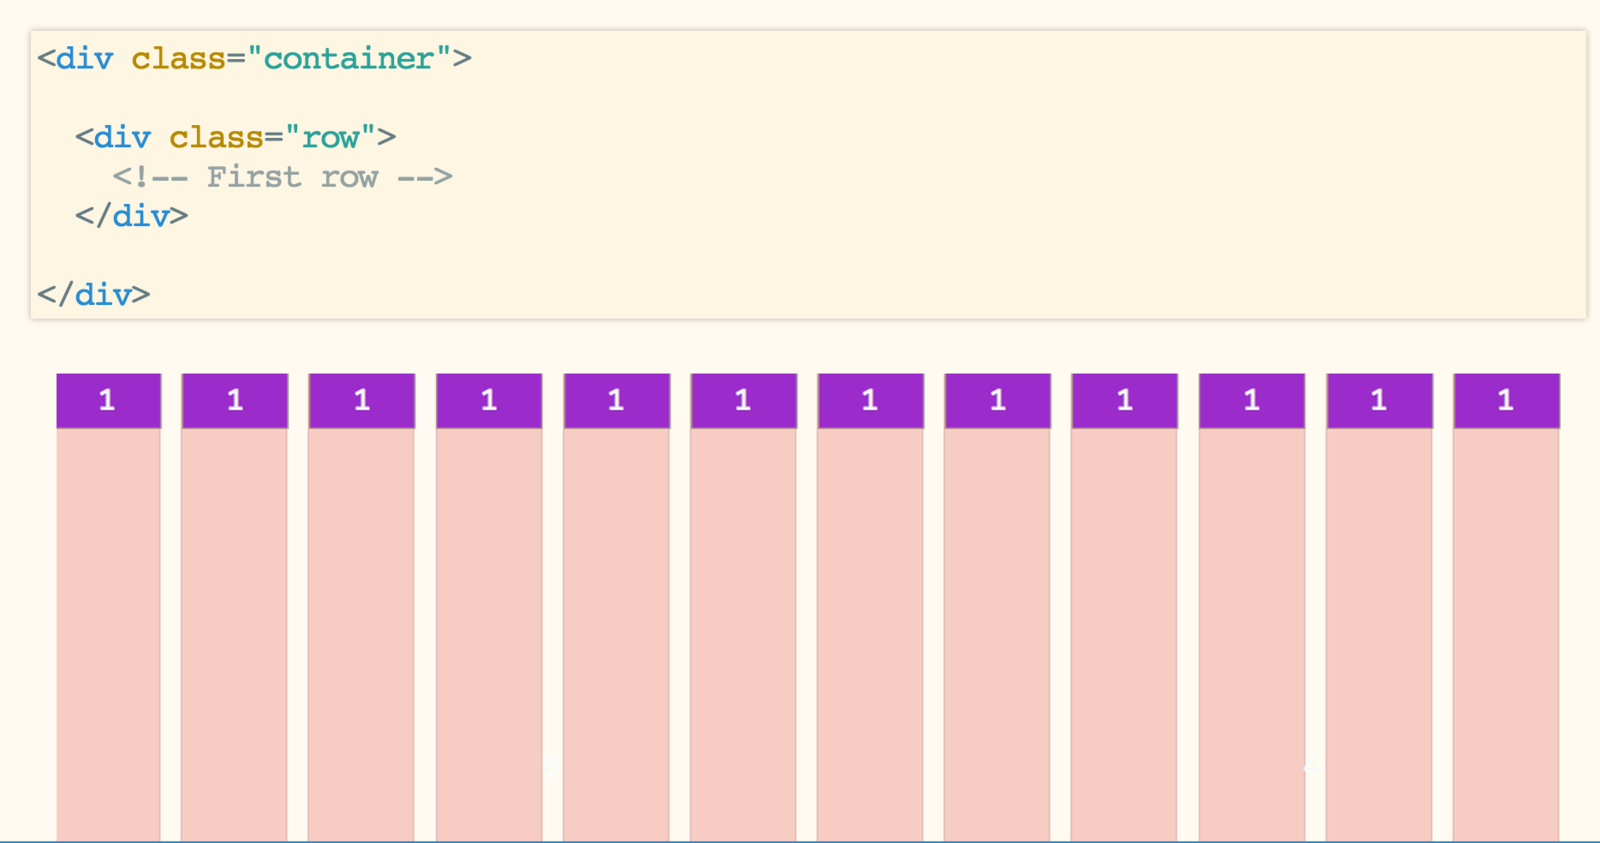
CONTAINER
Always start with a container
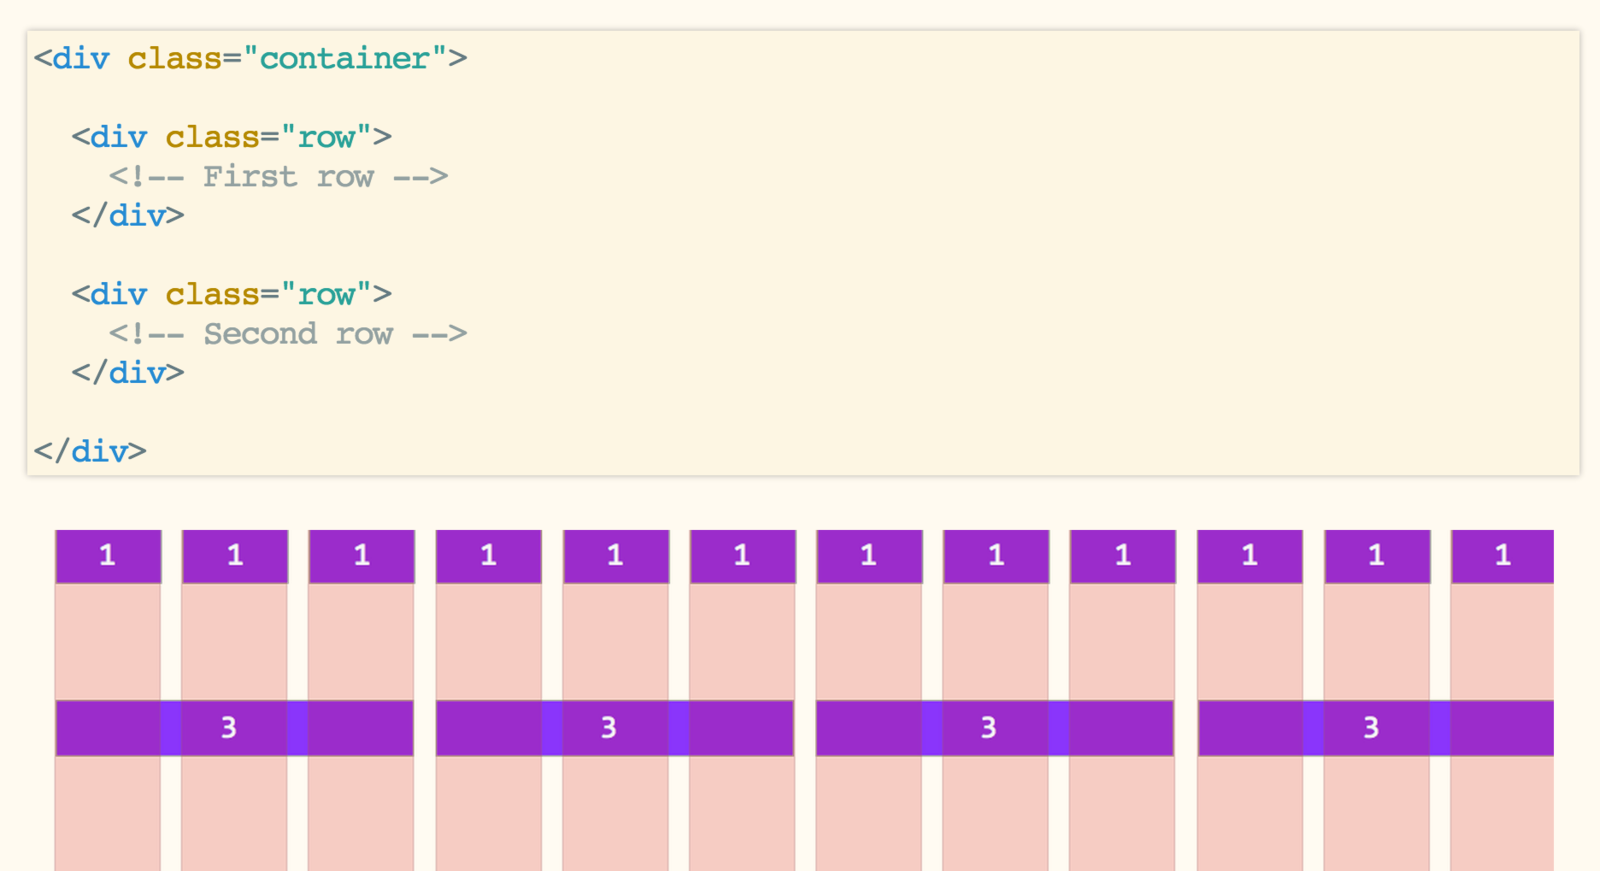
ROWS
then insert rows
ROWS
then insert rows
ROWS
more rows
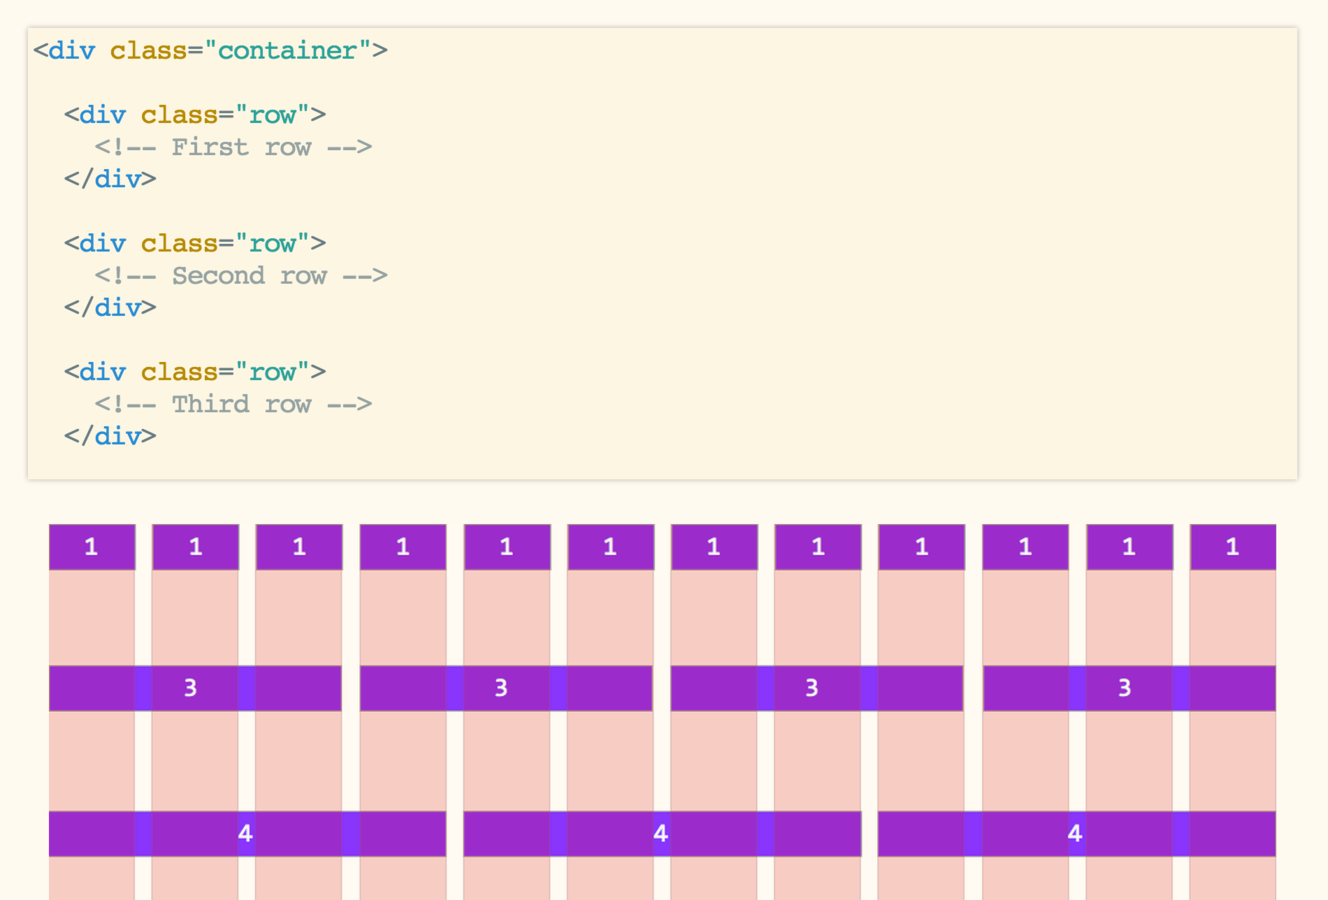
HOW DO WE FILL ROWS?
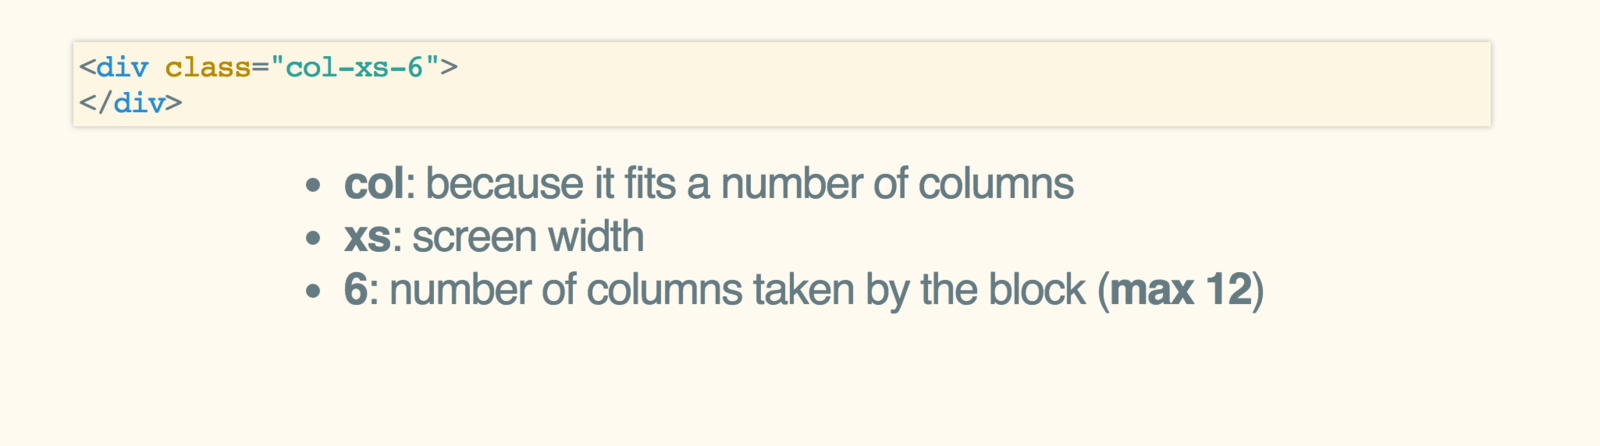
COLS
The elementary block
DEVICE SIZEs
- xs - Extra small devices (Phones < 768px)
- sm - Small devices (Tablets > 768px)
- md - Medium devices (Larger than 992px)
- lg - Large devices (Desktops > 1200px)
example - 2 cols

example - 2 cols
<div class=“container”>
  <div class=“row”>

    <div class=“col-xs-6”></div>
    <div class=“col-xs-6”></div>

  </div>
</div>
Mobile first means that .col-xs-6 will apply to larger screens
WHAT HAPPENS?
<div class=“container”>
  <div class=“row”>

    <div class=“col-xs-6”></div>
    <div class=“col-xs-6”></div>
    <div class=“col-xs-6”></div>

  </div>
</div>
RETURN TO NEW LINE
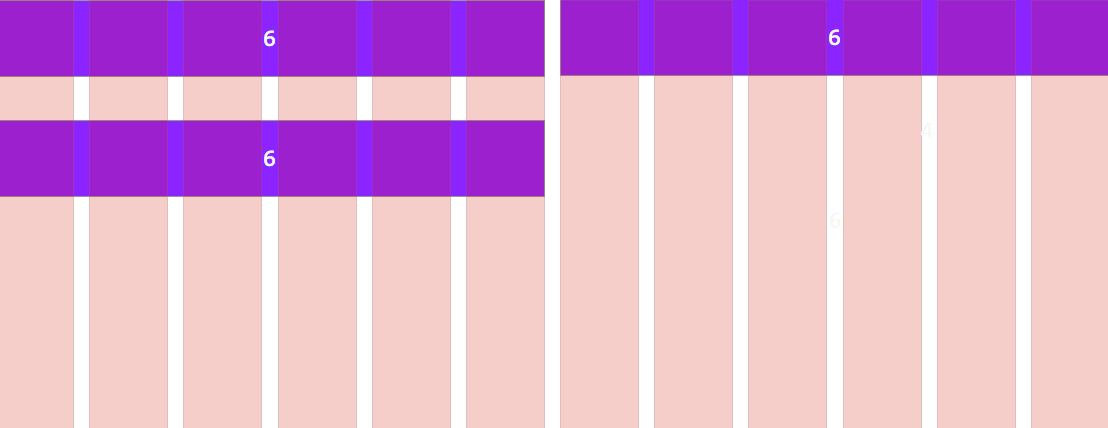
RESPONSIVE EXAMPLE
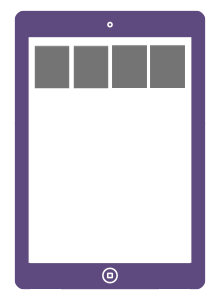

RESPONSIVE EXAMPLE
<div class="container">
  <div class="row">
    <div class="col-xs-6 col-sm-3"></div>
    <div class="col-xs-6 col-sm-3"></div>
    <div class="col-xs-6 col-sm-3"></div>
    <div class="col-xs-6 col-sm-3"></div>
  </div>
</div>
YOUR turn
Start with a raw initial grid
Insert each feature in a col
<div class="col-xs-6 col-sm-3">
  <div class="feature">
    ...
  </div>
</div>
<div class="container">
  <div class="row">
    <div class="col-xs-6 col-sm-3"></div>
    <div class="col-xs-6 col-sm-3"></div>
    <div class="col-xs-6 col-sm-3"></div>
    <div class="col-xs-6 col-sm-3"></div>
  </div>
</div>
Javascript
JavaScript is a powerful dynamic language.
It can be used to animate or change your HTML content
All without reloading your page!
JQUERY
jQuery is a powerful and popular JavaScript library
Installed on 65% of top 10 million web pages
It's designed to make your life easy

THE $() FUNCTION
Selects all divs on your page
$( "div" )Selects all tags with a "hello" class on your page
$( ".hello" )Finds the element with the "wagon" id on your page
$( "#wagon" )Any CSS Selector will do
$( "#footer>a>li" )Some Jquery functions
Makes your #footer disappear
$( '#footer' ).hide()Makes your #footer reappear
Makes your #header appear gradually
$( '#header' ).fadeIn()Selects all divs on your page
$( '#footer' ).show()$( '#header' ).fadeOut()YOUR TURN
- Create an application.js file in your folder
- Add this line at the bottom of your body:
<script src="application.js"></script>YOUR TURN - Javascript
$(document).ready(function() {
  // Your code here
});
YOUR TURN - BODY
Add a div with "main-title" id on
your h1, tagline and button
<div id="main-title">
  <h1>The Best Page Ever</h1>
  <p> Play with HTML and CSS!</p>
  <button class="btn btn-danger">Sign Up</button>
</div>
YOUR TURN - Javascript
$(document).ready(function() {
  $("#main-title").fadeIn(1000);
});
IT DOESN'T WORK!
SOLUTION IN THE CSS!
#main-title {
  display: none;
}
Thank you
See you soon !