Why teach computing to kids and teens?

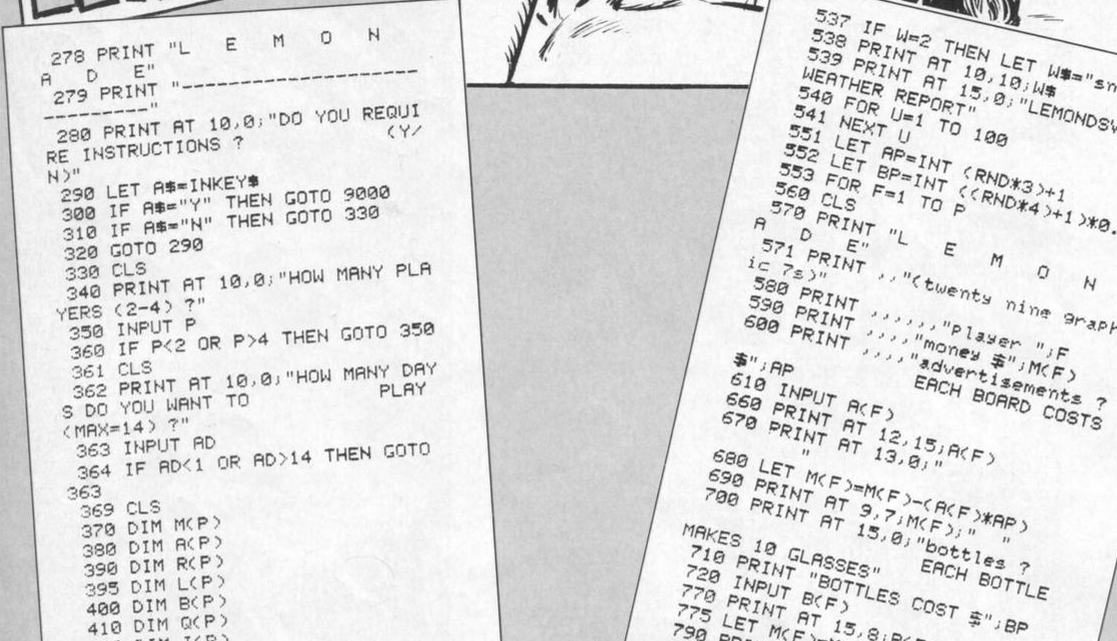
Early 80s - learn to program

This was the app store
What tools?

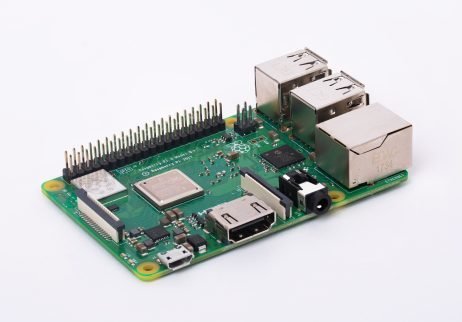
Why the Raspberry Pi?
- Community
- Foundation supporting education
- Resources
- Inexpensive $35
- Ran full OS - Linux!
- GPIO - connect to the real world again
Lesson Plan
-
Raspberry Pi Setup
-
Programming the GPIO with scratch
-
Fun with cameras!
-
Python programming
Raspberry Pi Setup
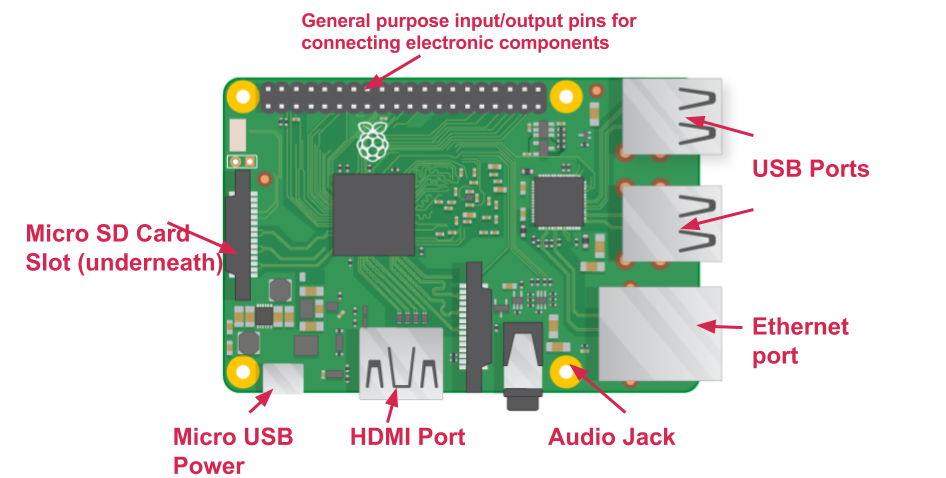
Hardware
- Raspberry Pi computer with an SD card
- Monitor with a cable
- USB keyboard and mouse
- Micro USB power supply (2.5A)
Software
- Raspbian, installed via NOOBS
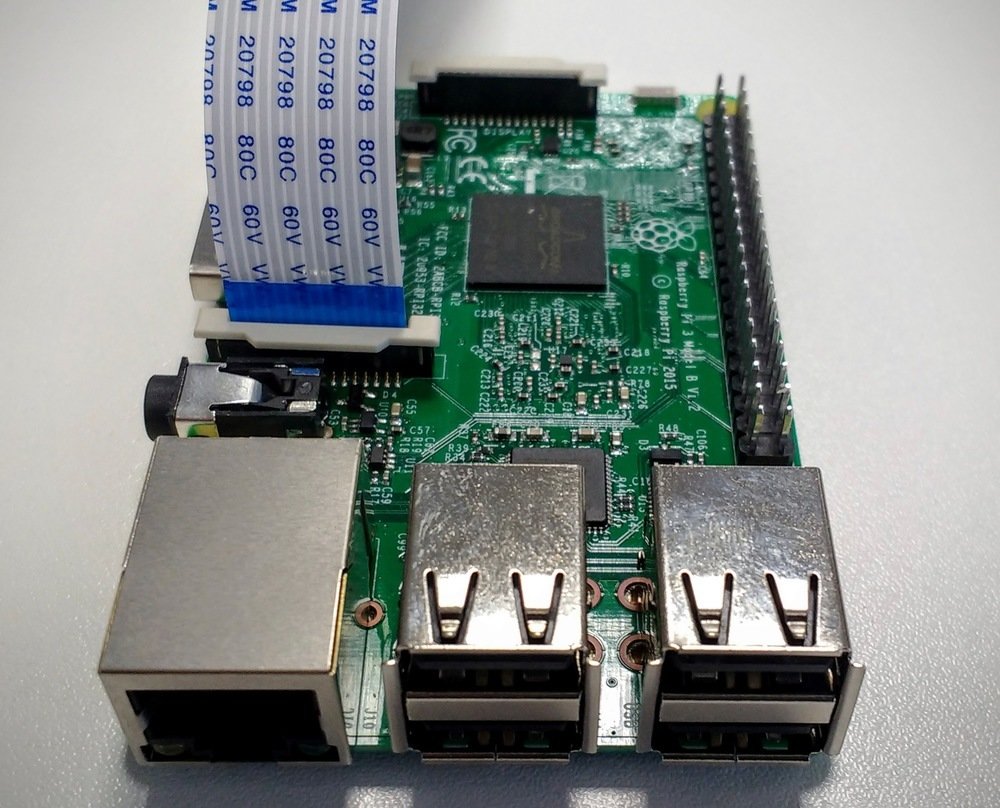
Raspberry Pi connections
Connecting Raspberry Pi
Pi Desktop
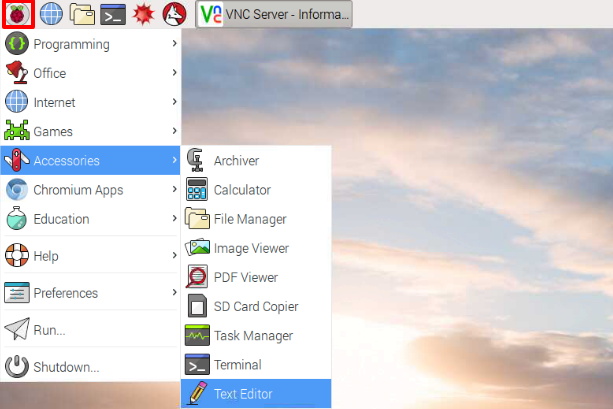
Programs
Programming the GPIO
with scratch
- 1 x Solderless breadboard
- 4 x Male-to-female jumper leads
- 1 x Tactile push button
- 1 x LED
- 1 x Buzzer
- 1 x 330 Ohm resistor
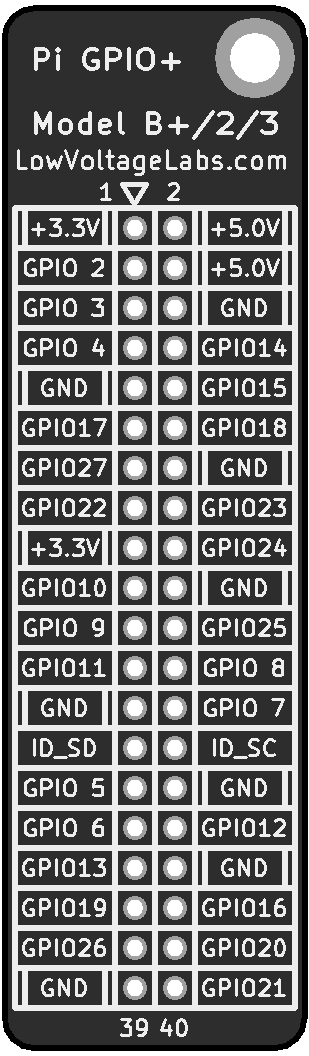
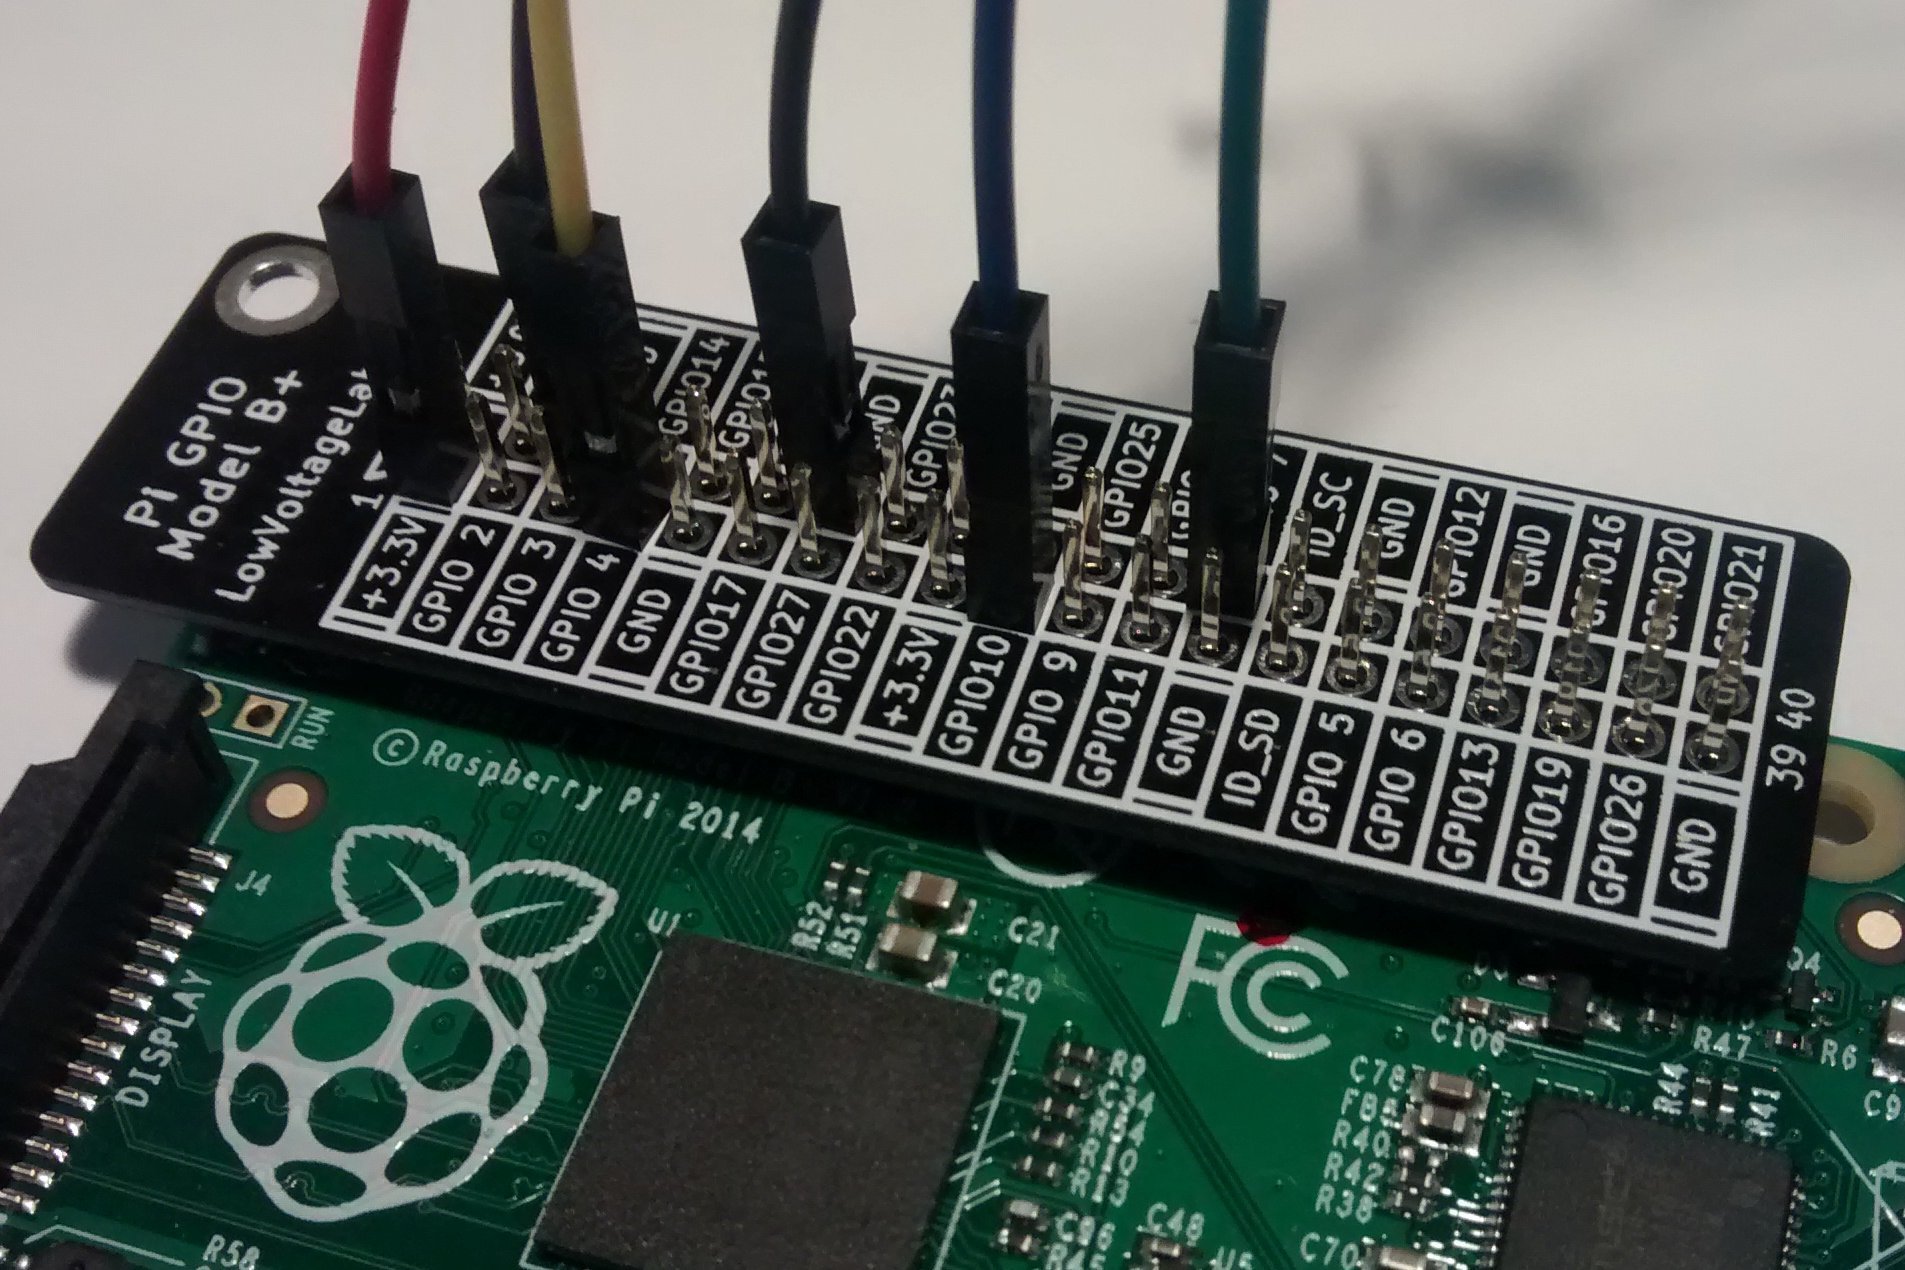
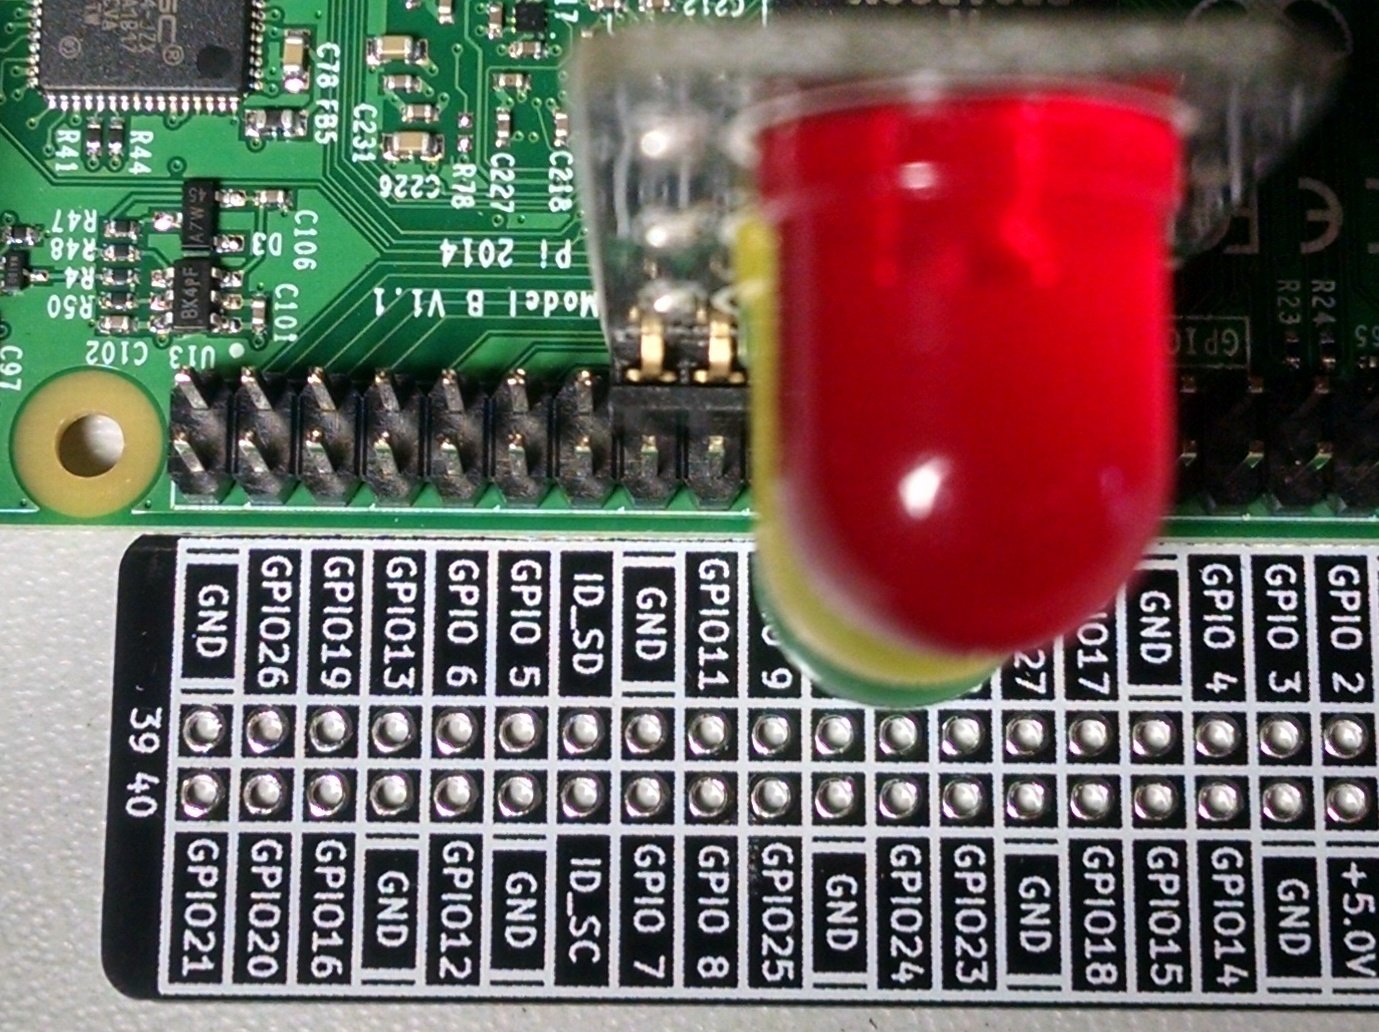
- Low Voltage Labs GPIO reference board
GPIO Pins
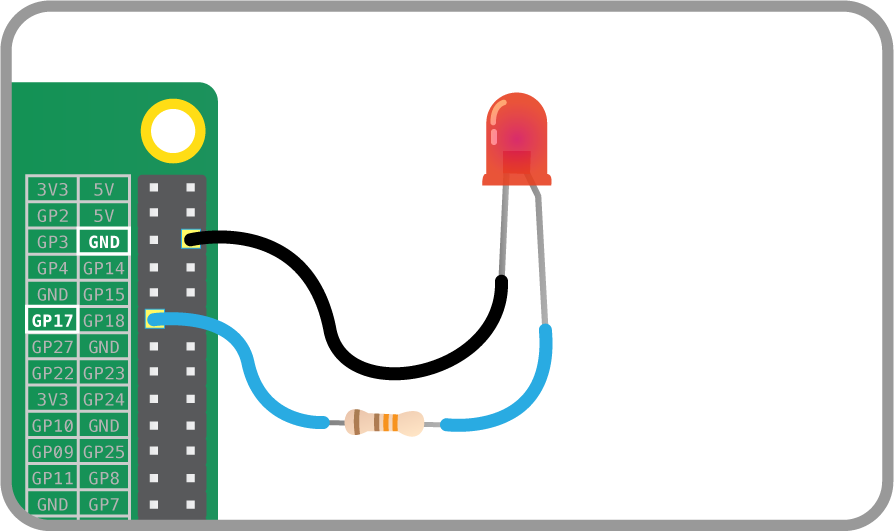
Lighting an LED
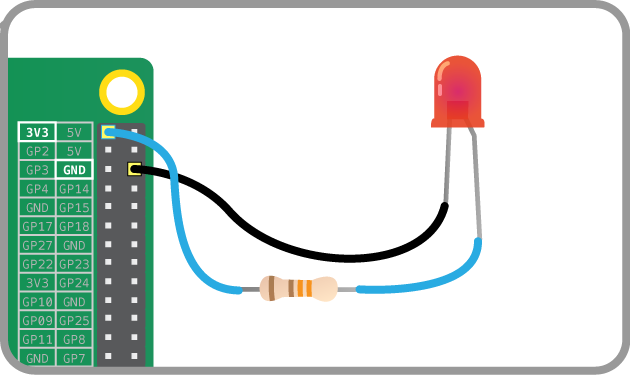
LED controlled by GPIO
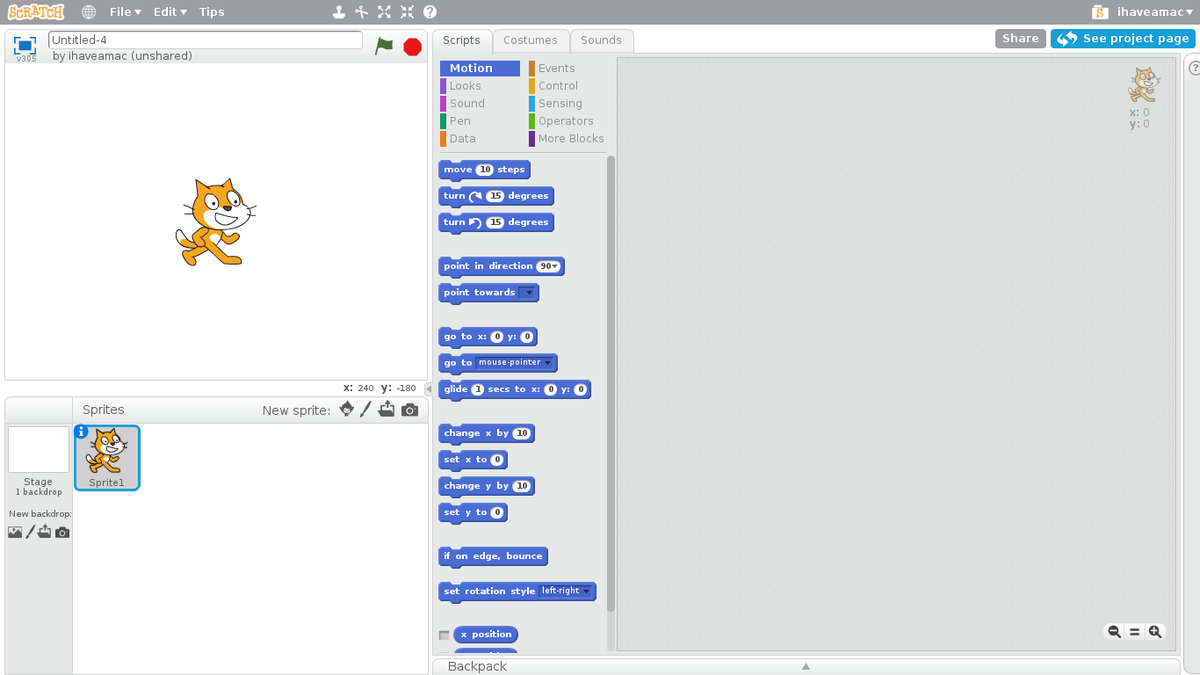
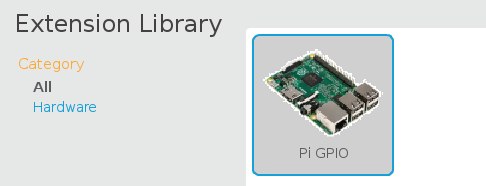
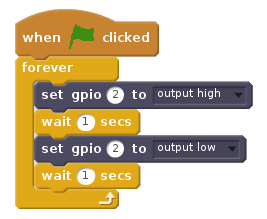
Scratch 2
Toggle a GPIO pin
Connect a button
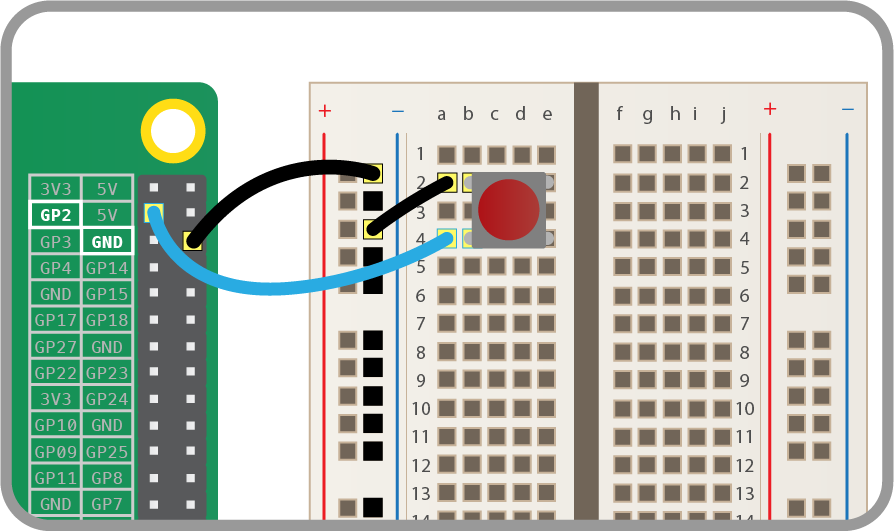
Detect the button

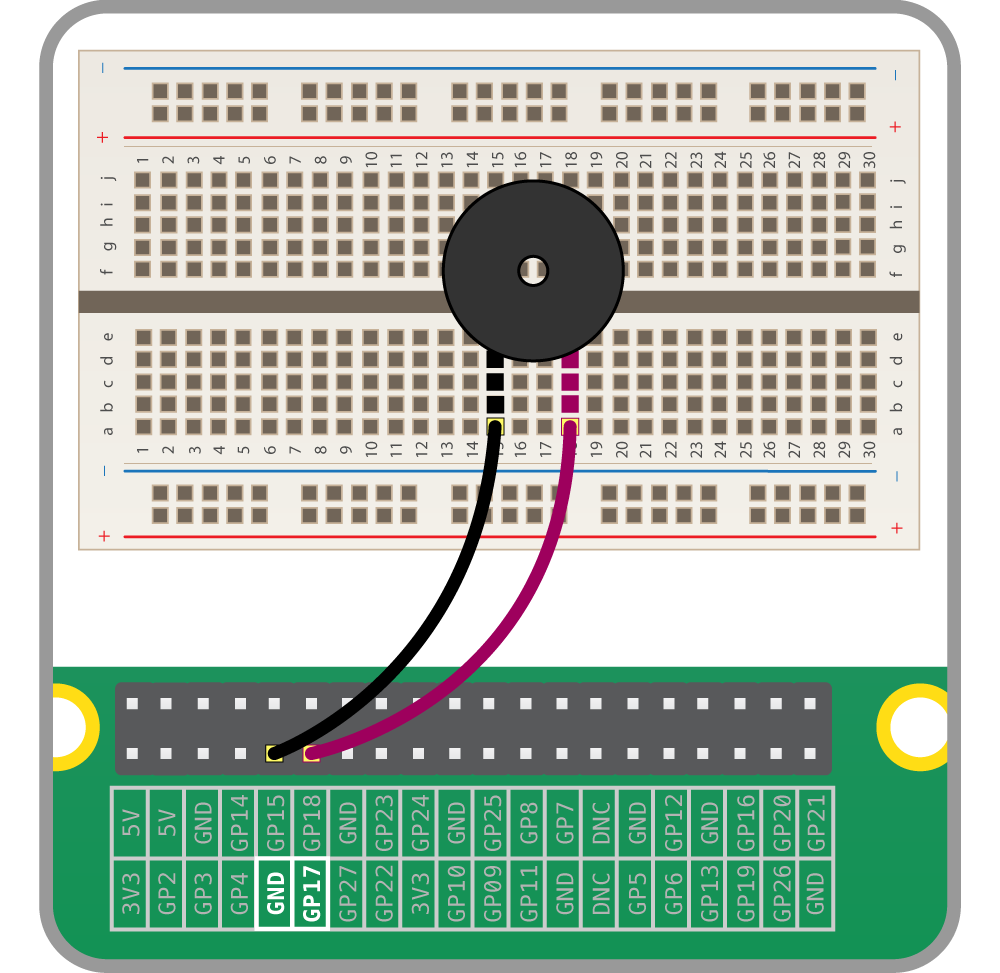
Connecting a buzzer
Connect like an LED but without a resistor
Fun with cameras!
- 8 Megapixels
- Still images up to 3280 x 2464 pixels
- Video modes up to 1080p at 30fps
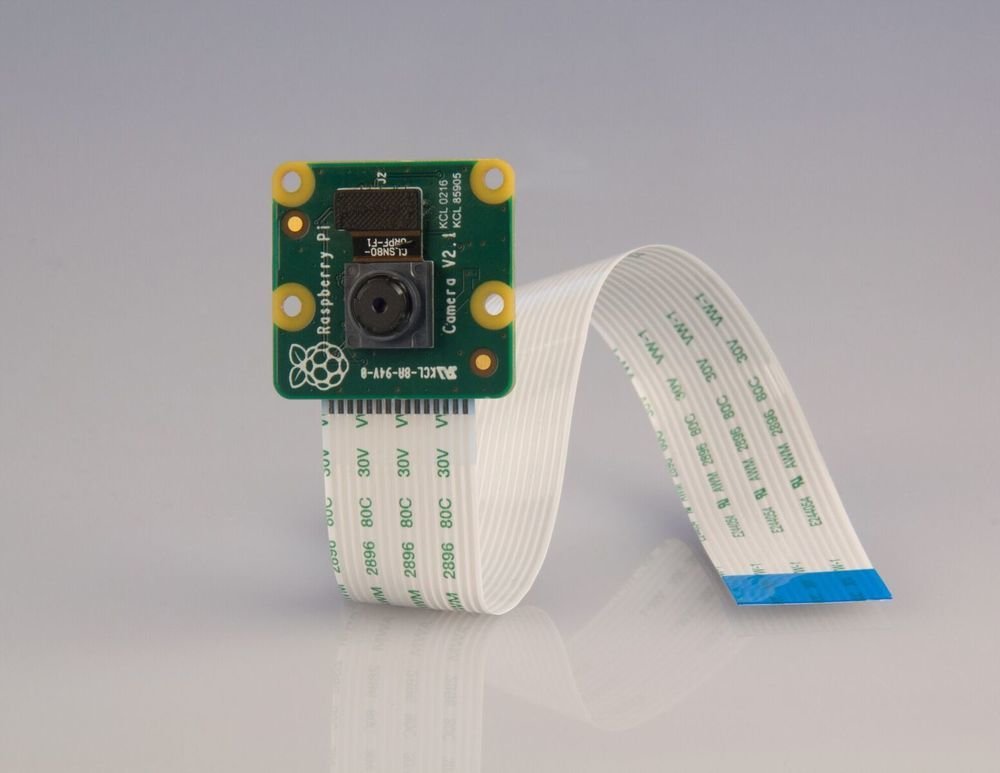
Connect the camera
- Power down the Raspberry Pi
- Connect the cable into the camera port
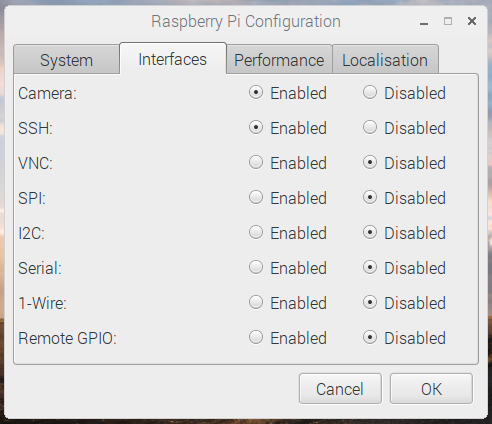
Enable the camera
Raspberry Pi Configuration
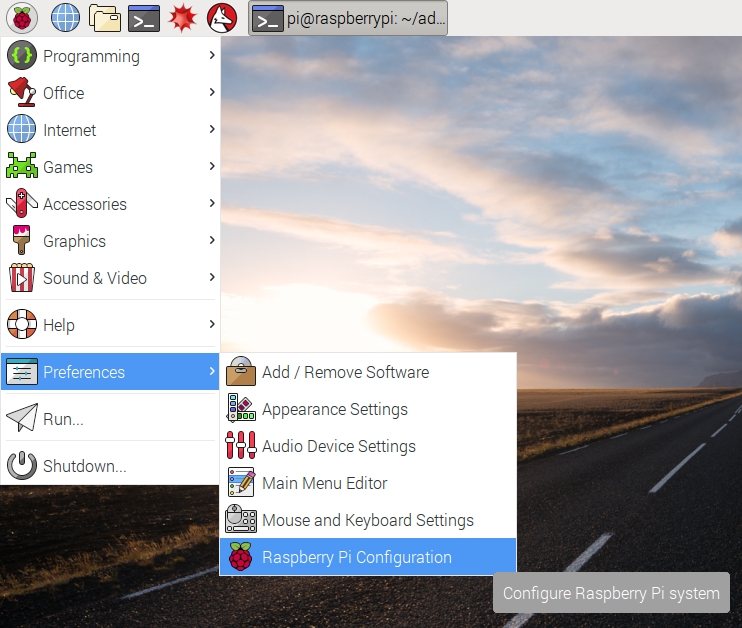
Enable the camera
Terminal
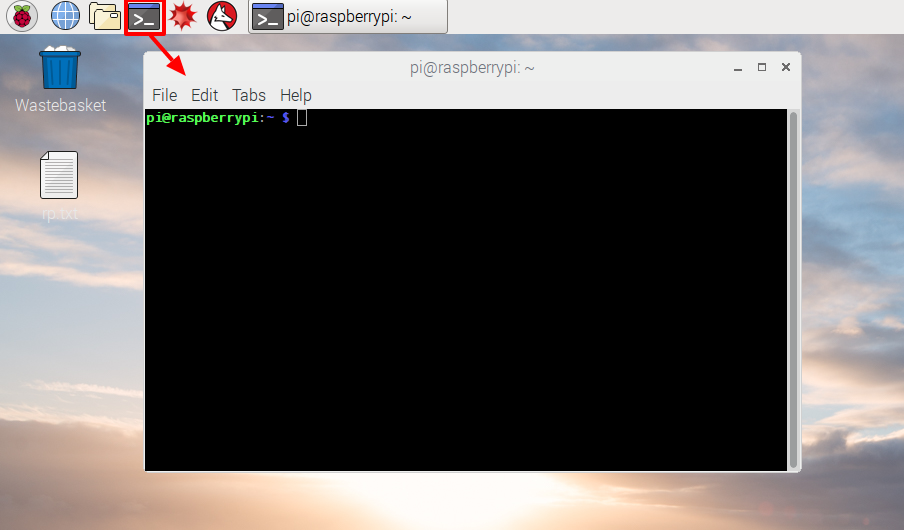
Camera commands
> raspistill -o pic.jpg
Take a picture - by default waits 5 seconds
> gpicview pic.jpg
View the picture
Advanced Camera commands
> raspistill
See all the command options
- Image size
- Image quality
- Timeout
- Timelapse mode
- Flip and rotate
- Effects
Camera effects
Image Effect mode options :
negative, solarise, sketch, denoise, emboss, oilpaint, hatch, gpen, pastel, watercolour, film, blur, saturation, colourswap, washedout, posterise, colourpoint, colourbalance, cartoon
> raspistill -ifx sketch -o sketch.jpg
Example:
More raspistill features
- Flip horizontal and vertical
- Time lapse mode
- Burst mode
- Exposure modes
Programming the GPIO
with Python
- Same original Raspberry Pi setup
- Low Voltage Labs Traffic Light
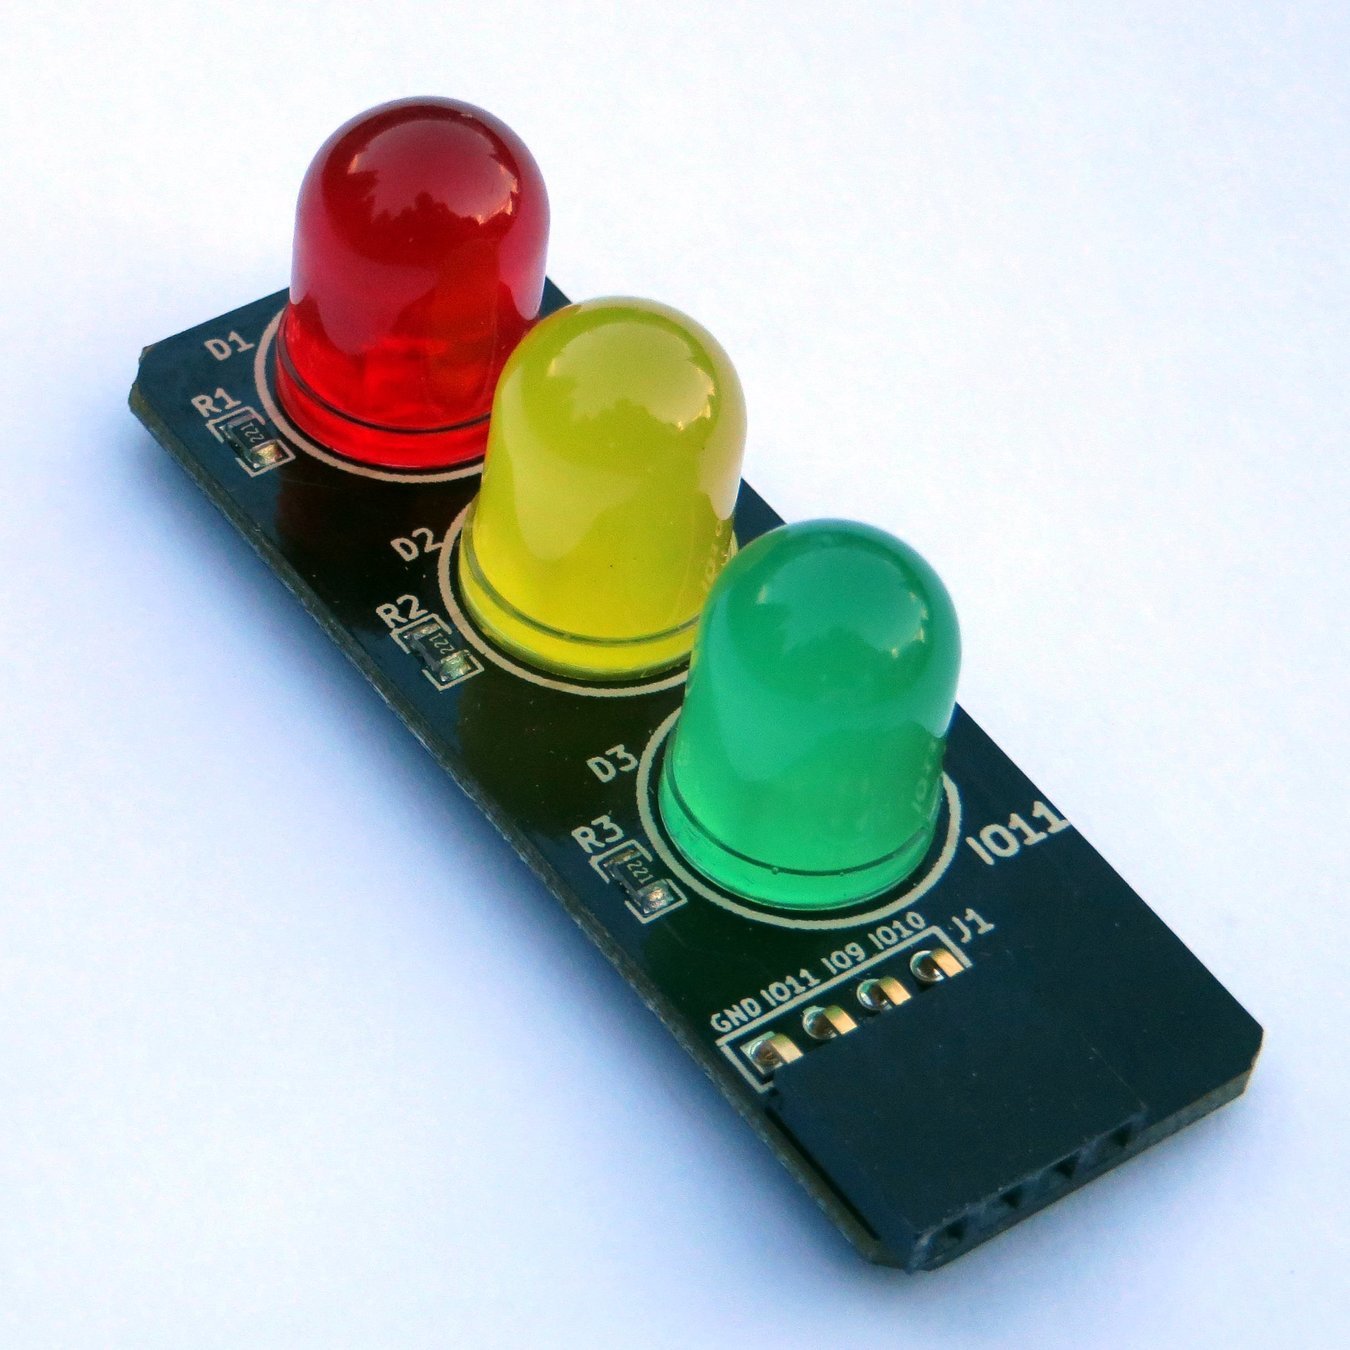
Connect the Traffic Light
Starting Python
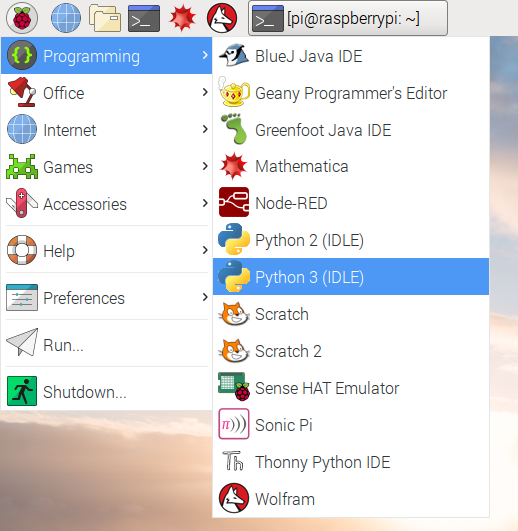
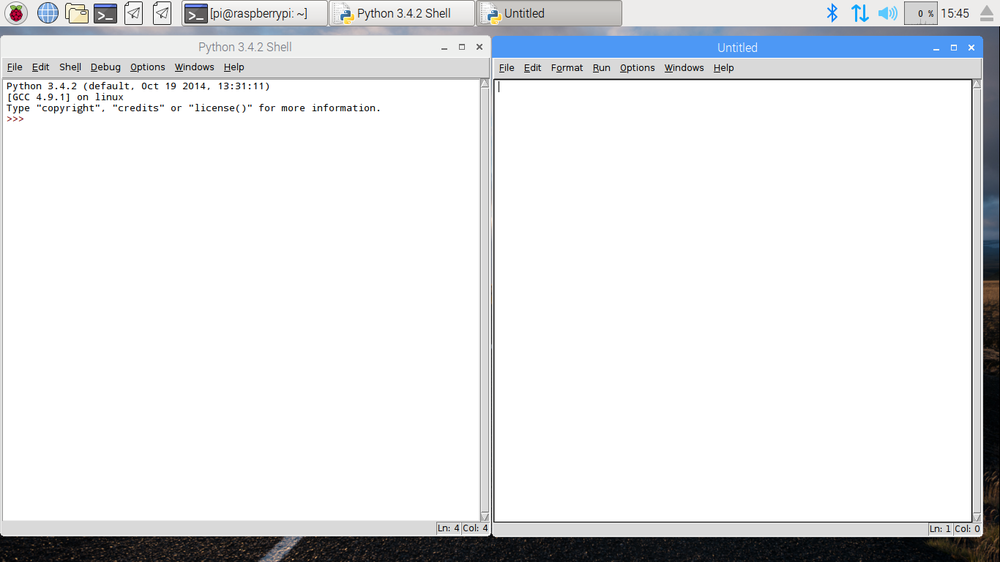
Python start a new project
Python shell on the left
Click on File -> Then New File to create a
project on the right
Python traffic light programming
from gpiozero import TrafficLights
Setup the GPIO
lights = TrafficLights(9, 10, 11)
Setup the traffic lights: red, amber, and green
lights.blink()
Blink the traffic lights
Save and run the project
CTRL-S to save
Function key F5 to run
Python traffic light
from time import sleep
Add delays
while True:
lights.green.on()
sleep(1)
lights.amber.on()
sleep(1)
lights.red.on()
sleep(1)
lights.off()
sleep(1)
Make a light sequence loop
Thanks!
Raspberry Pi Foundation
http://raspberrypi.org/
- Creative Commons Images
- Creative Commons training materials
Hayden
Questions?
See us for a free
GPIO Plus reference
board and stickers
Eric and Hayden
@LowVoltageLabs