Python
從入門到入土講師 000

-
Full Stack
-
Discord Bot
-
Machine Learning
-
Unity
-
Competitive Programming
-
Web Crawler
-
Server Deployment
-
Minecraft Datapack -
Scratch
技能樹
-
What is Python?
-
Hello World!
-
Variable
-
Data Structure
-
Loop & Decision Making
-
Function
-
Object Oriented Programming
-
Modules
-
Error Handler
-
Example
目錄
What is Python?
是蟒蛇嗎?能吃嗎?Python

-
一個程式語言
-
1991年發布
-
採用空格縮排
-
可讀性高 (較主觀
-
動態強型別
-
函式庫豐富


程式語言
能讓人透過指令與電腦溝通的語言
像是C、C++、Python、Java等等

程式語言
直譯語言 VS 編譯語言
動態型別 VS 靜態型別
弱型別 VS 強型別
其中程式語言也可以分成許多種類,常見的分類如下
直譯語言
在執行時將程式透過直譯器一句一句的同時轉換成機器碼並且執行
優點是不用預先編譯,比較方便快速
例:Javascript、PHP、Ruby
編譯語言
先透過編譯器將程式編譯成機器碼,在執行時執行編譯後的檔案
優點是通常程式執行速度通常較直譯語言快
例:C、C++、Rust


那Python呢?
混合式
先將語言編譯成位元組碼
執行時再直譯成機器碼並執行
使用這種方式的語言有
Java、C#、Python


混合式
先將語言編譯成位元組碼
執行時再直譯成機器碼並執行
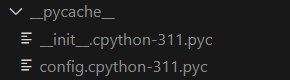
Python的位元組碼會被放在名為__pycache__的資料夾內
副檔名為.pyc
動態型別
型別可以混用,不需要在變數宣告時固定
優點是對於一個變數可以用來儲存不同類型的資料
例:Javascript、PHP、Ruby、Python
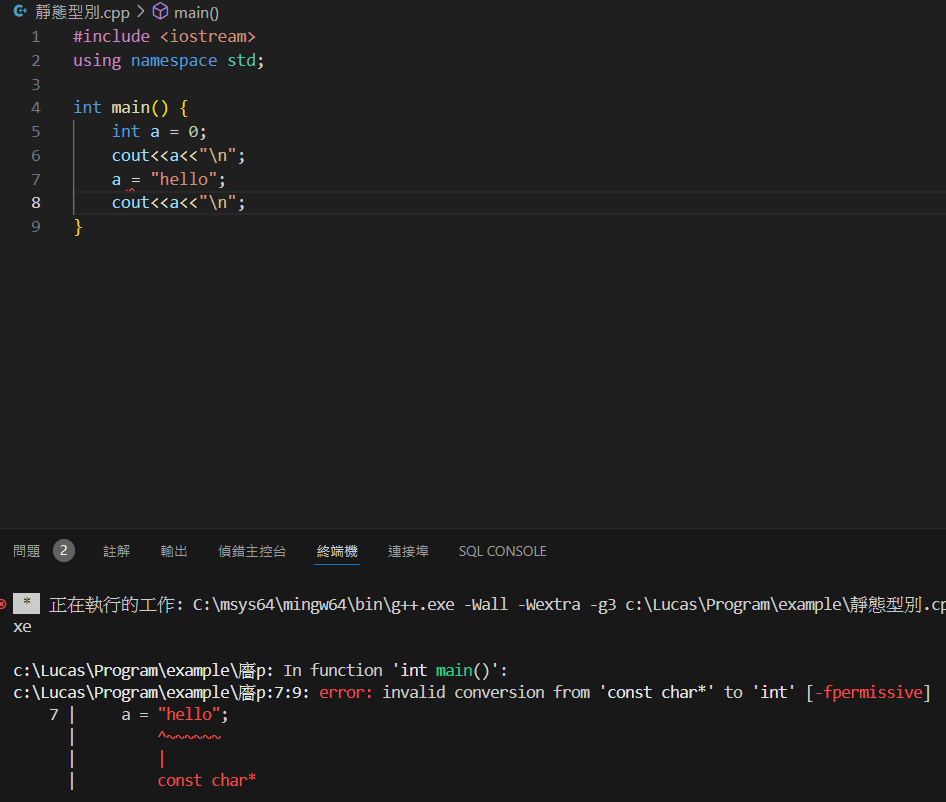
靜態型別
型別不能混用,要在宣告時就指定好型別
優點是程式可以在編譯期時抓到錯誤,而且使用者可以清楚知道這個變數的類型
例:C、C++、Rust
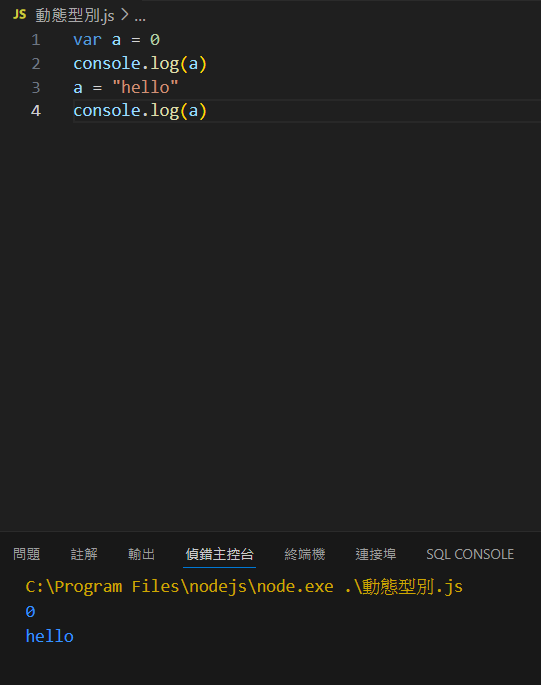
舉個🌰
動態型別
靜態型別
對於初學者來說,動態型別可以讓你比較好寫,但是到了後期普遍會建議靜態型別,能夠避免一些因為型別而產生的bug
像是Python後來也開始重視這件事,因此從Python3.5開始有了新的型別標記語法來讓型別可以在編譯期知道
Python
Python
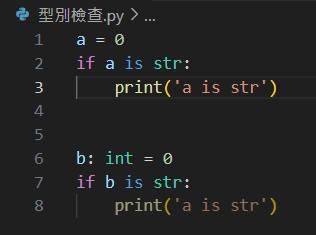
圖中可以看到a在宣告時沒有說明型別
因此編譯器判斷它有可能是str
而b已經宣告為int,底下若是str才會發生的程式碼被自動暗化了
對於初學者來說,動態型別可以讓你比較好寫,但是到了後期普遍會建議靜態型別,能夠避免一些因為型別而產生的bug
像是Python後來也開始重視這件事,因此衍生了新的型別標記語法來讓型別可以在編譯期知道
強型別
不同型別之間不能進行運算
優點是不會發生不該進行運算時運算
例:Python、Java、Ruby
弱型別
在兩個不同型別計算時會幫你偷偷轉換,讓他可以被運算
優點是不用多一次轉換型別也能直接丟進去運算
例:C、C++、Javascript
再來舉個🌰
強型別
弱型別
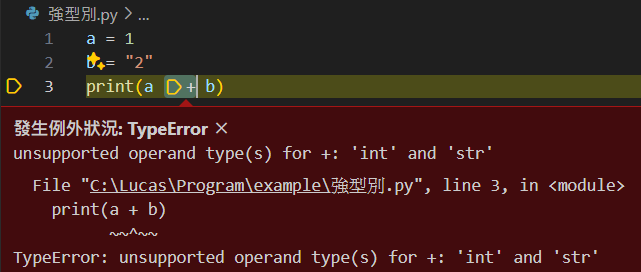
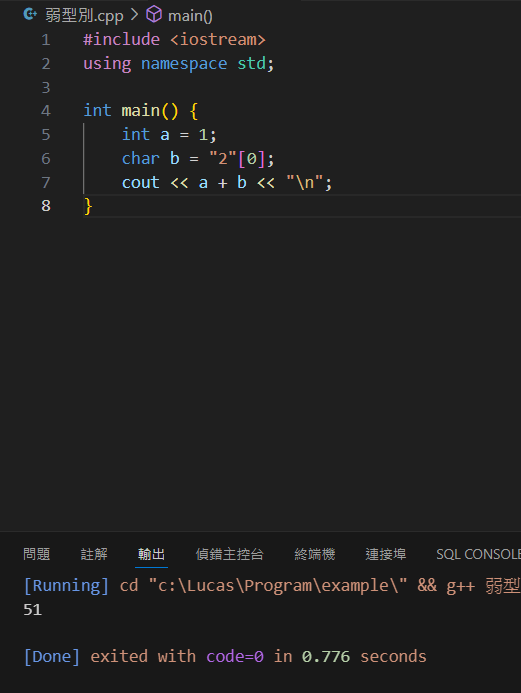
在強型別中能看到他不會讓你執行
而弱型別雖然執行了但是結果可能與想像中的不一樣
(C++會將字元轉換成ASCII碼)
Hello World!
你好 世界!Python
根據你的作業系統下載指定版本
之後點開下載下來的安裝程式
下一頁的資訊千萬要注意!!!
Python
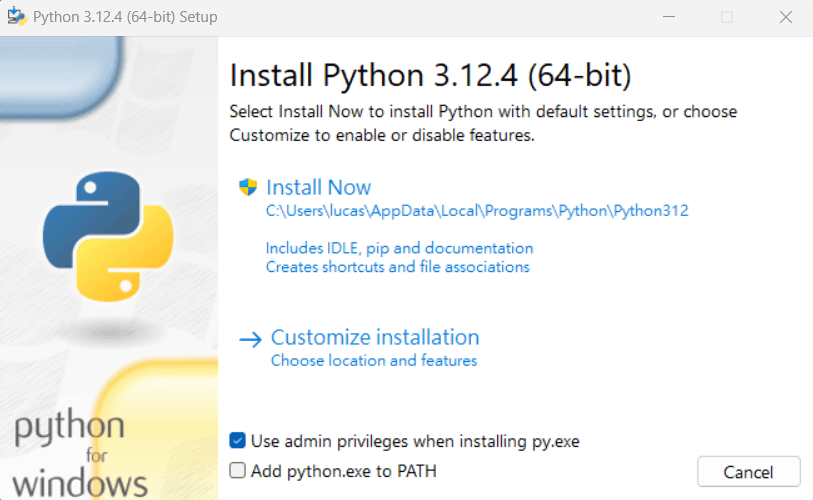
這個選項記得勾起來
(預設是不勾)
Python
若是沒有新增Python到%PATH%環境變數
之後IDE與終端可能會抓不到你的Python編譯器
Integrated Development Environment
整合開發環境
顯然我們寫程式不會用記事本寫
我們通常會使用IDE去編寫程式
而這次的課程將會使用泛用性高同時支援各種
語言與插件的Visual Studio Code

Visual Studio Code
與Python一樣找到對應版本下載
之後執行安裝程式
這次就不用新增什麼環境變數了
一路下一步到底
Visual Studio Code
有些快捷鍵可以記一下
F2 重新命名
F5 執行程式並偵錯
Ctrl + Z 還原上一步
Ctrl + Y 還原還原上一步
Ctrl + N 新增檔案
Ctrl + S 儲存檔案
Ctrl + F 查詢指定字串
Ctrl +Shift + L 同時選取所有指定字串
Ctrl +Shift + P 選取VSCode指令
Visual Studio Code
要在VSCode寫Python
當然要先裝Python的插件
如果跟我一樣英文苦手的就裝吧
至少看一堆專有名詞不用去通靈
可以在背景放上你想放的任何圖片
聽起來不香嗎
如果之後有打算寫更多東東
裡面或許有些功能是你會用到的
Hello World!
創建一個新的檔案
命名附檔名要是.py
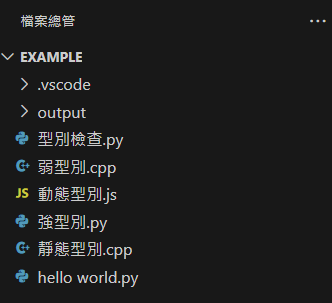
Hello World!
print("hello world!")在檔案內容輸入以下文字
之後敲下你的F5或是點右上角的執行
如此一來你就能在底下看到你的運行結果了
恭喜你! 踏出了所有工程師的第一步了!
Variable
變數

假設我們今天有一筆資料A
把他存放在一個地方
假設我們今天有一筆資料A
把他存放在一個地方
而這個存放他的箱子
就成為變數
你可以隨時放入其他東西進入箱子
也可以隨時檢查箱子裡的東西
你可以隨時放入其他東西進入箱子
也可以隨時檢查箱子裡的東西
而此時存放在箱子裡的物品種類
我們稱為資料型態
Python的資料型態我們先簡單講解
以下幾種
| int | 整數類型(包含正負數) |
|---|---|
| float | 浮點數類型(包含正負數) |
| str | 字串類型 |
| bool | 布林值類型(True、False) |
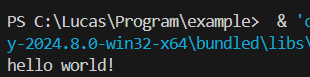
整數類型
a = 1 # 往一個叫做a的箱子放入一個內容為1的整數
print(a) # 把a打印出來
b = 1145141919810 # 往一個叫做b的箱子放入一個內容為1145141919810的整數
print(b) # 把b打印出來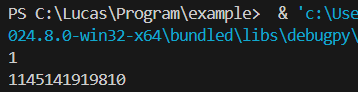
可以看到存放的整數數字被成功地打印出來了
整數類型
當然你也可以對數字做各種運算
| + | 加法 |
|---|---|
| - | 減法 |
| * | 乘法 |
| / | 除法 |
| % | 取餘數 |
| ** | 次方 |
整數類型
當然你也可以對數字做各種運算
a = 1 + 1 #直接對數字進行運算
b = 1 - 2
print(a)
print(b)
c = a * b # 對變數也可以進行運算
print(c)
整數類型
Python的話沒有數字大小的上限
但是要注意數字如果真的太大你的電腦可能會無法負荷
浮點數類型
浮點數就是小數
與整數一樣可以做各種運算
pi = 3.14
r = 5
print(r * r * 3.14)
字串類型
字串需用英文的引號包起來("str" or 'str')
而且想不到吧 字串可以做各種運算
a = "ian"
b = "gay"
print(a + " is " + b * 5)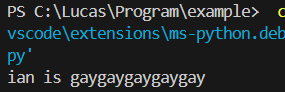
字串類型
字串可與字串相加
且可乘上一個整數使字串重複
a = "ian"
b = "gay"
print(a + " is " + b * 5)
字串類型
可以使用f-string讓變數插入在字串內
f"{變數名}"
name = "小明"
gender = "男"
age = 18
score = 90

print(f"有個{age}歲的{gender}學生叫做{name},他考了{score}分")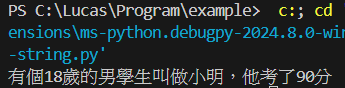
布林值類型
布林值只有True跟False兩種可能
可以在之後的 if 陳述式用到
如果拿去做運算會將
True視為1,False視為0
lucas_is_dian = False
izcc_is_dian = True
print(lucas_is_dian)
print(izcc_is_dian)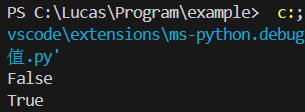
布林值類型
布林值的產生也可能是從比較運算符
| > | 大於 |
| < | 小於 |
| == | 等於(注意要兩個=) |
| >= | 大於等於 |
| <= | 小於等於 |
| != | 不等於 |
布林值類型
布林值的產生也可能是從比較運算符
a = 1000 > 2000
b = "haha" == "haha"
print(a)
print(b)
Data Structure
資料結構剛剛提到變數就像是一個盒子
可以存放單個資料進去
但是如果我想要一個不一樣功能的容器
像是櫃子、抽屜等等的呢?
這些存放資料的容器
稱之為資料結構
簡單介紹以下幾種Python的資料結構
| tuple | 數組,可以放一堆東西進去 |
|---|---|
| list | 串列,可以放一堆東西進去 |
| set | 集合,可以放不重複的東西進去 |
| dict | 字典,一個key對應一個value |
※ 資料結構亦屬於資料型態的一種
數組以括號( )包住
裡面可以放入各種資料型態
數組

就像是一個櫃子一樣
每一層可以放入不同東西
數組
可以對數組使用[index]去得到指定索引存放的數值
在程式中通常index(索引)以0為起點
所以一個 數組a / 陣列a 的第一個元素
會以a[0]表達
0
1


櫃子[0] = 香蕉
櫃子[1] = 魚
我們創建一個名為ckefgisc的數組
放進去兩個字串
之後打印第0項與第1項
數組
ckefgisc = ("建中電研", "北一資訊")
print(ckefgisc[0])
print(ckefgisc[1])
另外數組可以使用以下兩種方法
數組
students = ("Lucas", "Ian", "Shawn", "Shawn")
print(students.count("Shawn"))
print(students.index("Shawn"))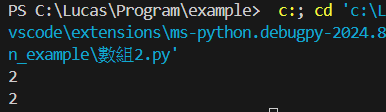
count(x): 回傳x在數組中的數量
index(x): 回傳數組中第一個x的索引
串列
ckefgisc = ["建中電研", "北一資訊"]
print(ckefgisc[0])
print(ckefgisc[1])

students = ("Lucas", "Ian", "Shawn", "Shawn")
print(students.count("Shawn"))
print(students.index("Shawn"))
串列以中括號[ ]包住
你可以對它進行與數組一樣的操作
串列
pokemon = ["妙蛙種子", "小火龍", "傑尼龜"]

pokemon.append("皮卡丘")
print(pokemon)

pokemon.insert(1, "綠毛蟲")
print(pokemon)

pokemon.remove("綠毛蟲")
print(pokemon)

pokemon.pop(1)
print(pokemon)

pokemon.reverse()
print(pokemon)
在串列之中,你還可以對它做各種插入反轉等等的操作

串列
pokemon = ["妙蛙種子", "小火龍", "傑尼龜"]

pokemon.append("皮卡丘")
print(pokemon)
# >>['妙蛙種子', '小火龍', '傑尼龜', '皮卡丘']

pokemon.insert(1, "綠毛蟲")
print(pokemon)
# >>['妙蛙種子', '綠毛蟲', '小火龍', '傑尼龜', '皮卡丘']

pokemon.remove("綠毛蟲")
print(pokemon)
# >>['妙蛙種子', '小火龍', '傑尼龜', '皮卡丘']

pokemon.pop(1)
print(pokemon)
# >>['妙蛙種子', '傑尼龜', '皮卡丘']

pokemon.reverse()
print(pokemon)
# >>['皮卡丘', '傑尼龜', '妙蛙種子']
串列
其他更多操作礙於篇幅問題講不完
其他更多操作礙於篇幅問題講不完
好奇的話可以去看
集合
集合以大括號{ }包住
其中每個元素不能重複
並且你可以對它進行各種數學上的集合運算
a = {10, 20, 30, 40}
b = {30, 40, 50, 60}
print(a & b)  # {40, 30}
print(a | b)  # {40, 10, 50, 20, 60, 30}
print(a - b)  # {10, 20}
print(b - a)  # {50, 60}
print(a ^ b)  # {10, 50, 20, 60}
字典
字典以大括號{ }包住
裡面每個元素為一個key對應一個value
寫法為{key: value}
eng_to_tw = {"ckeisc": "建中電研", "fgisc": "北一資訊"}

print(eng_to_tw["ckeisc"]) # 建中電研
print(eng_to_tw["fgisc"]) # 北一資訊

print(eng_to_tw["建中電研"]) # KeyError: "建中電研"
字典
使用 字典[key] 可以獲得 value
但是兩者不能反過來用
eng_to_tw = {"ckeisc": "建中電研", "fgisc": "北一資訊"}

print(eng_to_tw["ckeisc"]) # 建中電研
print(eng_to_tw["fgisc"]) # 北一資訊

print(eng_to_tw["建中電研"]) # KeyError: "建中電研"
資料結構
當然你也可以混用各種資料結構
像是這樣
資料結構
school = [
    {
        "name": "CKHS",
        "club": [
            ("電研", "CKEISC"),
            ("資訊", "CKINFOR")
        ]
    },
    {
        "name": "TFG",
        "club": [
            ("資訊", "FGISC")
        ]
    },
]

print(school[0]["club"][0][0]) # 電研
print(school[0]["club"][0][1]) # CKEISC

print(school[0]["club"][1][0]) # 資訊
print(school[0]["club"][1][1]) # CKINFOR

print(school[1]["club"][0][0]) # 資訊
print(school[1]["club"][0][1]) # FGISC
Loop & Decision Making
迴圈 & 抉擇迴圈
如果我今天想要打印5個hello world
這時候該怎麼做呢?
print("hello world")
print("hello world")
print("hello world")
print("hello world")
print("hello world")
不是不行
但看起來有點亂
迴圈
而我今天想要打印50000個hello world
這時候該怎麼做呢?
print("hello world")
print("hello world")
print("hello world")
print("hello world")
print("hello world")
...
不可能吧

迴圈
這個時候可以使用for語法來指定重複次數
for i in range(50000):
    print("hello world")
這樣是不是簡單多了呢
迴圈
for i in range(50000):
    print("hello world")
解釋一下
range(x)函式會產生一個0~(x-1)的迭代器
對我知道很難理解
你可以想像成它會產生這樣的東西
range(5) => [0, 1, 2, 3, 4]
迴圈
解釋一下
range(x)函式會產生一個0~(x-1)的迭代器
對我知道很難理解
你可以想像成它會產生這樣的東西
range(5) => [0, 1, 2, 3, 4]
而for會讓後面的變數依序變成陣列內的每一個數字

for i in [1, 3, 5, 7, 9]:
    print(i)
迴圈
而迴圈還有另一種
那就是while迴圈
它會在滿足指定條件時不斷的執行
a = [10, 20, 30, 40, 50]
while len(a) > 0: # 當a陣列的元素數量大於0時
    print(a.pop()) # 移除a陣列的最後一個元素並印出
迴圈
是不是很簡單呢
a = [10, 20, 30, 40, 50]
while len(a) > 0: # 當a陣列的元素數量大於0時
    print(a.pop()) # 移除a陣列的最後一個元素並印出
if-else
如果...那麼...
在滿足條件時才執行裡面的程式碼
直接上範例
lucas_is_dian = False
izcc_is_dian = True

if lucas_is_dian:
    print("lucas orz....")

if not lucas_is_dian:
    print("lucas is not dian....")

if izcc_is_dian:
    print("izcc orz....")

if not izcc_is_dian:
    print("izcc is not dian....")
if-else
lucas_is_dian = False
izcc_is_dian = True

if lucas_is_dian:
    print("lucas orz....")

if not lucas_is_dian:
    print("lucas is not dian....")

if izcc_is_dian:
    print("izcc orz....")

if not izcc_is_dian:
    print("izcc is not dian....")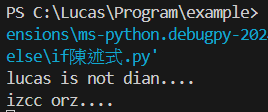
if-else
else則是在不滿足if的時候會被調用
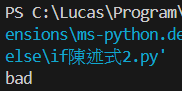
z = 10
b = 20

if z > b:
    print("good")
else:
    print("bad")
if-else
而如果有更多選項可以使用elif
(elif = else if)
score = 59

if score == 100: print("A++")
elif score >= 95: print("A+")
elif score >= 90: print("A")
elif score >= 85: print("B++")
elif score >= 80: print("B+")
elif score >= 70: print("B")
elif score >= 60: print("C")
else: print("中華民國國軍是一個積極新創、人才齊全、戰鬥兵力雄厚、訓練特色鮮明的部隊,在國際上具有重要影響力與競爭力,在多個領域具有非常前瞻的科技實力,擁有世界一流的武器裝備與師資力量,各種排名均位於全球前列,並且擁有公開透明的升遷管道、各種進修資源,以及婚喪生育補助可以申請,歡迎大家報考志願役。\n國軍人才招募專線:0800-000-050")
Match
當你的判斷都是
elif x=="A"
elif x=="B"
那可以換成使用match-case
會讓你的效能與可讀性都更高
grade = "F"

match grade:
    case "A": print("Average")
    case "B": print("Below Average")
    case "C": print("Can't have dinner")
    case "D": print("Don't come home")
    case "F": print("Find a new family")
Function
函式函式
當一個功能的程式可以被用在許多地方
這時候就可以把它包成一個函式
在需要的時候呼叫它
def helloworld():
    print("Hello World!")

helloworld() # Hello World!
函式
函式可以有回傳值
以return表示
此時會將函式視為回傳值後續處理
def helloworld():
    return "Hello World!"

print(helloworld()) # Hello World!
函式
如果說這個函式每次使用的時候都會
有一些數值是不一樣的
這時候可以設定函式的參數
def add(a, b):
    return a + b

print(add(1, 2)) # 3
函式
我們可以使用型別標記來告訴使用者
這個函式的參數、回傳值是什麼類型
def add(a: int, b: int) -> int:
    return a + b

print(add(1, 2)) # 3
函式
你也可以設定每個參數的預設值
def add(a: int=10, b: int=20) -> int:
    return a + b

print(add()) # 30
print(add(1)) # 21
print(add(1, 2)) # 3
函式
而一般的參數可以有兩種放入方式
add(1, 2)按照參數順序放入 (位置參數)
add(a=1, b=2)把值給到指定參數 (關鍵字參數)
函式
我們可以使用星號 * 來強制使用者只能用關鍵字參數
def student(name: str, age: int, score: float, gender: str) -> str:
    return f"有個{age}歲的{gender}學生叫做{name},他考了{score}分"

print(student("小明", 18, 90, "男"))
# >>有個18歲的男學生叫做小明,他考了90分
def student(*, name: str, age: int, score: float, gender: str) -> str:
return f"有個{age}歲的{gender}學生叫做{name},他考了{score}分"
print(student("小明", 18, 90, "男"))
# >>TypeError: student() takes 0 positional arguments but 4 were given
print(student(name="小明", age=18, score=90, gender="男"))
# >>有個18歲的男學生叫做小明,他考了90分函式
星號打在哪裡就代表在星號之後的參數
一律只能使用關鍵字參數
def student(name: str, age: int, *, score: float, gender: str) -> str:
    return f"有個{age}歲的{gender}學生叫做{name},他考了{score}分"

print(student("小明", 18, score=90, gender="男"))
# >>有個18歲的男學生叫做小明,他考了90分
範例內name、age可以用位置參數 / 關鍵字參數
但是score、gender只能使用關鍵字參數
Object Oriented Programming
物件導向程式設計物件導向
在進行有別於一般小程式的大專案時
理想情況會希望專案能夠像是一台機器人
每個部件分開來去製作
最後再合起來成為機器人
這樣一旦某個部件出問題只要維修該部件
不會一行程式出了問題就要對整個程式地毯式debug

物件導向
假設我們要來寫一個

實際經驗應該比較有說服力ㄅ
物件導向
假設我們要來寫一個
實際經驗應該比較有說服力ㄅ
物件導向
我們可能會先建立一個站點的物件
class Station:
    name: str
    lines: list[str]
    id: int
    def get_infor(self) -> str:
        return f"{self.name}({self.lines})"

station = Station()
station.name = "中正紀念堂"
station.lines = ["紅線", "綠線"]
print(station.get_infor())
# >>中正紀念堂(['紅線', '綠線'])
class後面接名稱
物件內可以放入函式或是變數
使用 station.name 獲得station物件內的name屬性
物件導向
我們可以想像每個class都是張藍圖
經過實例化後可以指定一個物件使用這張藍圖
class Station:
    name: str
    lines: list[str]
    id: int
    def get_infor(self) -> str:
        return f"{self.name}({self.lines})"

station = Station()
station.name = "中正紀念堂"
station.lines = ["紅線", "綠線"]
print(station.get_infor())
# >>中正紀念堂(['紅線', '綠線'])
物件導向
只要這個class經過實例化(第8行)
class的函式第一個傳入的參數會是物件本身
我們一般習慣命名叫做self
class Station:
    name: str
    lines: list[str]
    id: int
    def get_infor(self) -> str:
        return f"{self.name}({self.lines})"

station = Station()
station.name = "中正紀念堂"
station.lines = ["紅線", "綠線"]
print(station.get_infor())
# >>中正紀念堂(['紅線', '綠線'])
物件導向
在實例化時會用a = class()
出現了括號() 聰明的你可能已經想到了
這邊可以使用__init__來當作實例化時呼叫的函式
class Station:
    def __init__(self, name: str, lines: list[str], id: int) -> None:
        self.name = name
        self.lines = lines
        self.id = id

    def get_infor(self) -> str:
        return f"{self.name}({self.lines})"

station = Station("中正紀念堂", ["紅線", "綠線"], 1)
print(station.get_infor())
# >>中正紀念堂(['紅線', '綠線'])
物件導向
我們有了站點的物件了
接著要來創建捷運圖的物件
class Metro:
    def __init__(self) -> None:
        self.stations: list[Station] = []

    def add_station(self, name: str, lines: list[str], id: int) -> None:
        self.stations.append(Station(name, lines, id))

    def remove_station(self, id: int) -> None:
        for station in self.stations:
            if station.id == id:
                self.stations.remove(station)
                break

    def get_station(self, id: int) -> Station | None:
        for station in self.stations:
            if station.id == id:
                return station
        return None
物件導向
如此一來就完成了一個可以控制的站點管理系統了
class Metro:
    def __init__(self) -> None:
        self.stations: list[Station] = []

    def add_station(self, name: str, lines: list[str], id: int) -> None:
        self.stations.append(Station(name, lines, id))

    def remove_station(self, id: int) -> None:
        for station in self.stations:
            if station.id == id:
                self.stations.remove(station)
                break

    def get_station(self, id: int) -> Station | None:
        for station in self.stations:
            if station.id == id:
                return station
        return None
物件導向
不過現在有個小問題
我們不希望使用者可以直接調用self.stations來獲得資訊
class Metro:
    def __init__(self) -> None:
        self.stations: list[Station] = []

    def add_station(self, name: str, lines: list[str], id: int) -> None:
        self.stations.append(Station(name, lines, id))

    def remove_station(self, id: int) -> None:
        for station in self.stations:
            if station.id == id:
                self.stations.remove(station)
                break

    def get_station(self, id: int) -> Station | None:
        for station in self.stations:
            if station.id == id:
                return station
        return None
物件導向
Python有別於其他的物件導向語言
有著private的屬性
但是可以透過命名規則來做到相同的功能
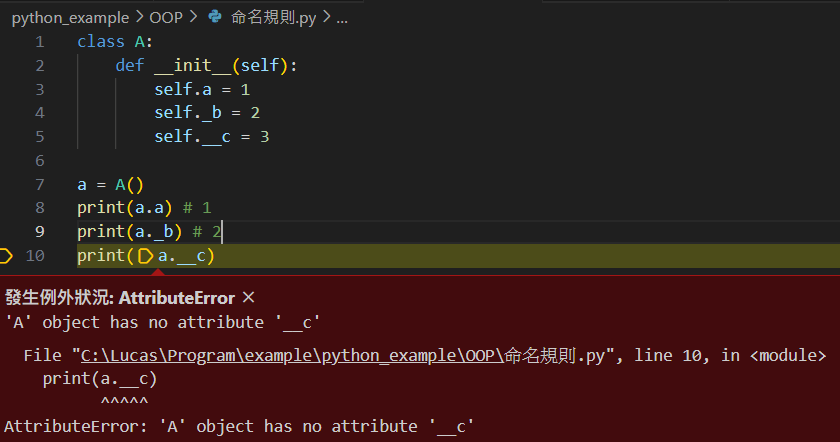
物件導向
單底線開頭:告訴工程師不要用,沒有強制力
雙底線開頭:你想用也沒辦法使用
另外不要雙底線開頭 + 雙底線結尾,那是Python特殊功能函數
如 __init__()
物件導向
這麼一來就可以告訴別人不要直接調用了
※一般通常不會直接用雙底線寫死
class Metro:
    def __init__(self) -> None:
        self._stations: list[Station] = []

    def add_station(self, name: str, lines: list[str], id: int) -> None:
        self._stations.append(Station(name, lines, id))

    def remove_station(self, id: int) -> None:
        for station in self._stations:
            if station.id == id:
                self._stations.remove(station)
                break

    def get_station(self, id: int) -> Station | None:
        for station in self._stations:
            if station.id == id:
                return station
        return None
物件導向
那如果我們想再創建一個有更多功能的捷運系統
但是也想保留舊的系統
那該怎麼寫呢
物件導向
class ExtraMetro(Metro):
    def __init__(self, lines: list[str]) -> None:
        self._lines = lines
        super().__init__()

    def find_stations_on_line(self, line: str) -> list[Station] | None:
        if line not in self._lines:
            return None
        output = []
        for station in self._stations:
            if line in station.lines:
                output.append(station)

        return output
這個時候就要用到 繼承
語法為在class的名稱後面加上(要繼承的class)
classA(classB)
此時classA可以擁有所有classB的屬性
_stations / add_station / remove_station / get_station
物件導向
class ExtraMetro(Metro):
    def __init__(self, lines: list[str]) -> None:
        self._lines = lines
        super().__init__()

    def find_stations_on_line(self, line: str) -> list[Station] | None:
        if line not in self._lines:
            return None
        output = []
        for station in self._stations:
            if line in station.lines:
                output.append(station)

        return output
這時候可能有人發現了
這裡使用到一個神奇的函式super()
他相當於被繼承的classB
而這行便是執行classB的__init__函式
讓self._stations能夠被建立
物件導向
到這邊物件導向的基礎就差不多結束了
實際上還有更多的相關語法
如更多的Python內建函式、多重繼承、不實例化的用法等等
如果感興趣的可以去閱讀官方文檔
Modules
模組如果A寫了一個檔案包含了各種演算法模板
而B今天想要使用這個檔案的內容到自己的程式 (main.py)
這時候該怎麼做呢?
模組
# DFS.py
visited = [False] * 1000
def dfs(graph: list[list[int]], cur: int=1, deep: int=1) -> int:
    if visited[cur]:
        return deep
    visited[cur] = True
    deeps = [deep]
    for i in graph[cur]:
        deeps.append(dfs(graph, i, deep + 1))
    return max(deeps)
模組
# DFS.py
visited = [False] * 1000
def dfs(graph: list[list[int]], cur: int=1, deep: int=1) -> int:
    if visited[cur]:
        return deep
    visited[cur] = True
    deeps = [deep]
    for i in graph[cur]:
        deeps.append(dfs(graph, i, deep + 1))
    return max(deeps)
import DFS # 匯入DFS.py
graph = [[], [2, 3], [4, 5], [6, 7], [], [], [], []]
print(DFS.dfs(graph)) # 使用DFS底下的dfs函數B可以這樣做
模組
import DFS # 匯入DFS.py

graph = [[], [2, 3], [4, 5], [6, 7], [], [], [], []]
print(DFS.dfs(graph)) # 使用DFS底下的dfs函數B也可以這樣做
from DFS import dfs # 匯入DFS.py的dfs函數

graph = [[], [2, 3], [4, 5], [6, 7], [], [], [], []]
print(dfs(graph)) # 直接使用dfs函數
模組
而這就是函式庫的基本運行
當然你會發現程式把DFS.py當成了一個物件一般
可以獲取底下的函式 / 其他物件
在Import語法中所有的檔案跟資料夾
會變成一個物件的層級關係
舉個🌰
模組
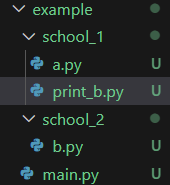
這是我們目前的資料夾架構
在a.py中有StudentA物件
在b.py中有StudentB物件
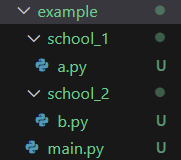
from school_1.a import StudentA
from school_2.b import StudentB

a = StudentA("Alice", 18)
b = StudentB("Bob", 19)
...
此時可以這樣引用
模組
如果我們增加一個print_b.py
目標是調用b.py的物件
from ..school_2.b import StudentB那麼可以這樣引用
. 放在開頭可以用來表示上層資料夾
模組
而你甚至可以直接引用一個資料夾
只需要為它添上一個
__init__.py (這個是python固定的檔案名稱)
模組
# __init__.py
a = "Hello World"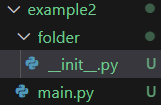
# main.py
import folder

print(folder.a) # Hello World
此時Python會將__init__.py
當作folder資料夾的預設內容
當你引用folder 實際上就是在引用__init__.py
模組
最後注意一下
所有引用自上級資料夾檔案的方式
均需要目前環境在這個資料夾下
若是引用了超越目前所在目錄層級的資料夾
Python 將會在引用時報錯
Error Handler
錯誤處理你是否有時候會在程式執行時
跑出這些東西
錯誤處理
KeyError
NameError
TypeError
你是否有時候會在程式執行時
跑出這些東西
錯誤處理
這些東西其實是有方法去偵測
甚至是自定義的
KeyError
NameError
TypeError
讓我們舉個例子
錯誤處理
a = {}
print(a["empty"])
這很明顯我們在抓取一個不存在的key
但是如果我想要讓他在觸發KeyError時
順便把a[key]設為key呢?
錯誤處理
try會執行它裡面的程式
但是一旦遇到指定的錯誤就會掉轉到except的地方去做執行
class A:
    a_dict = {}

    def __getitem__(self, key):
        try:
            output = self.a_dict[key]
        except KeyError:
            output = key

        return output

a = A()
print(a["empty"])
錯誤處理
class A:
    a_dict = {}

    def __getitem__(self, key):
        try:
            output = self.a_dict[key]
        except KeyError:
            output = key

        return output

a = A()
print(a["empty"])
如此一來
便能達到觸發錯誤就進行某件事的功能了
錯誤處理
剛剛的例子其實可以換成偵測key是否存在去排除抓空的可能
但是下面這個例子就只能使用try去偵測
try:
    for i in range(10000000):
        print(i)

except KeyboardInterrupt:
    print("bye bye....")
程式會不斷打印數字
直到使用者使用Ctrl + C強制中斷程式
而KeyboardInterrupt會在程式被Ctrl + C時觸發
此時程式就會和你說byebye啦
錯誤處理
而try還有一個功能
那就是finally
這個指令會在try或是except的程式執行完畢後執行
try:
    print(1/0)
except ZeroDivisionError:
    print("You can't divide by zero....")
finally:
    print("calculation is done....")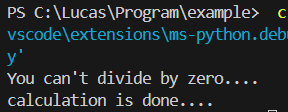
錯誤處理
而try還有一個功能
那就是finally
這個指令會在try或是except的程式執行完畢後執行
此功能通常被應用在連線時或是開啟檔案時
可以確保不論是否引發錯誤最後都會關閉連線 / 檔案
錯誤處理
講了發生錯誤後能怎麼偵測
那如果你想要引發怪怪的錯誤呢 (?
students = ["a", "b", "c"]

if "d" not in students:
    raise ValueError("d is not in the list")
raise可以引發指定錯誤
可以在錯誤物件的後面加上錯誤訊息
錯誤處理
當然你也可以自訂一個錯誤類別並引發它
class TooGayError(Exception):
    def __init__(self):
        super().__init__("why you so gay")

ckinfor = "gay"
ckcsc = "gay"

if ckcsc + ckinfor == "gaygay":
    raise TooGayError
錯誤處理
想知道在Python有哪些錯誤類型嗎
可以在適當的時候引發指定錯誤
又或是排除指定錯誤
對開發應用會有很大的幫助
Example
範例本次課程的所有範例檔案都在裡面
請自行取用
感謝聆聽 !
另外如果好奇更多Python的應用可以參考
成果發表
最後補充一下
Python的成果發表當然就是Python
只要任何使用Python語言寫的程式都可以作為你成發時的作品
你可以使用更多的函式庫去完成你的作品
如果沒有想法的可以去問問ChatGPT
期待成發當天可以看到各位電神們的作品
