Making a Windows
Build in Unity
Including setup
First Steps
- Choose File->Build Settings...
- Make sure you have the right scenes included.
- Under Platform, choose
PC, Mac & Linux Standalone - Find the dropdown called
Target Platform - Choose Windows from the list. If you don't see it, click here.
- Continue here if you are using a Mac, or here if you are using Windows.
Mac Build on a Mac
- Save the build as FirstLast-Date
Example: MargaretMoser-0825
- Zip the file.
Example: MargaretMoser-0825.zip
Note that I want a zip, not a rar.
- Put the zip where the assignments document says to put it (shared drive or Perforce).
- Relax – you're finished.
Mac Build on Windows
- In Windows, Unity makes builds as folders. When you click "Build" it will ask you to choose a folder.
- Make a new folder called
FirstLast-Date
Example: MargaretMoser-0825 - Click on your new folder, but don't open it.
- Click "Choose folder". Unity will work for a while and then show you your build.
Note that you might get an extra, empty folder at the end of this process. You can delete it. The one you want has .app at the end.
Mac Build on Windows
- Select the folder ending in .app.
-
Don't rename the folder. If you need to fix the name, make a new build with the right name.
- Zip the folder
Example: MargaretMoser-0825.app.zip
Note that I want a zip, not a rar.
- Upload the zip where the slides say to put it.
- Relax – you're finished.
Setting Up for Mac Builds
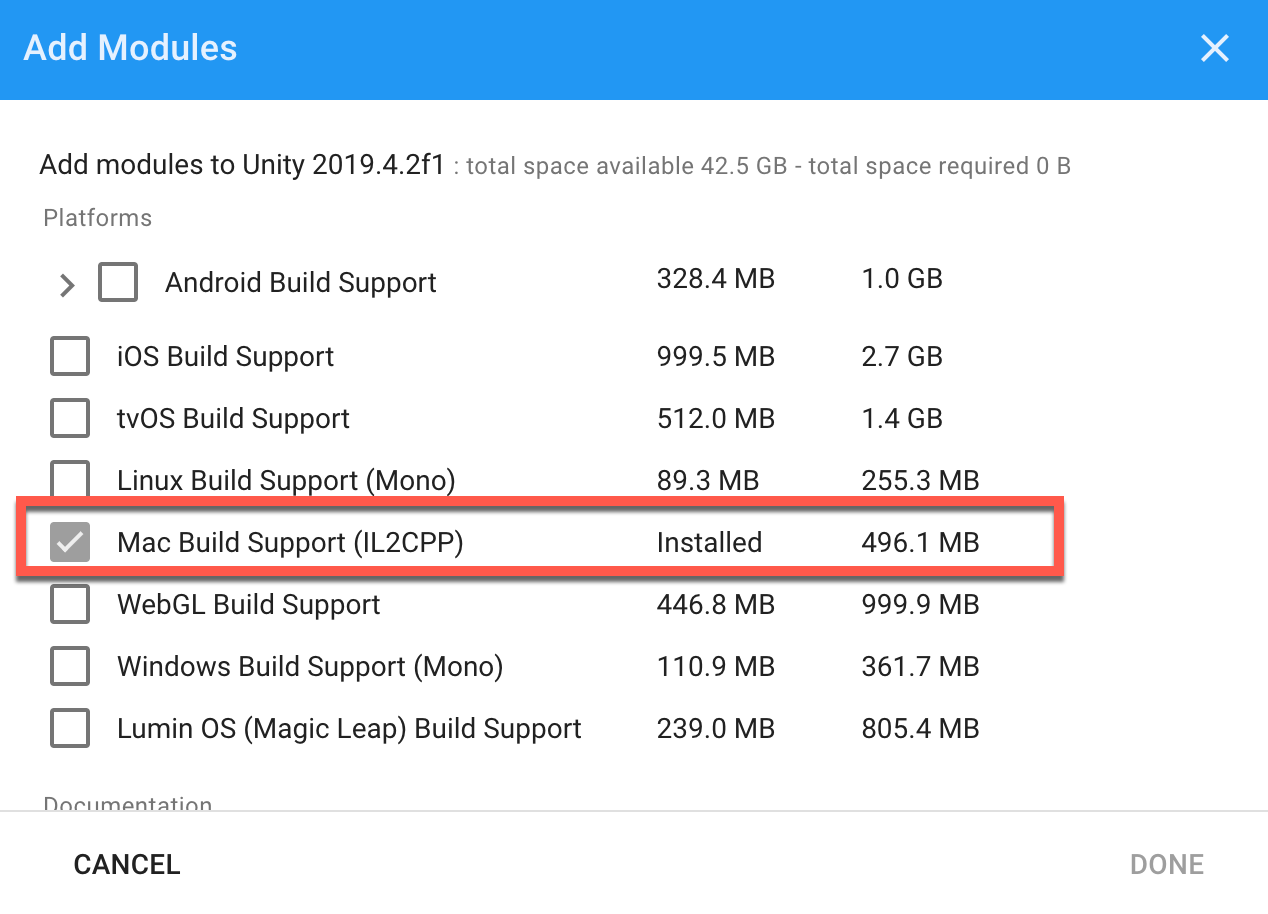
If you do not see "Mac OS X" as an option under "Target Platform", here's what to do.
First, quit Unity and Unity Hub.
Then re-open Unity Hub.
Continue on the next slide.
- Click on the Installs tab on the left.
- Find the version you are using and click on the dots on the right.
- Choose Add Modules.
Setting Up for Mac Builds


- Add Mac Build Support and click Done.
Setting Up for Mac Builds
