Developing RESTful APIs with Python and Flask

About Me

Md. Shahbaz Alam
Full Stack Developer
Auth0 Ambassador
Mozilla Reps Mentor

@mdsbzalam
Agenda
1. Why Python?
2. Why Flask?
3. Bootstrapping a Flask Application
4. Creating a RESTful Endpoint with Flask
5. Mapping Models with Python Classes
6. Serializing and Deserializing Objects with Marshmallow
7. Dockerizing Flask Applications
8. Securing Python APIs with Auth0
Why Python?
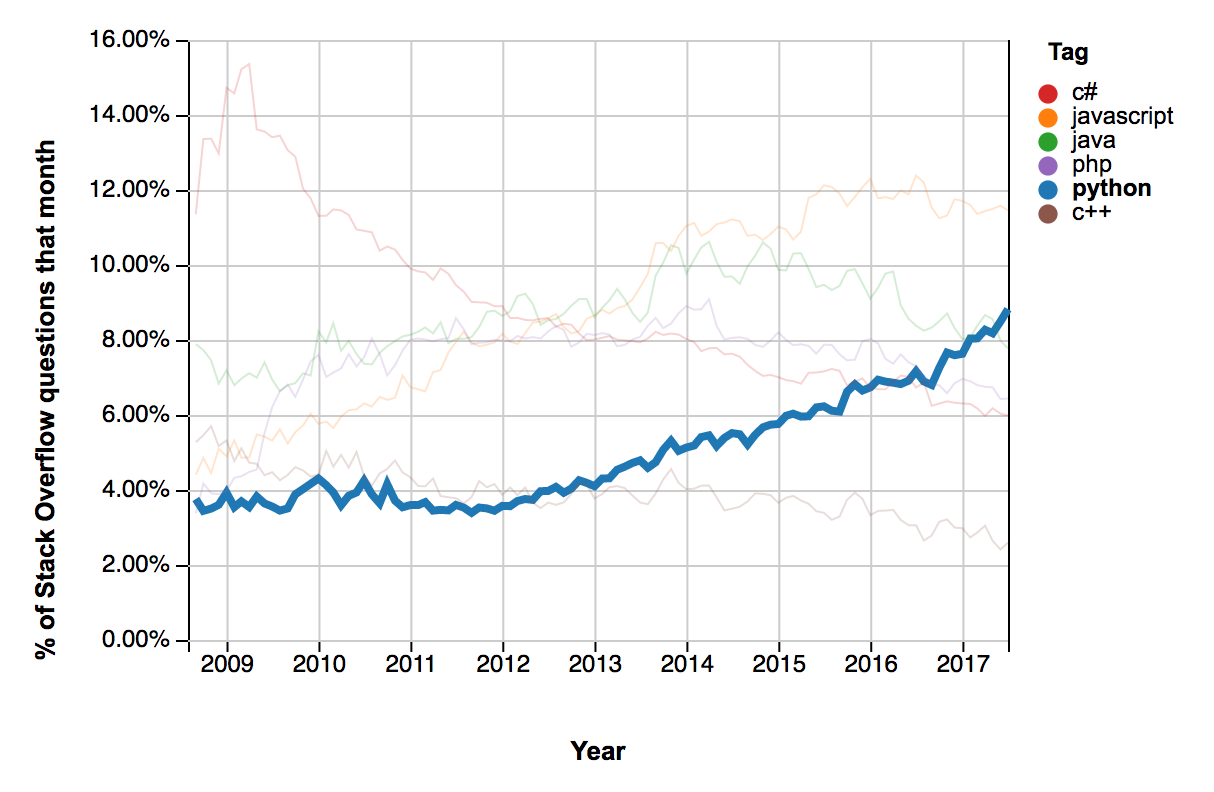
- Fastest growing programming language
- Huge Community base is improving every aspect of the language
- More & more open source libraries are being released to address AI, ML, and Web Development.
- https://docs.python.org/3/ for new adopters to learn its essence fast
Why Flask?

Why Flask?
Django
Django is older, more mature, and a little bit more popular.
On GitHub, this framework has around 37k stars, 1.6k contributors, ~200 releases, and more than 16k forks.
On StackOverflow, roughly 1.2% of questions asked in a given month are related to Django.
Flask
Flask, although less popular, is not far behind.
On GitHub, Flask has almost 39k stars, ~480 contributors, ~26 releases, and more than 11k forks.
On StackOverflow, up to 0.2% of questions asked in a given month are related to Flask.

Yes! Let's choose Flask
- Flask was built with scalability and simplicity in mind.
- Flask applications are known for being lightweight, mainly when compared to their Django counterparts.
- Flask developers call it a microframework, where micro means that the goal is to keep the core simple but extensible.
- Flask won’t make many decisions for us, such as what database to use or what template engine to choose.
- Lastly, Flask also has extensive documentation that addresses everything that developers need to start.
- Being lightweight, easy to adopt, well-documented, and popular, Flask is a very good option for developing RESTful APIs.
Let's get started with

Bootstrapping a Flask Application
Bootstrapping a Flask Application
Installing Python 3
# To see which version of Python 3 you have installed, open a command prompt and run

$ python3 --version

#If you are using Ubuntu 16.10 or newer, then you can easily install Python 3.6 with
# the following commands

$ sudo apt-get update
$ sudo apt-get install python3.6

# If you’re using another version of Ubuntu (e.g. the latest LTS release), use
# the deadsnakes PPA to install Python 3.6

$ sudo apt-get install software-properties-common
$ sudo add-apt-repository ppa:deadsnakes/ppa
$ sudo apt-get update
$ sudo apt-get install python3.6Bootstrapping a Flask Application
Installing Pip
# we might need to change pip by pip3
$ pip --version


$ curl https://bootstrap.pypa.io/get-pip.py -o get-pip.py

$ sudo python3 get-pip.py

$ pip3 --version
# pip 18.0 from /usr/local/lib/python3.5/dist-packages/pip (python 3.5)
Bootstrapping a Flask Application
Installing Flask
# we might need to replace pip with pip3

$ pip install Flask
from flask import Flask
app = Flask(__name__)
@app.route("/")
def hello_world():
return "Hello, World!"hello.py
Bootstrapping a Flask Application
# flask depends on this env variable to find the main file
export FLASK_APP=hello.py
# now we just need to ask flask to run
flask run
# * Serving Flask app "hello"
# * Running on http://127.0.0.1:5000/ (Press CTRL+C to quit)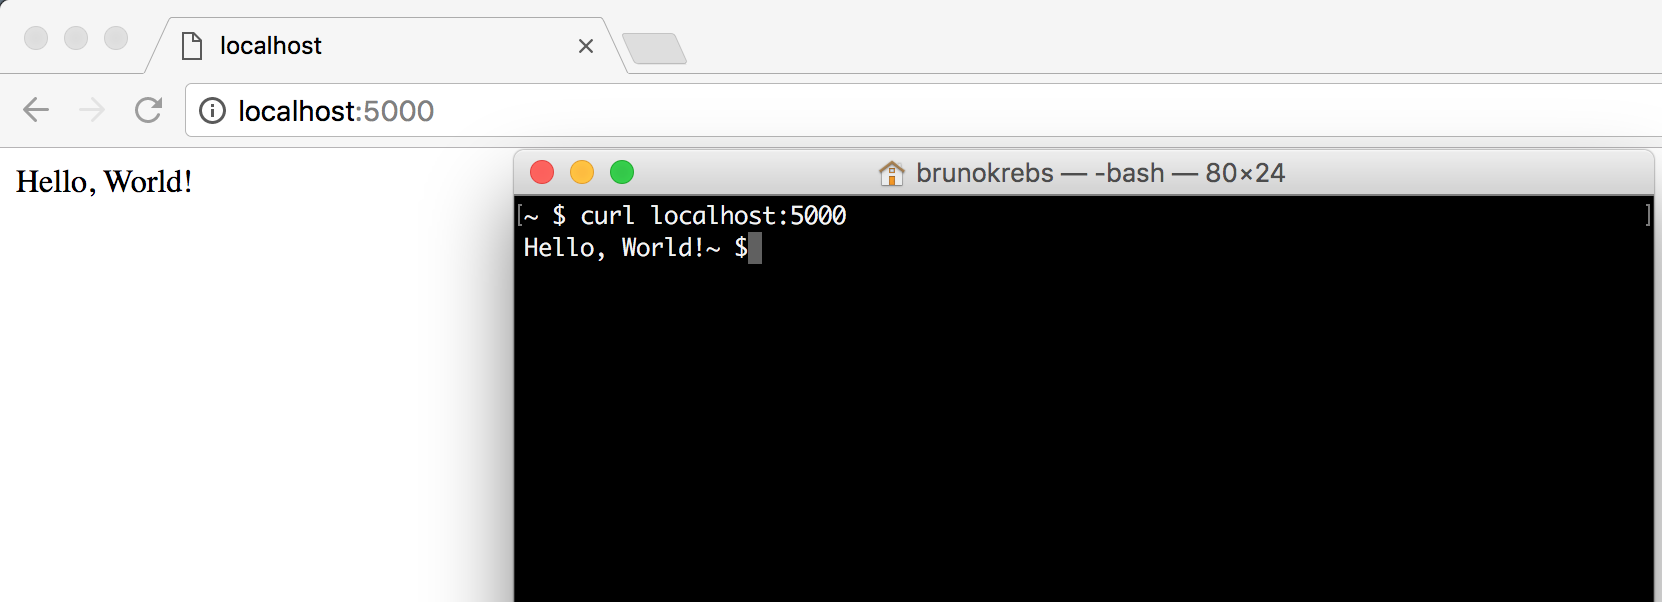
Creating RESTful API with Flask
Let's create a new directory that will hold our source code.
In this article, we will create Cashman, a small RESTful API that allows users to manage incomes and expenses.
Therefore, we will create a directory called
cashman-flask-project.
# dependency manager
$ sudo pip3 install pipenv
# create our project directory and move to it
$ mkdir cashman-flask-project && cd cashman-flask-project
# use pipenv to create a Python 3 (--three) virtualenv for our project
$ pipenv --three
# install flask a dependency on our project
$ pipenv install flaskLet's create our first module on our application.
# create source code's root
mkdir cashman && cd cashman
# create an empty __init__.py file
touch __init__.pycashman-flask-project>
from flask import Flask
app = Flask(__name__)


@app.route("/")
def hello_world():
return "Hello, World!"cashman-flask-project>cashman>
# move to the main directory
cd ..

# create the file
touch bootstrap.sh

# make it executable
chmod +x bootstrap.sh
#!/bin/sh
export FLASK_APP=./cashman/index.py
source $(pipenv --venv)/bin/activate
flask run -h 0.0.0.0To check that this script is working correctly, we can execute ./bootstrap.sh now. This will give us a similar result to when we executed the "Hello, world!" application.
$ ./bootstrap.sh

# * Serving Flask app "cashman.index"
# * Running on http://0.0.0.0:5000/ (Press CTRL+C to quit)
cashman-flask-project >

Creating a RESTful Endpoint with Flask
Let's replace the contents of the ./cashman/index.py file with the following:
from flask import Flask, jsonify, request

app = Flask(__name__)

incomes = [
  { 'description': 'salary', 'amount': 5000 }
]


@app.route('/incomes')
def get_incomes():
  return jsonify(incomes)


@app.route('/incomes', methods=['POST'])
def add_income():
  incomes.append(request.get_json())
  return '', 204
# start the cashman application
./bootstrap.sh &
# get incomes
curl http://localhost:5000/incomes
# add new income
curl -X POST -H "Content-Type: application/json" -d '{
"description": "lottery",
"amount": 1000.0
}' http://localhost:5000/incomes
# check if lottery was added
curl localhost:5000/incomes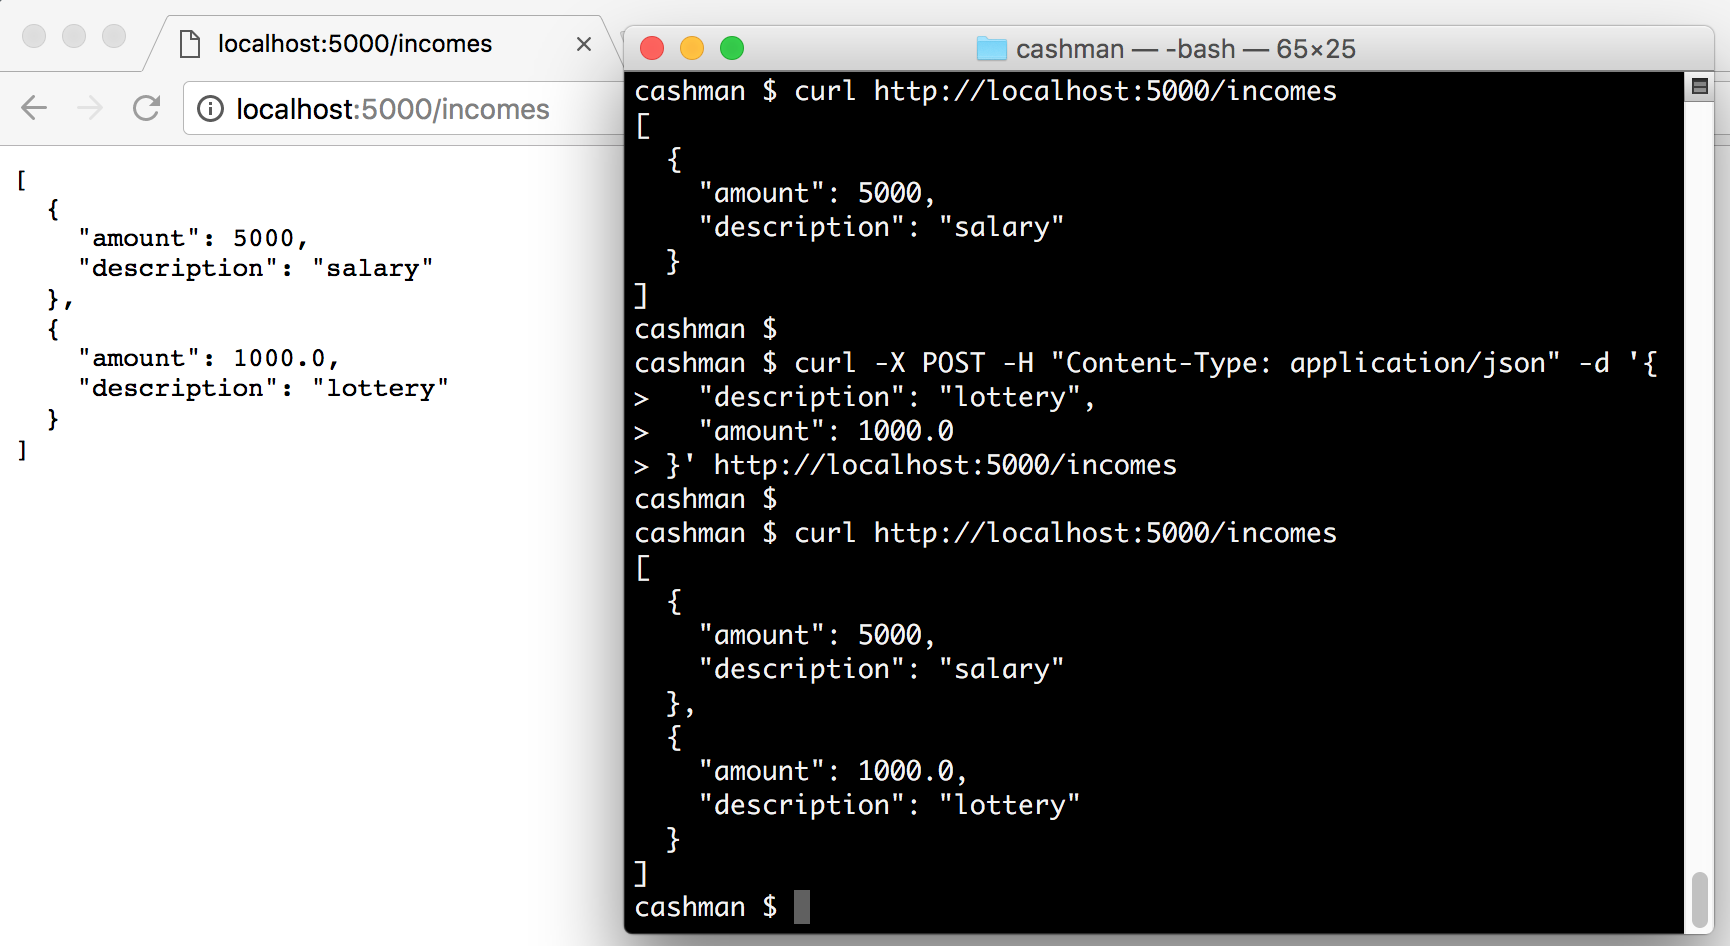
Mapping Models with Python Classes
Let's create a directory called model inside the cashman module and add an empty file called __init__.py on it.
# create model directory inside the cashman module
mkdir -p cashman/model

# initialize it as a module
touch cashman/model/__init__.py
# inside model directory under cashman
/cashman-flask-project/cashman/model$ touch transaction.py
import datetime as dt

from marshmallow import Schema, fields


class Transaction():
  def __init__(self, description, amount, type):
    self.description = description
    self.amount = amount
    self.created_at = dt.datetime.now()
    self.type = type

  def __repr__(self):
    return '<Transaction(name={self.description!r})>'.format(self=self)


class TransactionSchema(Schema):
  description = fields.Str()
  amount = fields.Number()
  created_at = fields.Date()
  type = fields.Str()
transaction.py
# installing marshmallow as a project dependency
pipenv install marshmallow

# inside cashman/model/
$ touch income.py
$ sudo pip3 install -U marshmallow --prefrom marshmallow import post_load
from .transaction import Transaction, TransactionSchema
from .transaction_type import TransactionType
class Income(Transaction):
def __init__(self, description, amount):
super(Income, self).__init__(description, amount, TransactionType.INCOME)
def __repr__(self):
return '<Income(name={self.description!r})>'.format(self=self)
class IncomeSchema(TransactionSchema):
@post_load
def make_income(self, data):
return Income(**data)income.py
# inside cashman/model/
$ touch transaction_type.py
from enum import Enum
class TransactionType(Enum):
INCOME = "INCOME"
EXPENSE = "EXPENSE"transaction_type.py
# inside cashman/model/
$ touch expense.py
from marshmallow import post_load
from .transaction import Transaction, TransactionSchema
from .transaction_type import TransactionType
class Expense(Transaction):
def __init__(self, description, amount):
super(Expense, self).__init__(description, -abs(amount), TransactionType.EXPENSE)
def __repr__(self):
return '<Expense(name={self.description!r})>'.format(self=self)
class ExpenseSchema(TransactionSchema):
@post_load
def make_expense(self, data):
return Expense(**data)expense.py
Serializing and Deserializing Objects with Marshmallow
Let's replace ./cashman/index.py contents to:
from flask import Flask, jsonify, request

from cashman.model.expense import Expense, ExpenseSchema
from cashman.model.income import Income, IncomeSchema
from cashman.model.transaction_type import TransactionType

app = Flask(__name__)

transactions = [
  Income('Salary', 5000),
  Income('Dividends', 200),
  Expense('pizza', 50),
  Expense('Rock Concert', 100)
]


@app.route('/incomes')
def get_incomes():
  schema = IncomeSchema(many=True)
  incomes = schema.dump(
    filter(lambda t: t.type == TransactionType.INCOME, transactions)
  )
  return jsonify(incomes.data)


@app.route('/incomes', methods=['POST'])
def add_income():
  income = IncomeSchema().load(request.get_json())
  transactions.append(income.data)
  return "", 204


@app.route('/expenses')
def get_expenses():
  schema = ExpenseSchema(many=True)
  expenses = schema.dump(
      filter(lambda t: t.type == TransactionType.EXPENSE, transactions)
  )
  return jsonify(expenses.data)


@app.route('/expenses', methods=['POST'])
def add_expense():
  expense = ExpenseSchema().load(request.get_json())
  transactions.append(expense.data)
  return "", 204


if __name__ == "__main__":
    app.run()
# start the application
./bootstrap.sh &
# get expenses
curl http://localhost:5000/expenses
# add a new expense
curl -X POST -H "Content-Type: application/json" -d '{
"amount": 20,
"description": "lottery ticket"
}' http://localhost:5000/expenses
# get incomes
curl http://localhost:5000/incomes
# add a new income
curl -X POST -H "Content-Type: application/json" -d '{
"amount": 300.0,
"description": "loan payment"
}' http://localhost:5000/incomesDockerizing Flask Applications
Let's create the Dockerfile in the root directory of our project with the following code:
# Using lightweight alpine image
FROM python:3.6-alpine

# Installing packages
RUN apk update
RUN pip install --no-cache-dir pipenv

# Defining working directory and adding source code
WORKDIR /usr/src/app
COPY Pipfile Pipfile.lock bootstrap.sh ./
COPY cashman ./cashman

# Install API dependencies
RUN pipenv install

# Start app
EXPOSE 5000
ENTRYPOINT ["/usr/src/app/bootstrap.sh"]
Let's execute docker and test our API
# build the image
docker build -t cashman .

# run a new docker container named cashman
docker run --name cashman \
    -d -p 5000:5000 \
    cashman

# fetch incomes from the dockerized instance
curl http://localhost:5000/incomes/
Securing Python APIs with Auth0

For example, to secure Python APIs written with Flask, we can simply create a requires_auth decorator:
# Format error response and append status code

def get_token_auth_header():
    """Obtains the access token from the Authorization Header
    """
    auth = request.headers.get("Authorization", None)
    if not auth:
        raise AuthError({"code": "authorization_header_missing",
                        "description":
                            "Authorization header is expected"}, 401)

    parts = auth.split()

    if parts[0].lower() != "bearer":
        raise AuthError({"code": "invalid_header",
                        "description":
                            "Authorization header must start with"
                            " Bearer"}, 401)
    elif len(parts) == 1:
        raise AuthError({"code": "invalid_header",
                        "description": "Token not found"}, 401)
    elif len(parts) > 2:
        raise AuthError({"code": "invalid_header",
                        "description":
                            "Authorization header must be"
                            " Bearer token"}, 401)

    token = parts[1]
    return token

def requires_auth(f):
    """Determines if the access token is valid
    """
    @wraps(f)
    def decorated(*args, **kwargs):
        token = get_token_auth_header()
        jsonurl = urlopen("https://"+AUTH0_DOMAIN+"/.well-known/jwks.json")
        jwks = json.loads(jsonurl.read())
        unverified_header = jwt.get_unverified_header(token)
        rsa_key = {}
        for key in jwks["keys"]:
            if key["kid"] == unverified_header["kid"]:
                rsa_key = {
                    "kty": key["kty"],
                    "kid": key["kid"],
                    "use": key["use"],
                    "n": key["n"],
                    "e": key["e"]
                }
        if rsa_key:
            try:
                payload = jwt.decode(
                    token,
                    rsa_key,
                    algorithms=ALGORITHMS,
                    audience=API_AUDIENCE,
                    issuer="https://"+AUTH0_DOMAIN+"/"
                )
            except jwt.ExpiredSignatureError:
                raise AuthError({"code": "token_expired",
                                "description": "token is expired"}, 401)
            except jwt.JWTClaimsError:
                raise AuthError({"code": "invalid_claims",
                                "description":
                                    "incorrect claims,"
                                    "please check the audience and issuer"}, 401)
            except Exception:
                raise AuthError({"code": "invalid_header",
                                "description":
                                    "Unable to parse authentication"
                                    " token."}, 400)

            _app_ctx_stack.top.current_user = payload
            return f(*args, **kwargs)
        raise AuthError({"code": "invalid_header",
                        "description": "Unable to find appropriate key"}, 400)
    return decorated
Then use it in our endpoints:
# Controllers API

# This doesn't need authentication
@app.route("/ping")
@cross_origin(headers=['Content-Type', 'Authorization'])
def ping():
    return "All good. You don't need to be authenticated to call this"

# This does need authentication
@app.route("/secured/ping")
@cross_origin(headers=['Content-Type', 'Authorization'])
@requires_auth
def secured_ping():
    return "All good. You only get this message if you're authenticated"
Securing Python APIs with Auth0

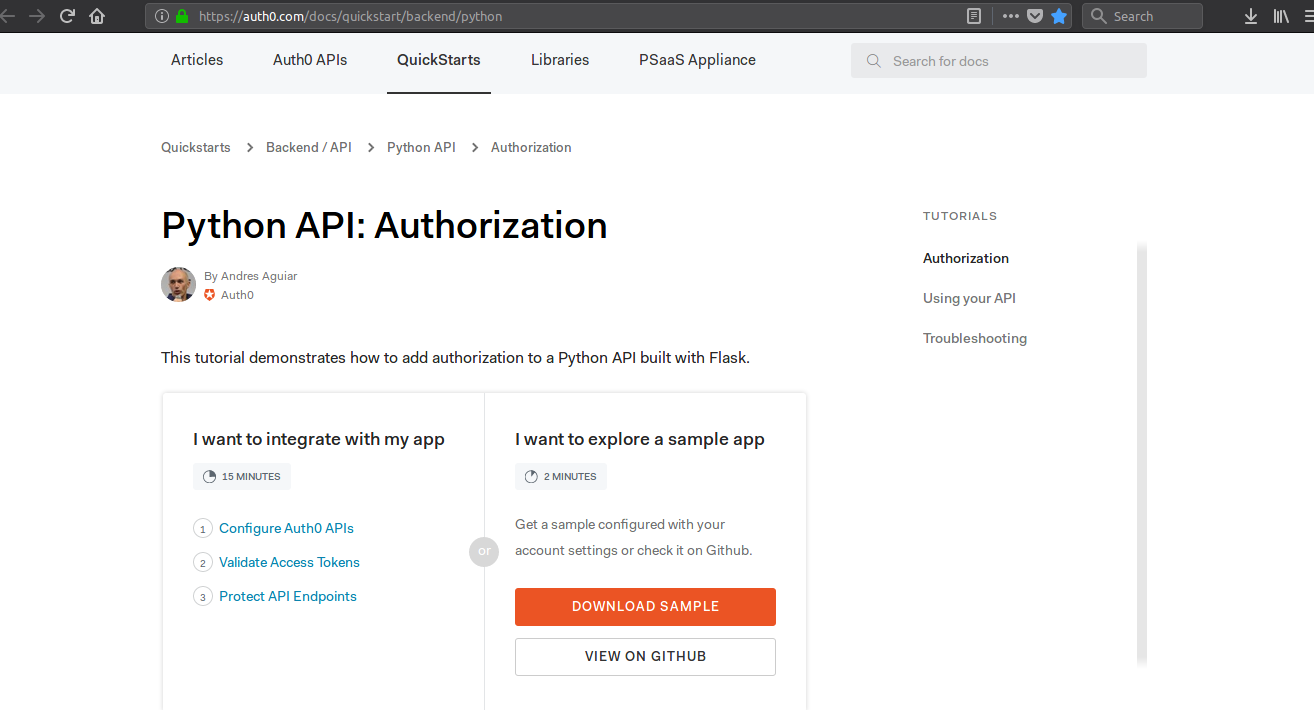
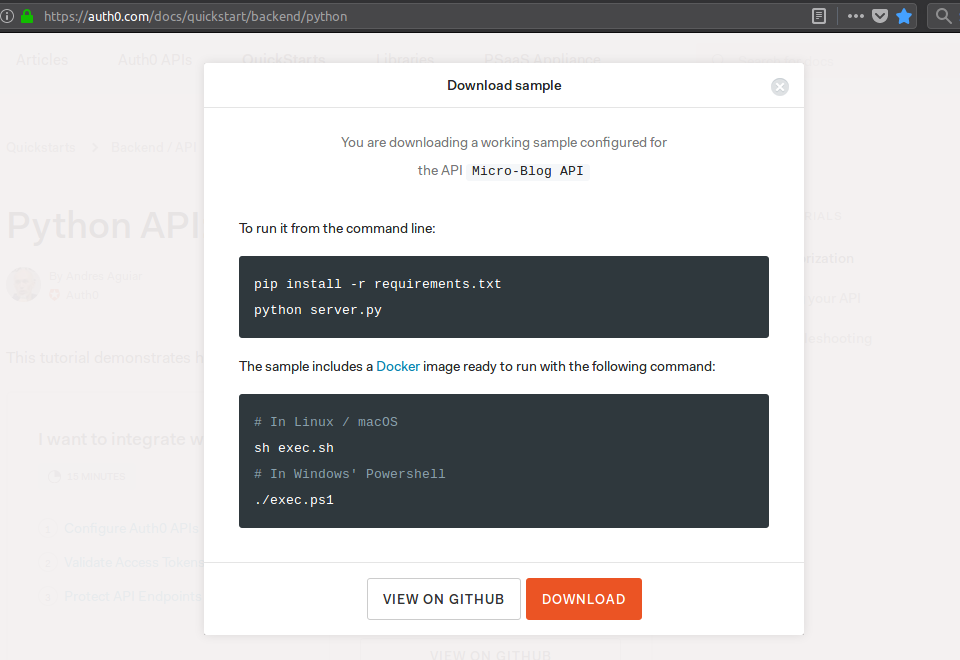
Sample App
