CONTENT COLLECTION

Schedule
The purpose of this training is to give you a comprehensive introduction to Learning Central content collection and how you can organise your resources with content collection.
What is Content Collection
Note: The Content Collection is not designed as a backup and restore system.
How Does It Work
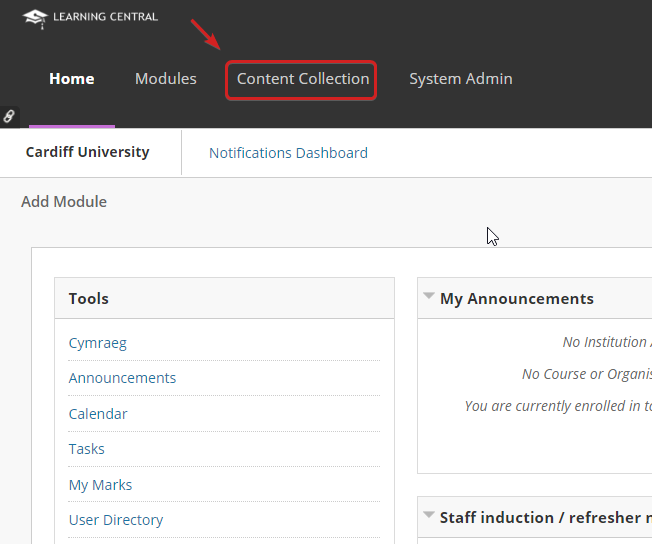
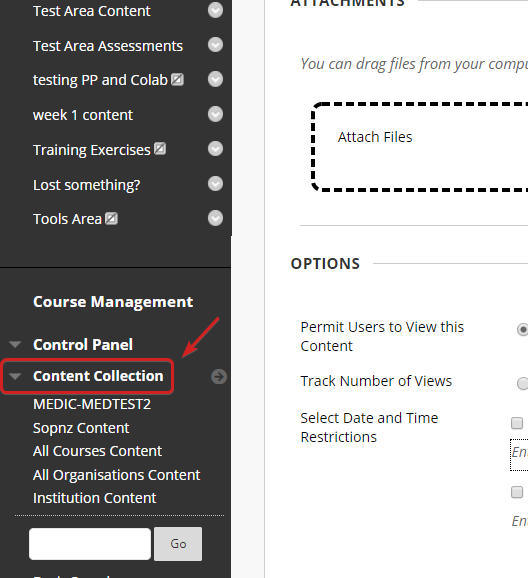
How do I access the Content Collection?
Content Collection tab
Module Management Control Panel
Interface Orientation
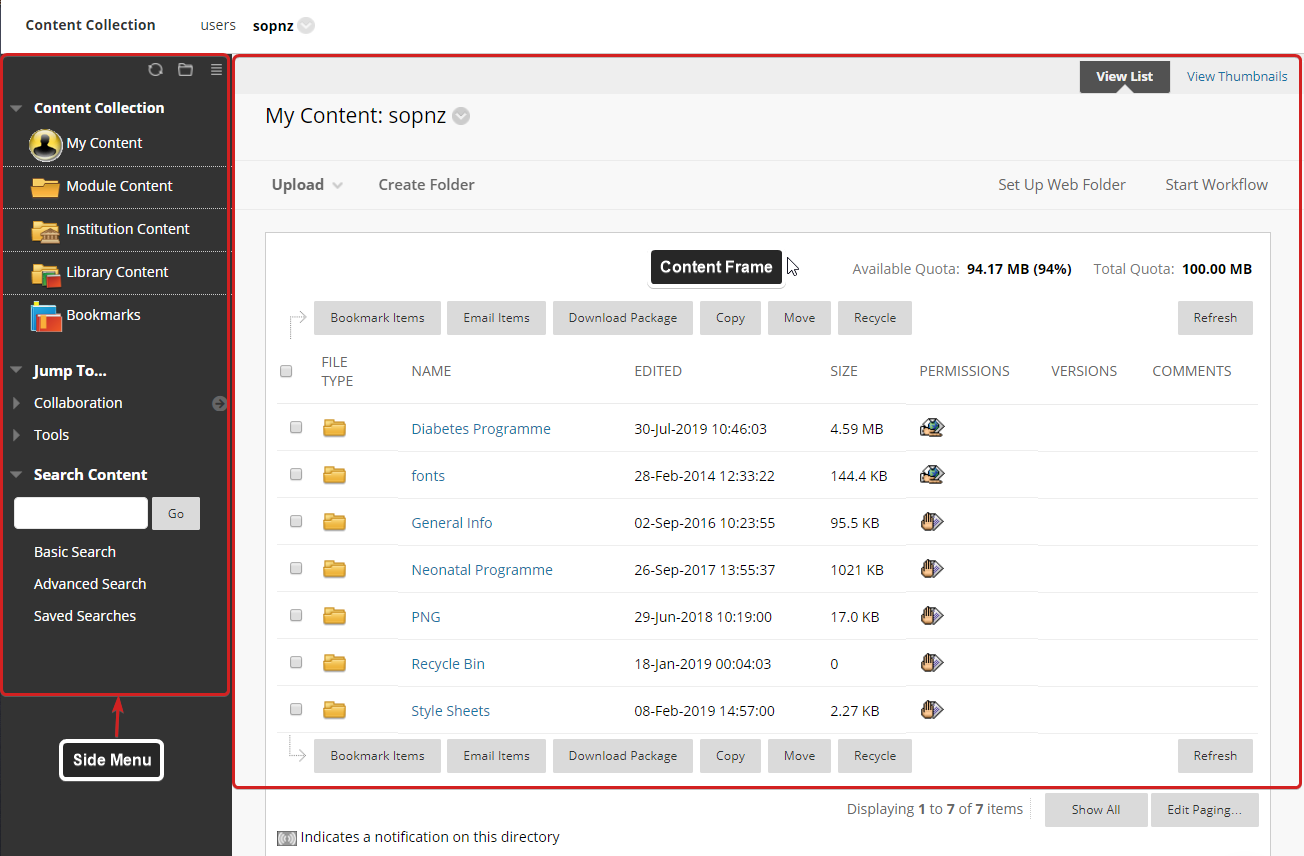
Side Menu

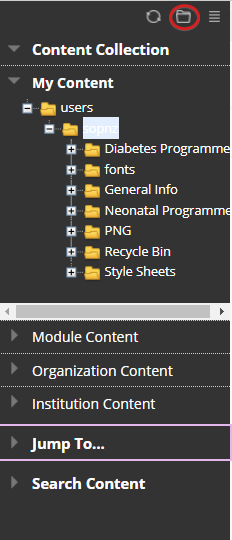
Folder List
Shortcut View (Default)
Folder View
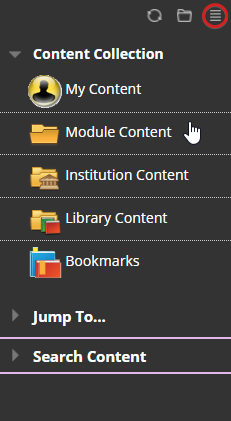
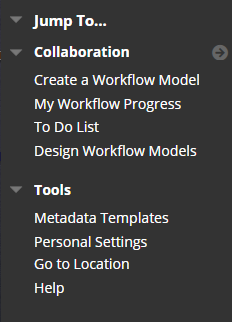
Jump to…
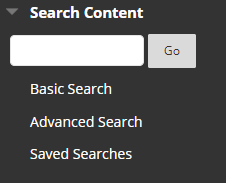
Search Content
The Content Frame
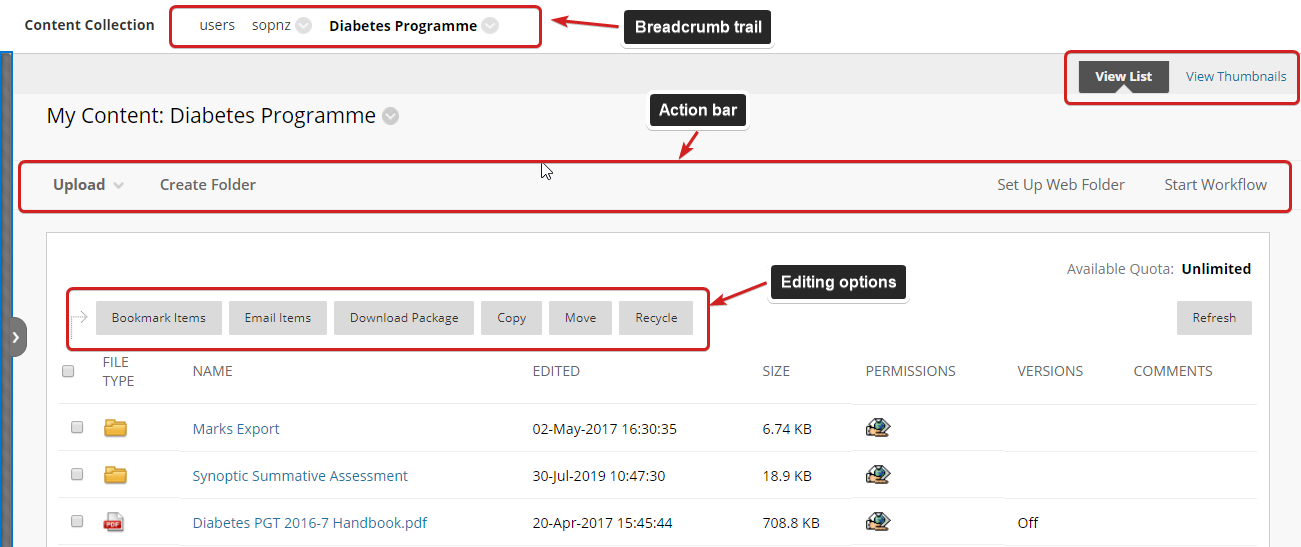
Folders and Items
There are two types of content that make up the Content Collection:
- Folders— Folders are storage “bins” for other folders and files. Folders can be created within other folders or can be standalone folders.
- Items— Item is a generic description that refers to any type of file, including MS Office, PDF, and other file types.
Creating Folders
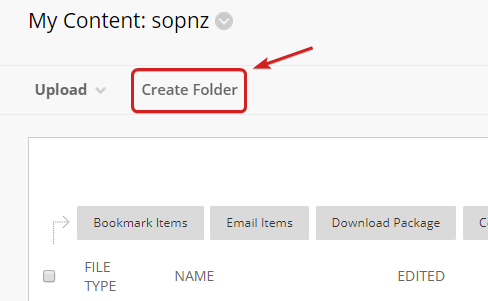
- Access the Content Collection
- Navigate to the area and folder that will contain the new folder
- On the action bar, click Create Folder
- Provide a name for the folder
- Click Create and Customise to set options for the folder
- Click Submit when finished
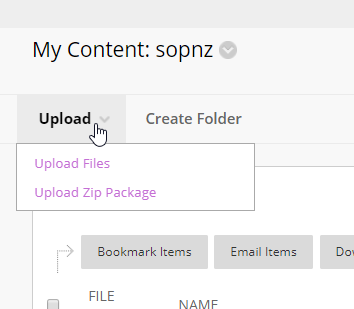
Uploading Items
- Access the Content Collection
- Navigate to the area and folder that will contain the Item
- On the action bar, click Upload and select either Upload Files or Upload Package (note: It is possible to upload multiple files at one time by pressing Ctrl)
- Select options to Lock File, Share Comments, Enable Versioning, and Enable Tracking
- Click Submit when finished
Organising and Managing Content
The Content Collection allows users to store, share, and publish content within personal user folders, Course folders and Institution folders. Some of the key options are:
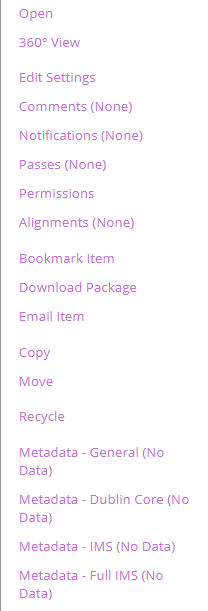
Open - Opens the selected file or folder.
360⁰ View - Provides information such as the permanent URL, the item’s Owner, who created it and when, when it was last edited, Permissions, and anywhere that it is deployed
Edit Settings - Allows for editing the name and options, including Lock, Tracking, or Comments
Overwrite File - (Item only) After an Item has been created, the file can be overwritten or replaced with another file.
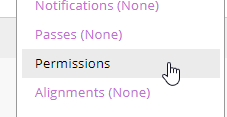
Permissions - Specifies who can access, modify, or delete the file
Download Package - Files can be downloaded into a .zip package and stored on your local workstation
Copy - Copying a file creates an exact replica of that file. The file can be copied to the same location or a new location
Move - Moving a file removes it from its current location and stores it in a new location. It is possible to select multiple files for moving, making it easy to transport large batches of content to new locations
Recycle - Recycling an Item/Folder moves it to the Recycle Bin folder. The Recycle Bin is automatically emptied after 30 days , so it is possible to recover a file that is recycled in error
Linking Items/Folders to Content Areas in Your Module
- Navigate to the course where you would like to link the file.
- Select a Content Area where you will be linking the file.
- From the action bar, select Build Content > Item or File.
- Click the Browse Content Collection button and navigate to the desire file.
- Click the Radio Button to select one or more files.
- Click Submit when finished.
Managing Course File Permissions
Permissions must be granted to make content accessible to users . There are four types of Permissions to consider:
- Read - allows users to view files and folders
- Write - allows users to modify files and folders
- Remove - allows users to remove files and folders
- Manage - allows users to control the properties and settings of files and folders

Further Information
- Individual faculty are allocated 100 MB of file space in the Content Collection. Course quotas are allocated 7 GB. When a file is linked to a course through the Content Collection, that file does not take up space in the course.
- Be careful who you grant Write, Remove, or Manage permissions because your files and folders may be overwritten or entirely removed from the Content Collection.
- Students are automatically given Read permission to content in the Content Collection when it is linked to a course.
- Packaged files, such as those created by software products like Adobe Presenter and Camtasia, must first be added to the Content Collection rather than being added directly to a course. These files can then be linked to an individual course.