Dynamic Web 2 Week # 2
Update 1 Due
For your update, try and get your website and database working both locally and on a hosted website. That is,
1. Have your Wordpress site up on your local machine and connected to a database
2. Have your Wordpress site up on your hosted site and connected to a database
Videos and Teamwork
Now that we have WordPress set up on our local and hosted machines, we can move on to the Lynda.com video tutorials and learning how to create WordPress applications.
The structure for our learning is going to be a combination of watching videos and completing the work from the videos in groups.
WordPress Essential Training
Please open up "Wordpress Essential Training" on Lynda.com
We are going to start with "Welcome" and then "Getting to Know Wordpress".
Let's watch these together and then discuss what we learned.
Discussion
Please explain, in turns:
1. What is Wordpress?
2. What the difference between Wordpress, WordPress.org, and Wordpress.com?
I will be randomly asking groups about their answer to these questions.
5 Minutes
Getting Started
We are now going to watch all of the videos in "Getting Started"
Let's watch these together and then discuss and implement what we learned.
Note that the modules talk about installing either WordPress locally or on a hosted site, whereas we've installed it locally and on a hosted site. That is, we are going to develop locally and then push up our changes when we're ready.
Getting Started Notes
WordPress Admin panel is structured as such:
- WordPress toolbar
- Admin Menu
- Dashboard
- Content Management
- Site Administration
- Admin Area
- Collapse icon will collapse the menu on left
- Menu is responsive, so menu shows as hamburger icon when viewport is small
- Menus can be collapsed and rearranged by clicking and dragging
- Menus in the admin area can also be switched on and off using the "screen options" menu.
Getting Started Notes
- The help menu on the top right section of the screen will bring up help options that are based on where in the site you are.
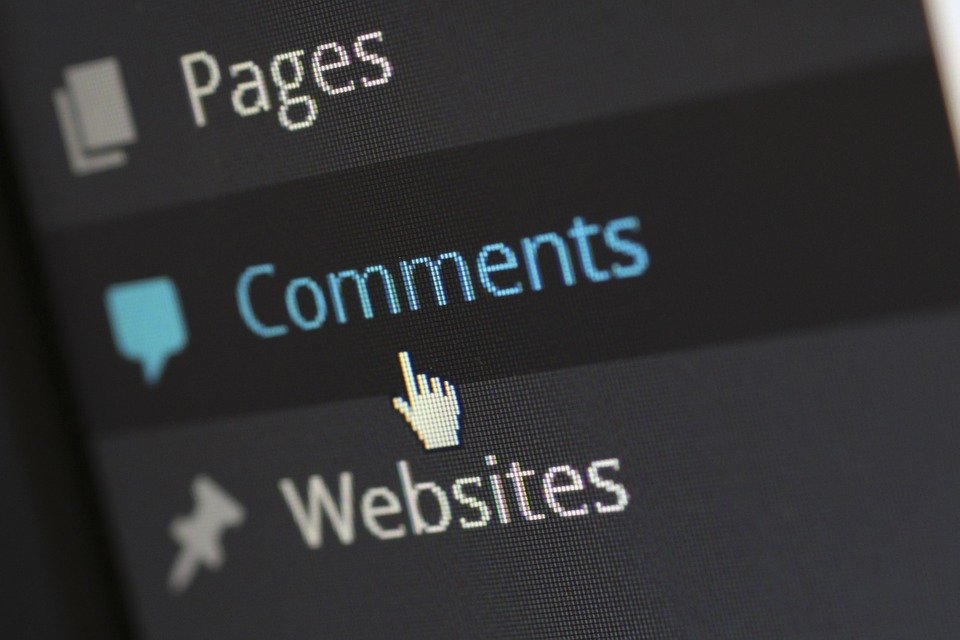
WordPress Toolbar
The WordPress toolbar is basically the nav menu at the top of the screen. This will follow you as you move up and down the site, both in the front end and back end (as long as you're logged in).
Toolbar components from back end:
- WordPress Icon: Will take you to links about WordPress.
- Site Name: Takes you to front end of site
- Comments: How many comments need to be moderated
- New: Creating content
- User Information and Logout
Getting Started Notes
WordPress Toolbar
Toolbar components from front end:
- WordPress Icon: Will take you to links about WordPress.
- Site Name: Takes you to front end of site
- Customize
- Comments: How many comments need to be moderated
- New: Creating content
- Edit Post (will appear if clicking on editable content on front end). Clicking on "Edit Post" will take you to the back end to edit the content. Clicking on "View Post" from there will take you back to the front end.
- User Information and Logout
Discussion
Please explain, in turns, the concepts we have learned in "Getting Started". Be sure to identify where the location of different elements that were discussed are on your WordPress application.
10 minutes
Creating Posts Notes
- Our next module is going to cover posts, which are a large part of a content management system. Basically, a post "is an article, or a photo, or a video, or anything you publish that shows up in a stream" (WordPress Essential Training)
-
There are 3 types of Posts:
- Posts
- Pages
- Attachments (media items)
- You can search for posts based on author and date.
-
Posts Versus Pages
-
Posts
- Published in a stream
- Organized by categories and tags
- Organized by publishing date
- Sortable by author
- Comments on by default
-
Posts
Creating Posts Notes
- Posts Versus Pages
- Pages
- Published as individual objects
- Organized by parent/child
- Hidden publication date
- Hidden author
- Comments off by default
- Basically, posts are like Facebook posts and pages are like Facebook pages
- Pages
Creating Posts Notes
-
Creating a Post
- Go to Admin Panel -> Posts -> Add New
- Information added to the post is automatically saved as draft
- You can access any of your posts by clicking on "All Posts"
- NOTE: When creating content, we will be doing so in our production site. That is, if you wanted to create information that is going to be stored in a database, make that change on your production site. If you want to change the theme, styling, or plugins, do that in your local machine and push up, since that information is stored in the wordpress file system, rather than the database.
-
Post Editor View
- Appears when editing a post or creating a new post
- When you create a title, WordPress will generate a permalink for us (link to post). The last part of the path can be changed by clicking on the "edit" button next to the link.
- You can also view the post by clicking the "view post" button next to the permalink.
Creating Posts Notes
-
Post Editor View
- Screen options on the top gives us other screens that we can use to modify the post
- The publish screen on the right gives us the ability to change the visibility, status, and when to publish the post
- Format panel is used to determine what type the post will be
- Categories: At least one needs to be defined for the post
- Tags: Posts can have as many tags as you'd like
- The icon under the "text" button allows you to have your post editor in a distraction-free writing mode
-
Post Editor Toolbar
- The toolbar within the text editor is similar to what you'd see in Microsoft Word.
- The post toolbar allows you to expand the toolbar so that there are many more options to choose from by clicking on the "toolbar toggle" button.
- If you want to copy and paste text from another program and strip all of the styling, simply click on the "paste as text" button (can be seen once you've clicked on toolbar toggle button)
Creating Posts Notes
-
Post Editor Toolbar (continued)
- The toolbar within the text editor is similar to what you'd see in Microsoft Word.
- The post toolbar allows you to expand the toolbar so that there are many more options to choose from by clicking on the "toolbar toggle" button.
- If you want to copy and paste text from another program and strip all of the styling, simply click on the "paste as text" button (can be seen once you've clicked on toolbar toggle button)
- The first 5 options in the toolbar (from left to right) are self explanatory, but the blockquote one right after is pretty cool. It turns anything into a cool looking blocked quote.
- The next options are creating a horizontal line, adjusting your content left, center, or right.
- We can also add links or remove links from text using the next 2 buttons.
- The next line in the toolbar has text sizes (using paragraph, h1, h2, etc), underline, justify text, and text color, all of which are self-explanatory
- Paste as text was covered earlier; clear formatting removes all formatting that was added to any text; special characters allows you to insert special characters; indentation buttons allow you to indent left and right; and undo/redo are self-explanatory.
Discussion
Go ahead and create a Post. Be sure that the post has a title and at least one paragraph of text. Furthermore, the post should have at least 5 different options from the toolbar implemented within it.
NOTE: Be sure to create your post on your production site, not on your local machine!
7 minutes
Creating Posts Notes
-
Shortcuts can be found in the "Using Quick Shortcuts to Format Text" section
-
Creating and editing links
-
Create a link by clicking on the "insert/edit link" in the post toolbar
-
Works in the same way as an anchor tag. That is, you put the url, what the text of the url is going to say, and then decide if the link is going to open in the same window or in a new window.
-
You can link to existing posts or pages by selecting "link to existing content" and then choosing which one that link will now point to.
-
-
Post Categories and Tags
-
Posts must belong to at least one category and can belong to as many categories as you'd like. Tags are optional.
-
Categories can be hierarchical, while tags do not. Categories are also organized by similar types, while tags help identify different topics that the post is about.
-
Creating Posts Notes
-
Publish
-
Status: This is where you can change the status of a your post. The status can be published, pending review, and draft. Only published will be public.
-
The visibility of the post determines who can see it.
-
Revisions: Gone over in last slide
-
Schedule a time to publish. You can actually schedule when the post will be published, allowing you to time when you want your post to go live.
-
-
Truncate
-
You can truncate the text in your post by using the "Insert Read More" button on the toolbar. You'll only be able to see this if you go to the site, not the post itself.
-
-
Excerpts
-
Brief summaries of your post. These can be customized.
-
Creating Posts Notes
-
Post Formats
-
Generally, be careful using the,. If you are going to use them, Standard and Aside will usually work fine. Other formats have poor compatibility across themes, so make sure they work before trying to use them.
-
Discussion
Add a Parent category, child category, and 3 tags to your post. Be sure to also add a link to your post as well. Then, Publish your site.
NOTE: Be sure to to do this on your production site, not on your local machine!
5 minutes
Adding Images and Media Notes
-
Now, we're going to learn how to add images and other media to our WordPress site.
-
Each media is an attachment that is then saved in different sizes for you to use across your pages or your posts.
-
In order to use images, you must first upload them by either (meaning any of these options)
-
clicking on the area where you want the media to be in your content editor and then dragging and dropping them in.
-
or clicking on the area where you want the media to be and then clicking on the "Add media" button.
-
-
Media Popup: Either of the above options will bring up the media popup, which will have all of your existing media listed. You can either drag/drop your image in the popup or click on "upload files" and upload media from there.
-
You can edit the images from here, but it's not suggested. You can delete the image, causing the image to delete from your whole wordpress application.
-
Adding Images and Media Notes
-
Media Popup: Either of the above options will bring up the media popup, which will have all of your existing media listed. You can either drag/drop your image in the popup or click on "upload files" and upload media from there.
-
You can edit the images from here, but it's not suggested.
-
You can delete the image, causing the image to delete from your whole Wordpress application.
-
-
Discussion
Please explain, in turns, the concepts we have learned in "Adding Images and Media". Be sure to identify where the location of different elements that were discussed are on your WordPress application.
10 minutes
Creating Pages Notes
Discussion
Please explain, in turns, the concepts we have learned in "Managing Content". Be sure to identify where the location of different elements that were discussed are on your WordPress application.
5 minutes
Managing Content Notes
Project Update
On your production WordPress application:
1. Create 3 posts. Each post should have unique content (not copy/pasted). Edit the posts using the post toolbar with at least 3 different styles from the toolbar (for example, making some bold a different color, making the text aligned to the left, etc.).
2. Schedule one of the posts from above to publish on April 23 at 8 am.
3. Truncate one of the posts from step 1 so that only the first line appears. The rest of the content requires users to click on "read more" link.