OSOM.finance
AUTOPILOT
STEP-BY-STEP INSTRUCTION
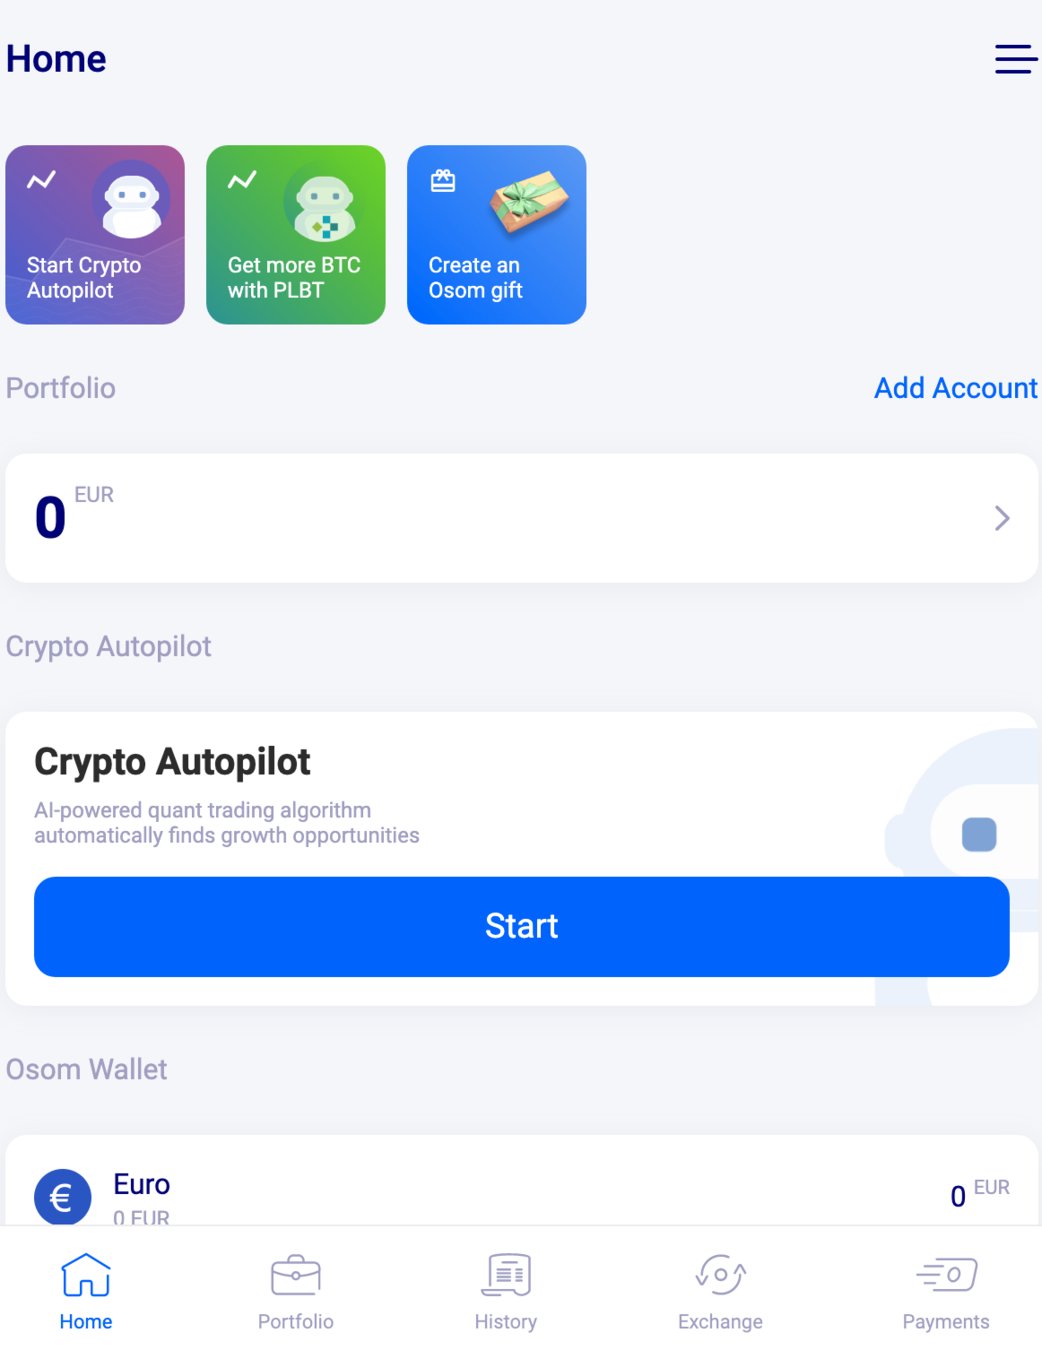
It's time to put your BTC on Autopilot 👍
Here are the steps:
Click on the big blue Start button below Crypto Autopilot
Read the introduction, then click on Agree and Start*
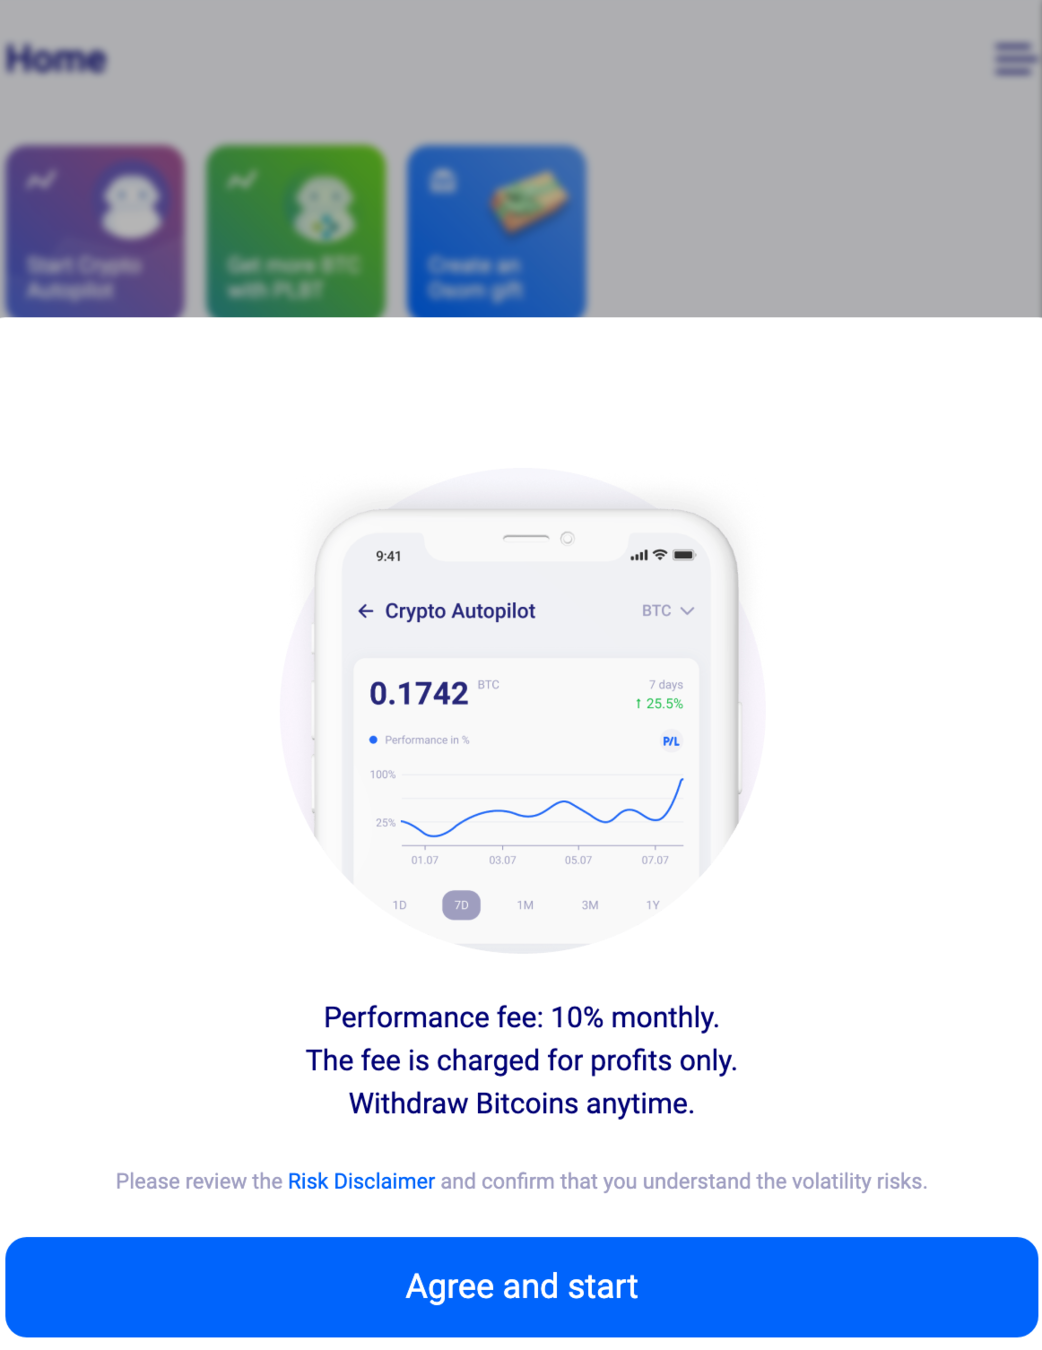
*Please read all of the information as well as this risk notice before using Crypto Autopilot (note that this article is not meant to serve as investment advice).
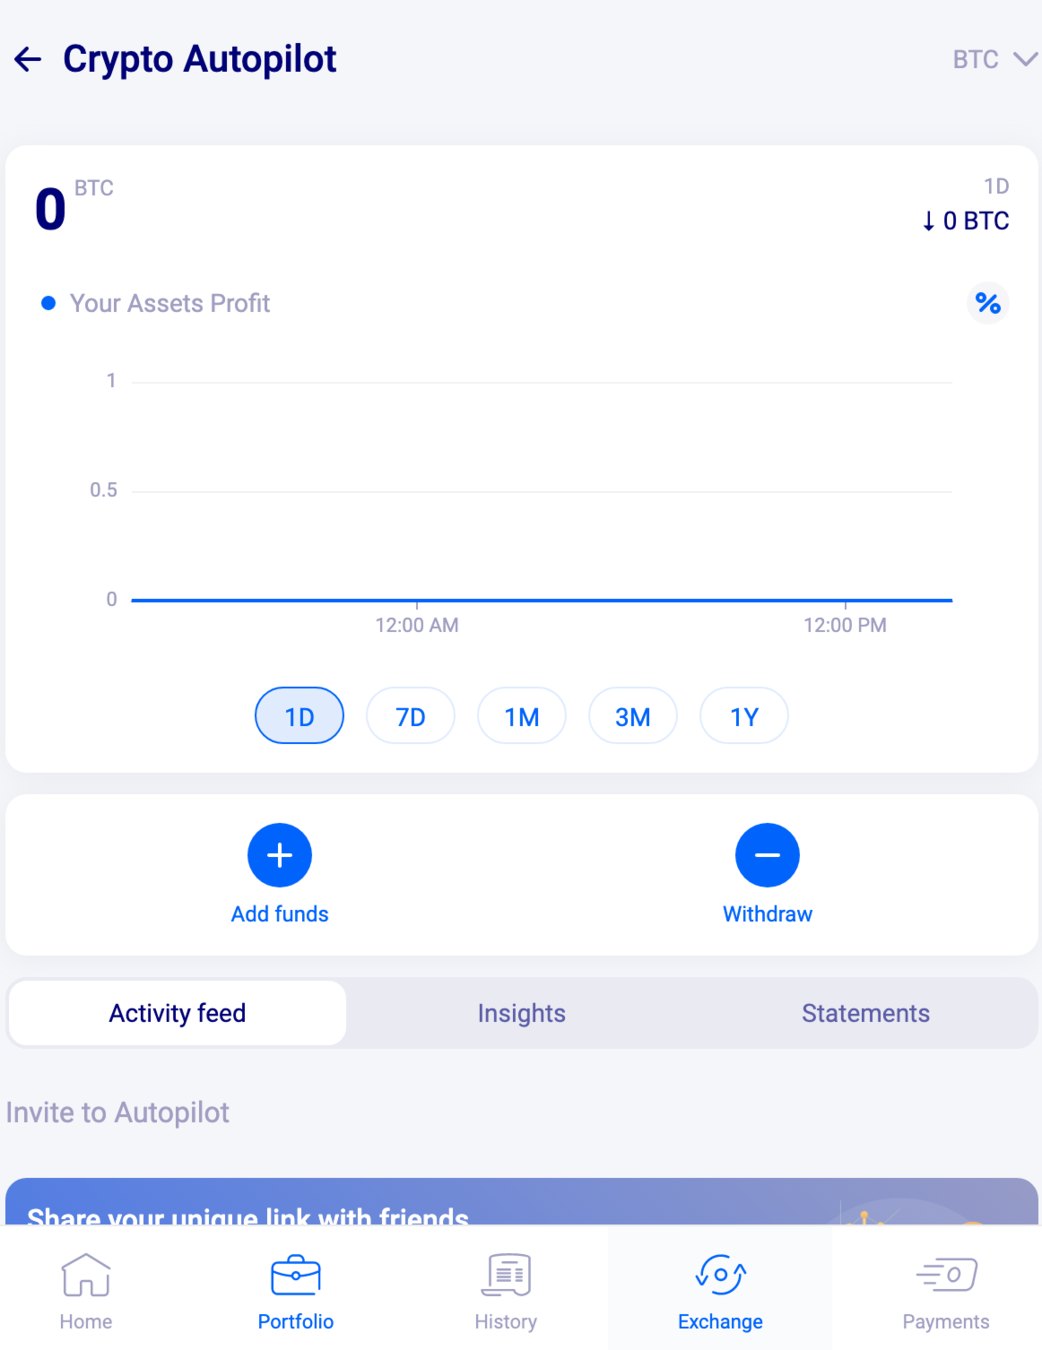
Click on Add Funds
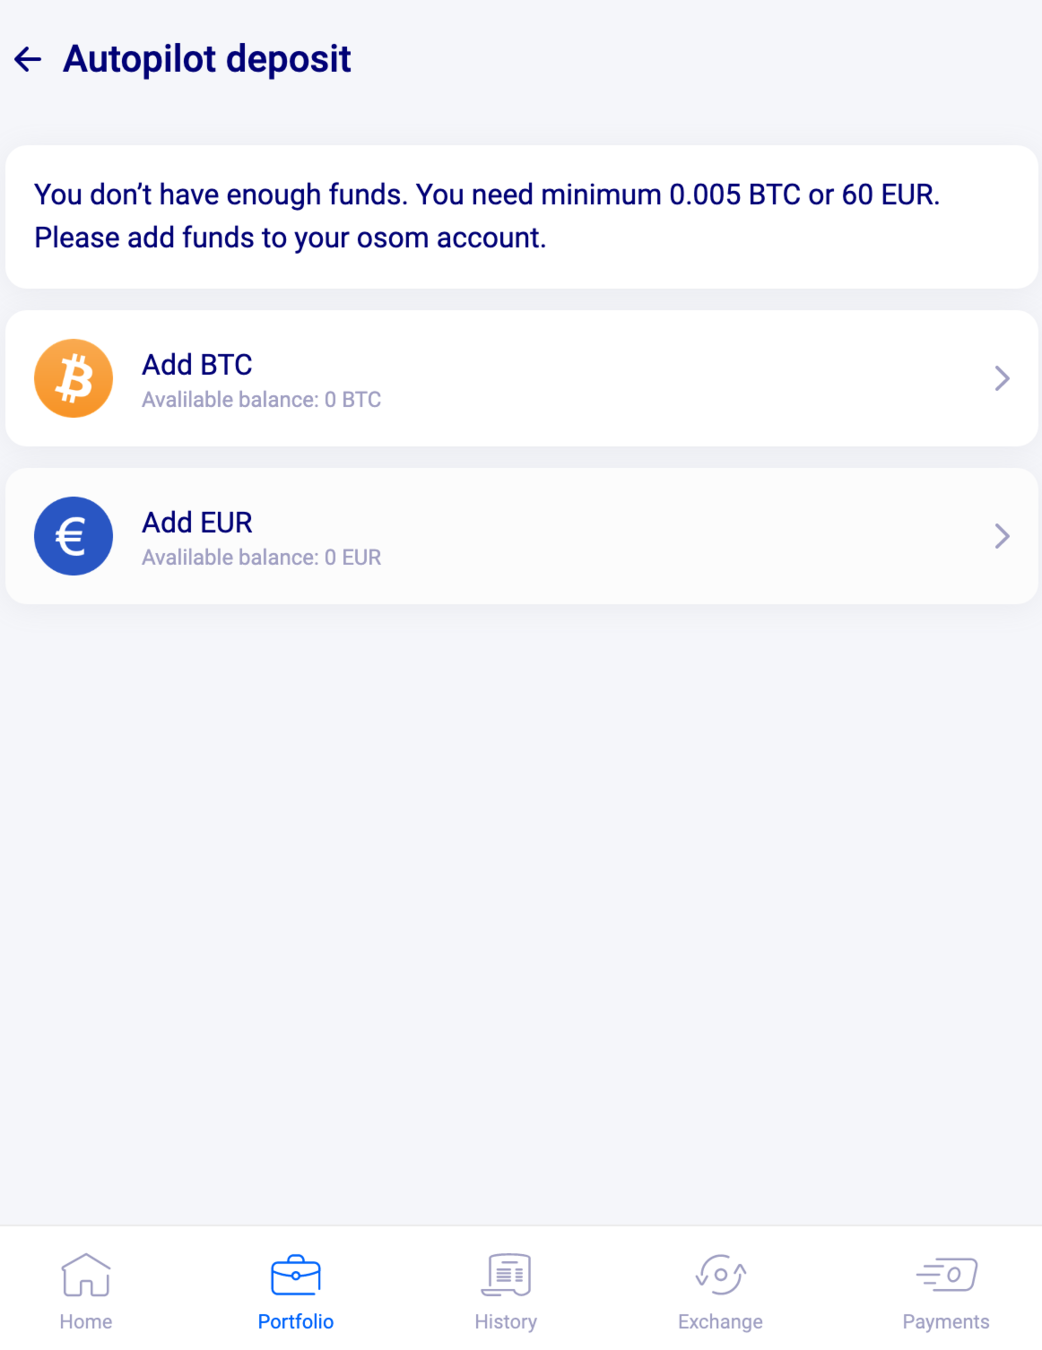
You will need to add a minimum of 0.0025BTC to your OSOM account to use the Crypto Autopilot.
You can transfer BTC from any wallet to your brand new OSOM wallet or alternatively, you can deposit EUR which will be converted into BTC.
To add BTC that is stored elsewhere:
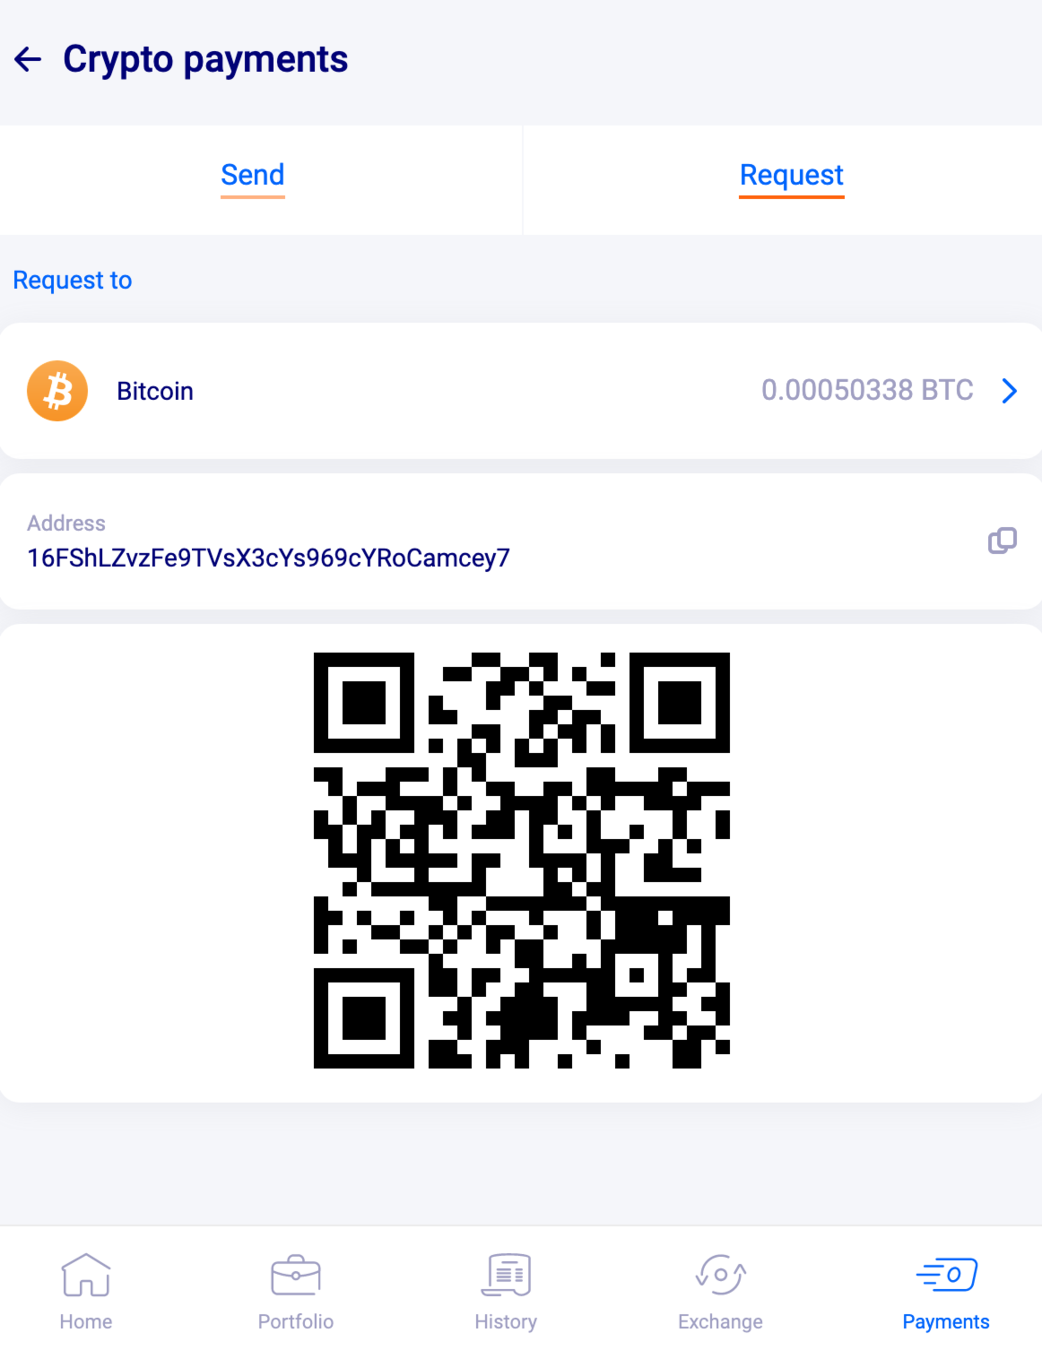
Click on Add BTC (you will be redirected to the Payments section of the app)
You can now copy your OSOM wallet address or use the generated QR code to transfer BTC from the external wallet to your OSOM wallet.
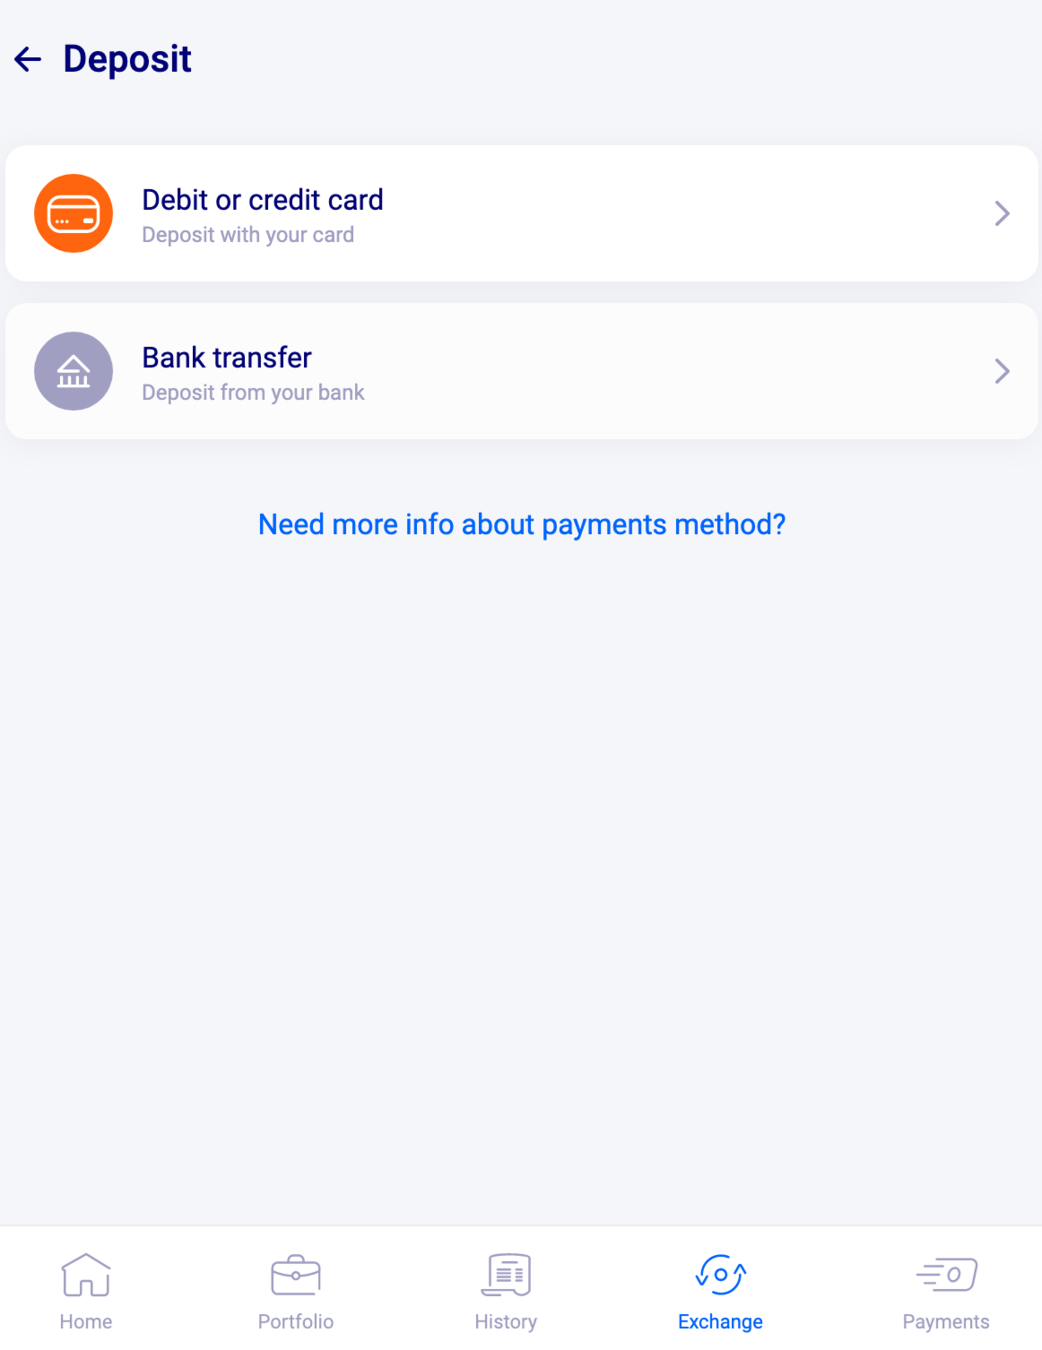
If you want to deposit EUR, you can make a deposit via debit orcredit card or via SEPA/SWIFT transfer:
Click on Add EUR
Select your preferred method
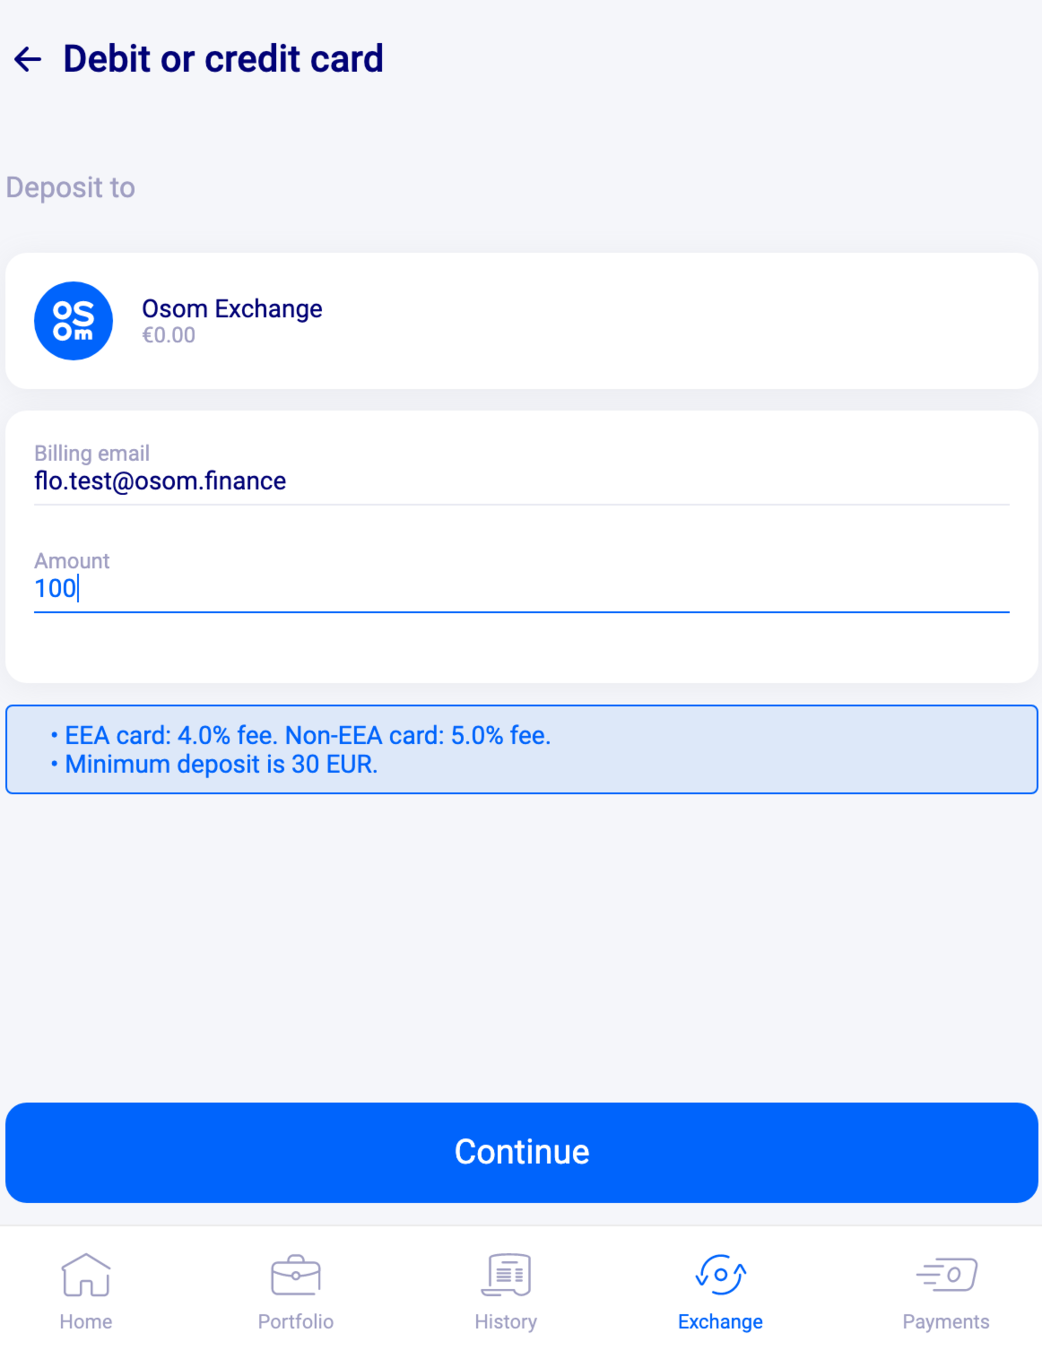
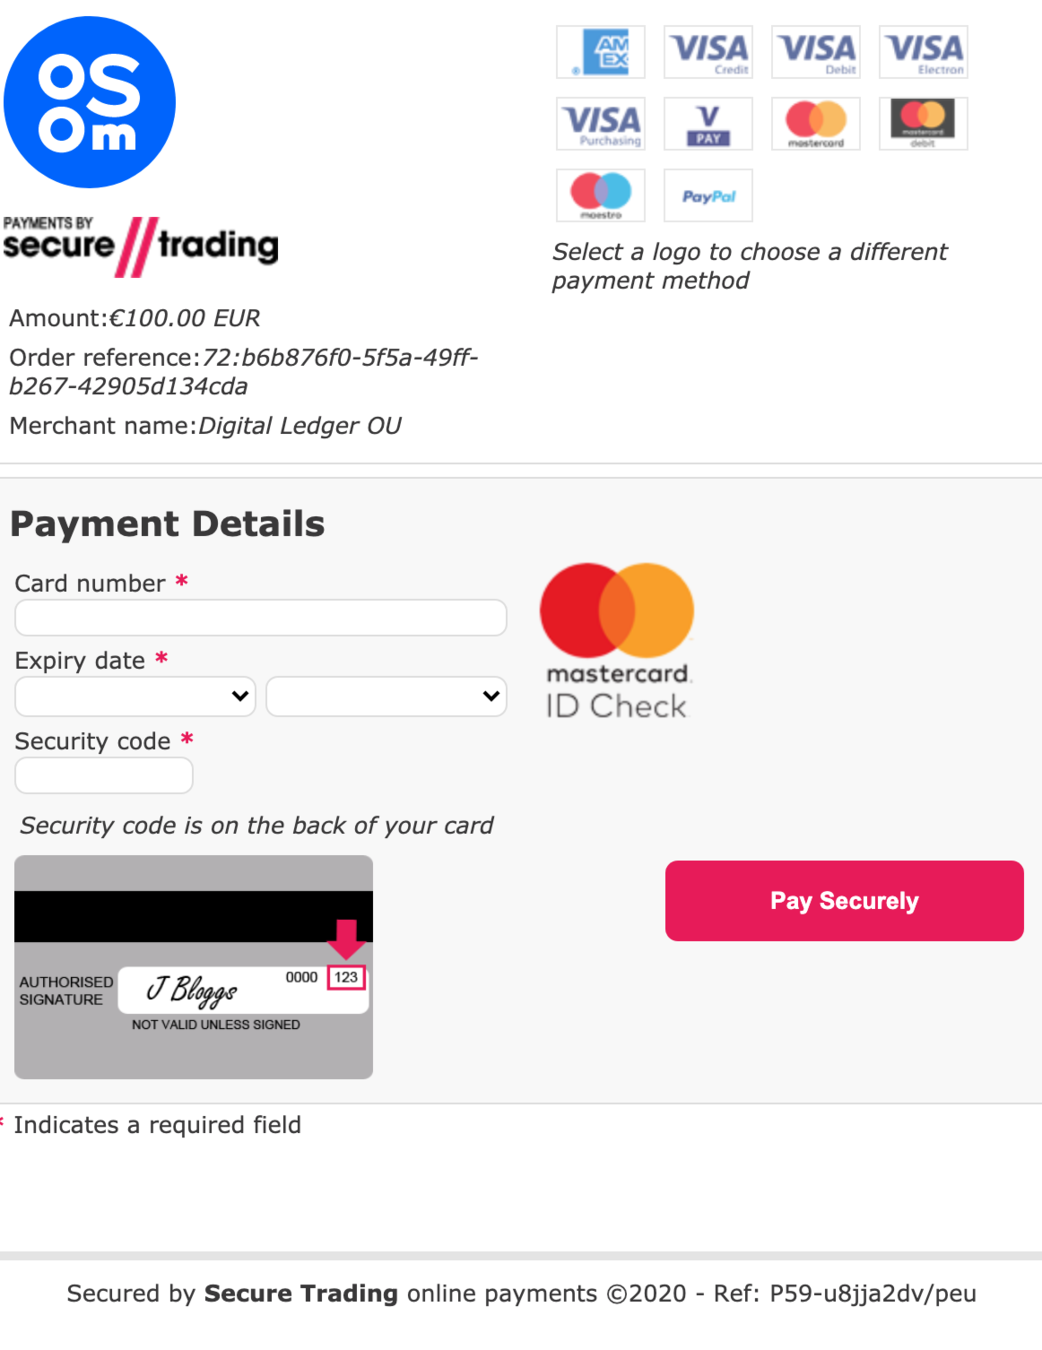
For debit or credit card method:
Indicate the amount and click on Continue
Select your payment method
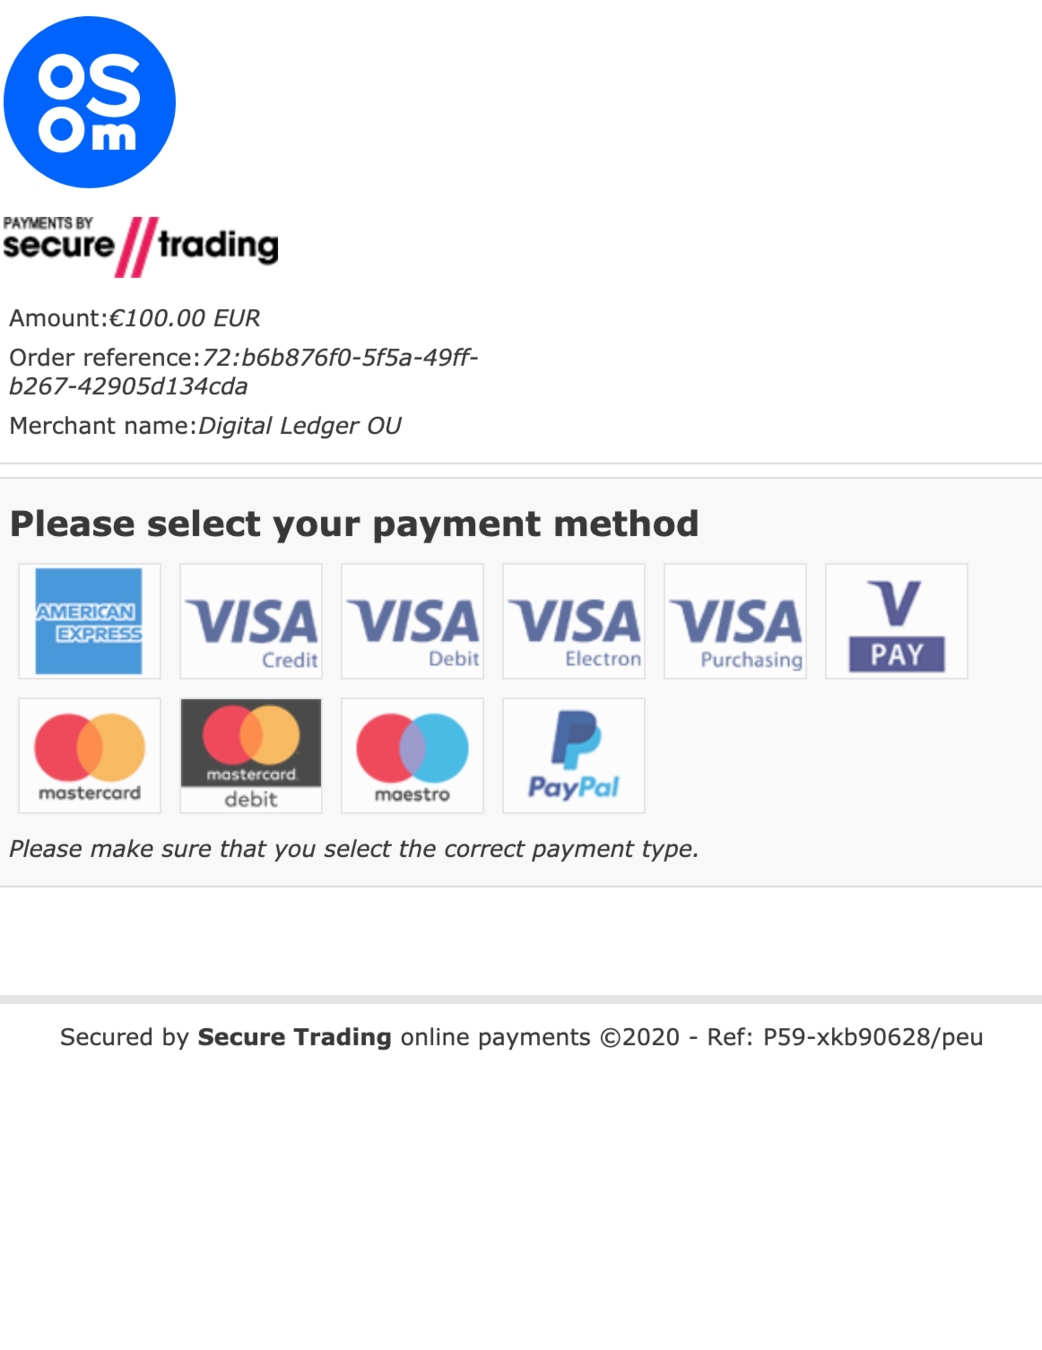
Fill in your details, then click on Pay Securely and confirm the 3D secure request
For SEPA or SWIFT method:
Click on Bank transfer
Select SEPA or SWIFT
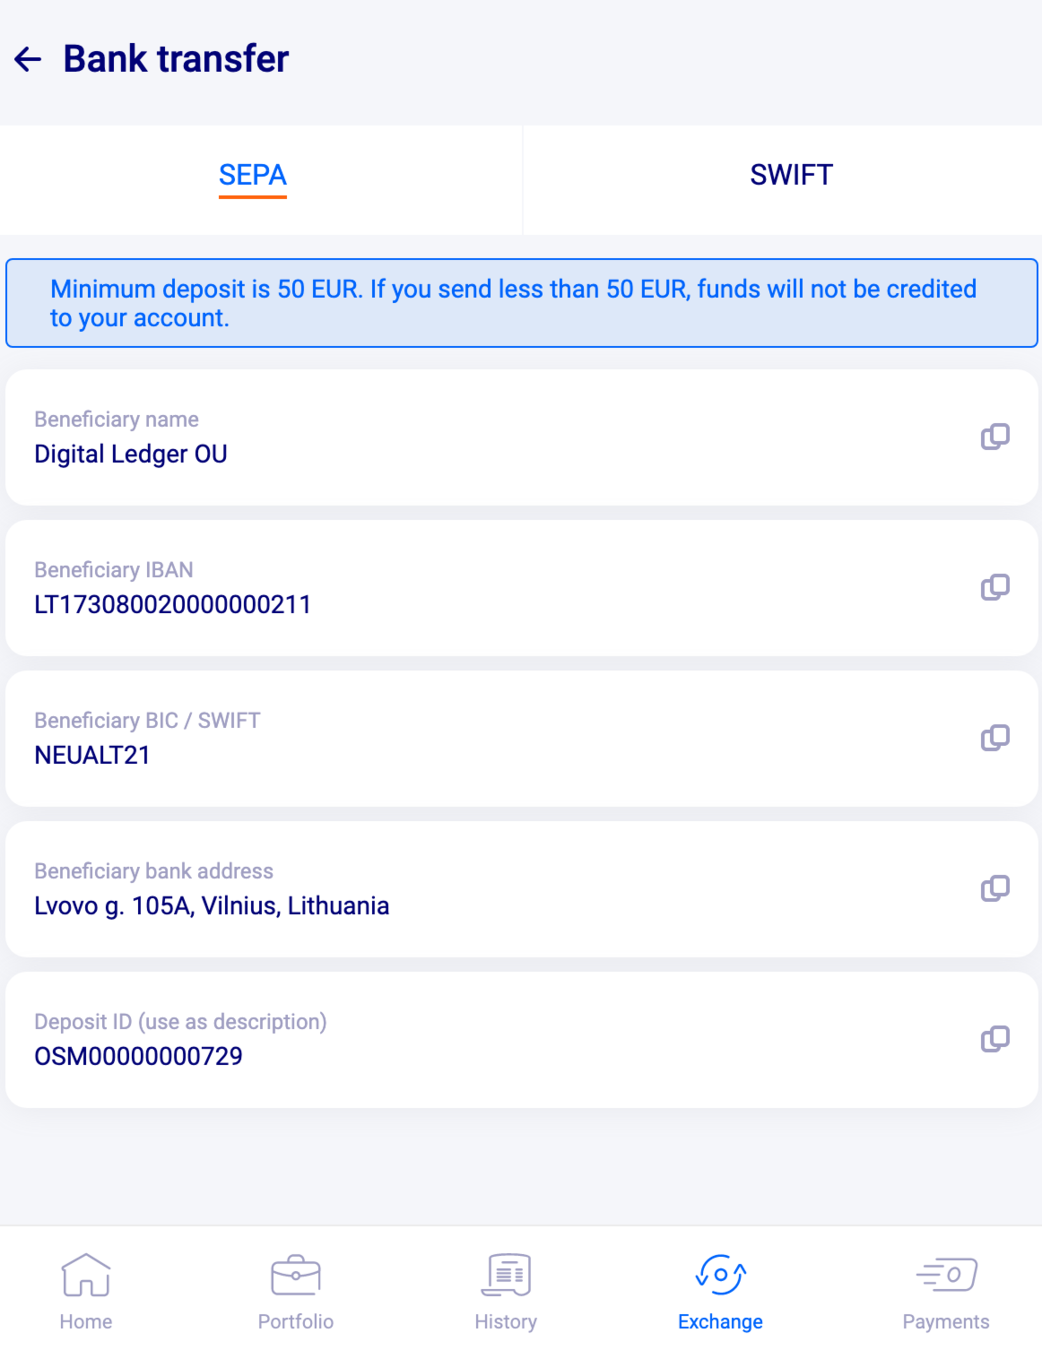
Select SEPA or SWIFT
Now, copy and paste the information into your bank’s interface. Don't forget to add the Deposit ID in the description.
Once you have received the credit into your account, make sure to go back and add the funds into the Autopilot. This will not happen automatically.
Click on Add funds
Indicate the amount and confirm
Every day, you will see fluctuations in your Autopilot balance. Don’t be alarmed! Changes can be both positive and negative, so don't worry if you see the Autopilot underperforming on some days.
So far, our tests have demonstrated that in the long run, the Crypto Autopilot outperforms all its competitors.