Programming for Sculptors
ARTS-A0407 – Digital Sculpture 3 (2cr)
Lecture 3, 15.1.2020
Today:
- Pick one of the three tutorials presented in these slides for the first assignment.
- Your task is to use the techniques presented in the tutorial for telling a story.
- Follow the tutorial, ask help if you're stuck.
- You may need to change the circuit or code presented in the tutorial to fit your needs. Gurden will help you out.
Remember to test often and work in small incremental steps.
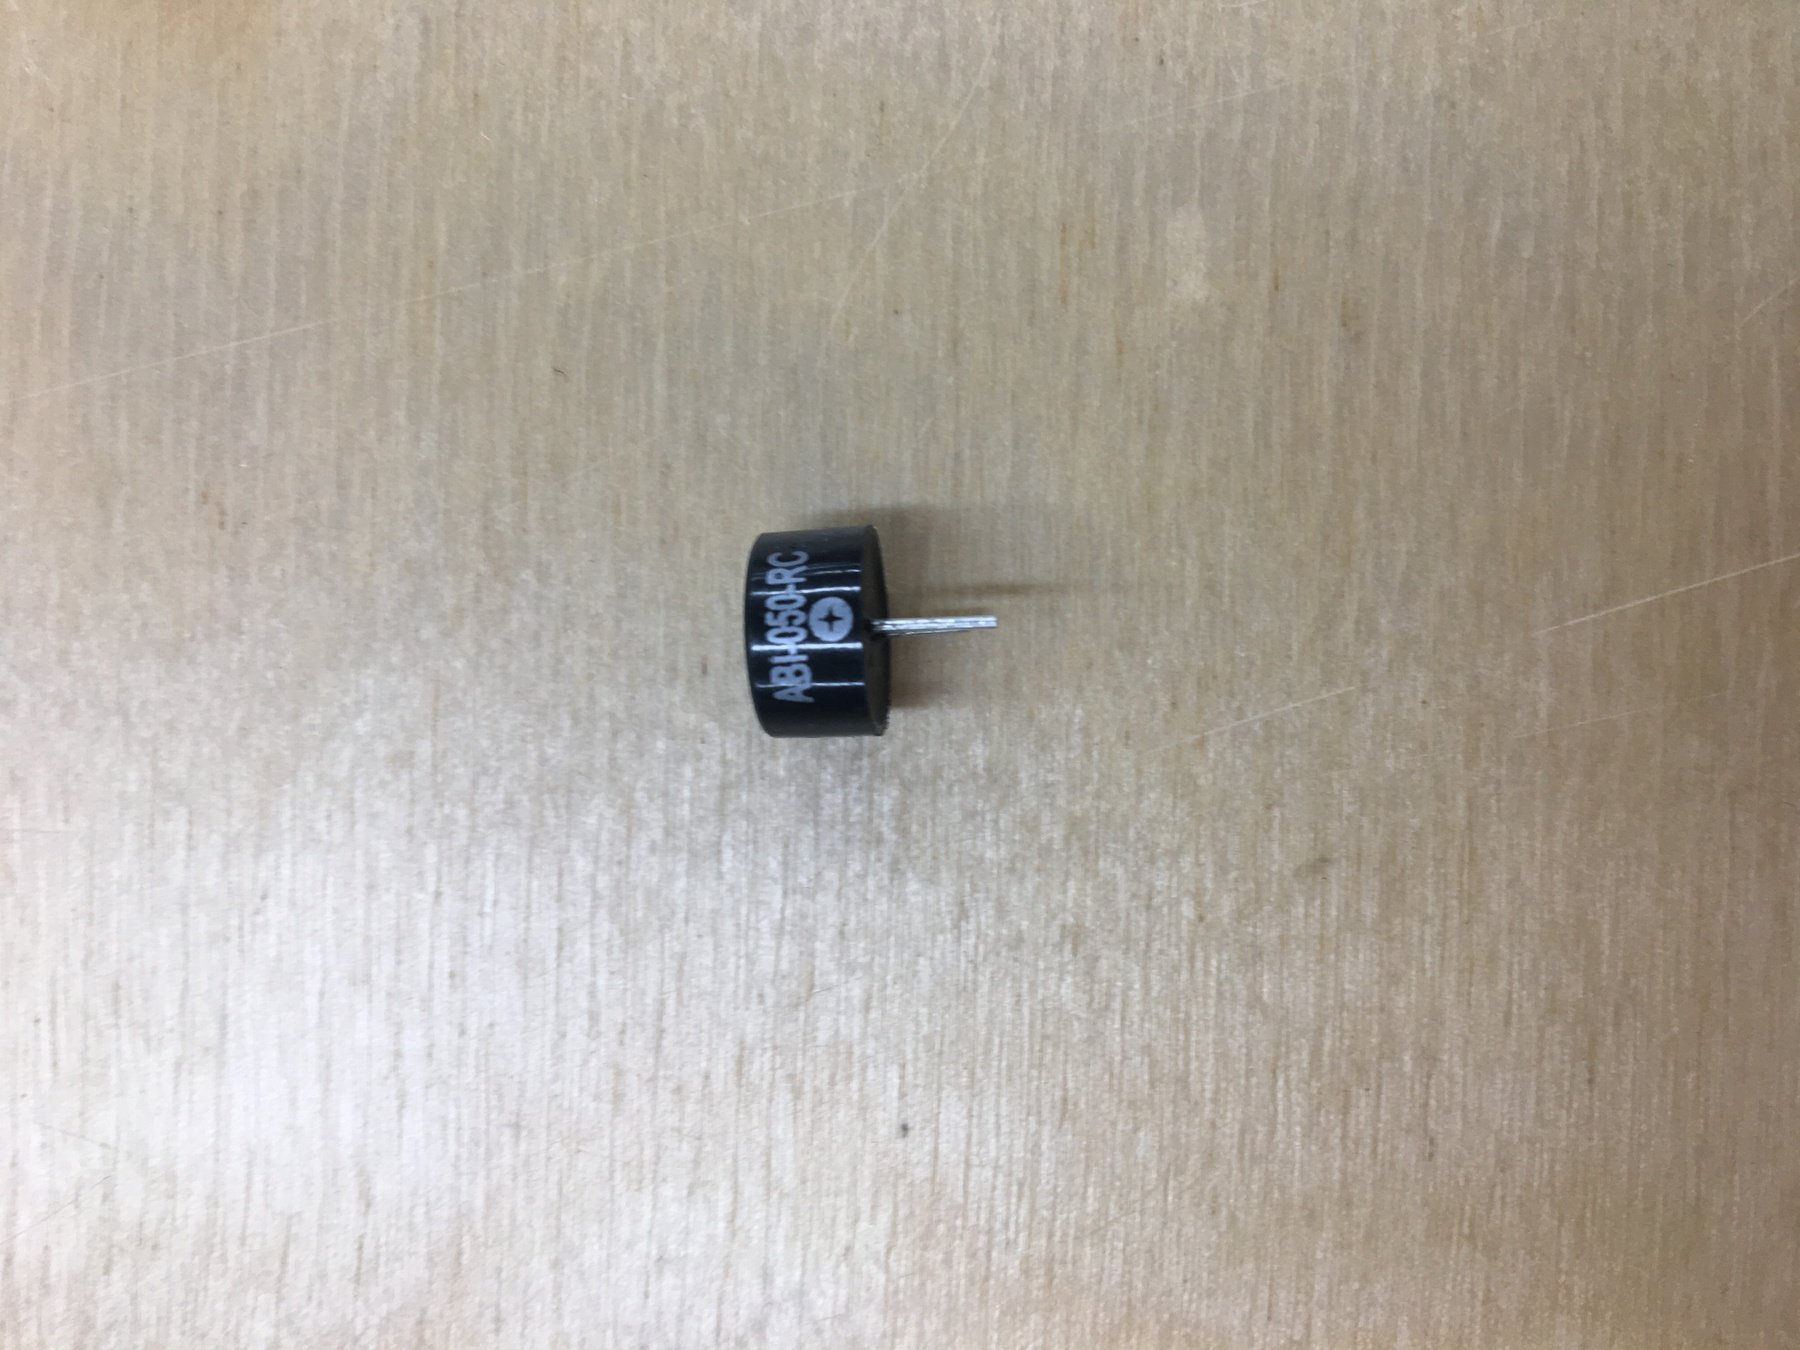
I noticed the small piezo buzzers are polarized: it matters which leg goes to ground and which to pin. Use the bigger ones instead or make sure '+' is on the side of the output pin.
From demo to poem, example for assignment 1
In the piece, two characters are facing each other. The lights are blinking evenly but in a slightly different interval. This causes the lights to drift in and out of sync with each other.
It's inspired by the work of the composer Steve Reich. Reich often uses harmonic rhythm, canons and phase differences in his compositions. Here's his composition 'Clapping music' performed by David Hockings and Toby Kearney. Both musicians are clapping the exact same rhythm but they are changing their relative phase by an 8th note after every eight bars.
Next steps
The following slides have three different tutorials: 1) Controlling leds with finer control, 2) Building an instrument with piezo buzzer and a sensor and 3) Advanced sound synthesis with Mozzi library.
Pick the tutorial based on what you want to work with in the assignment. If you want to work with light, choose tutorial 1 and if you want to work with sound choose tutorial 2. The tutorials act as the starting point for your assignment. There is additional slides after the tutorial that offer more techniques that might be relevant for your work.
After finishing the tutorial, plan your assignment and work out the details and technical challenges with Gurden.
The previous LED examples we did used the delay function for timing. During delay arduino halts completely, so it's not possible to do any other computation during delay. It is possible to keep using the delay function but for finer control you will need to use another approach. If you want to control multiple LEDs for your assignment or if you want to use a sensor to trigger your installation you will need to use the technique presented in this tutorial:
1. Controlling LEDs without delay
Two leds example, circuit
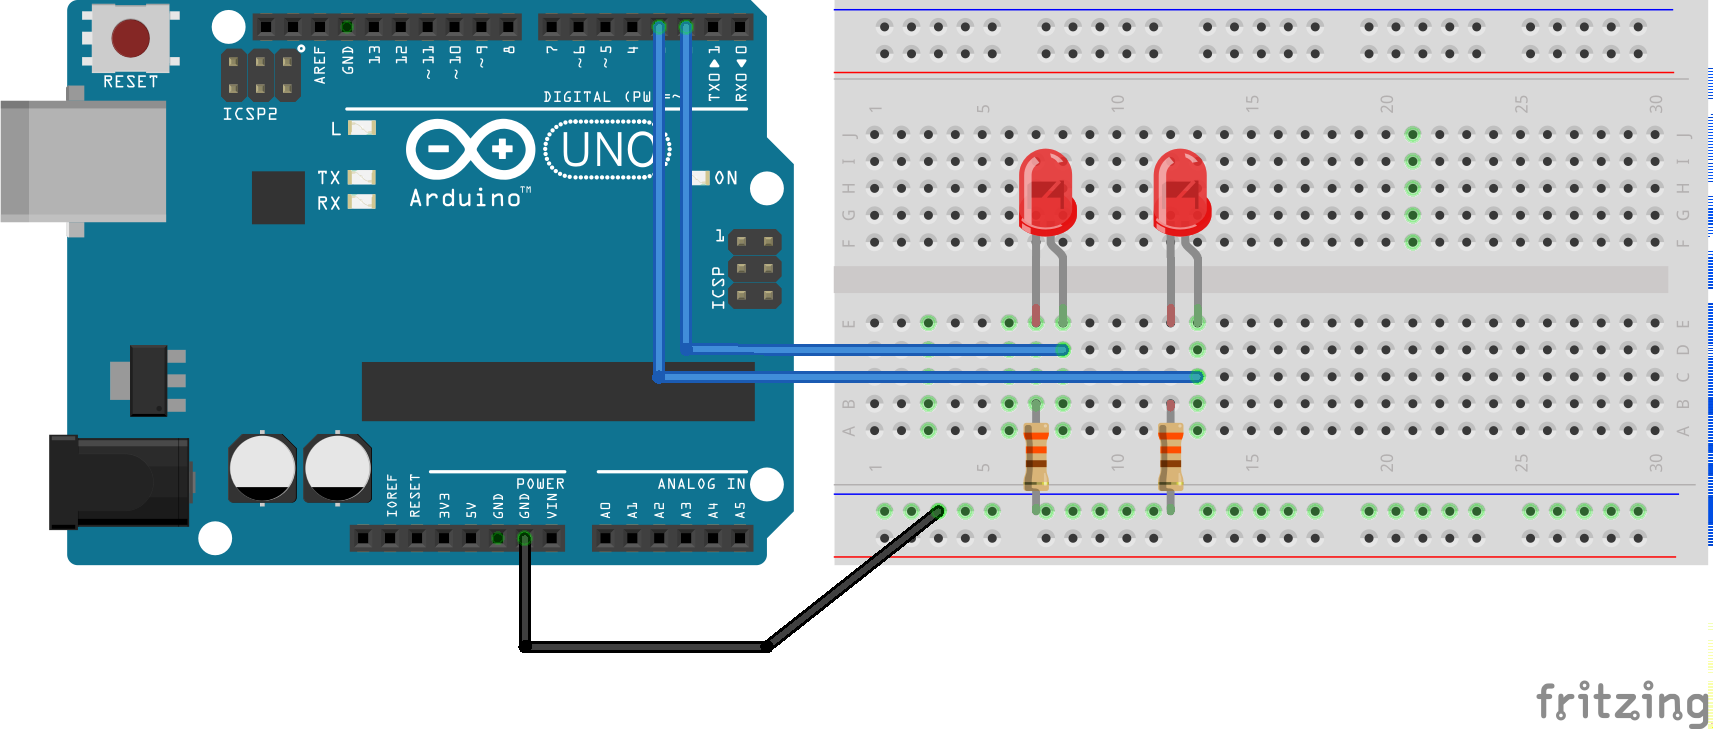
Two leds
example, code
// Pn numbers for LEDs
int ledPin = 2;
int ledPin2 = 3;

int ledState = LOW; // ledState used to set the LED
long previousMillis = 0; // will store last time LED was updated
int ledState2 = LOW; // ledState used to set the LED2
long previousMillis2 = 0; // will store last time LED2 was updated

// the following variables is are the type 'long' becouse they can store more numbers than an 'int'
// time, measured in miliseconds, will quickly become a bigger number than can be stored in an int.
long interval = 1000; // interval at which to blink (milliseconds)
long interval2 = 900; // interval at which to blink (milliseconds)

void setup() {
  // set the digital pins as output:
  pinMode(ledPin, OUTPUT);
  pinMode(ledPin2, OUTPUT);
}

void loop()
{
  // check to see if it's time to blink the LED; that is, if the
  // difference between the current time and last time you blinked
  // the LED is bigger than the interval at which you want to
  // blink the LED.
  long currentMillis = millis();

  if(currentMillis - previousMillis > interval) {
    // save the last time you blinked the LED
    previousMillis = currentMillis;

    // if the LED is off turn it on and vice-versa:
    if (ledState == LOW)
      ledState = HIGH;
    else
      ledState = LOW;

    // set the LED with the ledState of the variable:
    digitalWrite(ledPin, ledState);
  }

  if(currentMillis - previousMillis2 > interval2) {
    // save the last time you blinked the LED
    previousMillis2 = currentMillis;

    // if the LED is off turn it on and vice-versa:
    if (ledState2 == LOW)
      ledState2 = HIGH;
    else
      ledState2 = LOW;

    // set the LED with the ledState of the variable:
    digitalWrite(ledPin2, ledState2);
  }
}
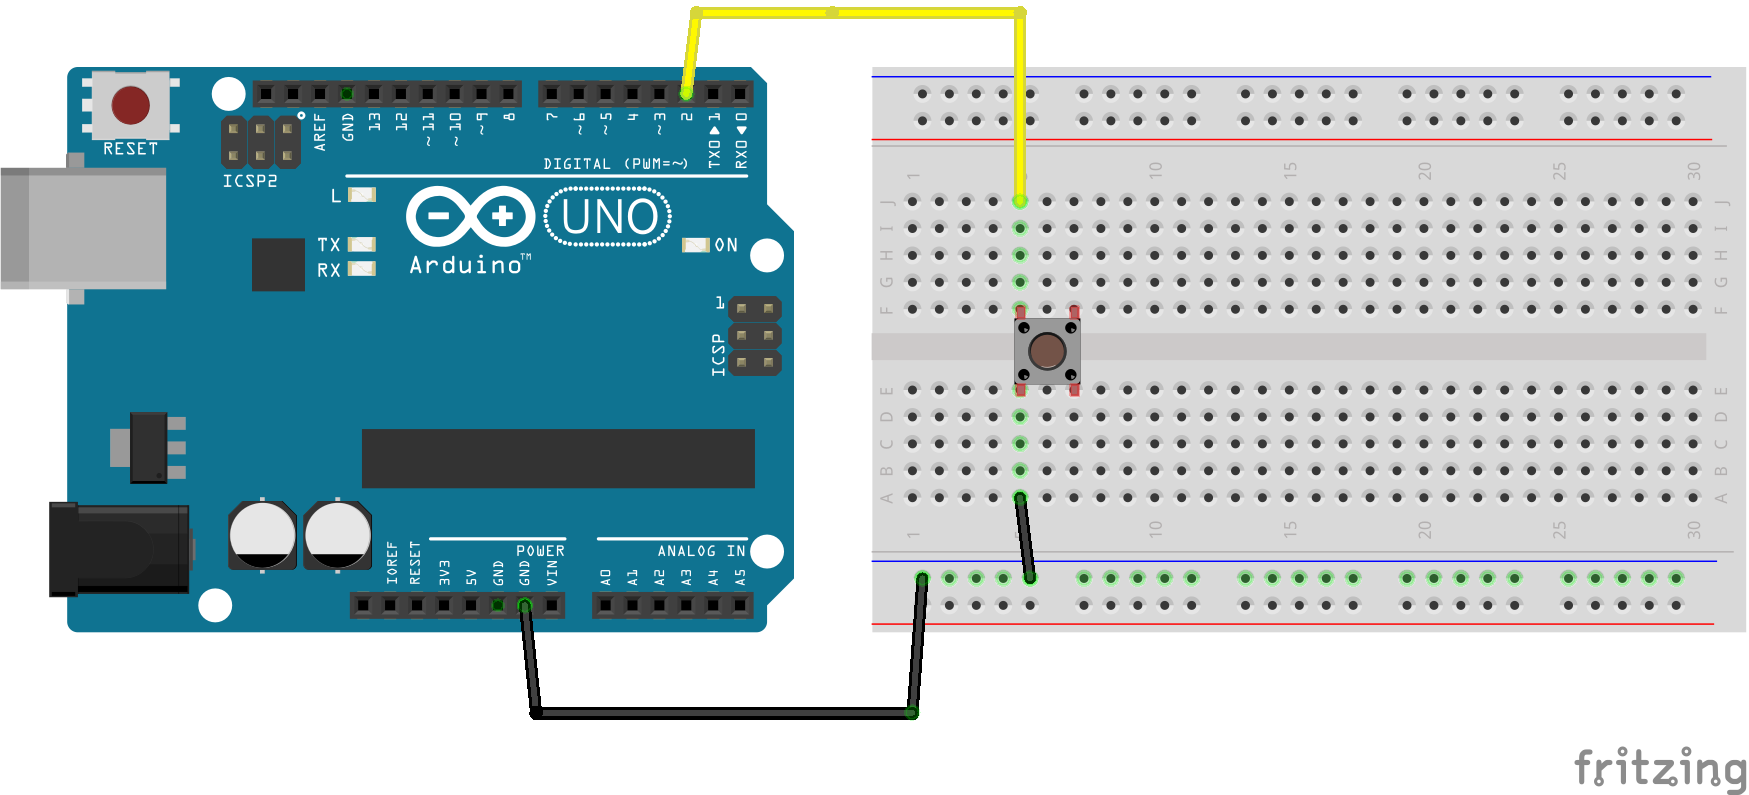
Two leds + LDR. Turn on the installation with a sensor
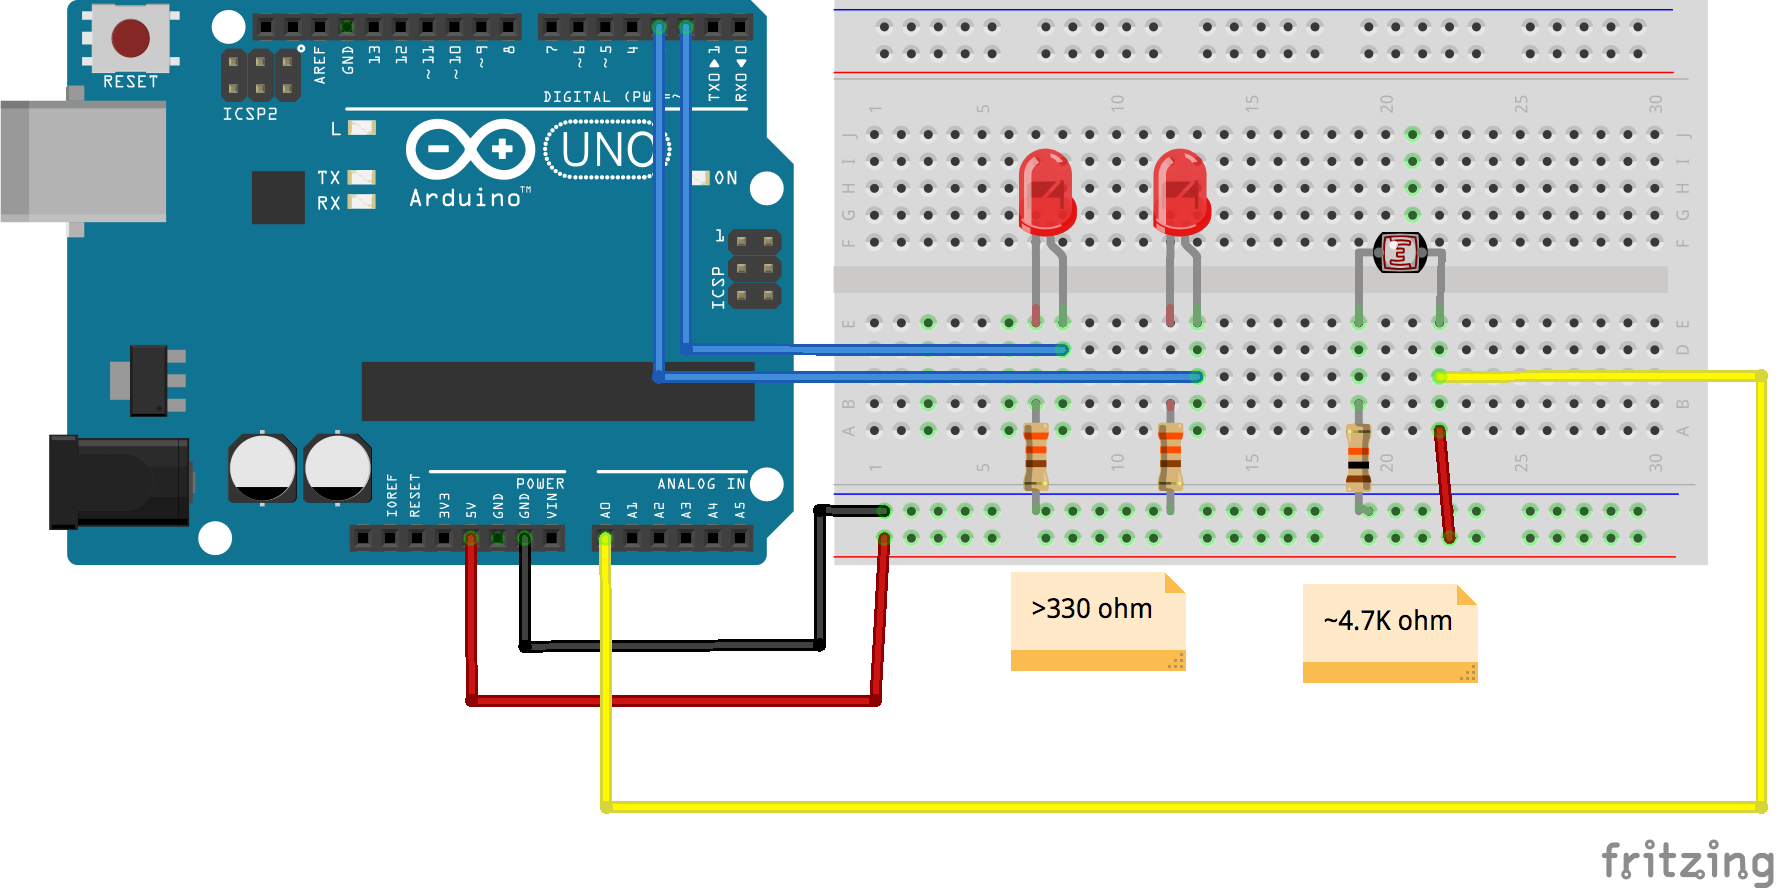
Two leds + LDR
example, code
// Pn numbers for LEDs
int ledPin = 2;
int ledPin2 = 3;

int ledState = LOW; // ledState used to set the LED
long previousMillis = 0; // will store last time LED was updated
int ledState2 = LOW; // ledState used to set the LED2
long previousMillis2 = 0; // will store last time LED2 was updated

// the following variables is are the type 'long' becouse they can store more numbers than an 'int'
// time, measured in miliseconds, will quickly become a bigger number than can be stored in an int.
long interval = 1000; // interval at which to blink (milliseconds)
long interval2 = 900; // interval at which to blink (milliseconds)

void setup() {
  // set the digital pins as output:
  pinMode(ledPin, OUTPUT);
  pinMode(ledPin2, OUTPUT);
  // initialize serial communications for debugging
  Serial.begin(9600);
}

void loop() {
  // read the sensor:
  int sensorReading = analogRead(A0);
  // print the sensor reading so you know its range
  Serial.println(sensorReading);

  // Run the blinking code only if sensorReading is big enough
  // Otherwise turn leds off and set ledStates to LOW
  if (sensorReading > 700) {
    // check to see if it's time to blink the LED; that is, if the
    // difference between the current time and last time you blinked
    // the LED is bigger than the interval at which you want to
    // blink the LED.
    long currentMillis = millis();

    if (currentMillis - previousMillis > interval) {
      // save the last time you blinked the LED
      previousMillis = currentMillis;

      // if the LED is off turn it on and vice-versa:
      if (ledState == LOW)
        ledState = HIGH;
      else
        ledState = LOW;

      // set the LED with the ledState of the variable:
      digitalWrite(ledPin, ledState);
    }

    if (currentMillis - previousMillis2 > interval2) {
      // save the last time you blinked the LED
      previousMillis2 = currentMillis;

      // if the LED is off turn it on and vice-versa:
      if (ledState2 == LOW)
        ledState2 = HIGH;
      else
        ledState2 = LOW;

      // set the LED with the ledState of the variable:
      digitalWrite(ledPin2, ledState2);
    }
  } else {
    digitalWrite(ledPin, LOW);
    digitalWrite(ledPin2, LOW);
    ledState = LOW;
    ledState2 = LOW;
  }
}
2. Pitch follower
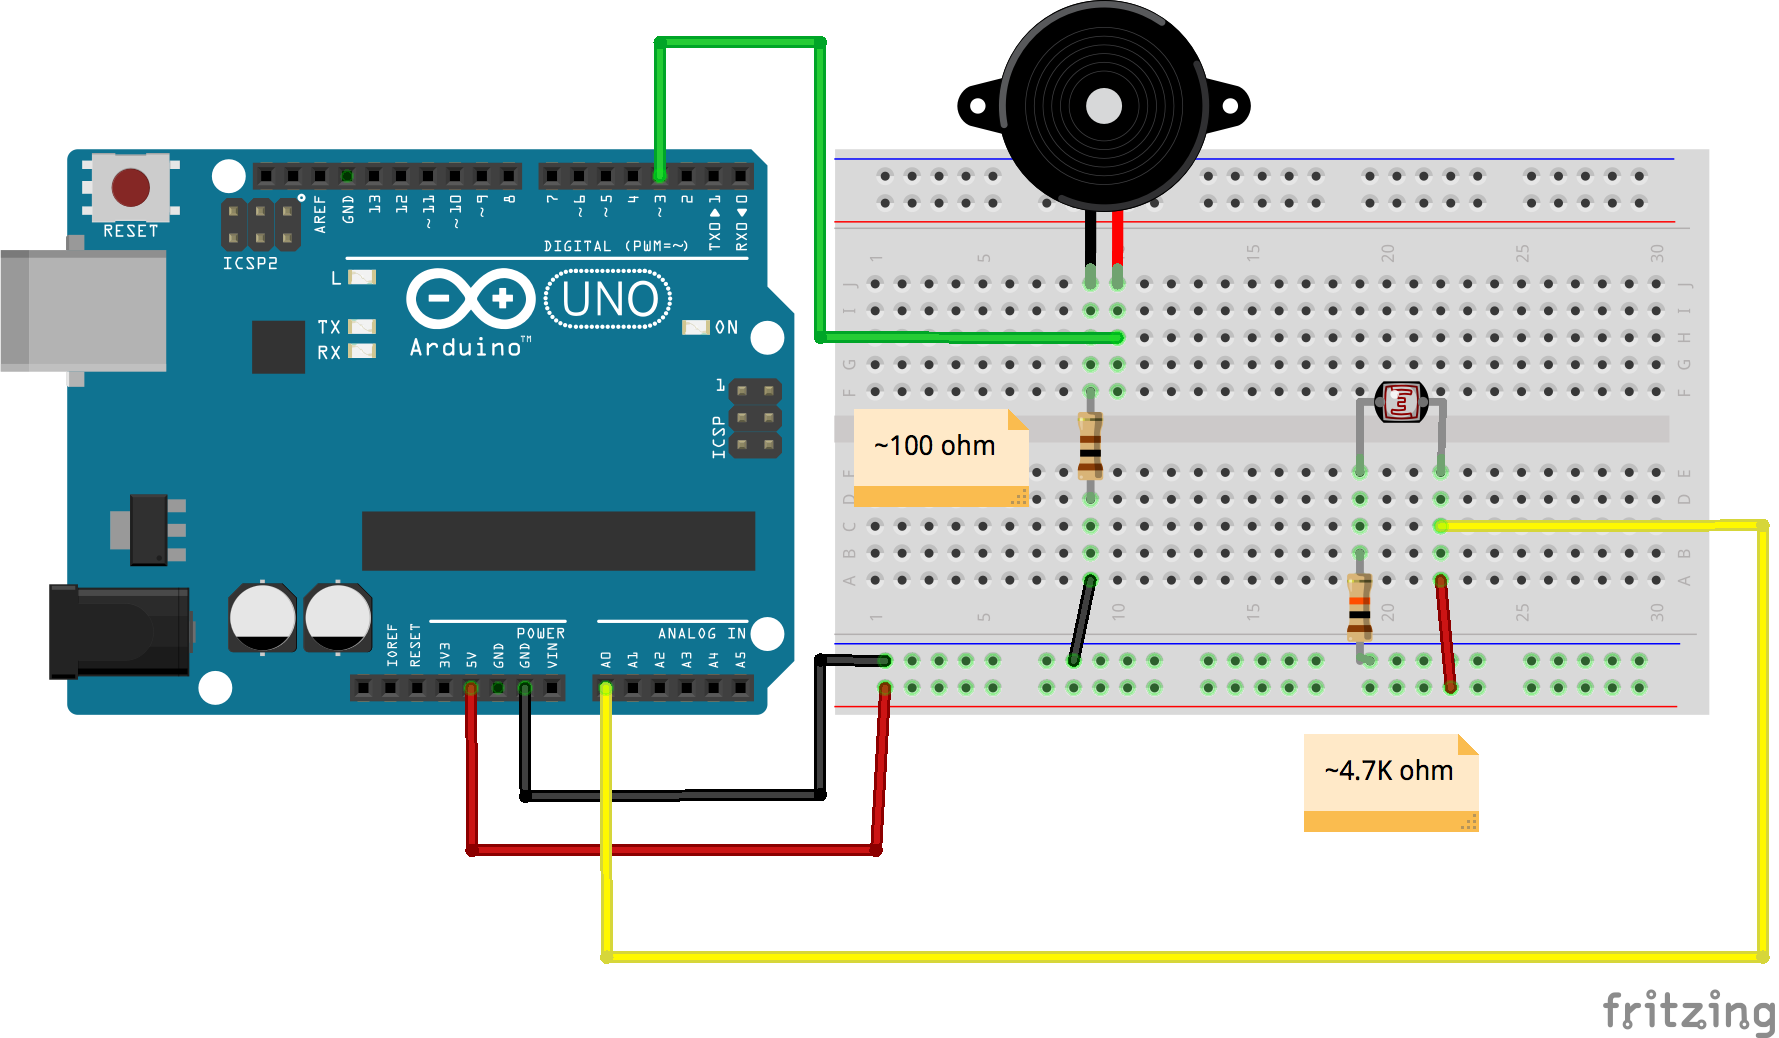
You could also use buttons to control pitch or trigger notes on and off. Remember that you can build a button with anything conductive.
For inspiration, here's Leafcutter John playing his LDR controller at Loop Berlin
Another example: Peter Vogel, interactive sound objects

Longer documentary: https://vimeo.com/59829961
3. Advanced sound synthesis with Mozzi library
https://sensorium.github.io/Mozzi/learn/introductory-tutorial/
(skip part '2. Arduino')
or
https://www.instructables.com/id/Using-Mozzi-Library-with-5-potentiometers/
(You can find more potentiometers from the lab)
Example built with Mozzi
Assignment 1
Short poem with input and output
- Build an installation/sculpture/instrument with the techniques presented in the tutorials
- Shoot a video
- Send a link to the video with a short description (with WeTransfer or similar) to otso.havanto@aalto.fi by 22.1.
- Try to find a battery operated electronic thing (a toy maybe?) by 29.1.
- Email otso.havanto@aalto.fi for any questions or challenges