Let's Make The Web Great Again

Vyacheslav Koldovskyy
programmingmentor.com
t.me/programmingmentor
A little about myself...
- 20+ years industry experience
- Ph.D. (Software Project Management)
- Learning Solutions Architect (SoftServe)
- Professional Google Cloud Architect
- Developer:.Net/Java/Python/JavaScript/
TypeScript/Angular/DevOps... - Startuper (SlimCard...)
- Community leader & speaker
https://www.facebook.com/groups/
learningwebdevelopment - IT Entrepreneur
- IT Journalist
- Teacher/Trainer/Mentor/Educator

What's Wrong with Modern Web?
What is Modern Web?

The Case...


Medium...
Medium...WTF?!!

Stack Matters


https://dou.ua/lenta/articles/creating-blog-with-jamstack/
What's wrong with LAMP?
- Performance
- Security
- Content-management
- Scaling
- Maintenance
- Reliability

Frameworks?










Introducing JAMstack

JAMstack

What is not JAMstack?
-
A site built with a server-side CMS like WordPress, Drupal, Joomla, or Squarespace.
-
A monolithic server-run web app that relies on Ruby, Node, or another backend language.
-
A single page app that uses isomorphic rendering to build views on the server at runtime.
Why JAMstack?
-
Better Performance
Why wait for pages to build on the fly when you can generate them at deploy time? When it comes to minimizing the time to first byte, nothing beats pre-built files served over a CDN.
Why JAMstack?
-
Cheaper, Easier Scaling
When your deployment amounts to a stack of files that can be served anywhere, scaling is a matter of serving those files in more places. CDNs are perfect for this, and often include scaling in all of their plans.
Why JAMstack?
-
Higher Security
With server-side processes abstracted into microservice APIs, surface areas for attacks are reduced. You can also leverage the domain expertise of specialist third-party services.
Why JAMstack?
-
Better Developer Experience
Loose coupling and separation of controls allow for more targeted development and debugging, and the expanding selection of CMS options for site generators remove the need to maintain a separate stack for content and marketing.
Best Practices
- Entire Project on a CDN
- Everything Lives in Git
- Automated Builds
- Atomic Deploys
- Instant Cache Invalidation
JAMstack ecosystem

Technologies
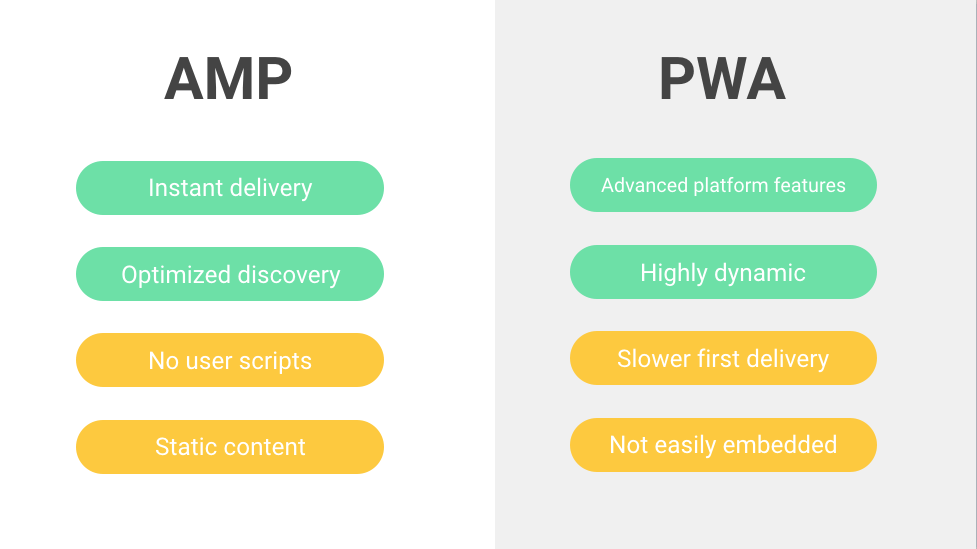
Serverless





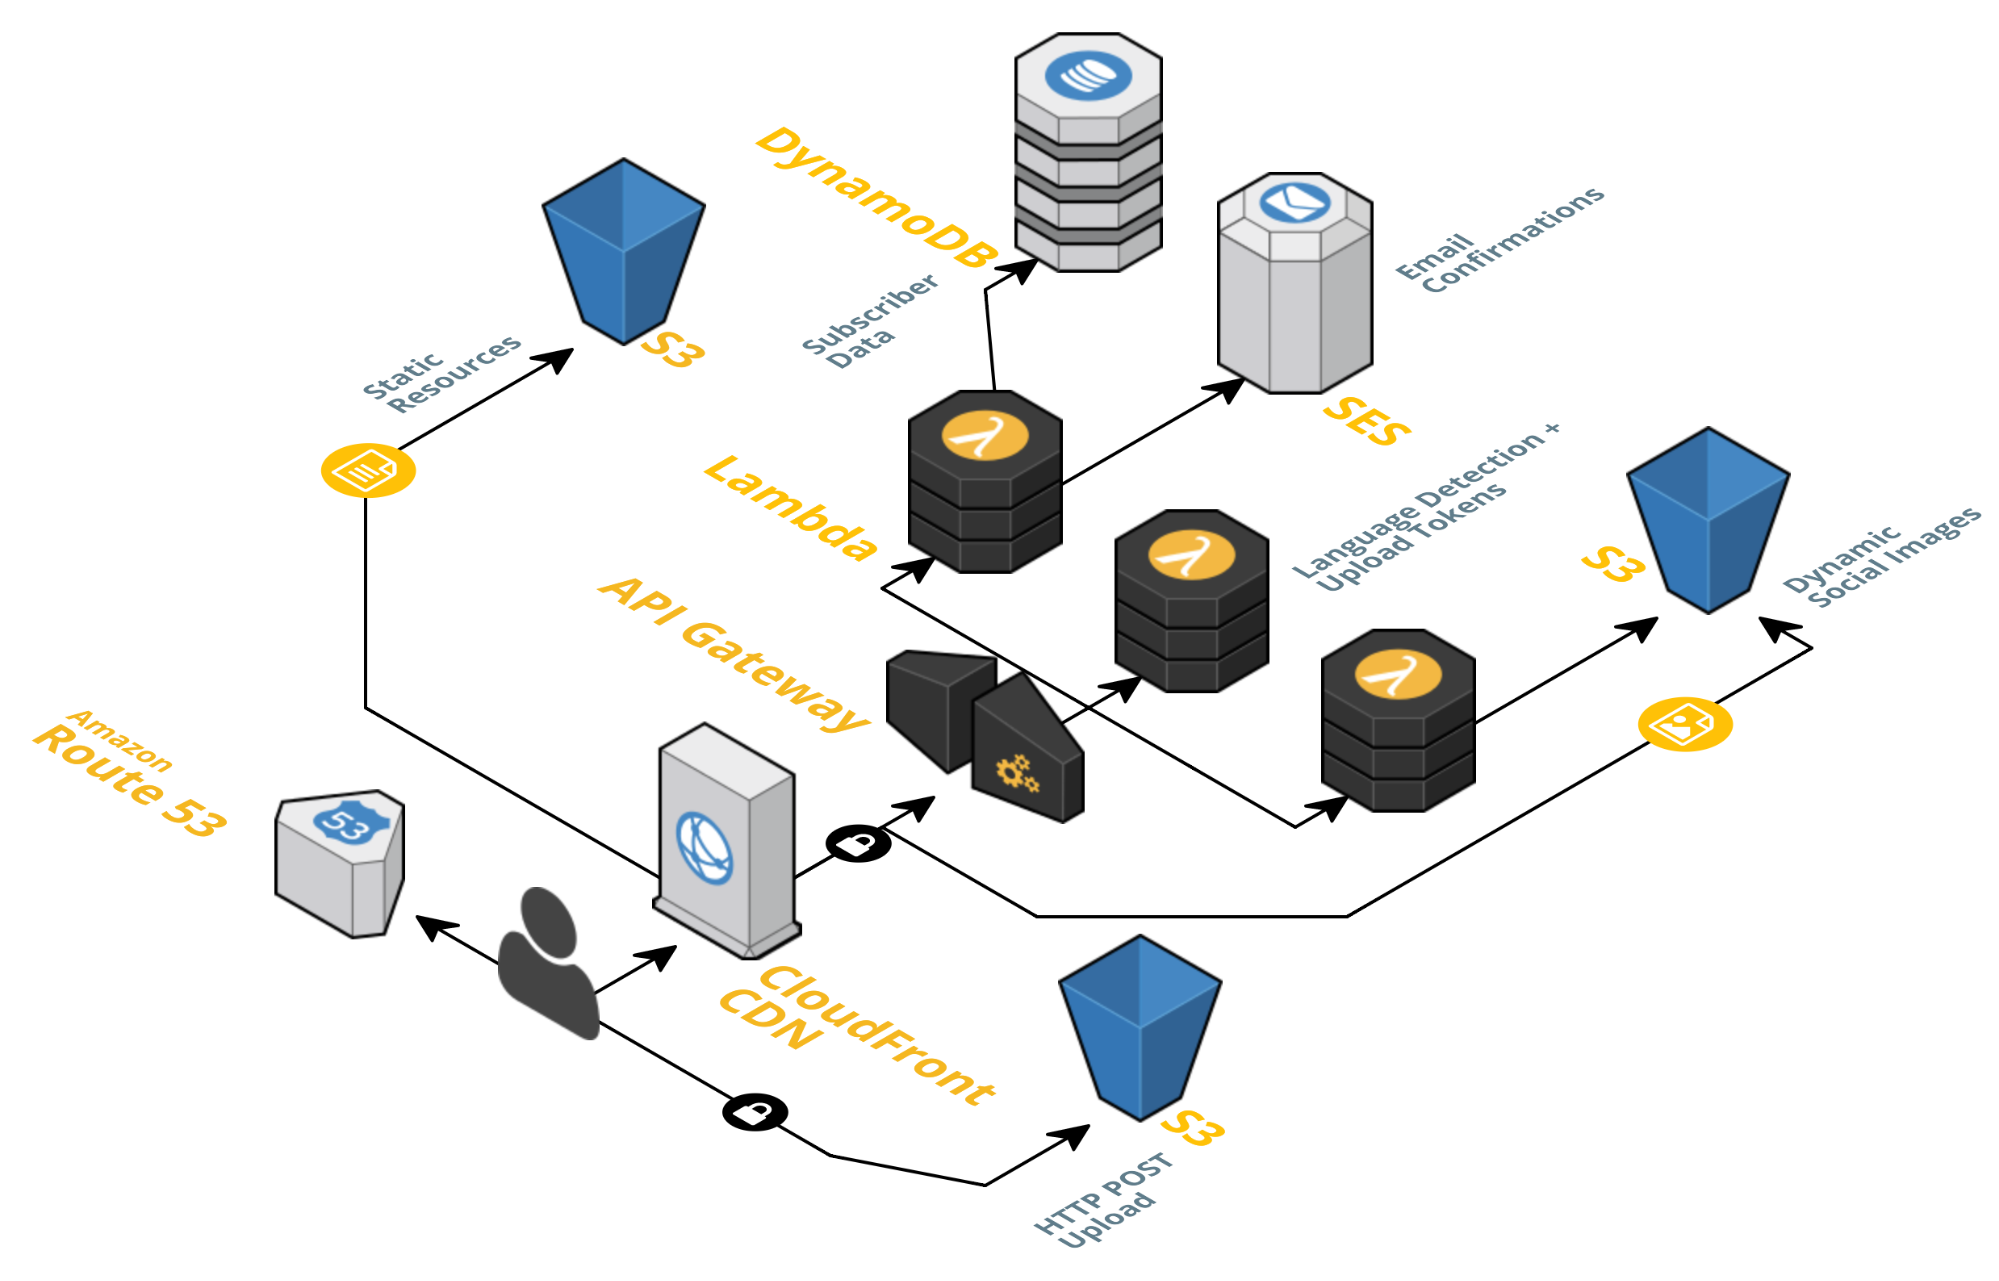
Serverless Architecture
Google Cloud
Google Cloud


Google Network

Google Data Centers

Google Edge PoPs

Google Edge Nodes


Who uses Gatsby?
Workshop
Time
goo.gl/6tz3Ne

Step 1 - Prep
npm i -g gatsby-cli

gatsby new web-great-again https://github.com/gatsbyjs/gatsby-starter-blog

cd web-great-again

code .

gatsby develop
Step 2 - Some Content

Step 3 - Build
gatsby build
Step 4 - Prep Firebase
npm i -g firebase-tools

firebase login

firebase init

Step 5 - Create & Add Project


firebase use --projectIDStep 6 - Deploy
firebase deploy
Step 7 - Prep for CI
npm install --save-dev firebase-tools

"devDependencies": {
    "firebase-tools": "^6.5.0"
}

firebase login:ci

// save key
Step 8 - Init CI
#
# CircleCI 2.0 Gatsby to Firebase Configuration File
#

version: 2
jobs:
  build:
    docker:
      - image: circleci/node:8

    working_directory: ~/repo

    steps:
      - checkout

      # Download and cache dependencies
      - restore_cache:
          keys:
            # Find a cache corresponding to this specific package-lock.json checksum
            # when this file is changed, this key will fail
            - v1-npm-deps-{{ checksum "package-lock.json" }}
            # Find the most recently generated cache used from any branch
            - v1-npm-deps-

      - run:
          name: Install Dependencies
          command: npm install

      - save_cache:
          key: v1-npm-deps-{{ checksum "package-lock.json" }}

          paths:
            - ./node_modules

      - run:
          name: Gatsby Build
          command: ./node_modules/.bin/gatsby build

      - run:
          name: Firebase Deploy
          command: ./node_modules/.bin/firebase deploy --token=$FIREBASE_TOKEN
.circleci/config.yml
Step 9 - Setup CI


Step 10 - push & enjoy

Thank you!


Vyacheslav Koldovskyy
programmingmentor.com
t.me/programmingmentor