AWS for Java developers part-2
- A security group acts as a Virtual Firewall that controls the traffic for one or more instances.
- You add rules to each security group that allow traffic to or from its associated instances
- By Default Security group allows all outbound traffic
- Security Group rules are always permissive. You allow access and not deny access
- Security Groups are stateful
- You can modify the rules of the security group at any time and rules are applied immediately
Security Group
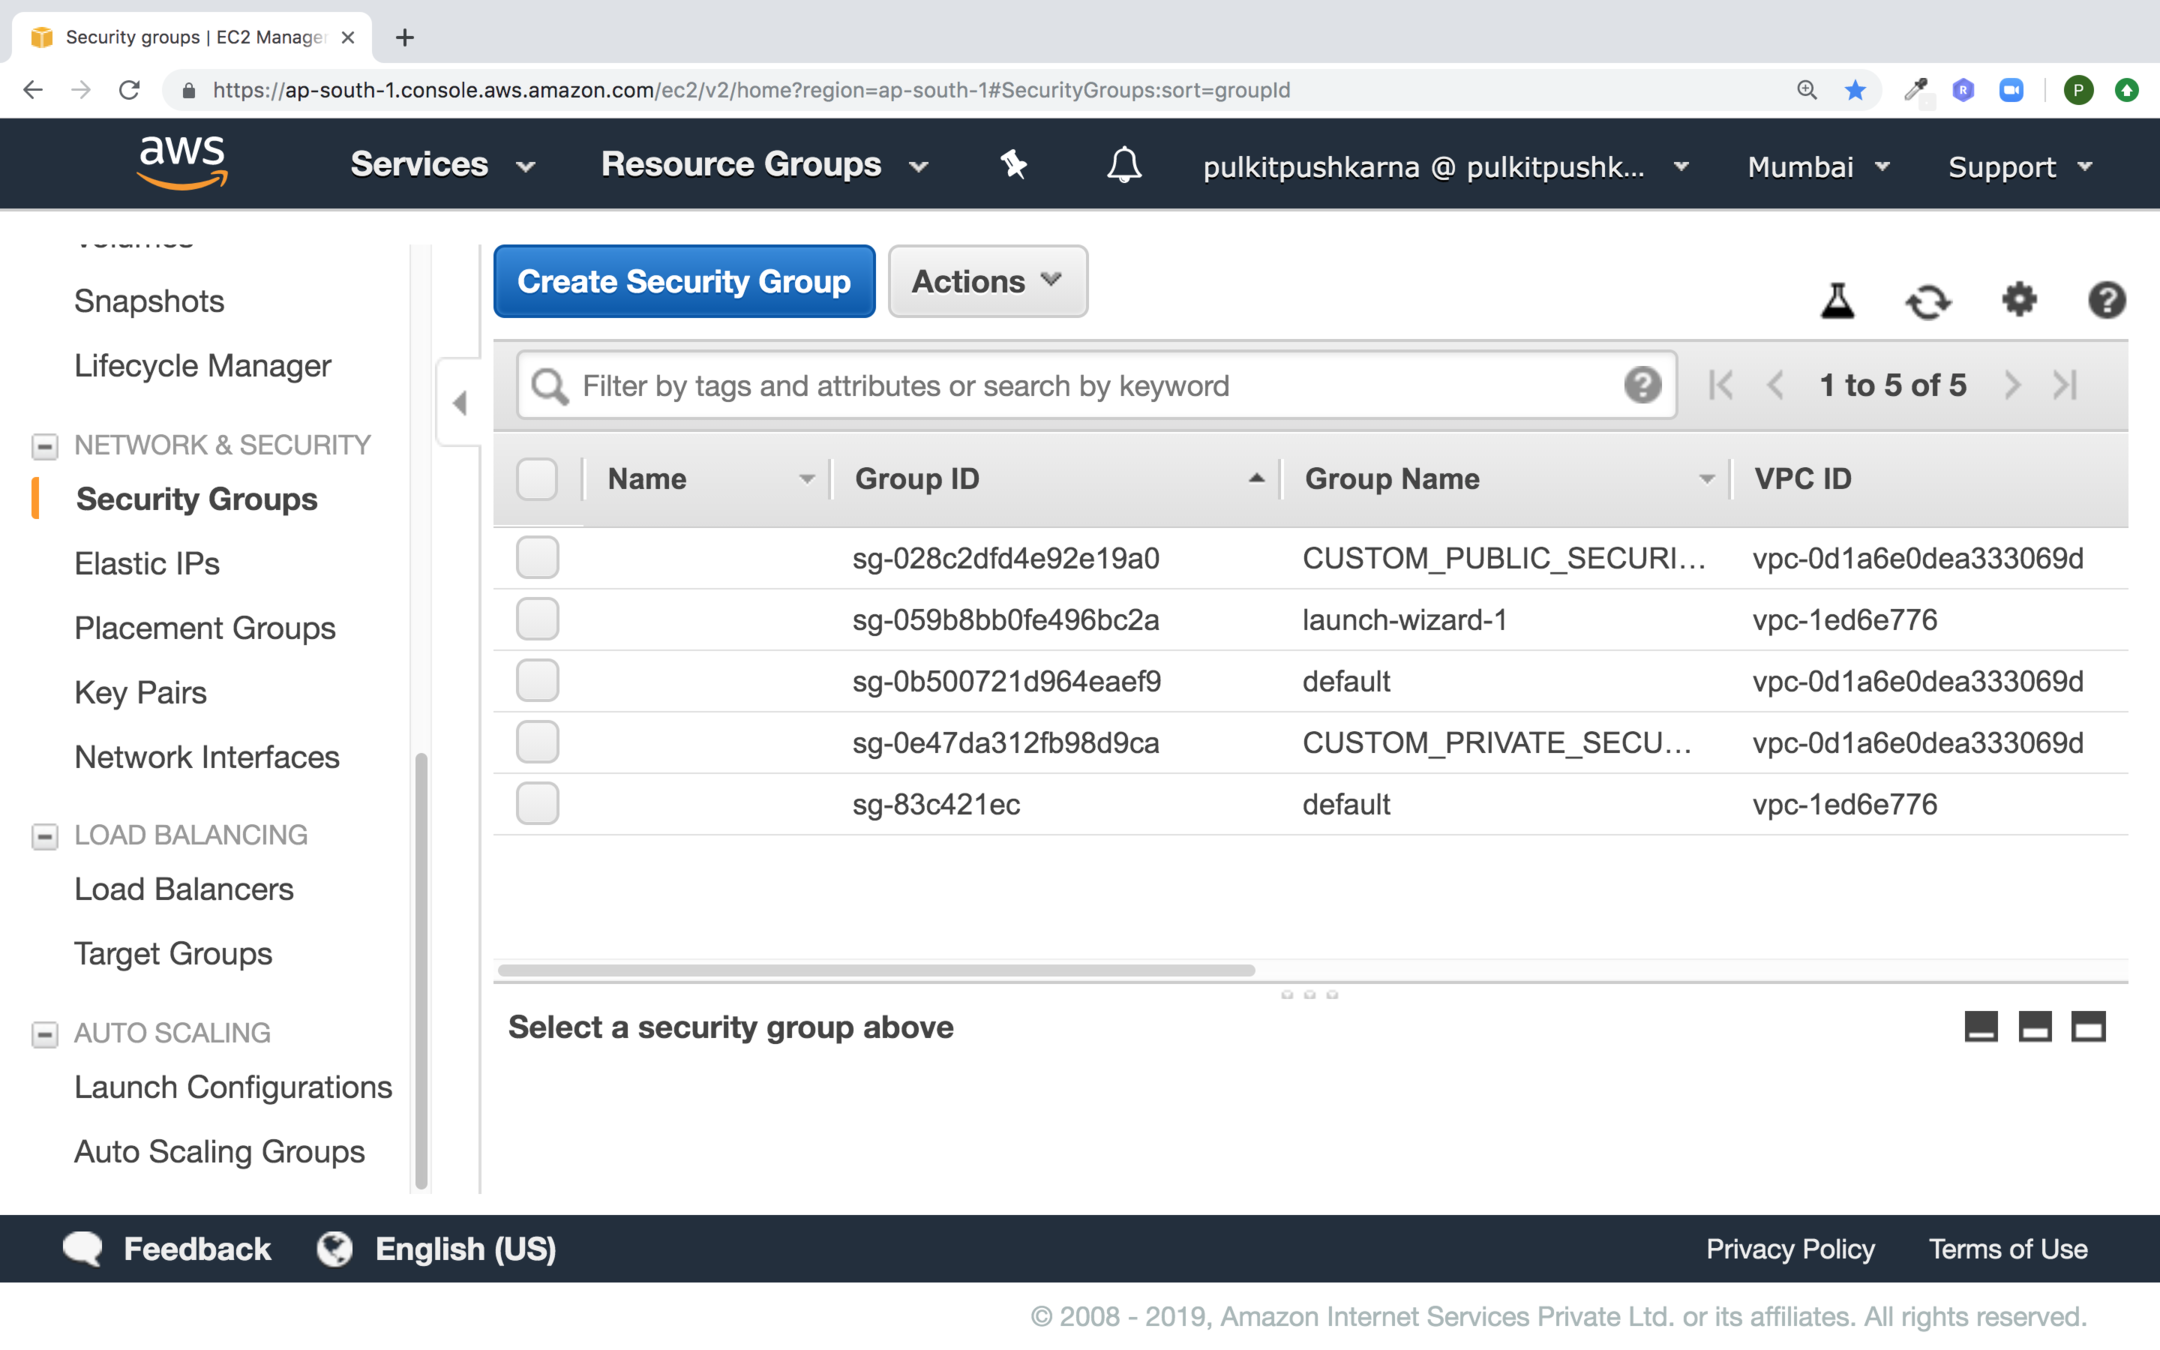
Go to the Security Group section of EC2 and click on Create Security Group button
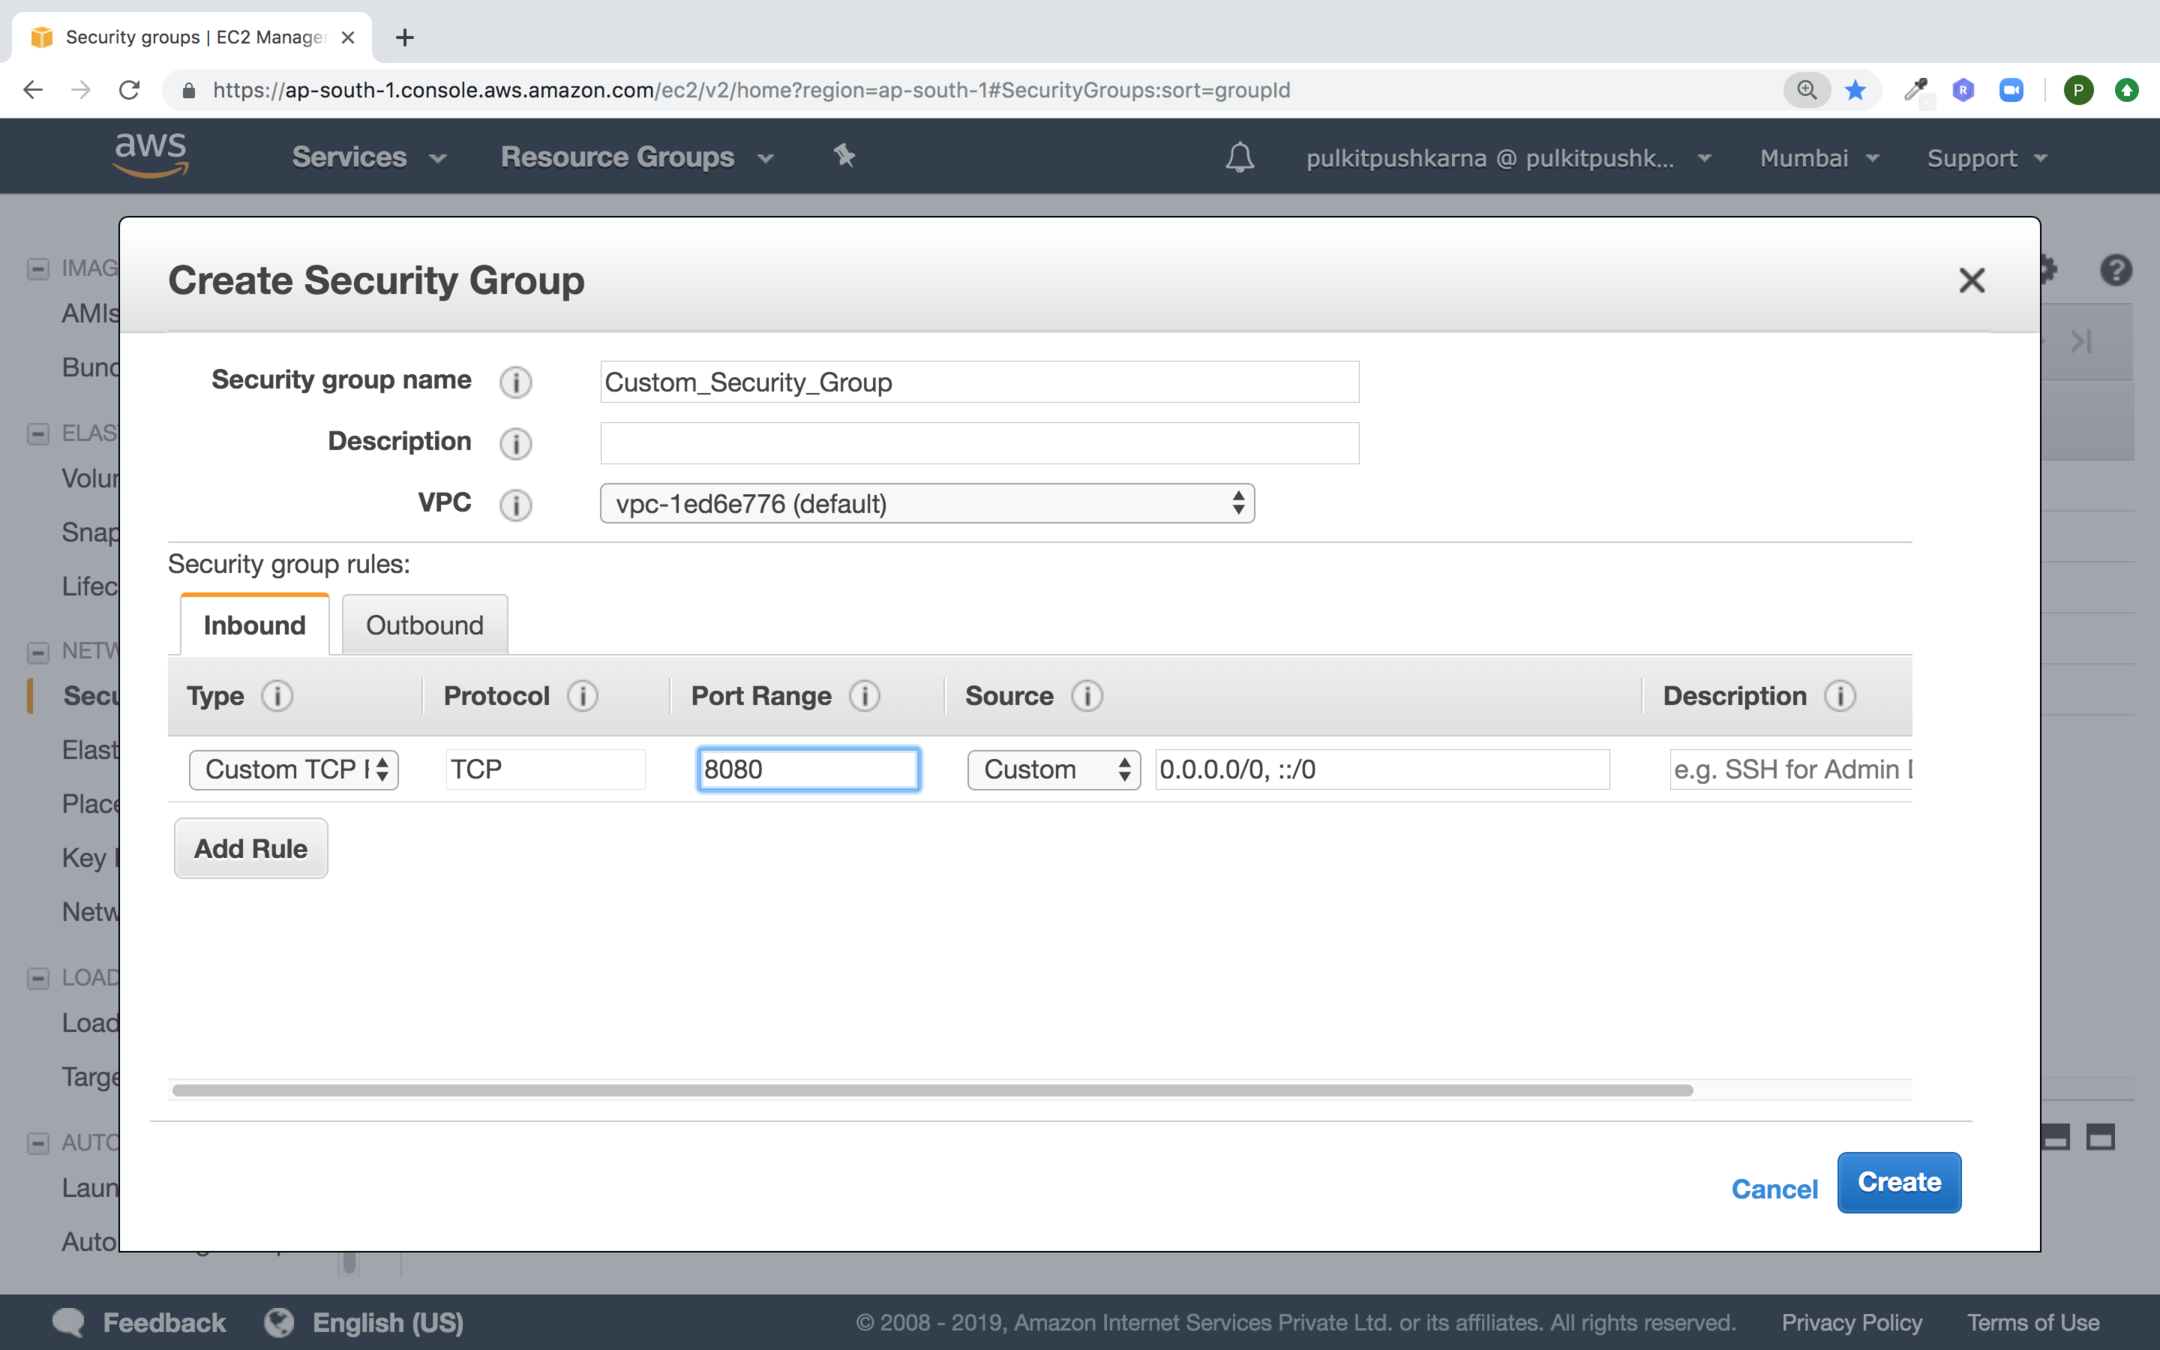
Fill up the details for you Security Group and hit on Create button
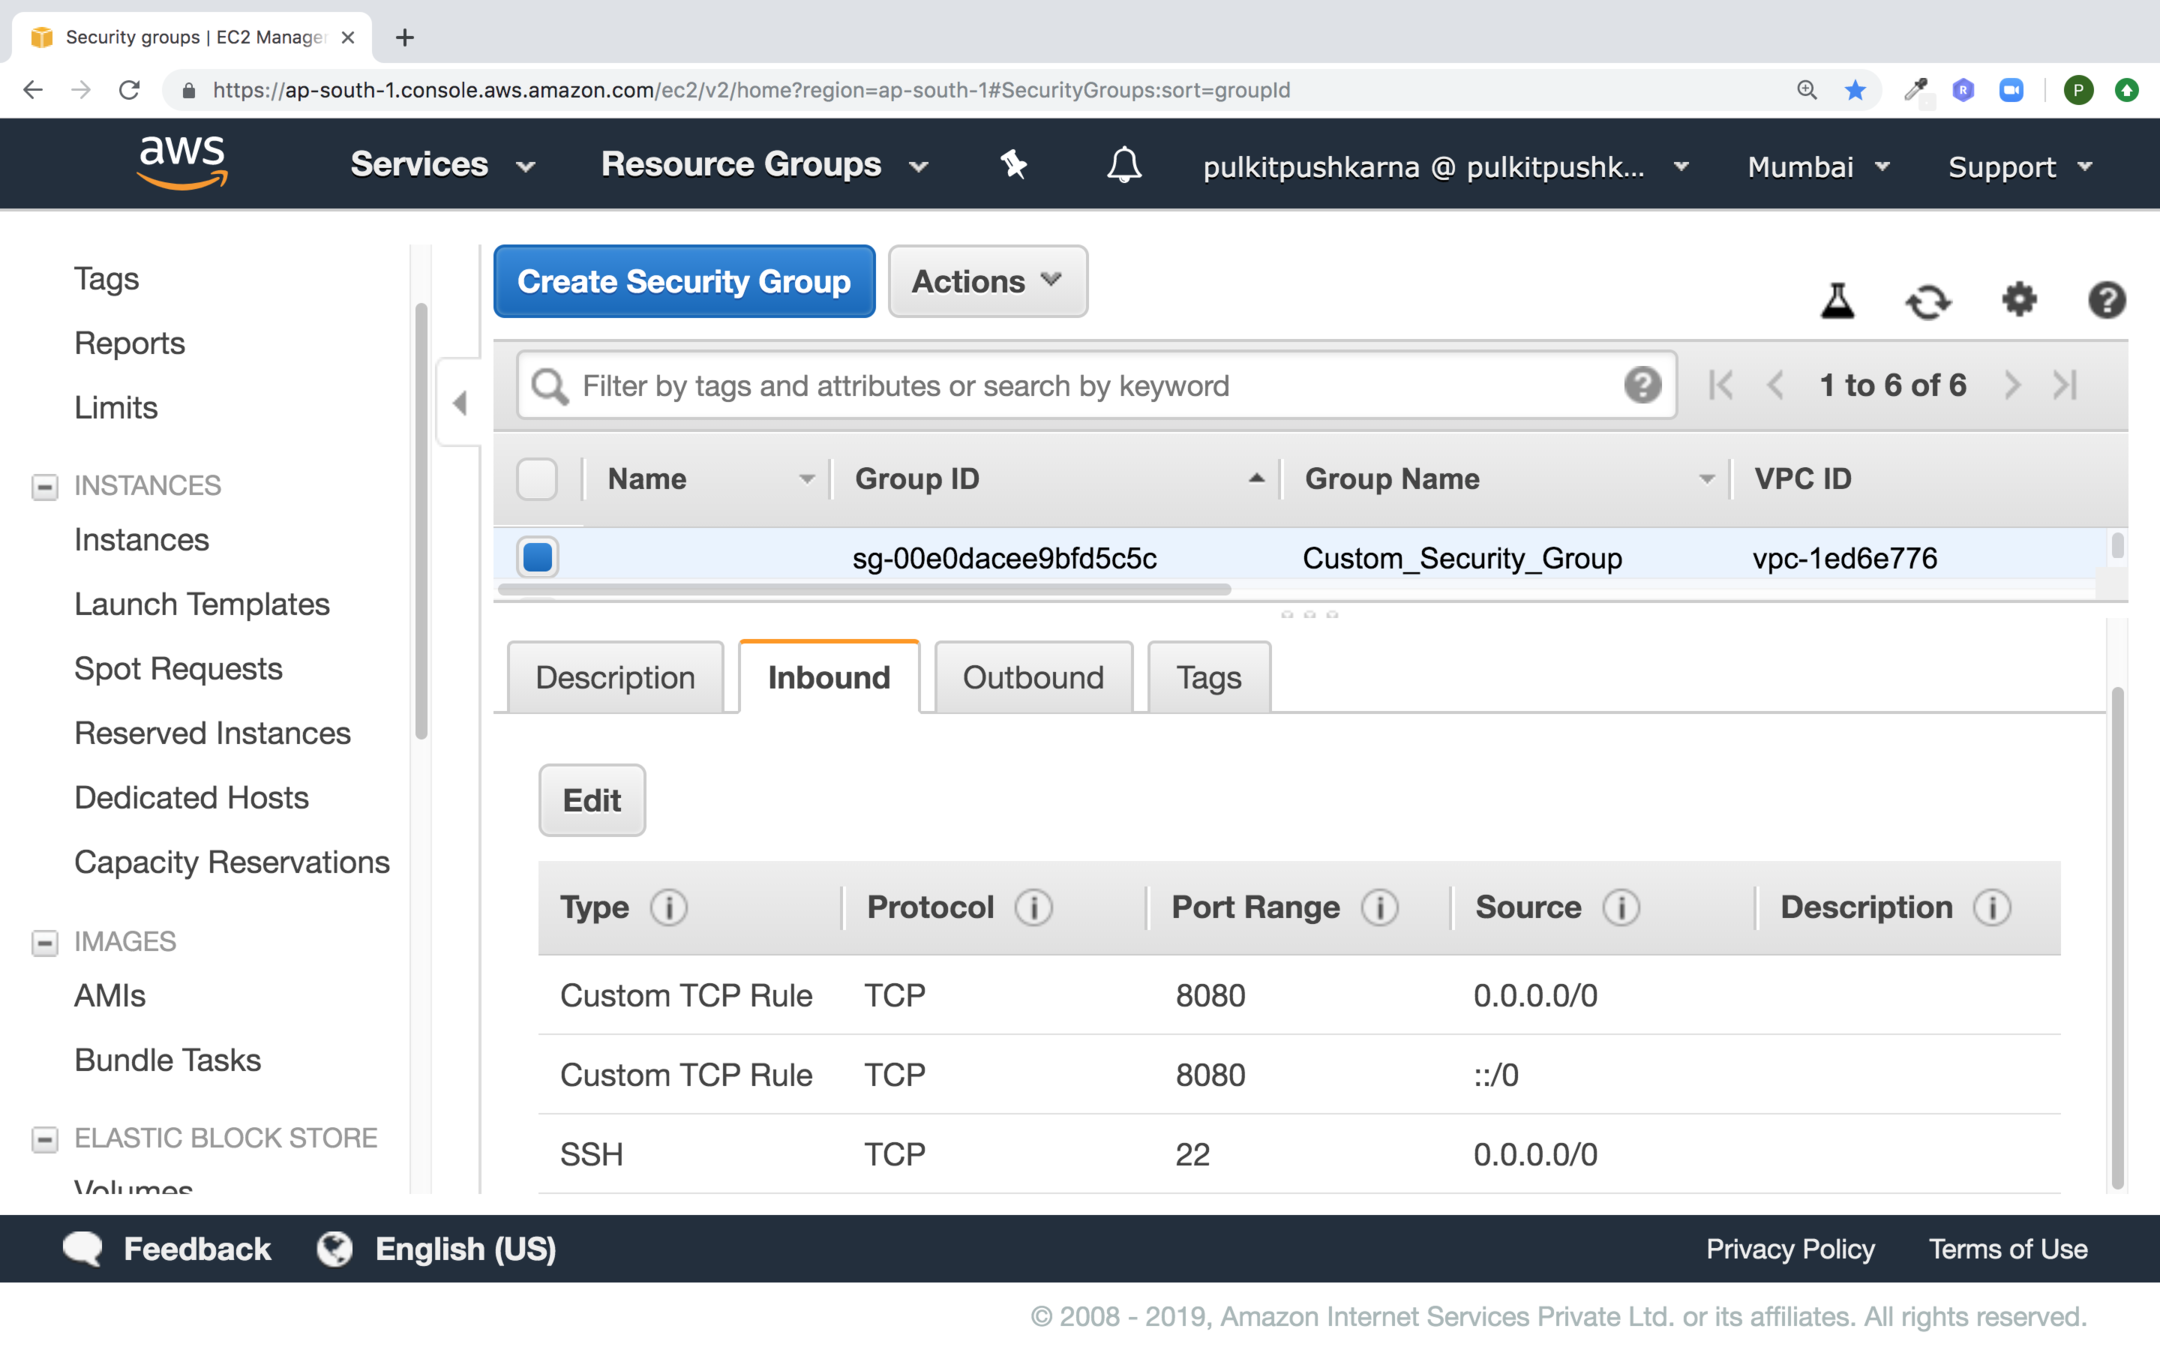
You will be able to see security group in the list
Elastic IP
- An elastic IP address is a static IPV4 address designed for dynamic cloud computing.
- To use an Elastic IP address, you first allocate one to your account, and then associate it with your instance
- You can disassociate an Elastic IP address from a resource, and reassociate it with a different resource.
- While your instance is running, you are not charged for one Elastic IP address associated with the instance, but you are charged for any additional Elastic IP addresses associated with the account.
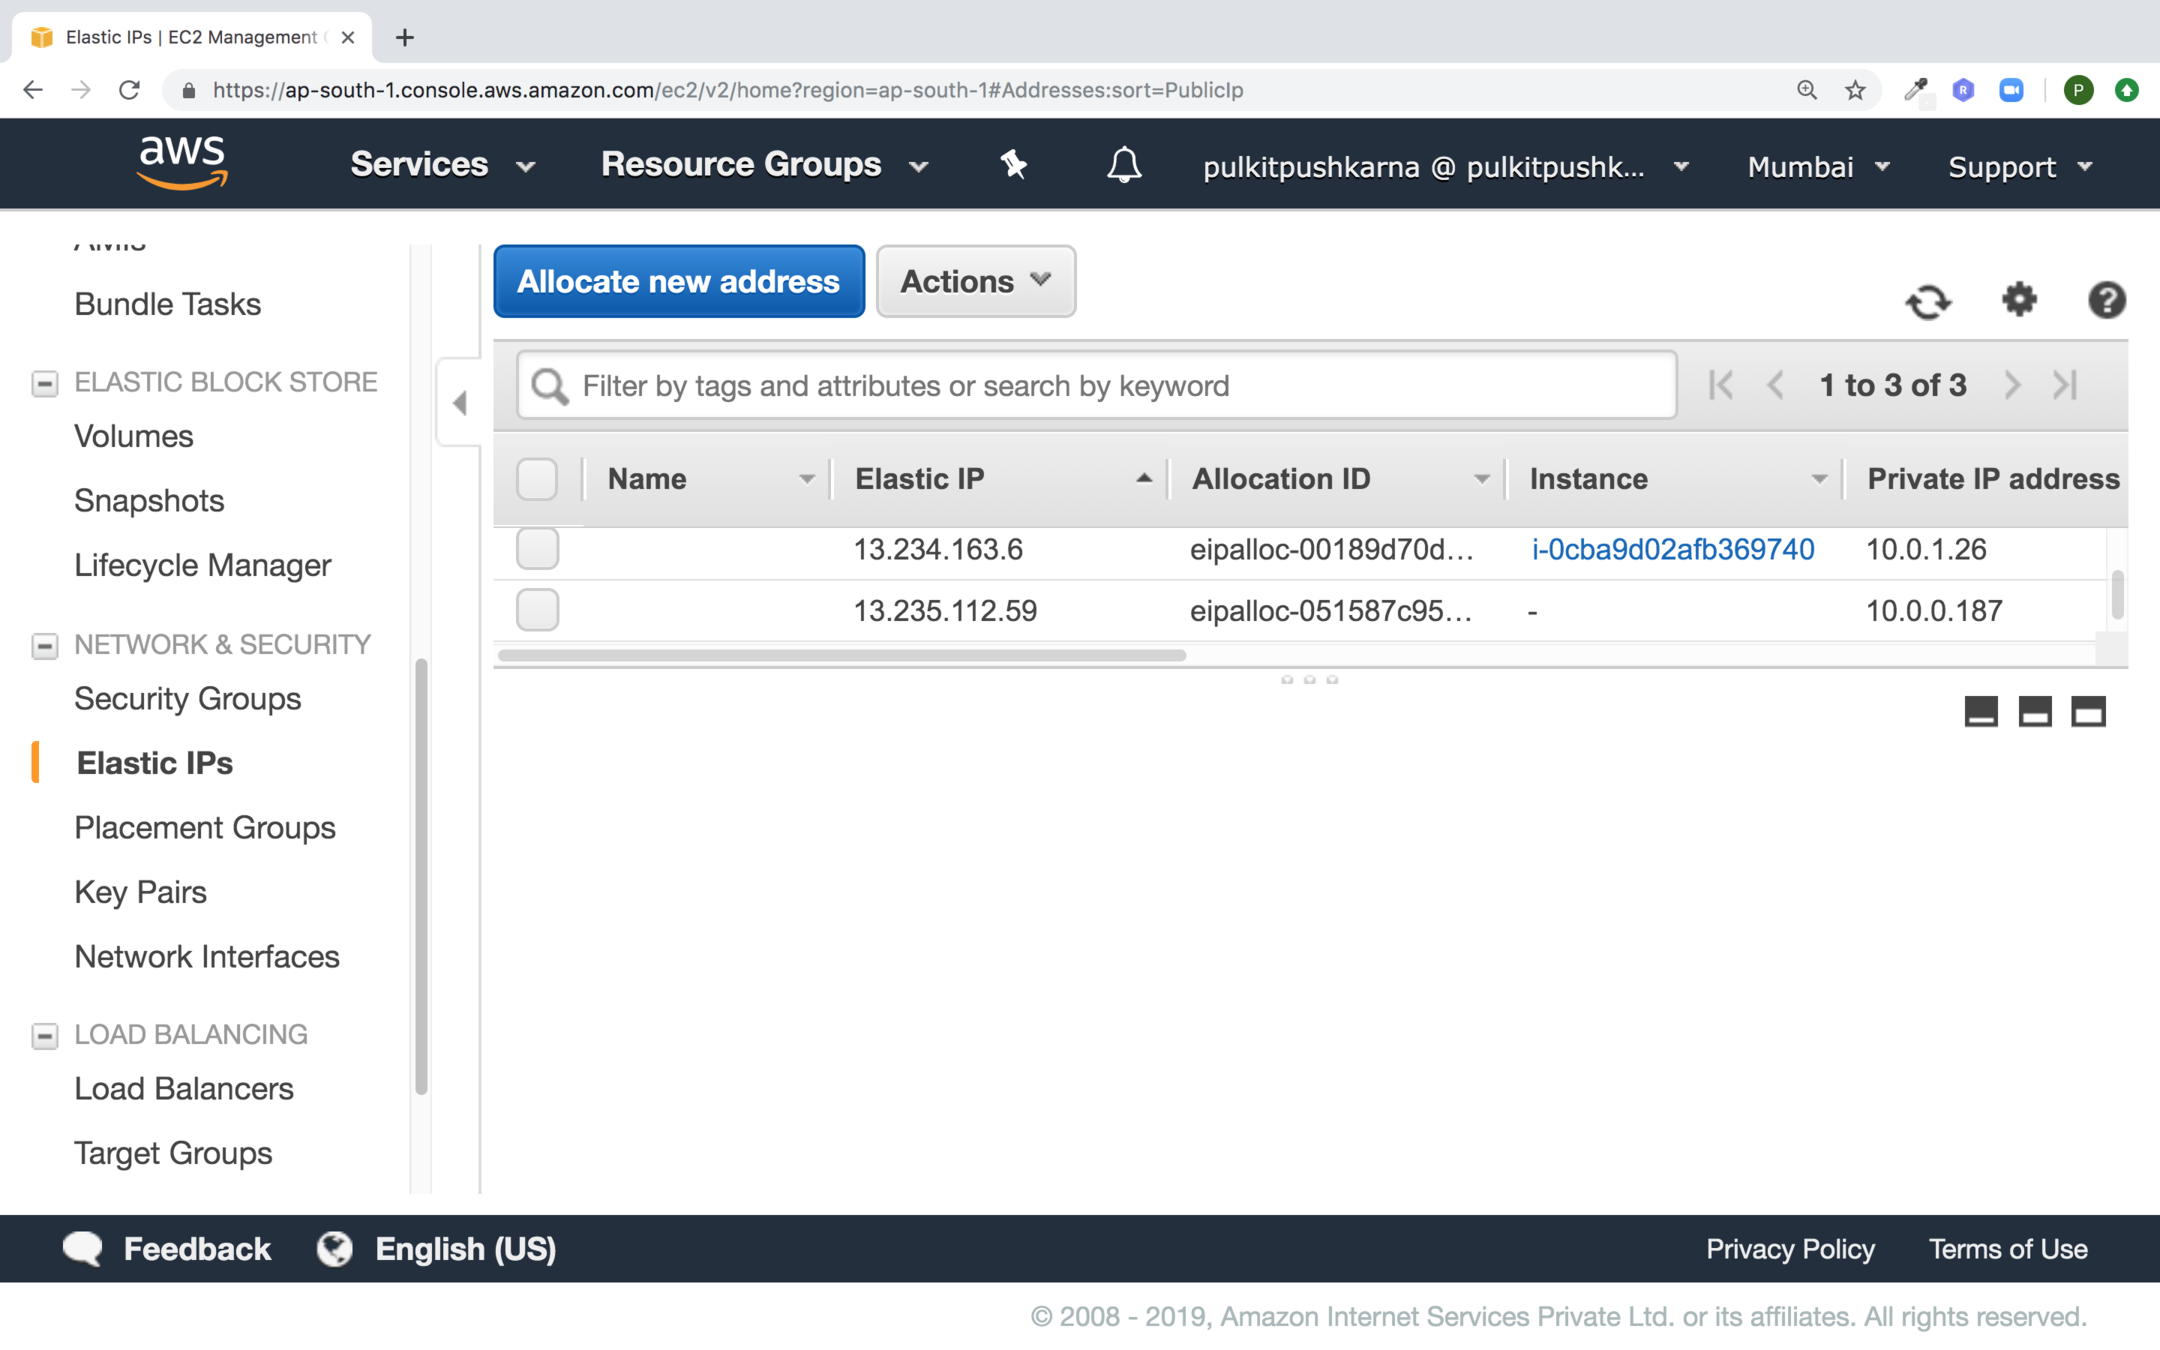
Go to Elastic IPs section in EC2 and click on Allocate new address
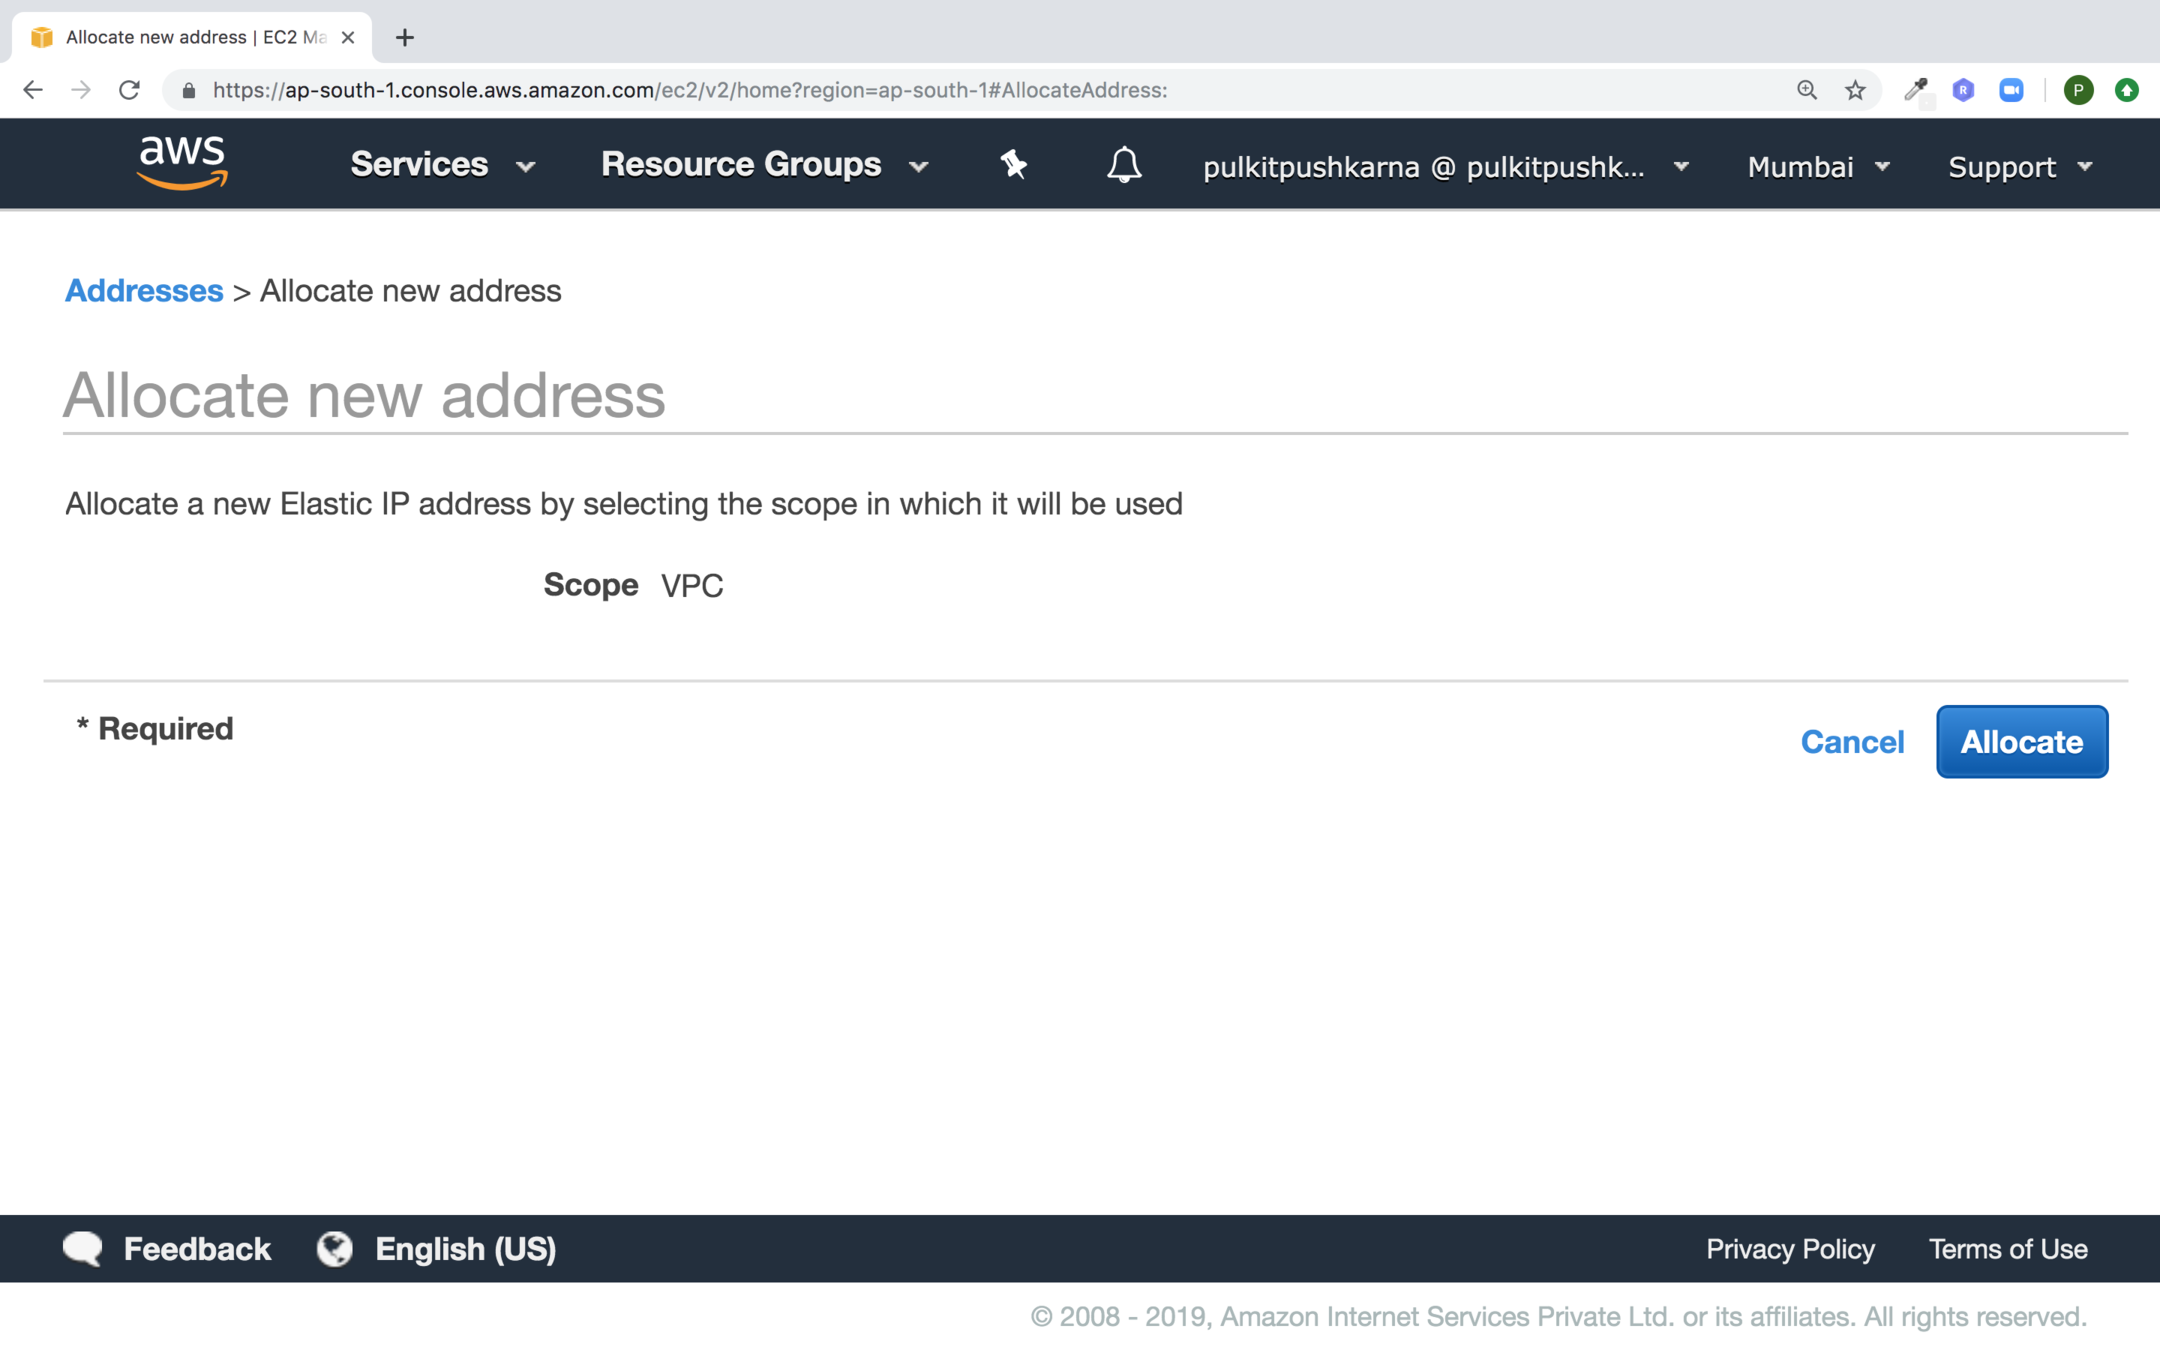
Text
Click on Allocate Button
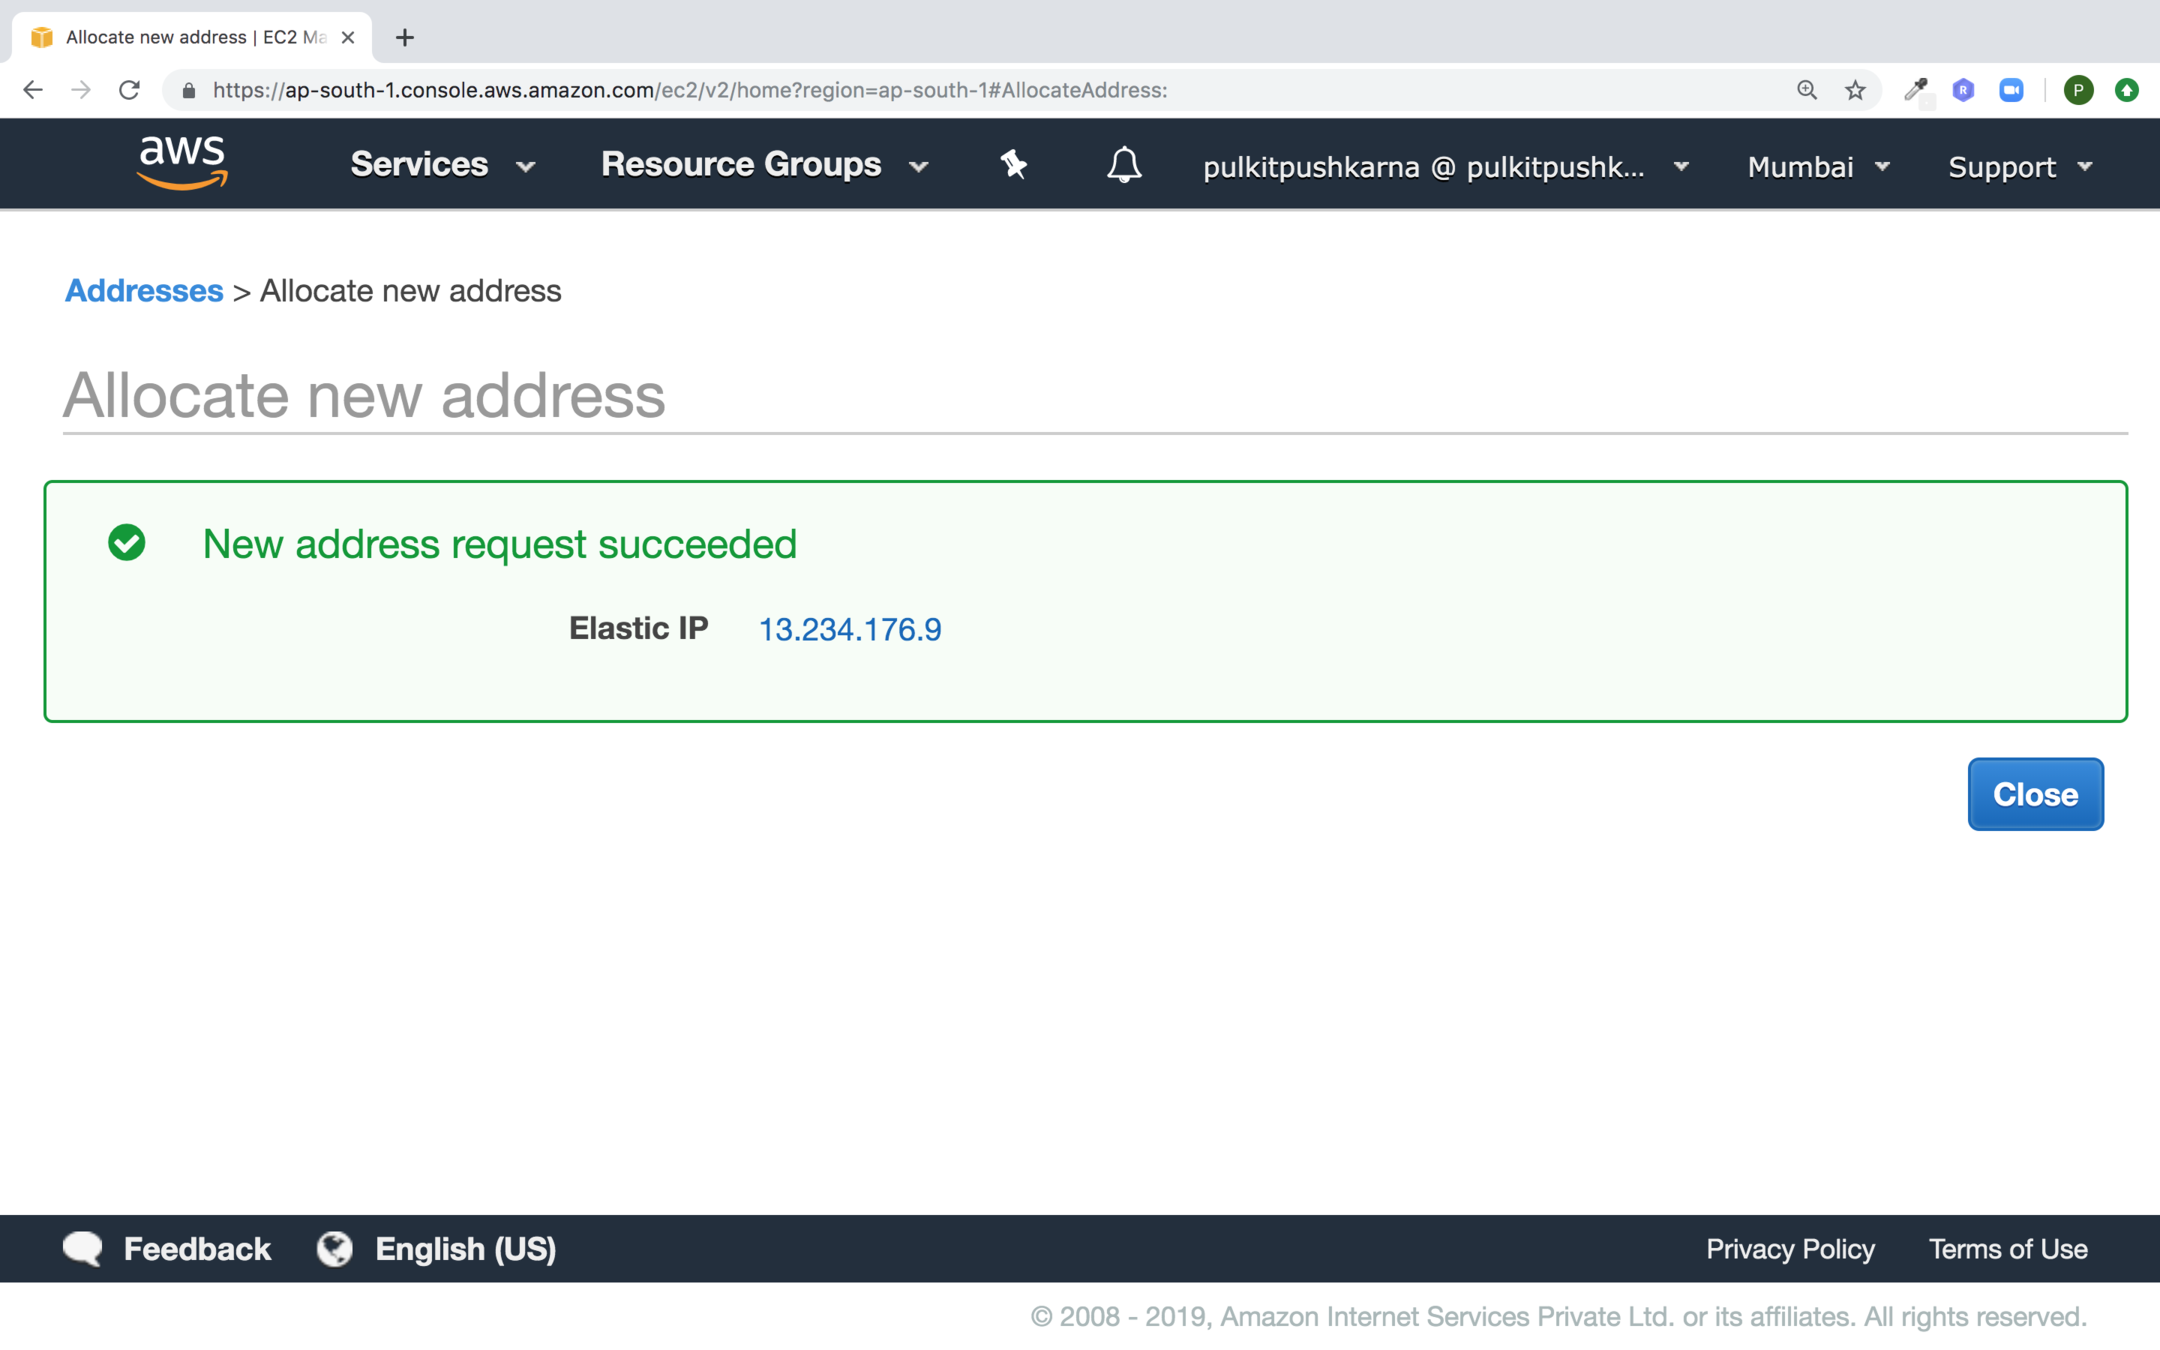
Click on Close button

Select the IP and associate it the your instance
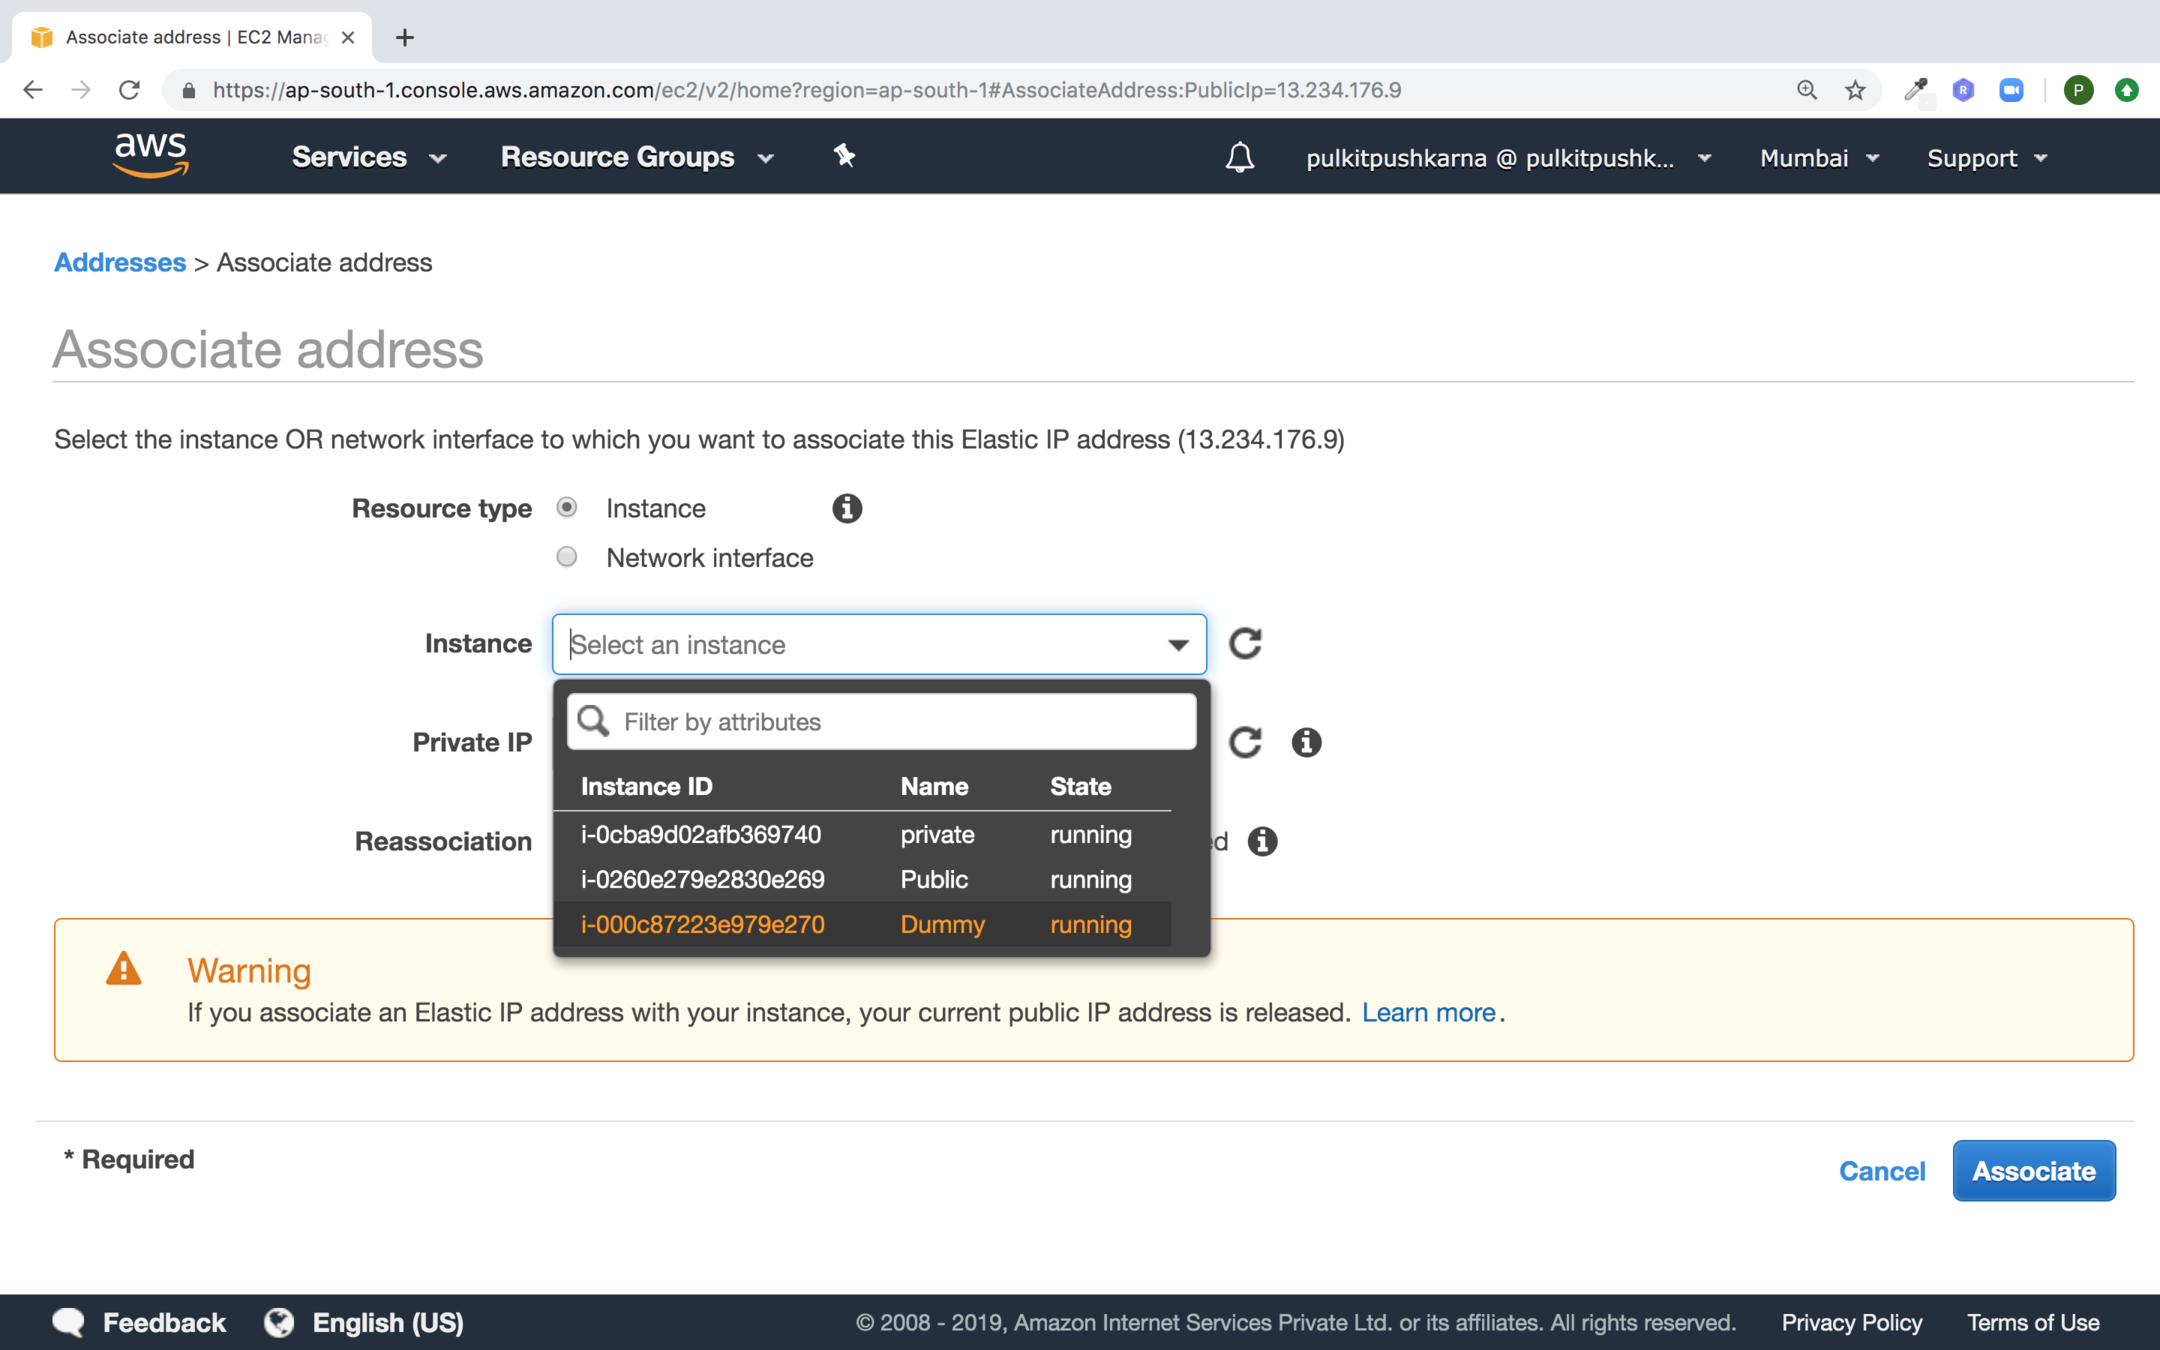
Provide the instance and click on Associate
Monitoring with CloudWatch
- Cloudwords is an AWS service, that can be used on the AWS cloud for monitoring various infrastructure and application resources running on your AWS cloud.
- Cloudwatch can also collect log files, generate metrics out of them and help to monitor log files.
- You can set alarm on specific events and trigger an action whenever an event occurs
- e.g if CPU utilization for a specific instance crosses a threshold of 80%, you can initiate an action to spin up an new instance
- Basic Monitoring : Basic Monitoring is free ans it collects data at 5 minutes time interval.
- Detail Monitoring : Detailed monitoring is chargeable and it makes data available at 1 minute time interval.
Monitoring Types
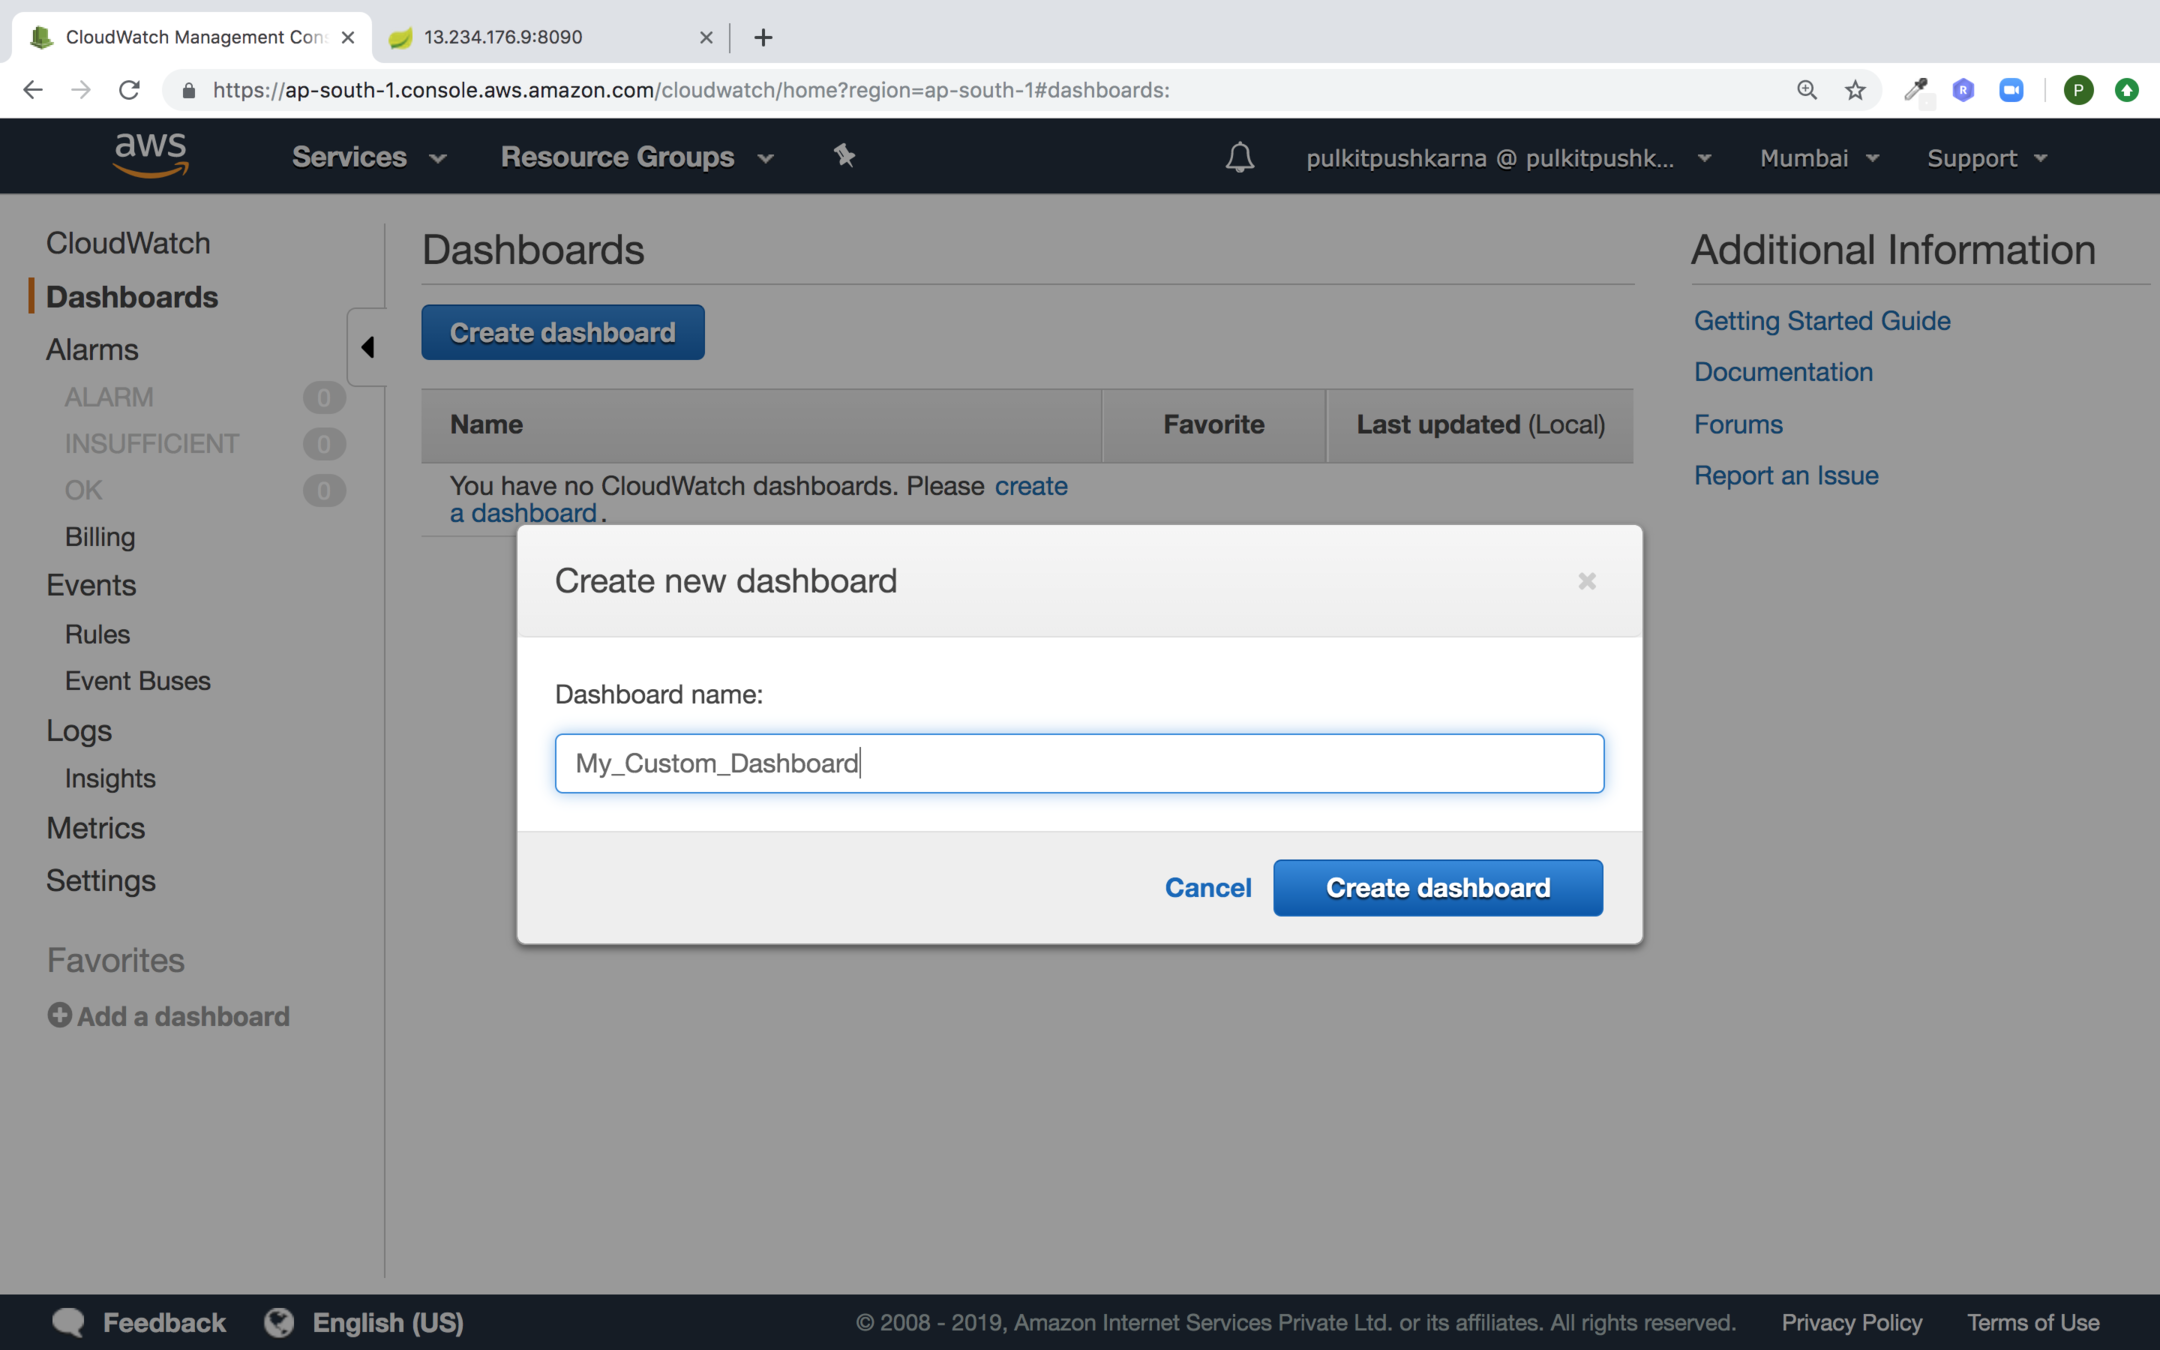
Go to the dashboard in the Cloudwatch Section and provide the name for custom dashboard and click on Create dashboard button
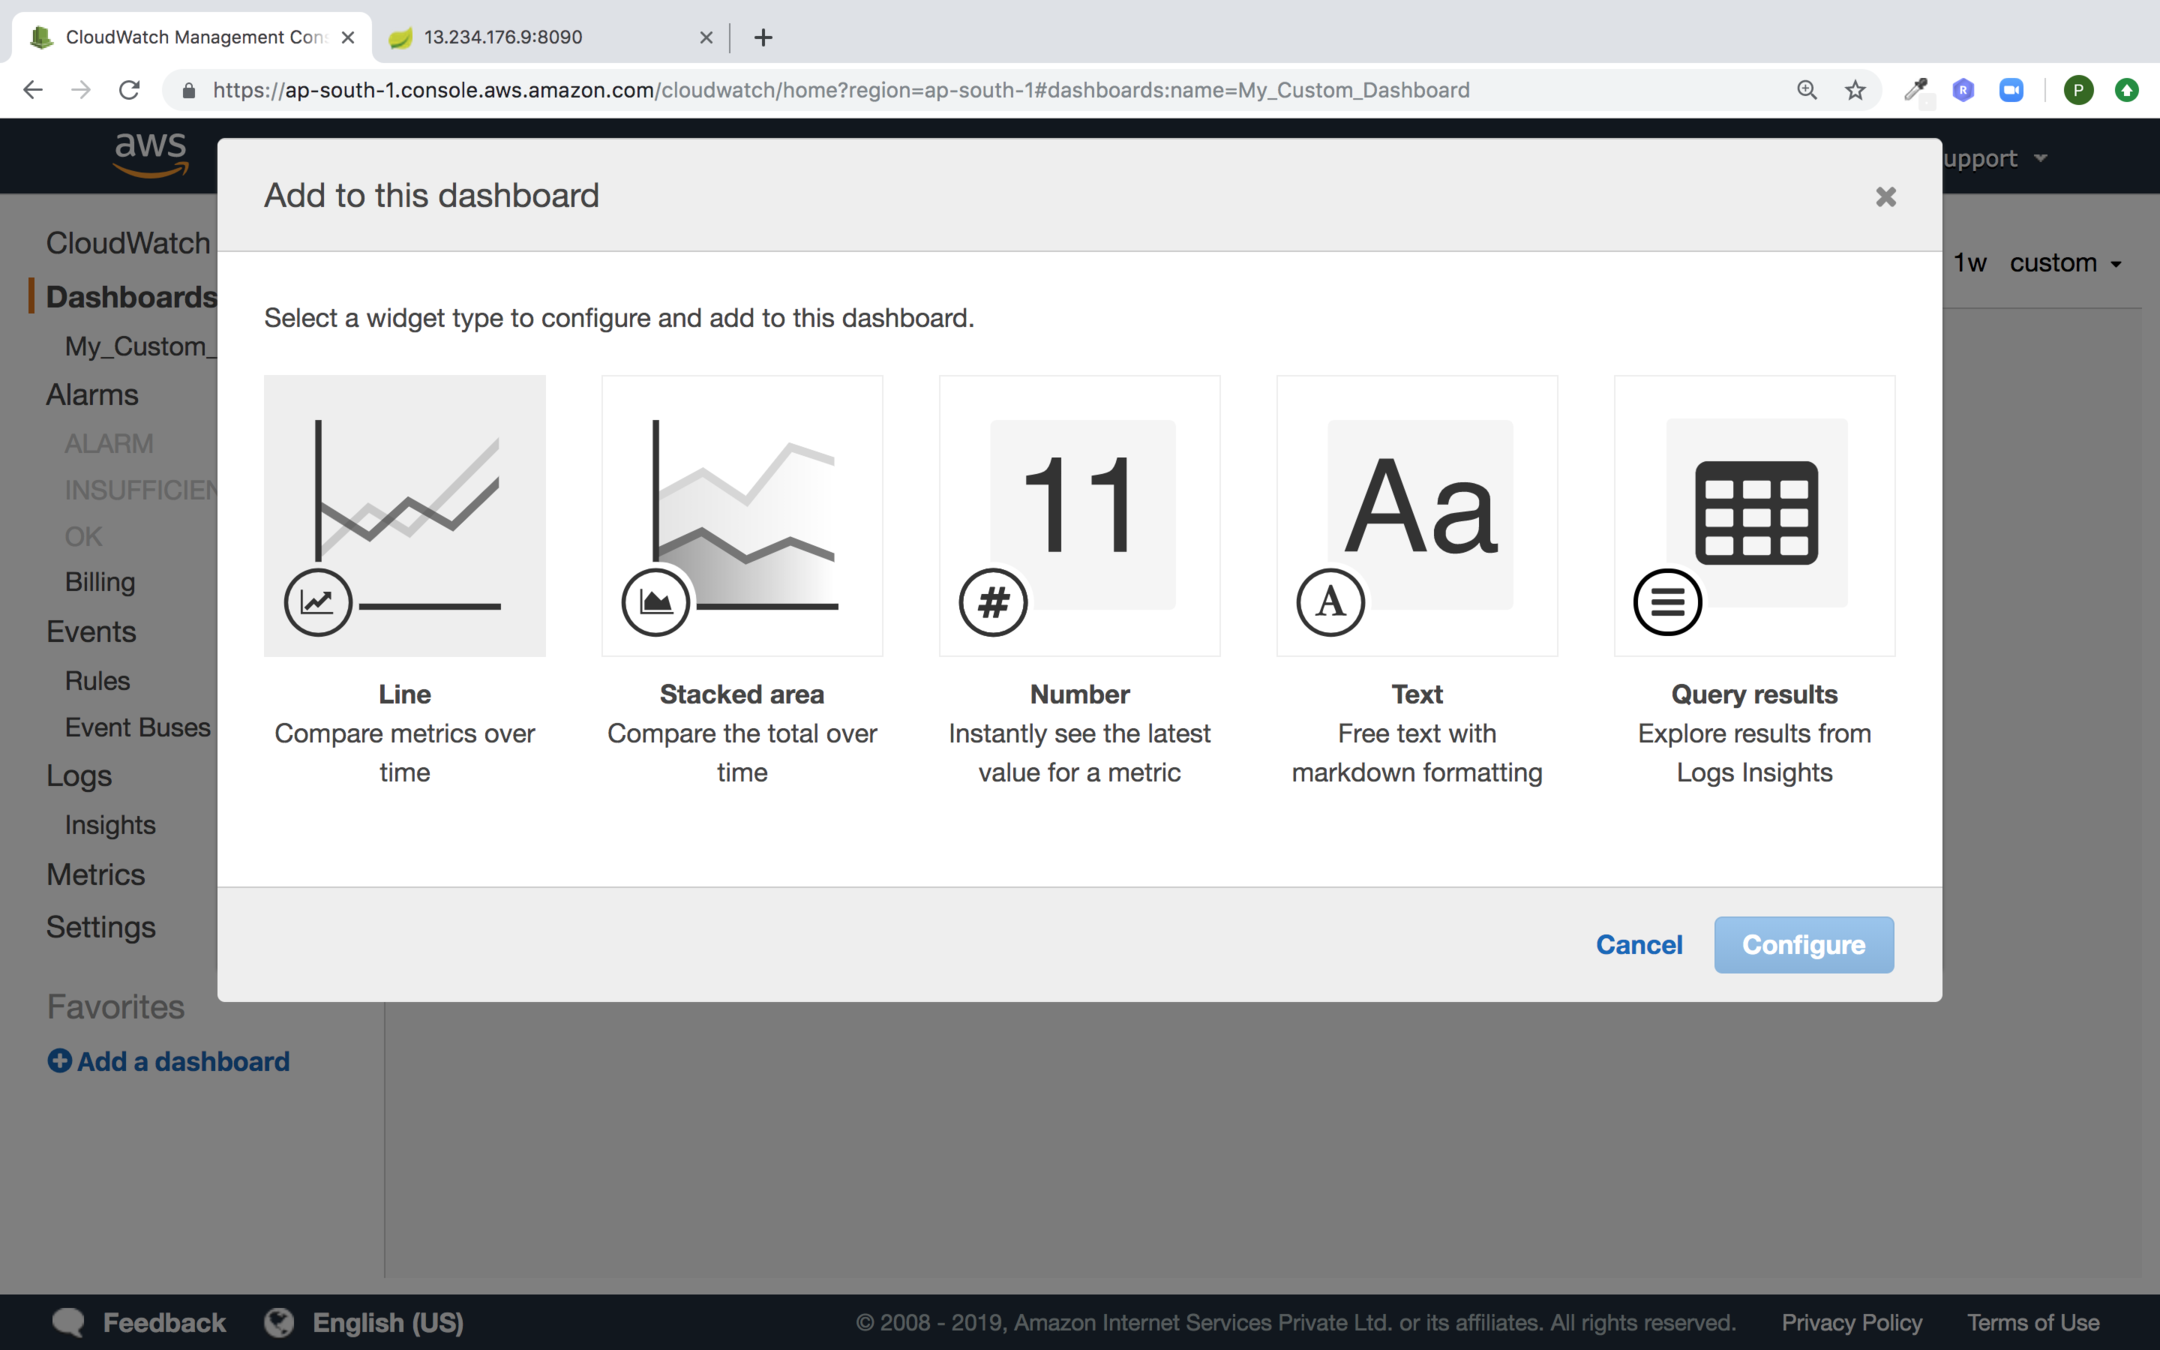
Select the Line graph and click on Configure button
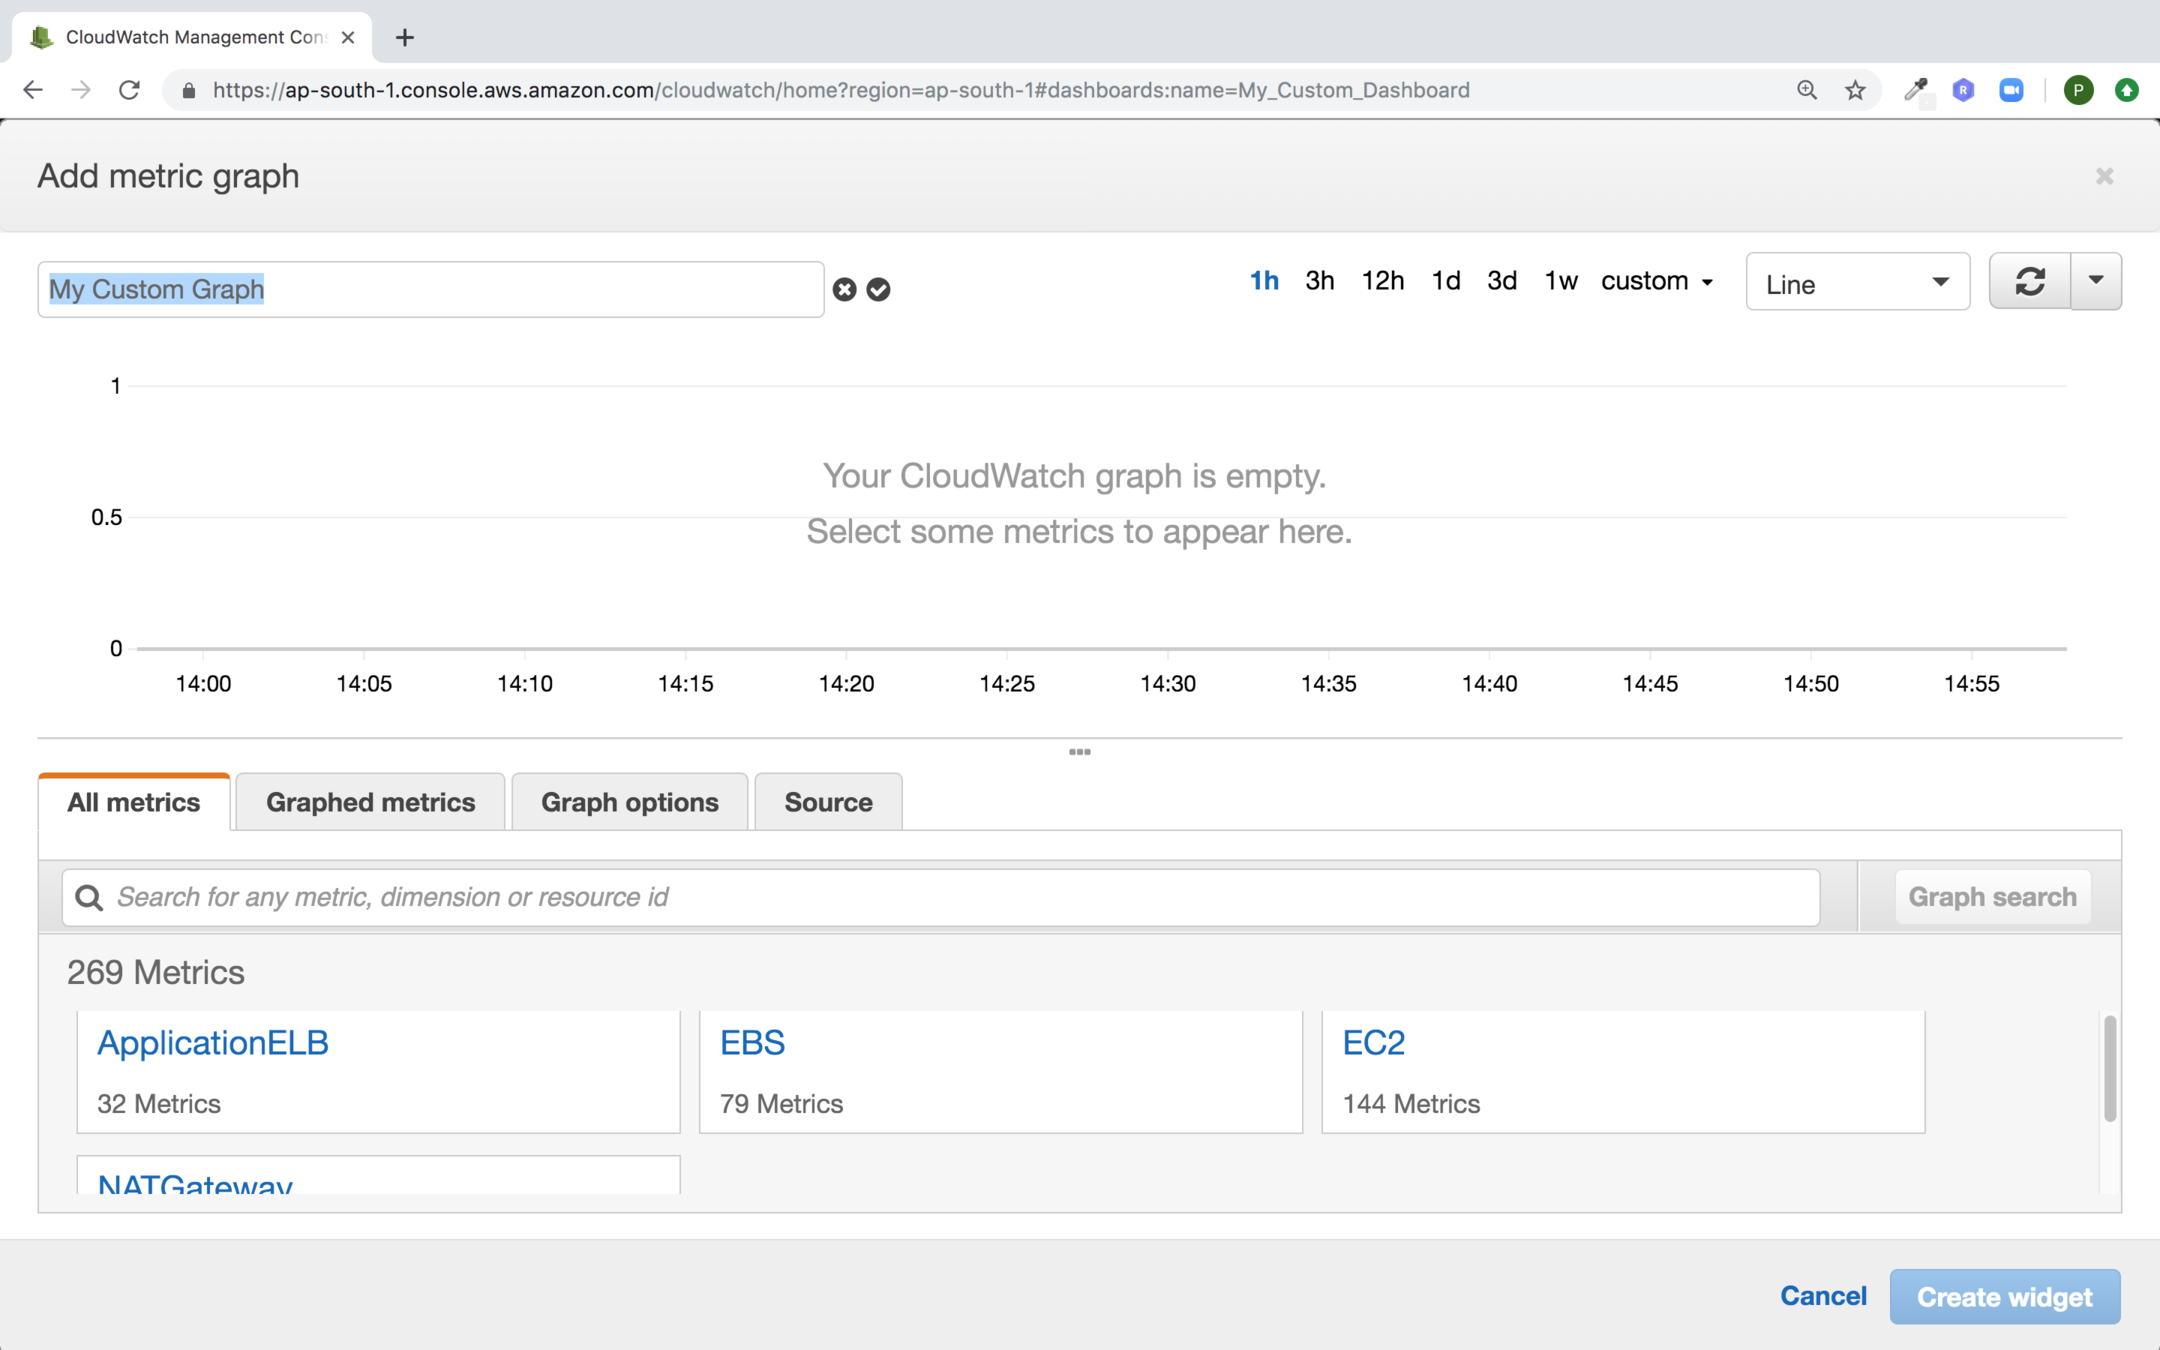
Provide the name to the graph and click on EC2 under All metrics section
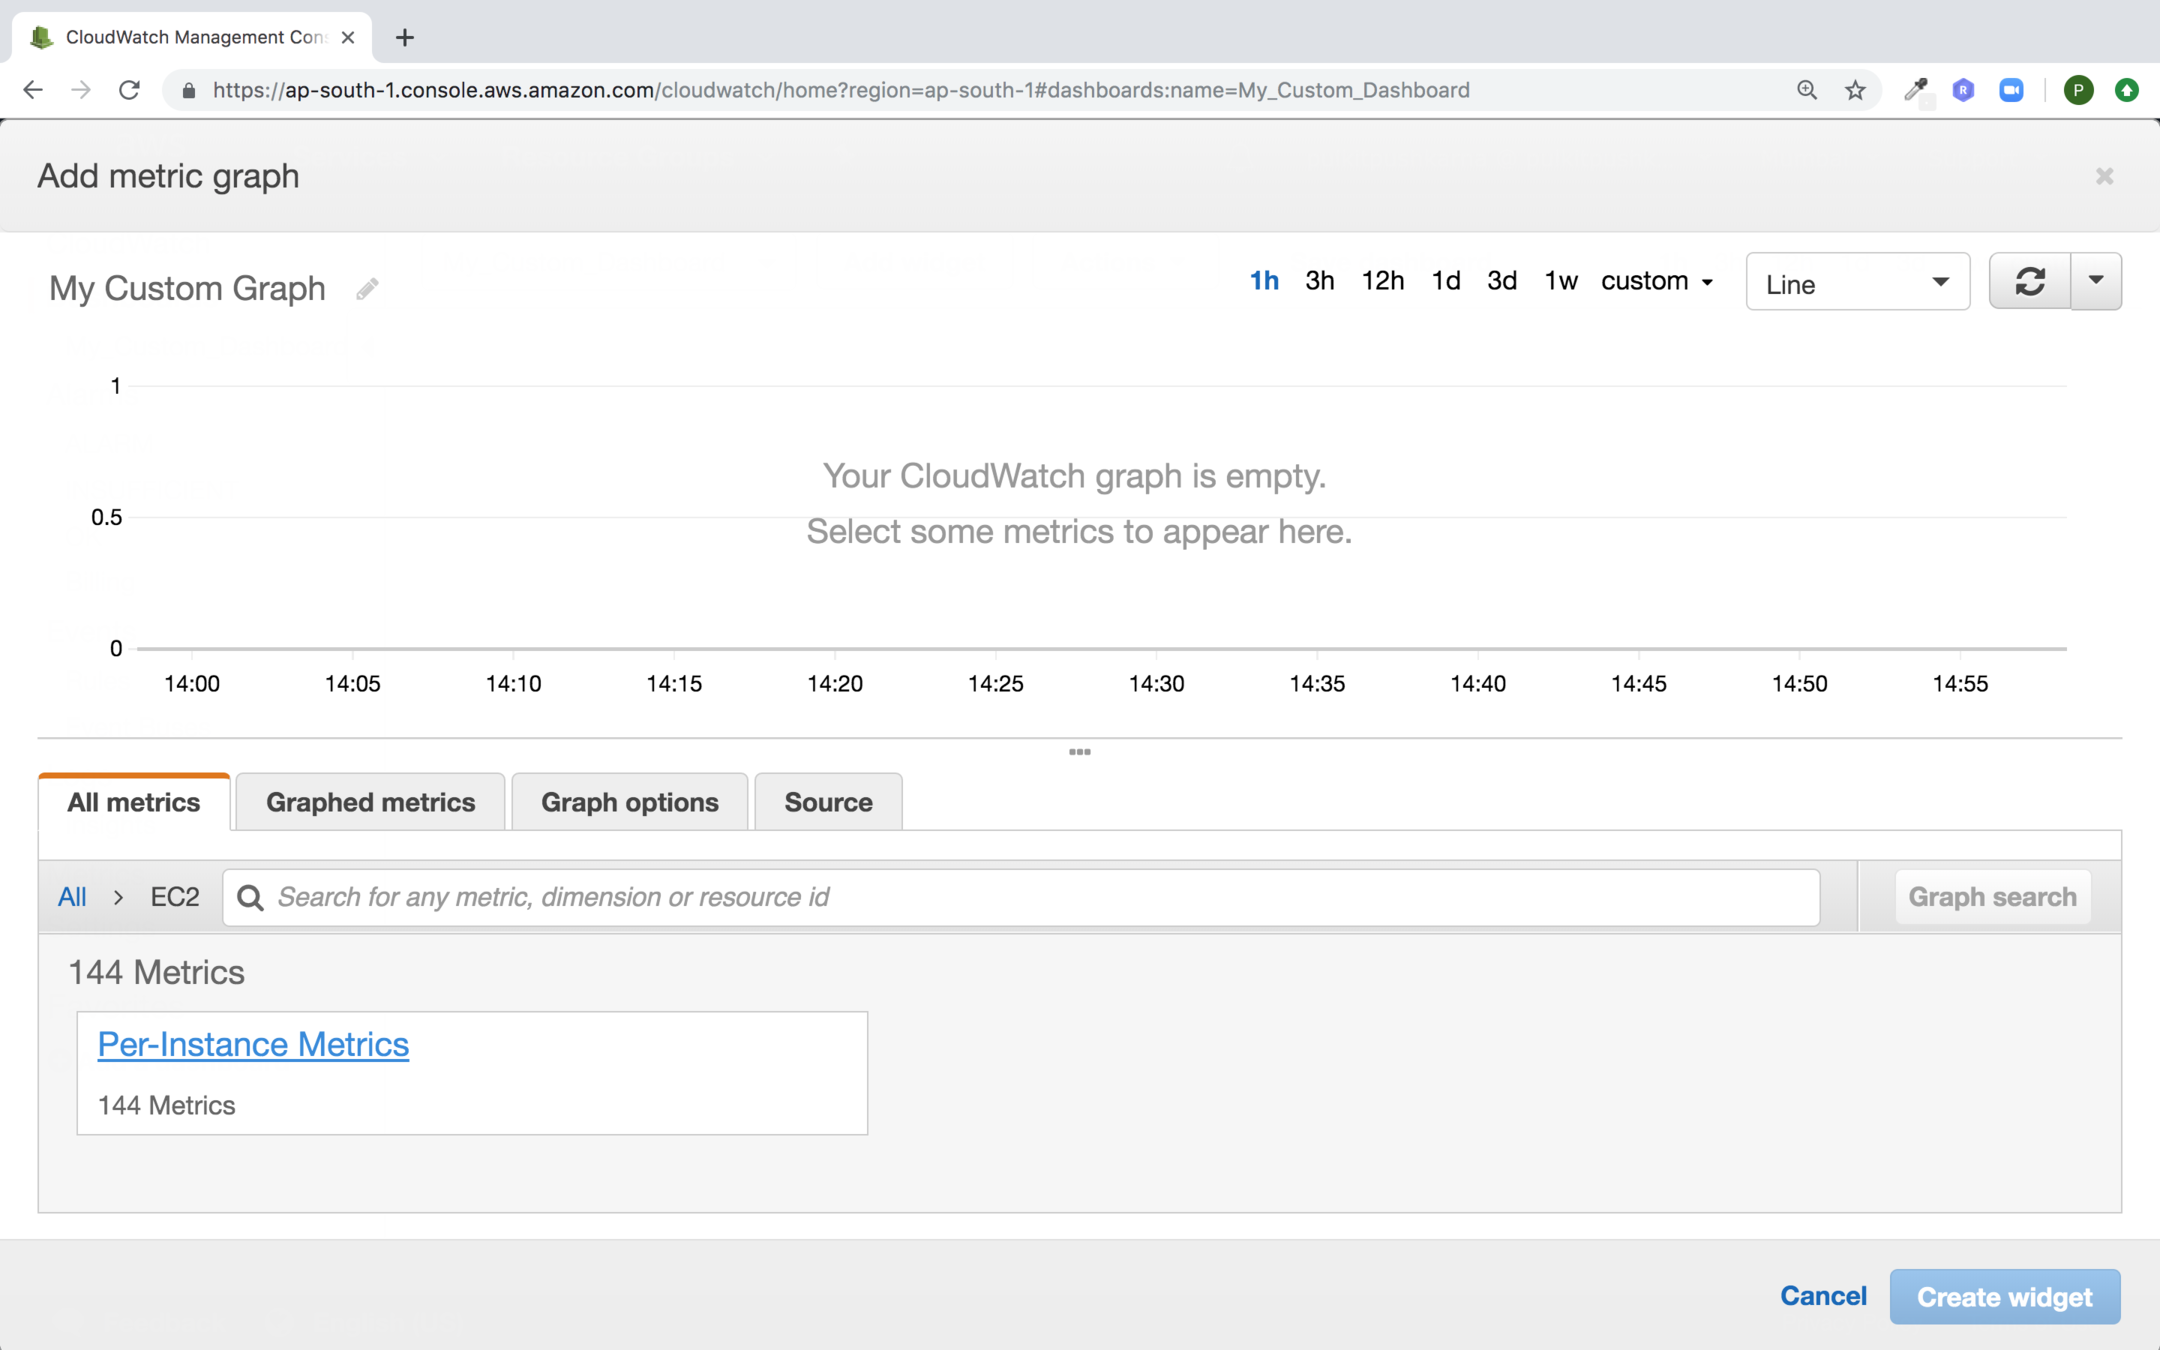
Select Per-Instance Metrics
From the all metrics section you can select the metrics you want to display as shown below and change the graph time and duration for graph
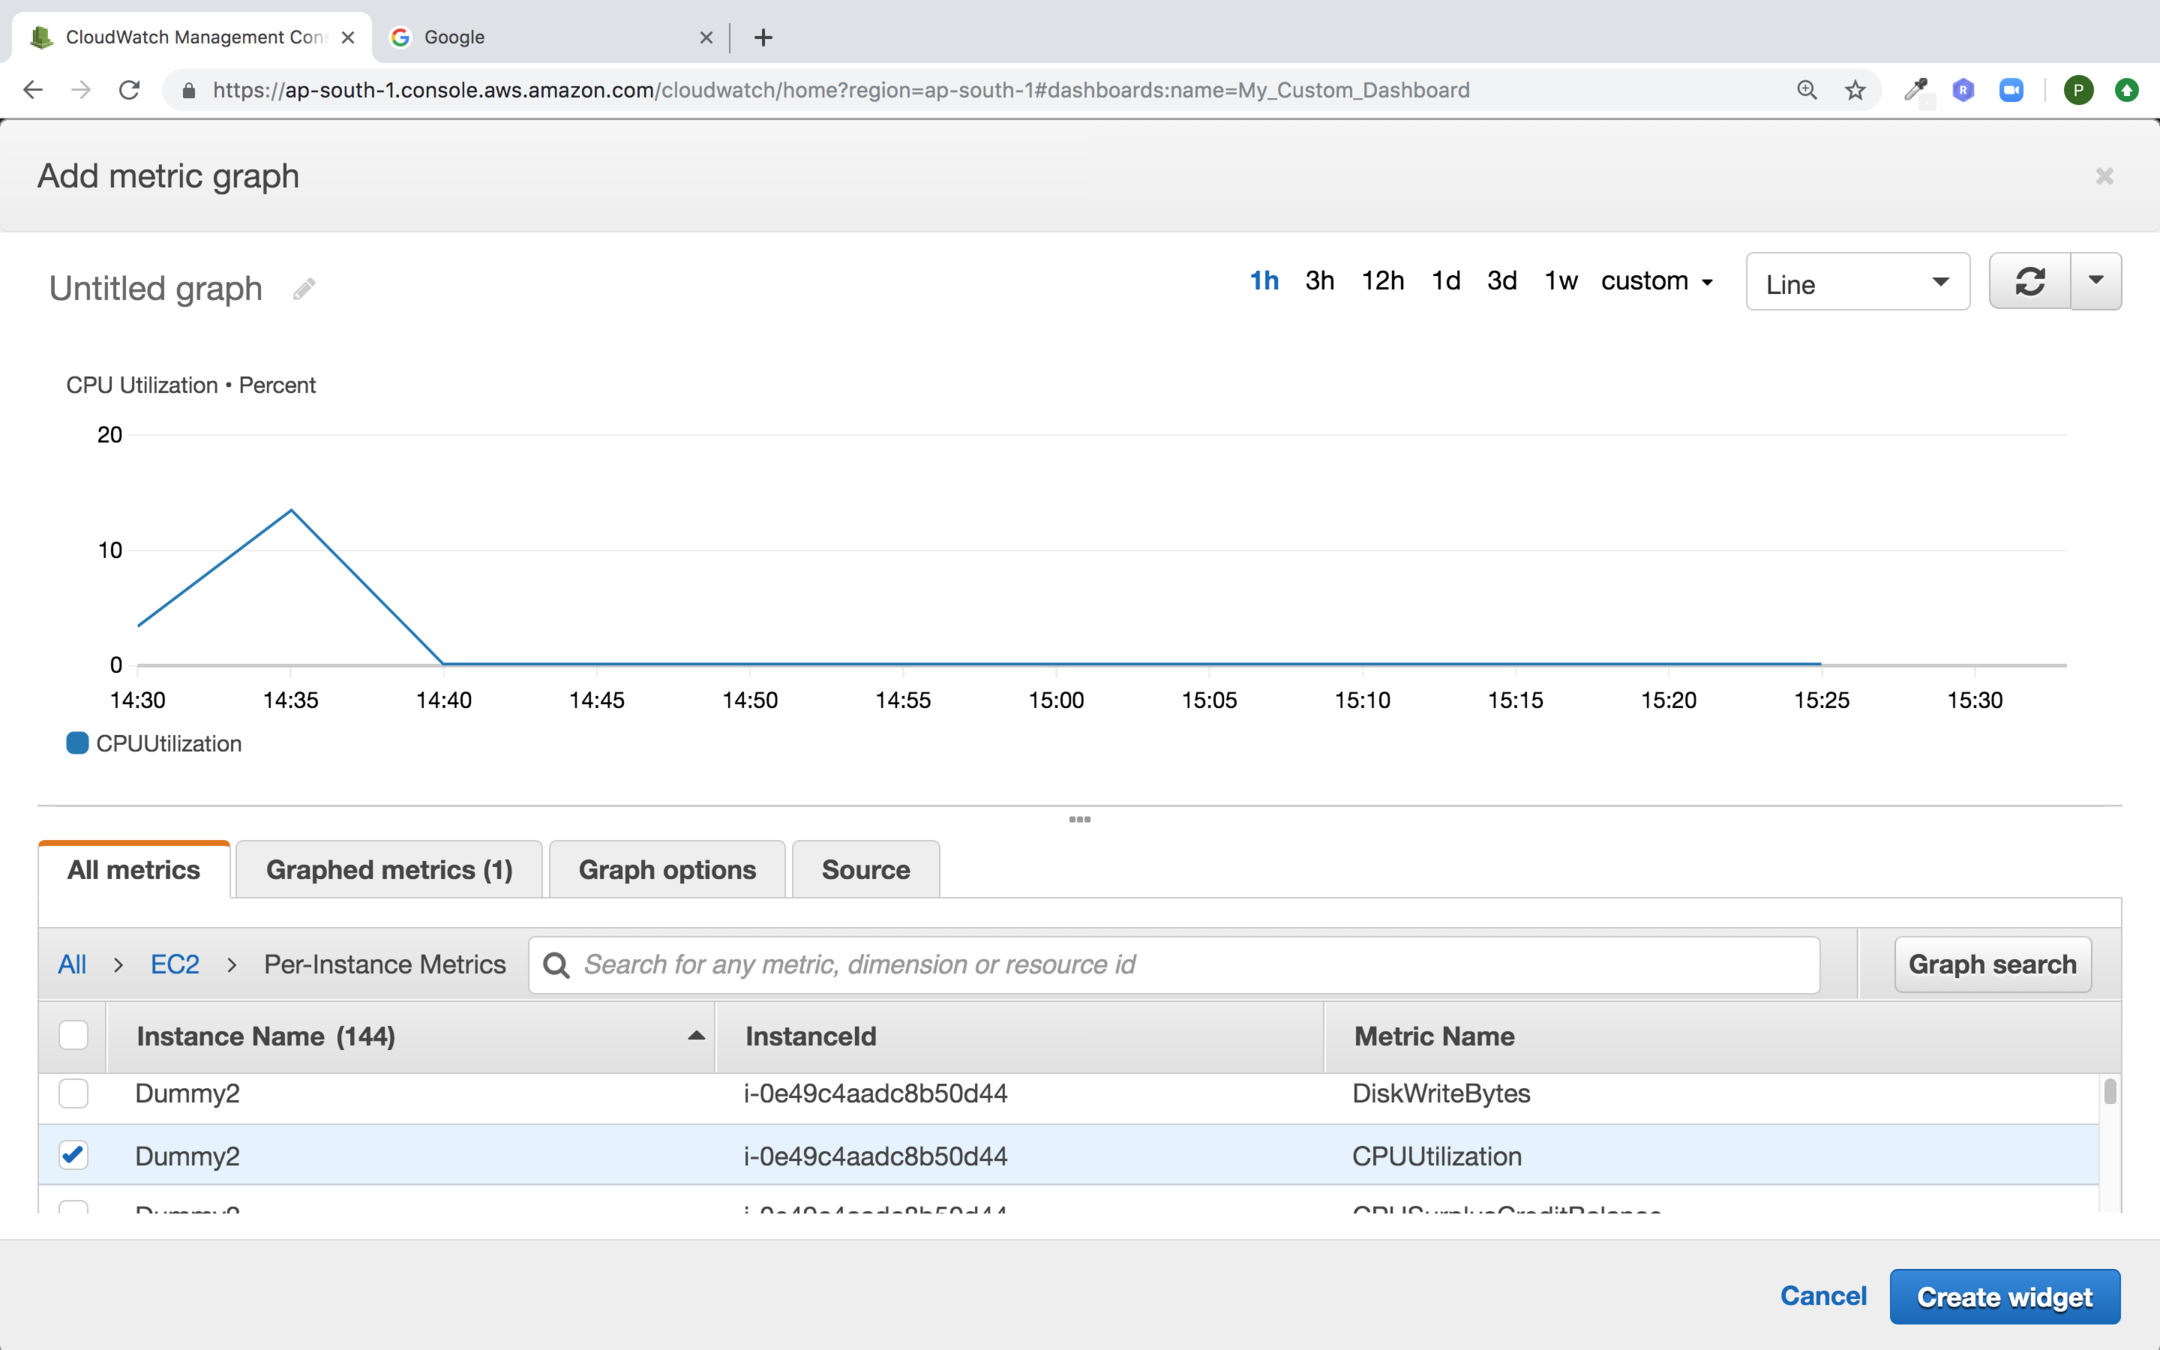
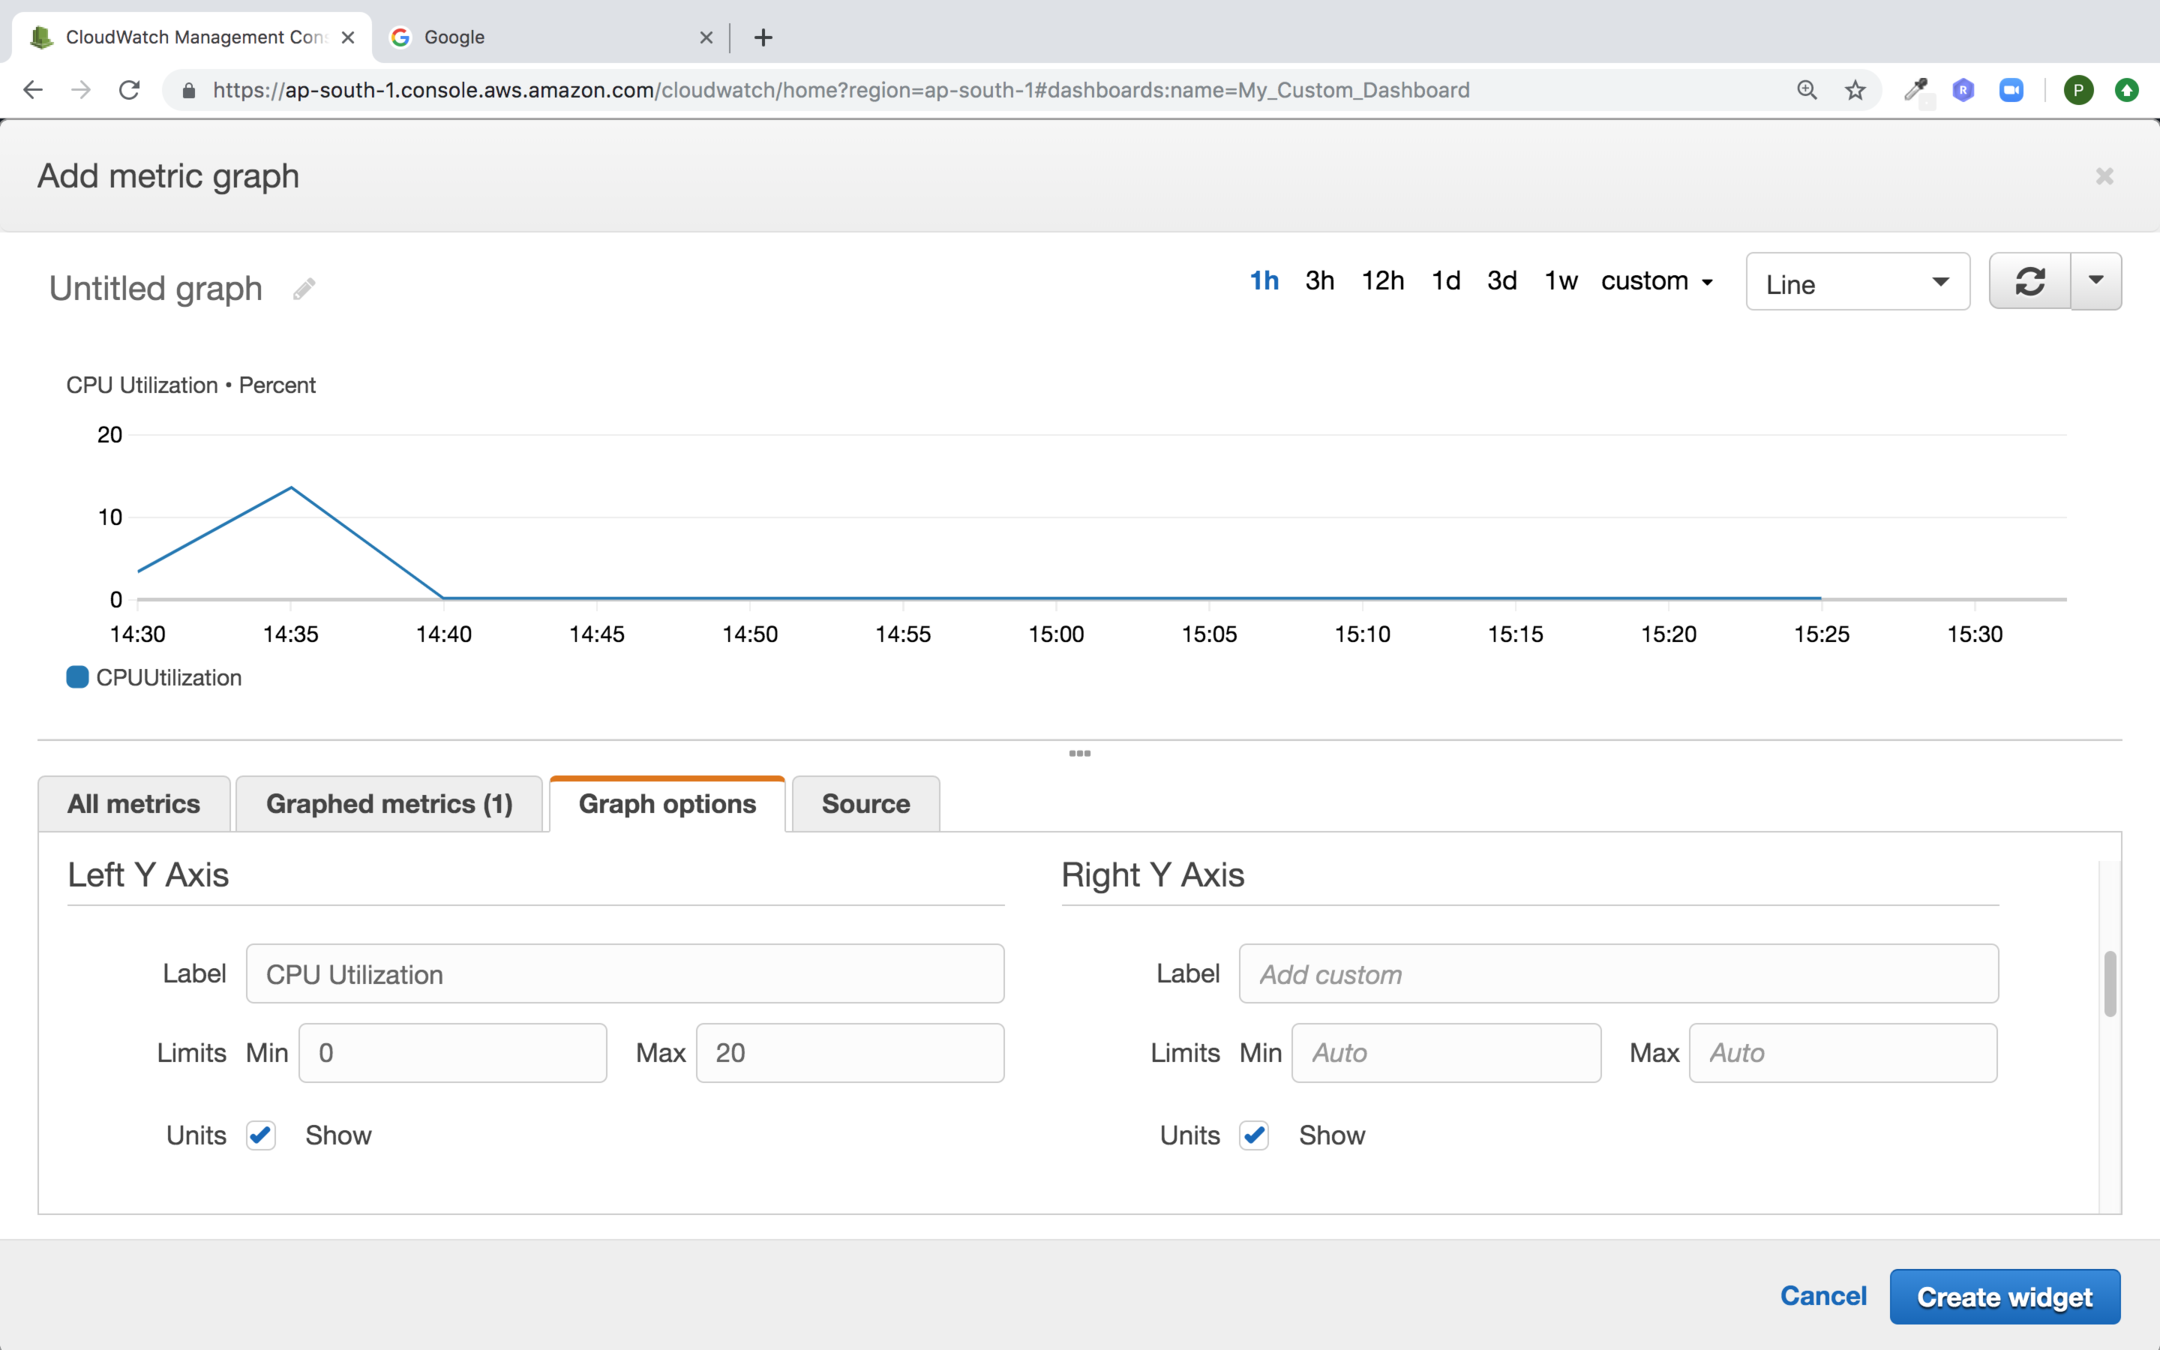
Specify the graph options for Y axis
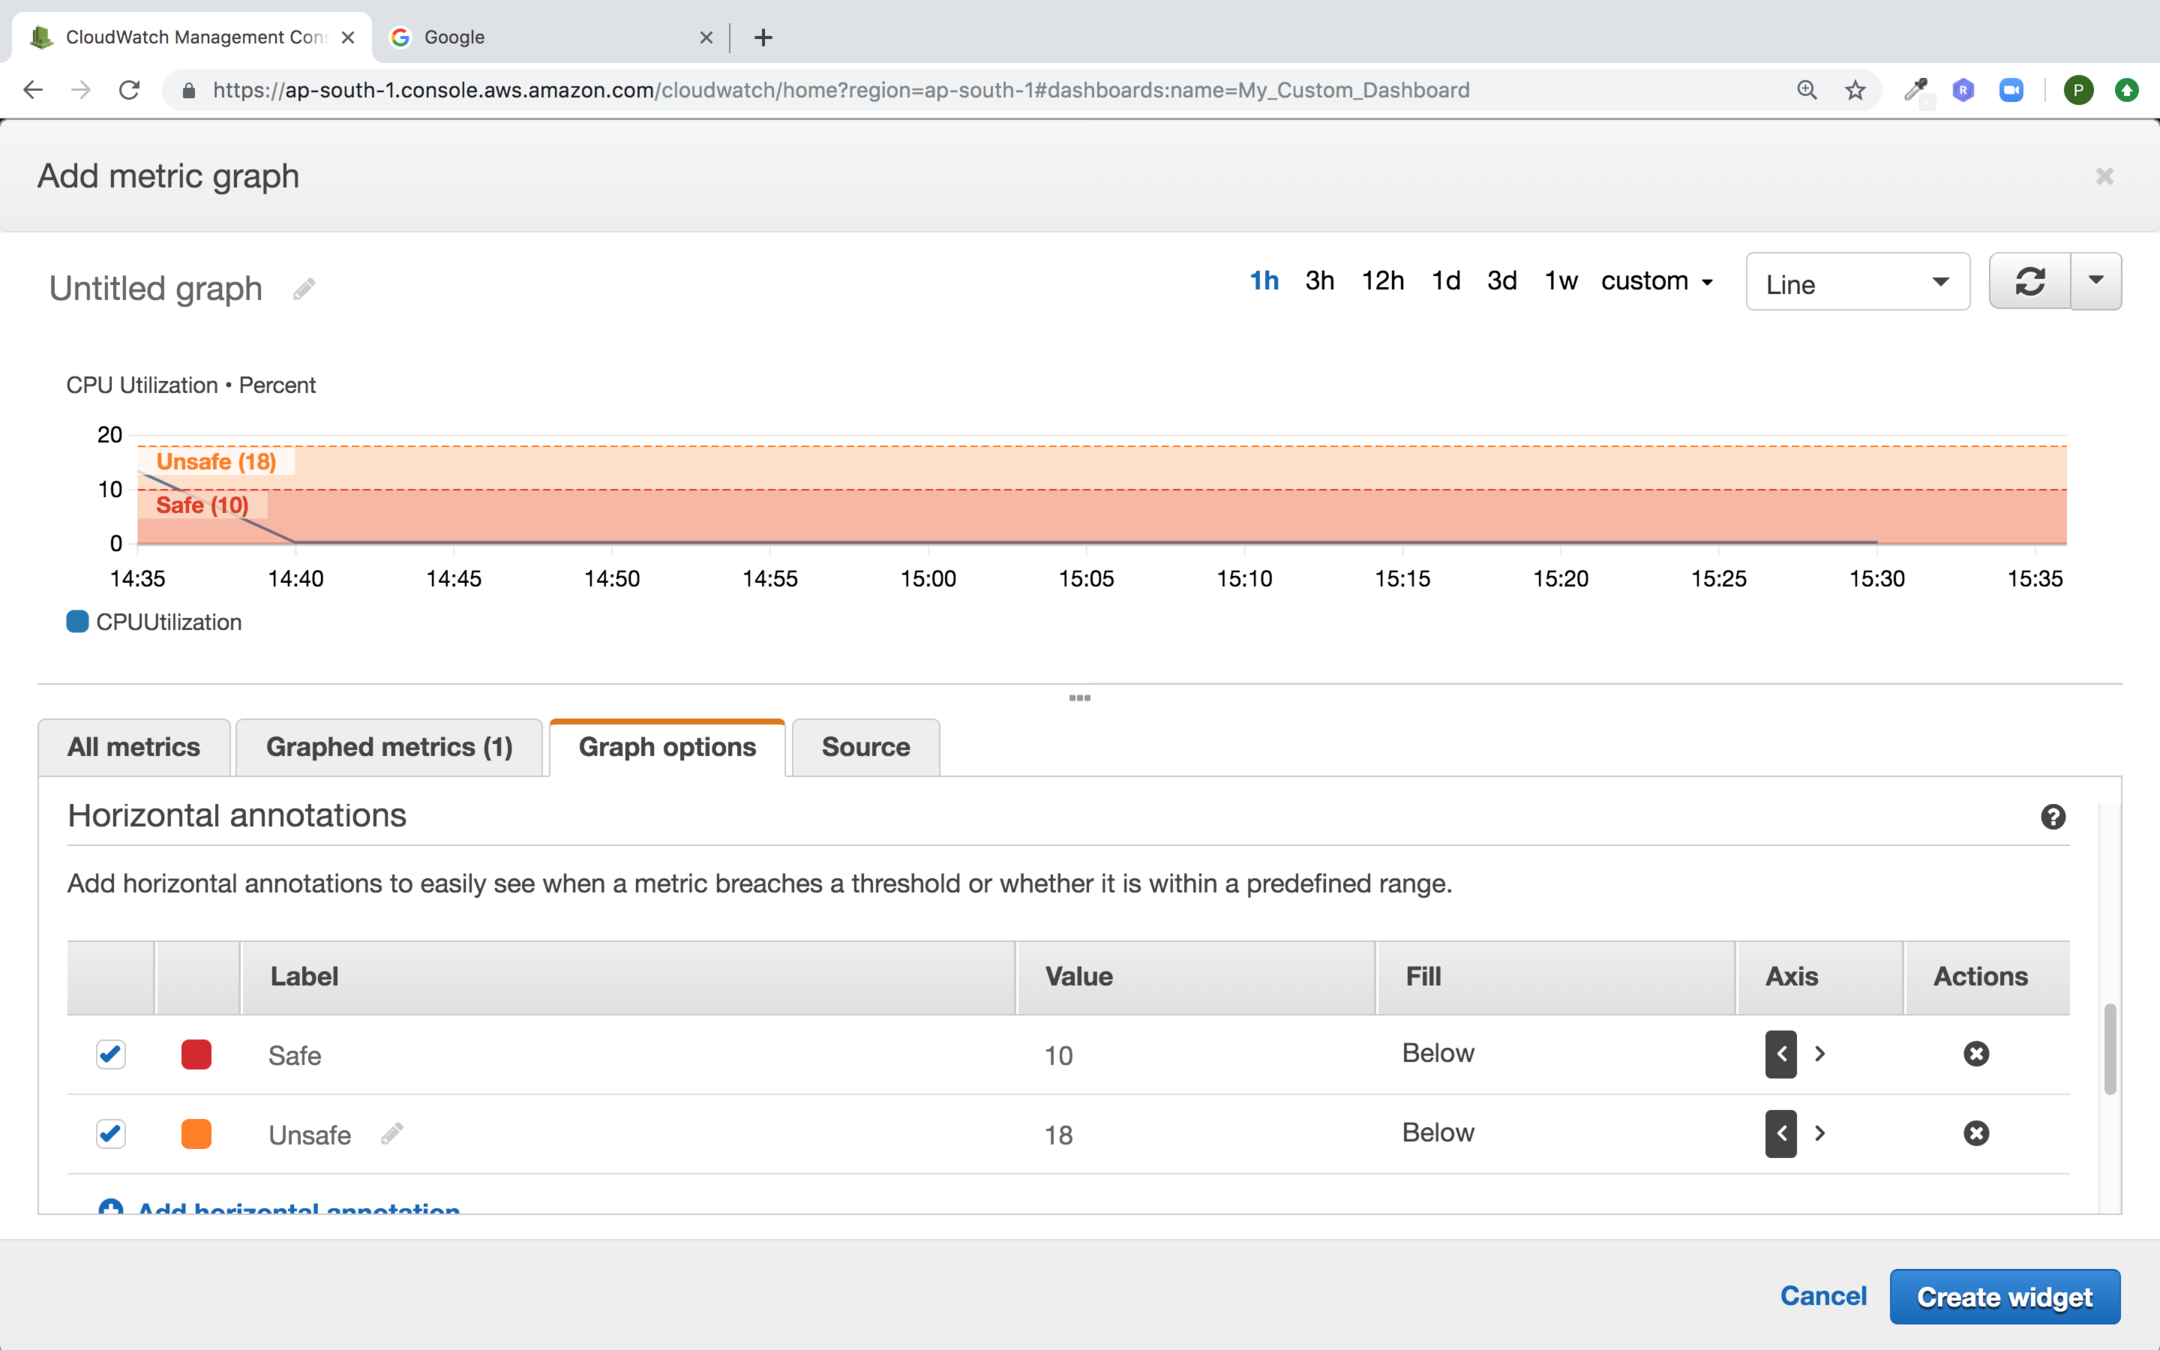
Provide Horizontal Annotations
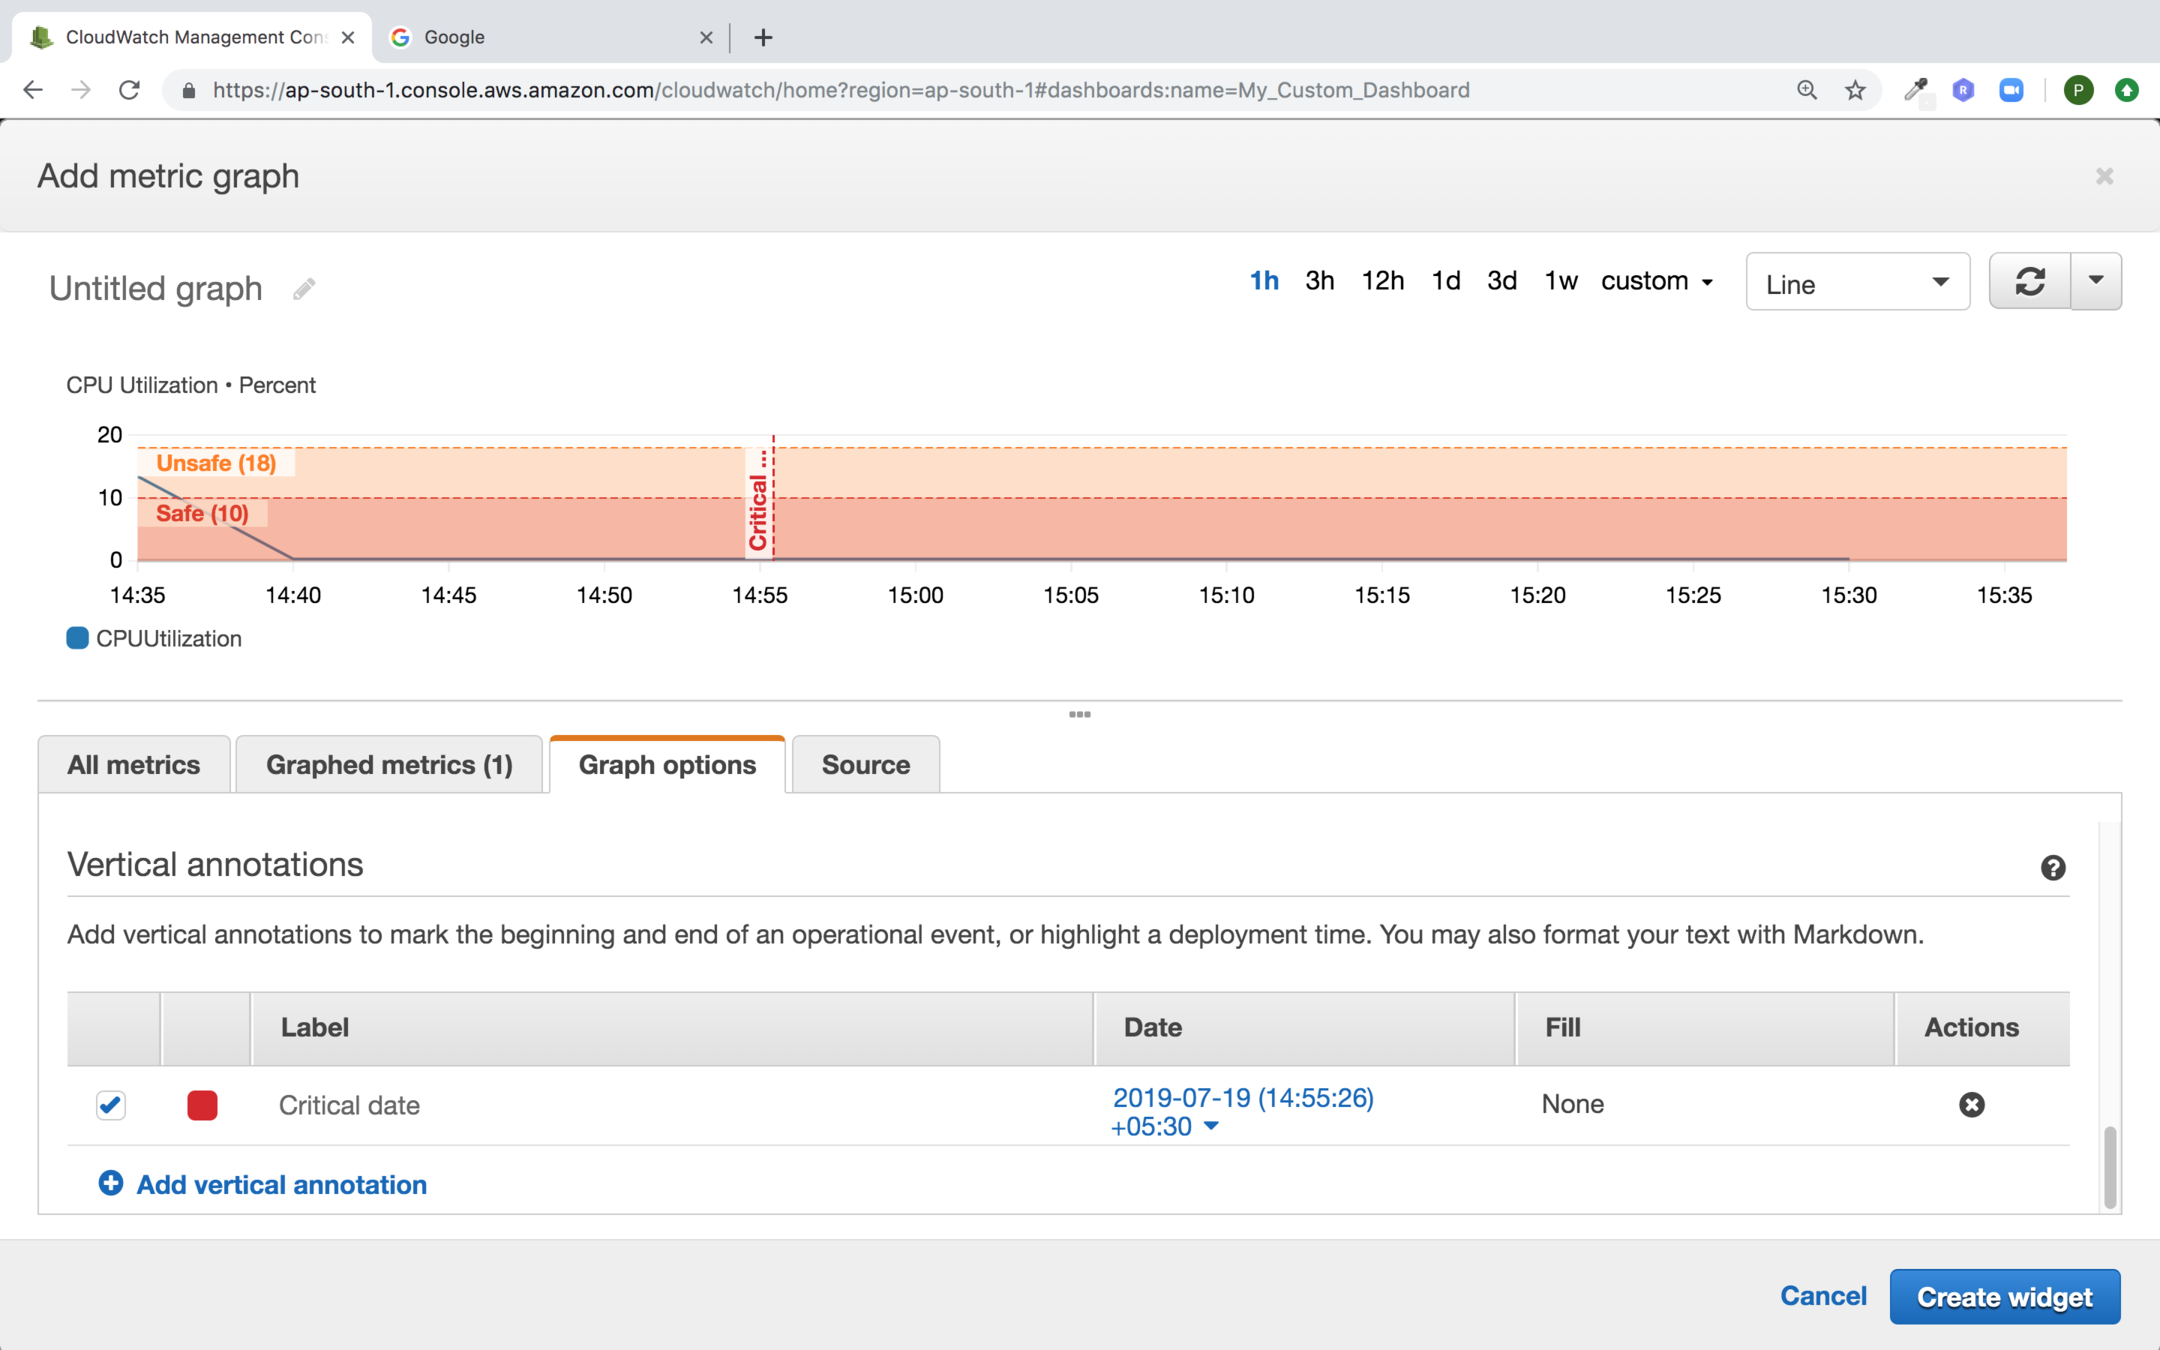
Provide the Vertical Annotation and not click on Create widget
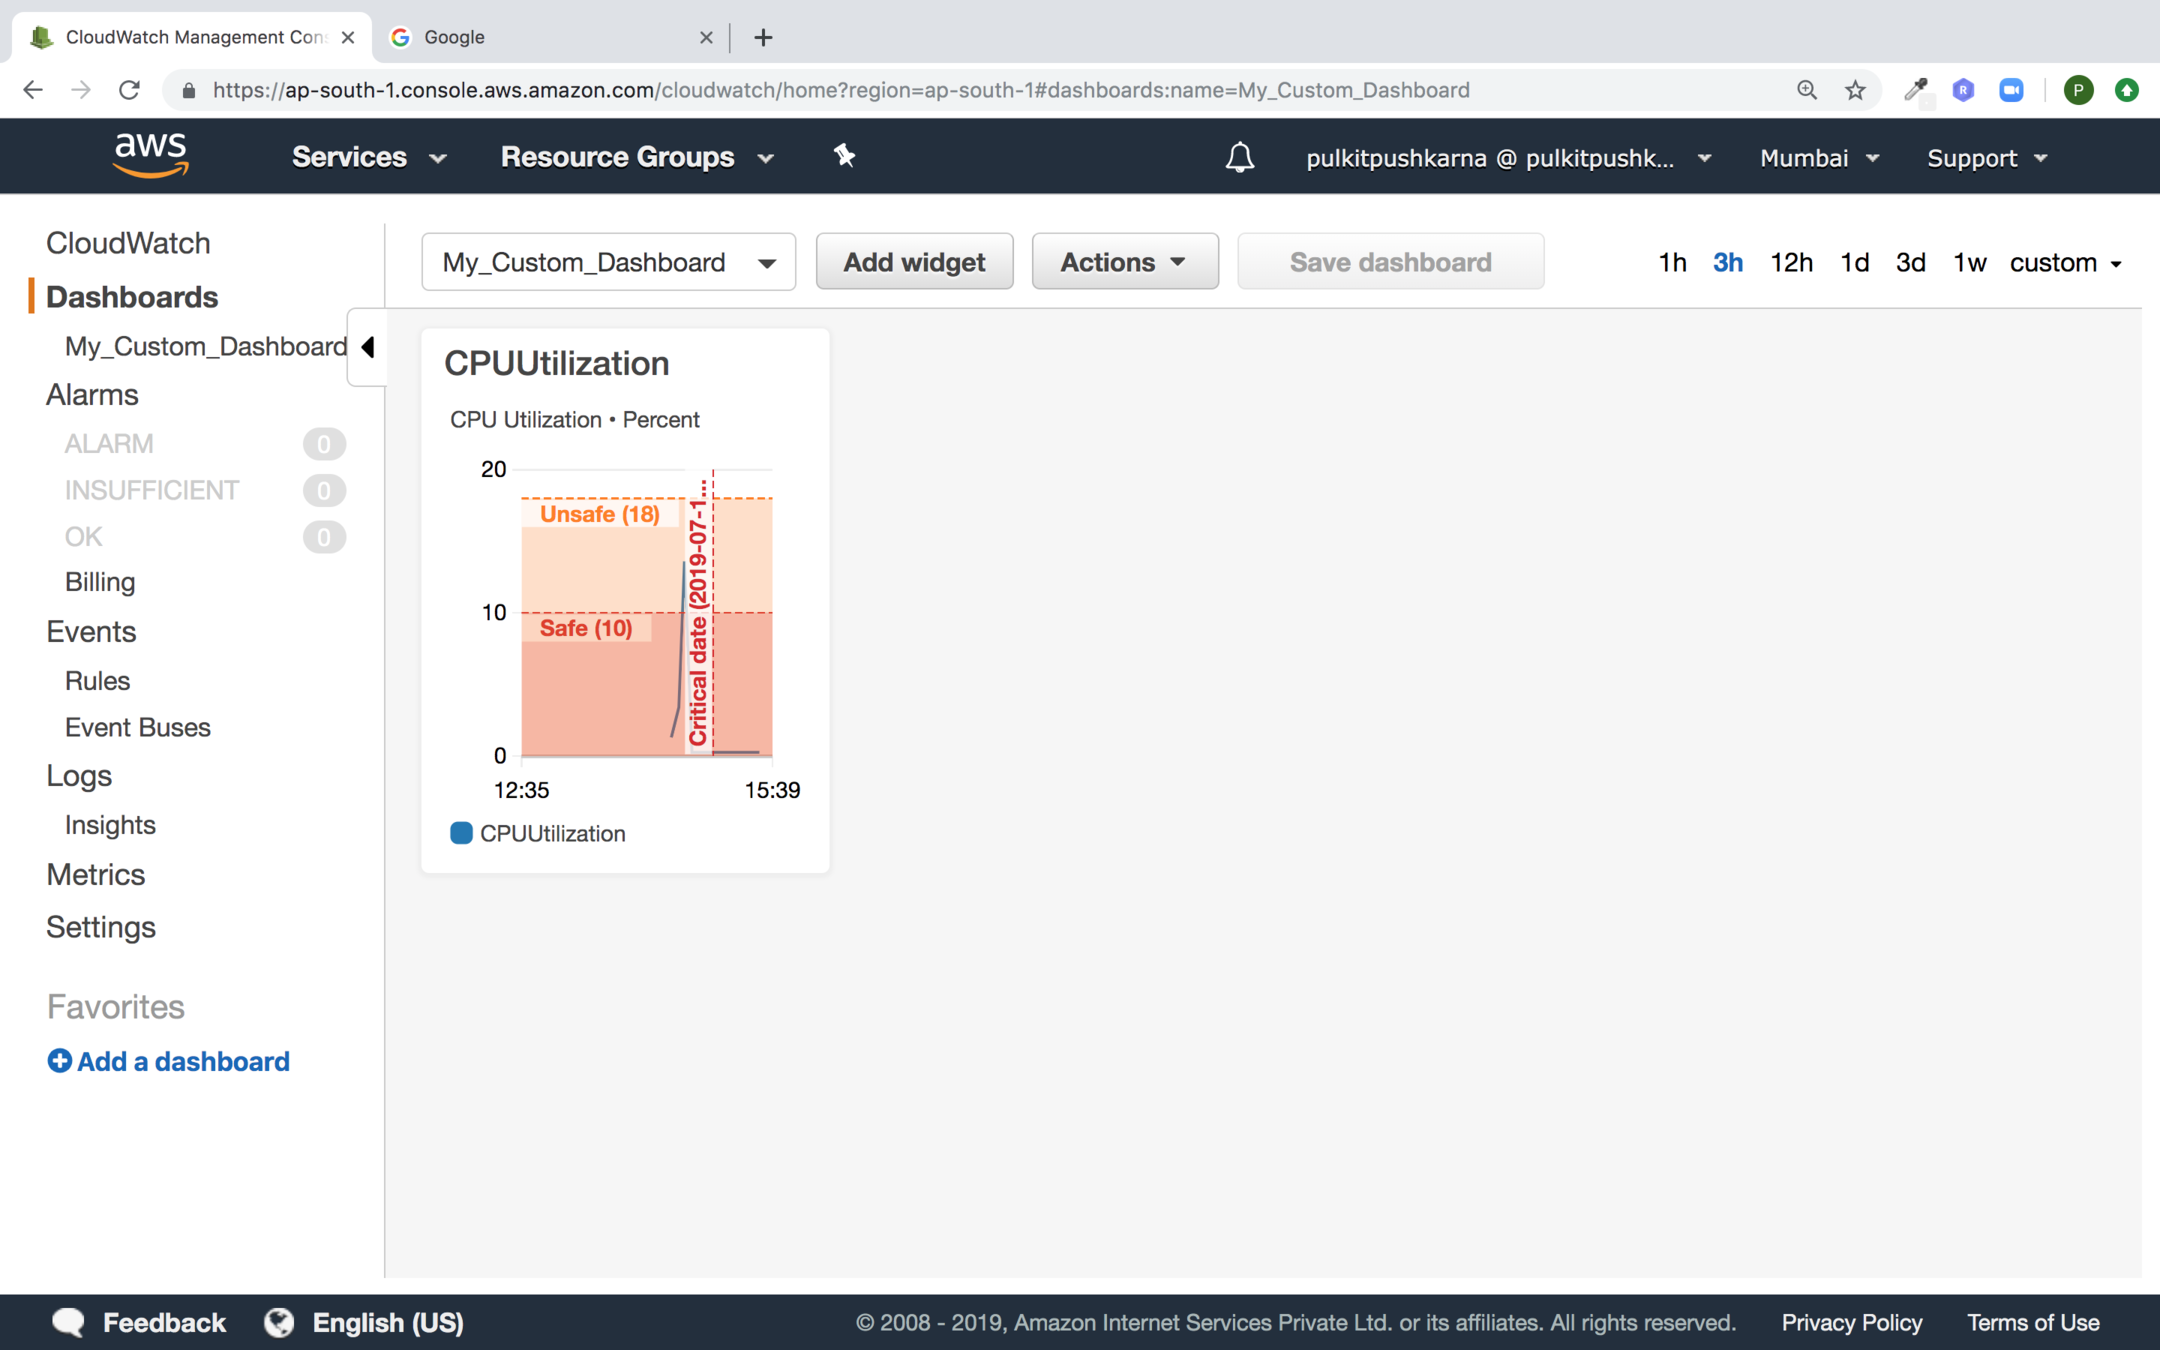
Now click on Save Dashboard
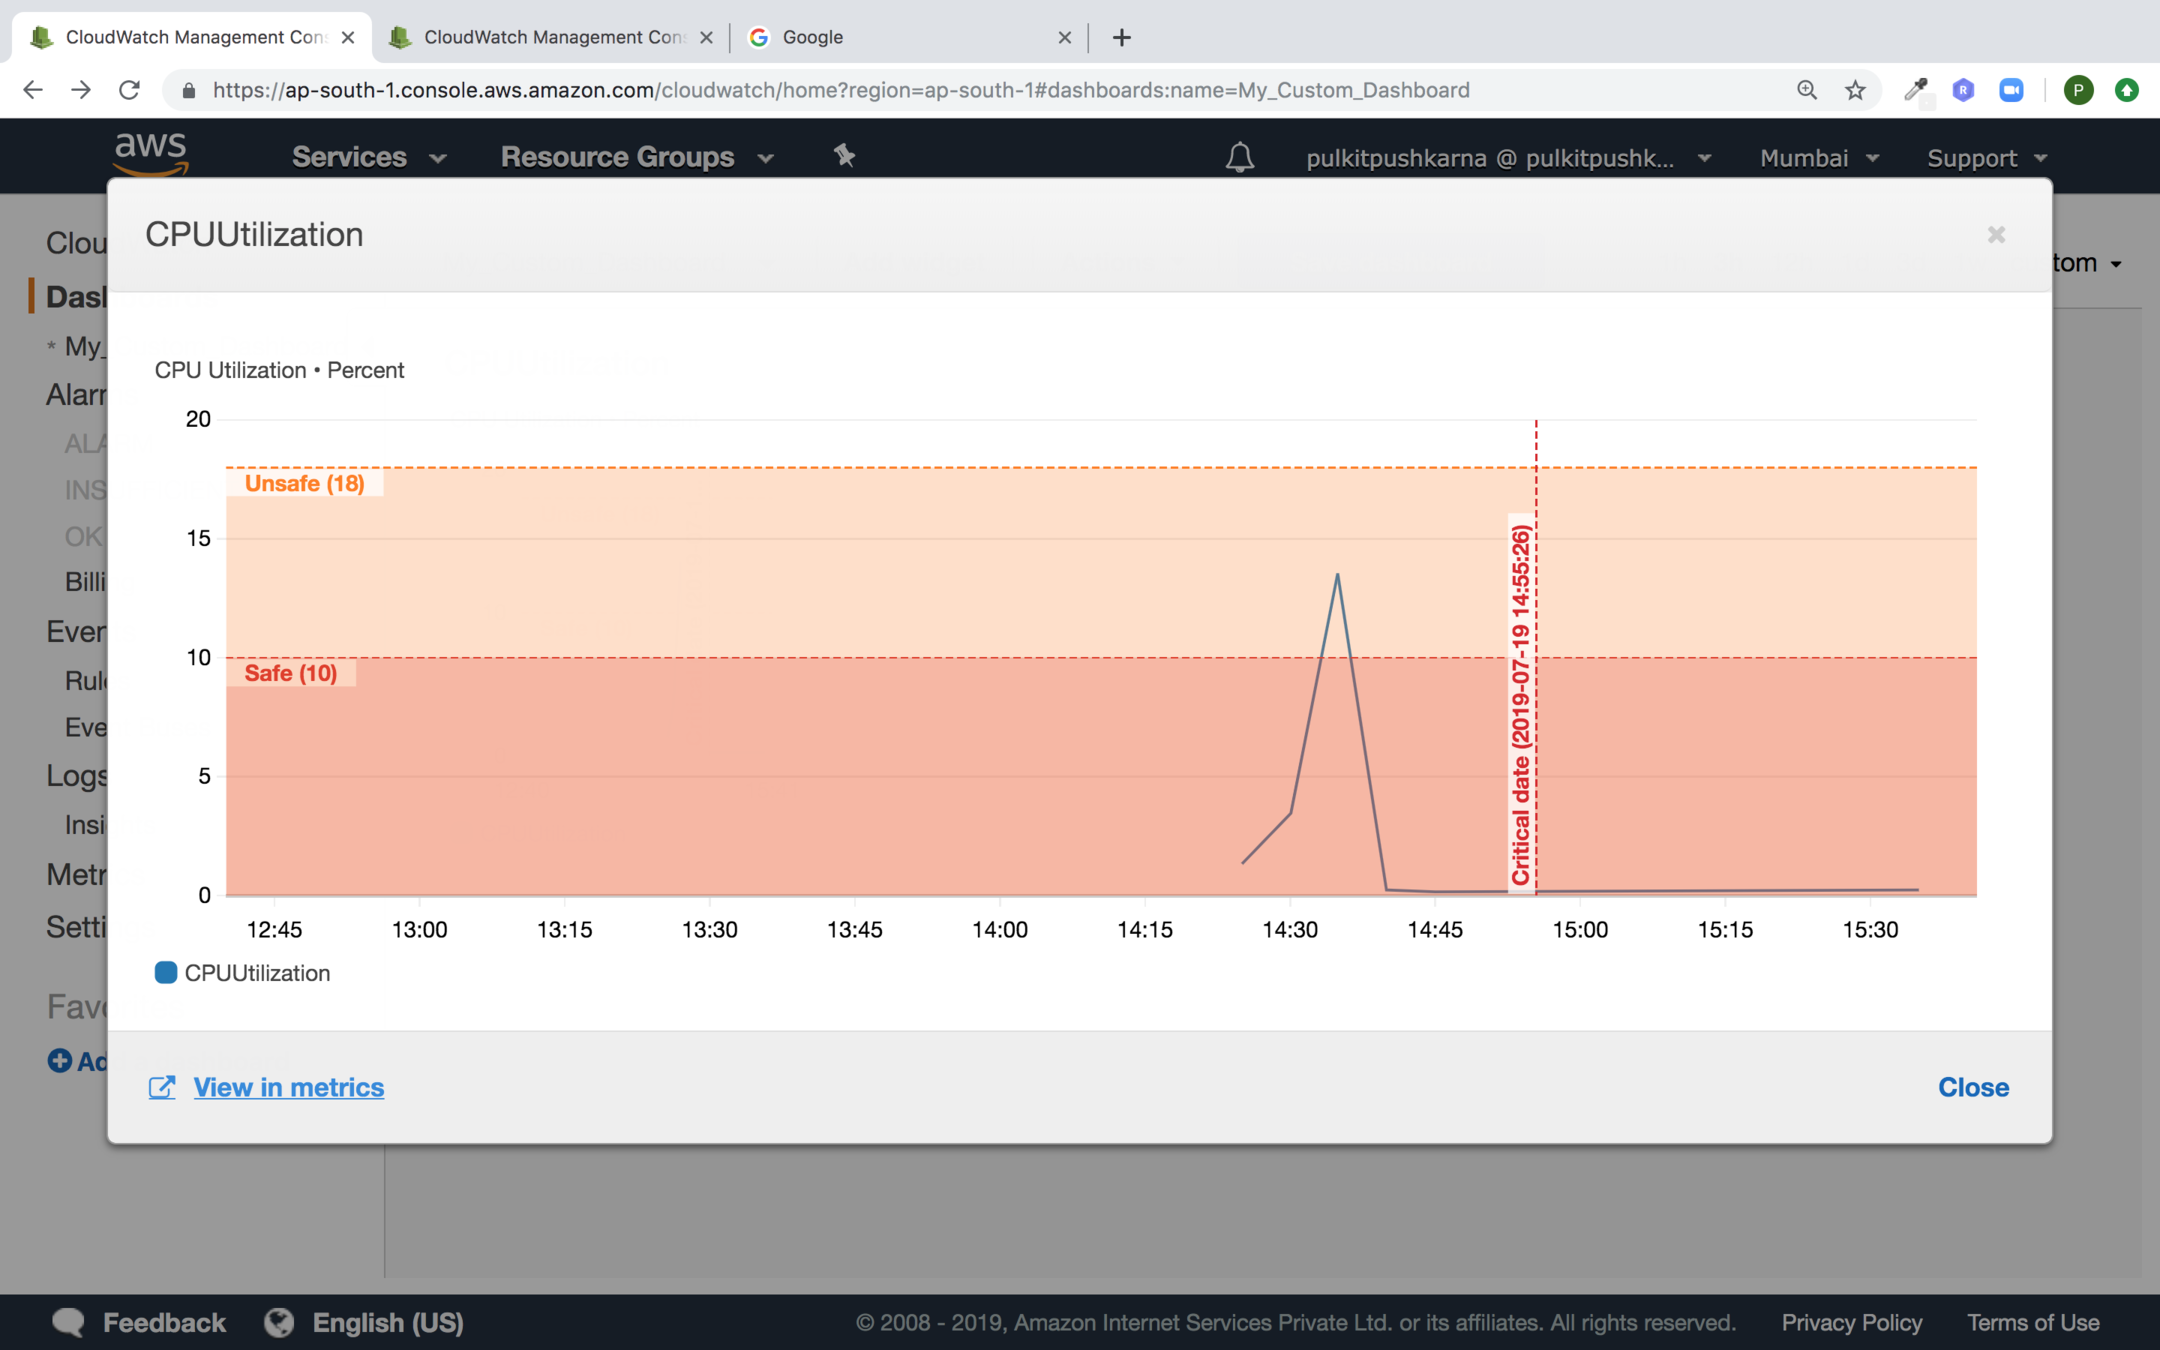
Now click on the widget and click on view in metrics
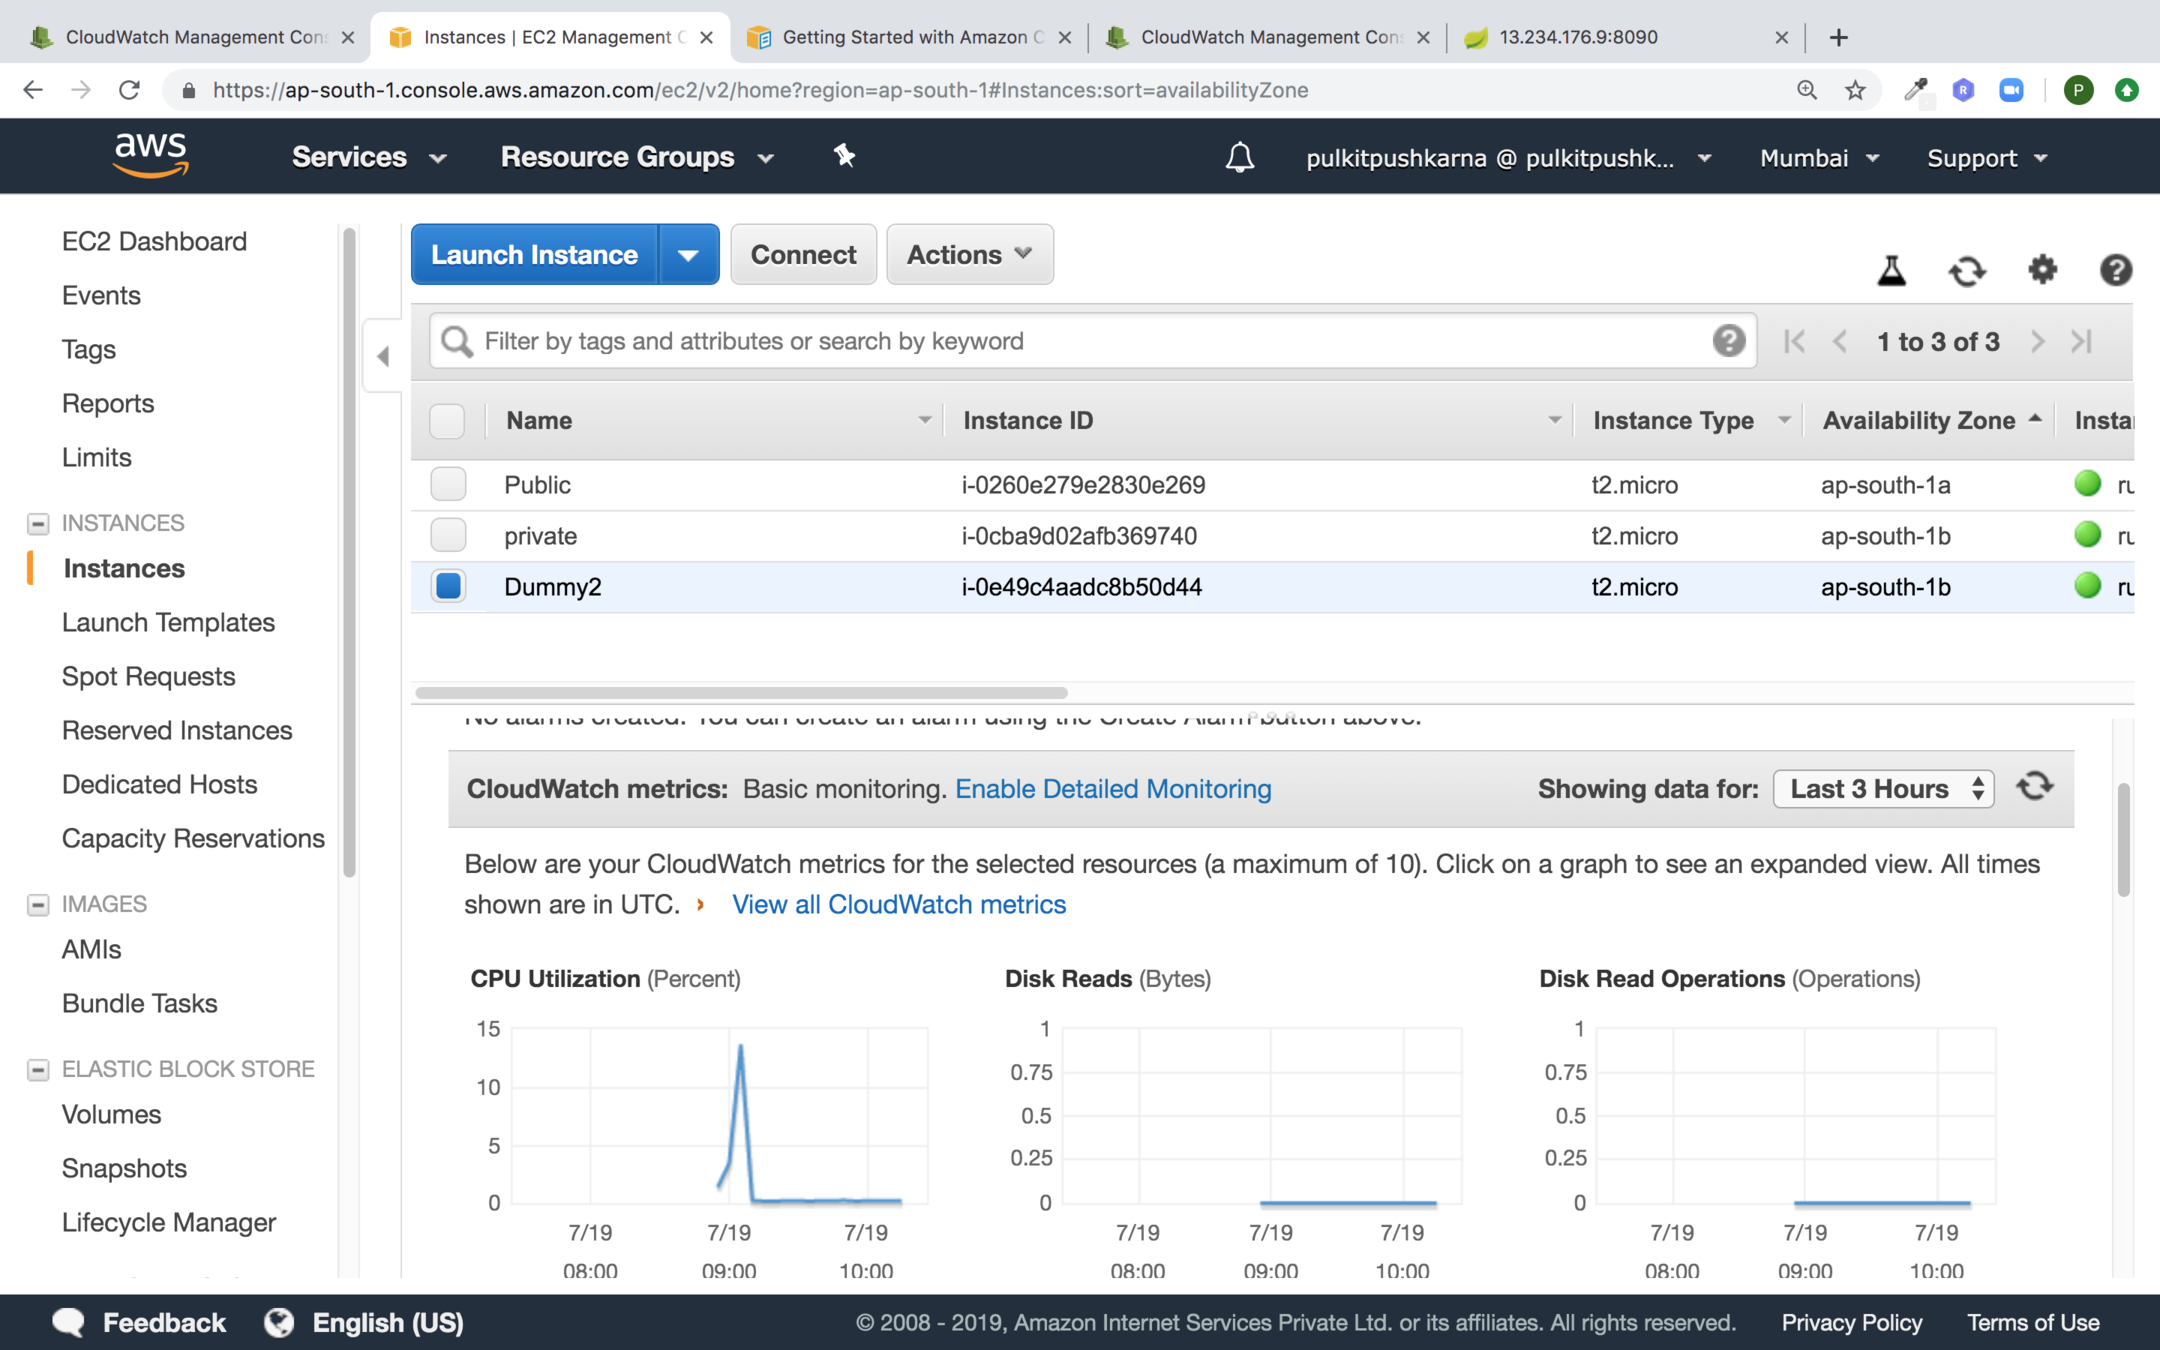
Basic Monitoring in EC2 section
Exercise 1
- Launch an AWS instance and run an Spring application on it using Custom Security Group.
- Assign the Elastic IP to your instance.
- Configure CPU utilization Cloudwatch Dashboard.
Follow the steps https://slides.com/pulkitpushkarna/aws-basics/fullscreen#/32 the only change is the Security Group where you will have to select your own Security Group inspite of the default one.
VPC (Virtual private cloud)
Amazon Virtual private cloud (Amazon VPC) enables you to launch AWS resources in a virtual network that you have defined. The virtual network closely resembles a traditional network that you'd operate in your own data center with the benefit of using a scalable infrastructure on AWS.
Default VPC
vs
Custom VPC
Note : Do not delete the default VPC otherwise you will have to request AWS to get it back
Creating a Custom VPC
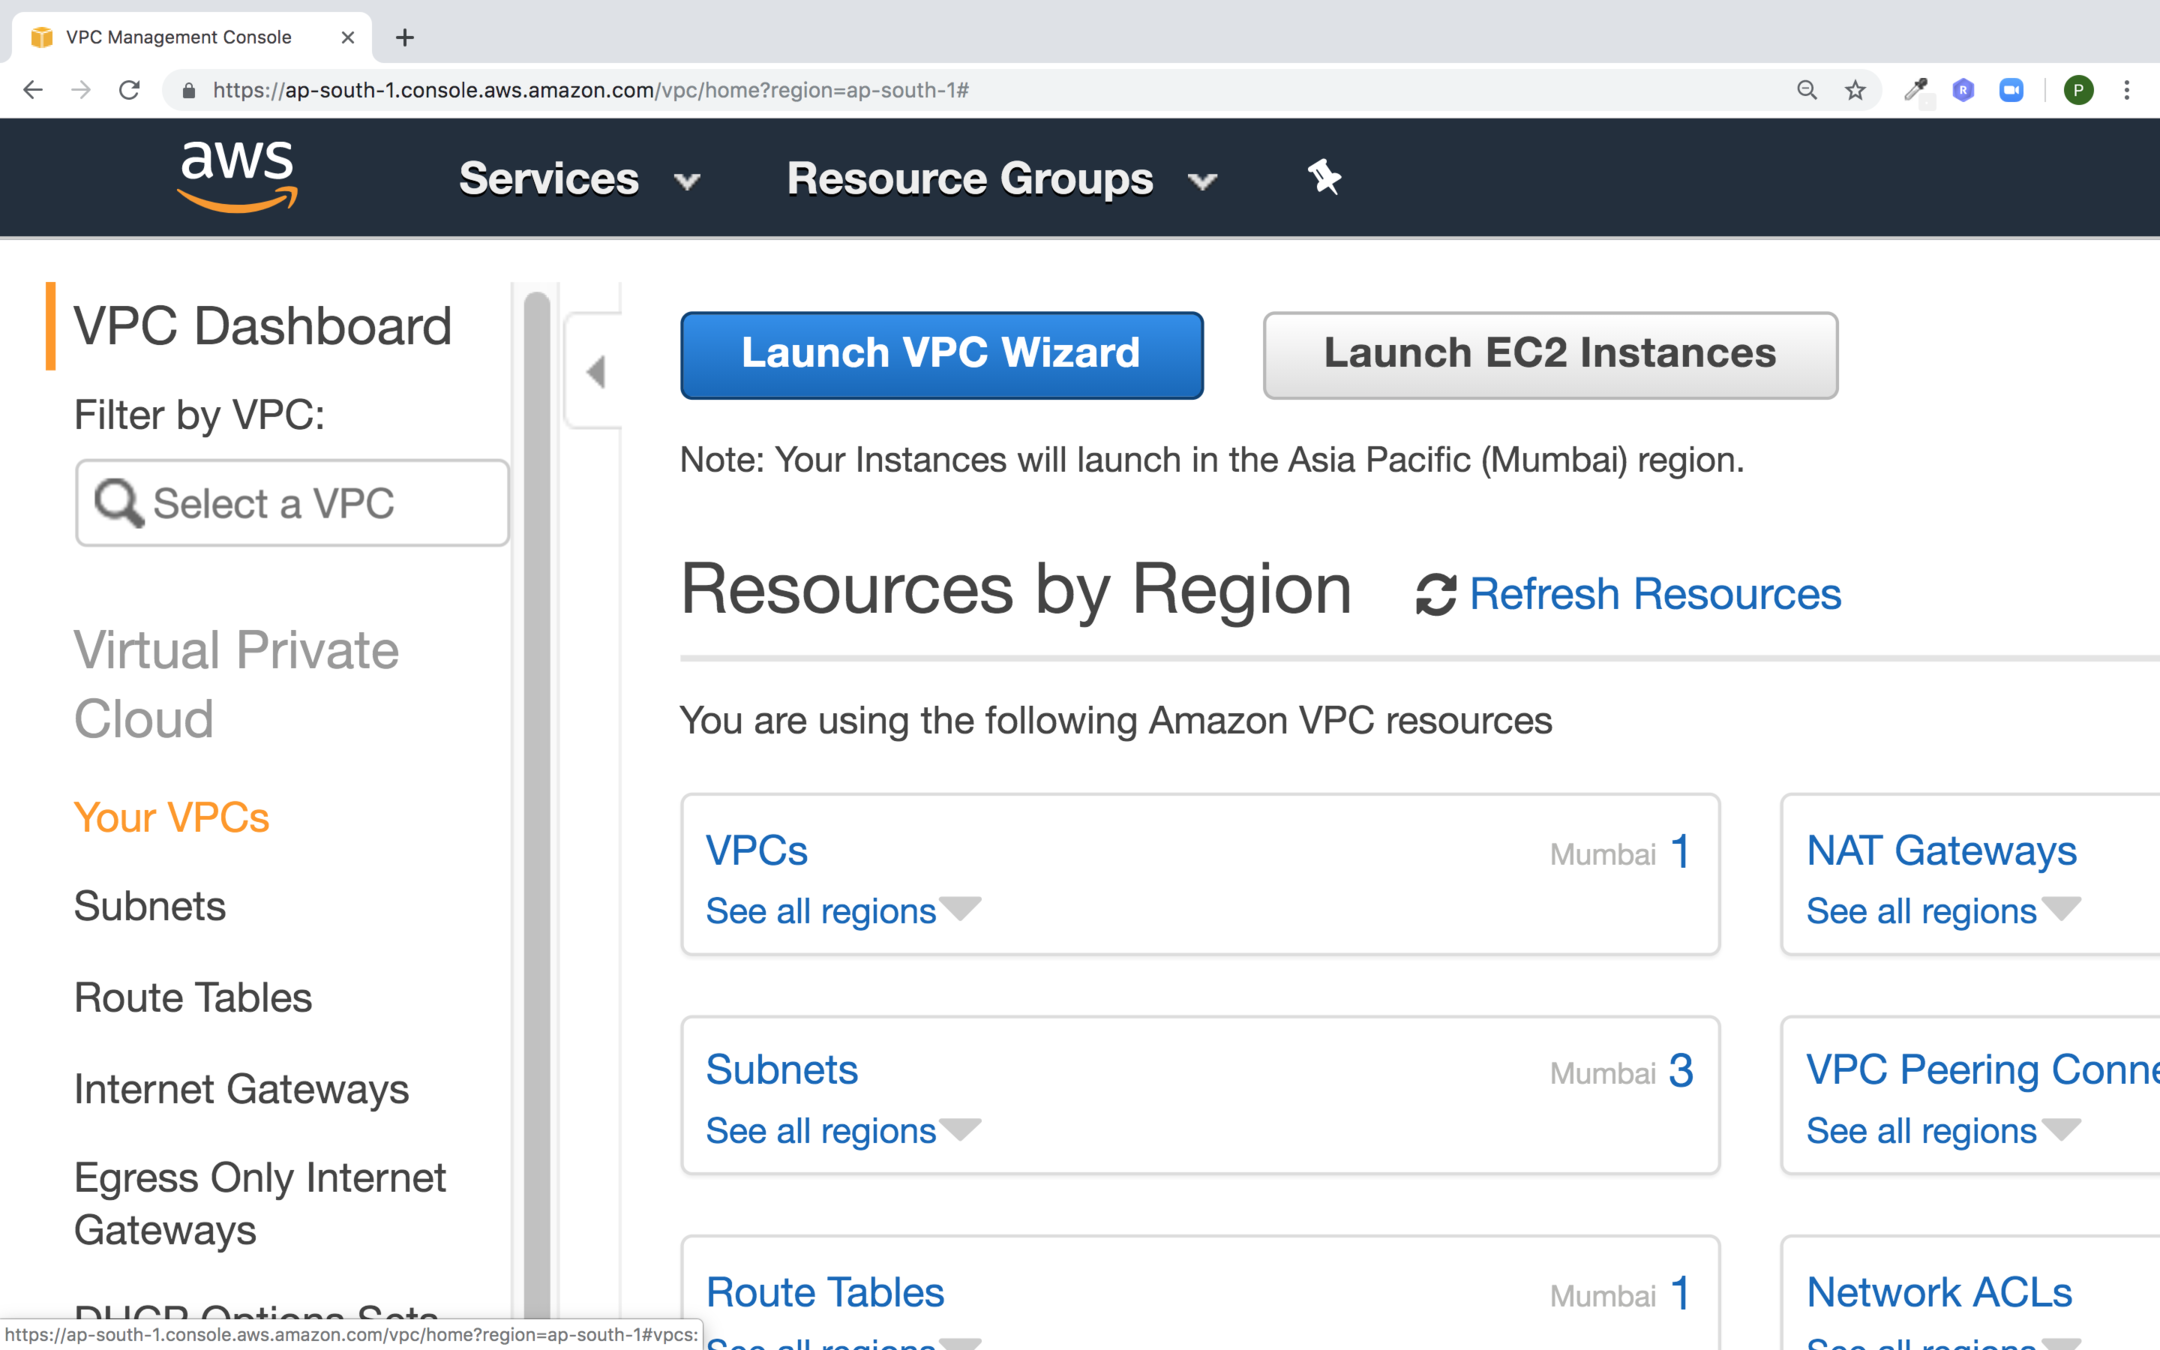
Go to the VPC service and click on Your VPCs
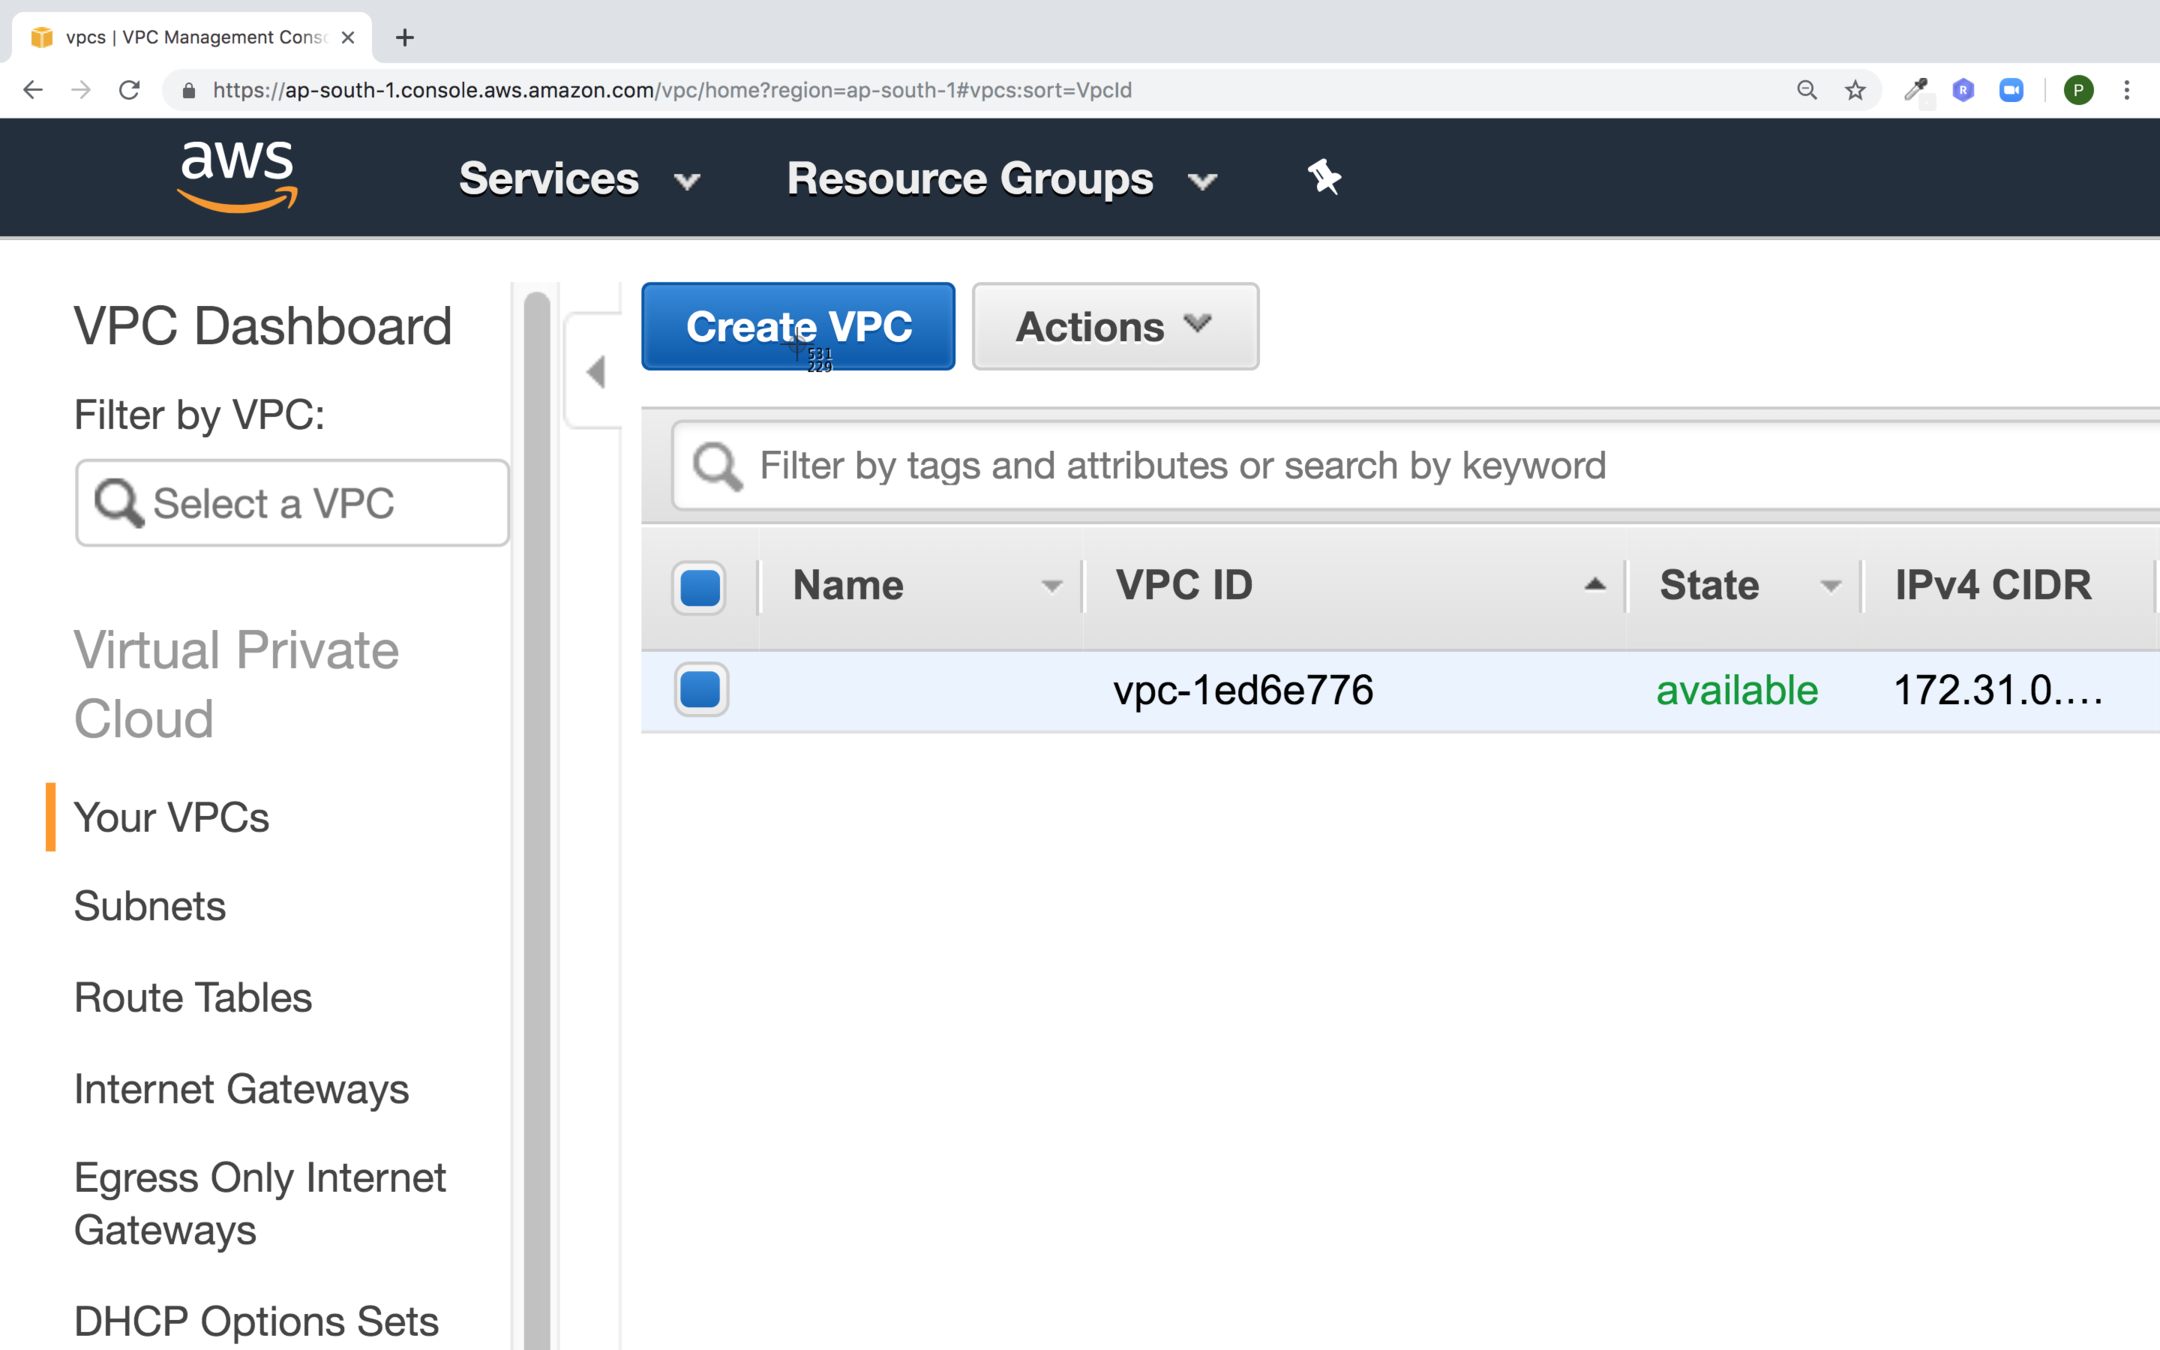
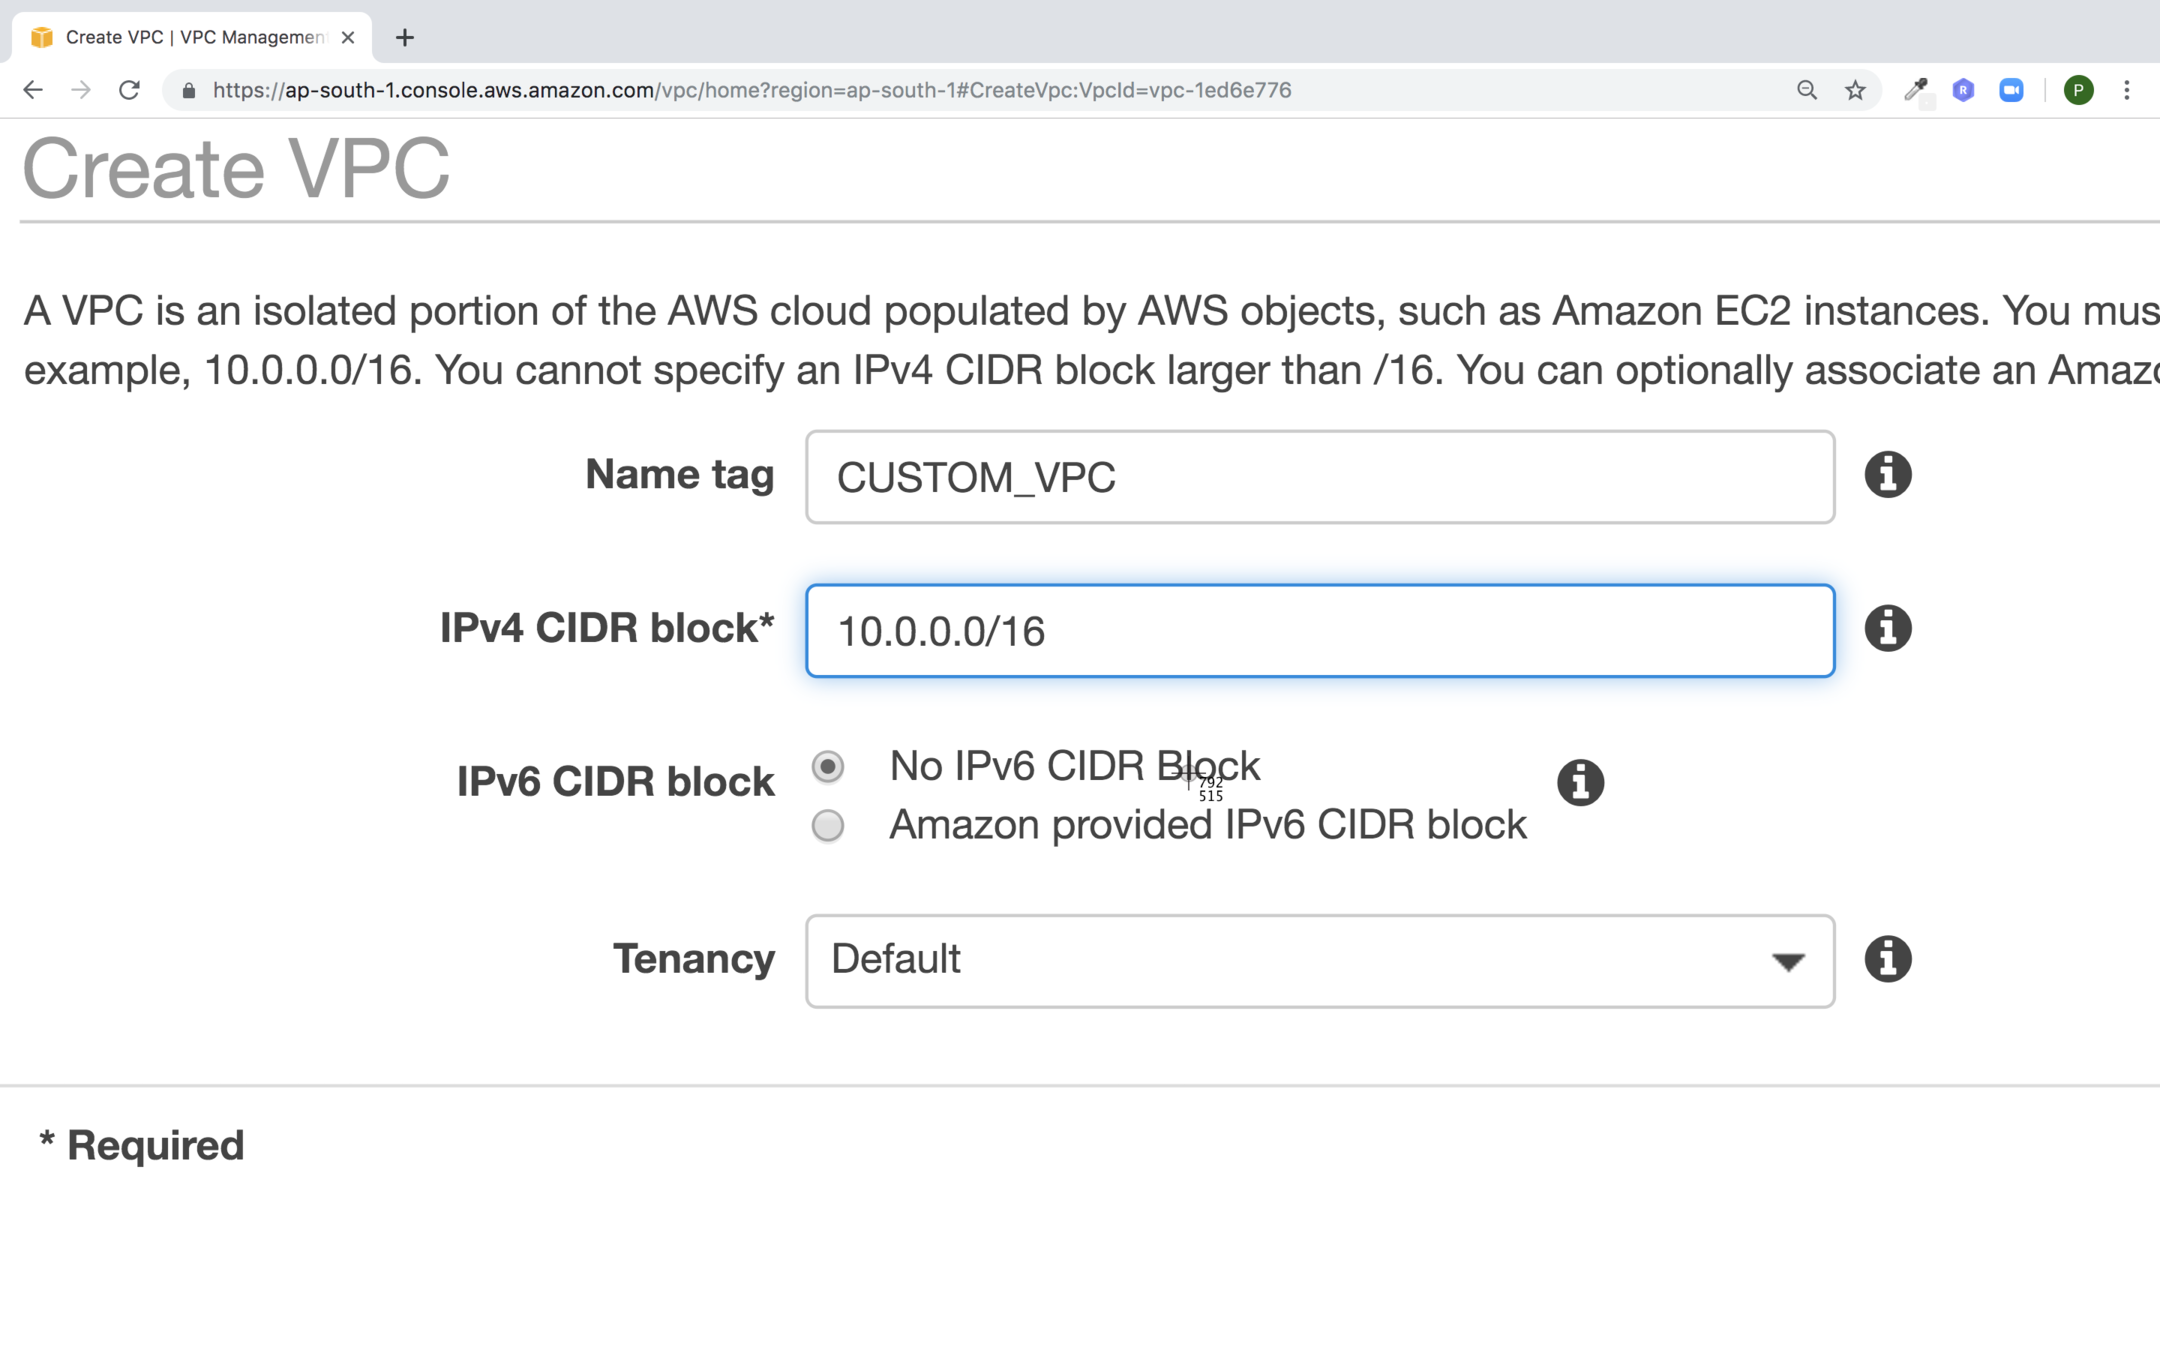
Click on Create VPC
Fill the values for your VPC and click on Create
- Subnets are required to launch instances in a VPC.
- Private email addresses are the once which are not reachable from internet.
- Public IP addresses are those which are reachable form internet.
- When you stop or terminate instance the associated IP address is freed and when you start the instance then new IP address is assigned.
Subnet
- A range of IP addresses in your VPC, You can launch AWS resource into a subnet that you select. Use a public subnet for the resources that won't be connected to the internet.
- A VPC can span to multiple availability zones.
- A subnet is mapped to a single availability zone.
- There are 2 types of subnet:
- Private : Resources that don't need internet connection e.g database instances
- Public : Resources must be connected to the internet e.g Web Service
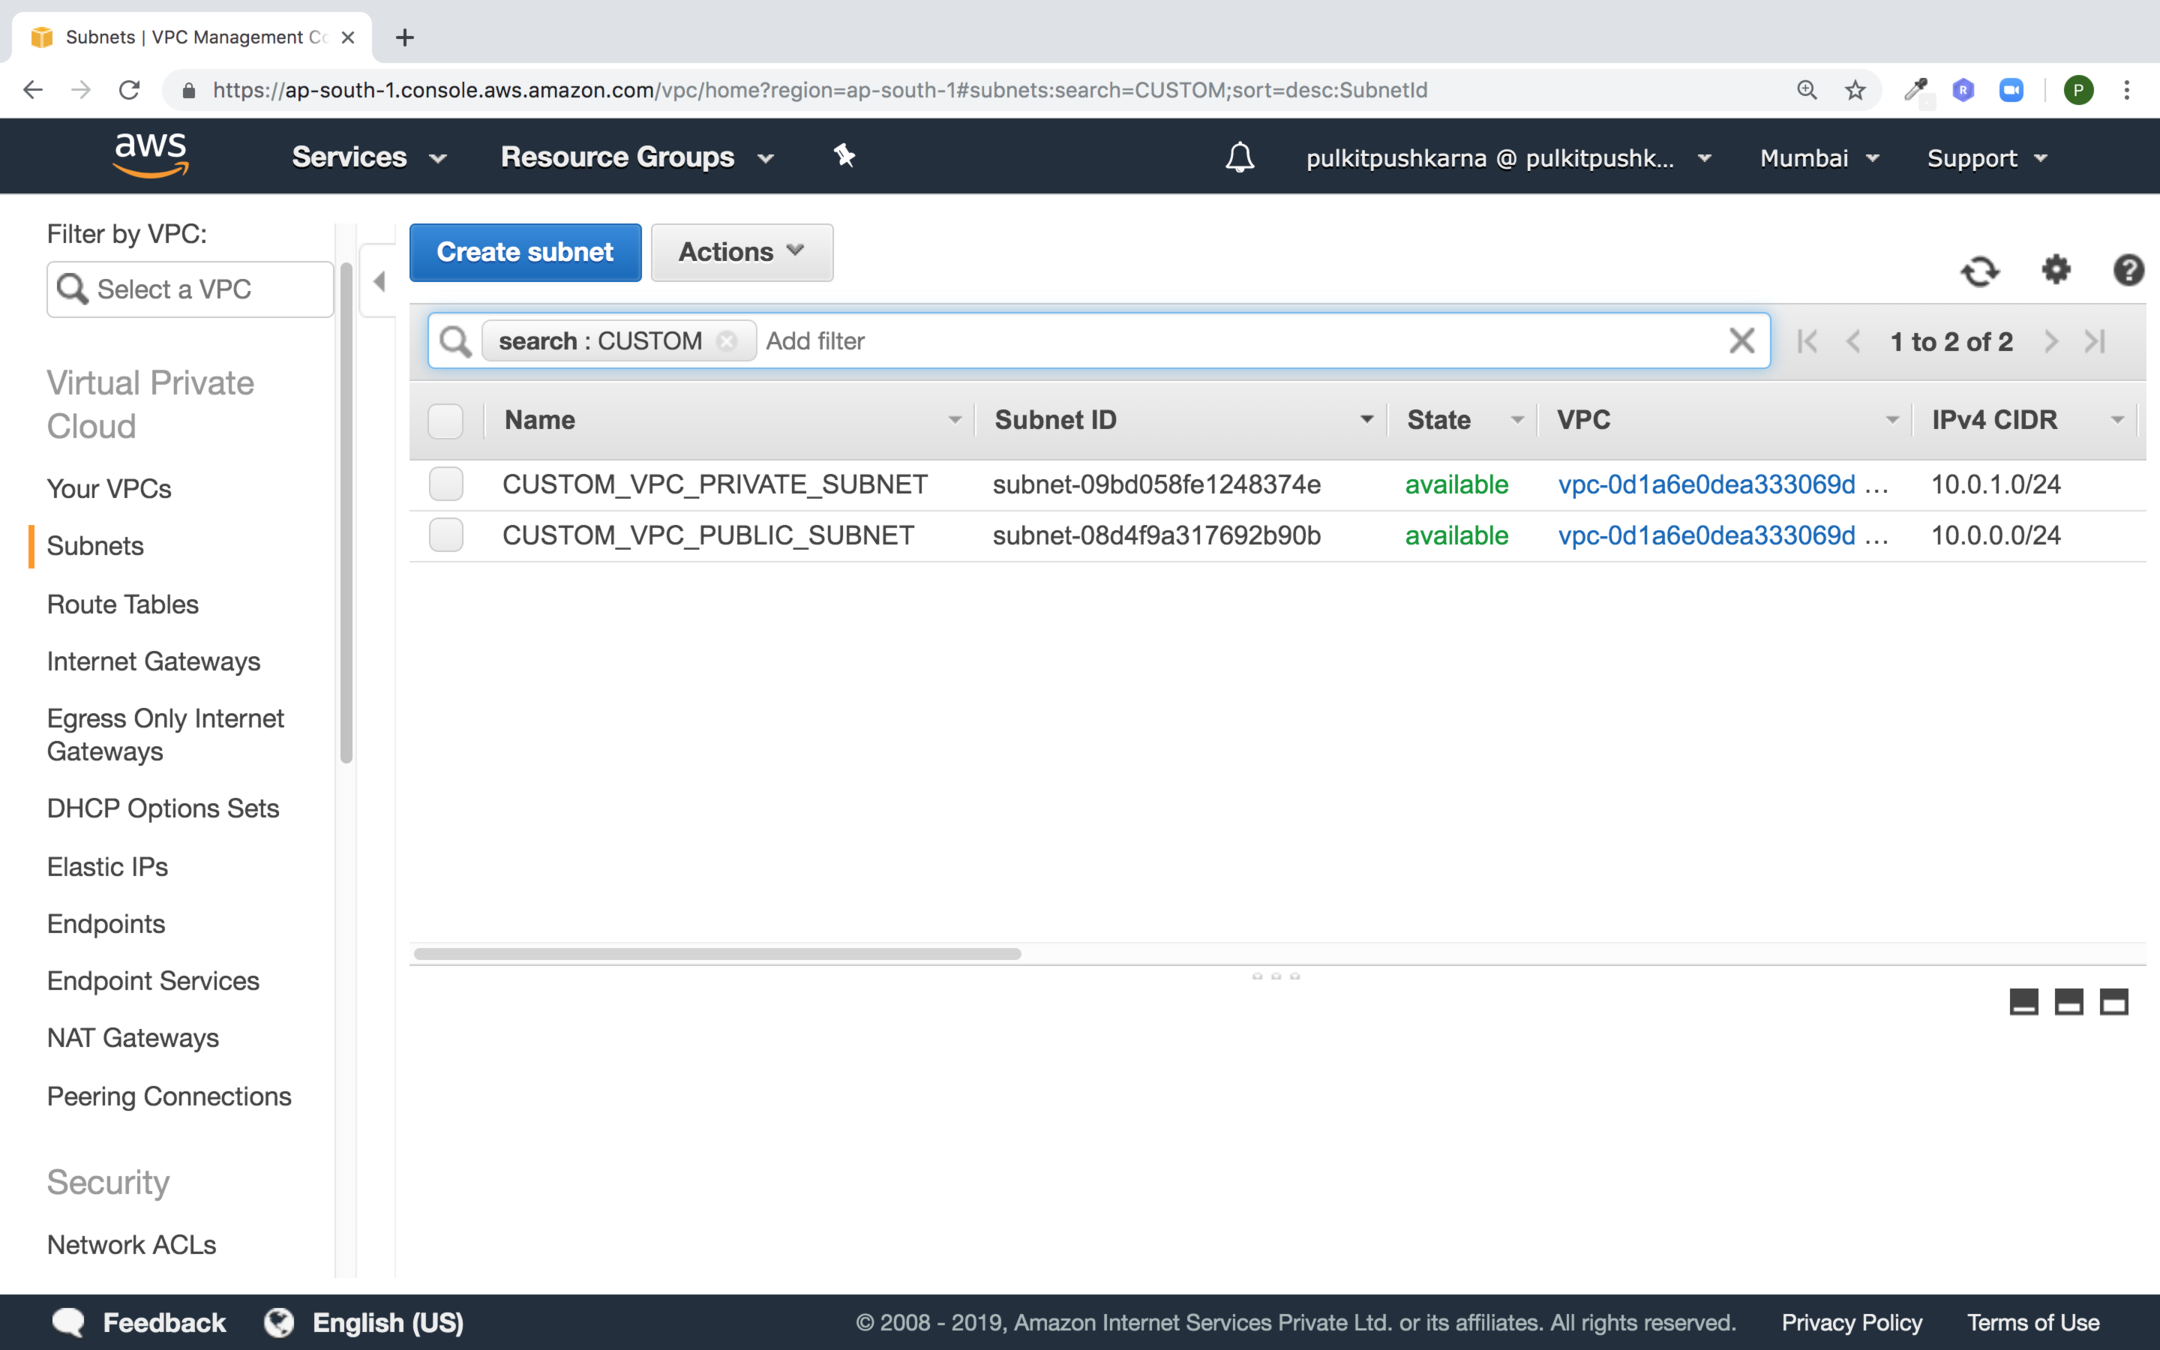
Creating Subnet
In the VPC section got to Subnets
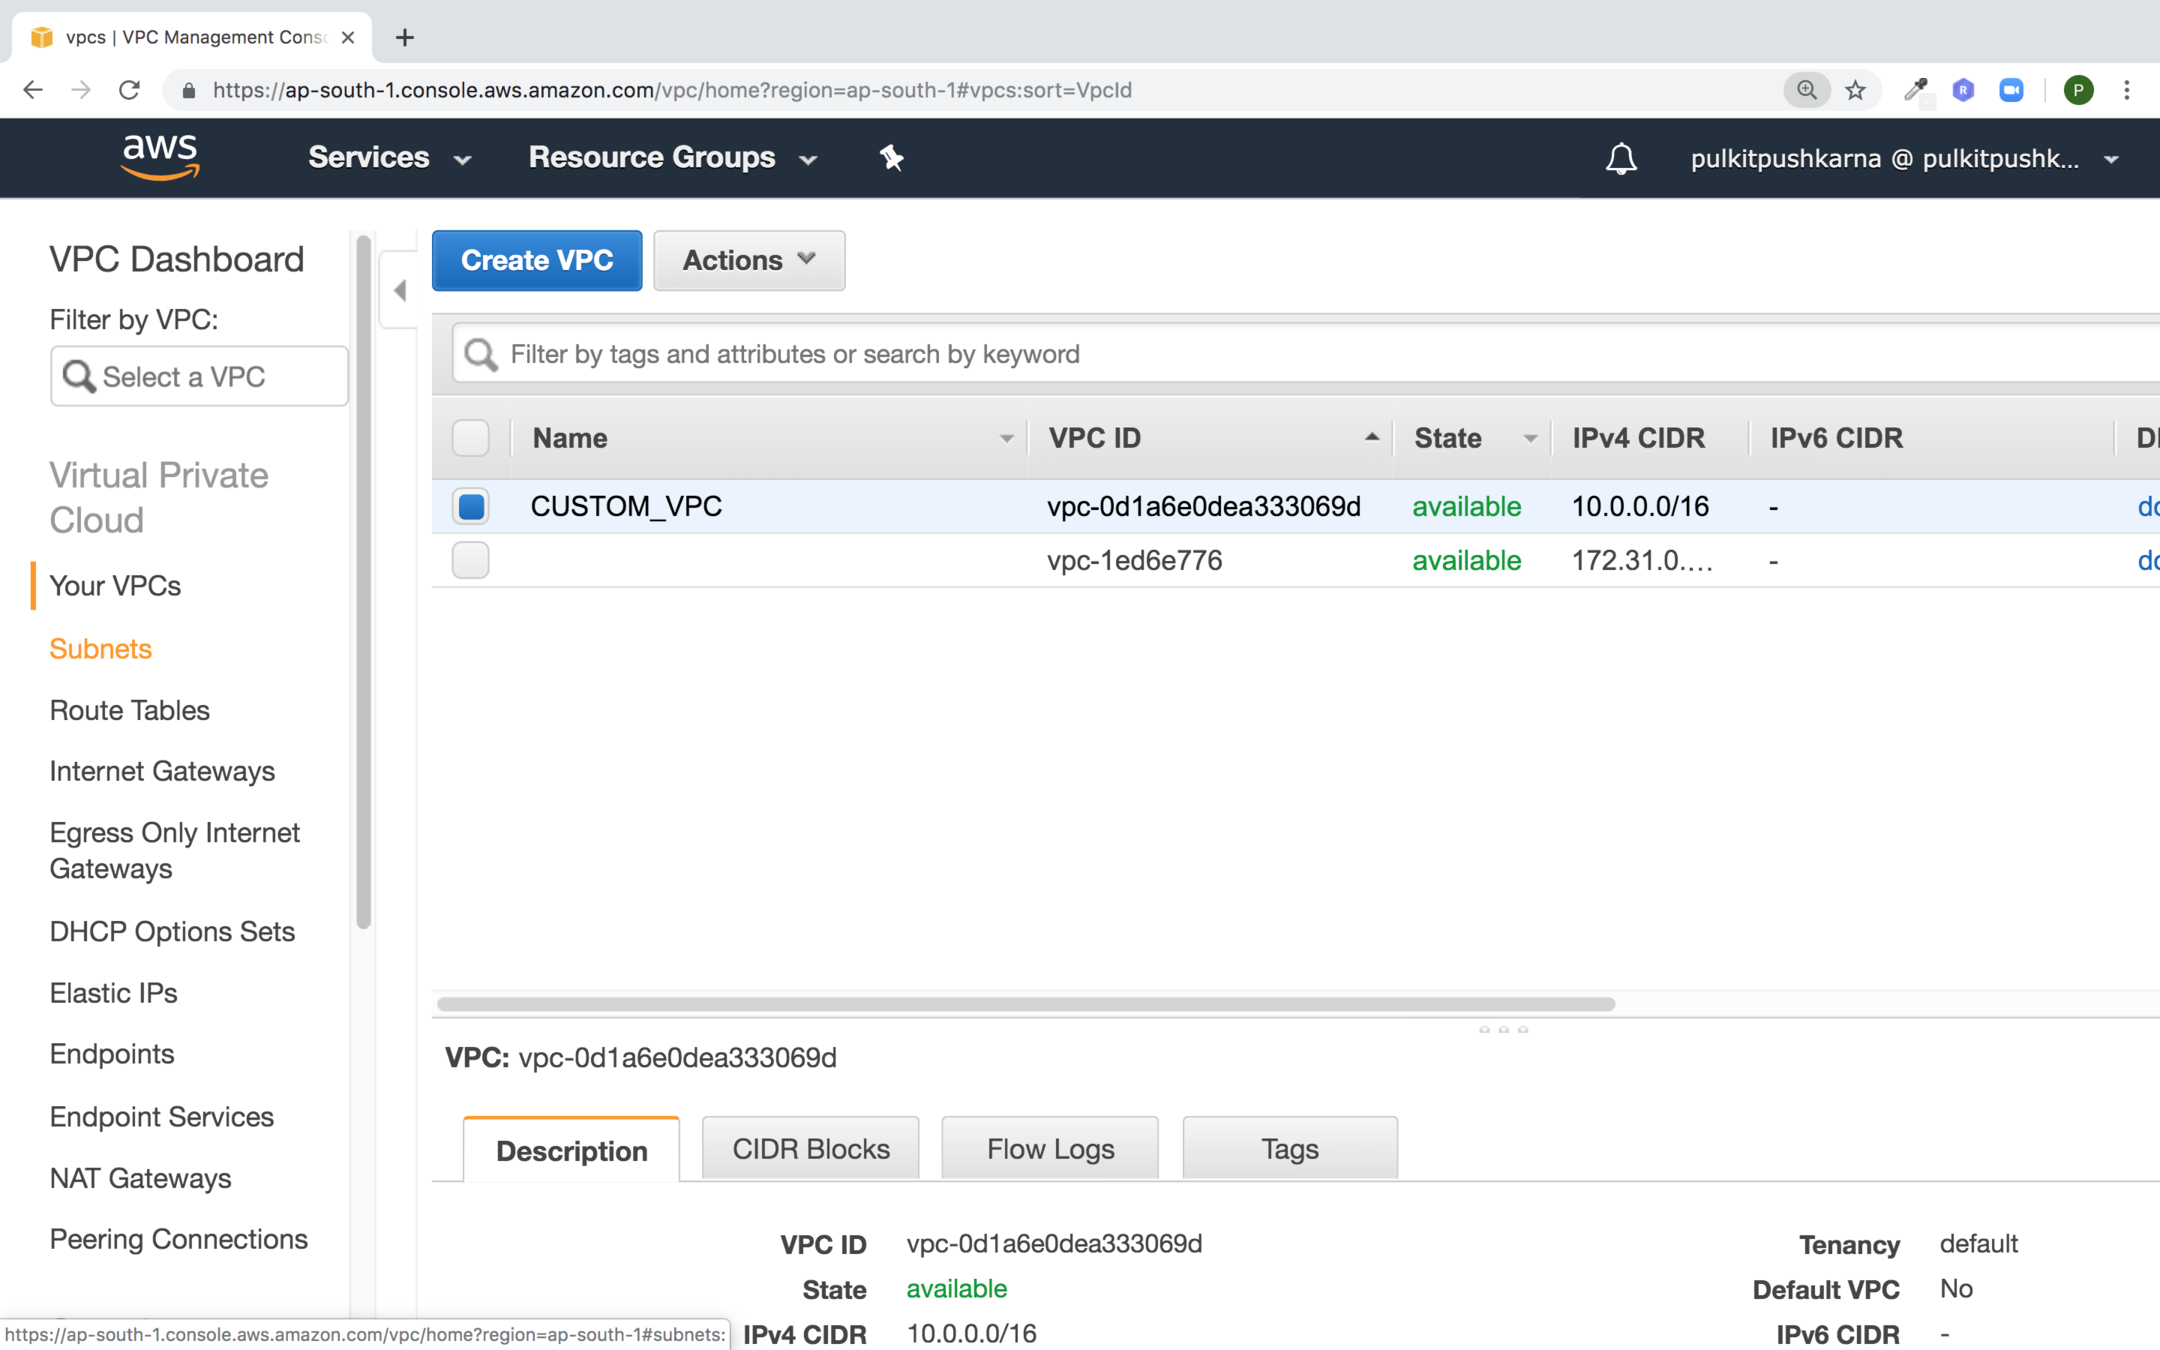
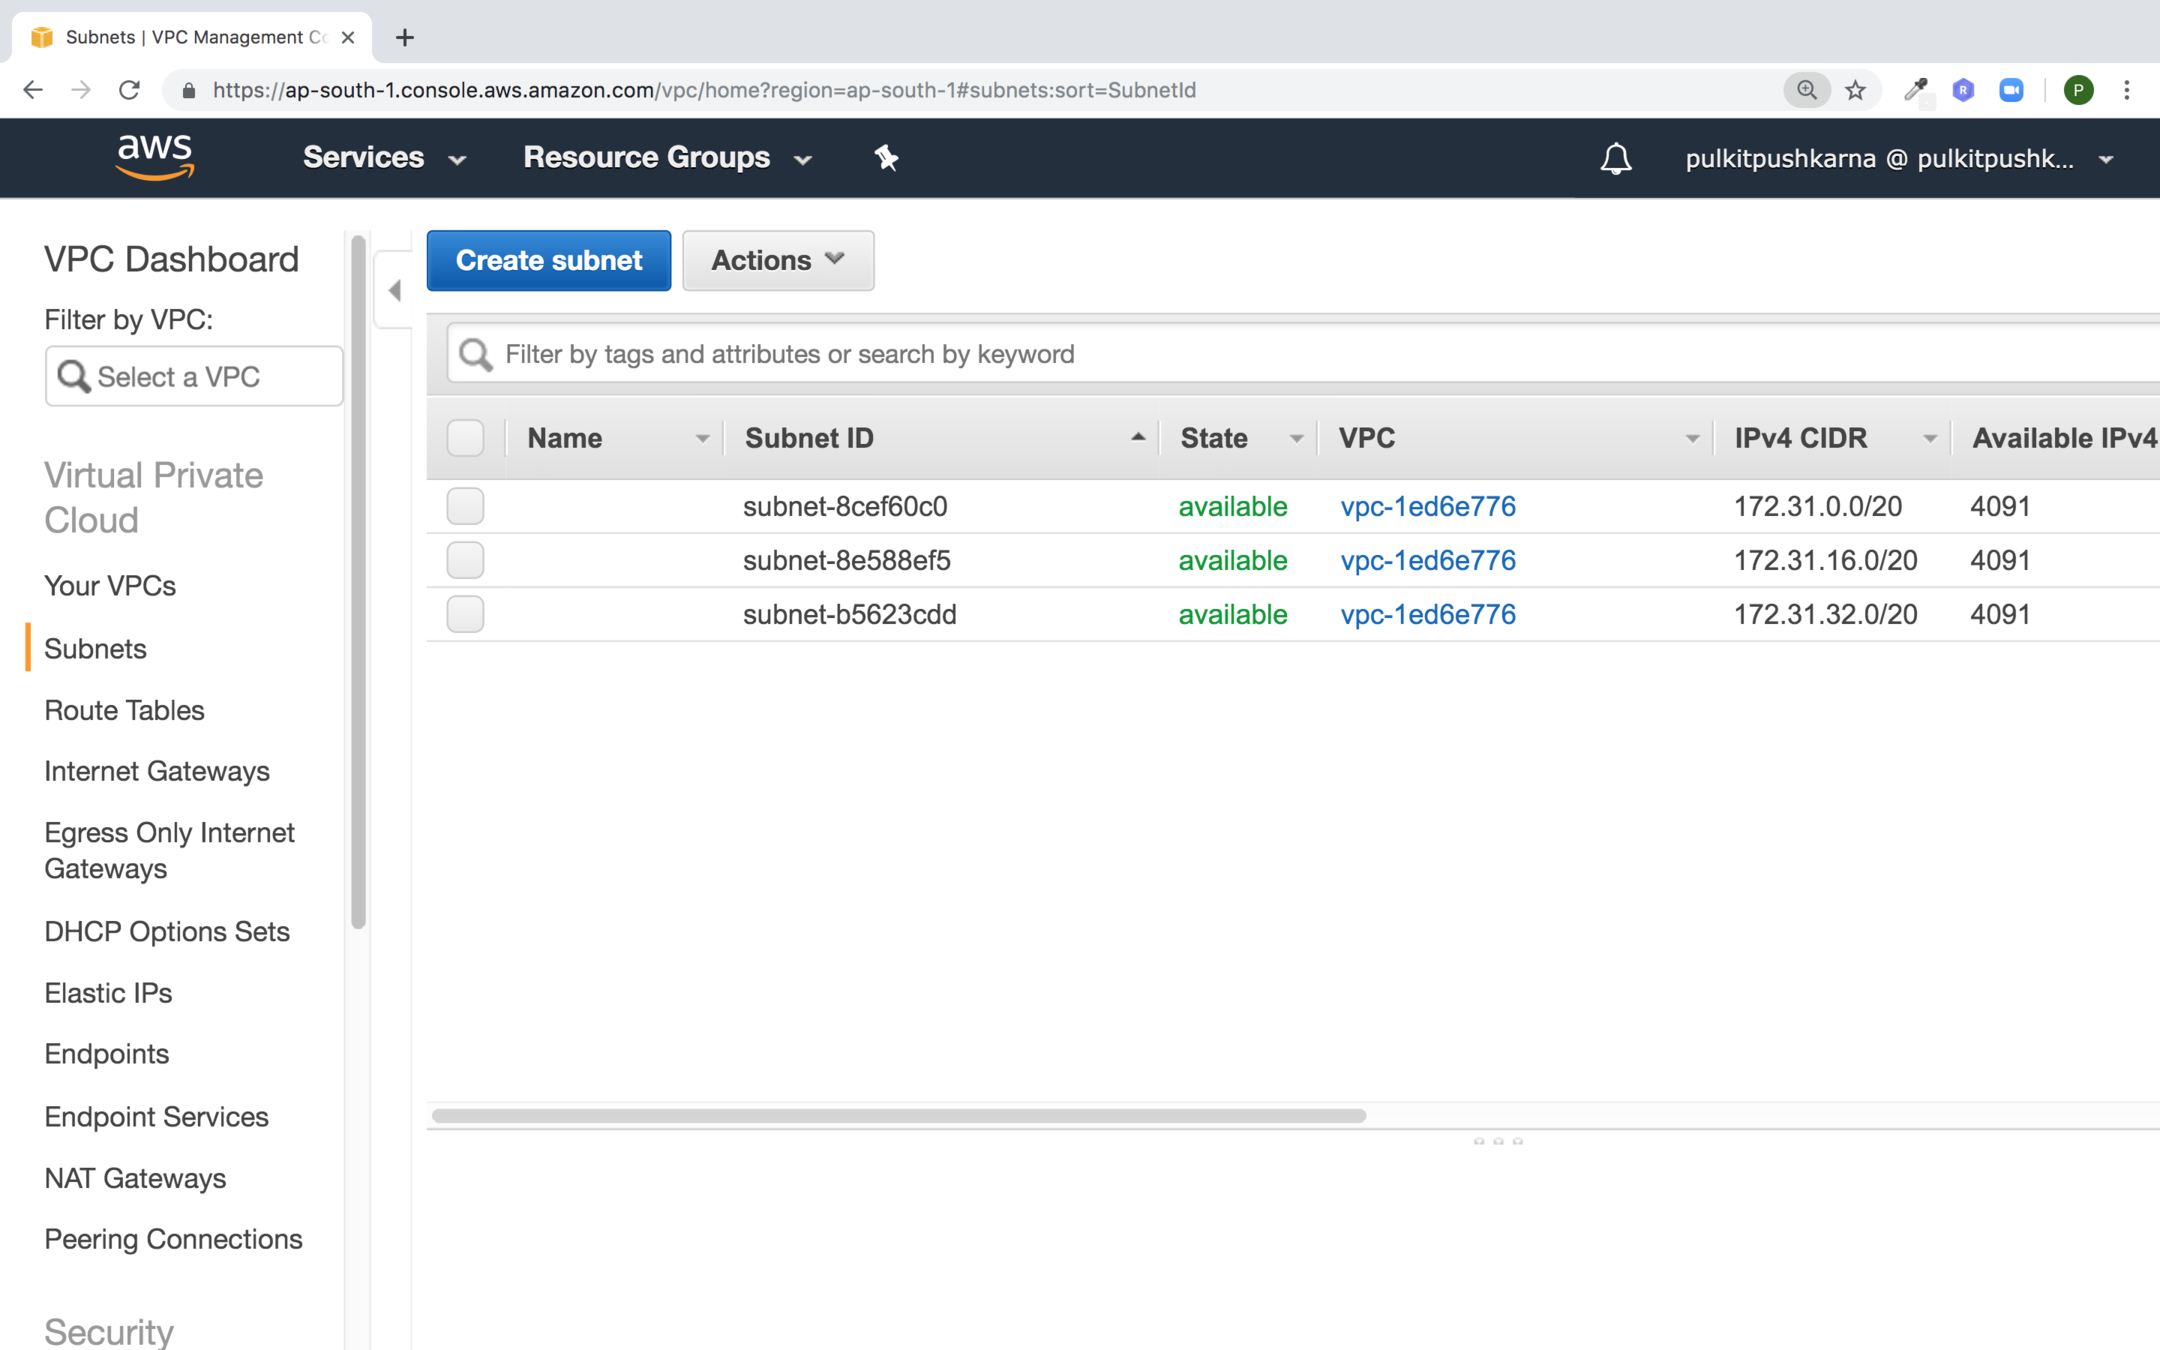
Click on Create subnet
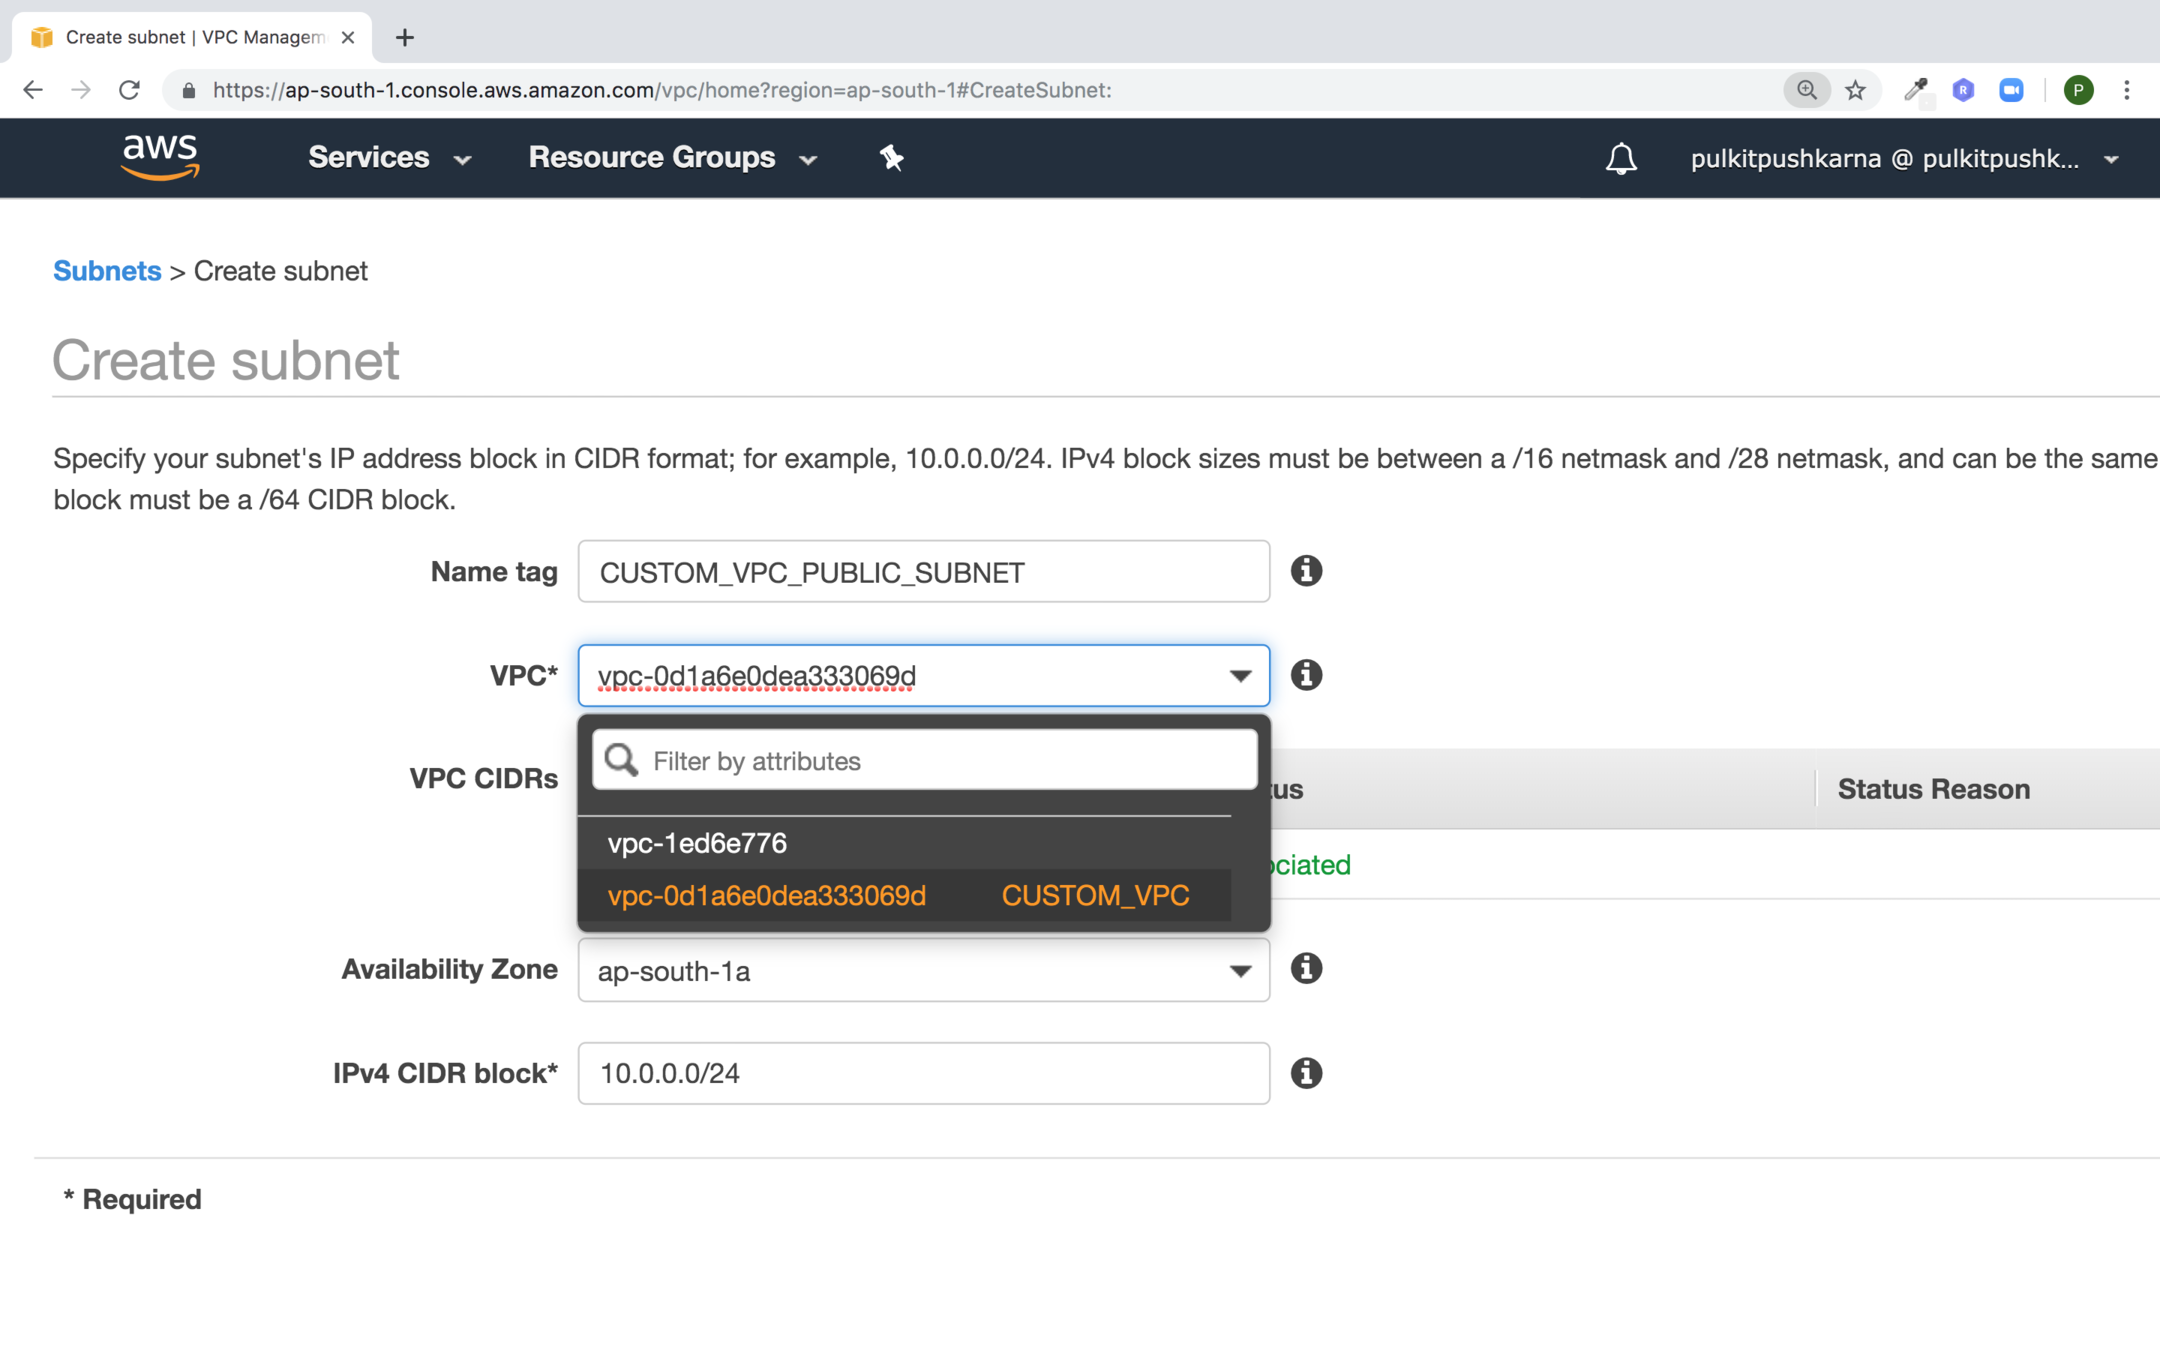
Enter the details for the subnet and click on Create
Create one more private Subnet
Internet Gateway
- An internet gateway is a horizontally scalable, redundant, and highly available VPC component that allows communication between instances between you VPC and the internet.
- It therefore imposes no availability risks or bandwidth constraints on your network traffic.
- Only one internet gateway can be attached to a VPC
Internet Gateway Requirements
- An internet gateway must be attached with your VPC.
- All instances in your subnet must have either a public IP address or an elastic IP address.
- Your subnet's route table must point to the internet gateway.
- All Network access control and security group rules must be configured to allow the required traffic to and from your instance
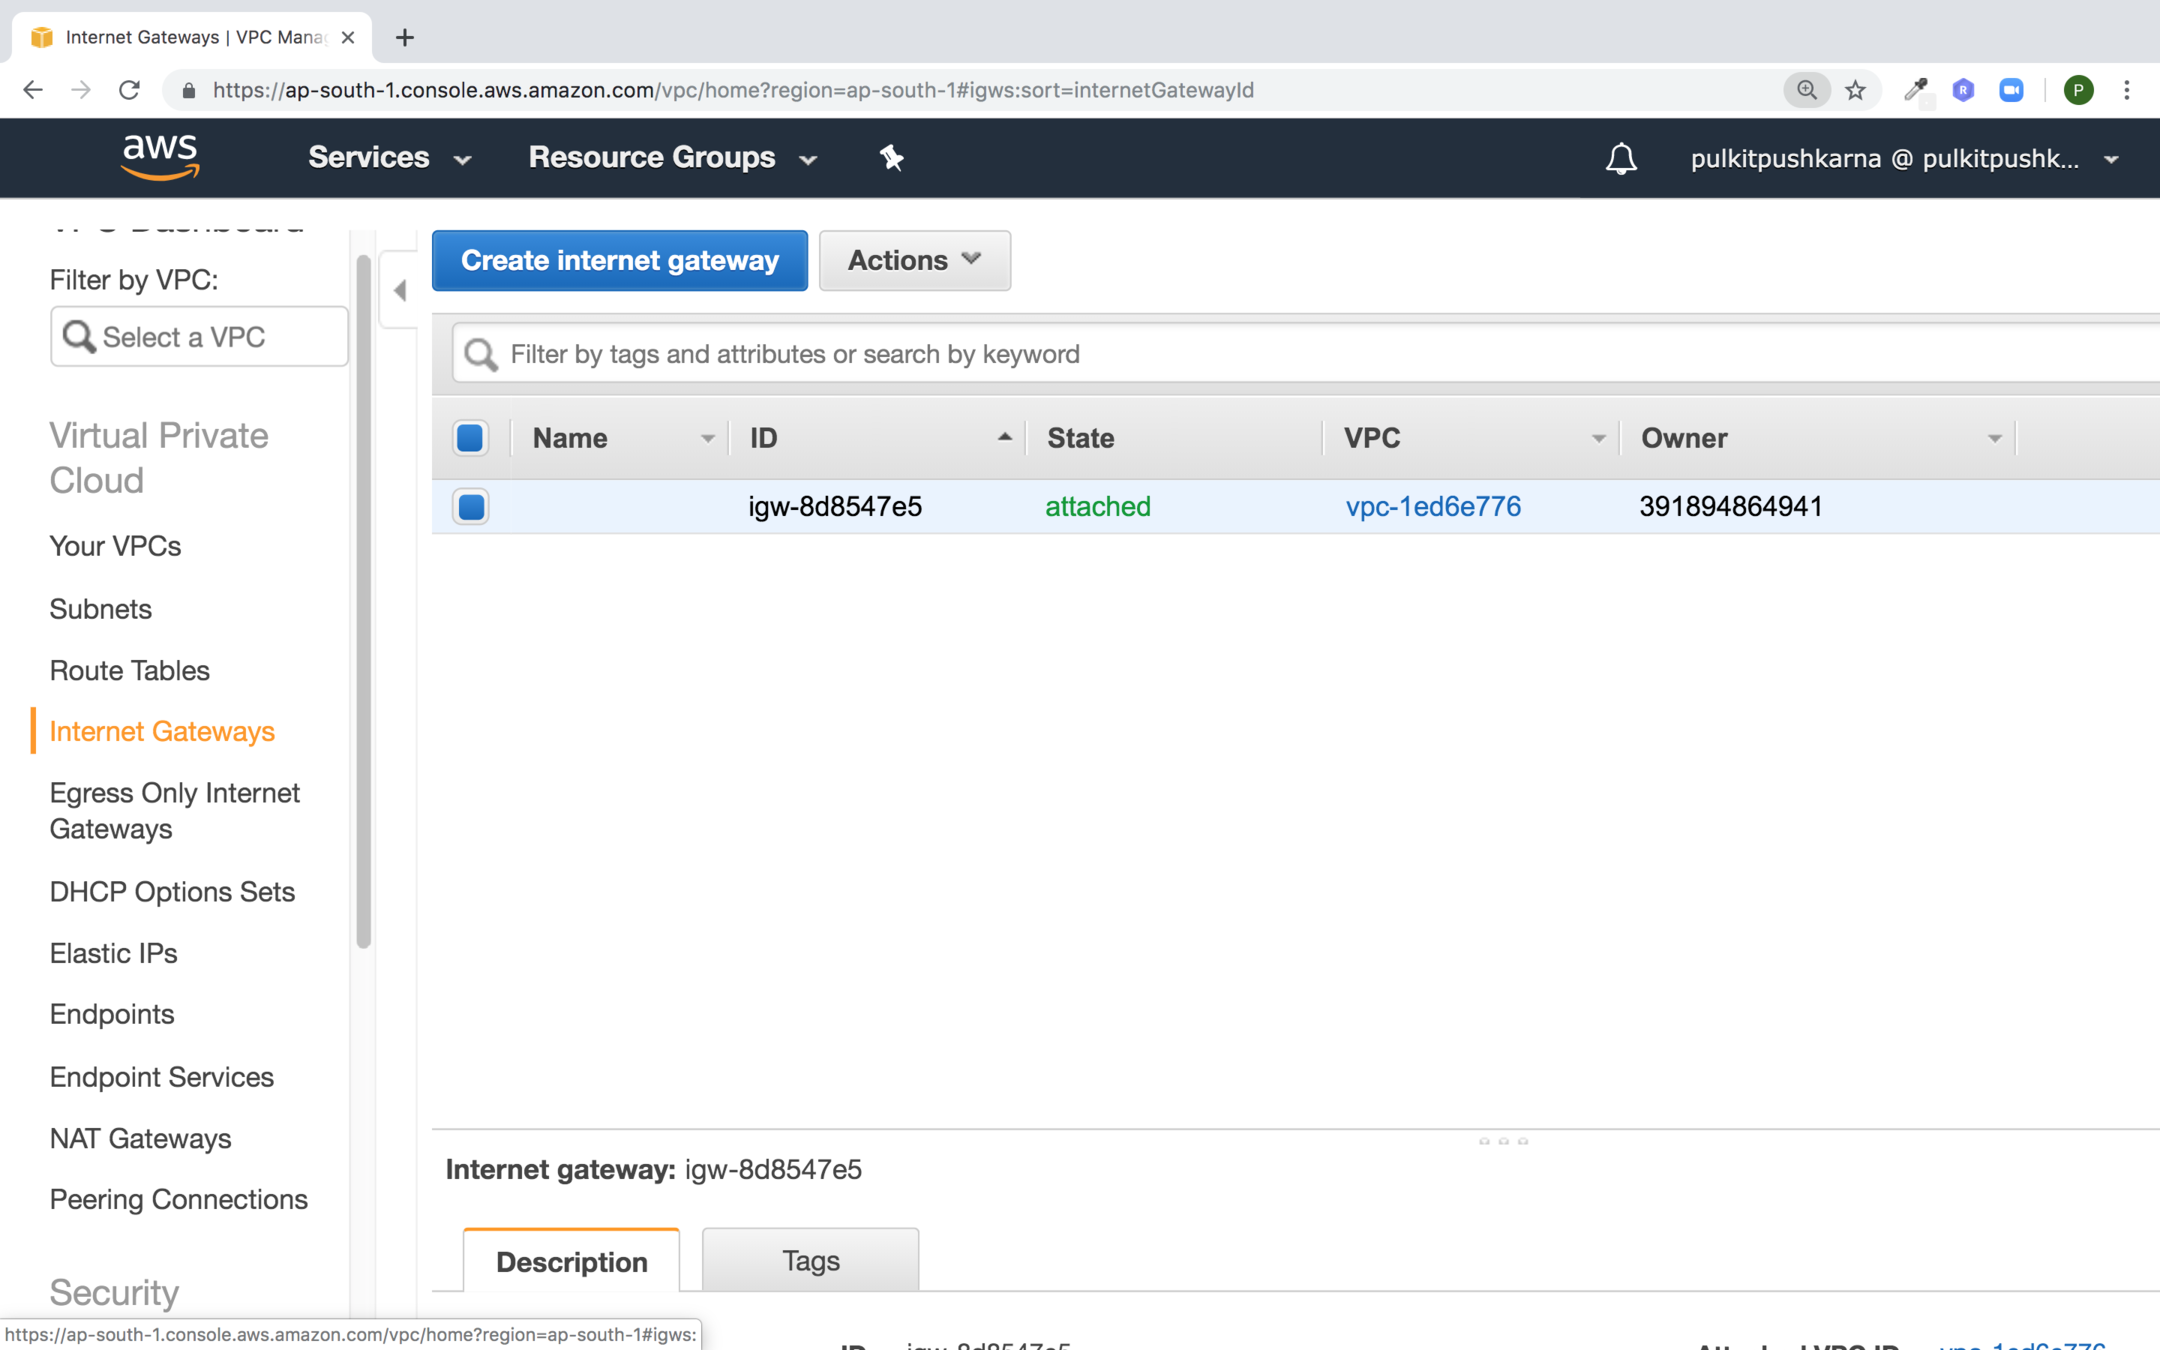
Go to Internet Gateway section and hit Create internet gateway
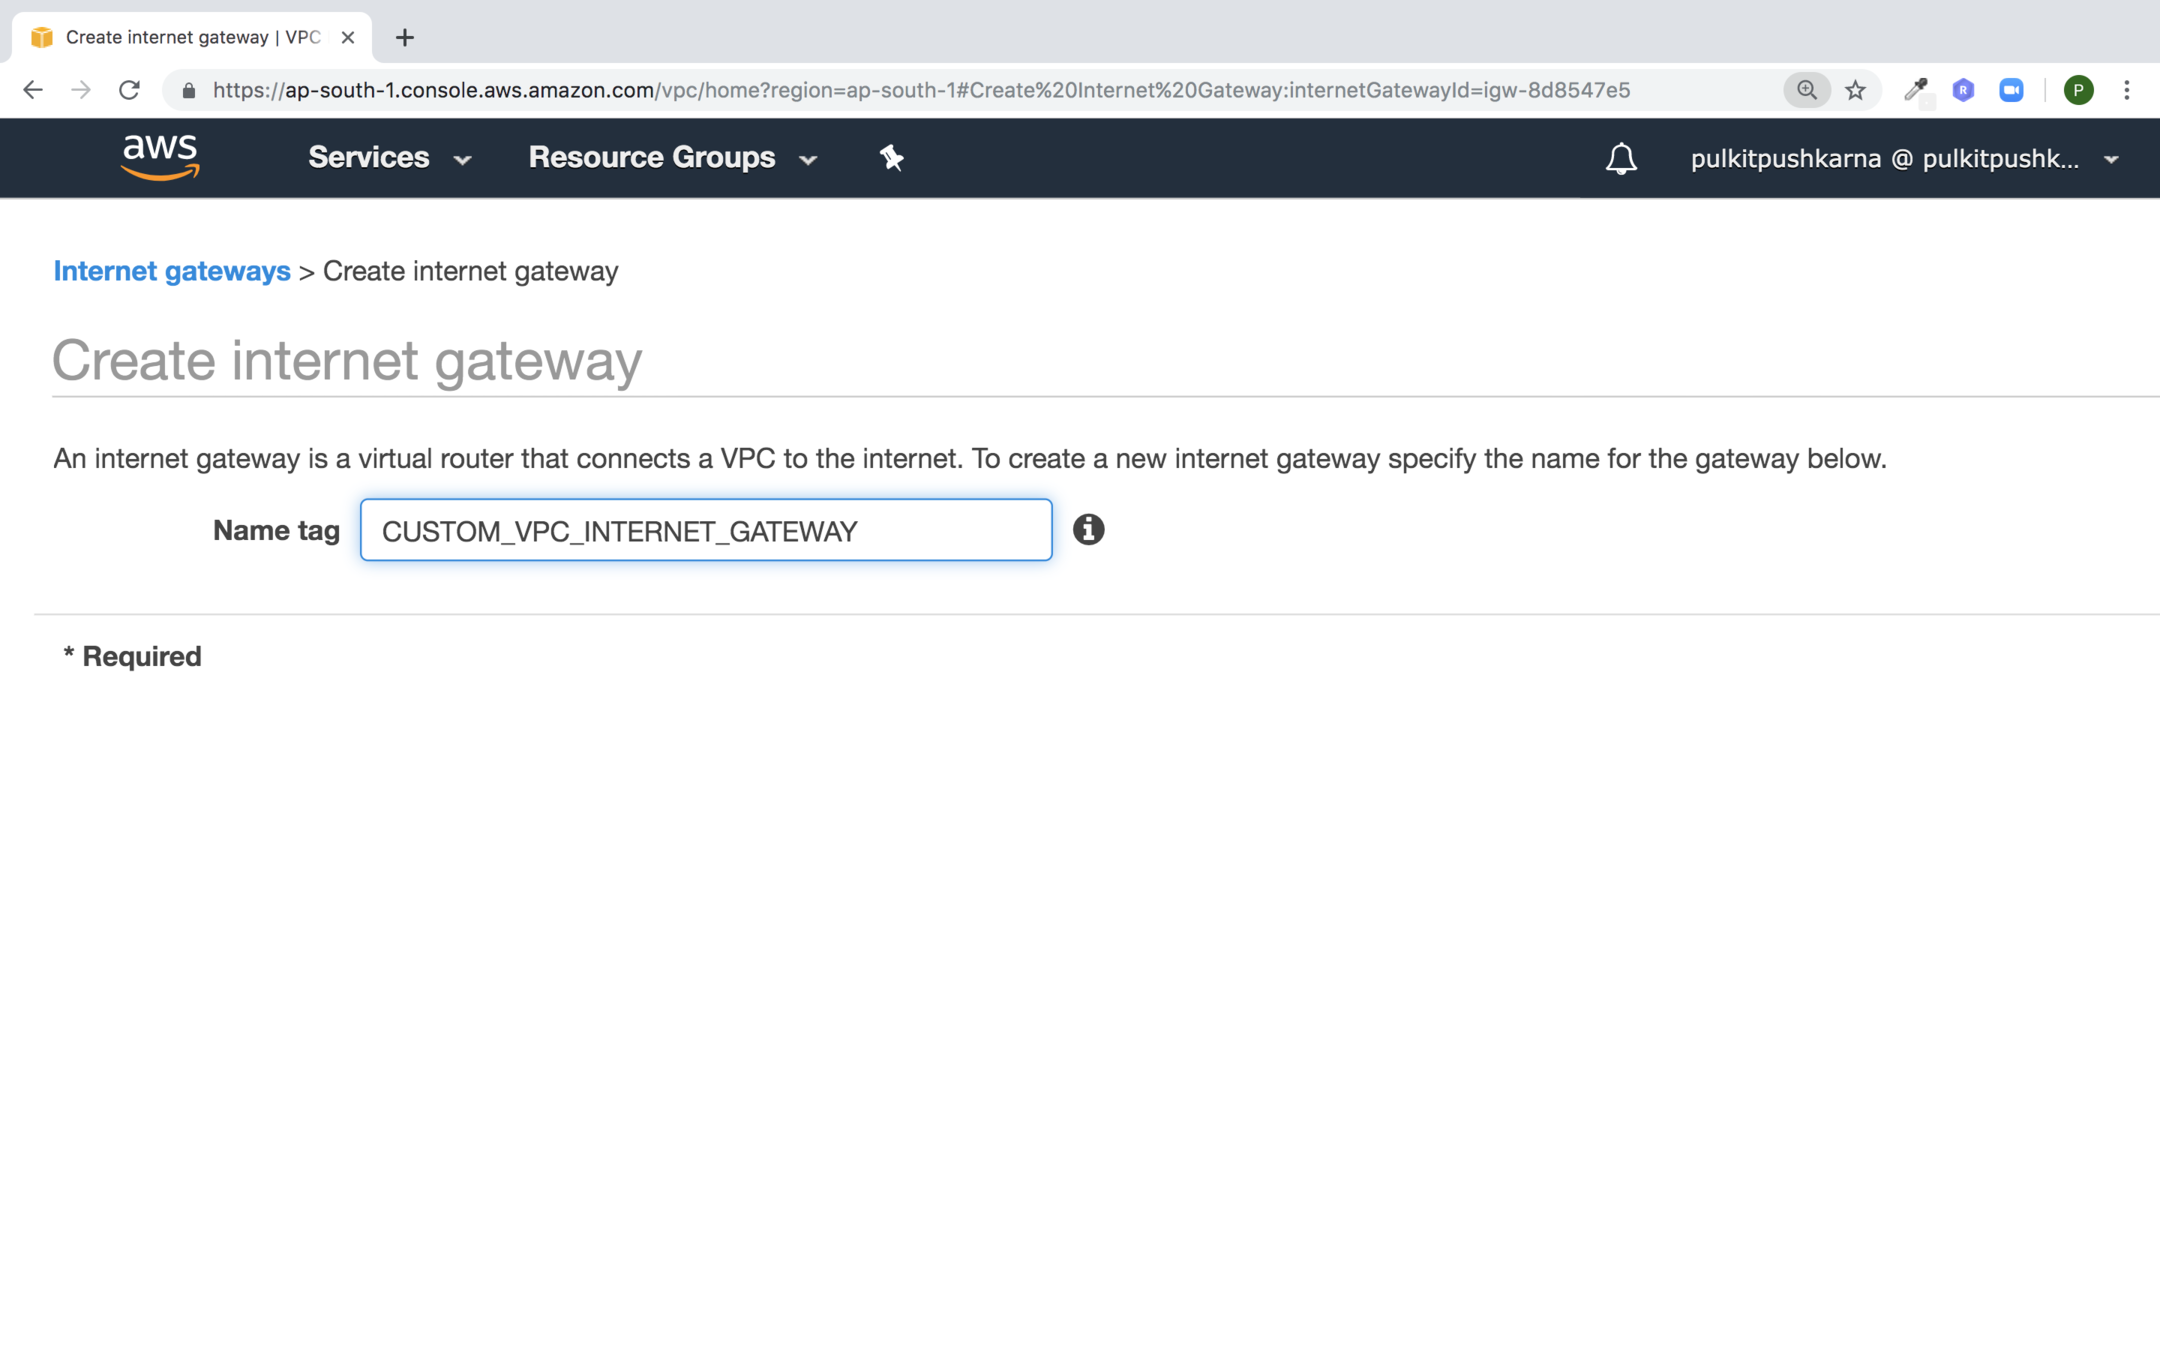
Enter the Name of Internet Gateway and Click on Create
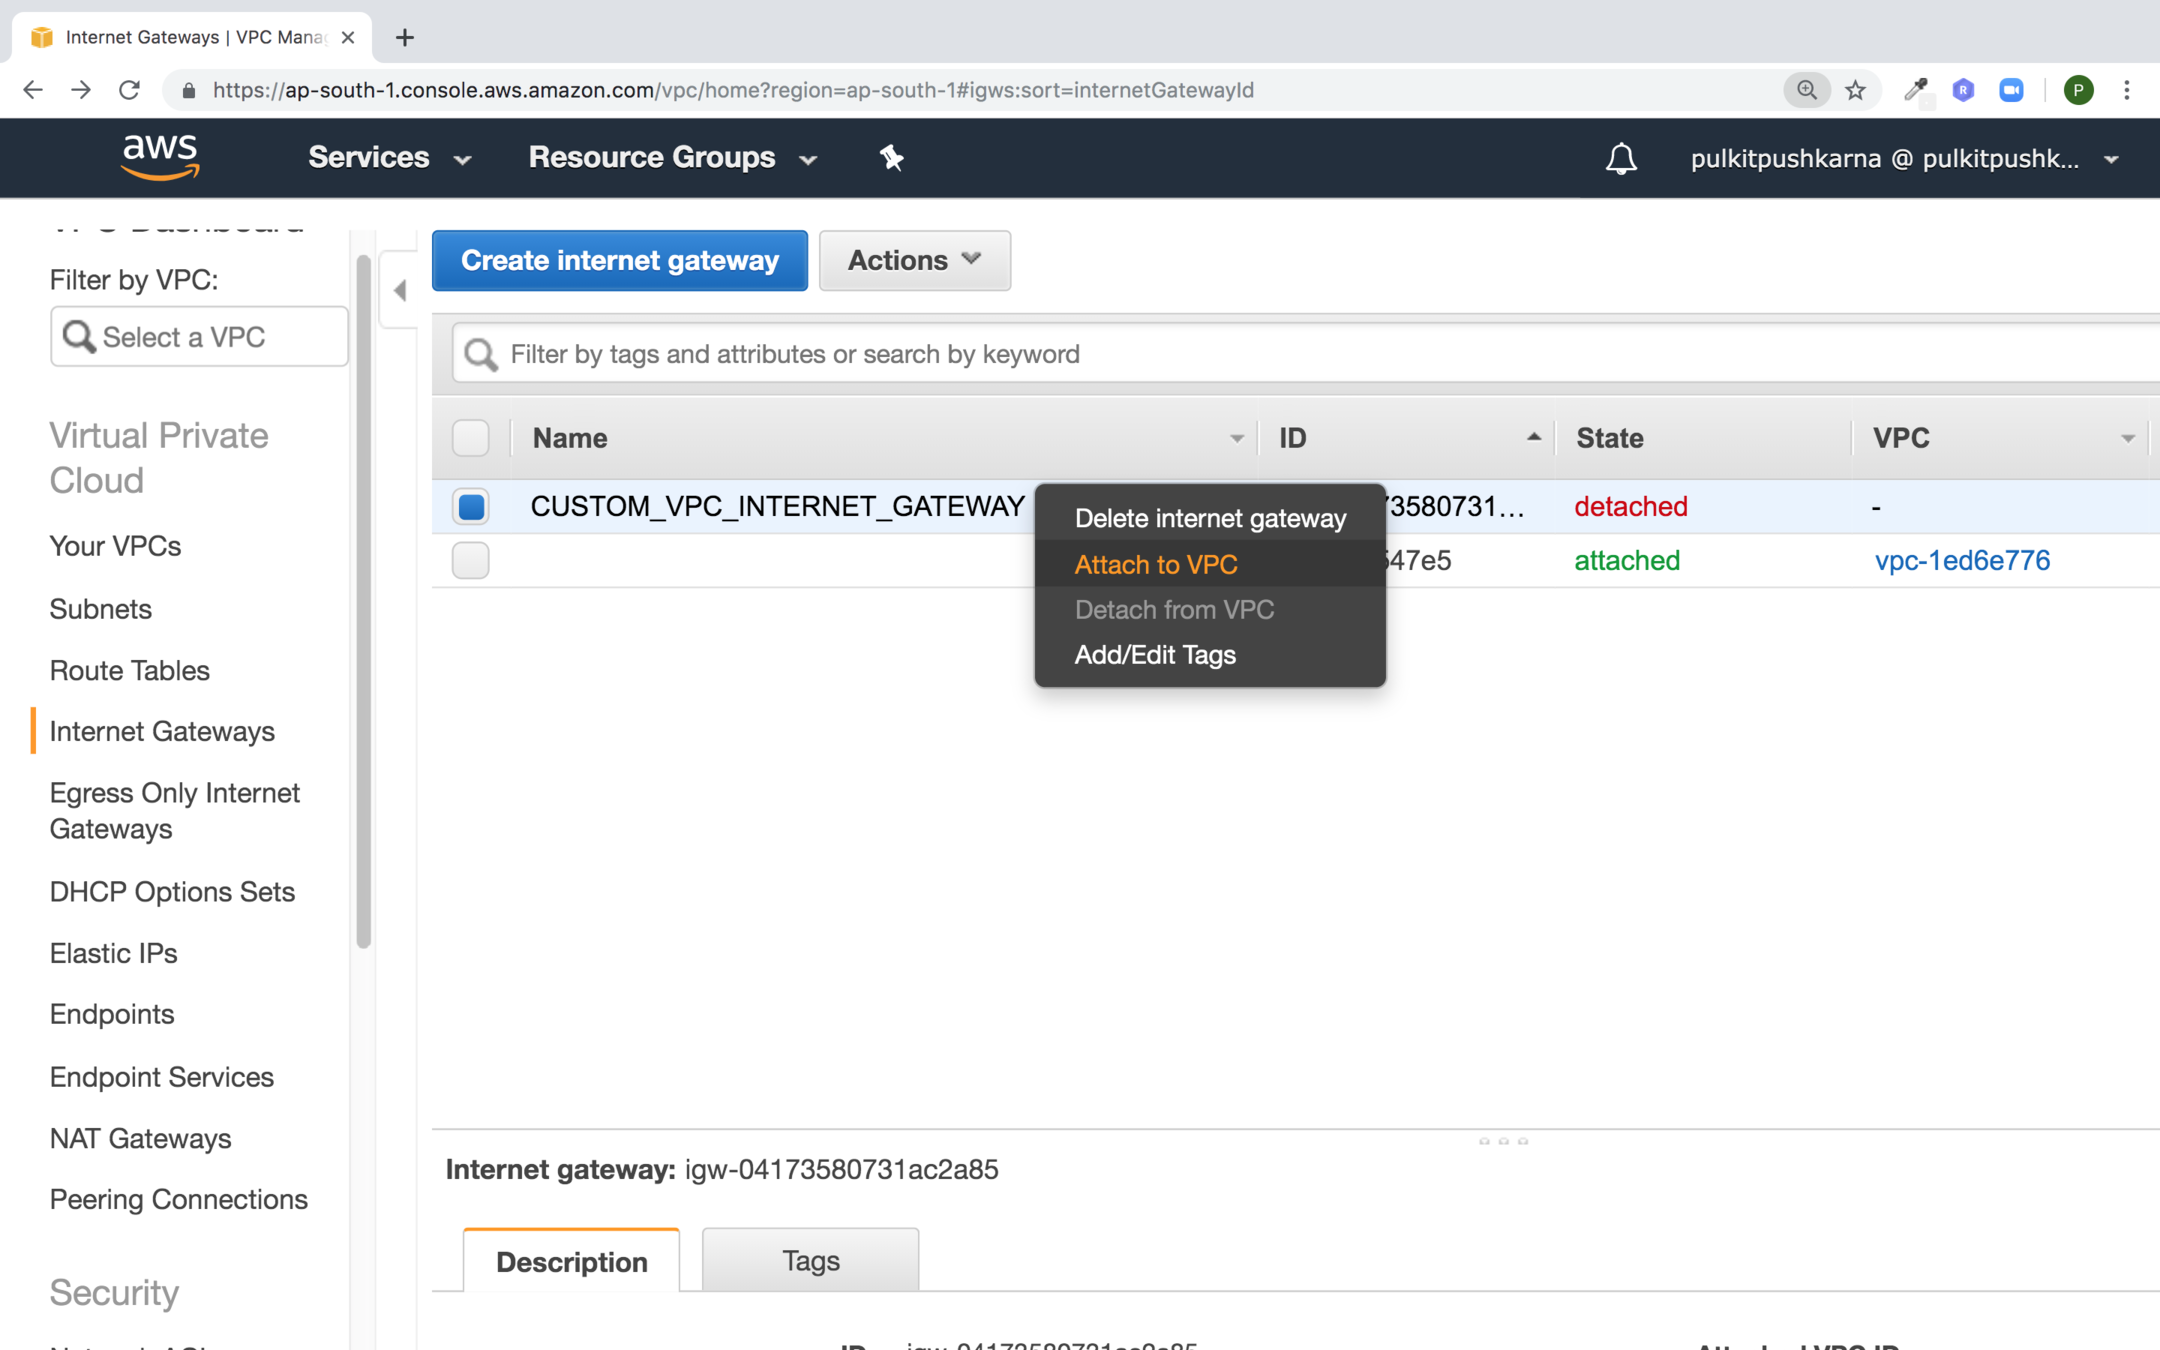
Right click on your internet Gateway and Attach to VPC
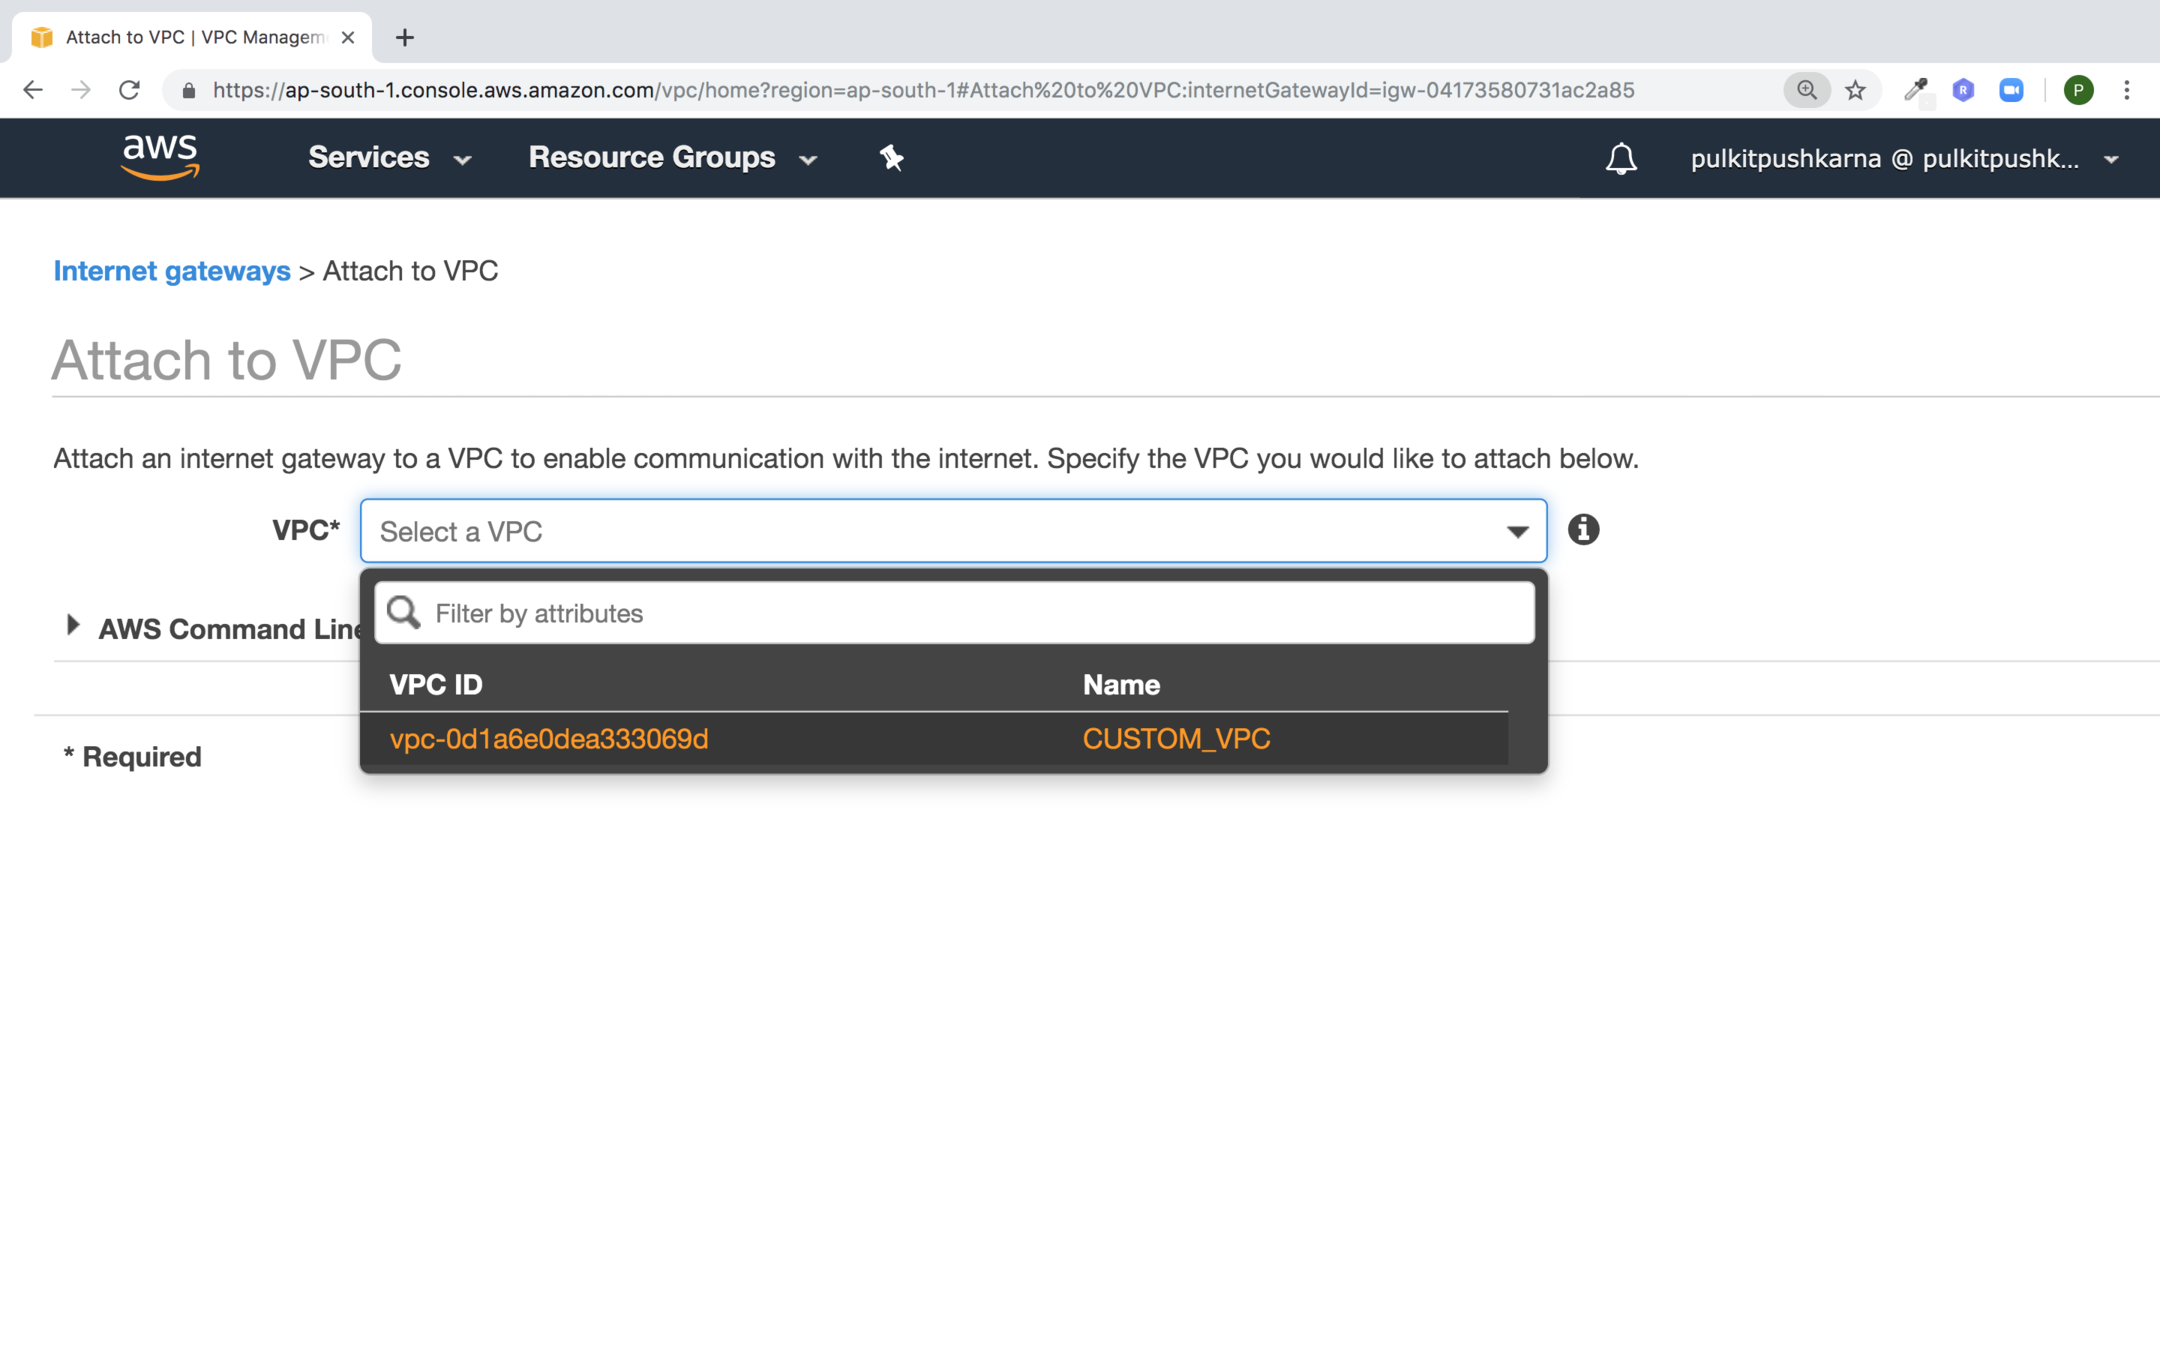
select the VPC for Internet Gateway
Route Table
- A route table contains a set of rules called routes which are used to determine where network traffice is directed.
- Each subnet in you VPC must be associated with a route table; the tables controls the routing for the subnet.
- A subnet can only be associated with one route table at a time, but you can associate multiple subnets with the same route table
- Every VPC has a default route table.
- It is a good practice to create a new route table to customise the network traffic of you VPC
- Edit the routes of route table and point it to internet(0.0.0.0/0) and set target to internet gateway.
- Associate the subnet to route table which you want to make public.
Creating Route table
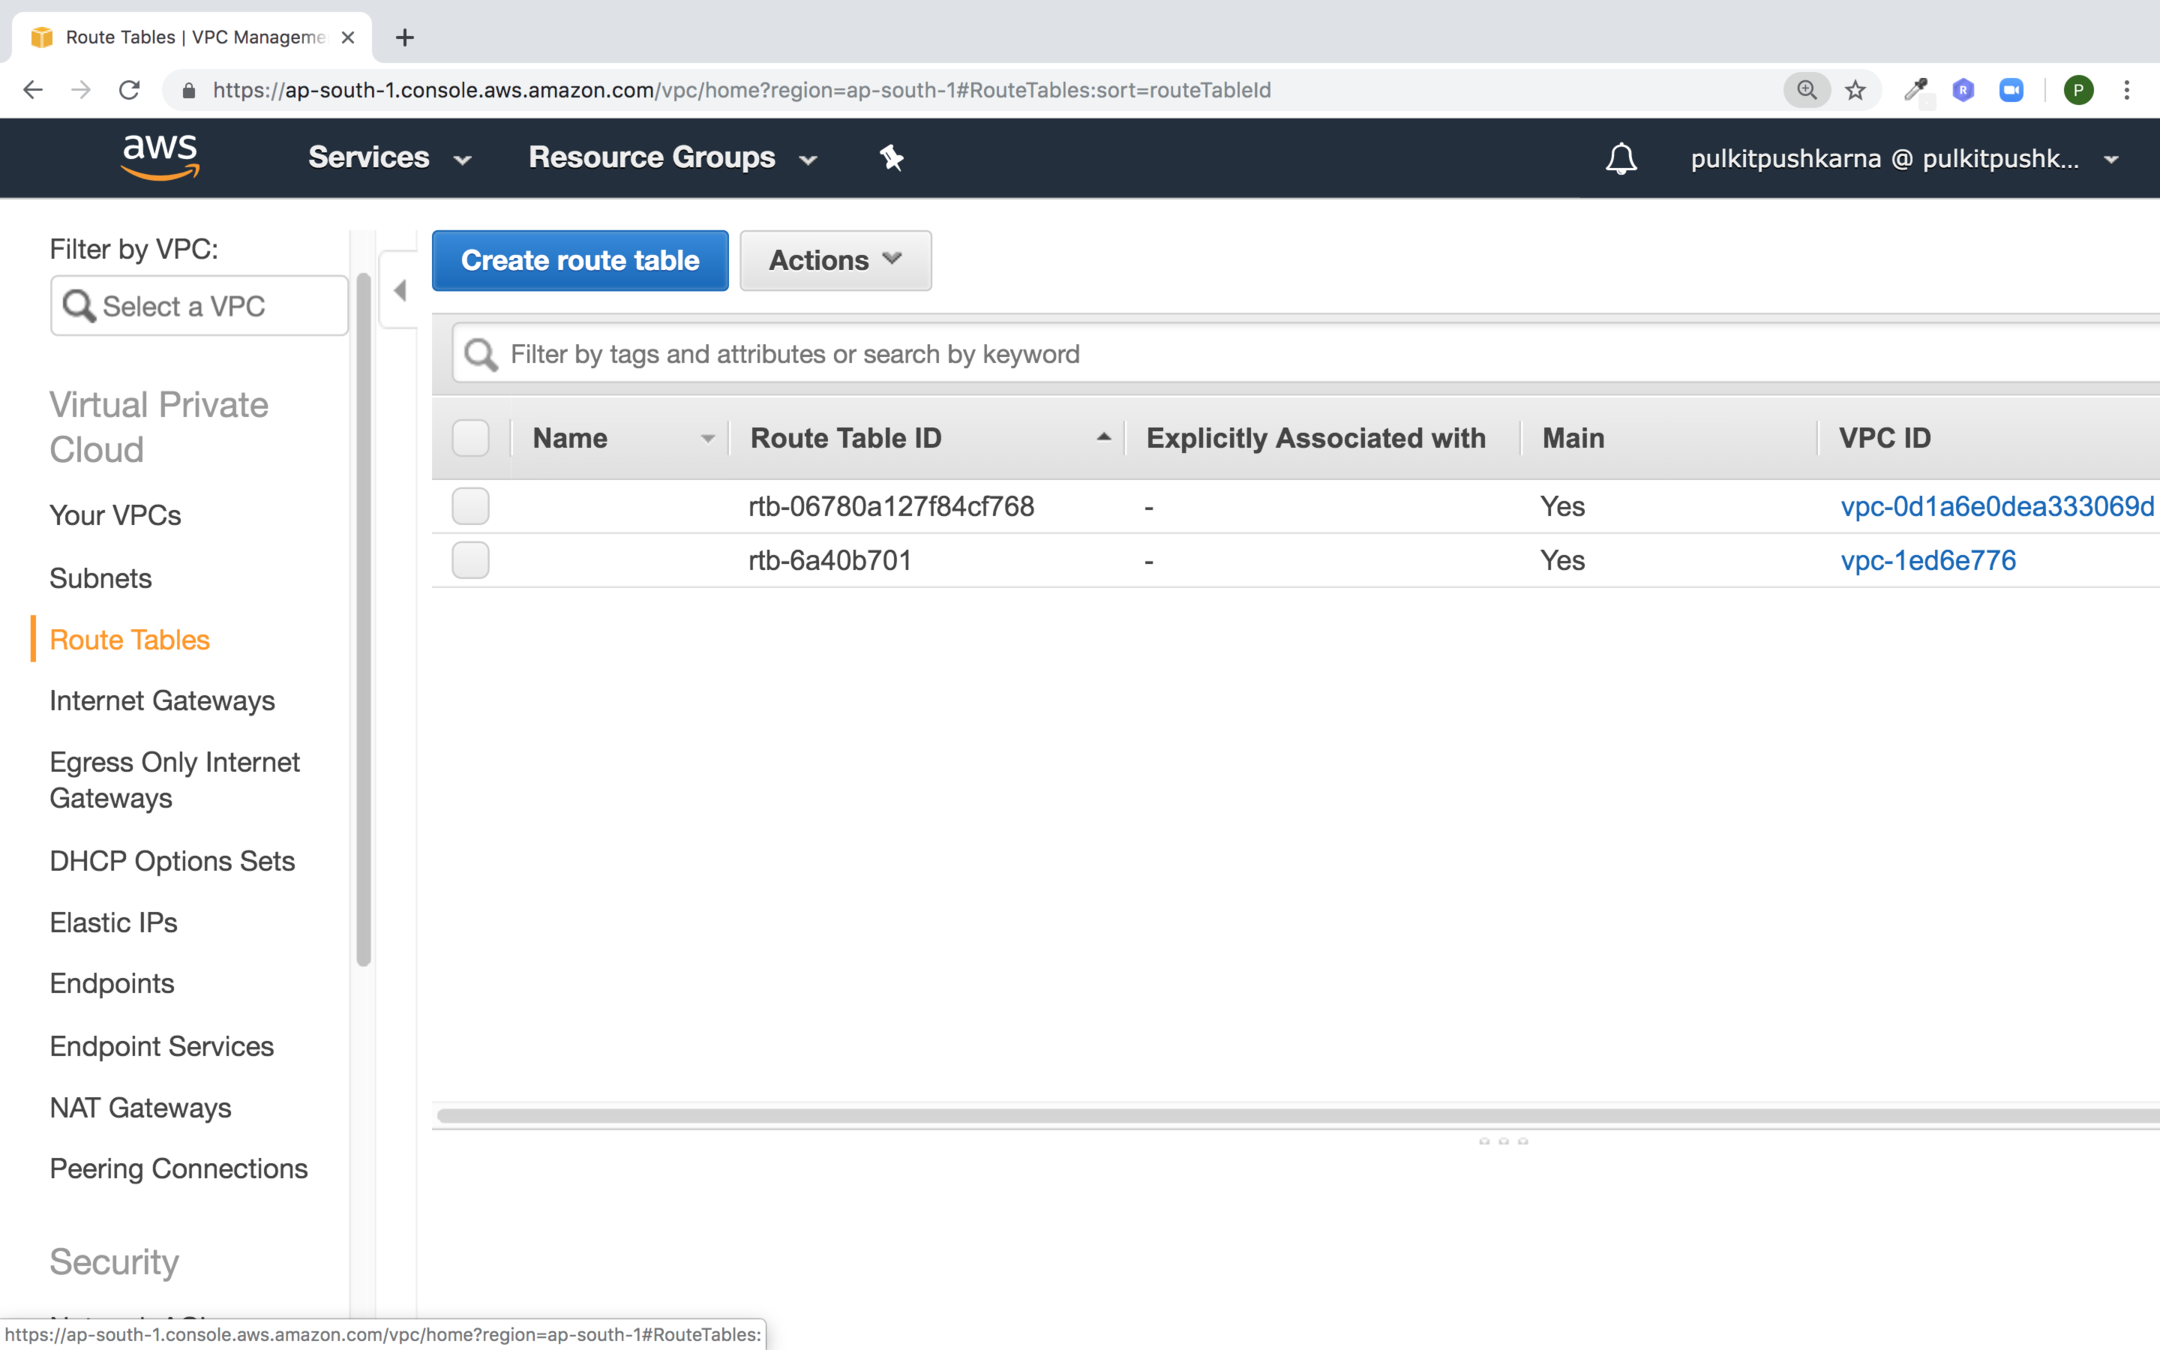
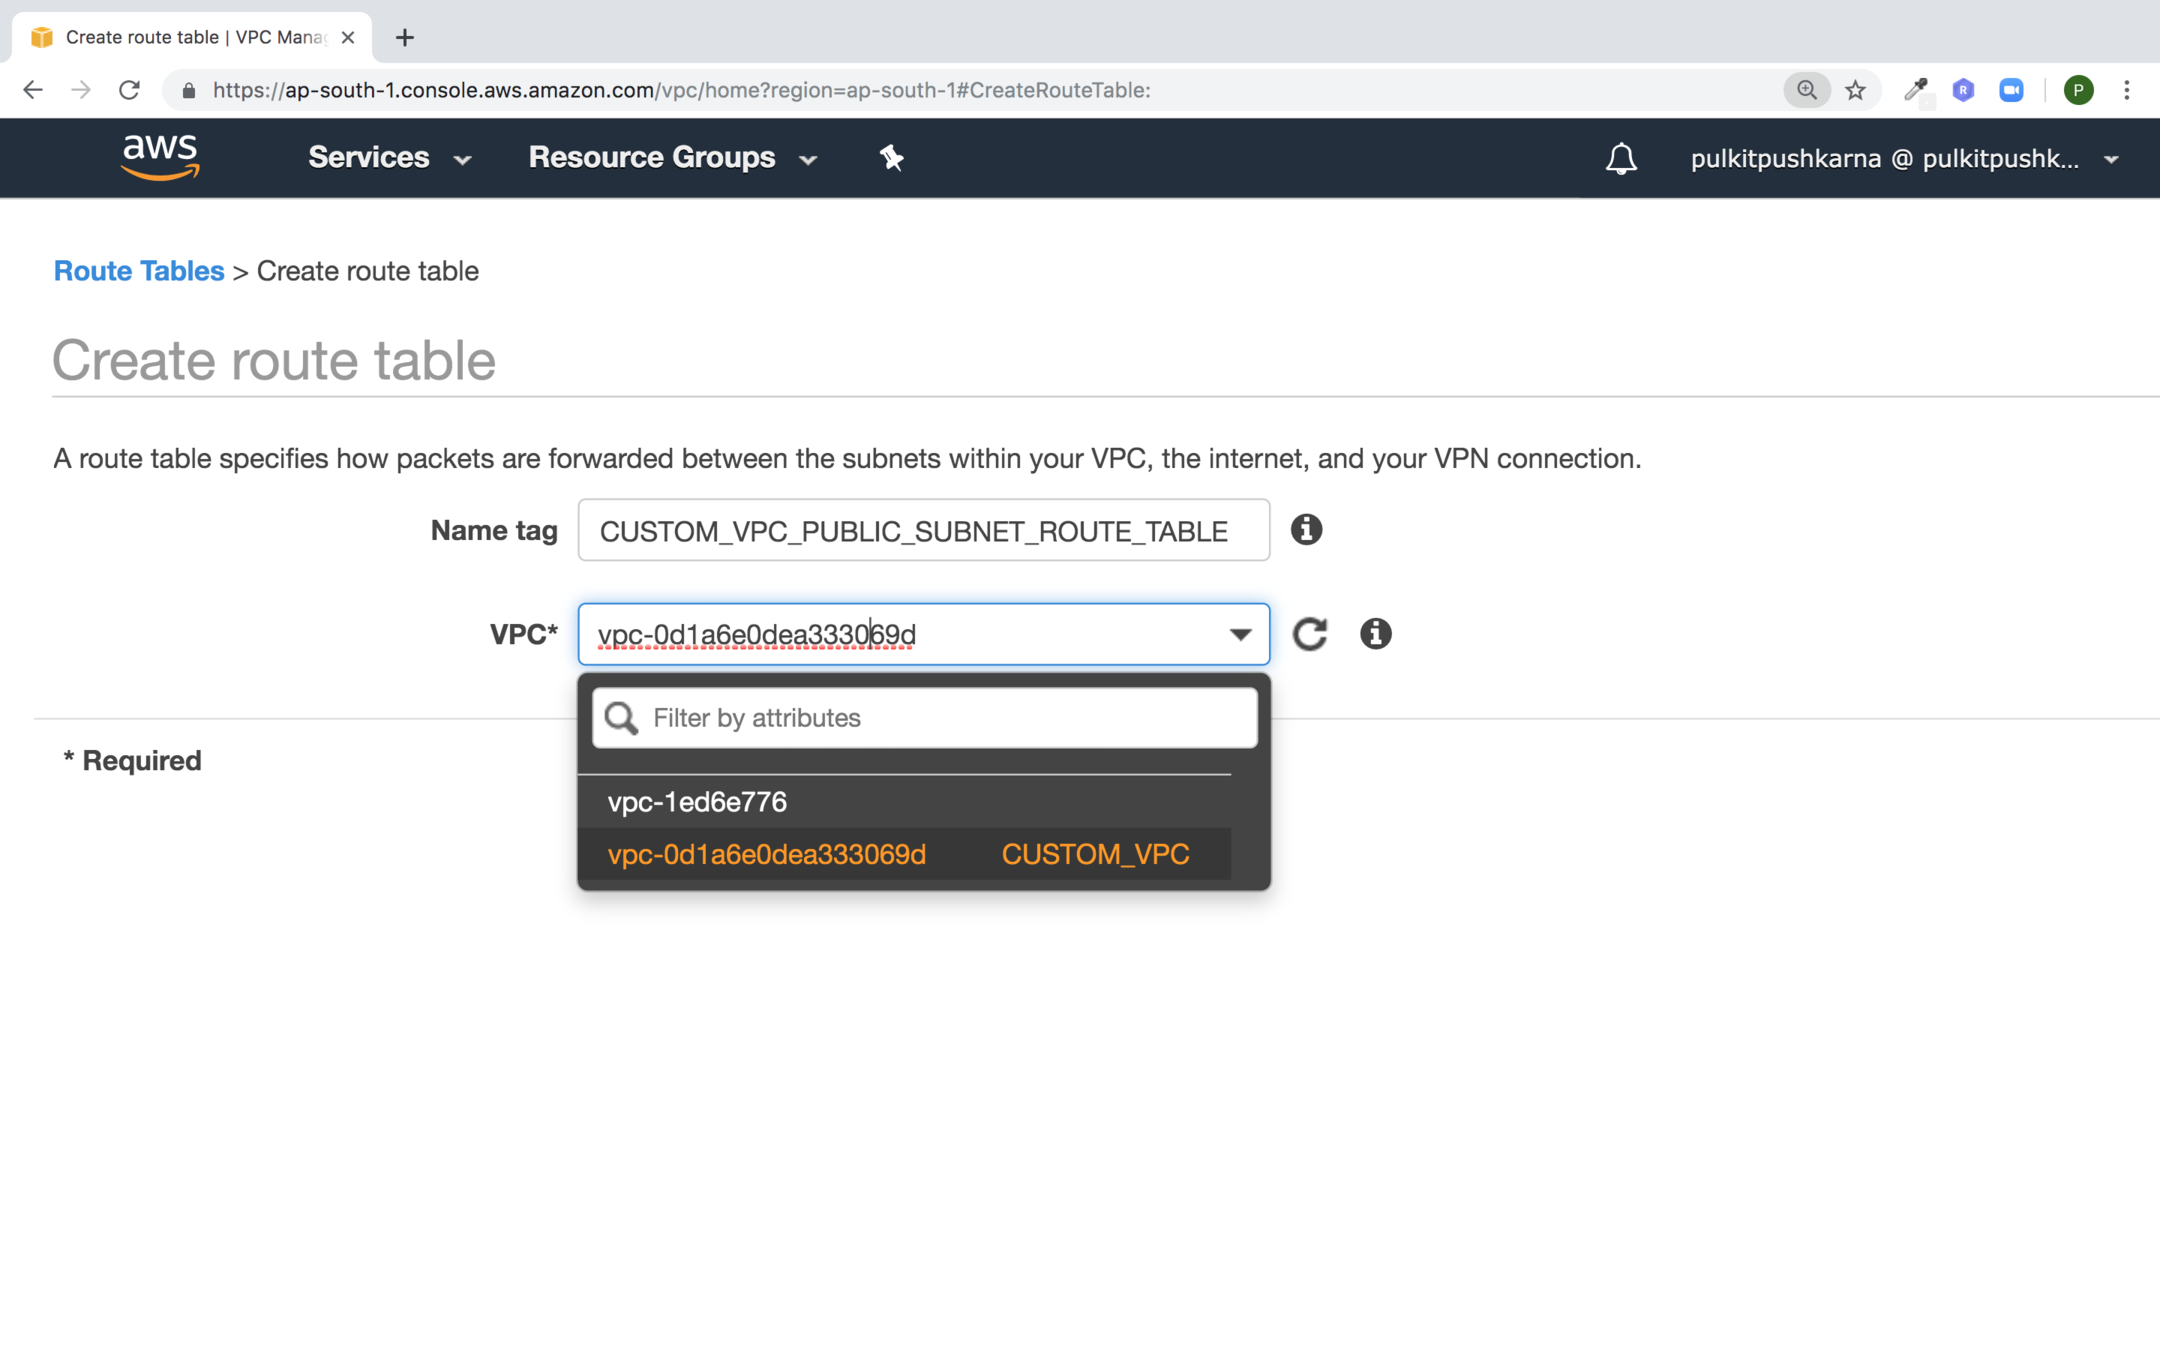
Fill the values for custom Route Table and select the VPC for route table and hit Create
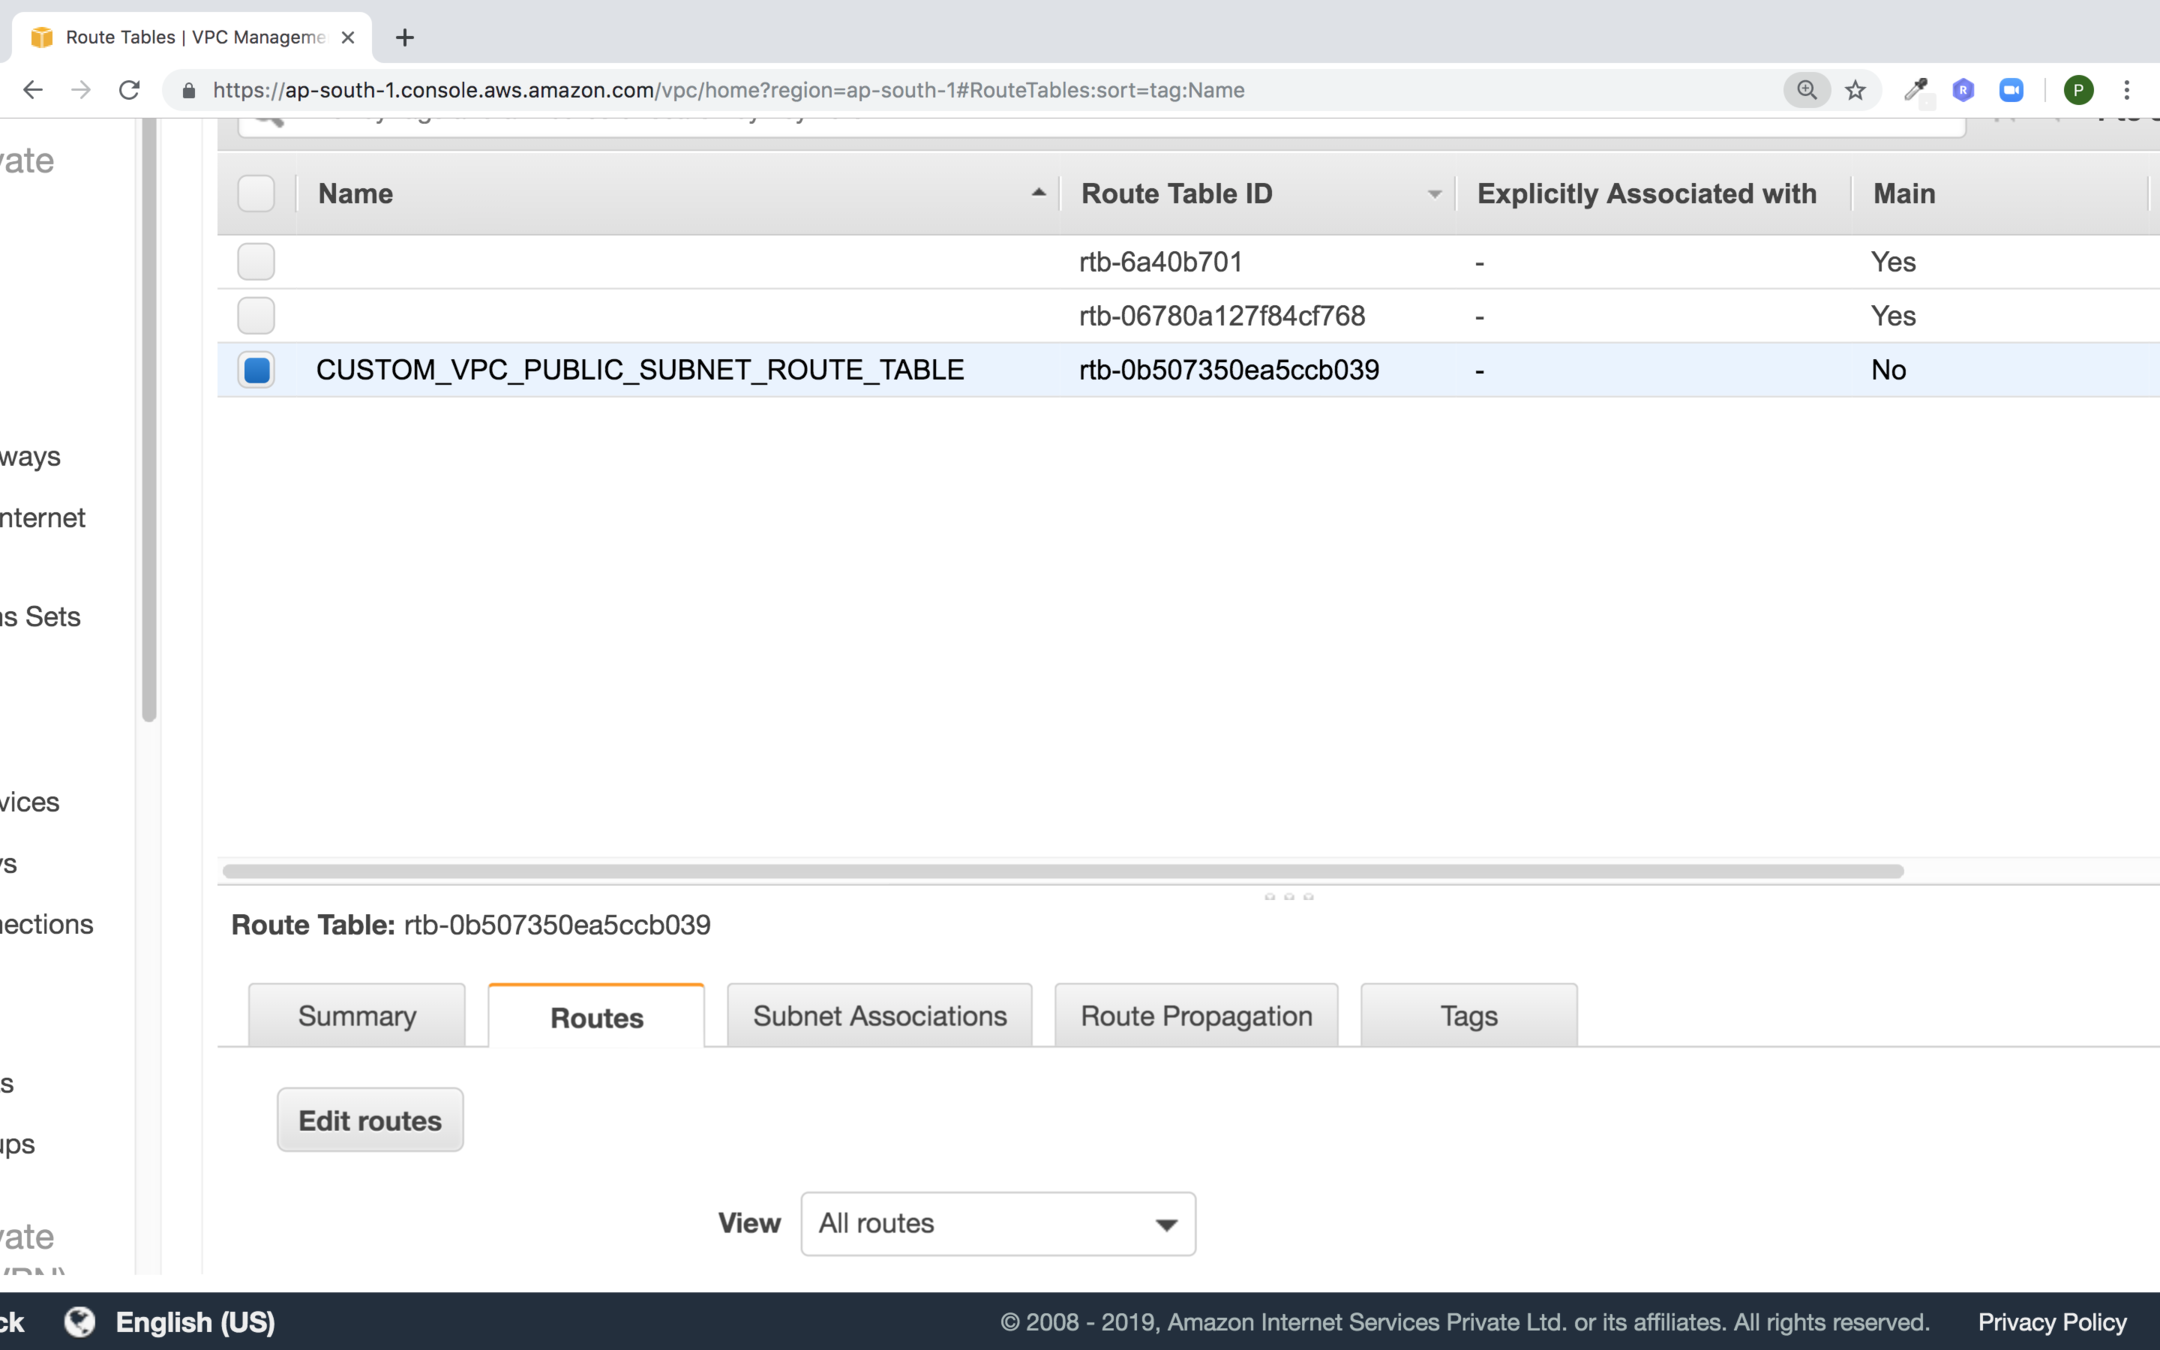
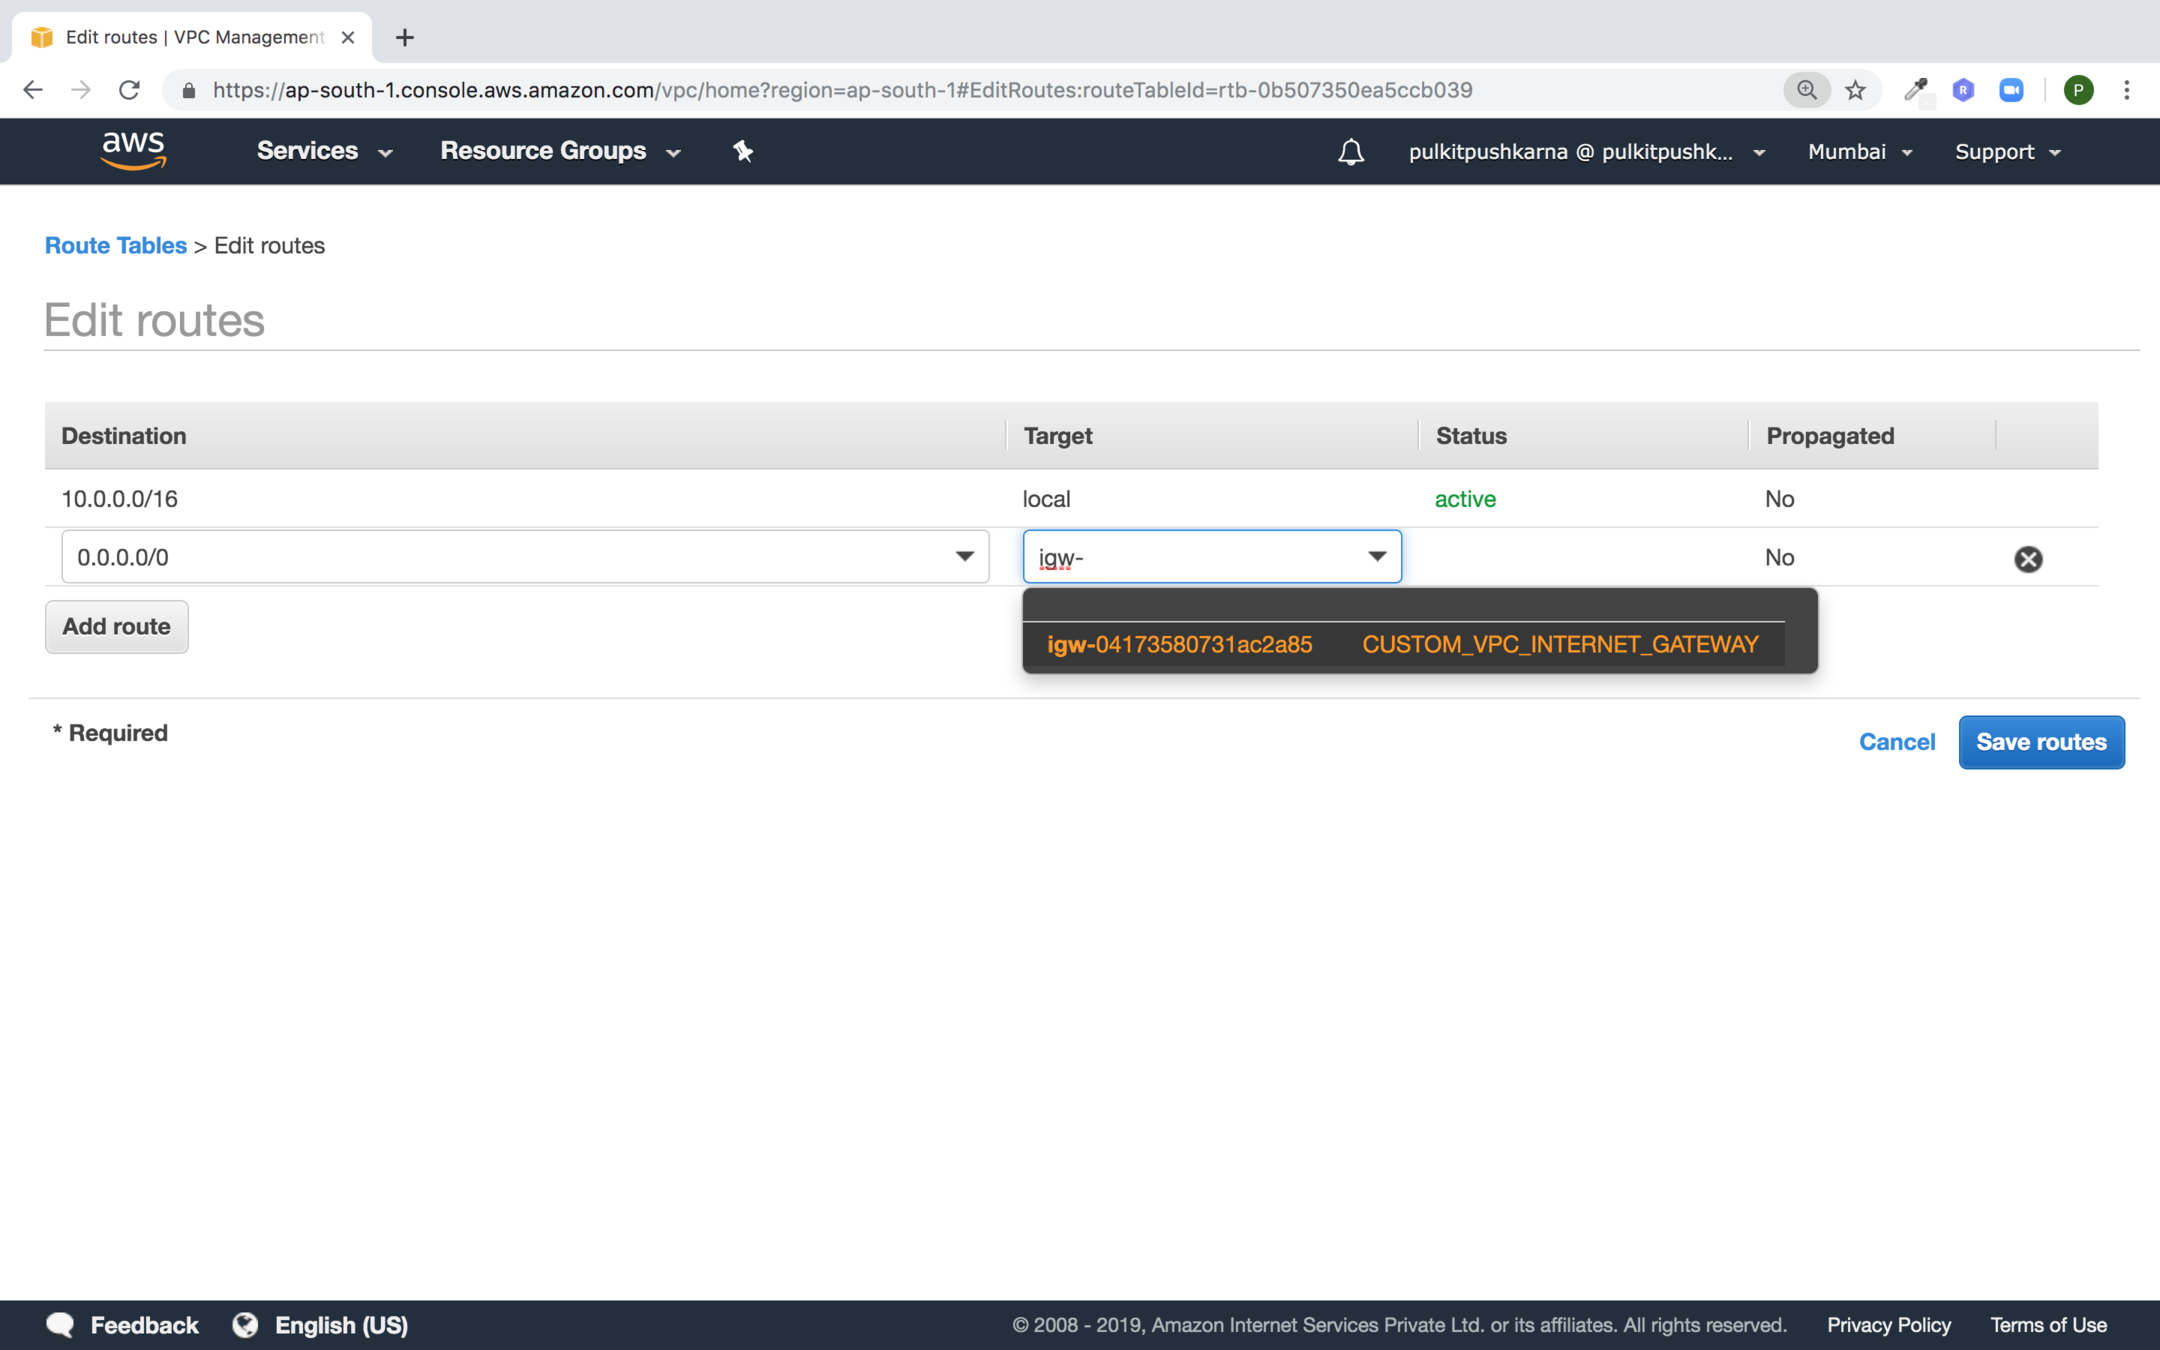
Change the routes of the route table by clicking on edit routes
Click on Add Route. Set destination to 0.0.0.0/0 and source to the internet gateway and hit create
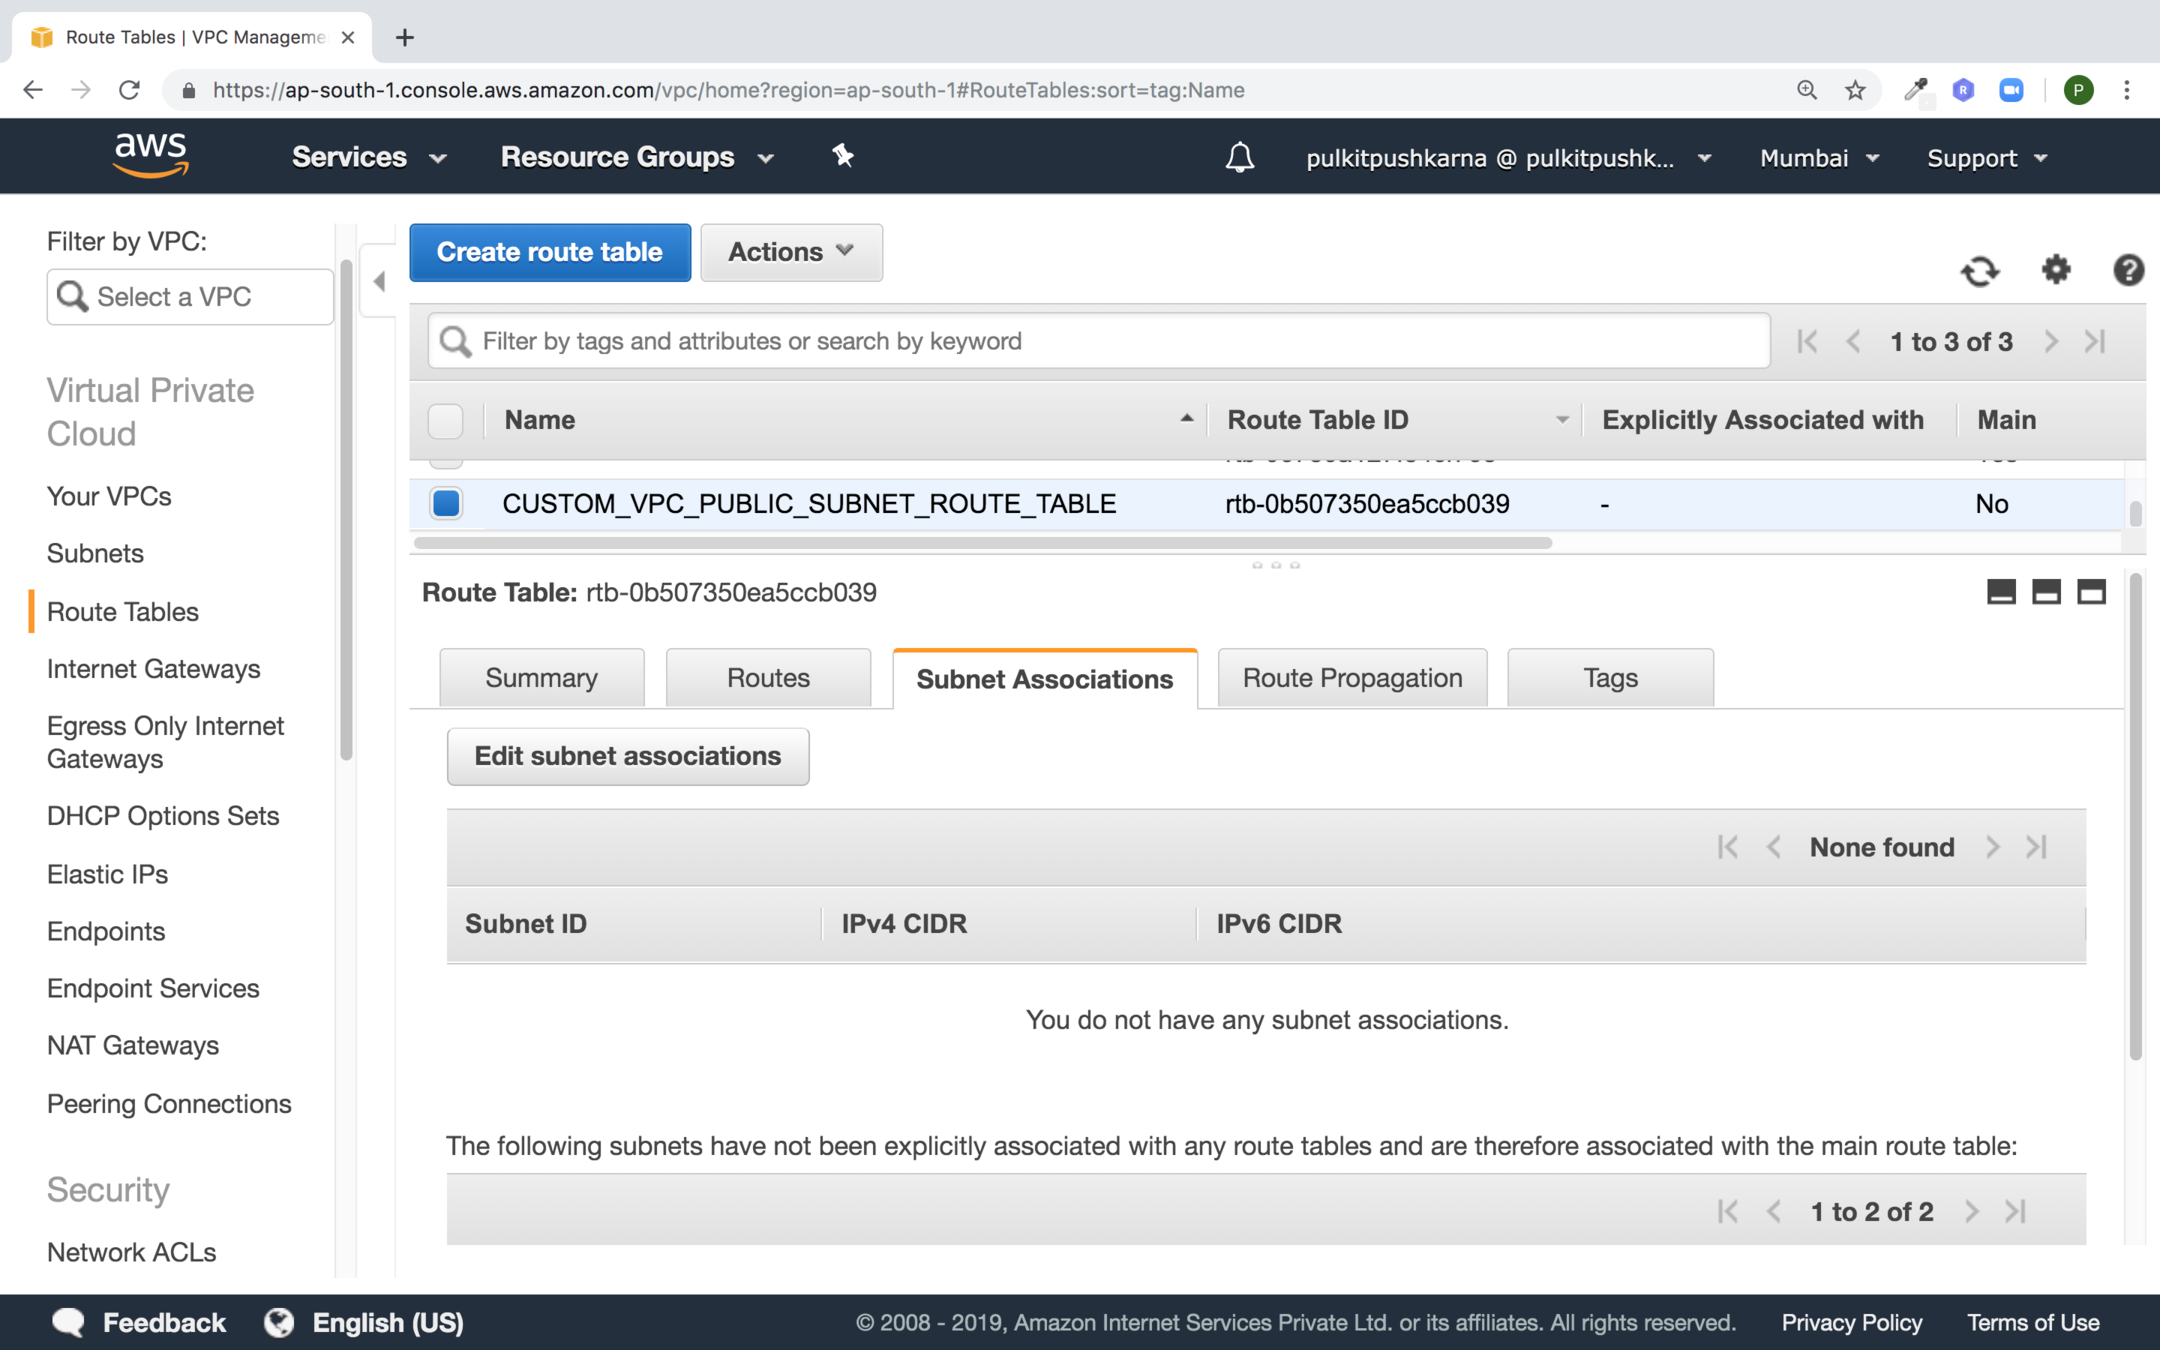
Select the Route table and in the subnet associations tab click on Edit subnet assosiations
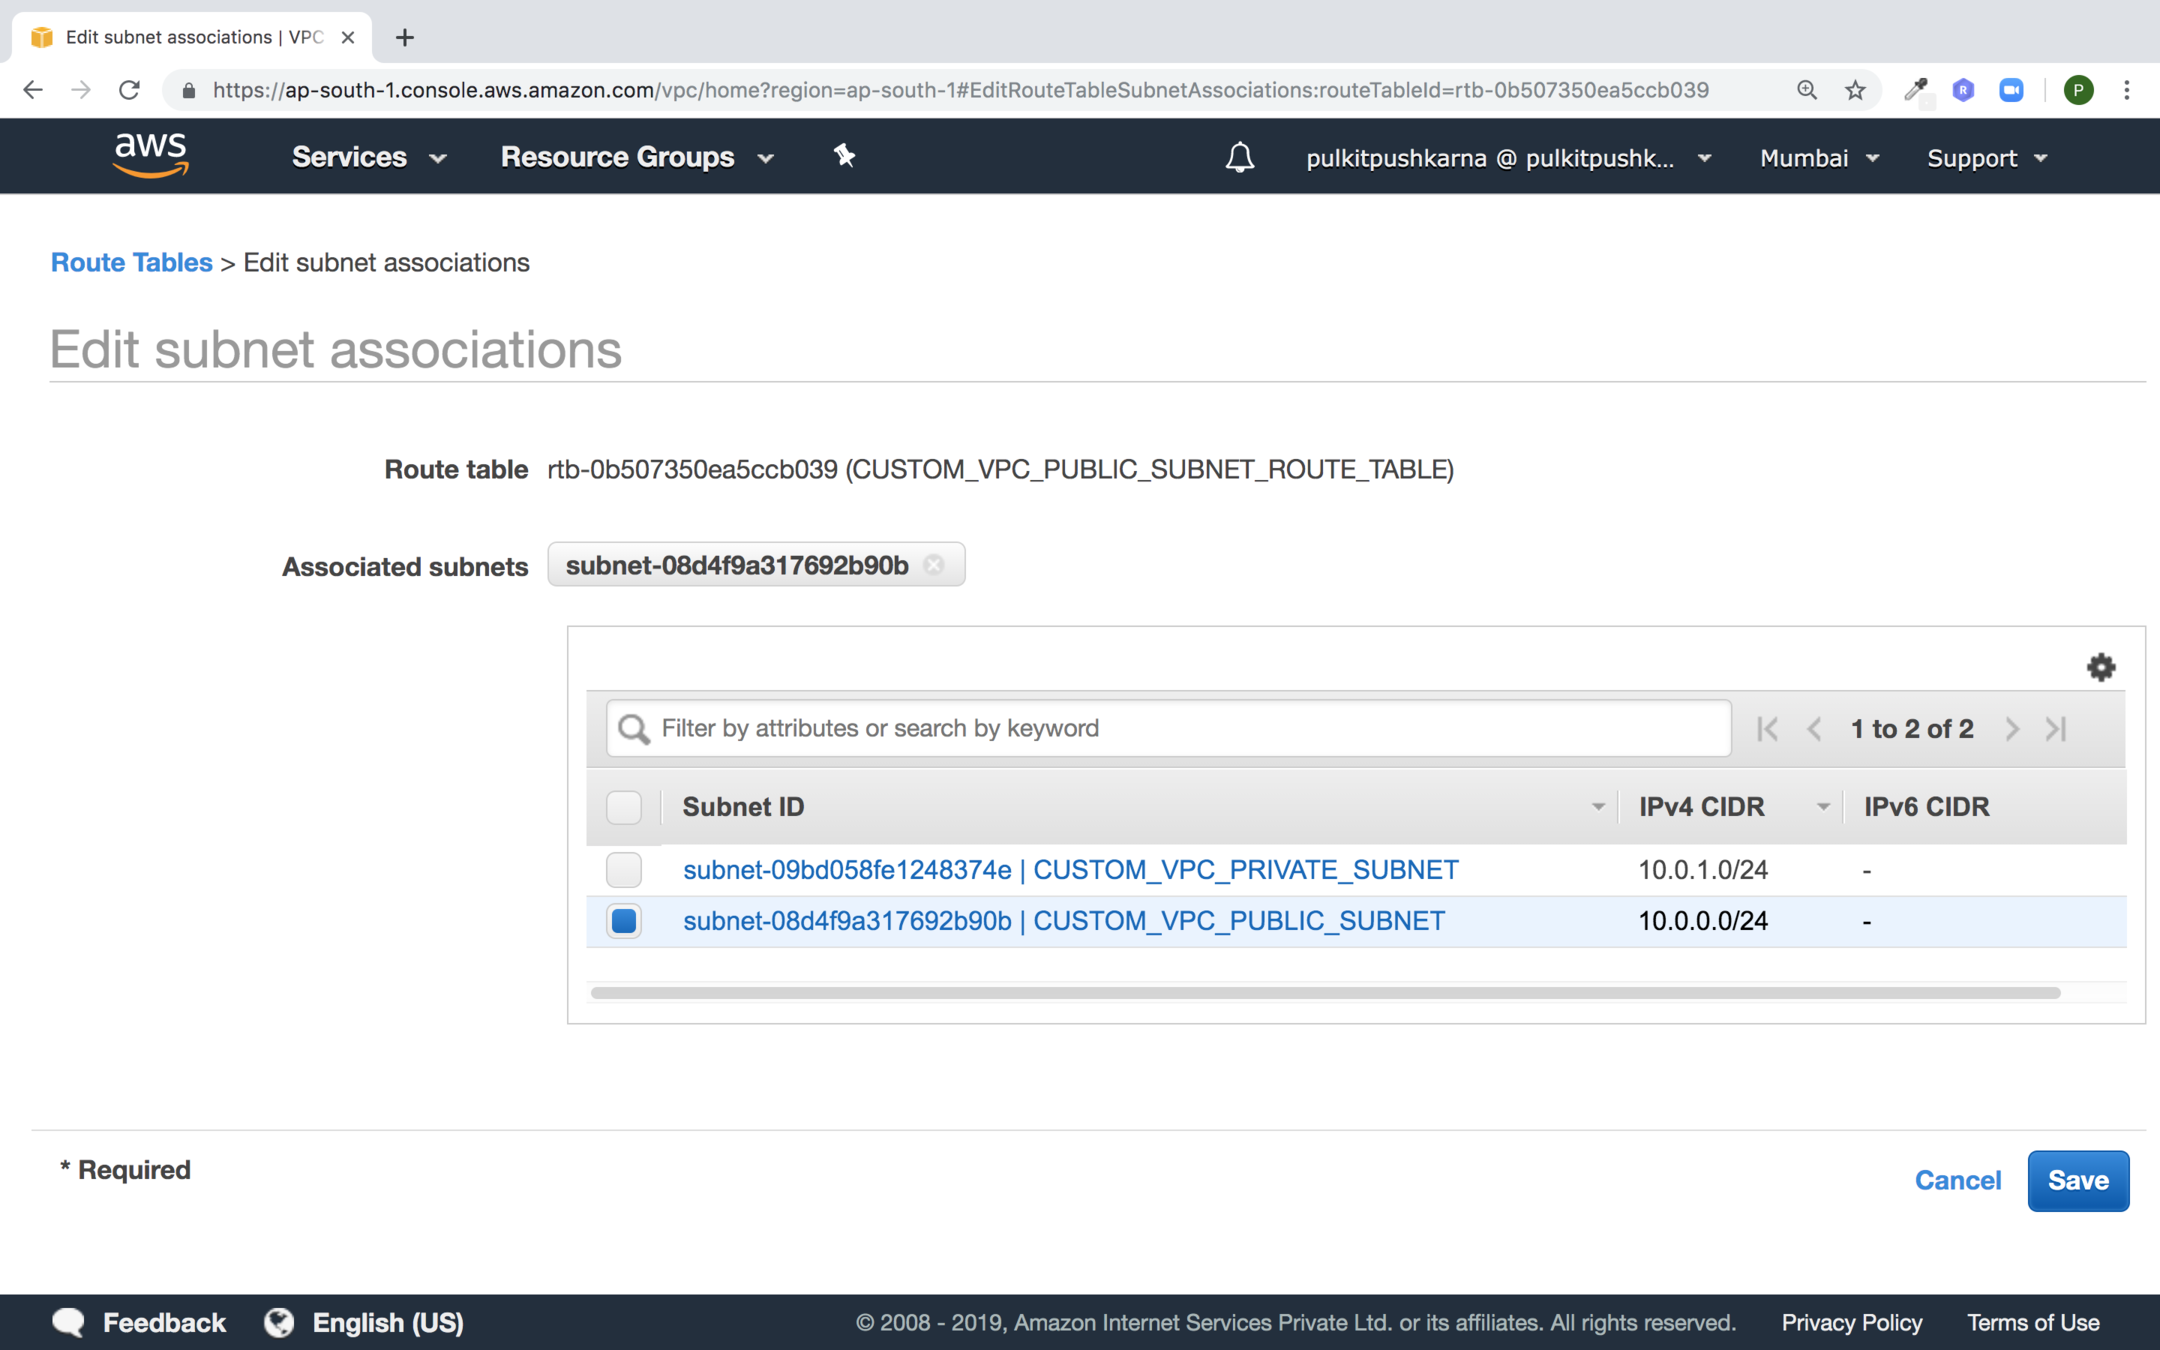
Select the Public Subnet in order to associate it with route table and click on Save
(Network Address Translation) NAT Devices
- NAT device can be used to enable instances in a private subnet to connect to the internet.
- Prevent the internet from initiating connections with the instances in the private subnet
- NAT Device ports the traffic from your instance to the internet and send the response back to the instances
- When traffic goes to the internet the source IP address of your instance is replaced with the NAT device address.
- When the internet traffic comes back again NAT device translates address to instance private address
- NAT devices should be put in the public subnet so that they can connect to internet
- Elastic IP needs an elastic IP address which is assigned to it at the time of launch
- You need to update the route table associated with the private subnet to point internet bound traffic to NAT gateway
Creating a NAT gateway
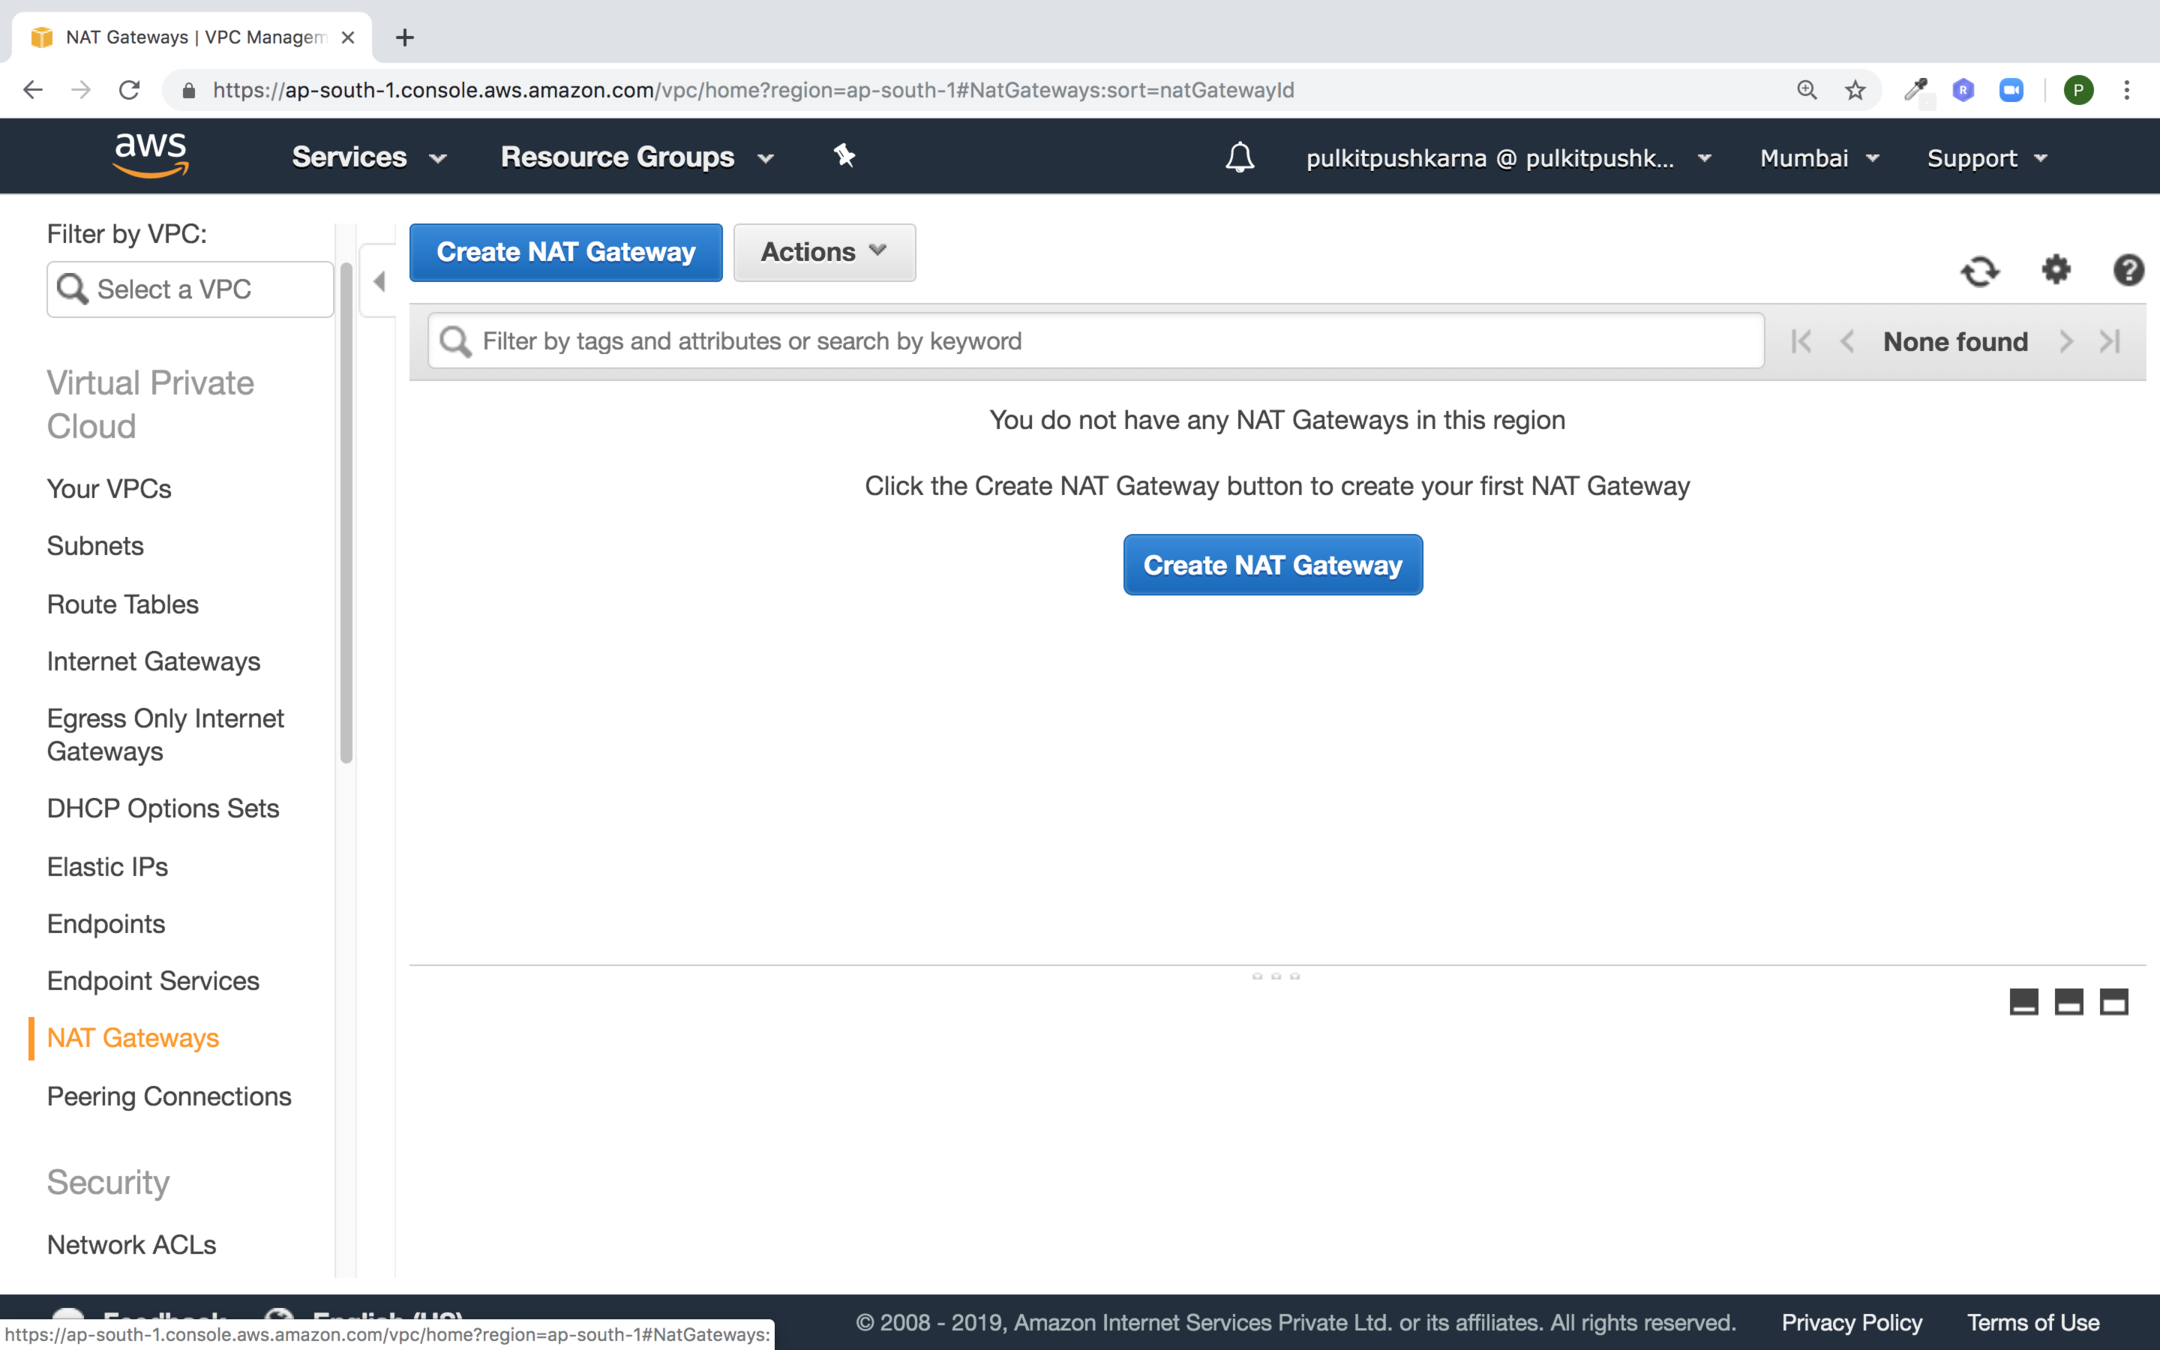
NAT gateway should reside in public subnet
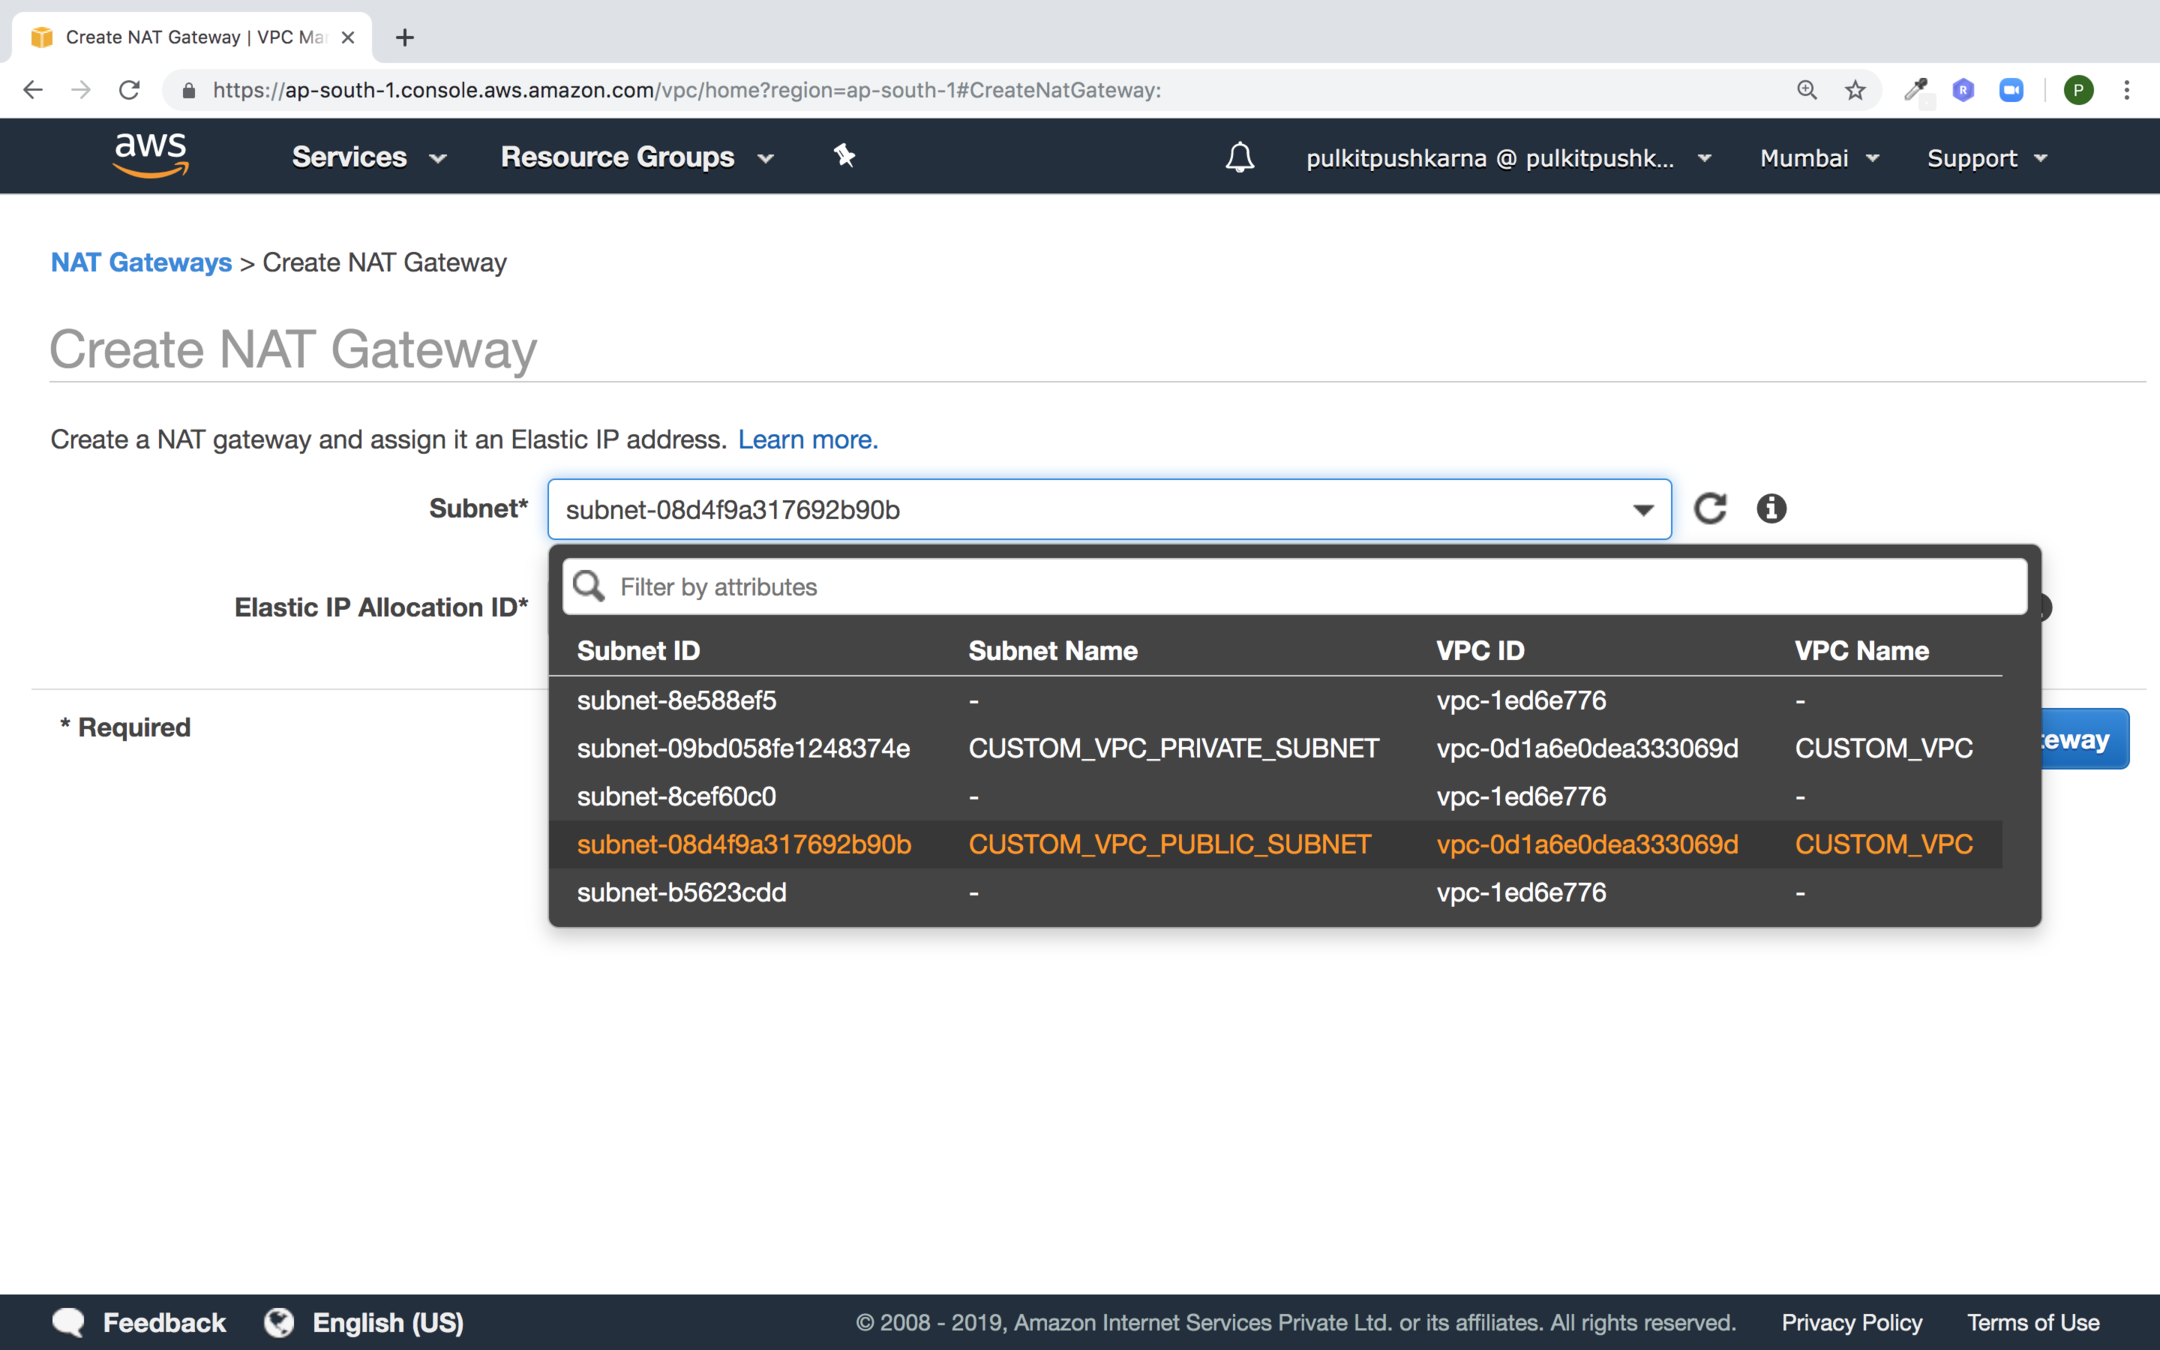
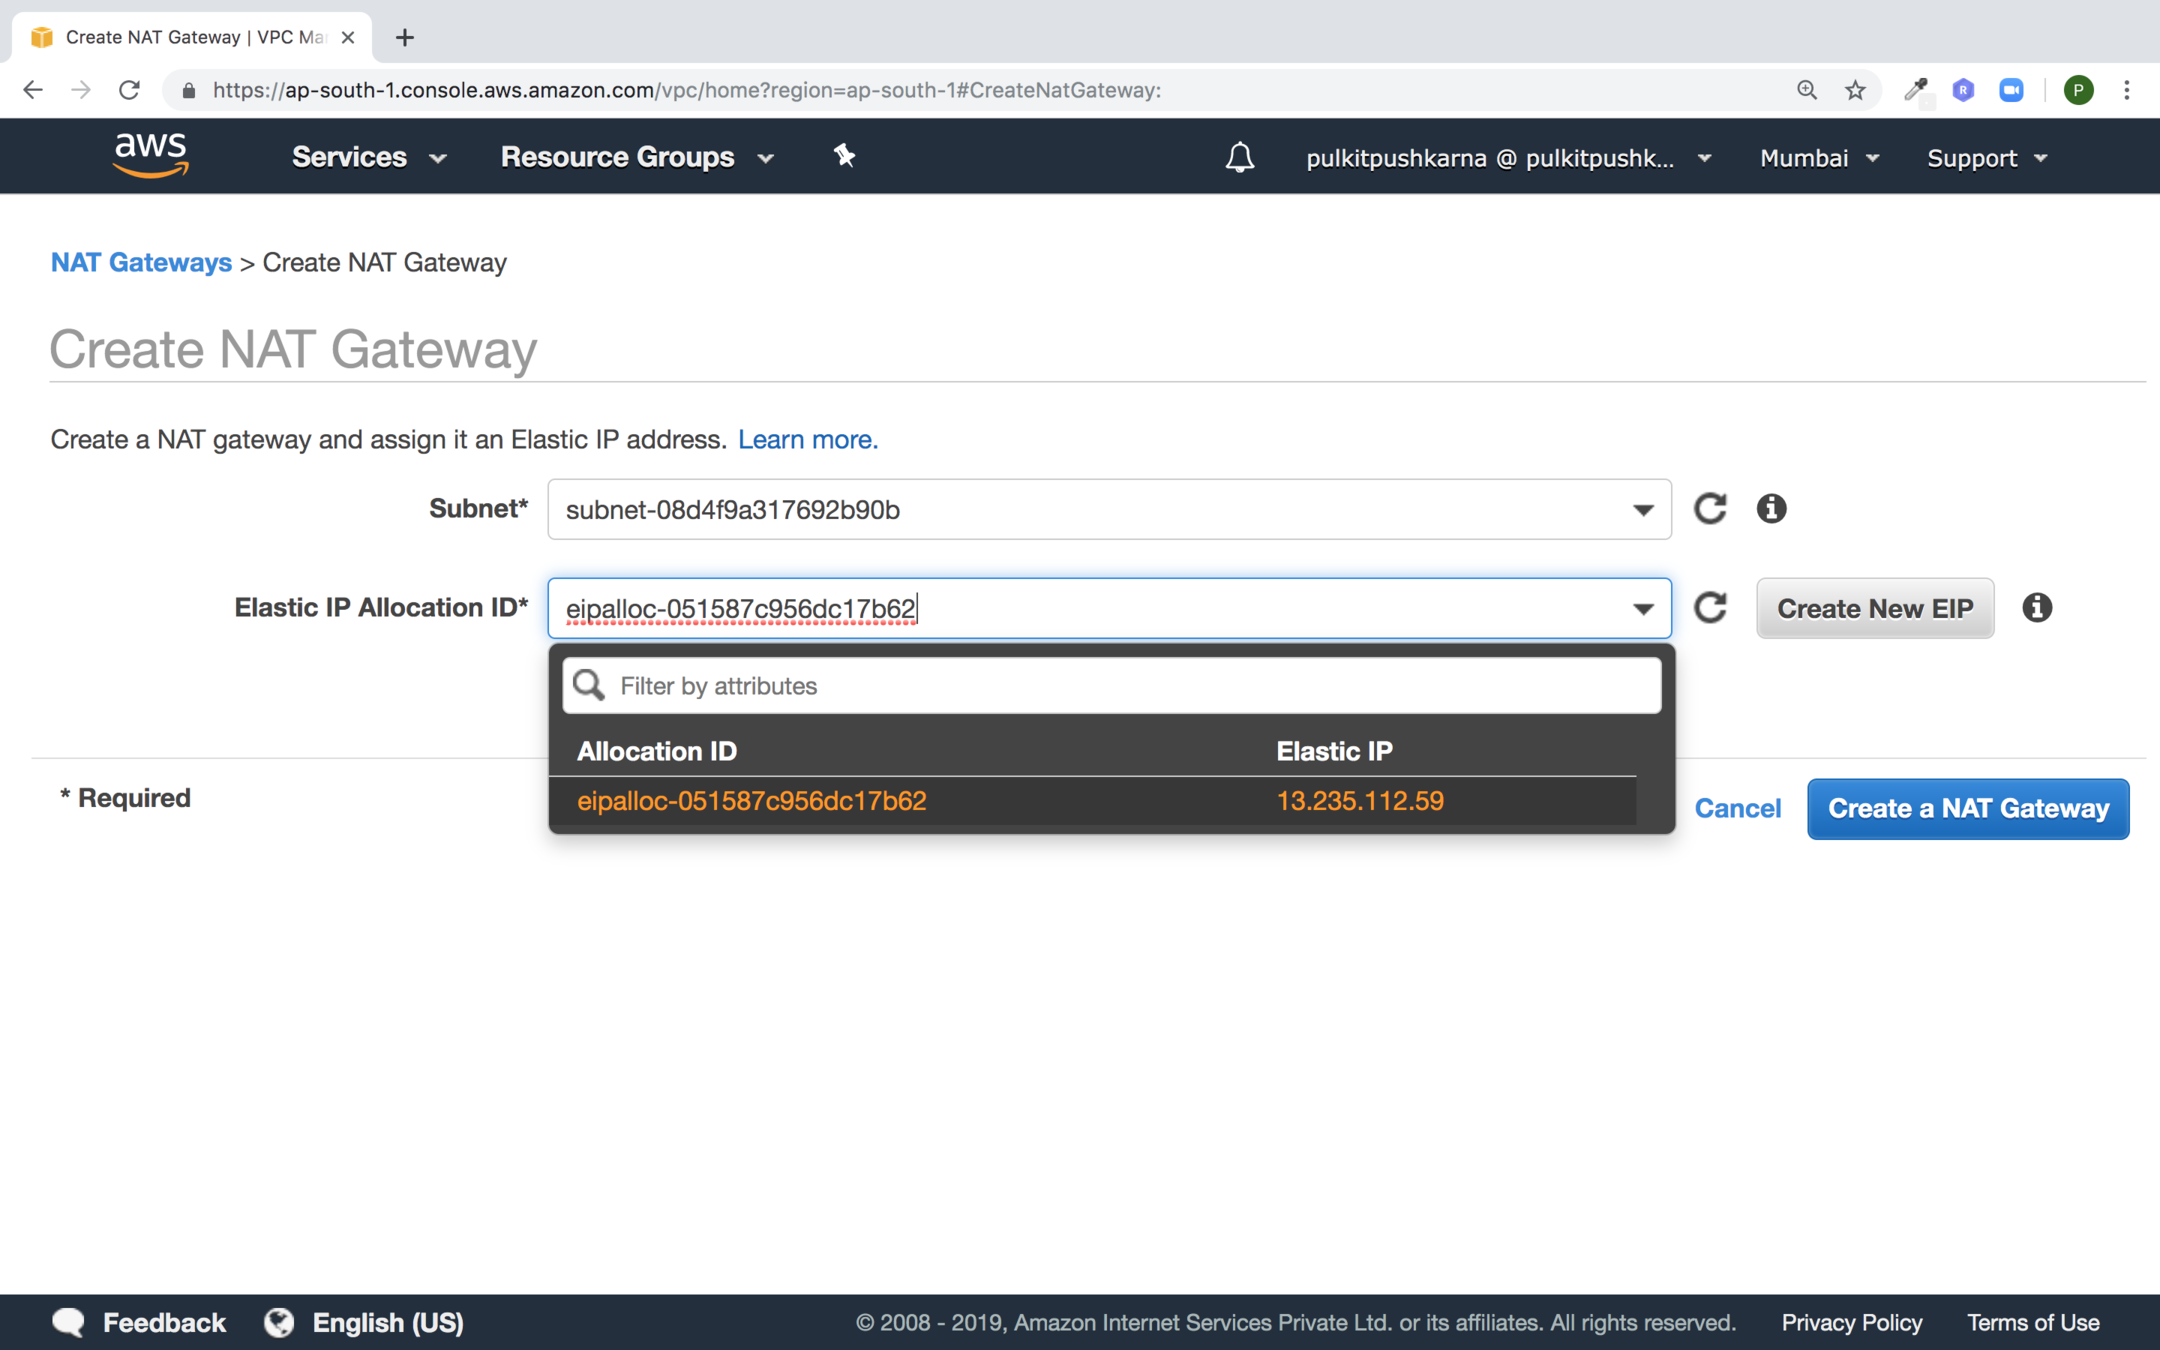
Create or Select new elastic IP and click on Create a NAT Gateway button
Click on edit route tables
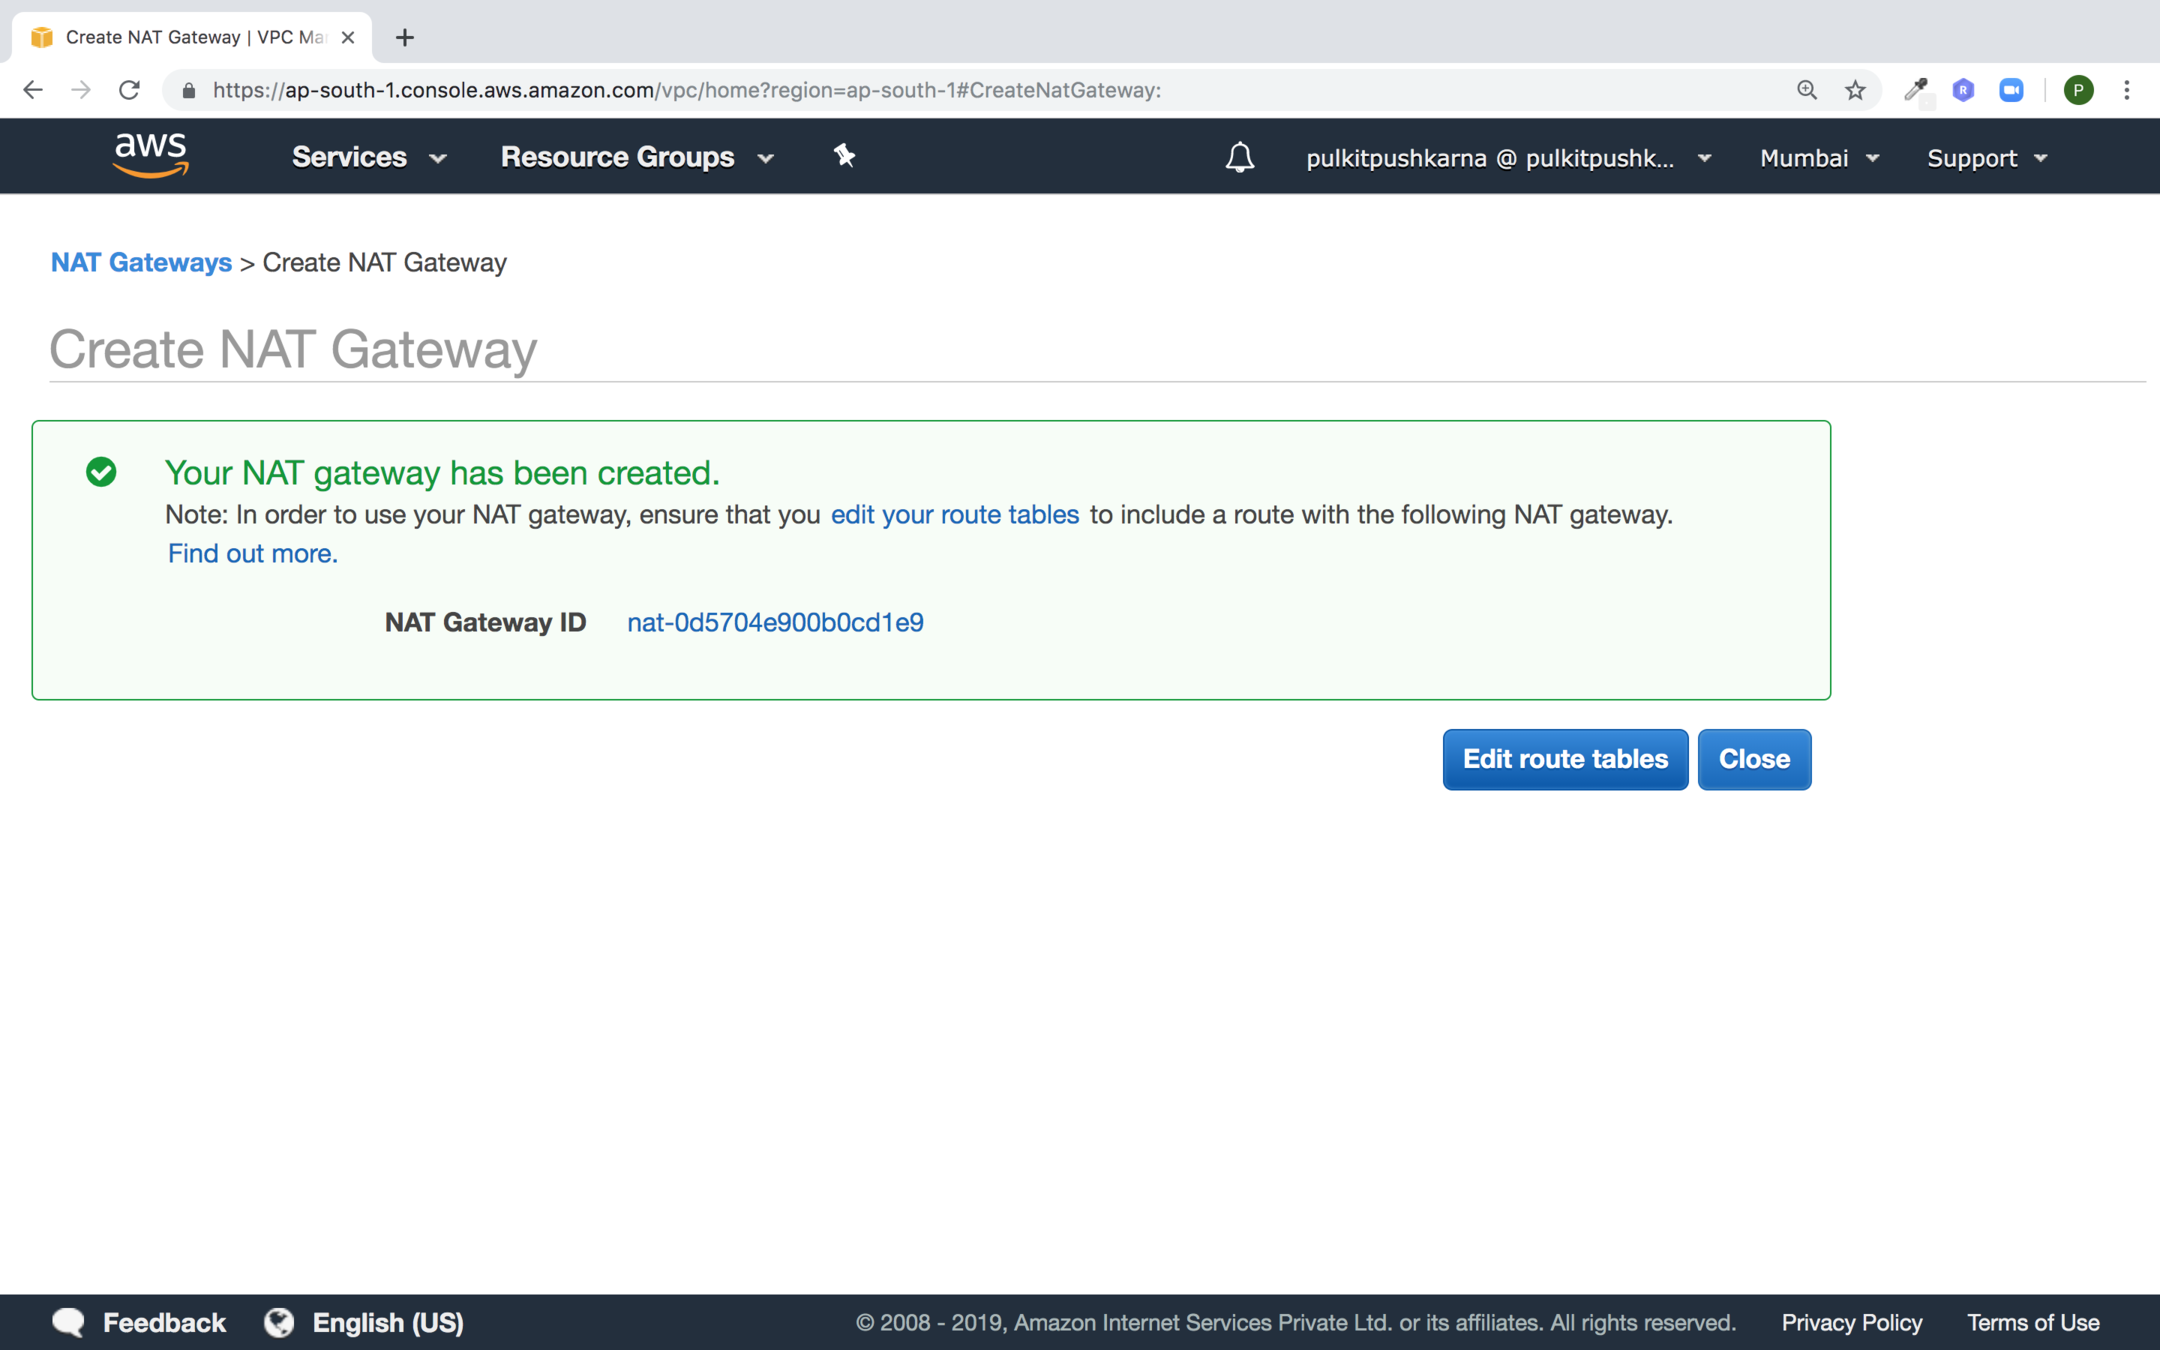
Select the route table to whom private subnet is associated
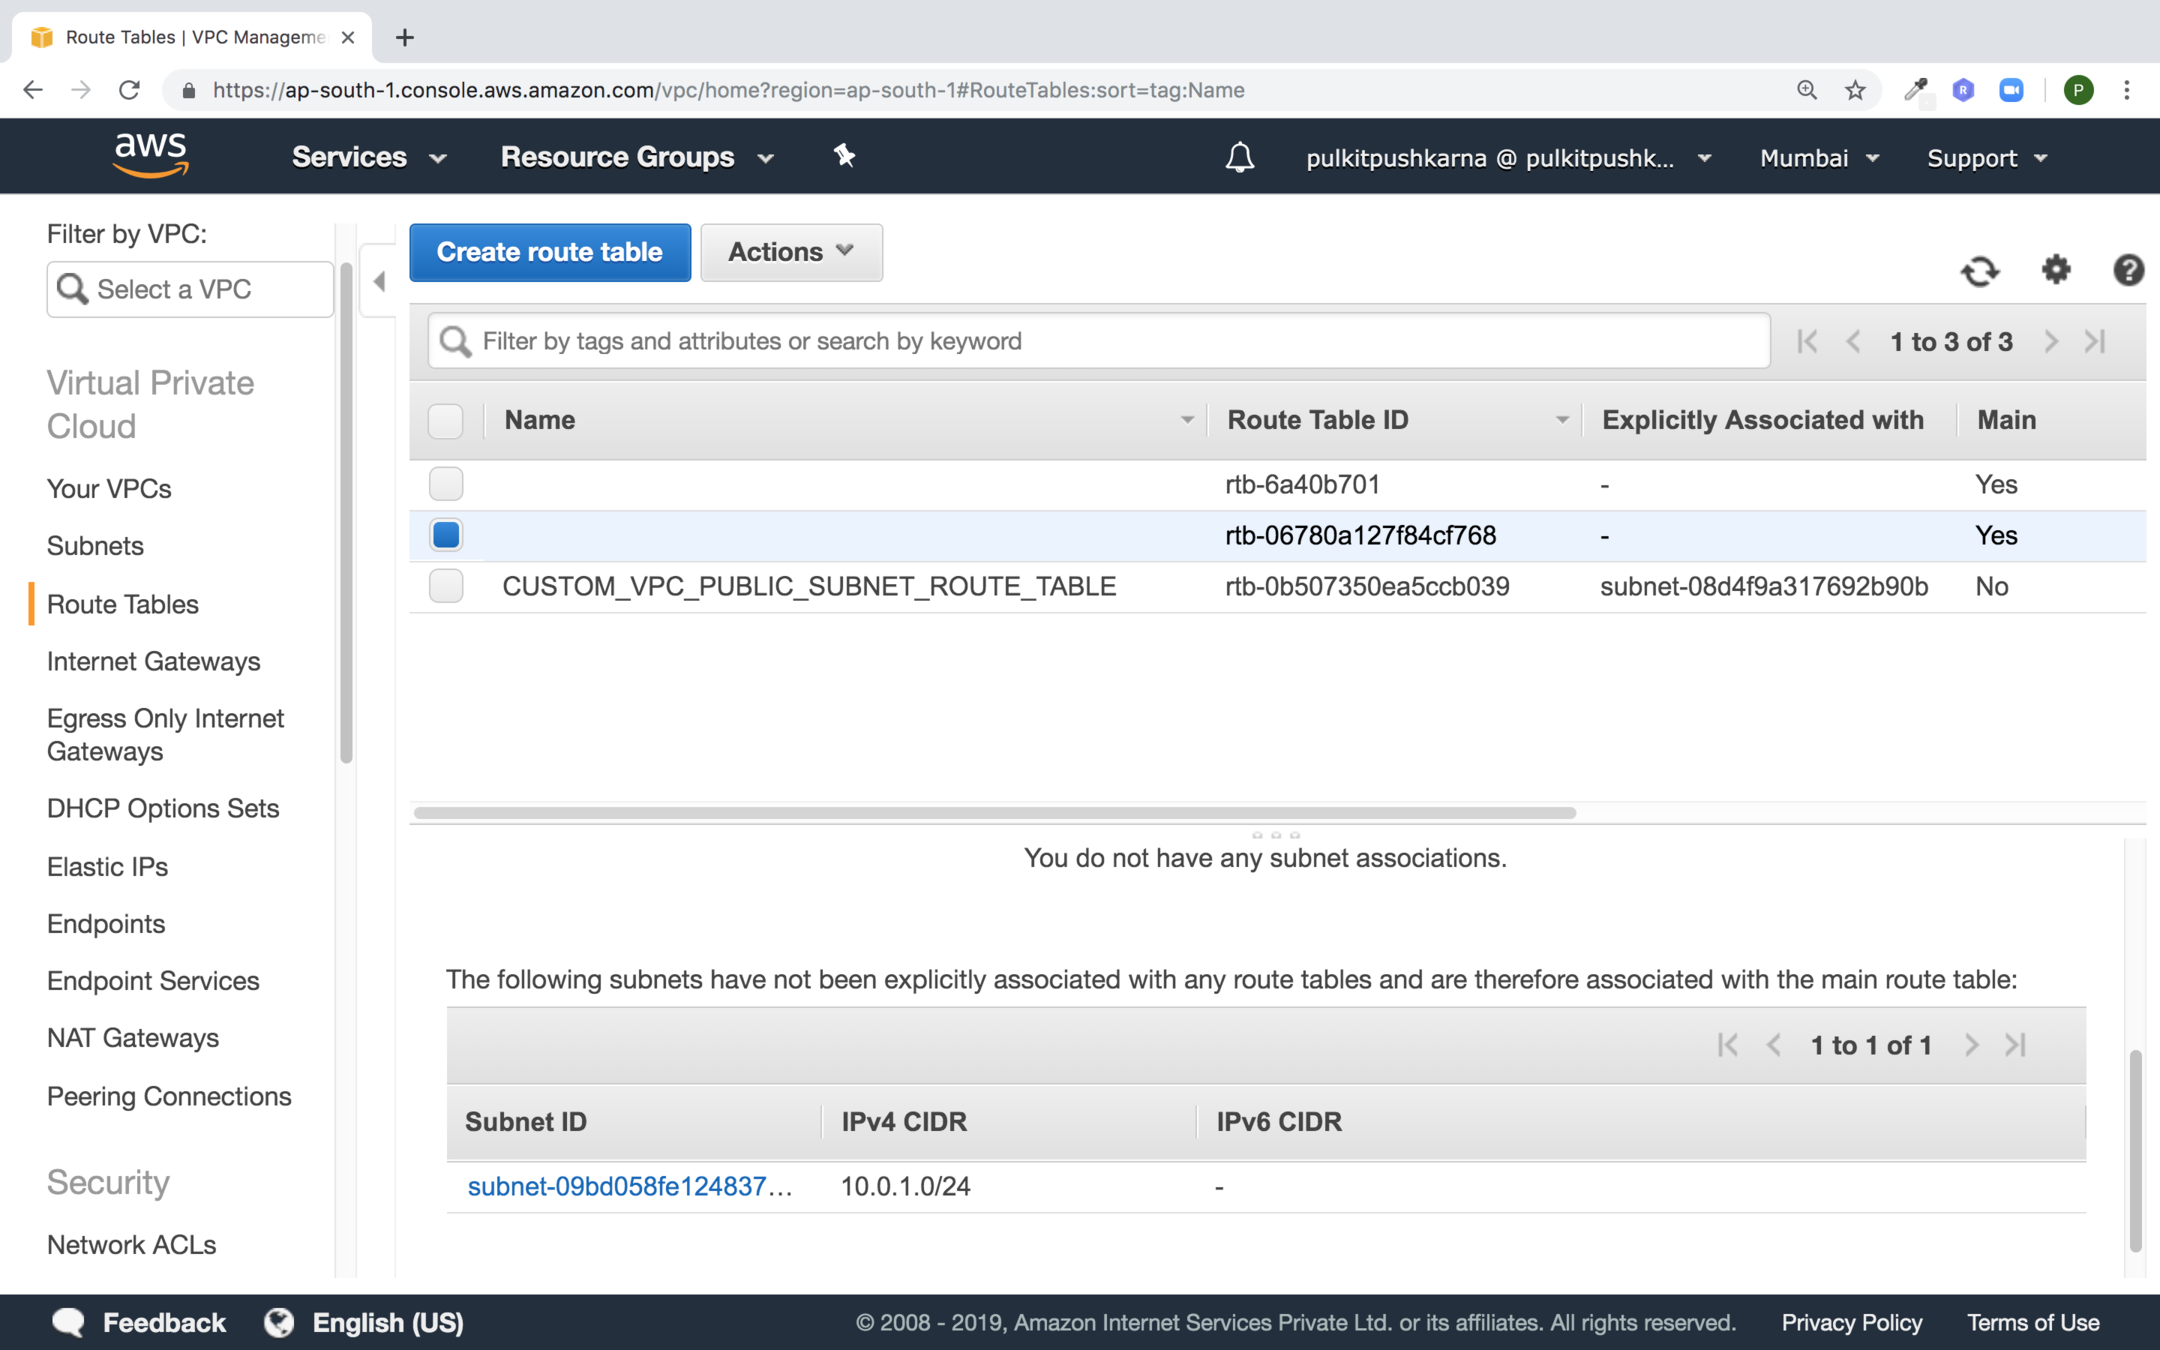
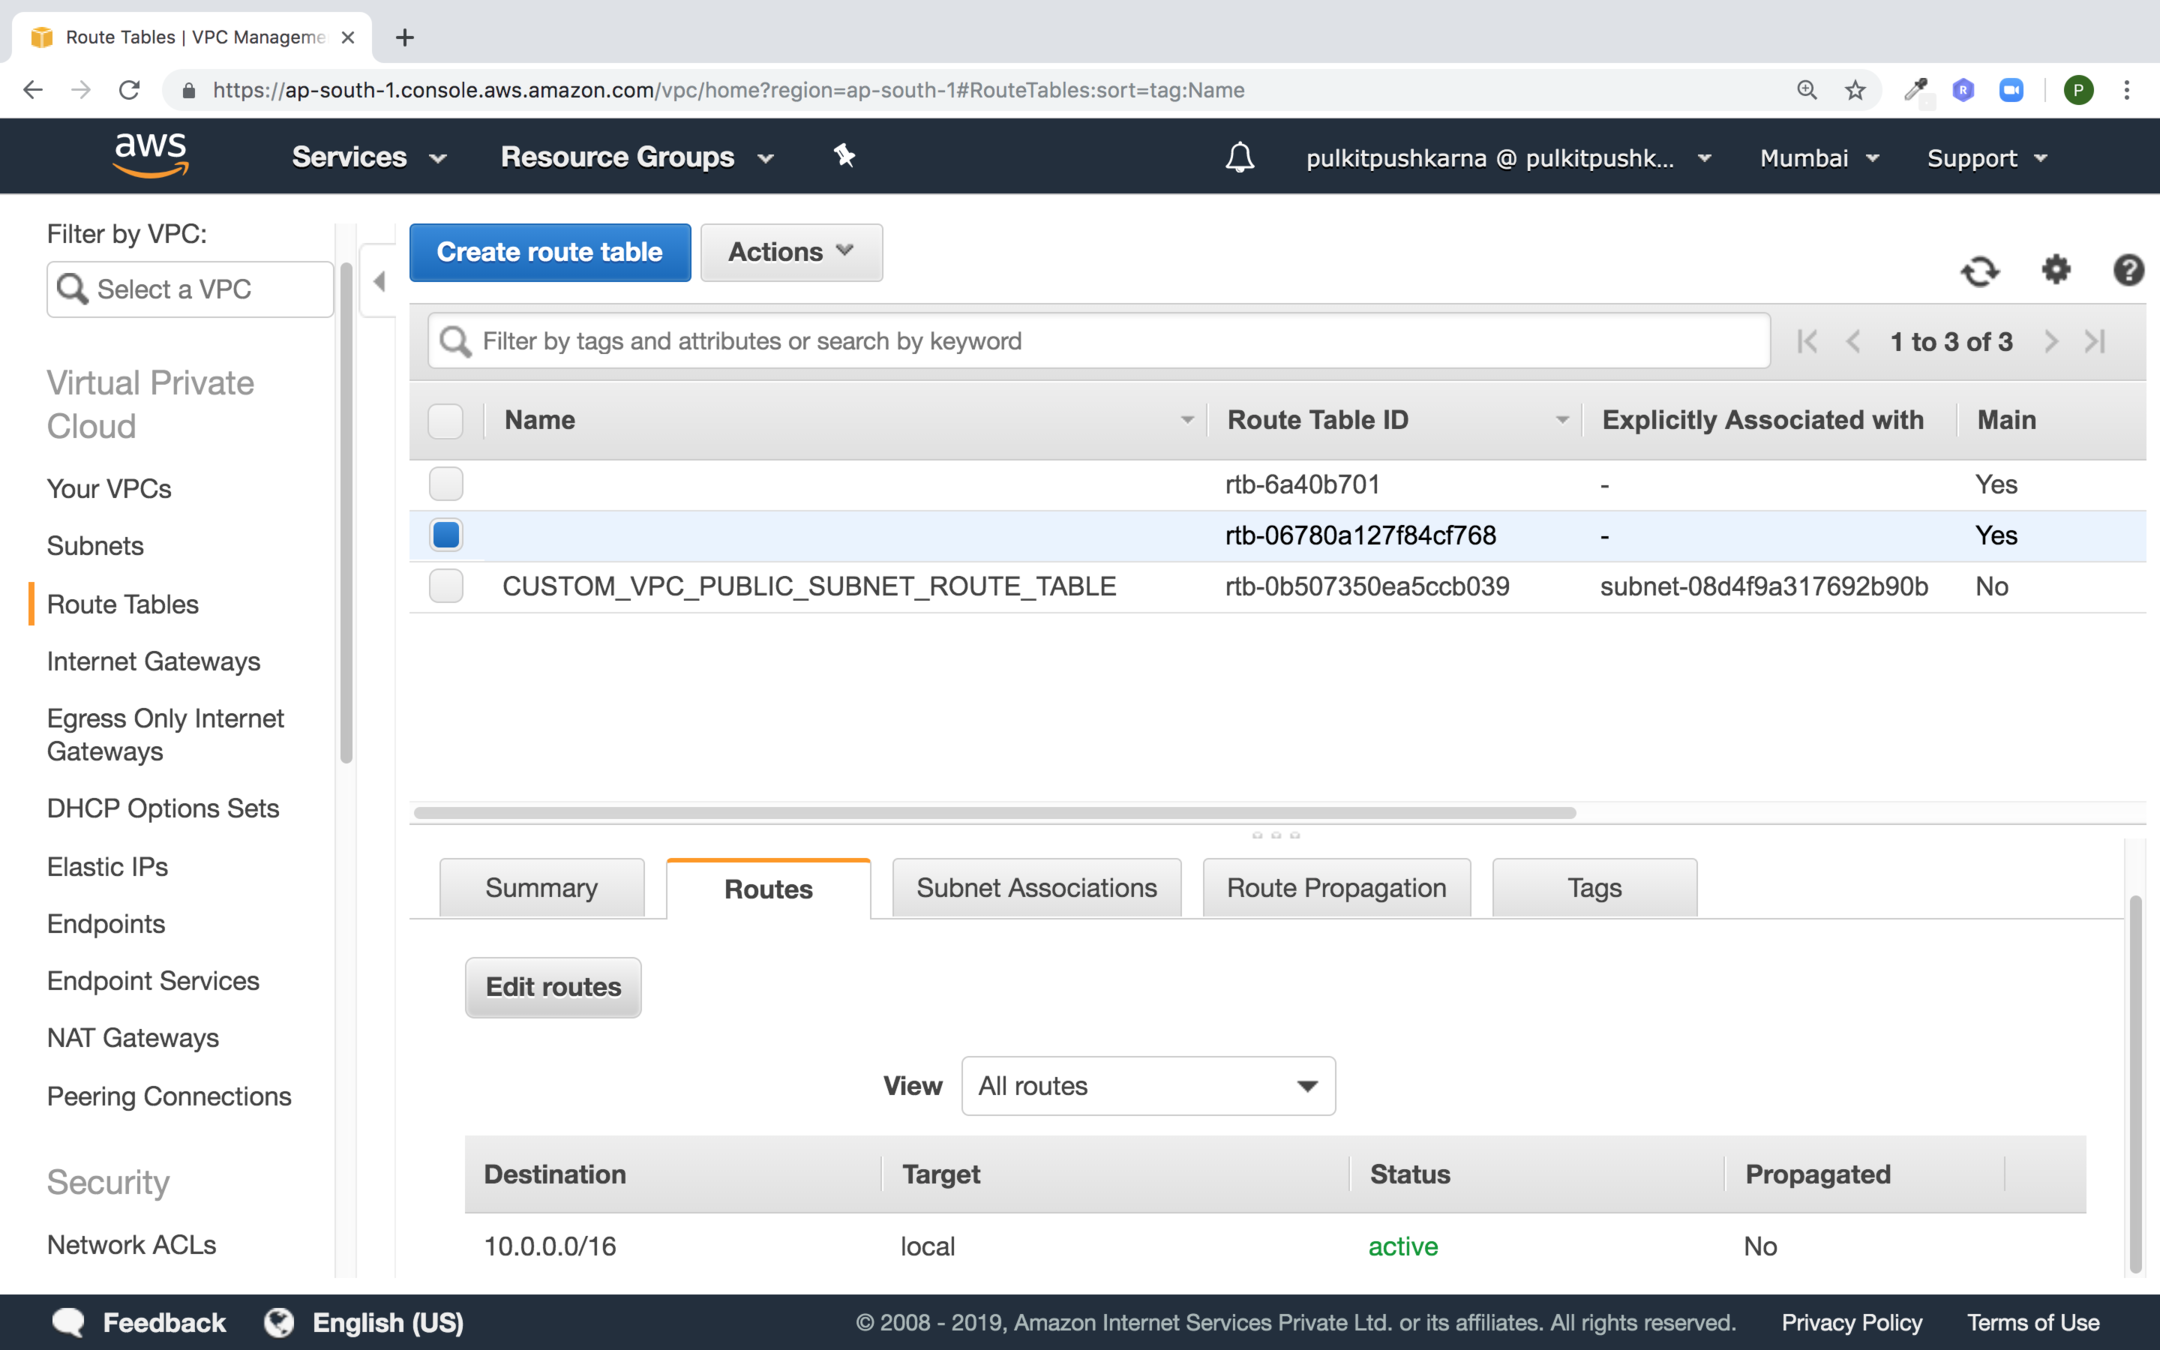
In the route section click on Edit routes
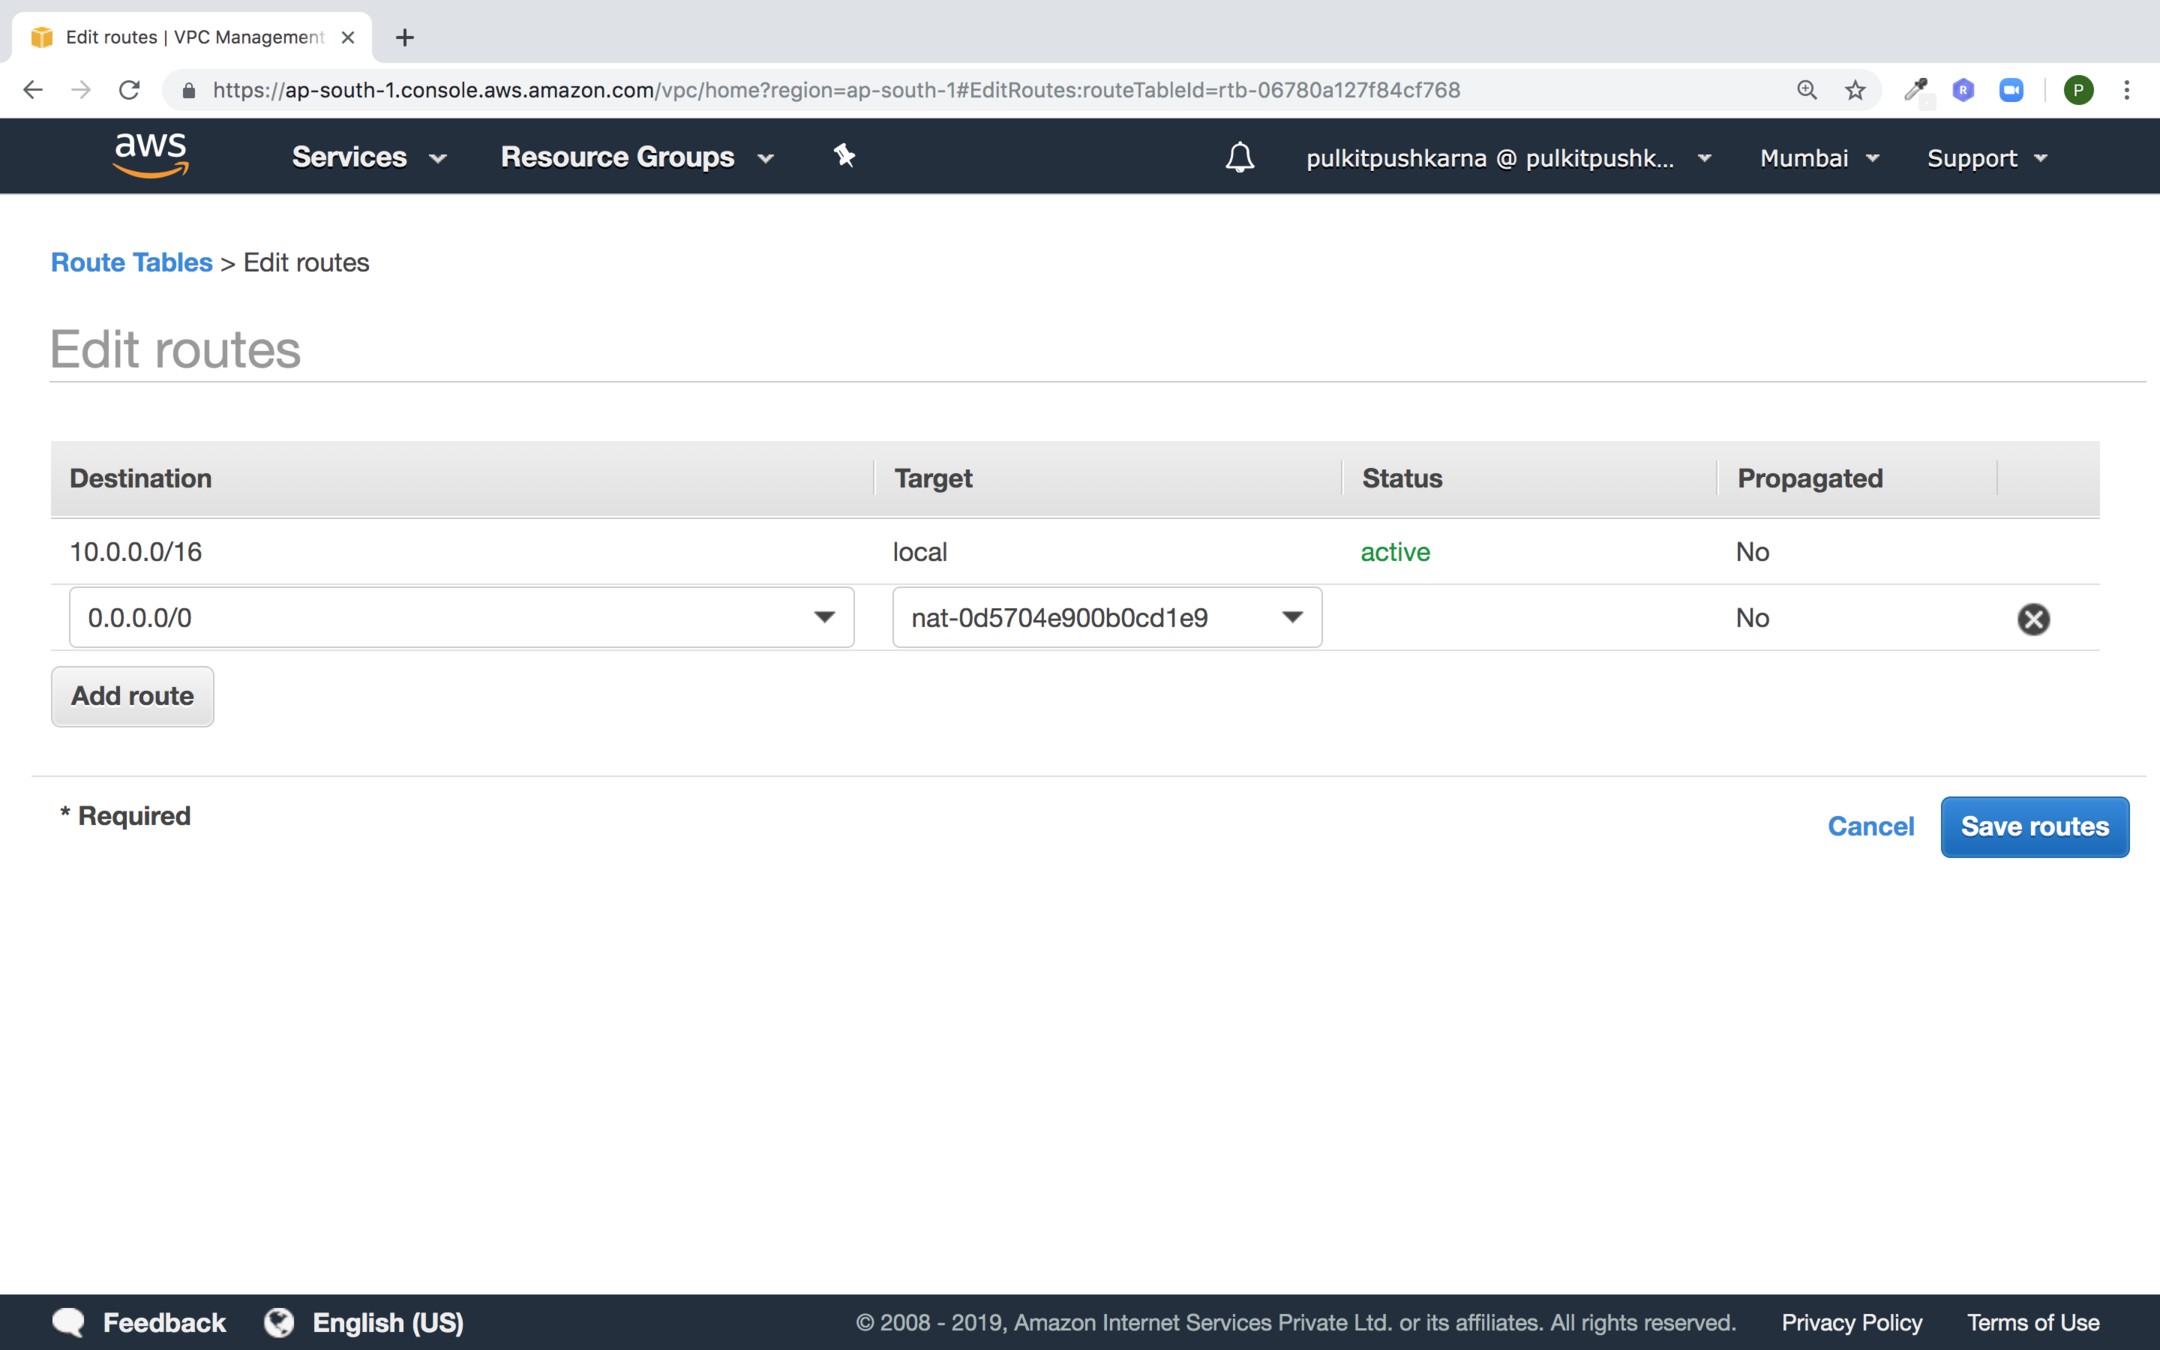
In the source provide 0.0.0.0/0 and in the target set NAT gateway
Security Group
- A security group acts as a Virtual Firewall that controls the traffic for one or more instances.
- You add rules to each security group that allow traffic to or from its associated instances
- By Default Security group allows all outbound traffic
- Security Group rules are always permissive. You allow access and not deny access
- Security Groups are stateful
- You can modify the rules of the security group at any time and rules are applied immediately
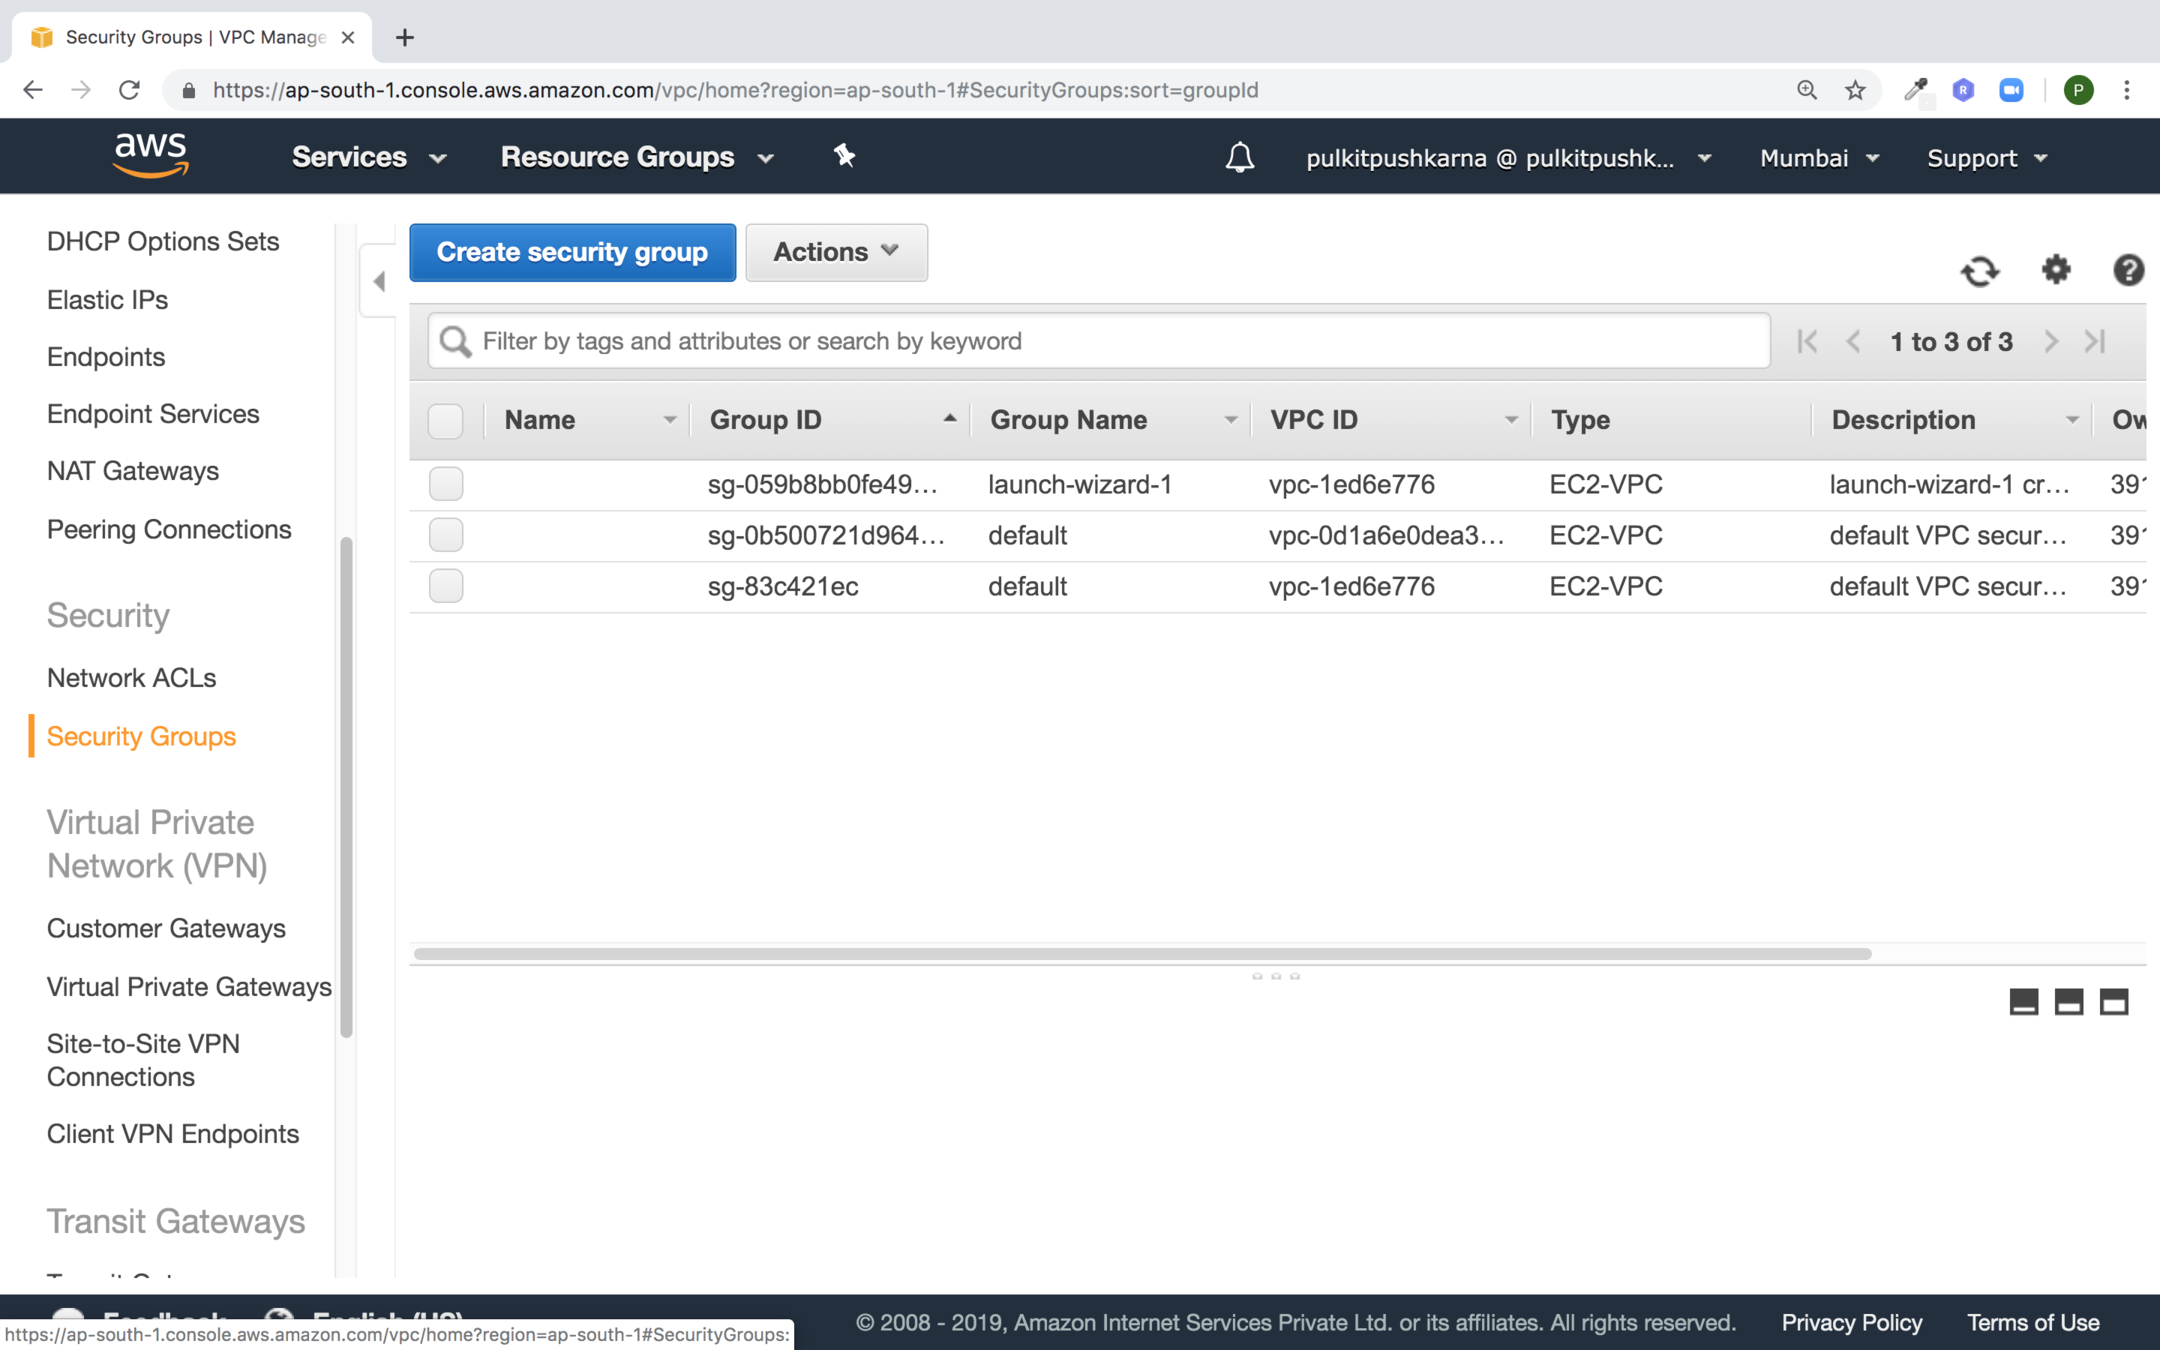
Go to the Security Group Section under VPC and click on Create security group
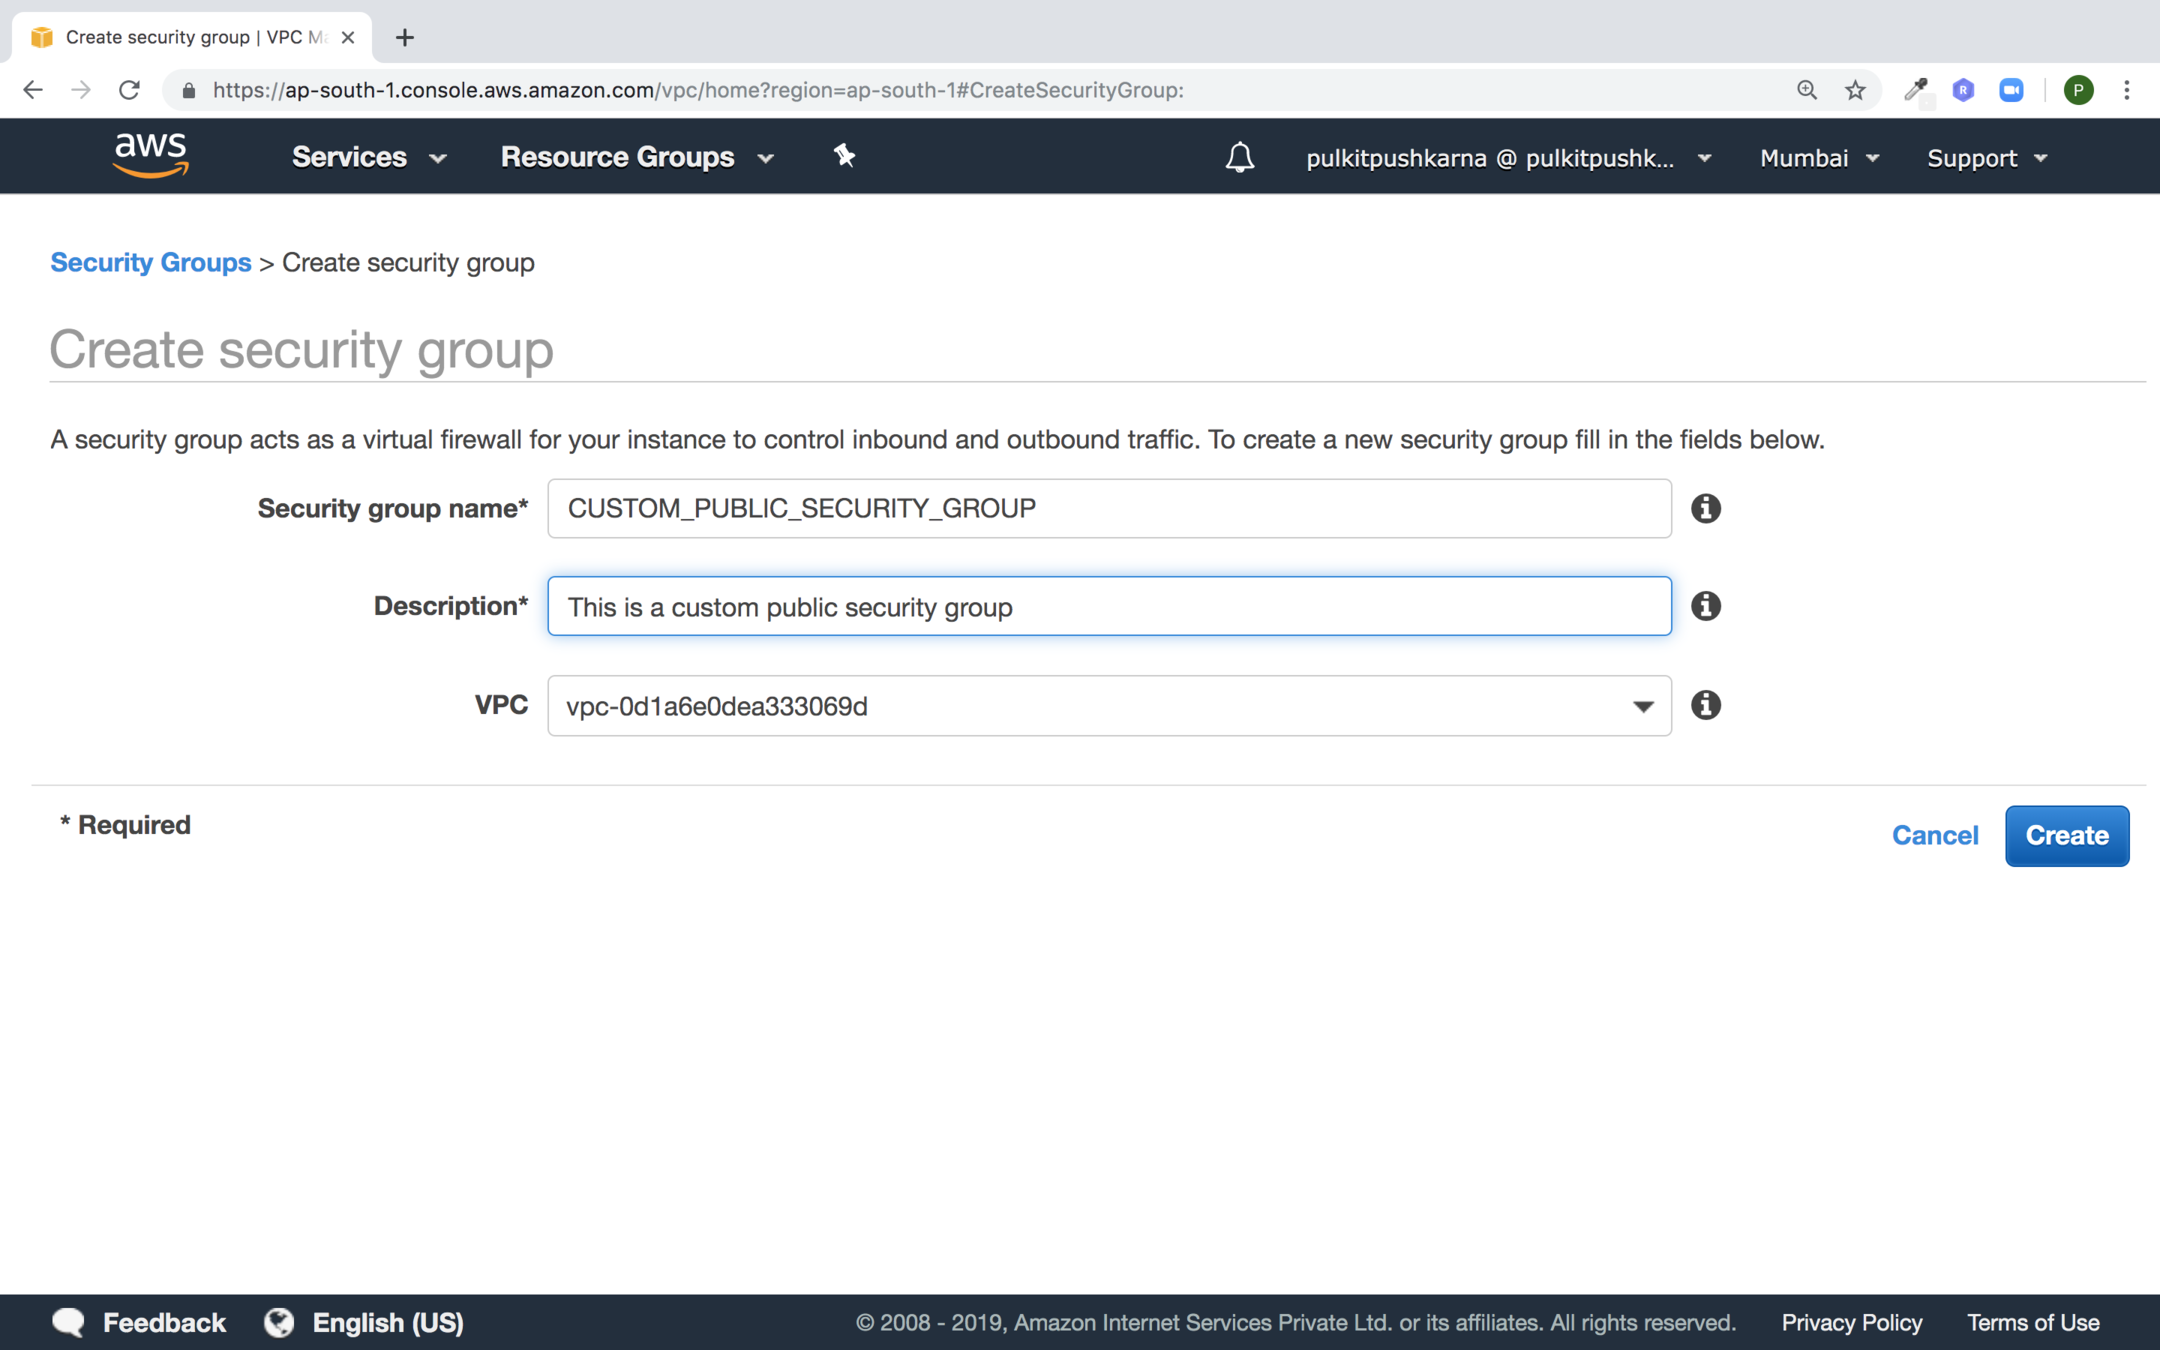
Enter the details for security group and click on Create button
Select the newly create group and click on edit rules in the Inbound Rules section
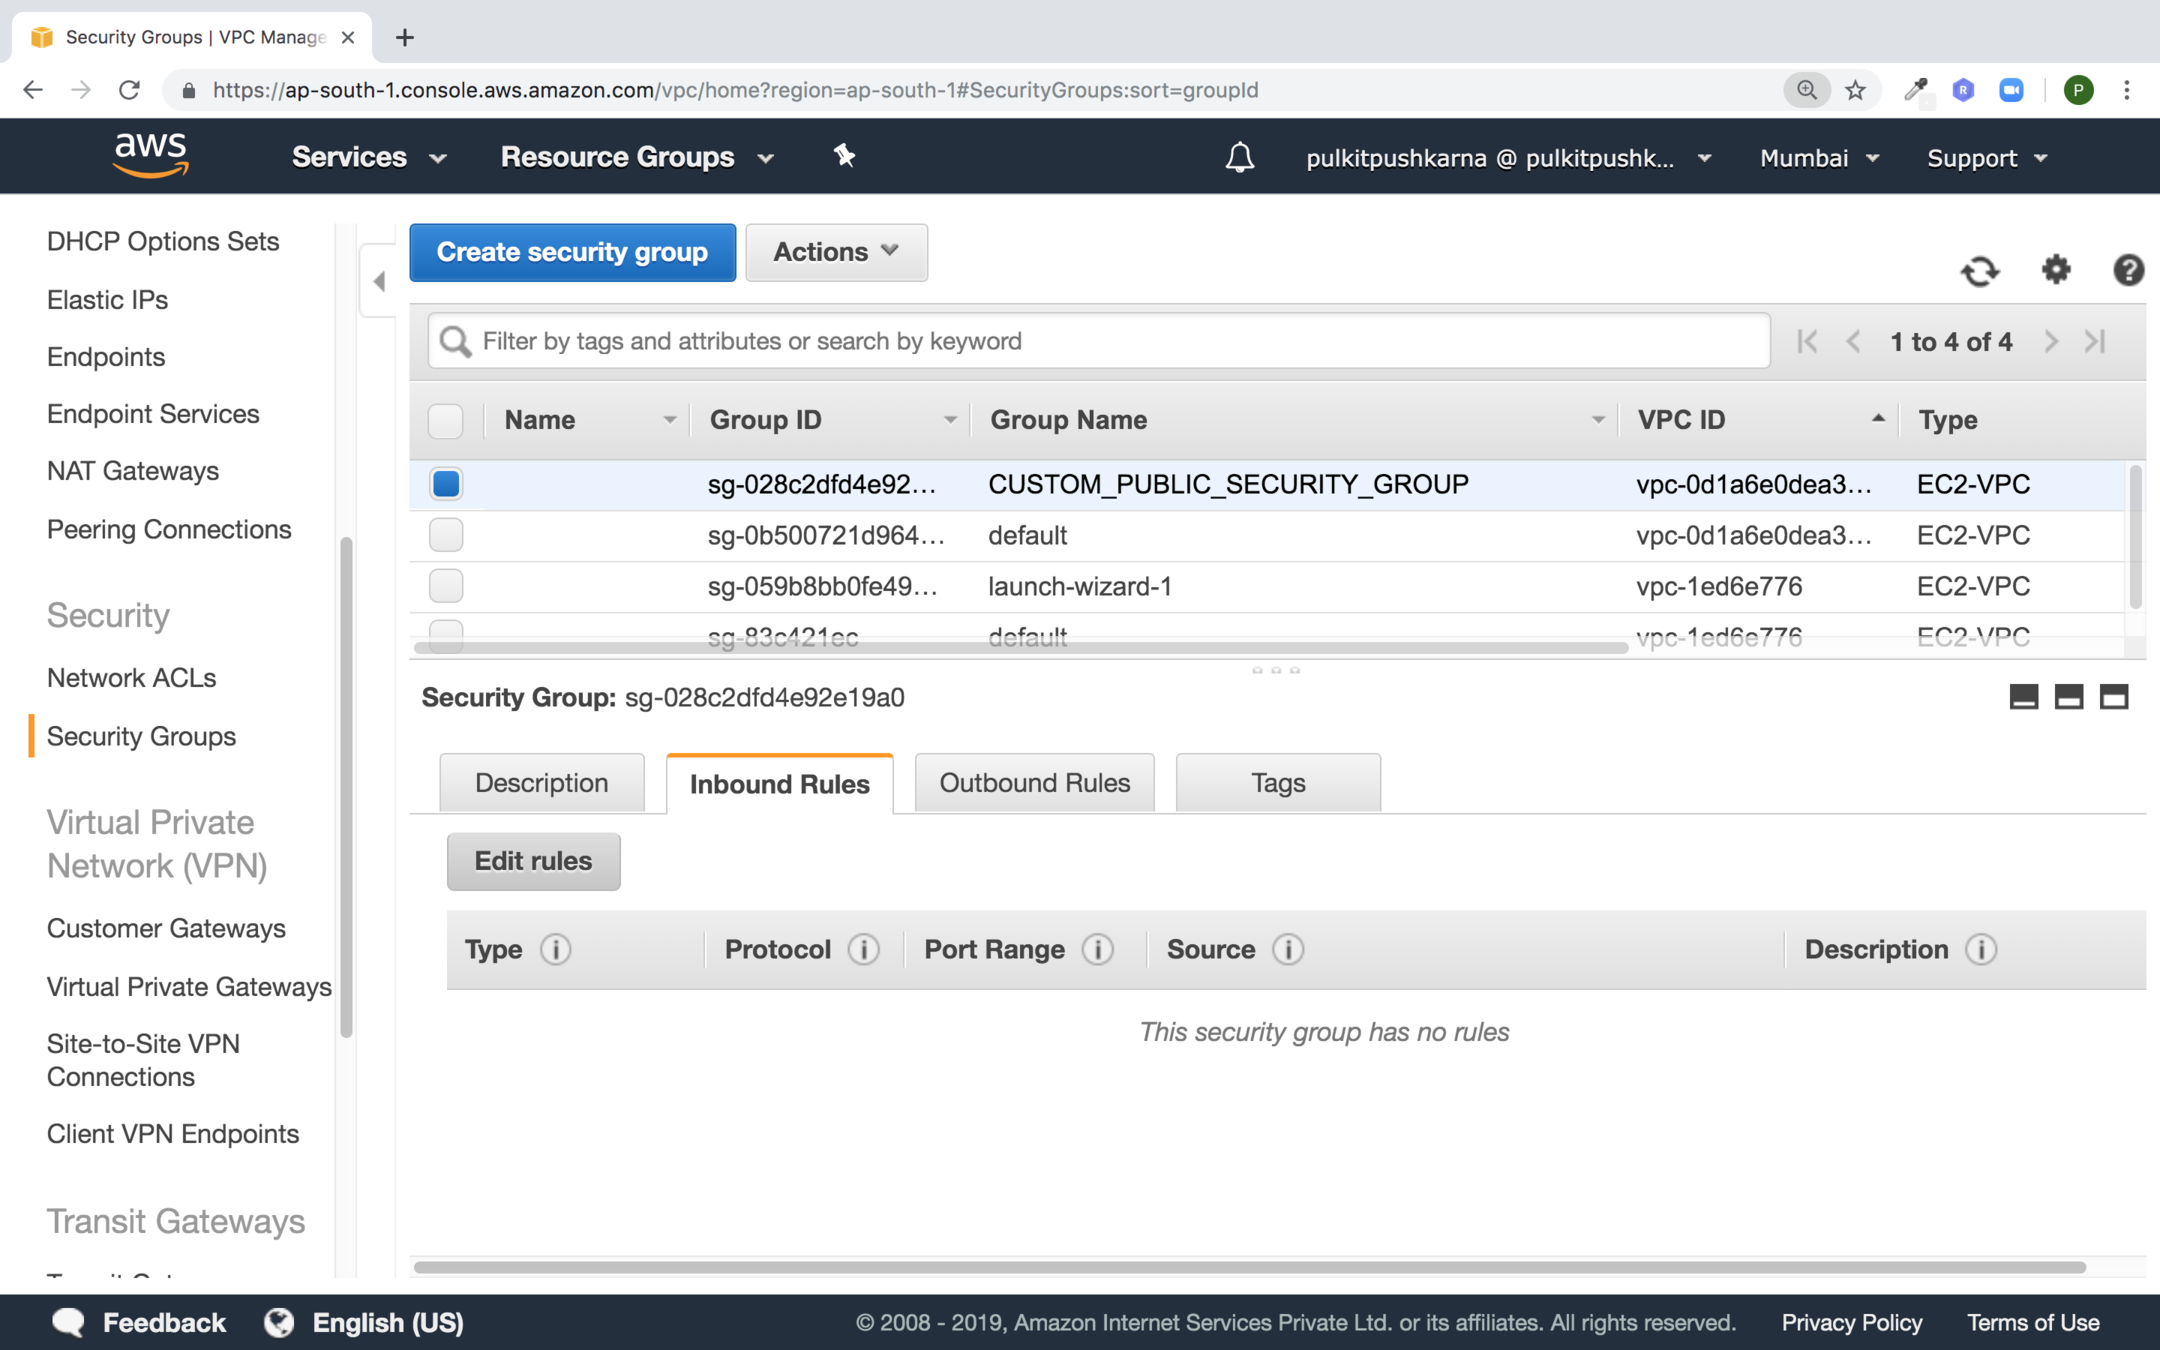
Set values for Public Security Group Inbound
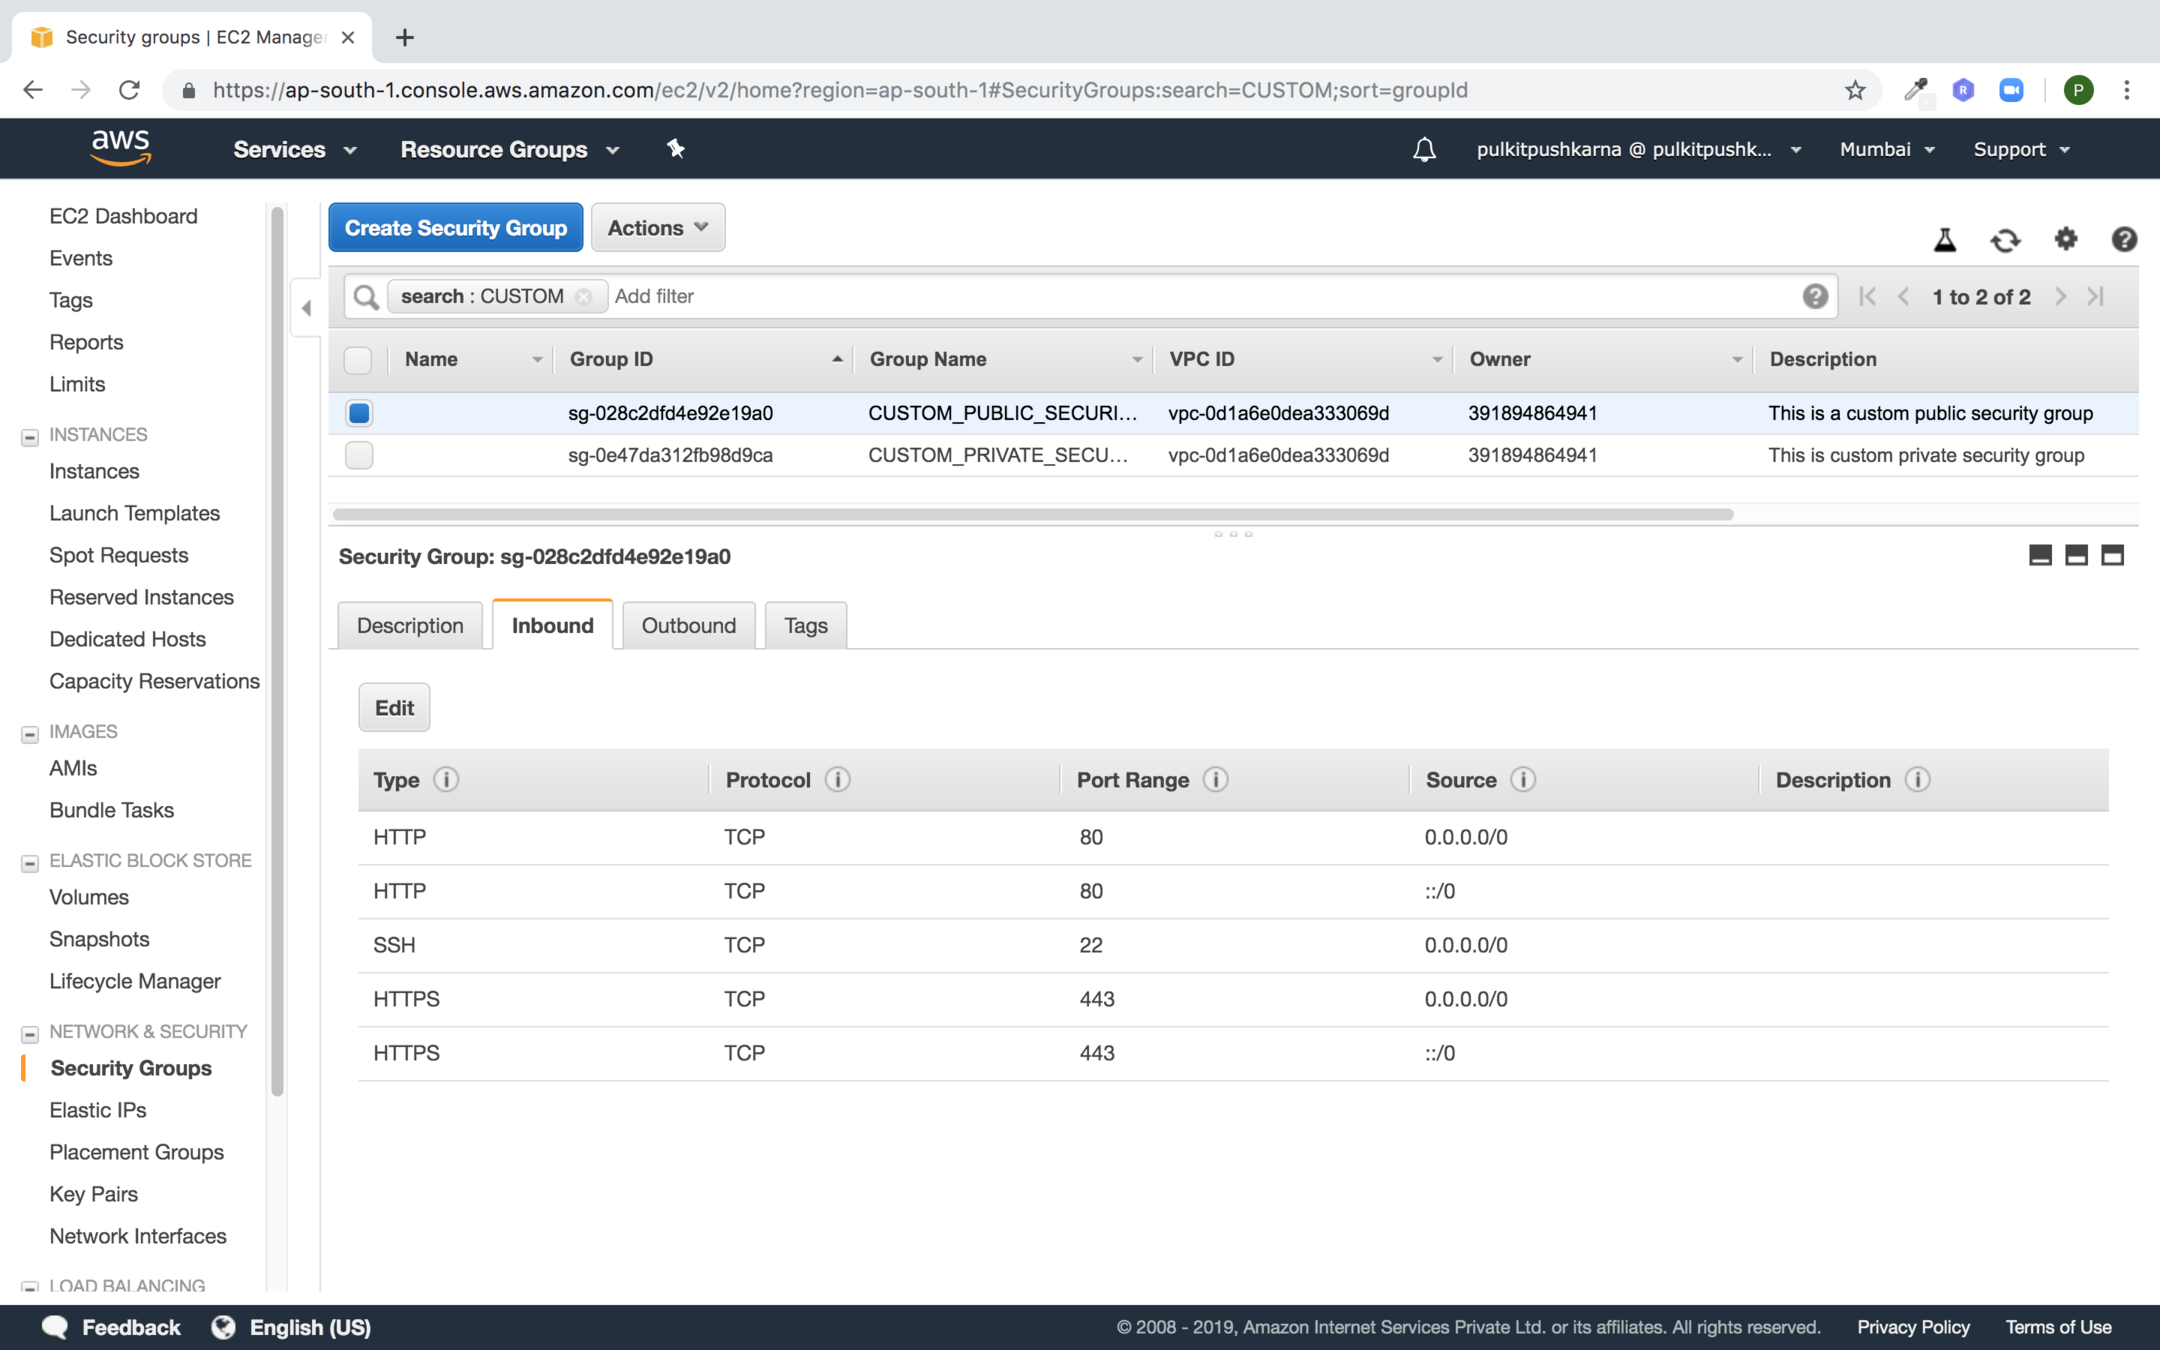
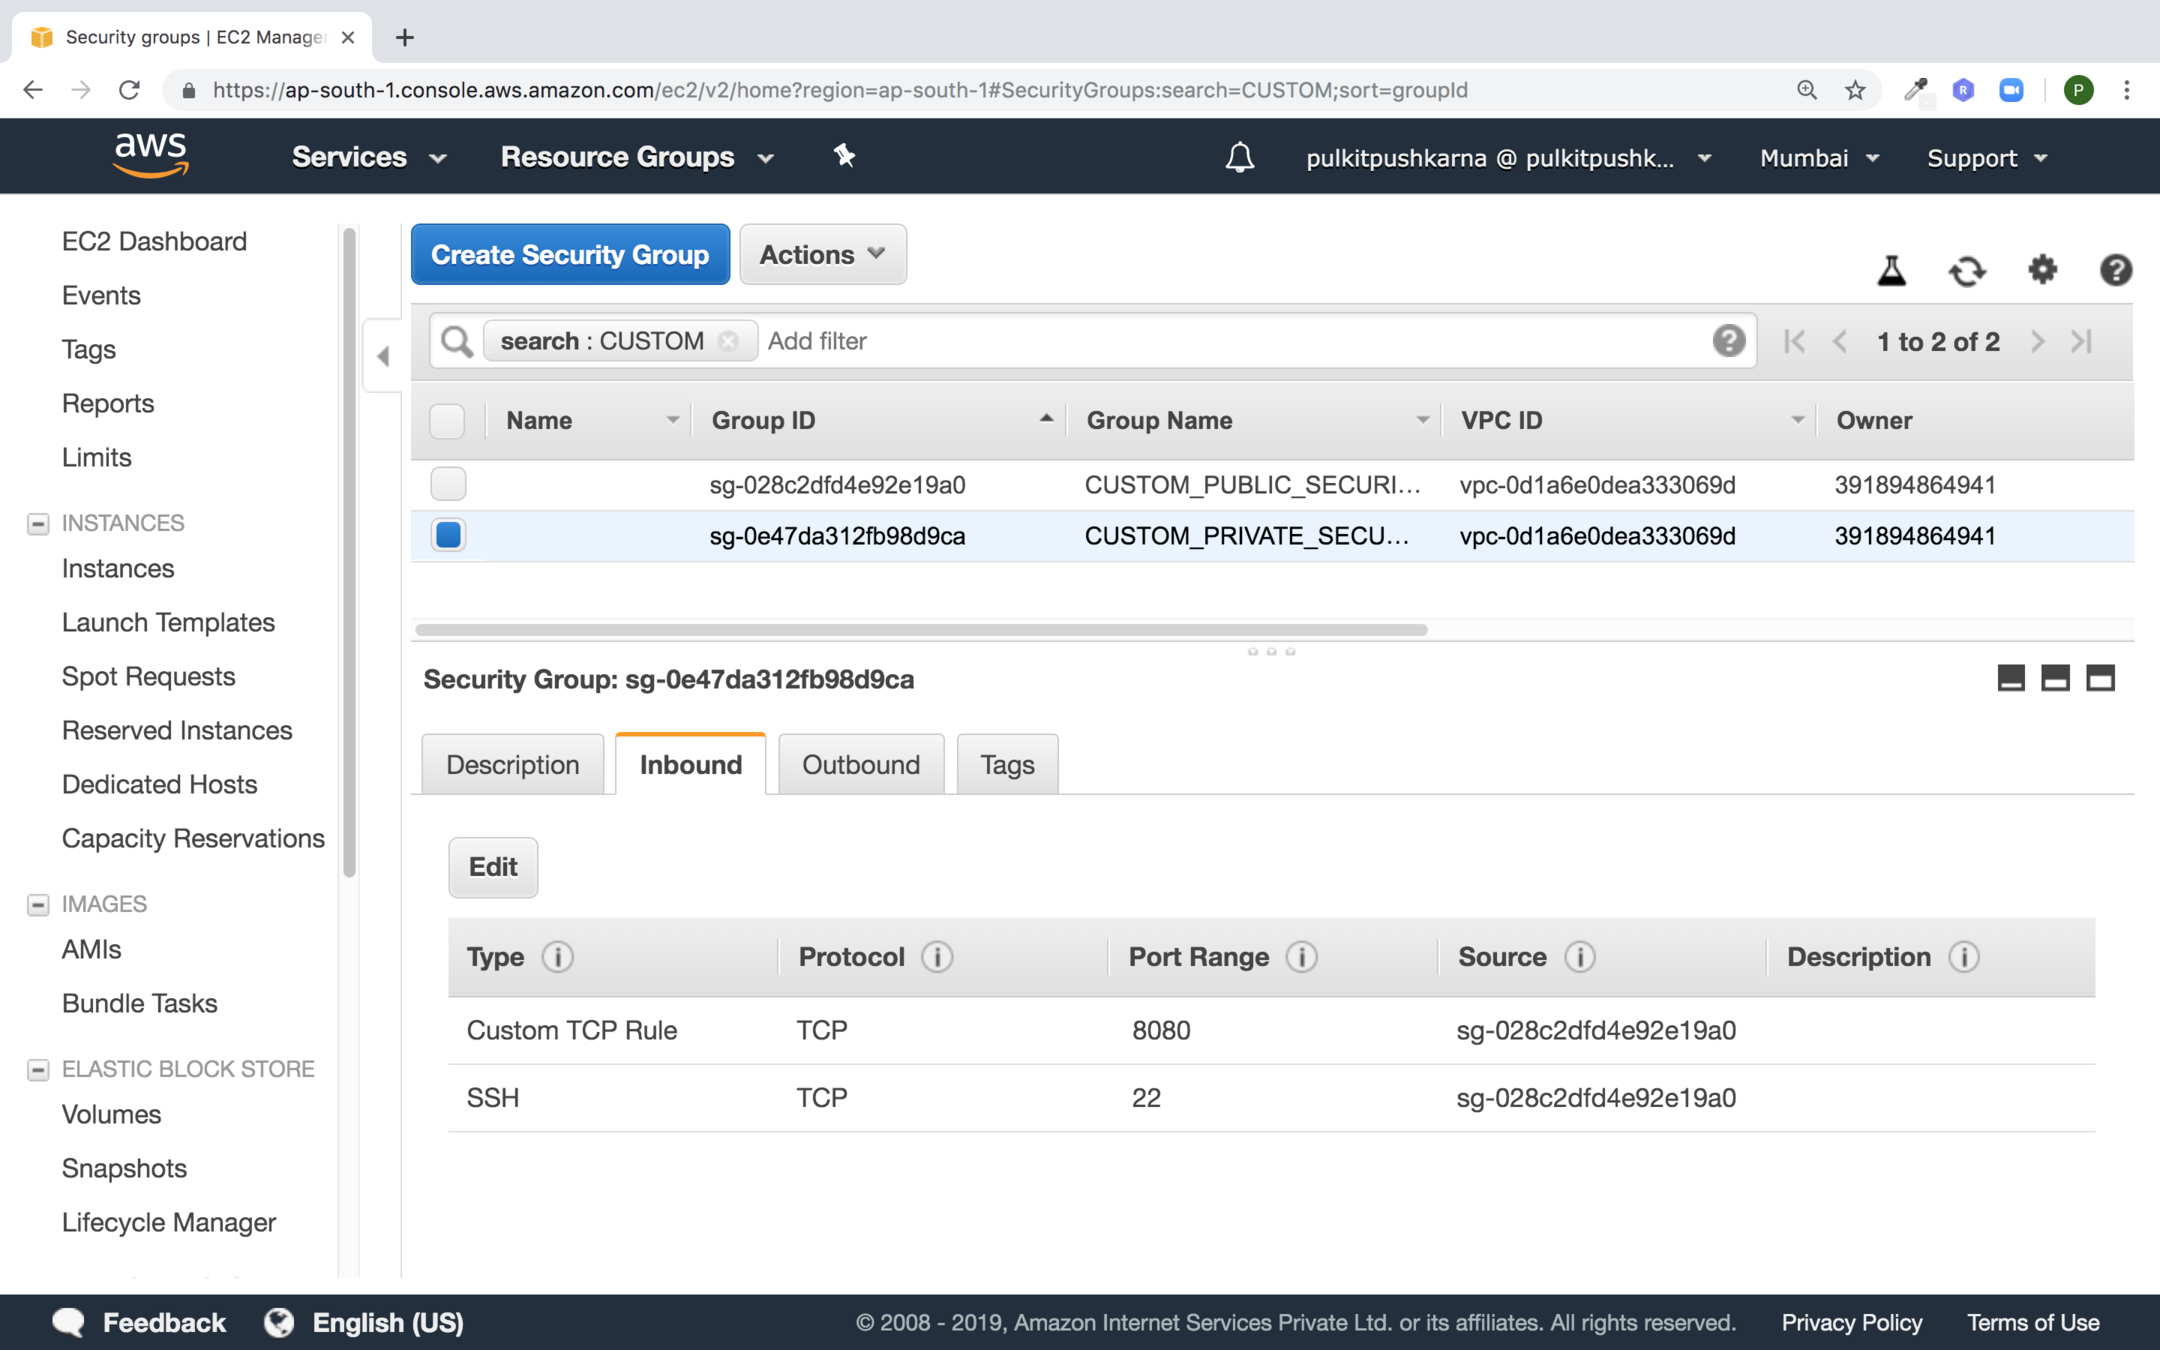
Create one more Private Security Group and set the inbound as shown in the below in the security group in the source point to the Public security group
Exercise 2
- Create a Custom VPC
- With One Private and Public Subnets.
- Configure Internet Gateway, NAT Gateway and Route Tables as per the need of of Private and Public Subnets.
- Launch an Instance in Public Subnet and an Instance in Private Subnet.
- Create a Load Balancer in Public Subnet and Run a Spring Boot Application in instance launch in Private Subnet.
- Connect the Load balancer with the instance launched in Private Subnet.
Note : You can connect to Private Instance via public Instance through private IP. Steps to create Application load balancer https://slides.com/pulkitpushkarna/aws-basics/fullscreen#/96
S3 - Simple Storage Service
- Amazon S3 is storage for the internet. It is a simple storage service that offers software developers a highly scalable reliable, low latency data storage infrastructure at very low costs.
- S3 often known as key value data store.
- S3 provides a simple web service interface that you can use to store and retrieve any amount of data, at any time, from anywhere on the web.
- Using this service developers can easily build applications that make use of internal storage
- It is secure and highly reliable object store from AWS
- S3 objects can range from 0 bytes to 5 terabyte
Types of S3 Storage classes
- Amazon S3 Standard : General purpose storage for frequent access of data.
- Amazon S3 Standard - Infrequent Access : Long Lived but less frequently accessed data.
- Amazon Glacier : For long term archive
- Reduced Redundancy Storage (RRS) is an Amazon S3 storage option that enables customers to reduce cost by storing non critical reproducible data at lower levels of redundancy than amazon S3 standard storage.
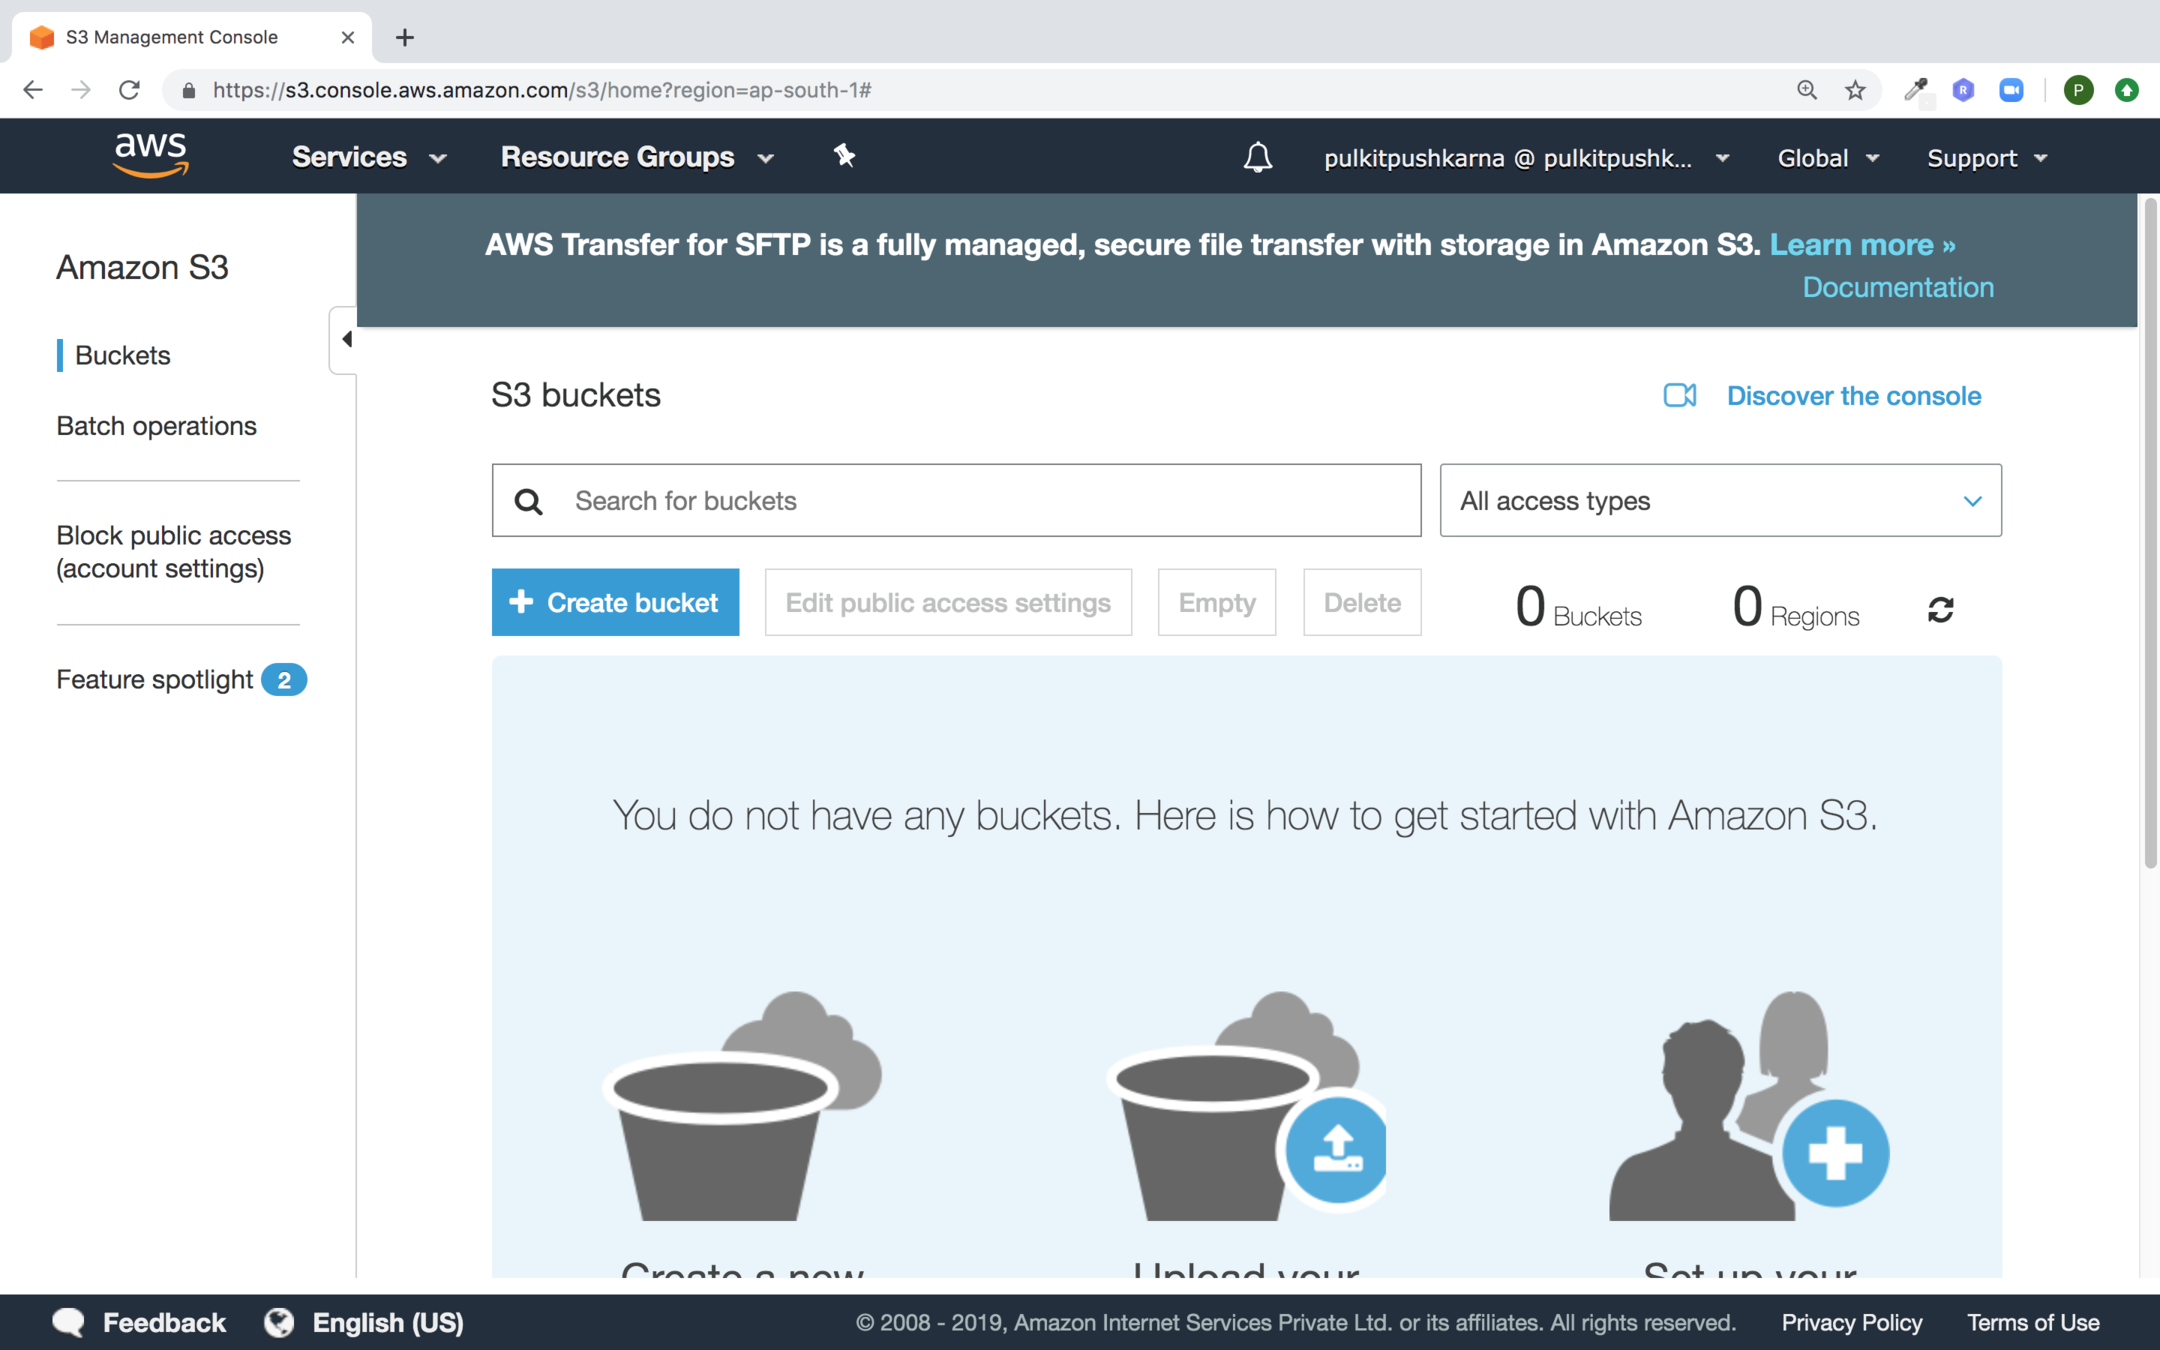
Go to the S3 bucket section Click on Create bucket
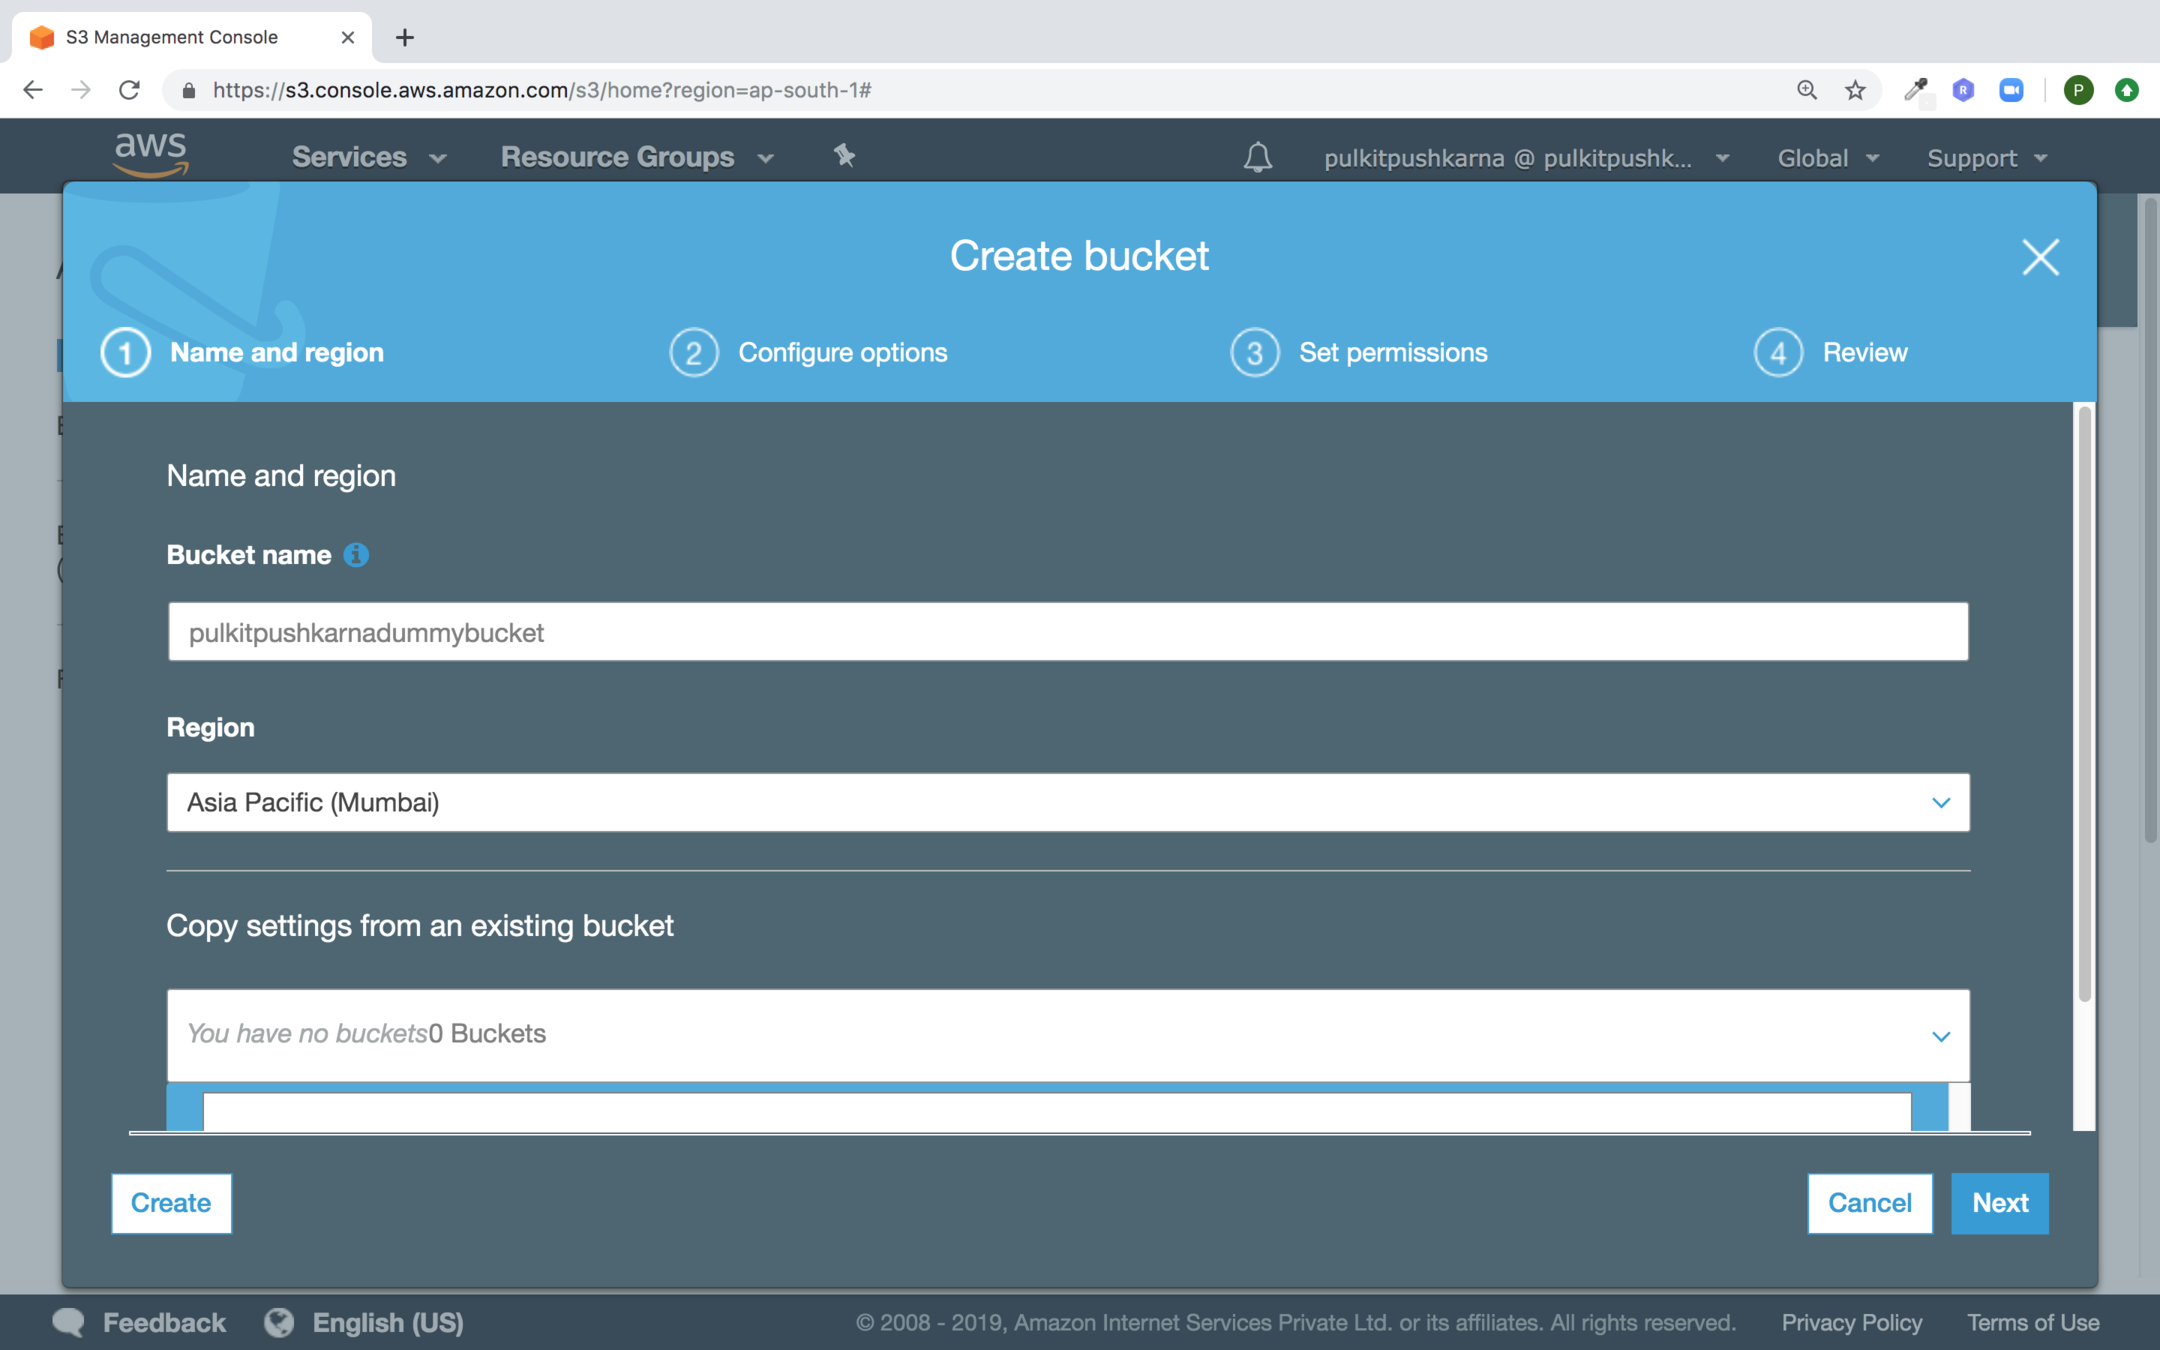
Provide the Bucket name and select the Region an hit on Next
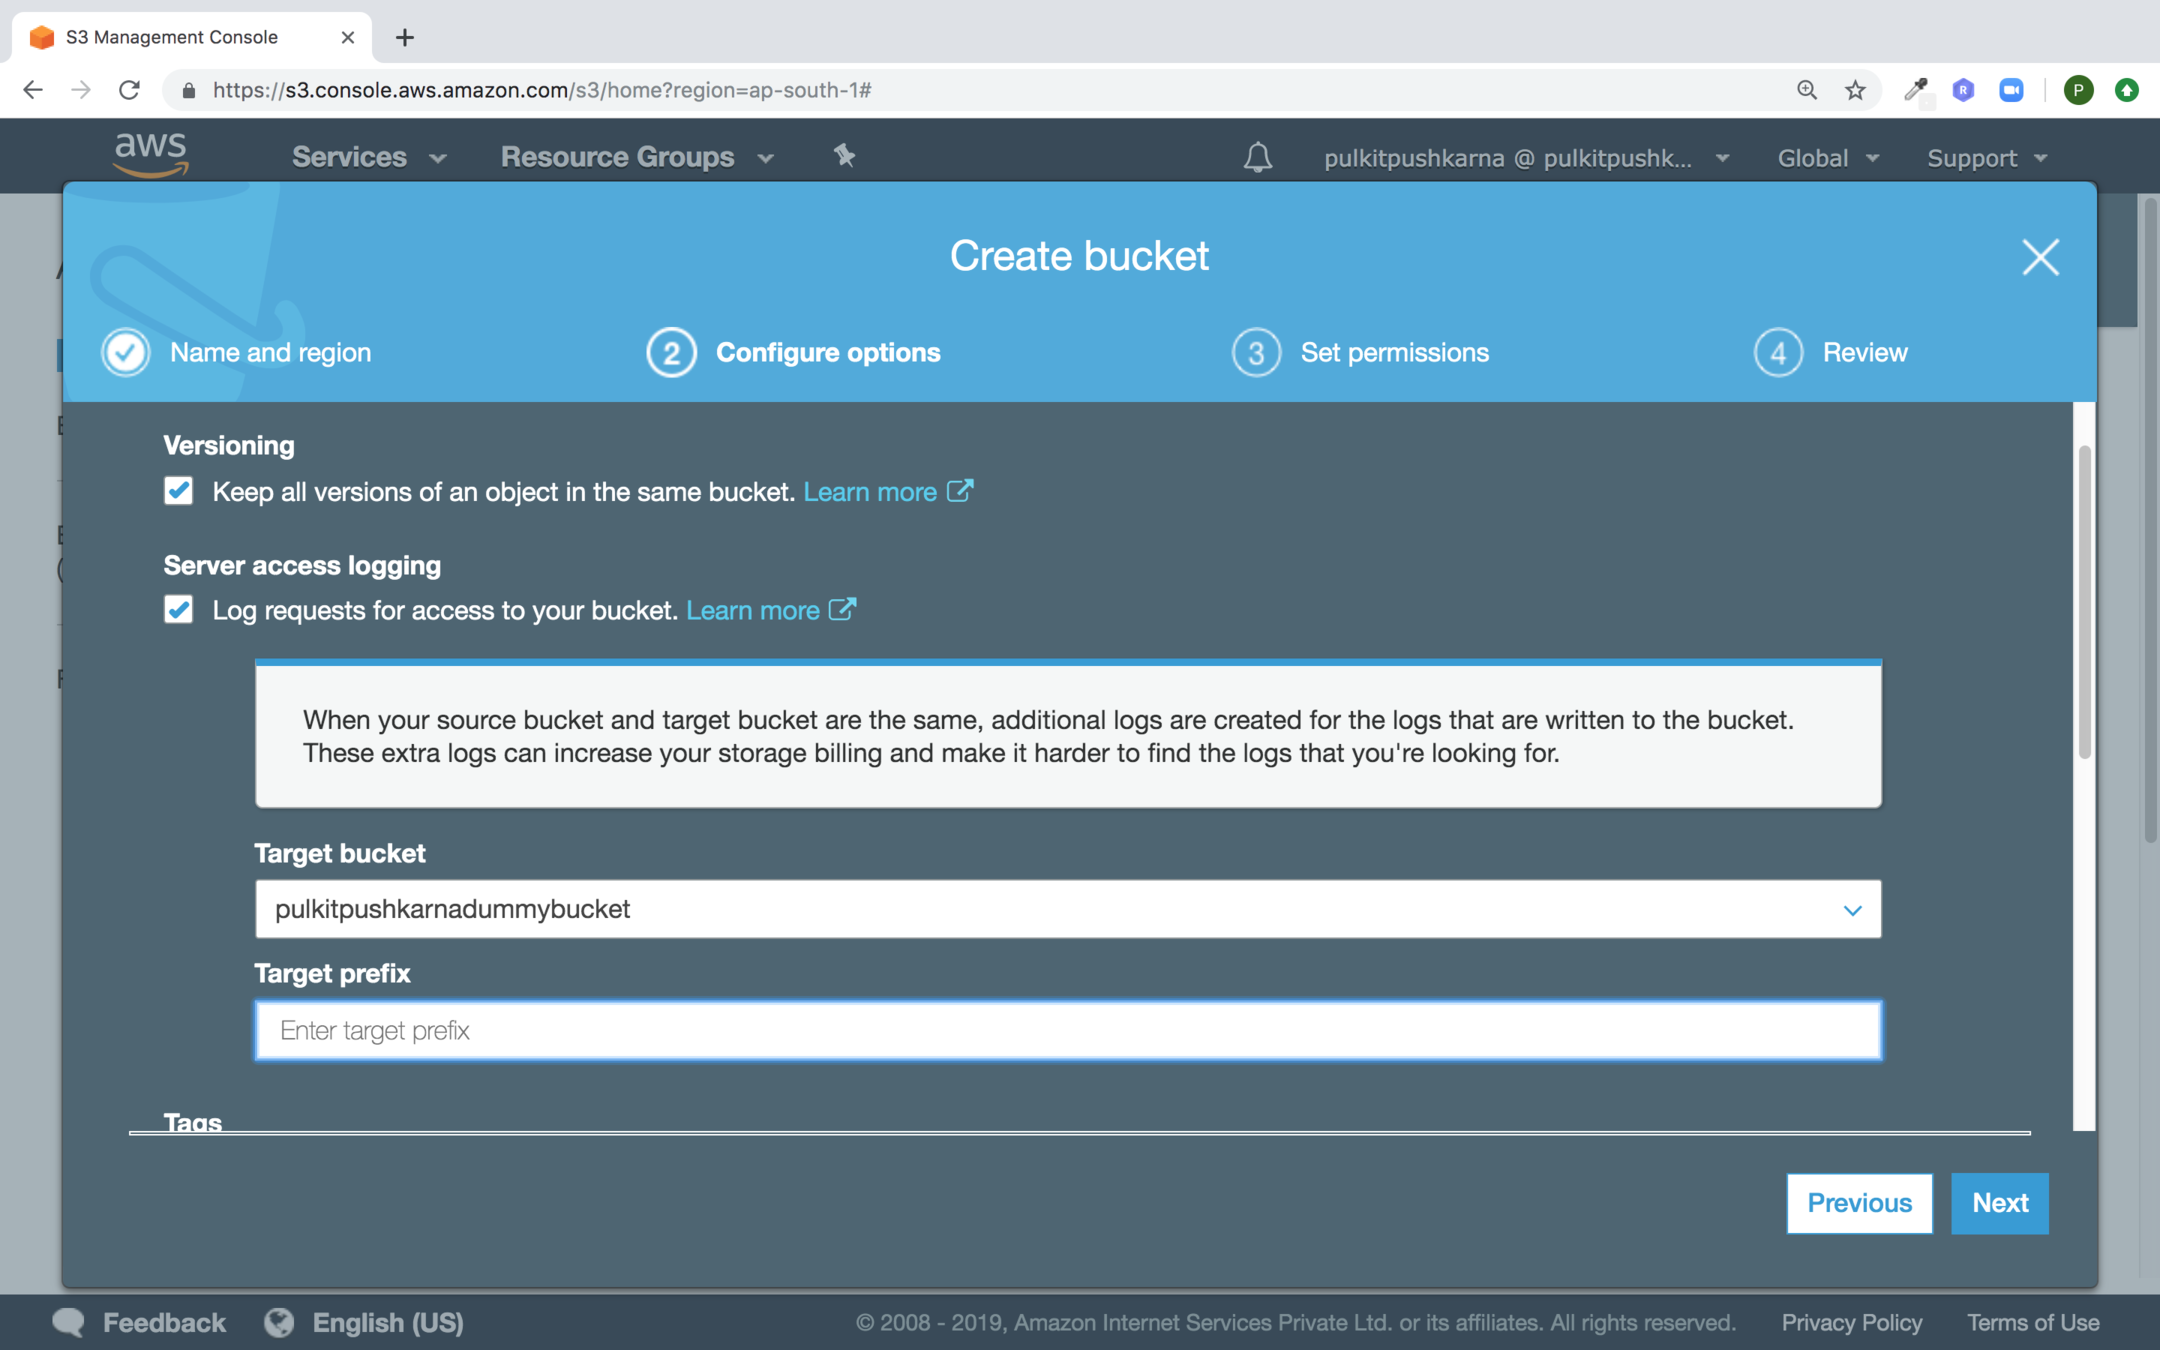
Check the checkbox for Versioning and logging
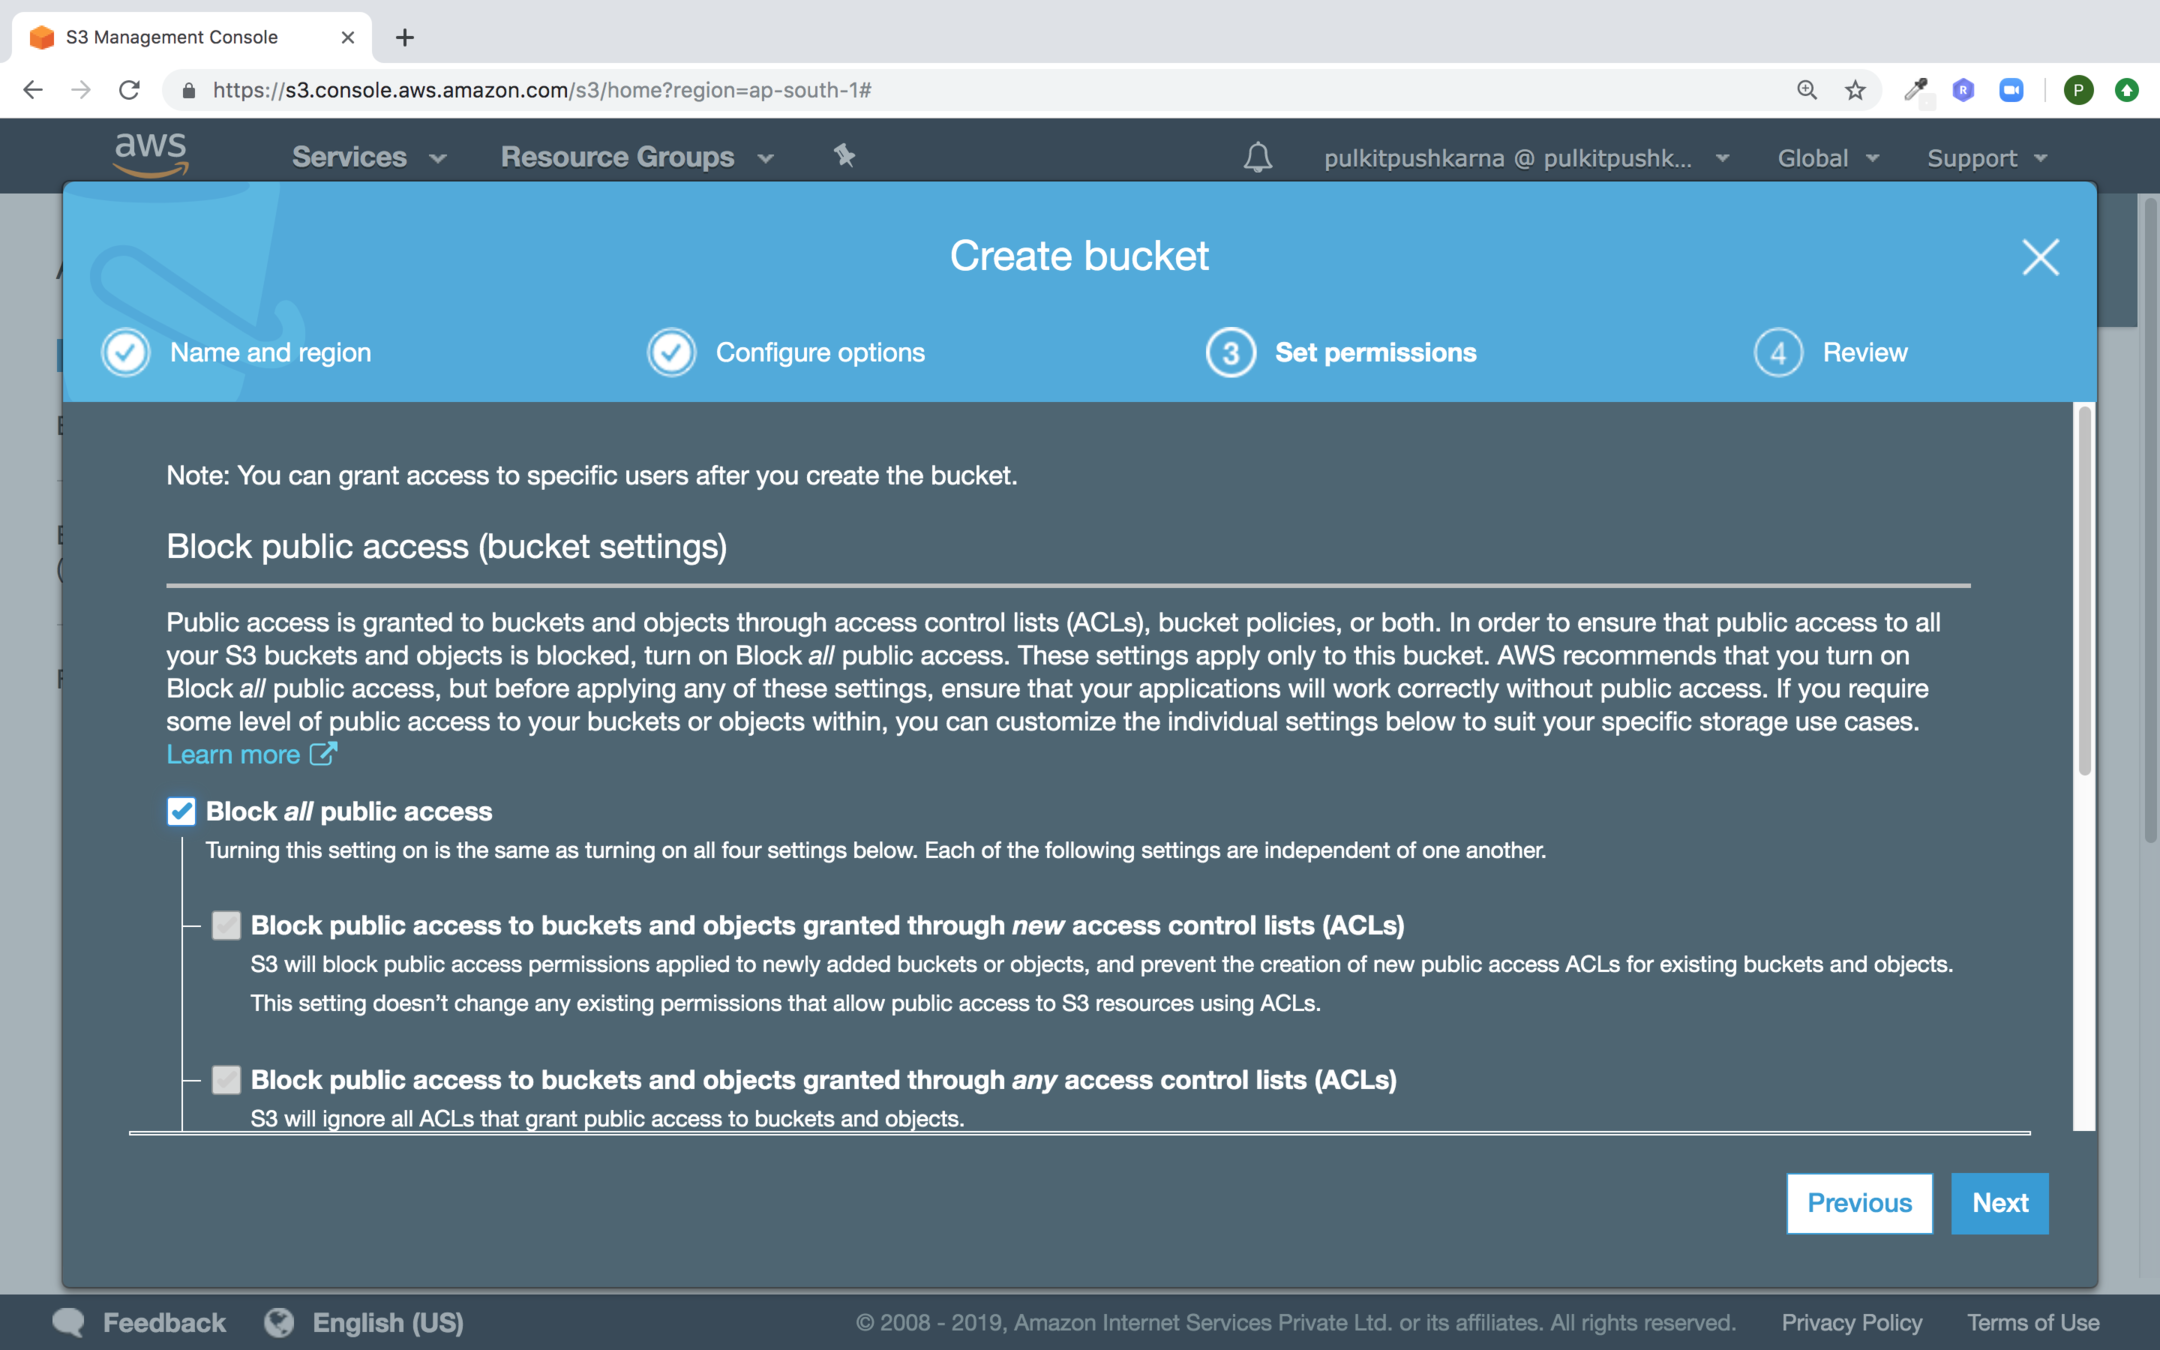
uncheck Block all public access checked and hit next
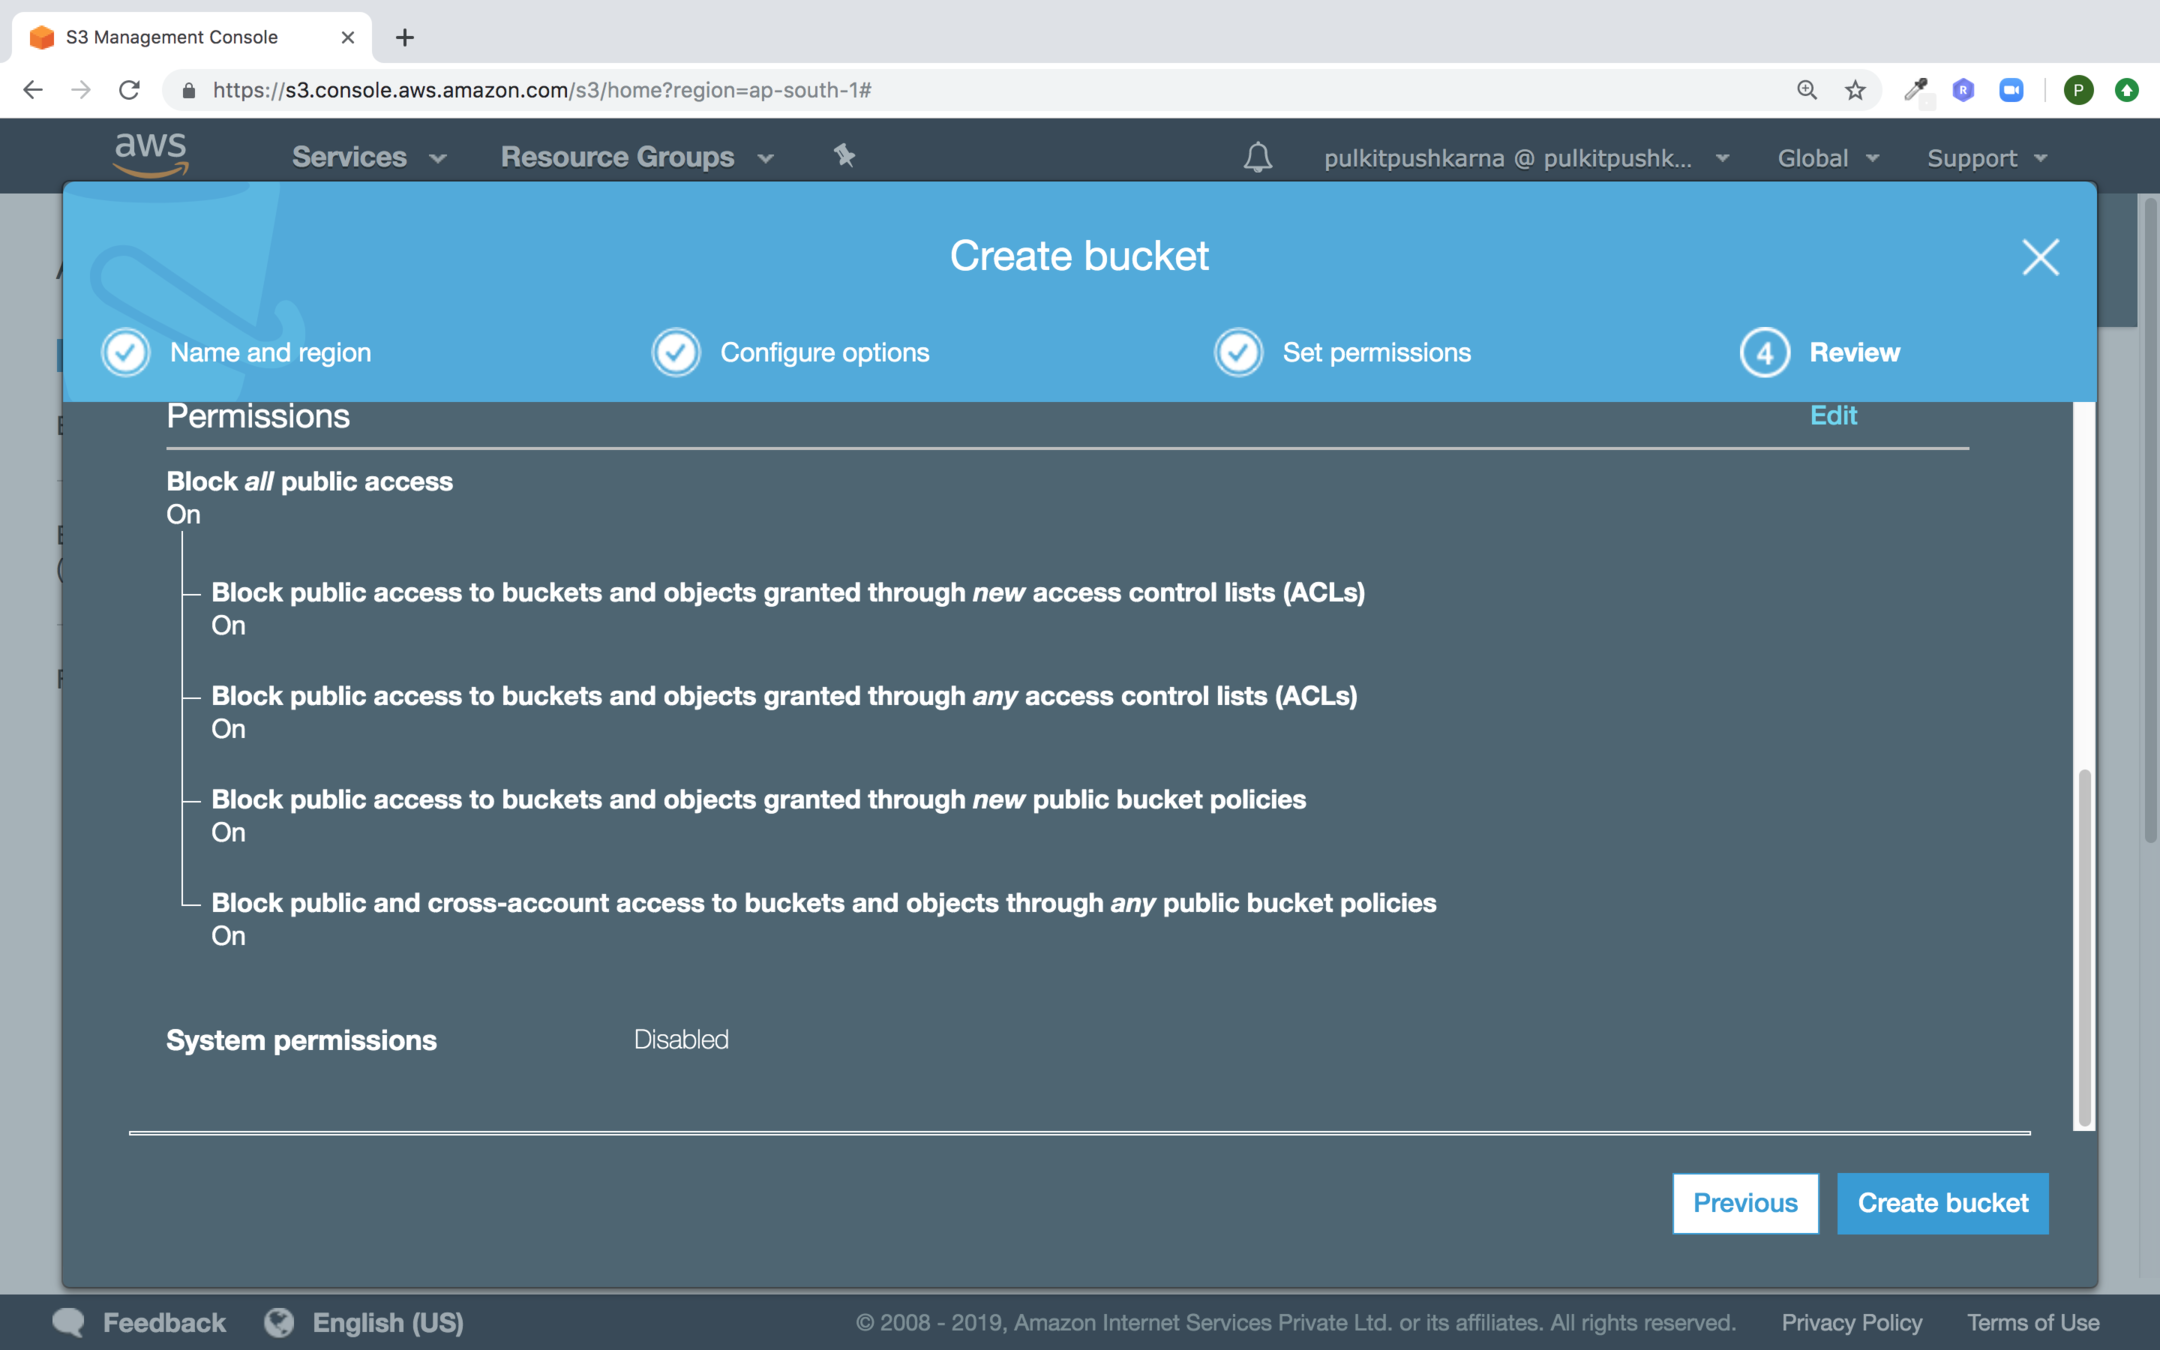
Click on Create bucket button
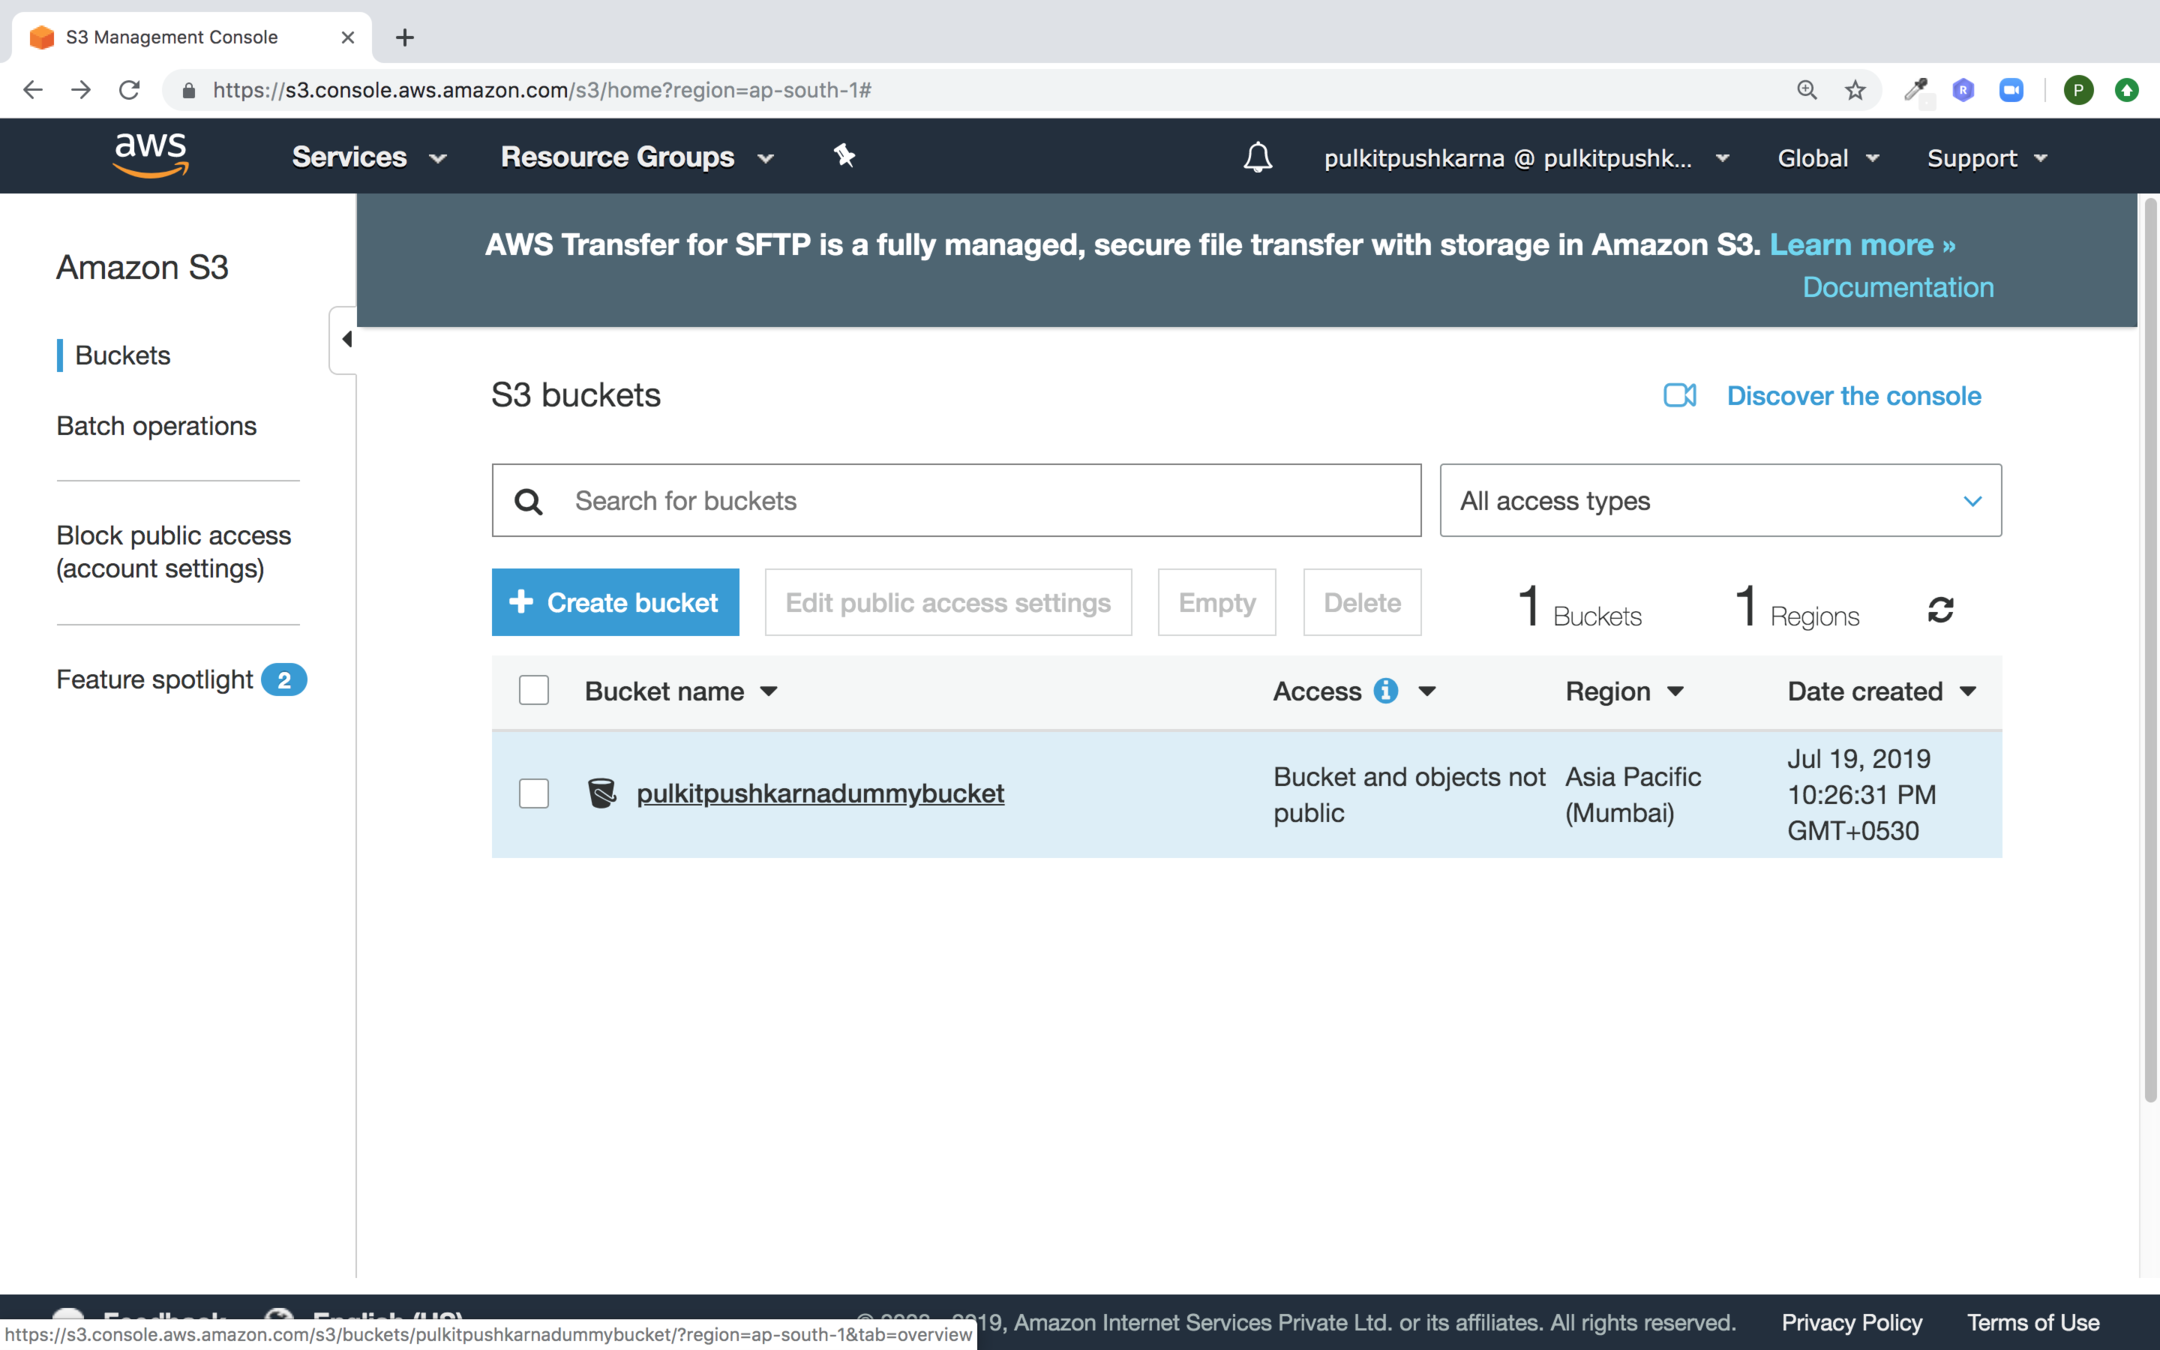
Click on the newly created bucket
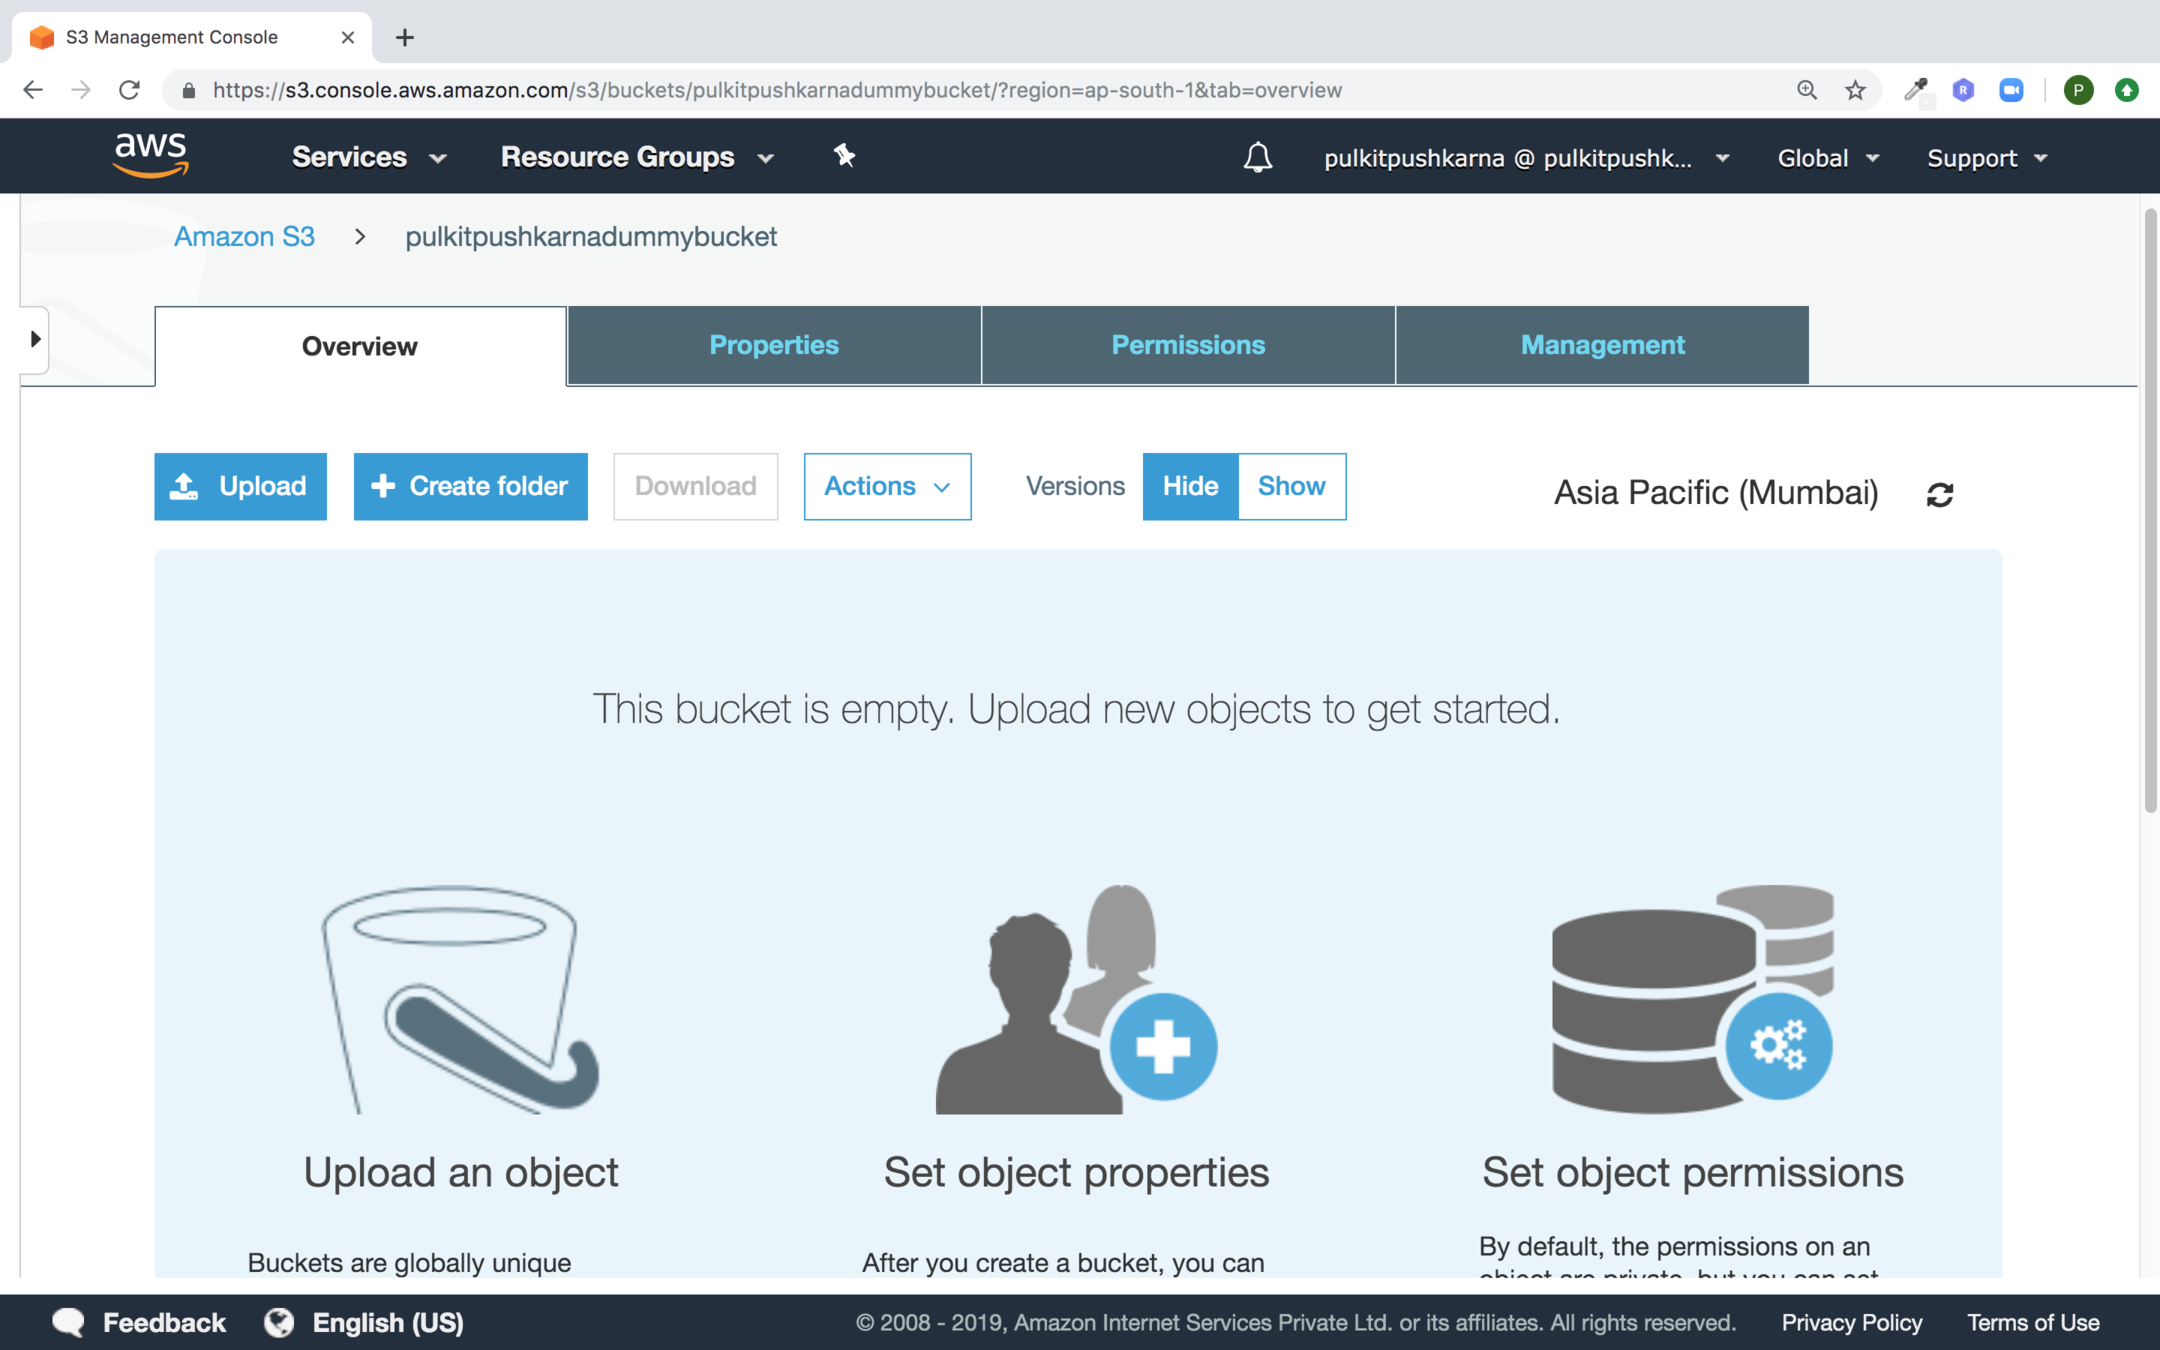
You will land to this screen click on Upload
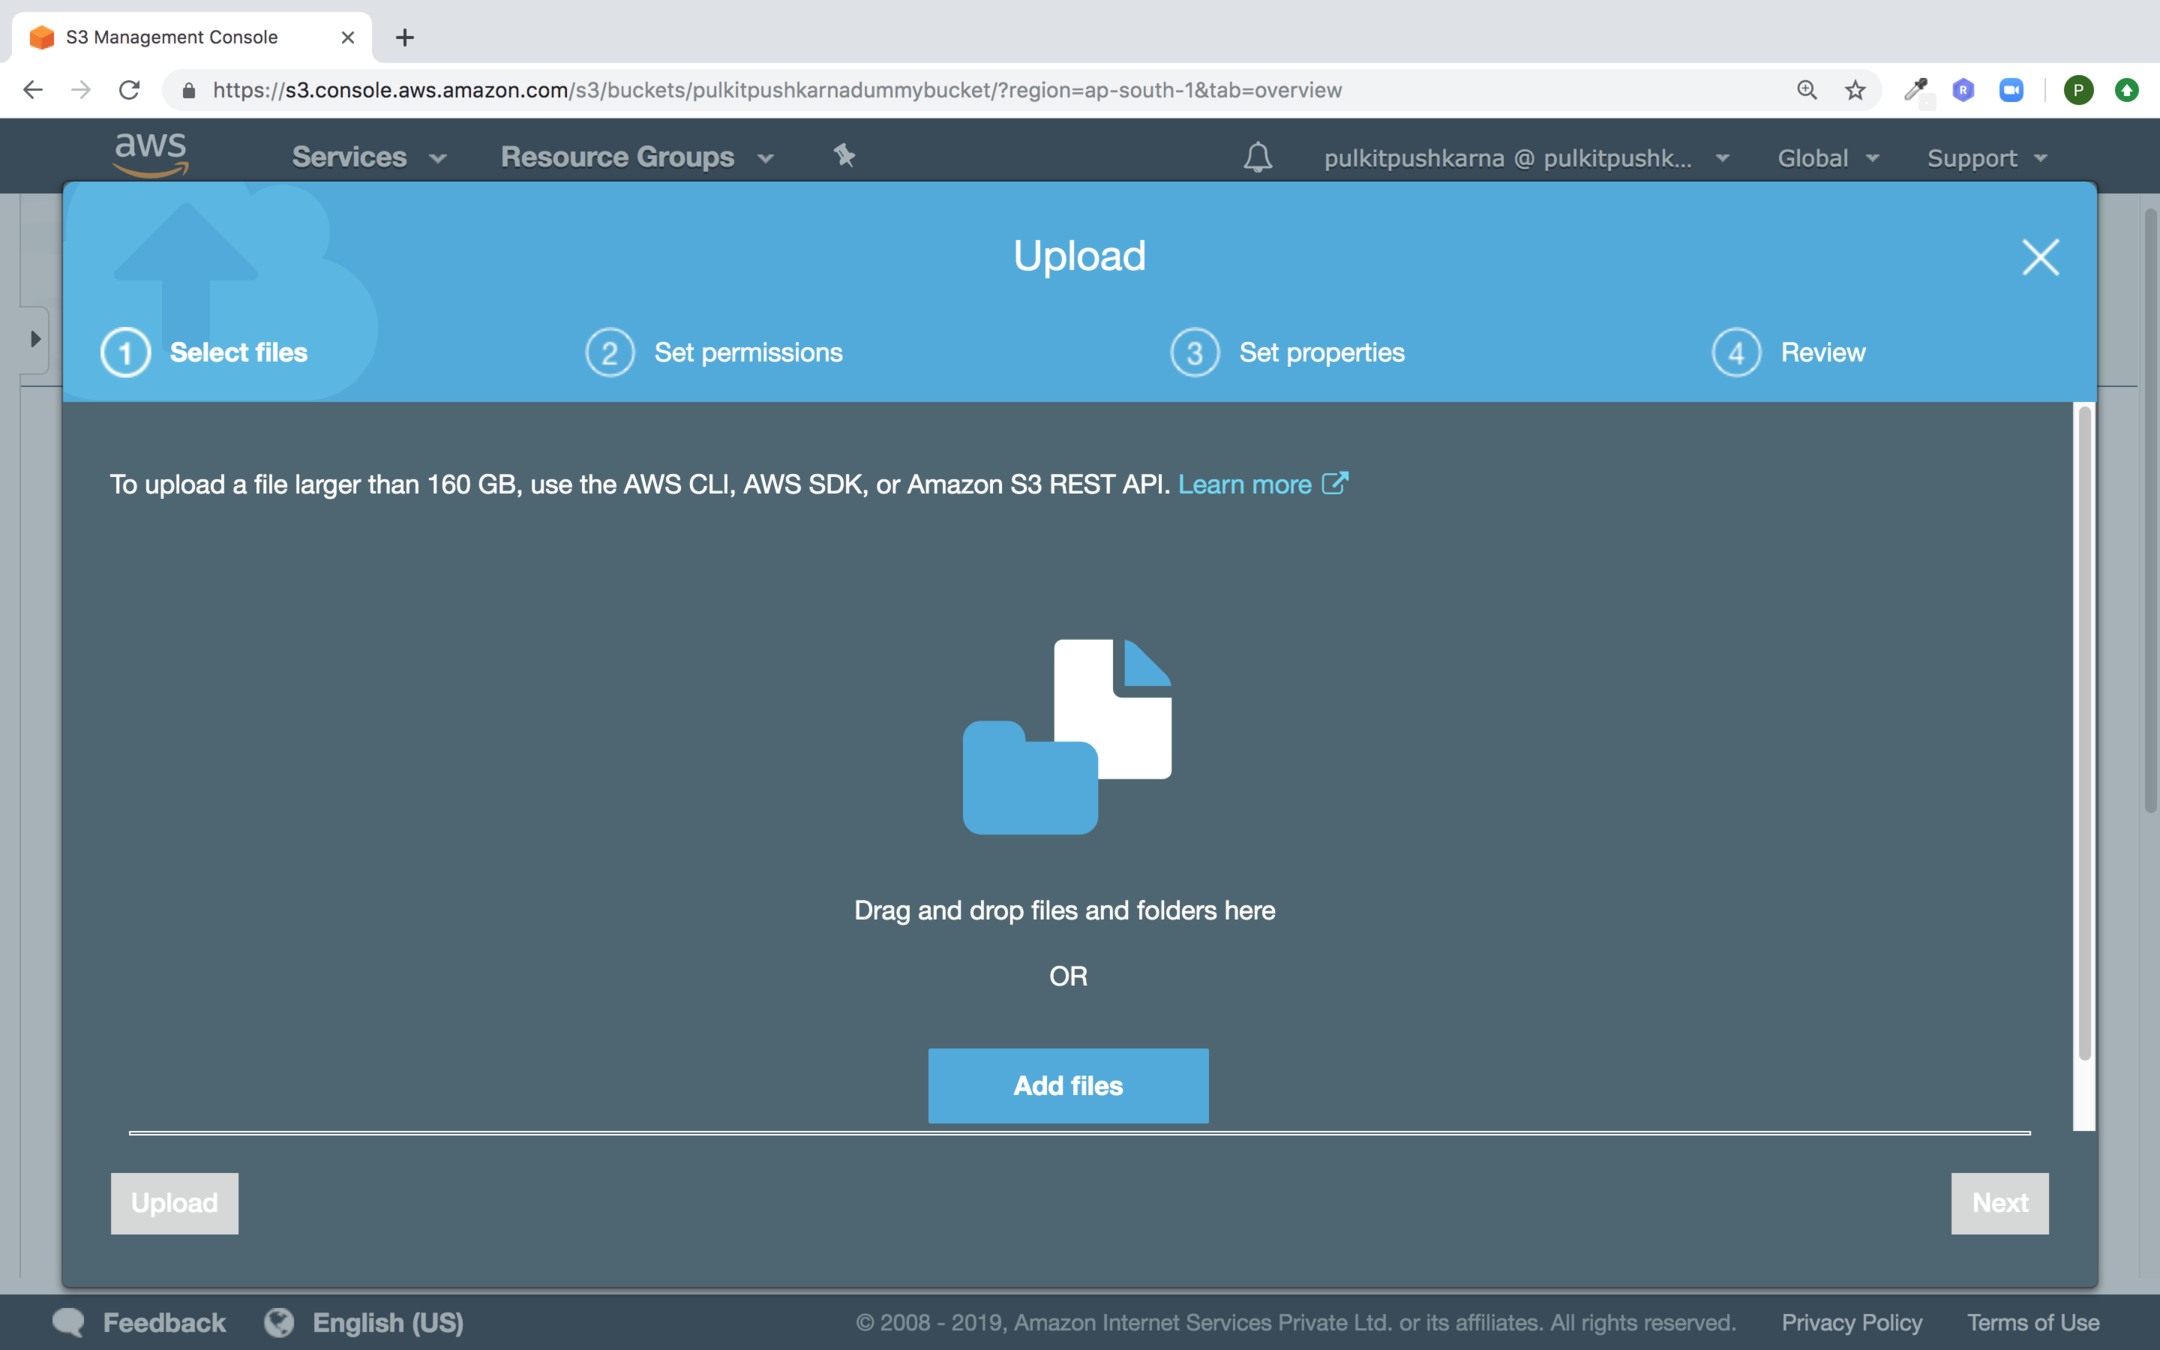
Click on Add files and select the file to be uploaded
Click on next
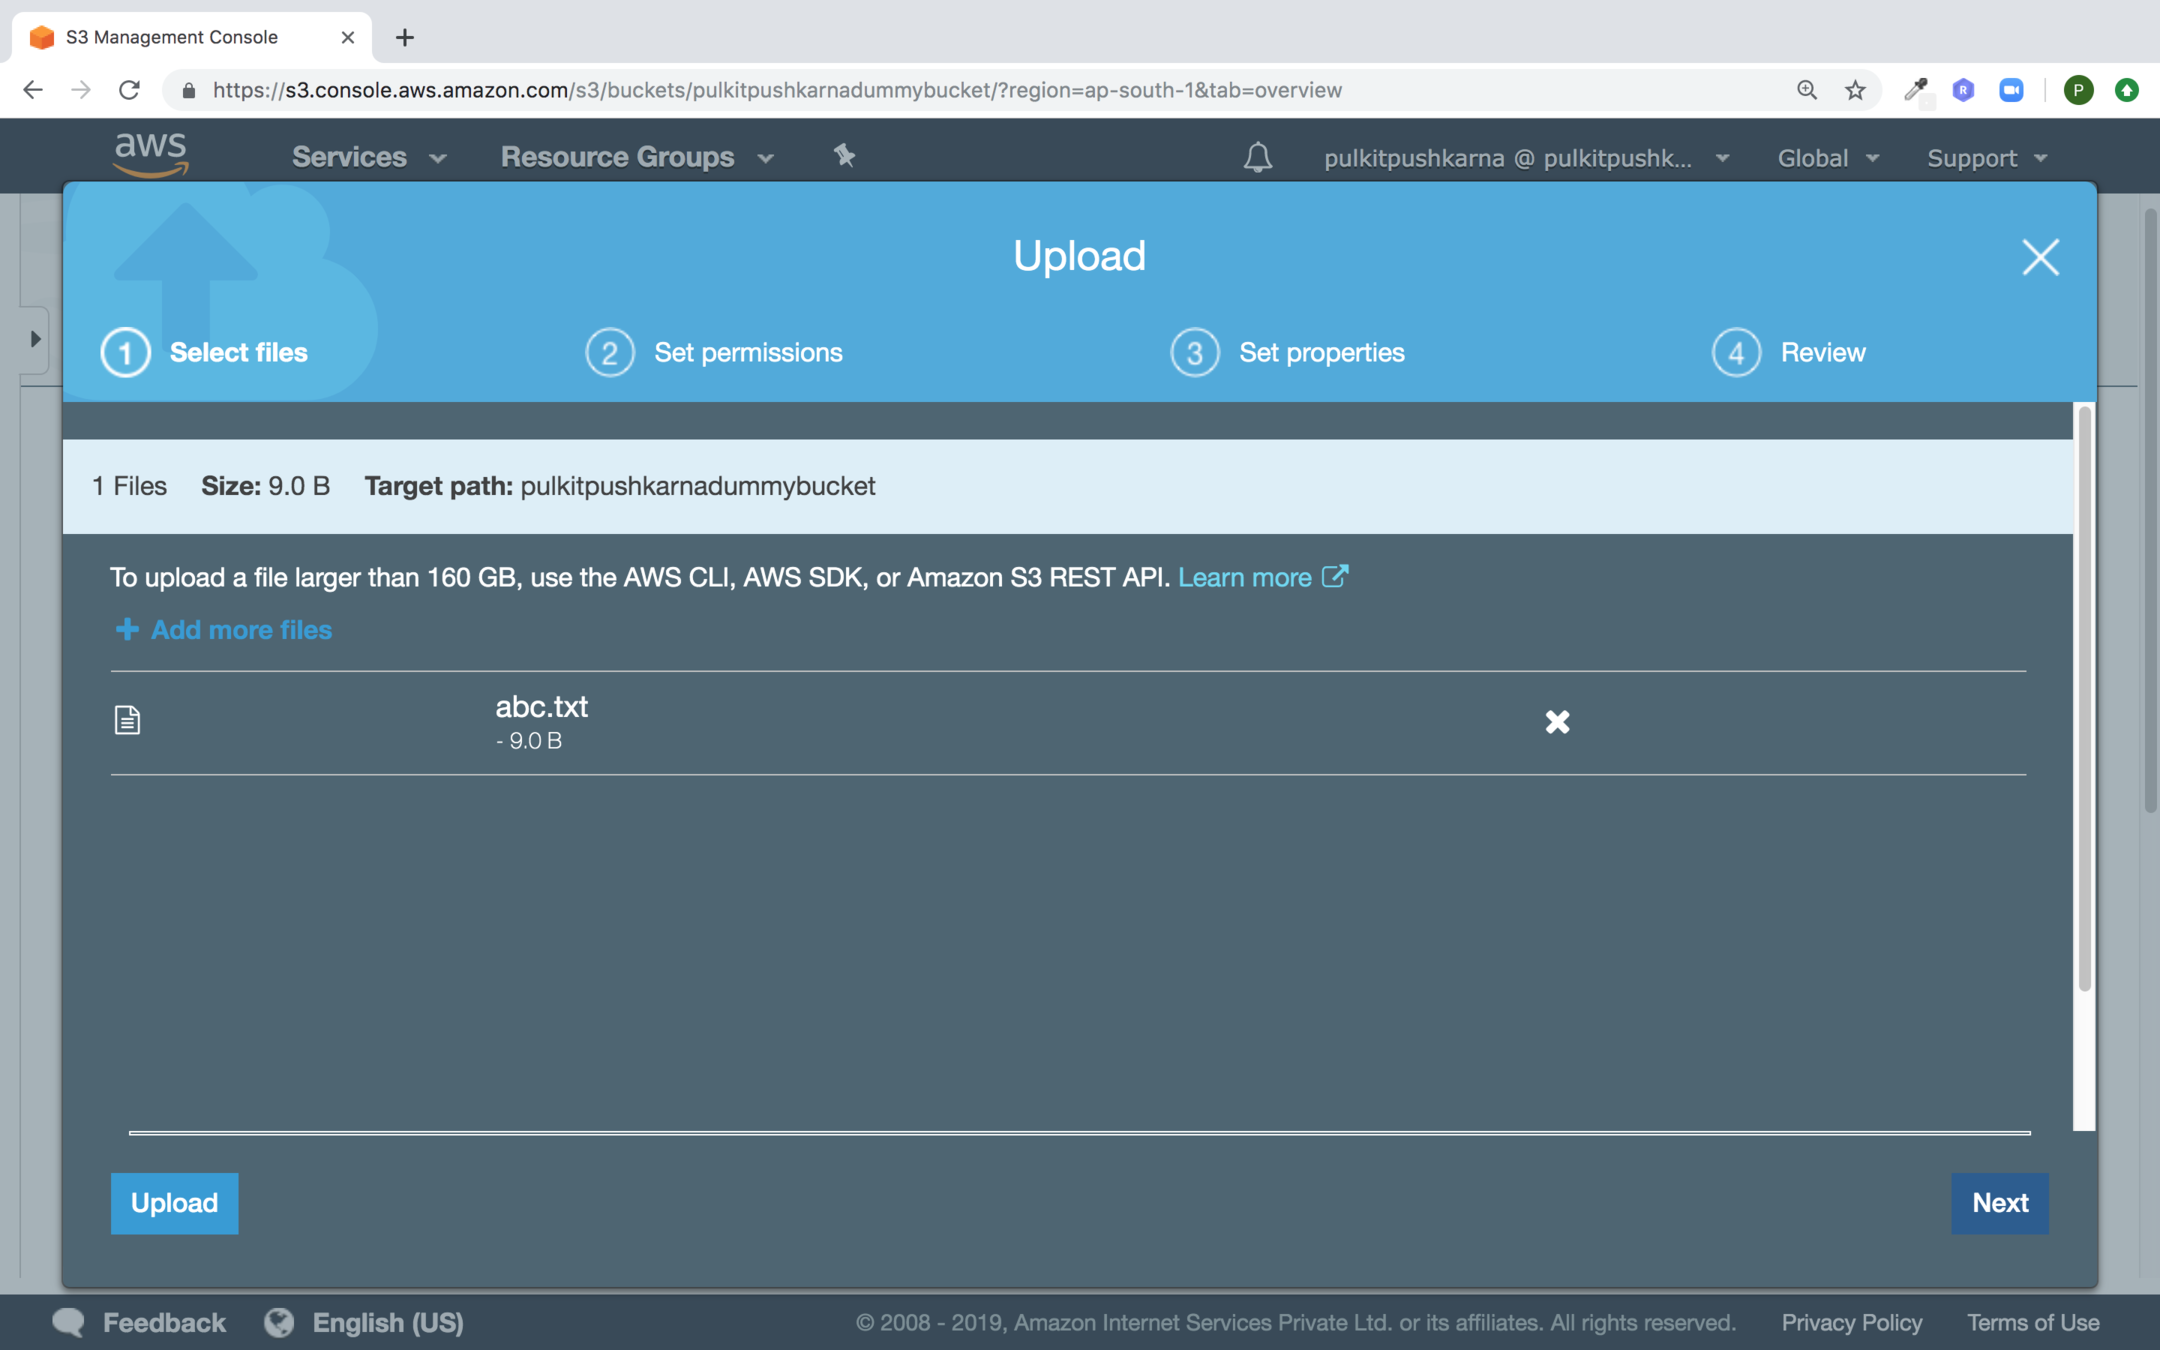
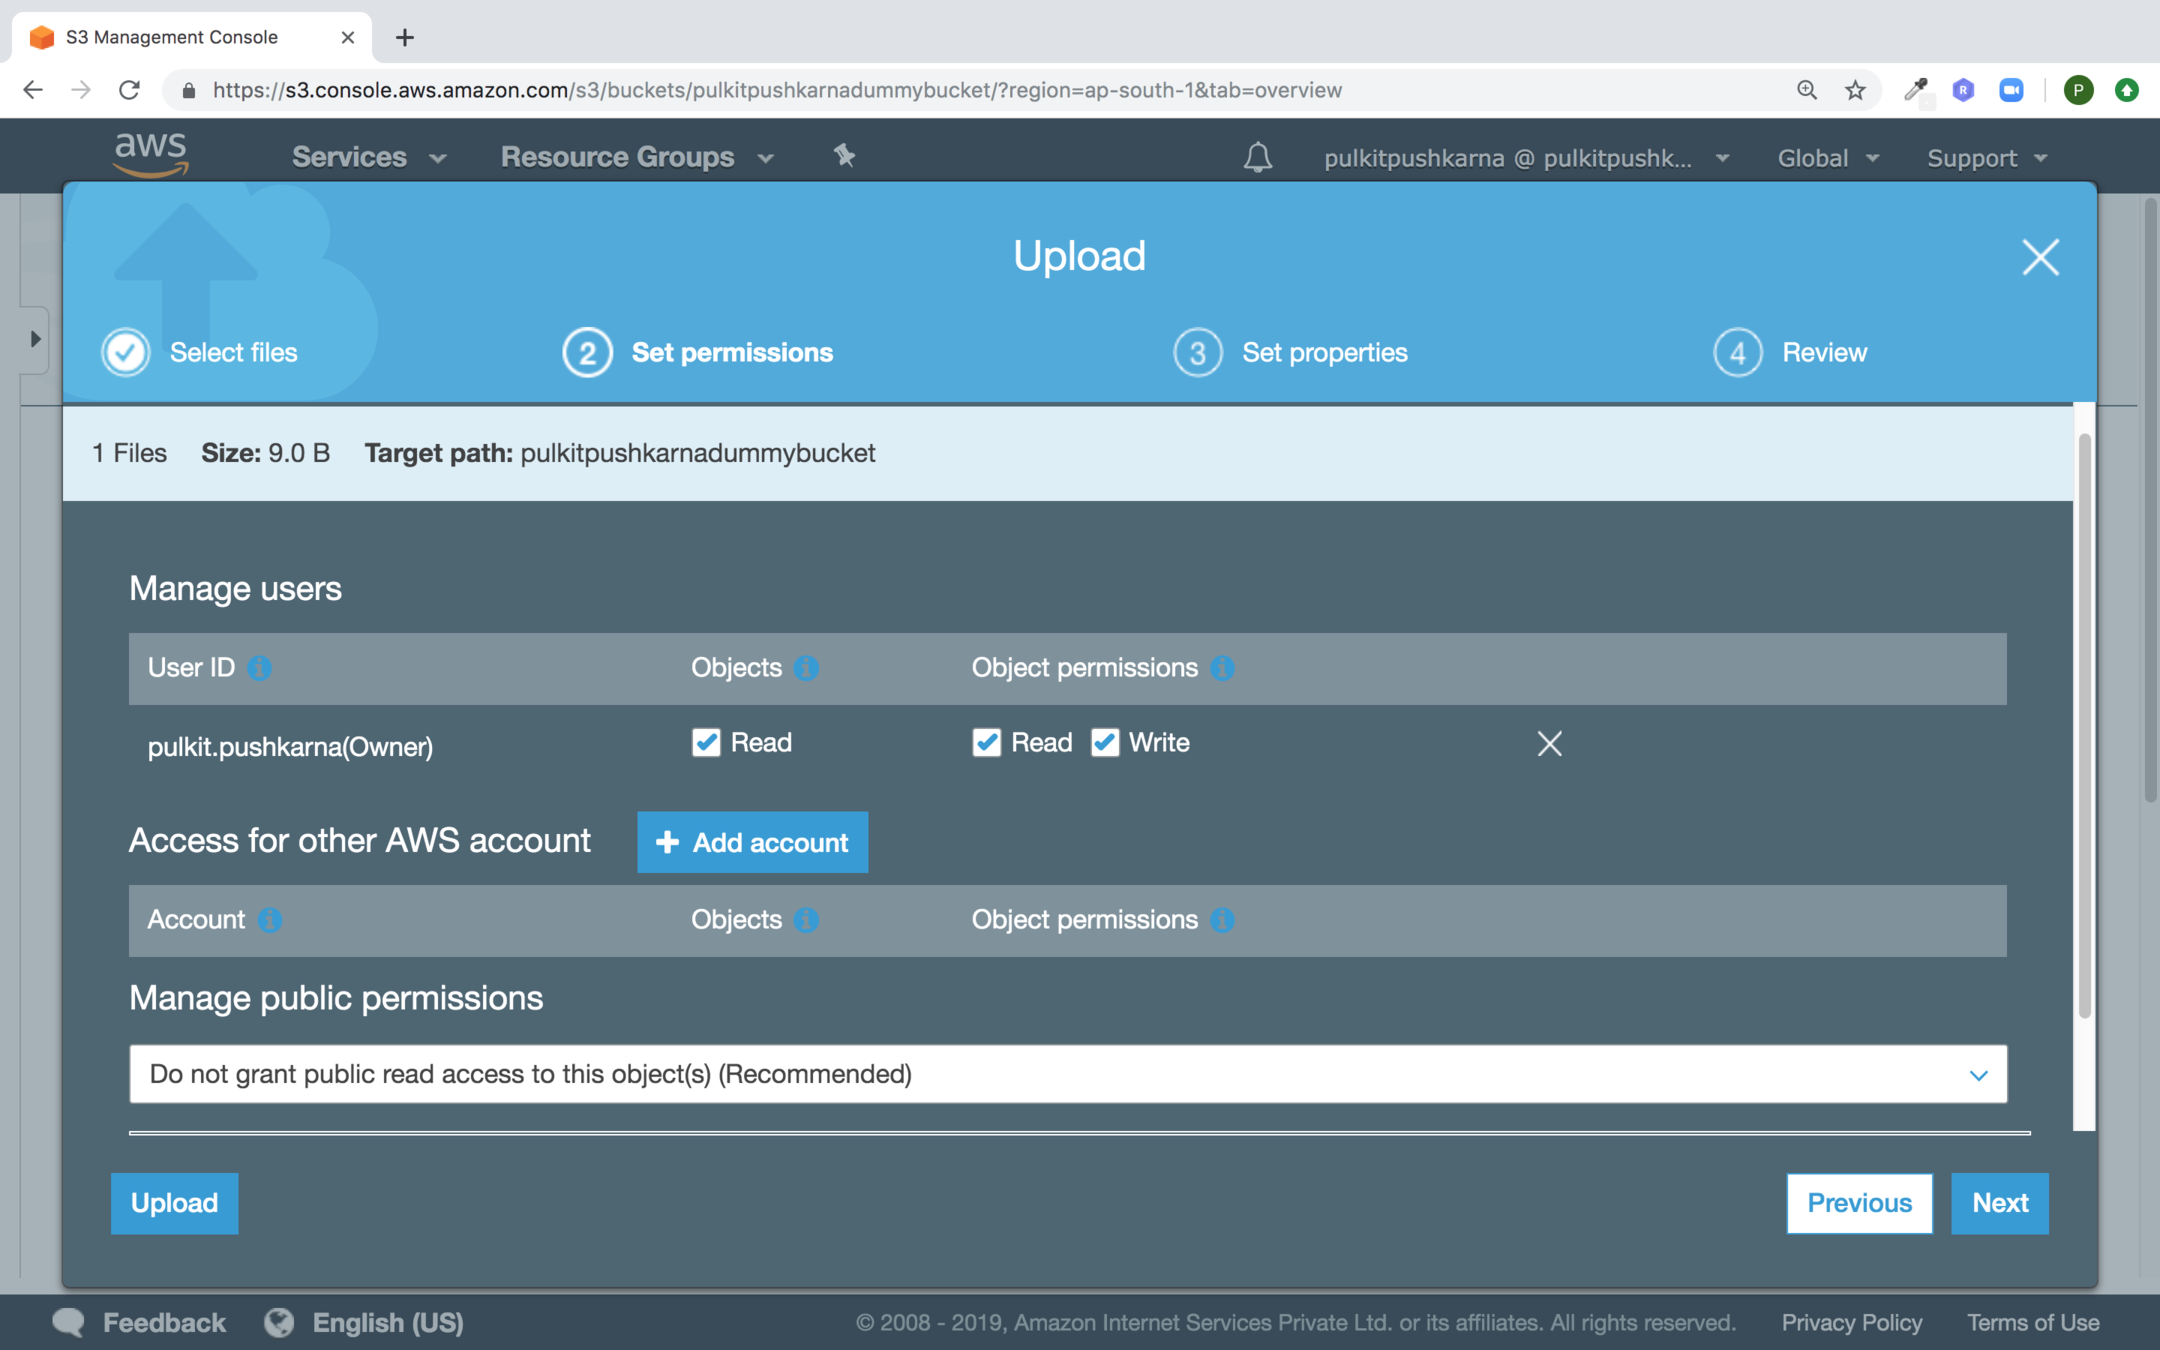
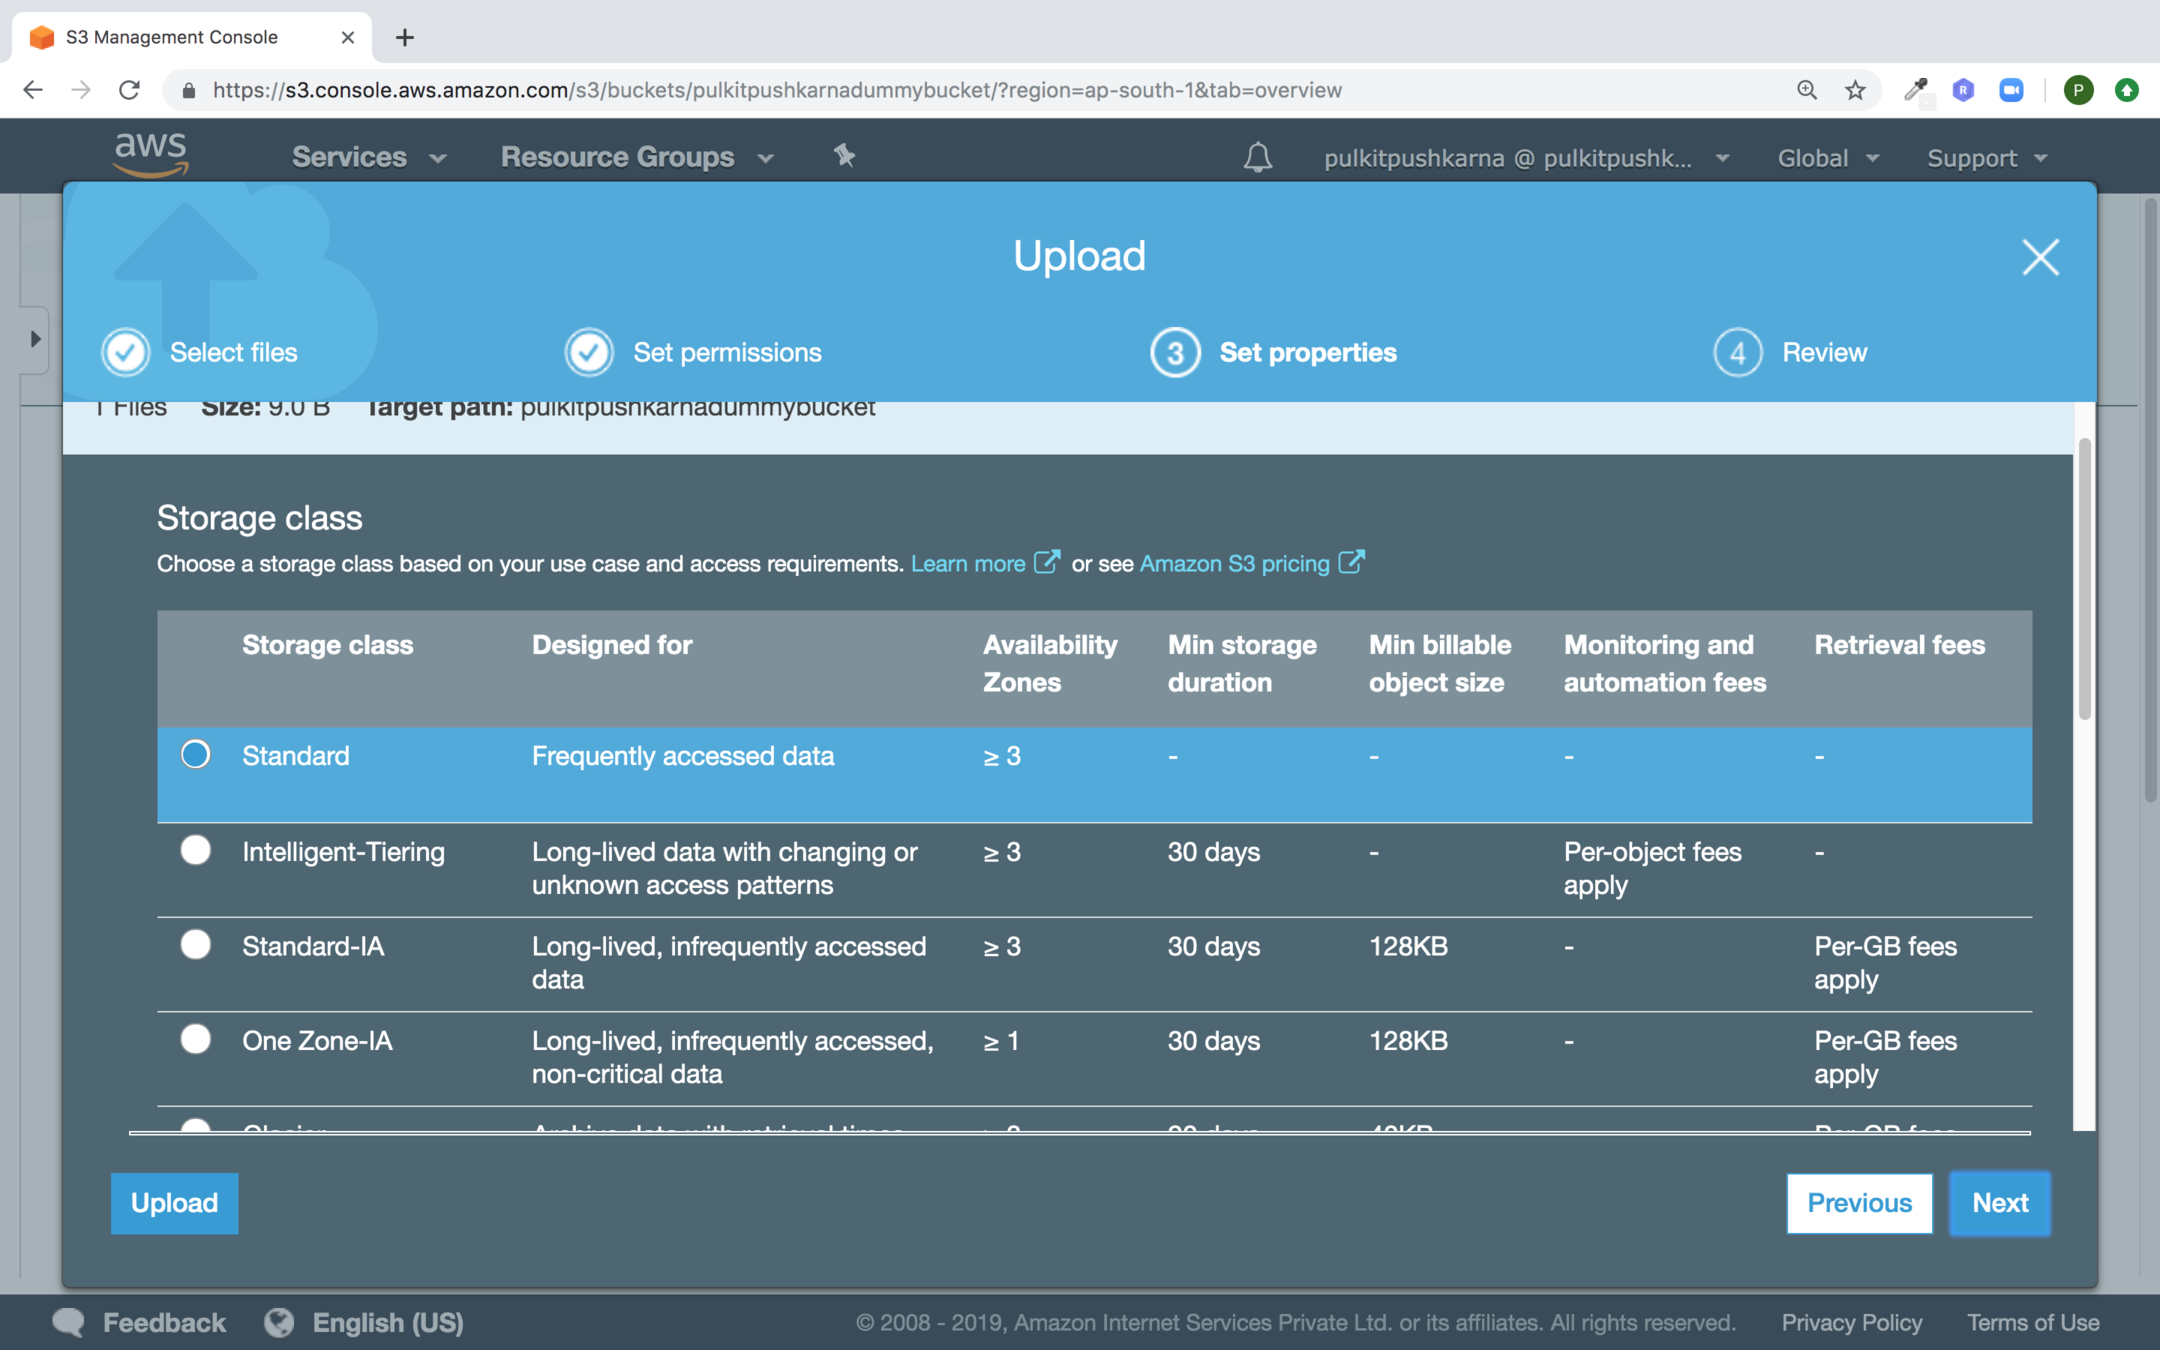
Select Standard and click Next
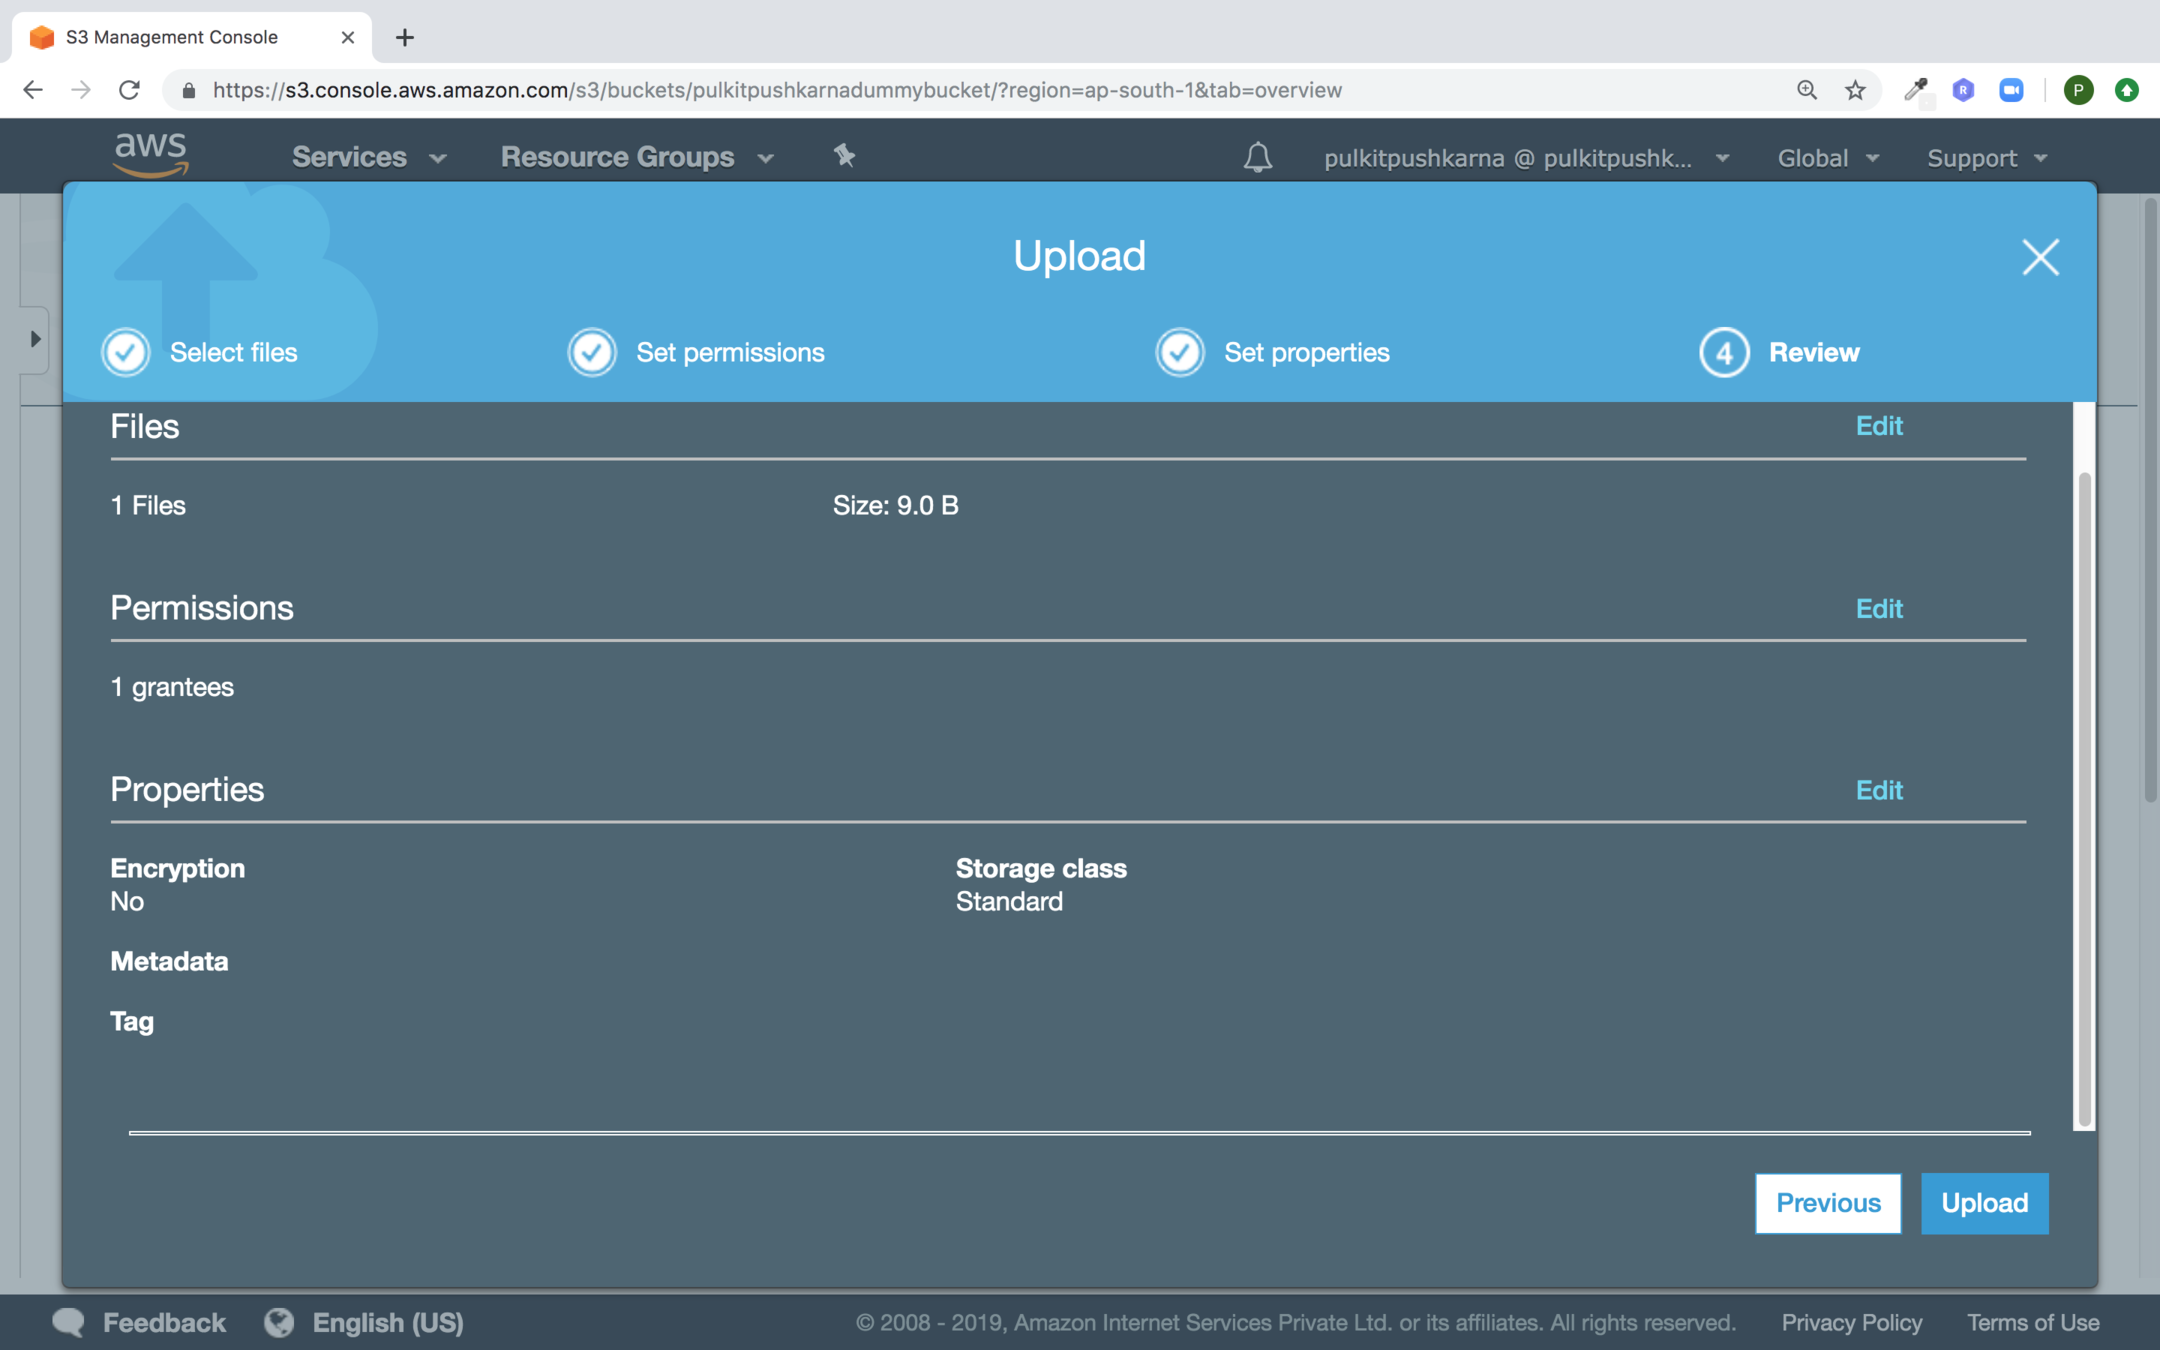
Now click on upload
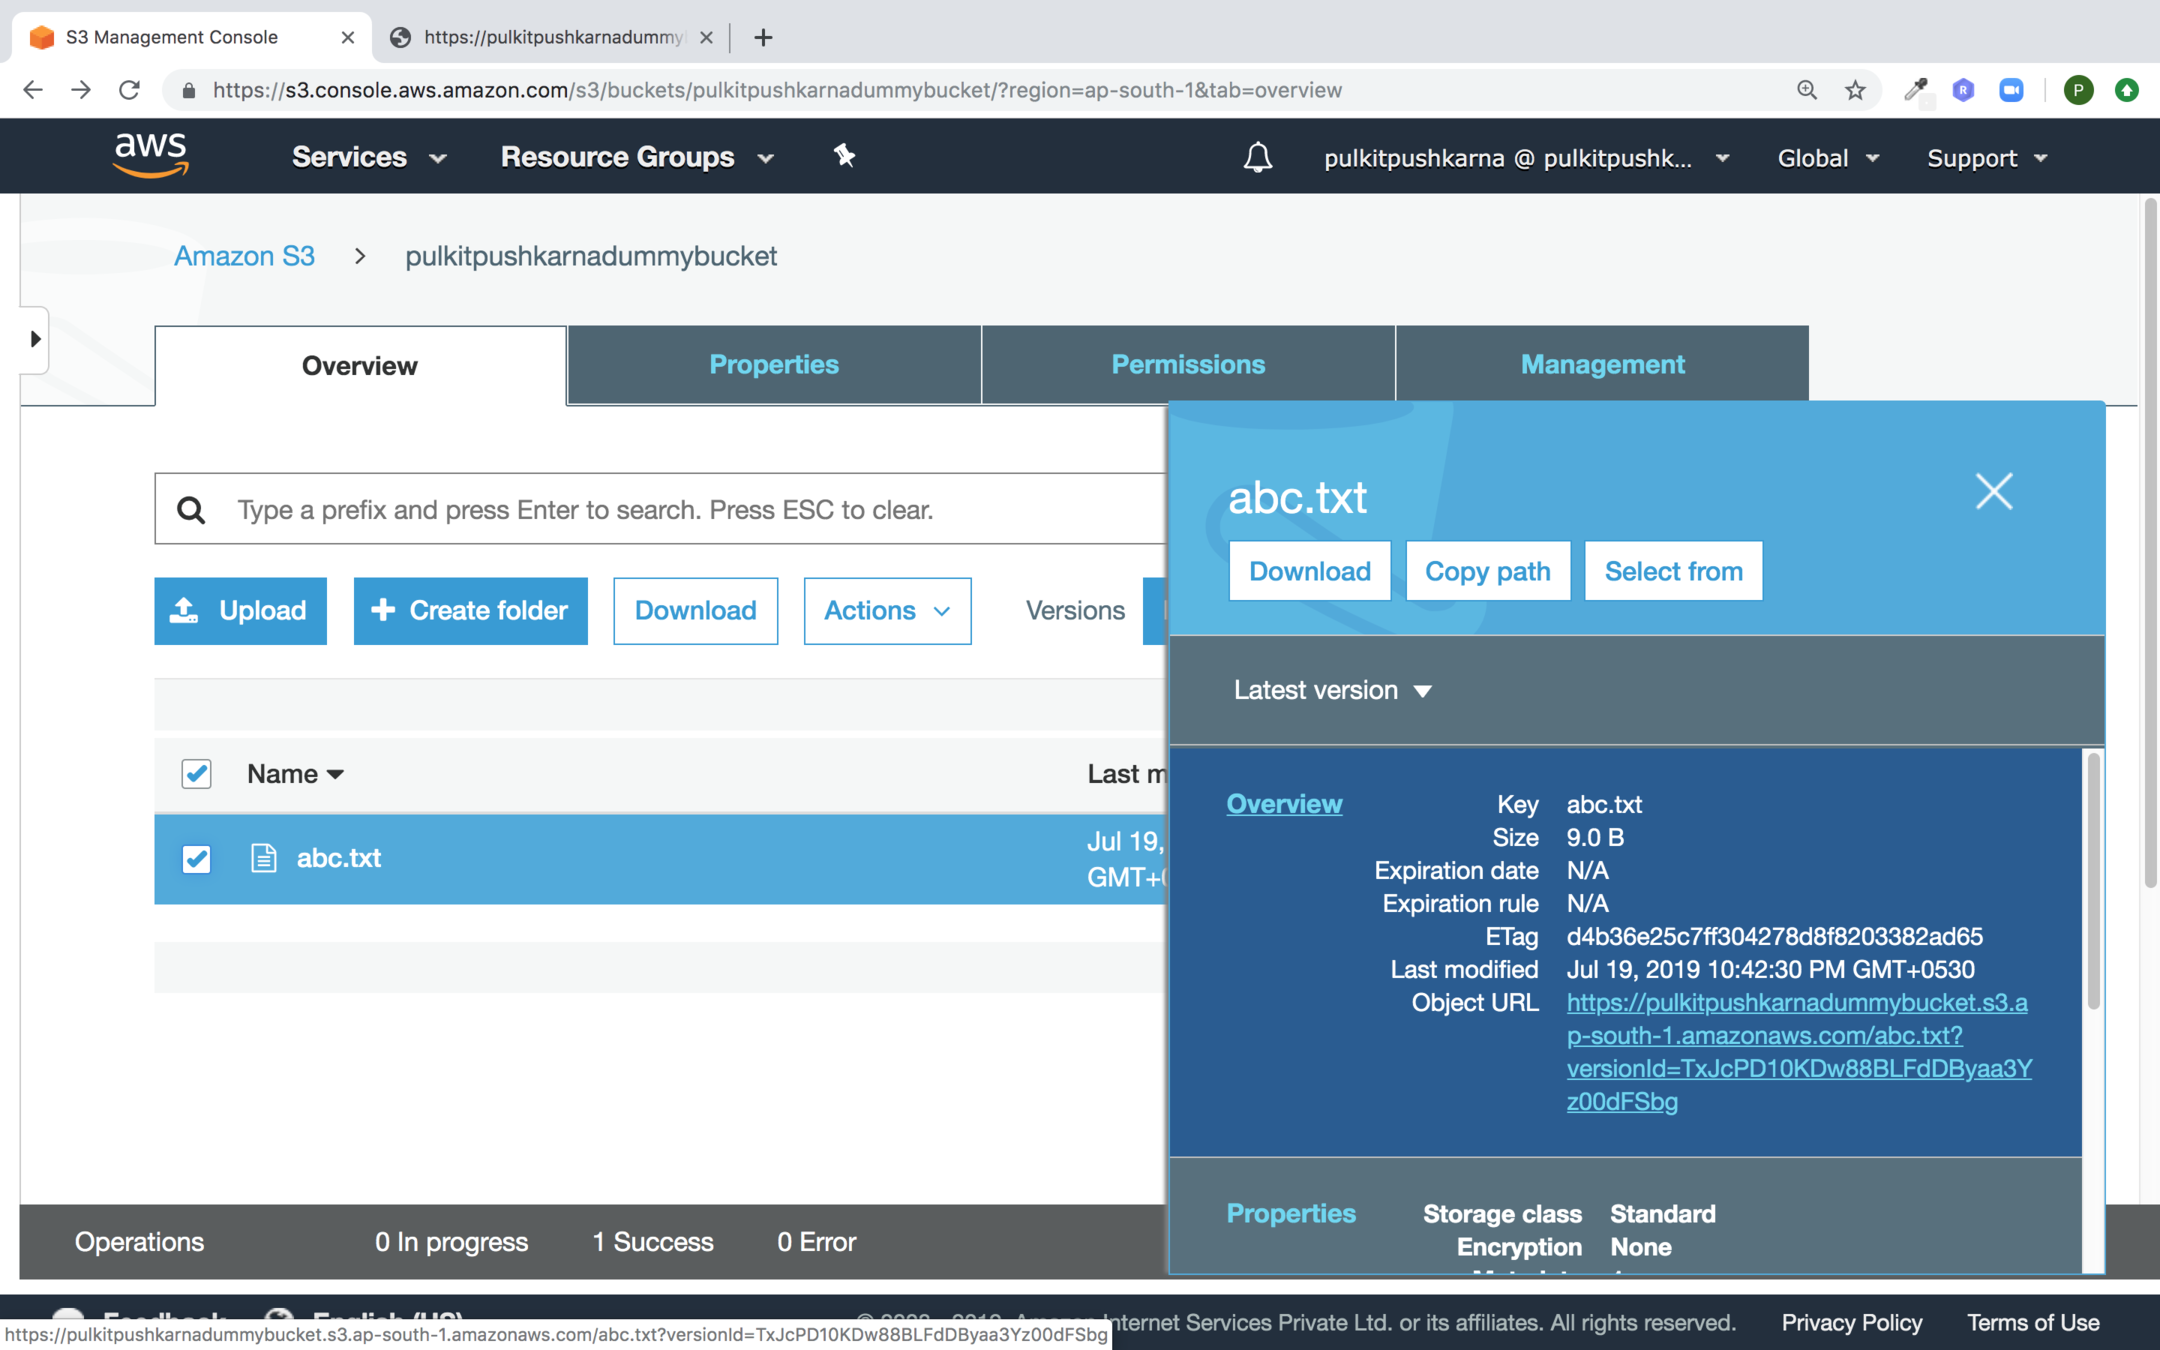
Once the file is uploaded. Select the checkbox of the file.
In the pop up select the link to the file. You must get the access error .
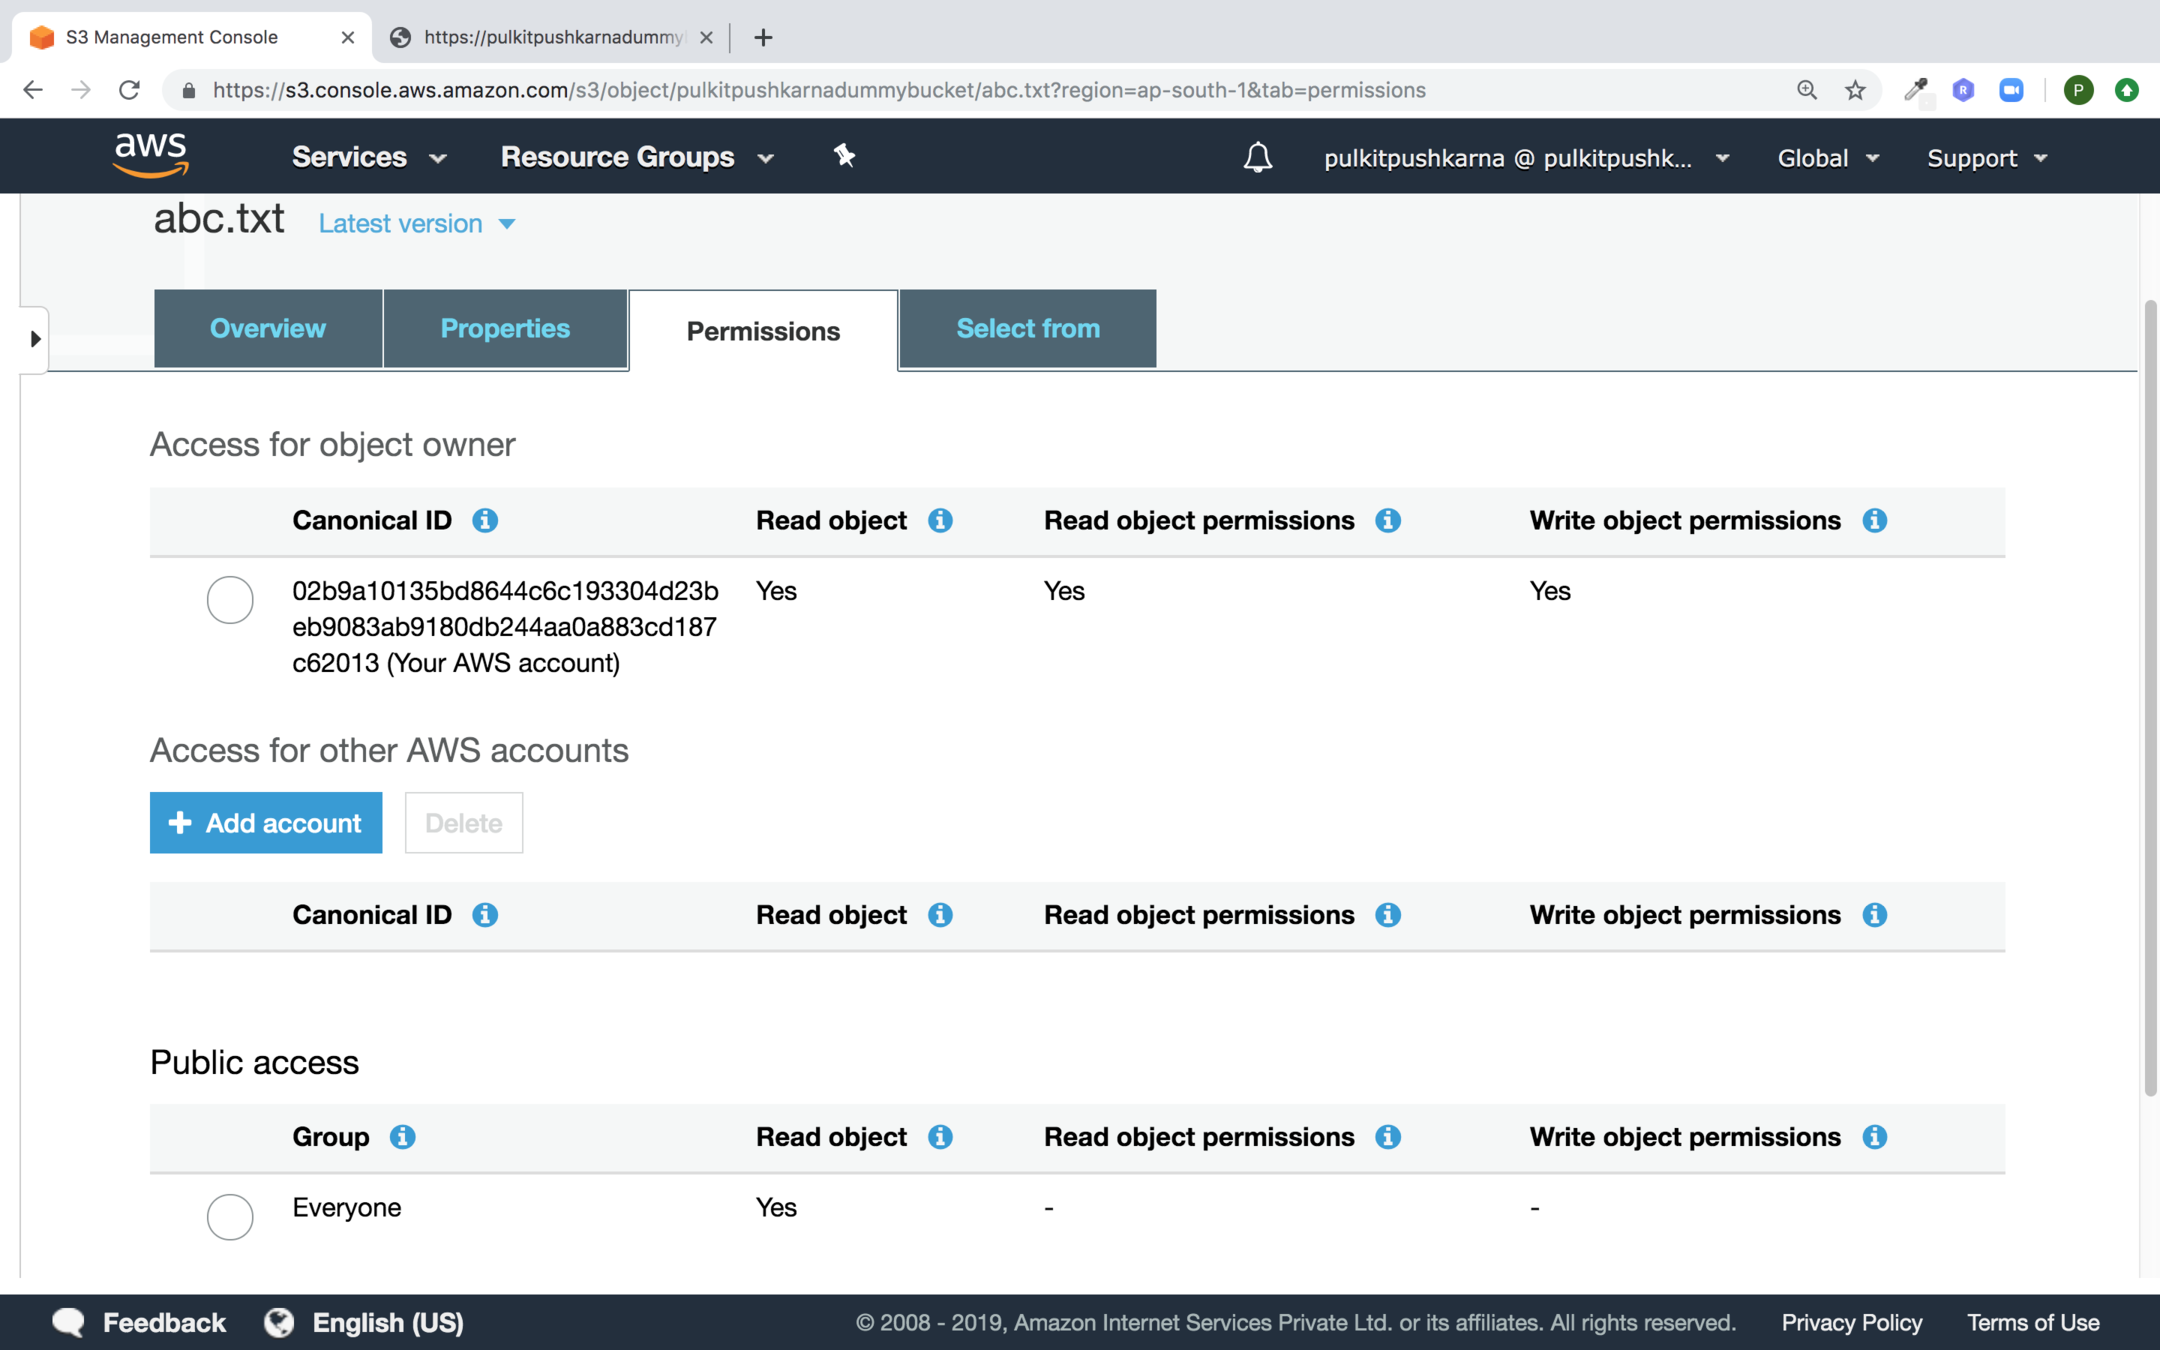
Go to the uploaded file and in the Permissions section Provide access to everyone
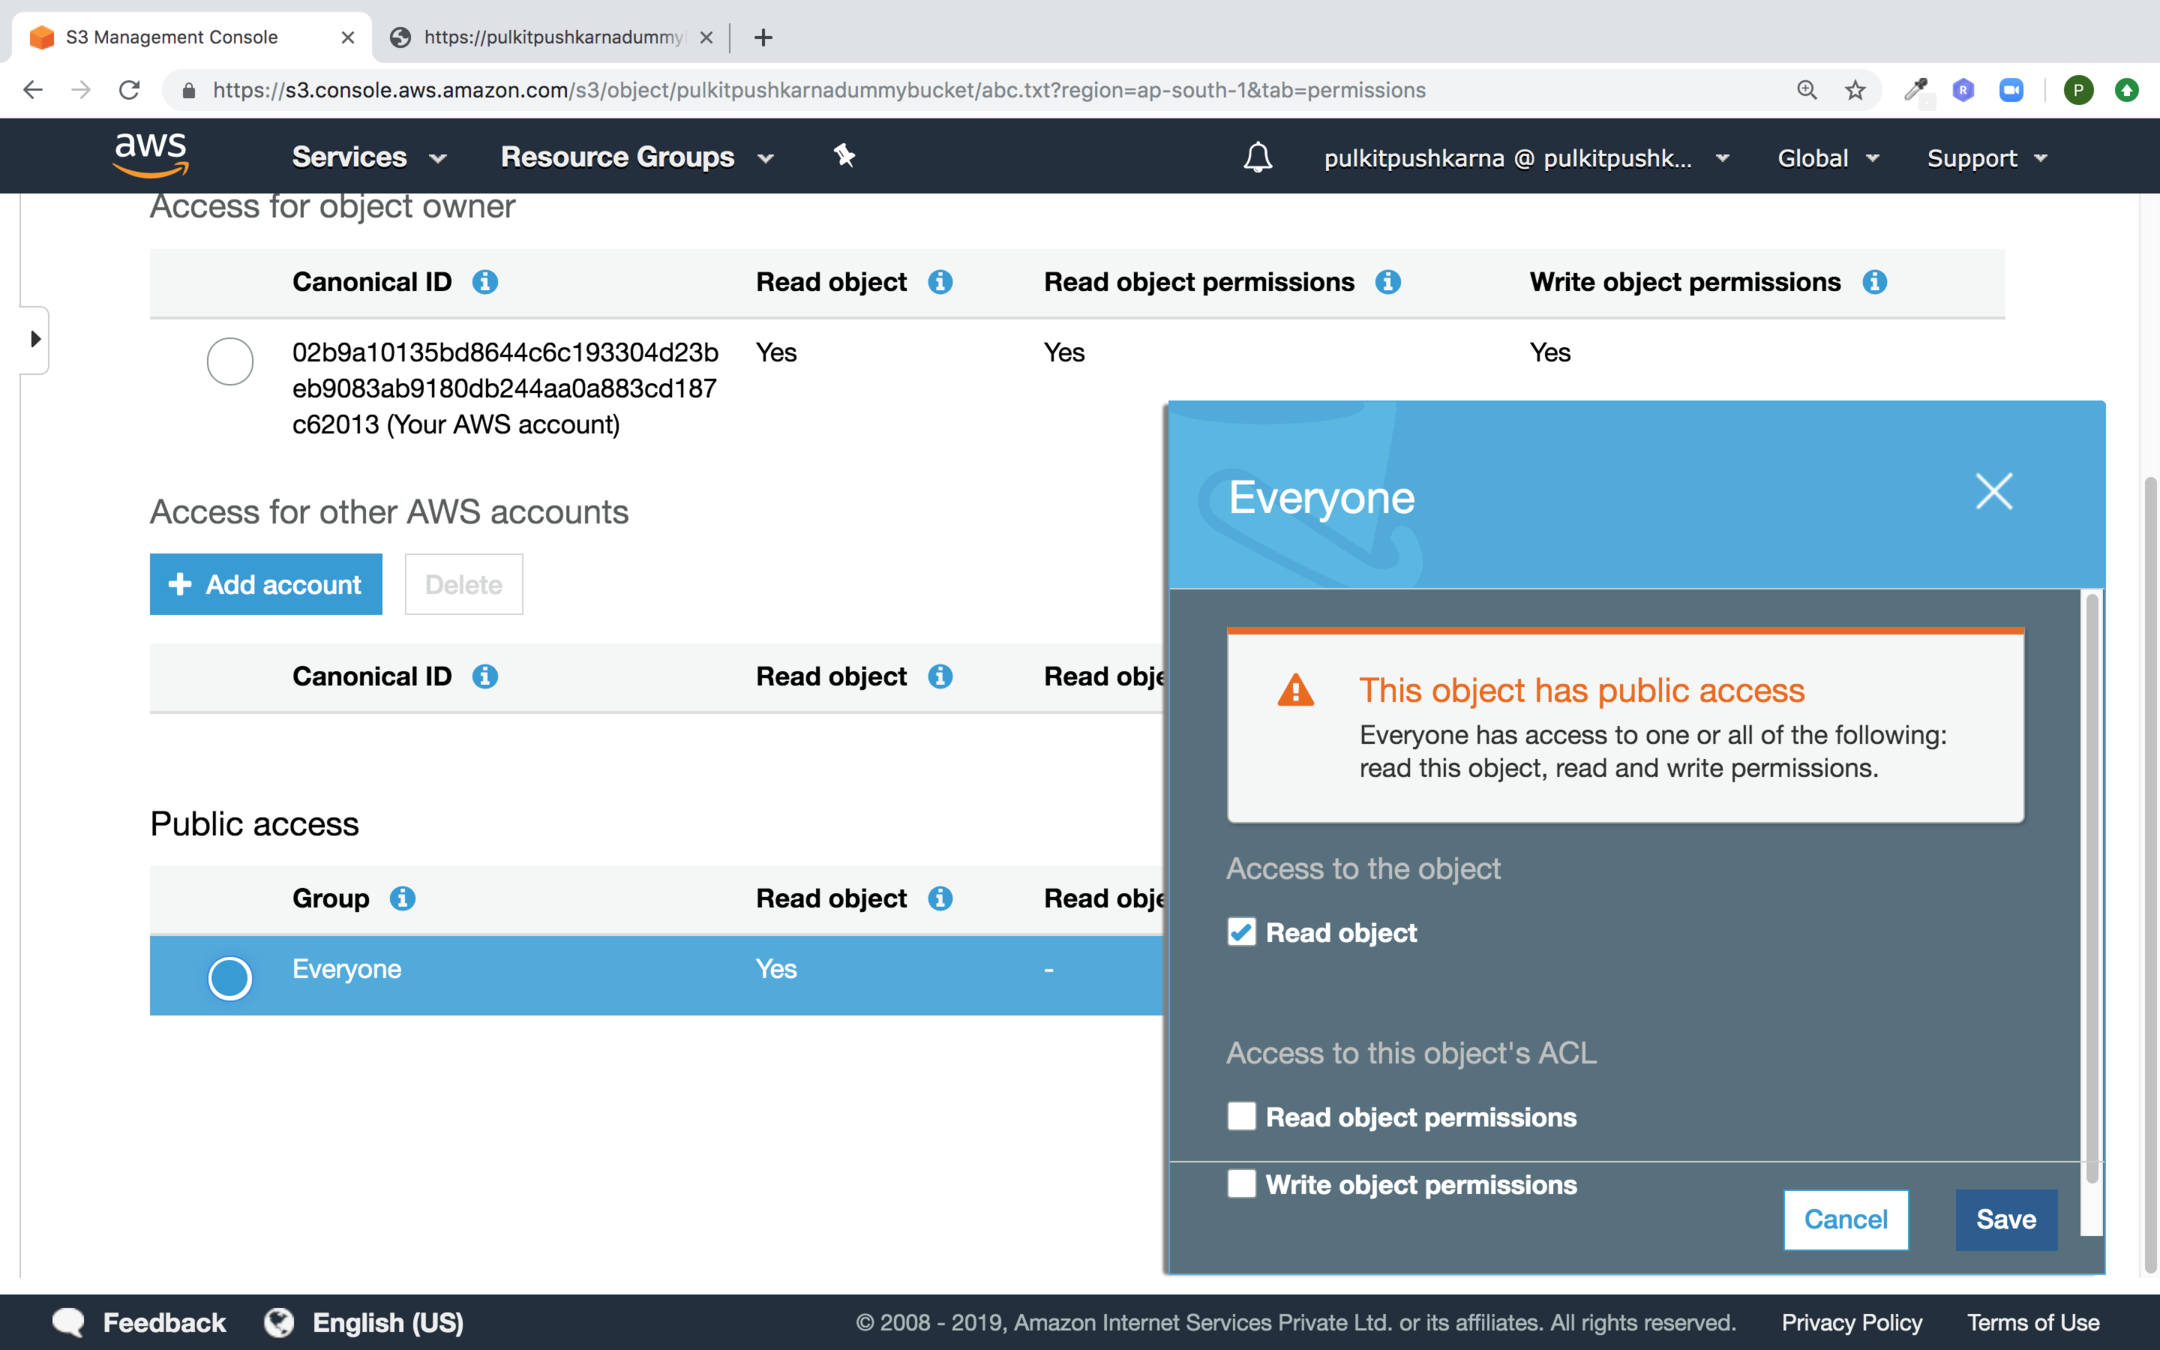
Text
In the pop up select Read Object Permission for Everyone and Click on Save.
After giving the permision you should able to see the file
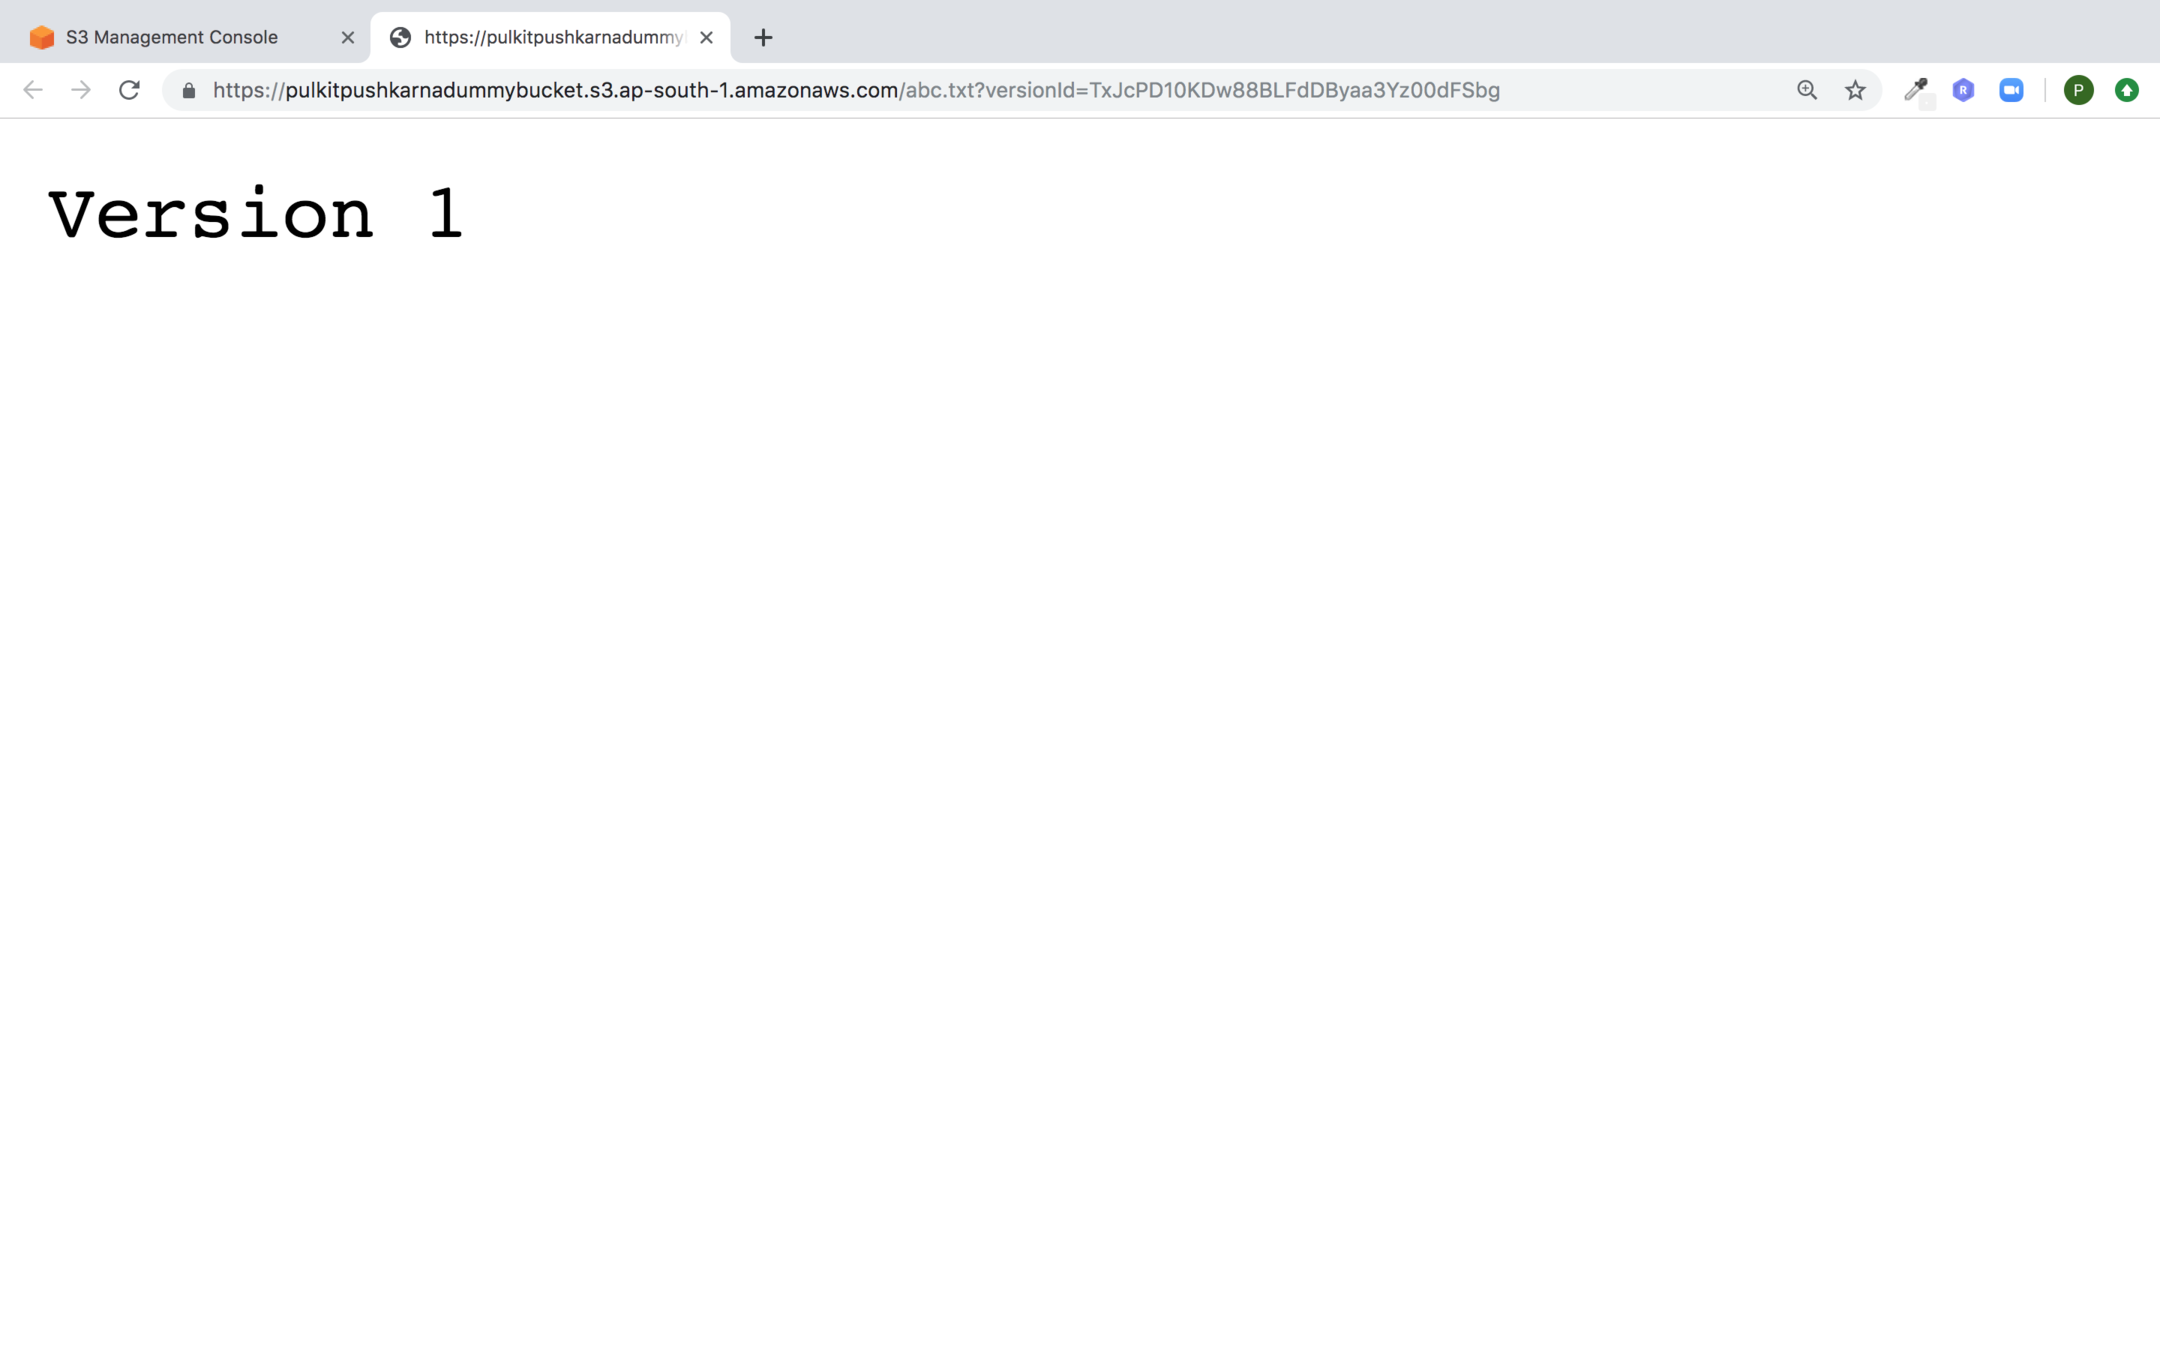
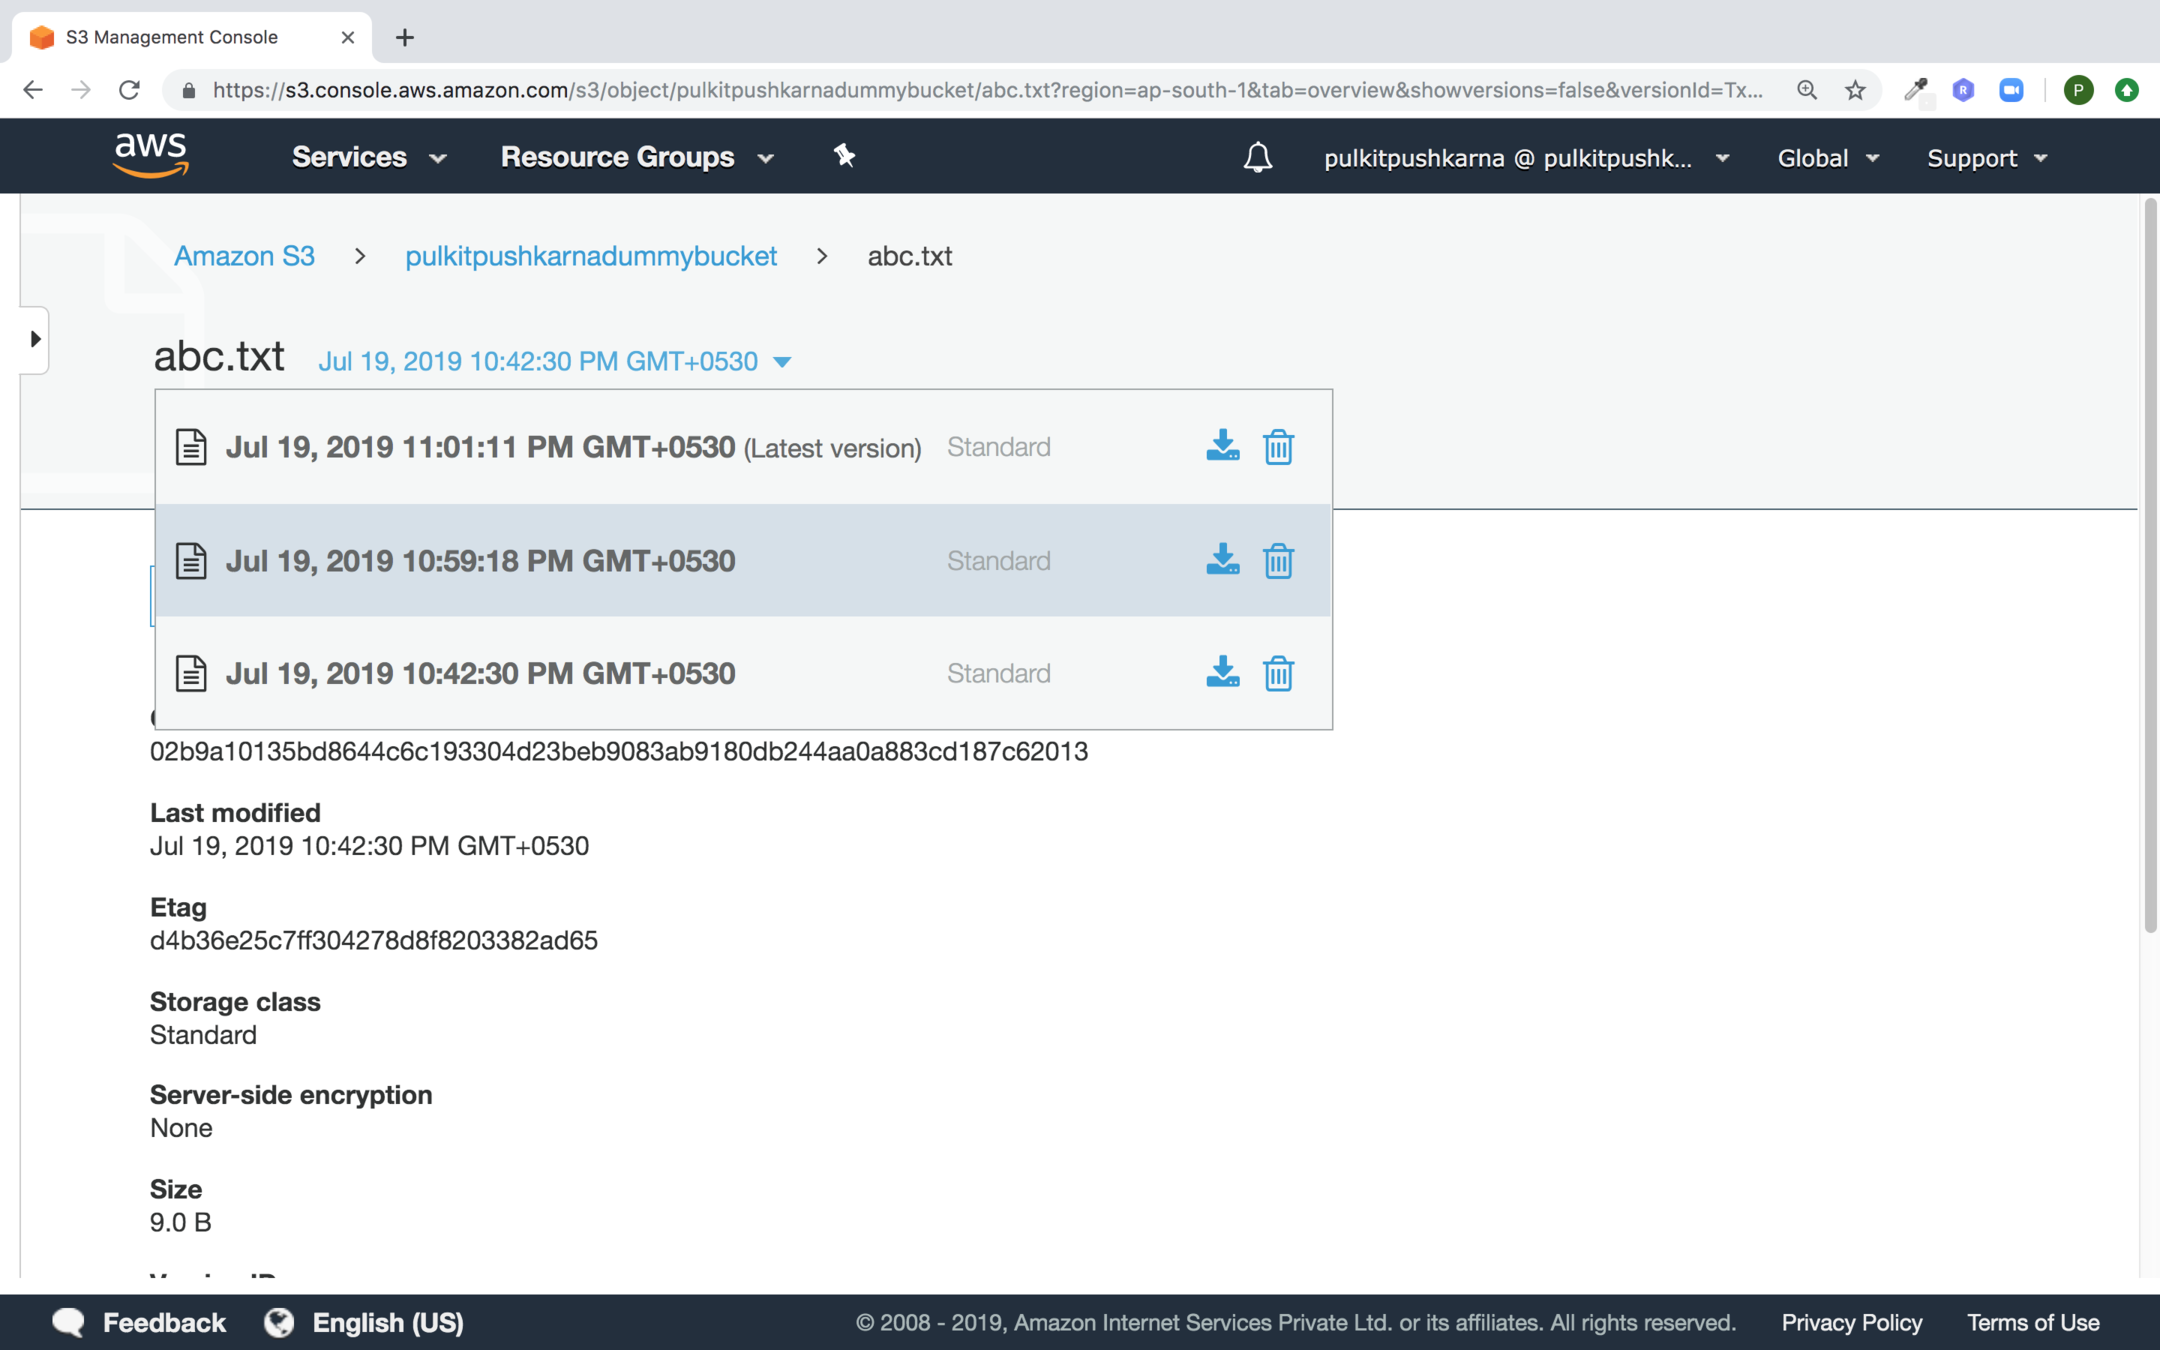
Select the file and upload another version of it after editing the text in the original file. Now you should see the different version of the file.
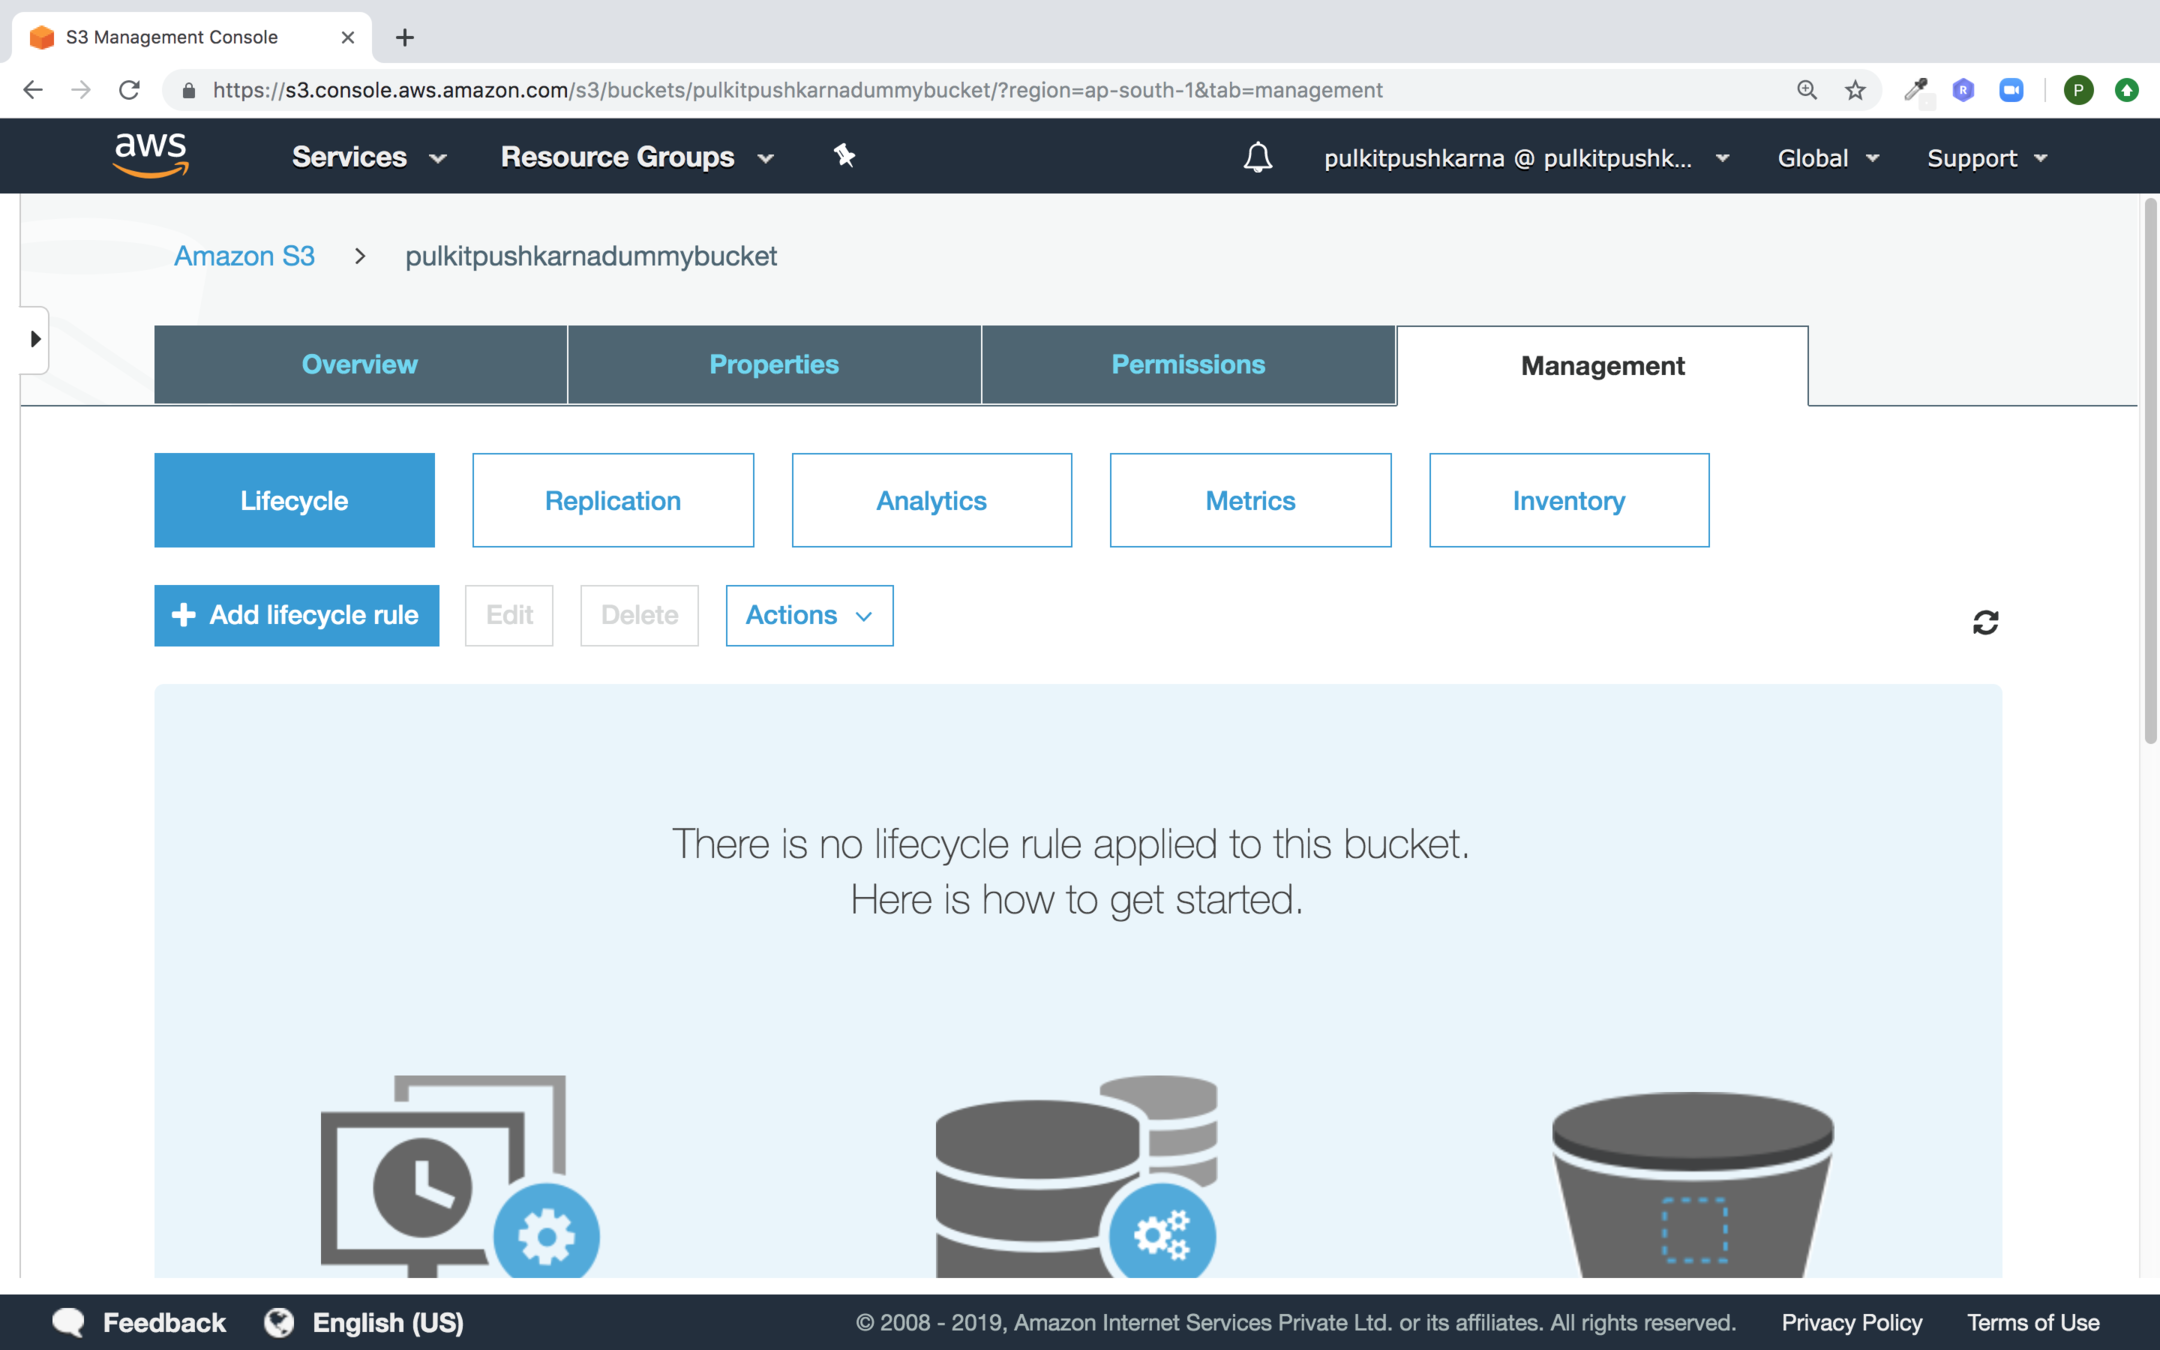
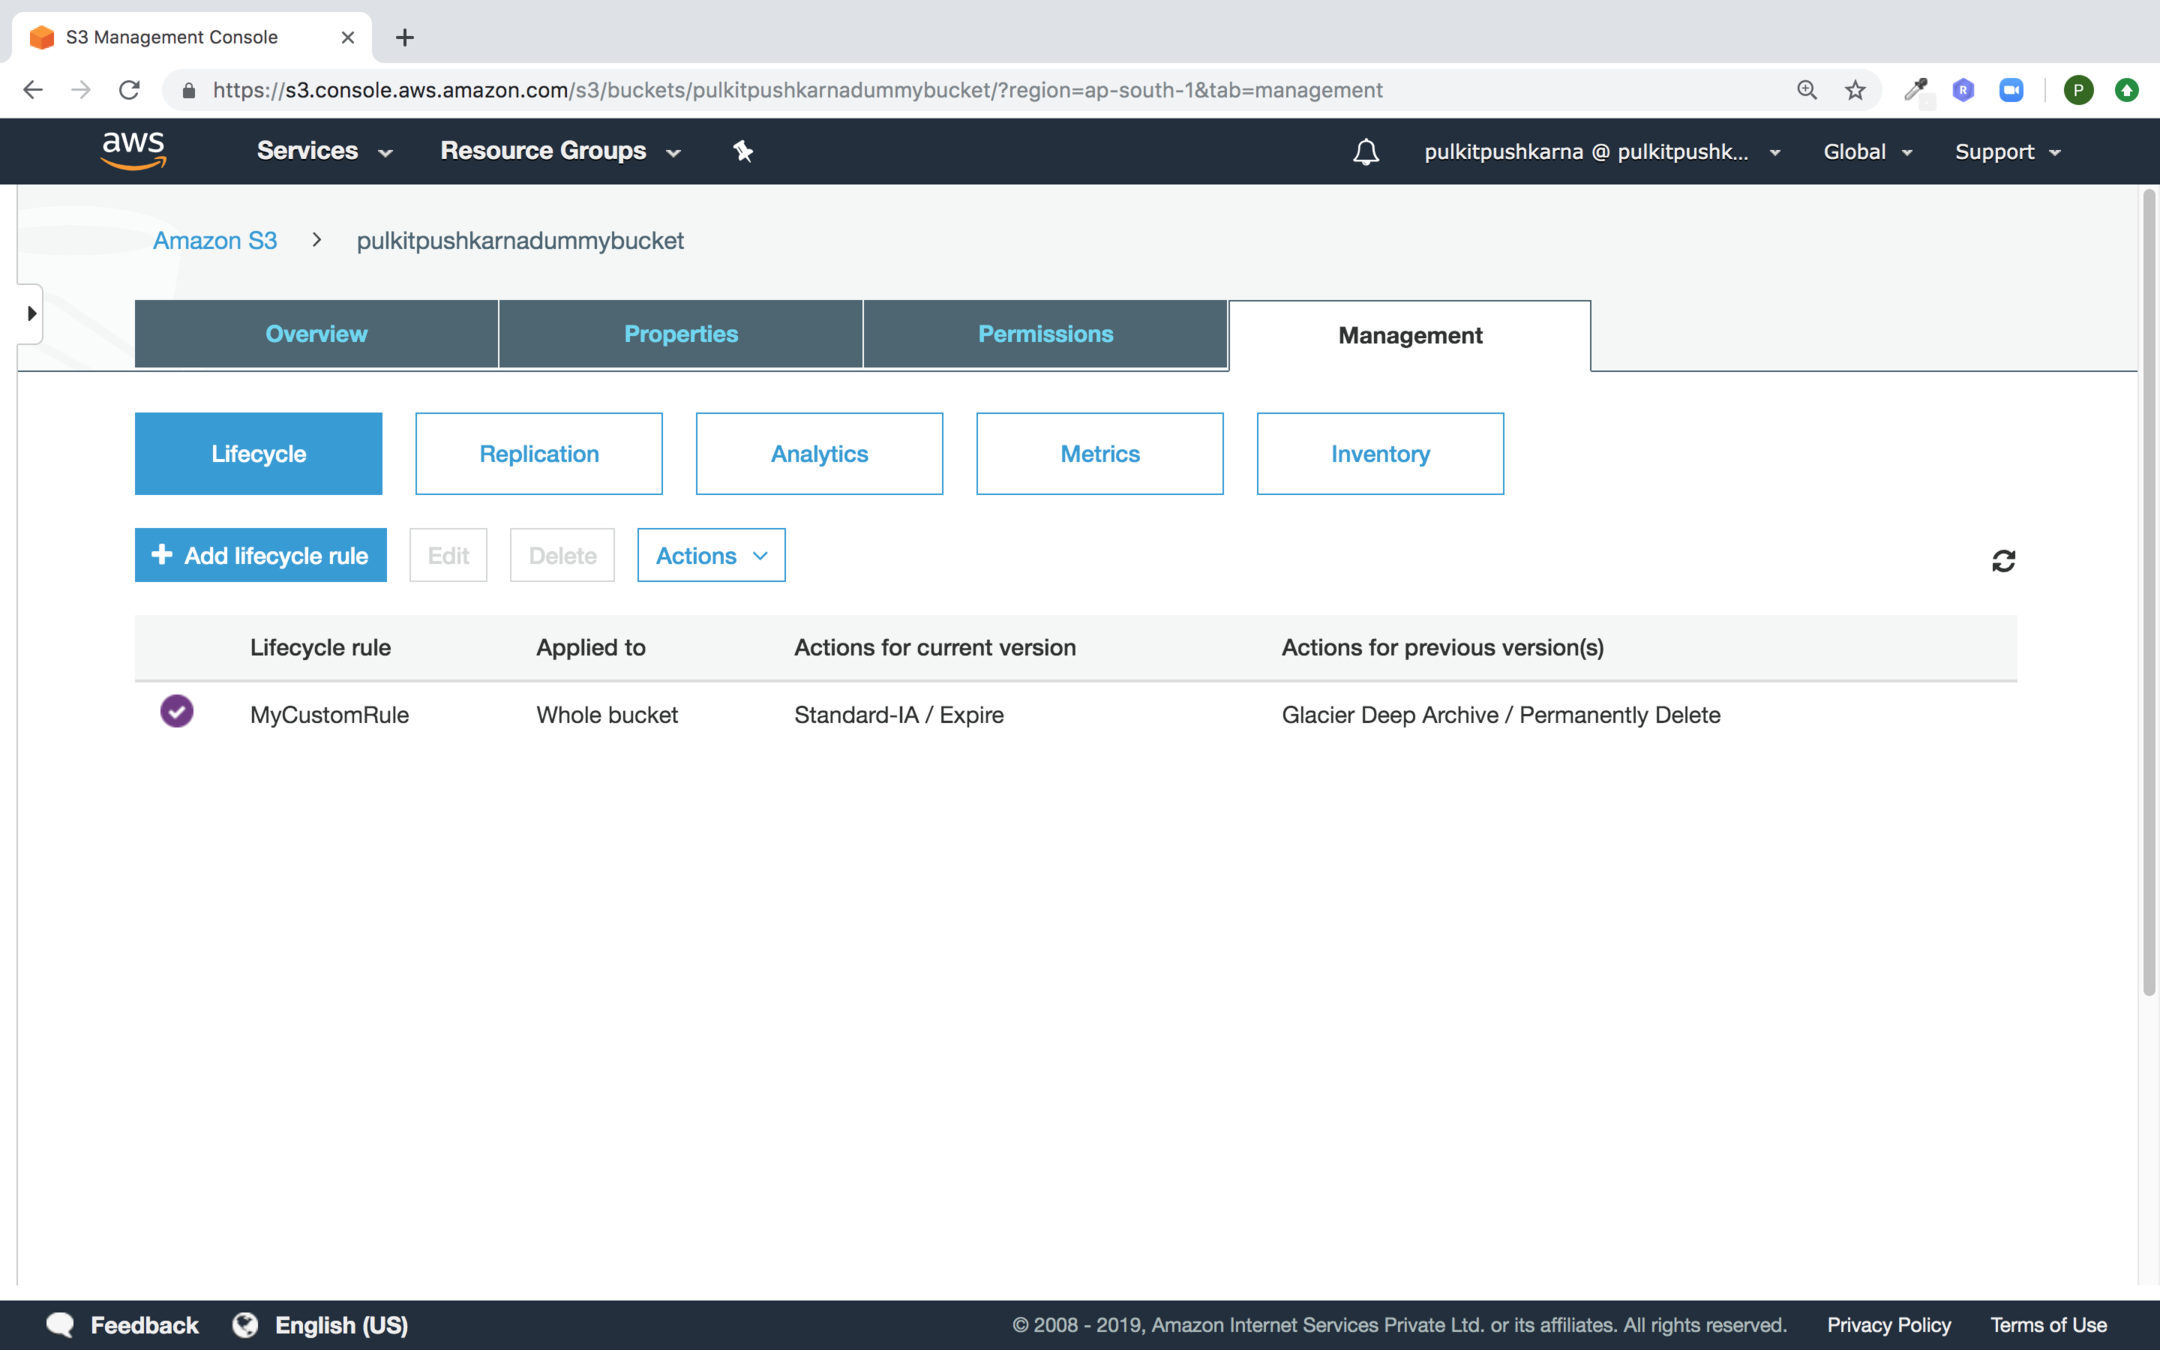
Go to your S3 bucket Management Section and Click on Add lifecycle rule button
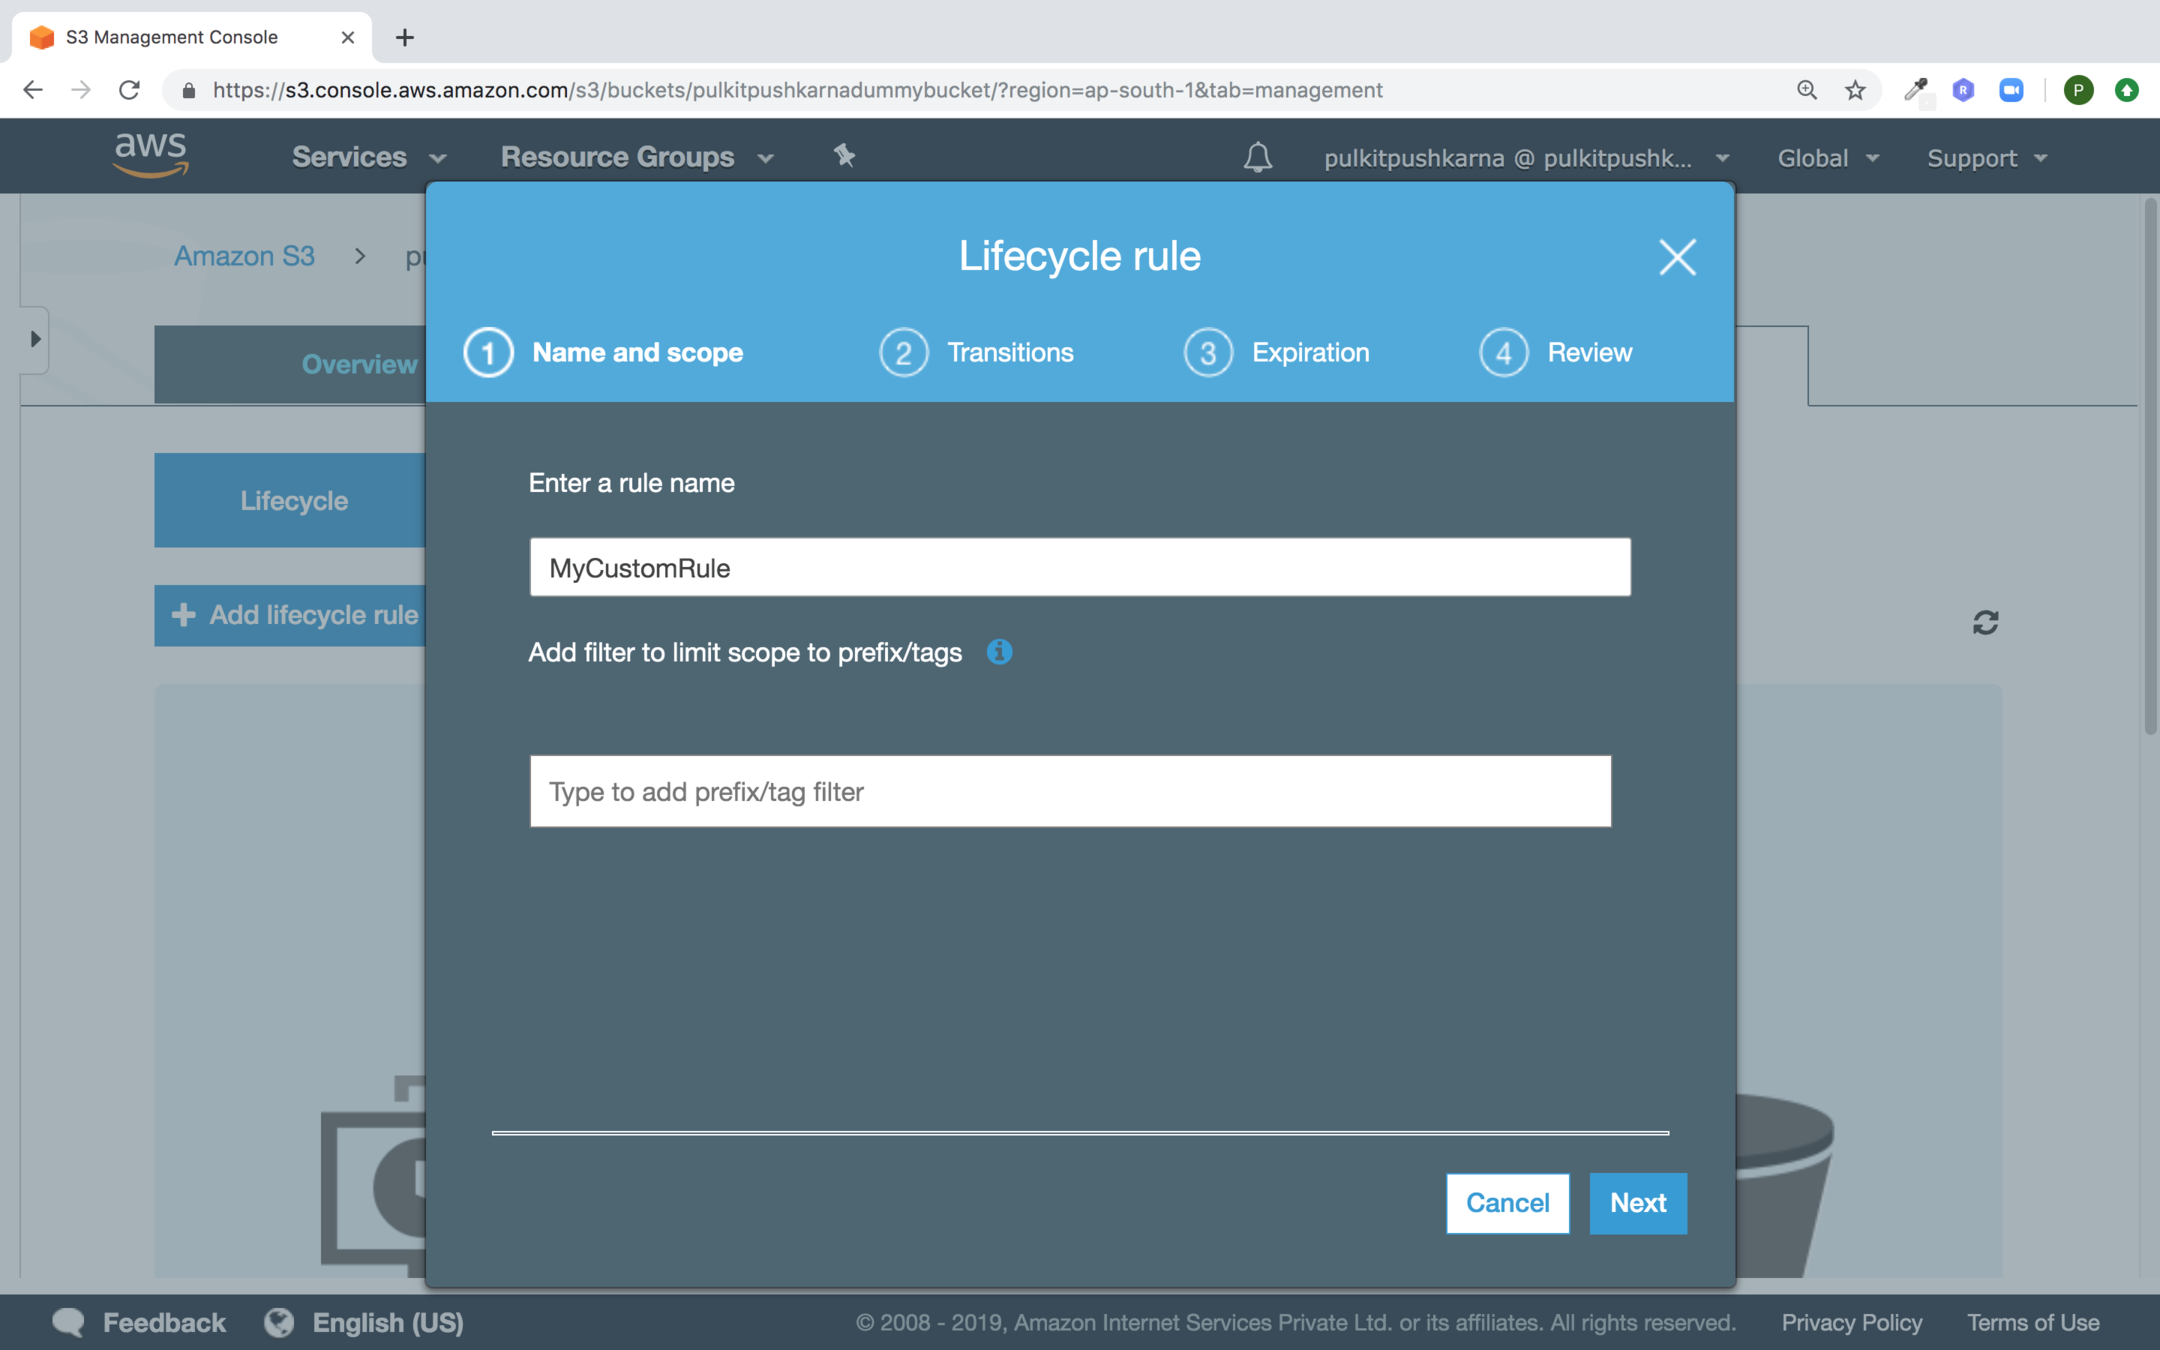
Enter the name of your rule and click on next
Select the checkbox Current version and Previous Versions and Provide the transition rules

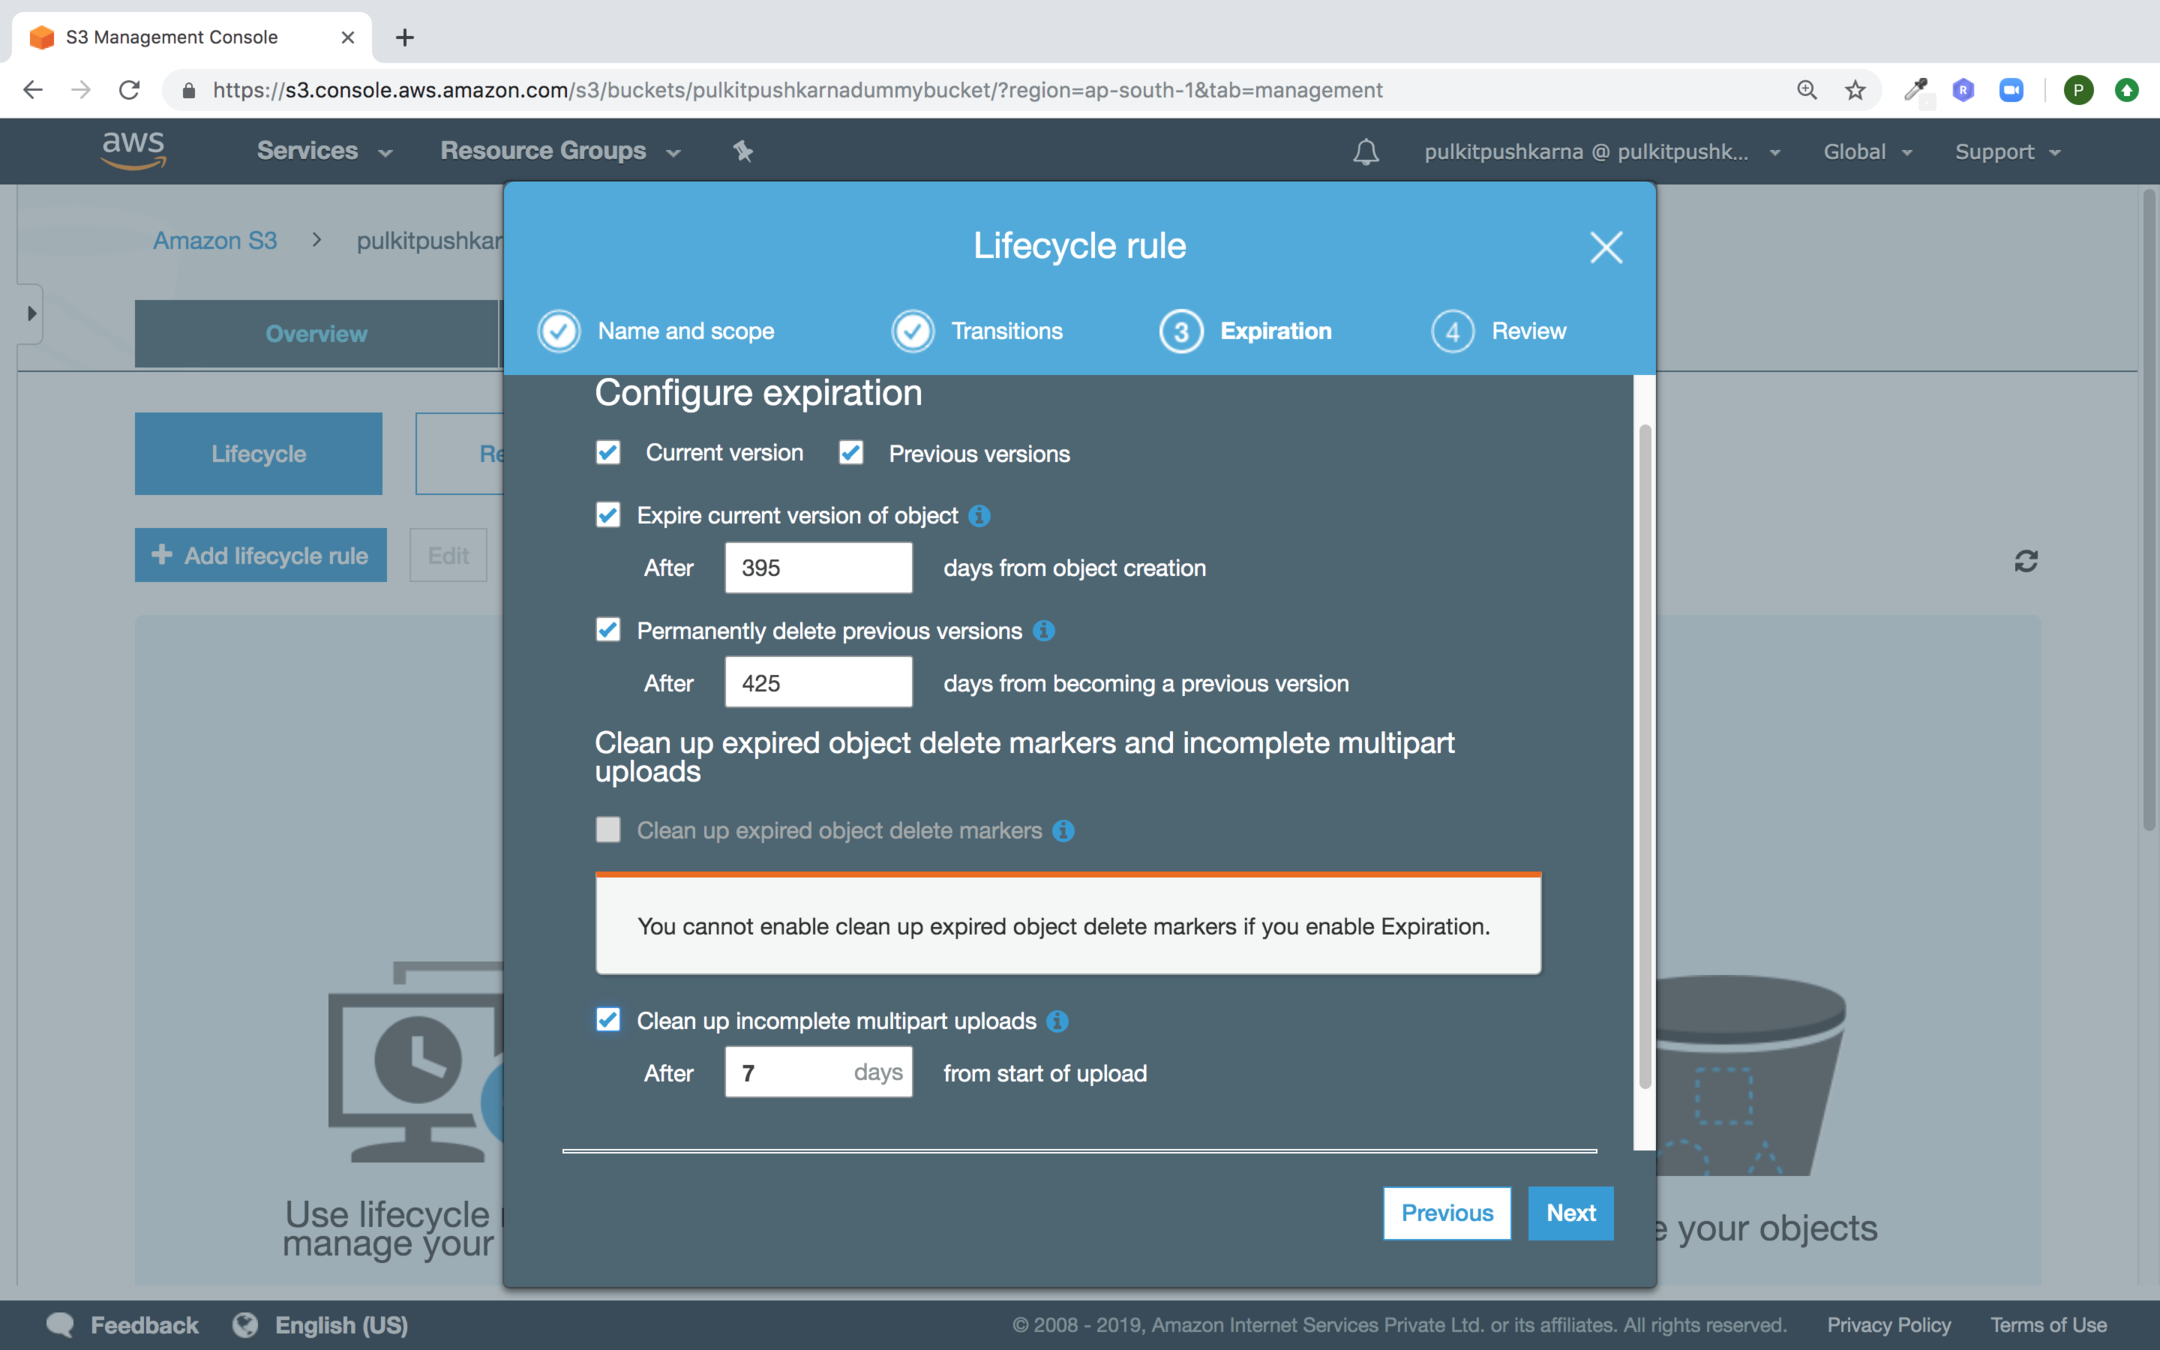
Fill in the expiration details and Click Next
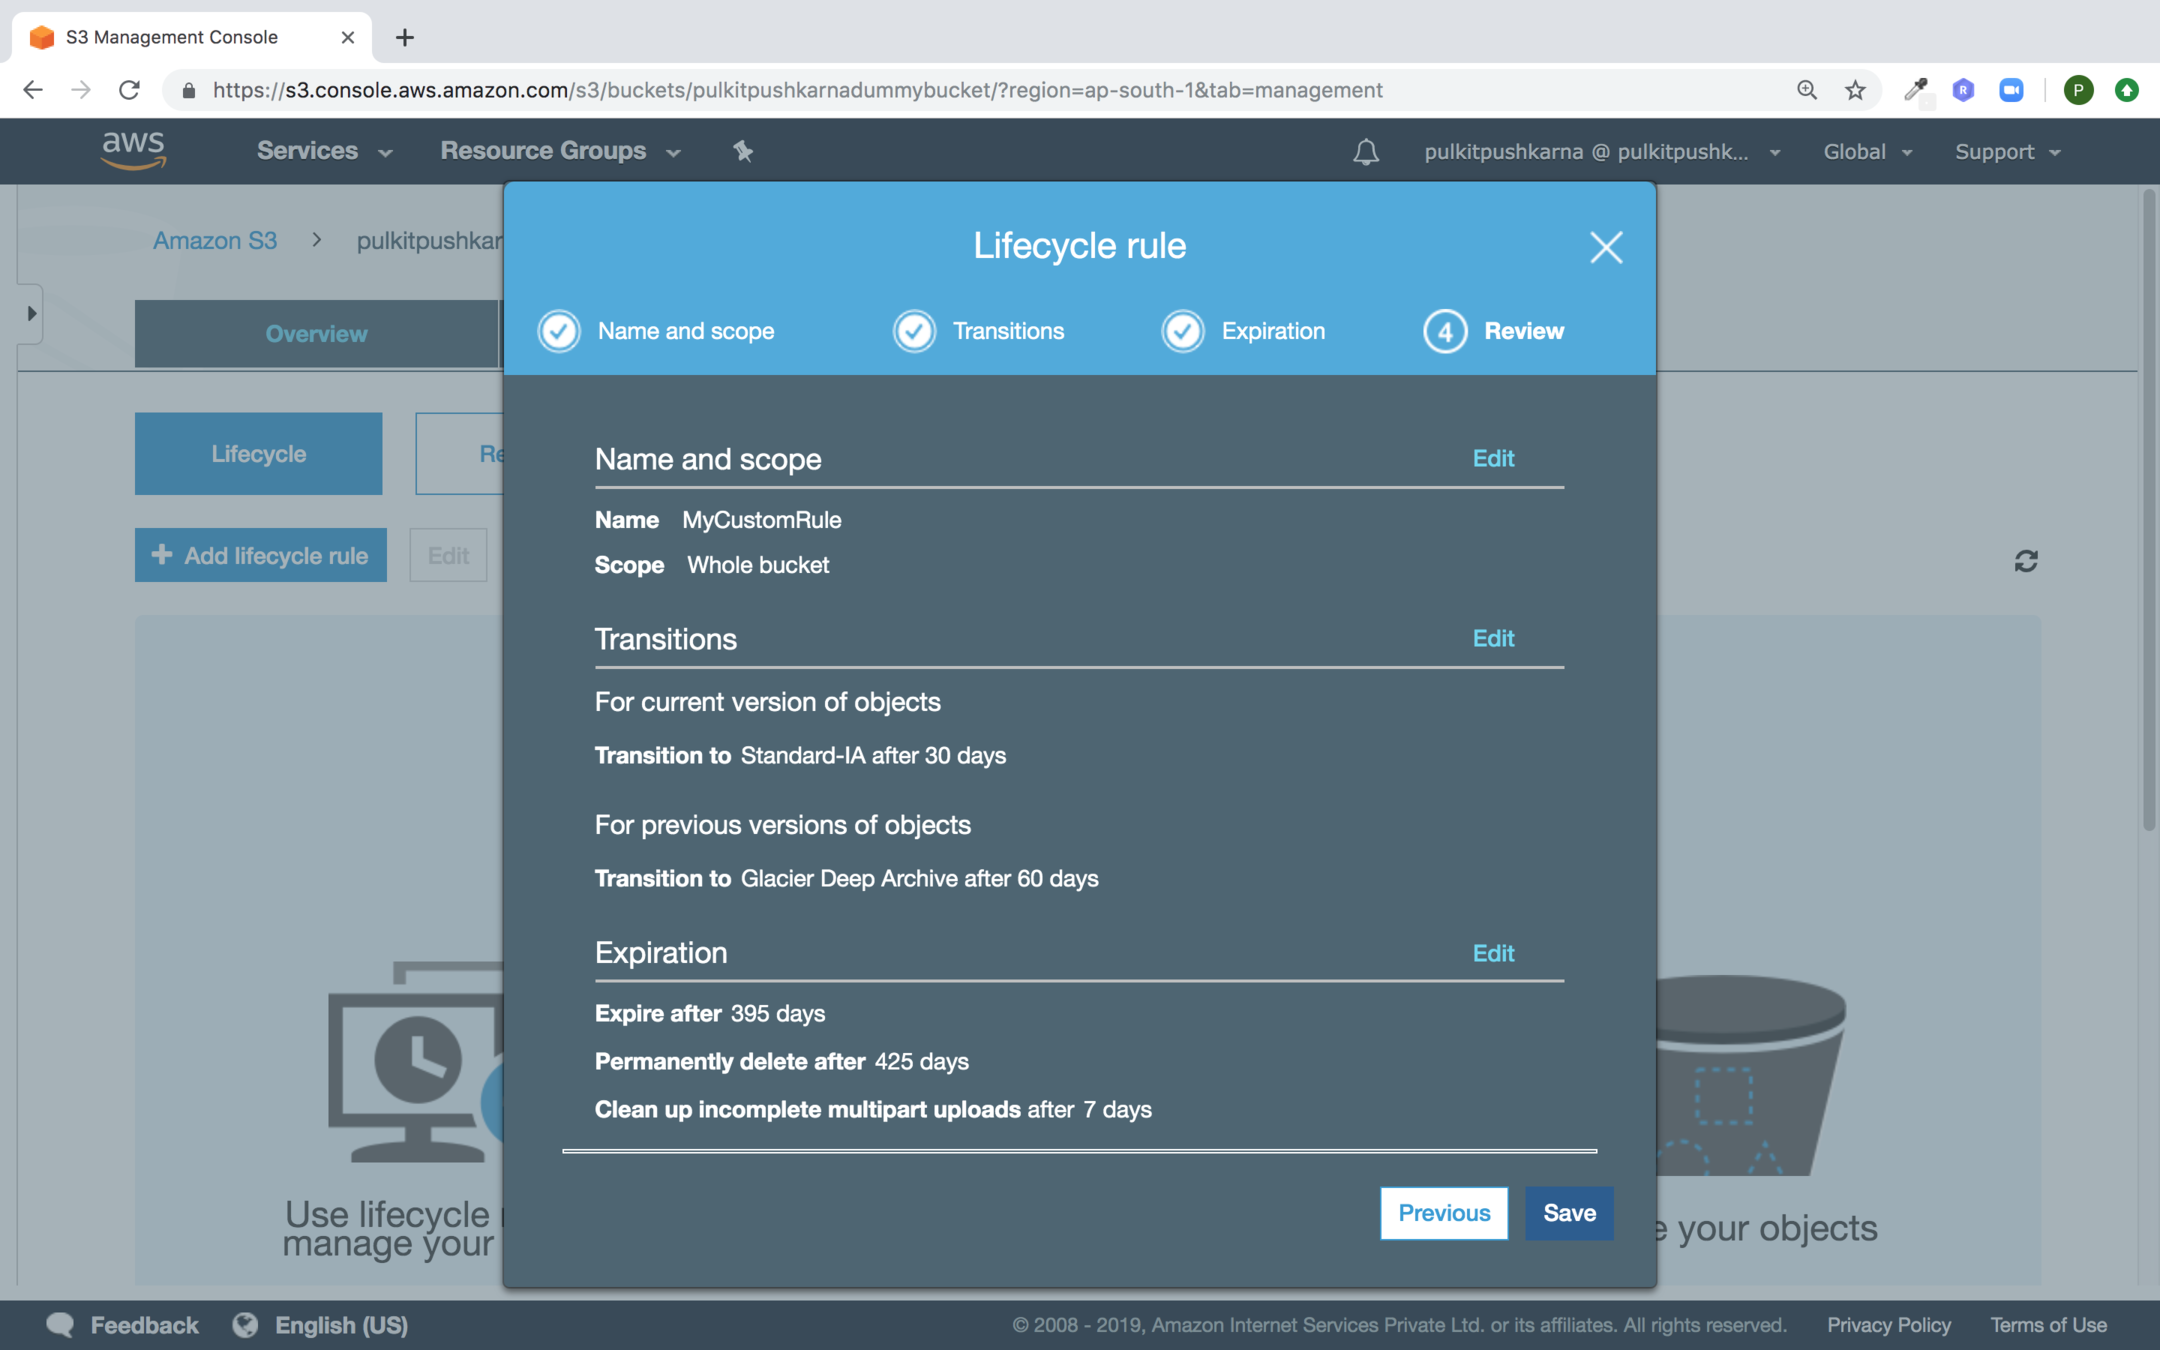
Now Click Save
Select the bucket name and Hit the Delete Button

Java SDK for Aws Services
plugins {
    id 'java'
}

repositories {
    mavenCentral()
}

dependencies {
    compile group: 'com.amazonaws', name: 'aws-java-sdk', version: '1.11.581'
}
package com.aws.demo.s3;

import com.amazonaws.auth.AWSStaticCredentialsProvider;
import com.amazonaws.auth.BasicAWSCredentials;
import com.amazonaws.regions.Regions;
import com.amazonaws.services.s3.AmazonS3;
import com.amazonaws.services.s3.AmazonS3ClientBuilder;

public class CloudCredentials {

    public  static BasicAWSCredentials getCloudCredentials() {
        return new BasicAWSCredentials("access_key", "secret_key");
    }

    public static AmazonS3 getAmazonS3Client(){
       return AmazonS3ClientBuilder.standard()
                .withRegion(Regions.AP_SOUTH_1)
                .withCredentials(new AWSStaticCredentialsProvider(getCloudCredentials()))
                .build();
    }

}
package com.aws.demo.s3;

import com.amazonaws.services.s3.AmazonS3;

public class CreateBucket {
    public static void main(String[] args) {
        AmazonS3 amazonS3= CloudCredentials.getAmazonS3Client();
        String name = "pulkitpushkarnabucket1";
        if(amazonS3.doesBucketExistV2(name)){
            System.out.println("Bucket Already Exists");
        }else {
            System.out.println(amazonS3.createBucket(name));
        }
    }
}
Create bucket
package com.aws.demo.s3;

import com.amazonaws.services.s3.AmazonS3;

public class ListBucket {

    public static void main(String[] args) {
        AmazonS3 s3 = CloudCredentials.getAmazonS3Client();
        s3.listBuckets().forEach(System.out::println);
    }
}
List Bucket
Delete Bucket
package com.aws.demo.s3;

import com.amazonaws.services.s3.AmazonS3;

public class DeleteBucket {

    public static void main(String[] args) {
        AmazonS3 amazonS3= CloudCredentials.getAmazonS3Client();
        amazonS3.deleteBucket("pulkitpushkarnabucket1");
    }
}
Upload Object
package com.aws.demo.s3;

import com.amazonaws.services.s3.AmazonS3;
import com.amazonaws.services.s3.model.PutObjectResult;

import java.io.File;

public class UploadObject {
    public static void main(String[] args) {
        AmazonS3 amazonS3 = CloudCredentials.getAmazonS3Client();
        PutObjectResult putObjectResult=amazonS3.putObject("pulkitpushkarnabucket1",
                "myfile",
                new File("/Users/pulkitpushkarna/Documents/abc.txt"));
        System.out.println(putObjectResult);

    }
}
List Objects
package com.aws.demo.s3;

import com.amazonaws.services.s3.AmazonS3;
import com.amazonaws.services.s3.model.ListObjectsV2Result;

public class ListObjects {

    public static void main(String[] args) {
        AmazonS3 amazonS3 = CloudCredentials.getAmazonS3Client();
        ListObjectsV2Result listObjectsV2Result =
          amazonS3.listObjectsV2("pulkitpushkarnabucket1");
        listObjectsV2Result.getObjectSummaries().forEach(System.out::println);
    }
}
package com.aws.demo.s3;

import com.amazonaws.services.s3.AmazonS3;

public class DeletingObject {
    public static void main(String[] args) {
        AmazonS3 amazonS3 = CloudCredentials.getAmazonS3Client();
        amazonS3.deleteObject("pulkitpushkarnabucket1","123");
    }
}
Delete Object
Exercise 3
- Create an S3 bucket enable Versioning and Logging.
- Upload different versions of a file in the bucket.
- Apply Bucket Life Cycle.
- Perform Create, List and Delete Operations on bucket.
- Perform Upload, List and Delete operations on the Object of the bucket

Network ACL
A network access control list (ACL) is an optional layer of security for your VPC that acts as a firewall for controlling traffic in and out of one or more subnets
You might set up network ACLs with rules similar to security groups in order to add additional layer of security to your VPC
Network ACL Rules
Each subnet in your VPC must be associated with an ACL
A subnet can only be associated with one subnet. However, an ACL can be assosiated with multiple subnets.
An ACL contains a list of numbered rules with are evaluated in order, starting with lowest
ACLs are stateless, responses to allowed inbound traffic are subject to rules of outbound traffic.