Hello!

GET /speaker/info
{
    "name": "Igor Randjelovic",
    "location": "Budapest",
    "occupation": "I study software engineering",
    "twitter": "@igor_randj",
    "website": "igor-randjelovic.com",
}
Vue.js

NativeScript

What is NativeScript?

Open Source framework for building truly native mobile applications.

NO DOM
NO WebViews
Just
PURE AWESOME
Native Views
YES PLEASE!


What is Vue?

A JavaScript MV framework
A bit like Angular 1
but only the good things
Vue is SIMPLE!
Learn it in less than a week
Two main units in Vue
Components
Directives
Pretty much everything is a component
for low-level DOM access
A simple Vue component
// Define a new component called todo-item
Vue.component('todo-item', {
  template: '<li>This is a todo</li>'
})
<ol>
<!-- Create an instance of the todo-item component -->
<todo-item></todo-item>
</ol>A simple Vue directive
// Register a global custom directive called v-focus
Vue.directive('focus', {
  // When the bound element is inserted into the DOM...
  inserted: function (el) {
    // Focus the element
    el.focus()
  }
})
<!-- Use the focus directive on an input element -->
<input v-focus>Vue is very powerful
Simple when you need it to be
Scales very well with larger applications
First-Party ecosystem
VueRouter
+
Vuex
How does Vue come into play with NativeScript?


+
= ?
Vue 1.x is DOM dependent :(
Vue 2.x is DOM independent! :)
Virtual DOM is awesome!
This brings me to my next point...
NativeScript-Vue


+
An integration between NativeScript and Vue
In short, it's a custom renderer implementation for Vue
NativeScript
NativeScript-Vue
Vue
The only difference is the template*
* and the way you start the Vue app
const Vue = require('nativescript-vue');

const app = new Vue({
    template: '',
    data: {},
    methods: {}
    // ...
    // everything is the same!
});


// The only difference is the following line
app.$start();
Let's build an app!
Step 1: Initialize project
$ tns create hello-nativescript-vue --template tns-template-blankInstalling tns-template-blank
+ tns-template-blank@3.2.0
added 4 packages in 1.182s
up to date in 0.125s
Project hello-nativescript-vue was successfully created.
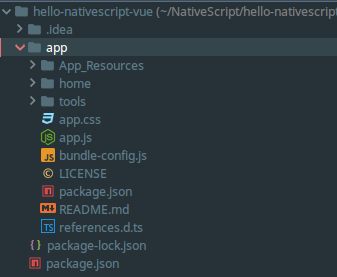
Step 2: Delete files we will not need
and clear out app.js
$ cd hello-nativescript-vue/app
$ rm bundle-config.js home -r
$ echo "" > app.js
Step 3: Let's add nativescript-vue
$ tns plugin add nativescript-vue
$ # or
$ npm install --save nativescript-vue
$ # or
$ yarn add nativescript-vue
Step 4: Let the fun begin
// app.js

const Vue = require('nativescript-vue');


const app = new Vue({
  template: `<page></page>`,
});

app.$start();
Step 5: Run the application
$ tns run androidYay!
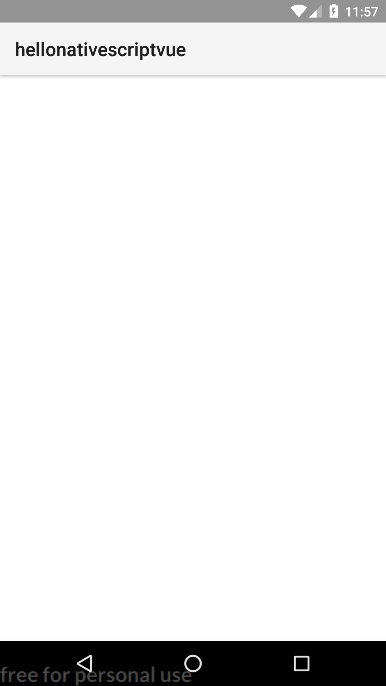
Not very exciting is it?
Let's add an action bar and a label
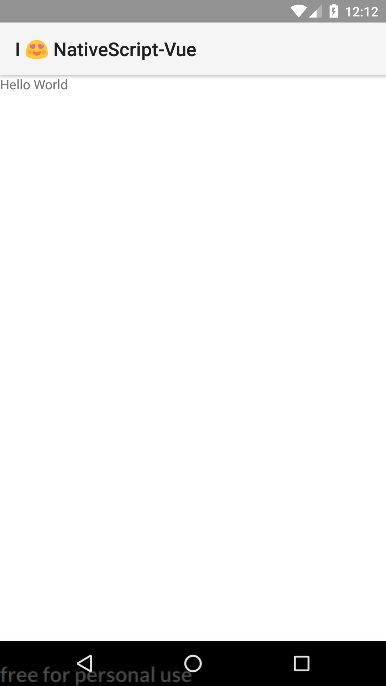
// app.js

const Vue = require('nativescript-vue');


const app = new Vue({
  template: `
    <page>
      <action-bar title="I 😍 NativeScript-Vue"></action-bar>
      <stack-layout>
        <label text="Hello World"></label>
      </stack-layout>
    </page>
  `,
});

app.$start();
How about some tabs?
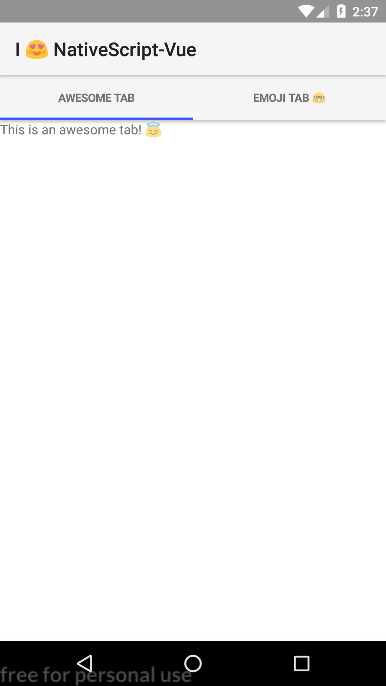
<page>
  <action-bar title="I 😍 NativeScript-Vue"></action-bar>
  <stack-layout>

    <tab-view>
      <!-- First Tab -->
      <tab-view-item title="Awesome Tab">
        <label text="This is an awesome tab! 😇"></label>
      </tab-view-item>

      <!-- Second Tab -->
      <tab-view-item title="Emoji Tab 🤓">
        <label text="This is an emoji tab 😂"></label>
      </tab-view-item>

    </tab-view>

  </stack-layout>
</page>
Make them dynamic?!
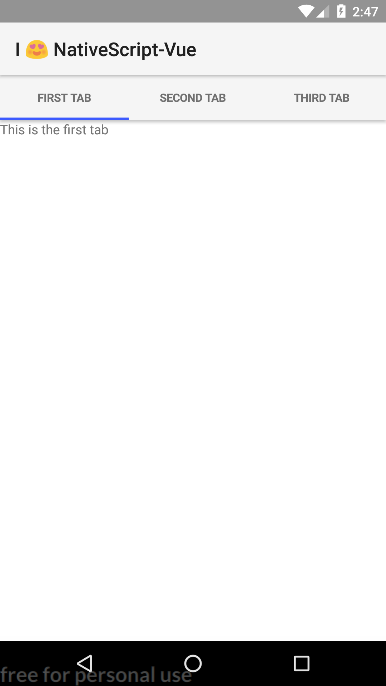
<page>
  <action-bar title="I 😍 NativeScript-Vue"></action-bar>
  <stack-layout>
    <tab-view>
      <!-- Dynamically populated tabs -->
      <tab-view-item v-for="tab in tabs" :title="tab.title">
        <label :text="tab.content"></label>
      </tab-view-item>
    </tab-view>
  </stack-layout>
</page>
const app = new Vue({
template: `...`,
data: {
tabs: [
{ title: 'First Tab', content: 'This is the first tab' },
{ title: 'Second Tab', content: 'This is the second tab' },
{ title: 'Third Tab', content: 'This is the third tab' },
]
}
});We can add a tab header
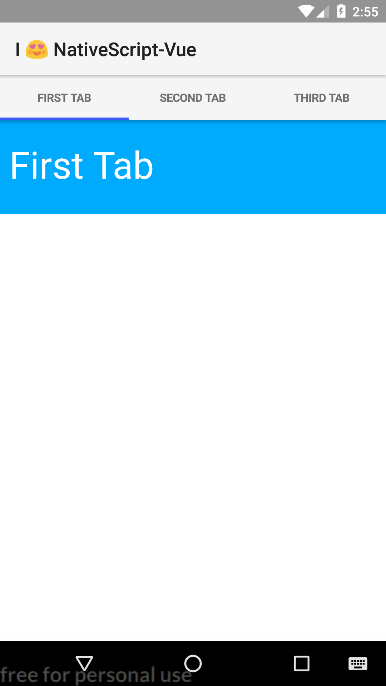
<page>
  <action-bar title="I 😍 NativeScript-Vue"></action-bar>
  <stack-layout>
    <tab-view>
      <tab-view-item v-for="tab in tabs" :title="tab.title">
        <stack-layout>
          <stack-layout height="100"
                       :backgroundColor="tab.bgColor">

            <label :text="tab.title" class="tab-title"></label>

          </stack-layout>
          <!-- Will add something cool here -->
        </stack-layout>
      </tab-view-item>
    </tab-view>
  </stack-layout>
</page>
Let's add a List View
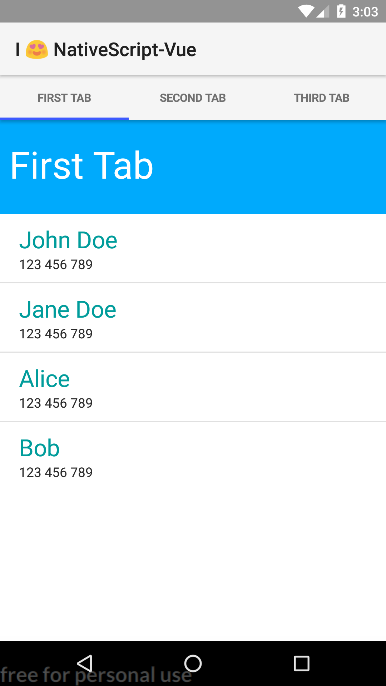
...
<stack-layout>
  <stack-layout height="100"
               :backgroundColor="tab.bgColor">

    <label :text="tab.title" class="tab-title"></label>

  </stack-layout>
  <!-- Will add something cool here -->
  <list-view :items="s(tab.listSource)">
    <template scope="contact">
      <stack-layout class="contact-list-item">

        <label :text="contact.name"
                class="contact-name"></label>

        <label :text="contact.phone"
                class="contact-phone"></label>

      </stack-layout>
    </template>
  </list-view>
</stack-layout>
...
After some cleanup
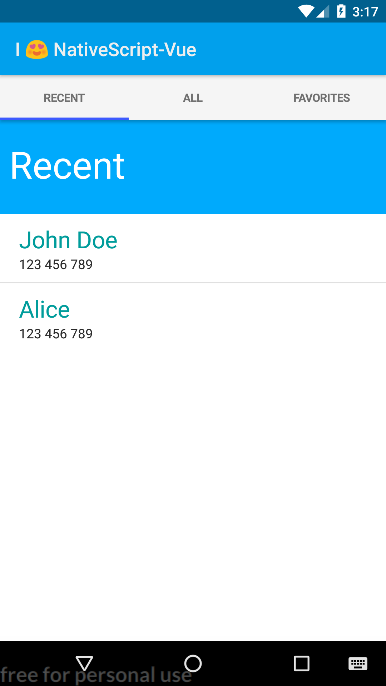
const app = new Vue({
  template: `...`,

  data: {
    tabs: [
      {
        title: 'Recent',
        listSource: 'recentContacts',
        bgColor: '#00aafc'
      },
      { title: 'All', ... },
      { title: 'Favorites', ... },
    ]
    contacts: [
      {
        name: 'John Doe',
        phone: '123 456 789',
        recent: true,
        favorite: true
      },
      // ...
    ],
  },

  // Next slide
  // ...
});
... continued

const app = new Vue({
  // ...
  // Next slide
  computed: {
    recentContacts() {
      return this.contacts.filter(c => c.recent);
    },
    favoriteContacts() {
      return this.contacts.filter(c => c.favorite);
    }
  },

  methods: {
    s(source) {
      return this[source];
    }
  }
});
Let's add a modal

<list-view :items="s(tab.listSource)" @itemTap="openContact">methods: {
s(source) {
return this[source];
},
openContact(e) {
const contact = e.item;
this.$showModal({
template: `<!-- On next slide -->`
})
}
}Define the modal template

  <stack-layout width="90%" height="40%"
                style="background-color: #fff;">
    <stack-layout style="height: 150; background-color: #00aafc;">
      <label text="${contact.name}" class="tab-title"
            style="margin-top: 80;"></label>
    </stack-layout>

    <label text="Phone" style="margin: 10; font-size: 12;"></label>
    <label text="${contact.phone}" style="margin-left: 20;"></label>
  </stack-layout>
template: ``Let's see what we
made so far.
We want to be able to add new users
const ContactForm = {
  template: `


  `,
}
<stack-layout width="90%" style="background-color: #fff;">
<stack-layout style="height: 150; background-color: #00aafc;">
<label :text="isNew ? 'Add Contact' : 'Edit Contact'" class="tab-title"
style="margin-top: 80;"></label>
</stack-layout>
<label text="Name" style="margin: 10; font-size: 12;"></label>
<text-field v-model="_contact.name" hint="Contact Name"></text-field>
<label text="Phone" style="margin: 10; font-size: 12;"></label>
<text-field v-model="_contact.phone" hint="Contact Phone"></text-field>
<grid-layout columns="*, *" height="40">
<button col="0" text="Cancel" @tap="cancel"></button>
<button col="1" text="Save" @tap="save"></button>
</grid-layout>
</stack-layout>const ContactForm = {
template: `
`,
}Add the rest
const ContactForm = {
  props: {
    contact: {
      default() {
        return { name: '', phone: '', recent: false, favorite: false }
      }
    },
    isNew: Boolean
  },

  template: `...`,

  created() { this._contact = Object.assign({}, this.$props.contact) },

  data() {
    return {
      _contact: {},
    };
  },

  methods: {
    save() {
      this.$modal.close(this._contact);
    },
    cancel() {
      this.$modal.close();
    },
  }
};
Now we just use it
<action-bar title="I 😍 NativeScript-Vue">
  <action-item android.systemIcon="ic_menu_add" @tap="showForm()"></action-item>
</action-bar>
showForm(contact) {
const isNew = !contact;
const options = {
context: {
propsData: {
contact: contact,
isNew: isNew,
}
}
}
this.$showModal(ContactForm, options).then((res) => {
if (res) {
if (isNew) {
this.contacts.push(res);
} else {
// update existing contact
for (const prop in res) {
contact[prop] = res[prop]
}
}
}
});
}We can edit contacts
And create new contacts
It's tedious to write your templates as string literals...
But there are .vue files to make your life easier
Single File Components
<template>
    <!-- Your components template goes here -->
</template>

<script>
    // Your JavaScript goes here
</script>

<style>
    /* Your CSS goes here */
</style>

<style scoped>
    /* Your scoped CSS goes here */
</style>AwesomeComponent.vueYou can use them in nativescript too!
tns create nativescript-vue-app --template https://github.com/tralves/nativescript-vue-rollup-templateAnd finally, let me show you NativeScript Sidekick
An extension to the NativeScript CLI
Manage plugins
Debug apps using chrome devtools
Build apps locally and in the Cloud
Let me show you
NativeScript-Vue

NativeScript Slack Community
In the #vue channel
Thank You!
@igor_randj