React + Three.js
for Easy 3D
Suzi Curran
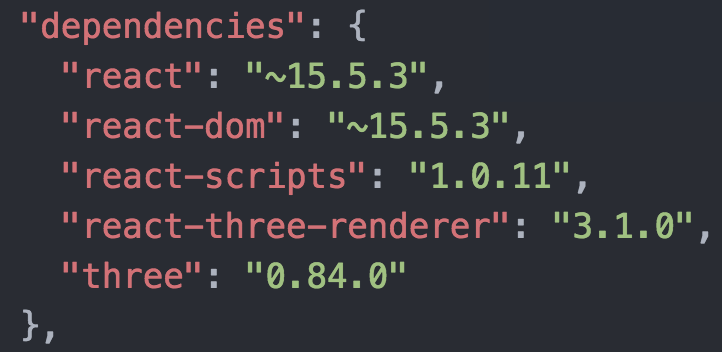
Package dependencies
We'll need to add the three.js and react-three-renderer libraries, and make sure we're using a version of React that will play nicely with them.
Be sure to 'yarn install' once you've made the changes.
Component setup
Go to src/App.js and blow away the CSS and logo imports, replacing them with our dependencies

Then delete everything in render, replacing it with a simple 'hello world' div. This is a good time to do 'yarn start' and make sure your app compiles to localhost:3000 without issues.
Make a scene
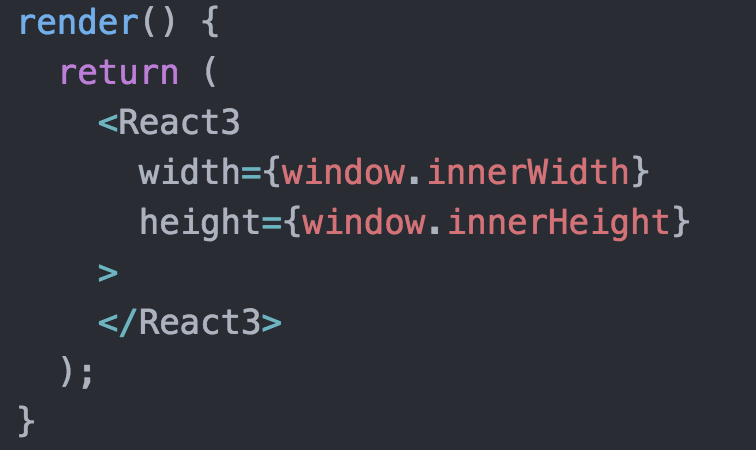
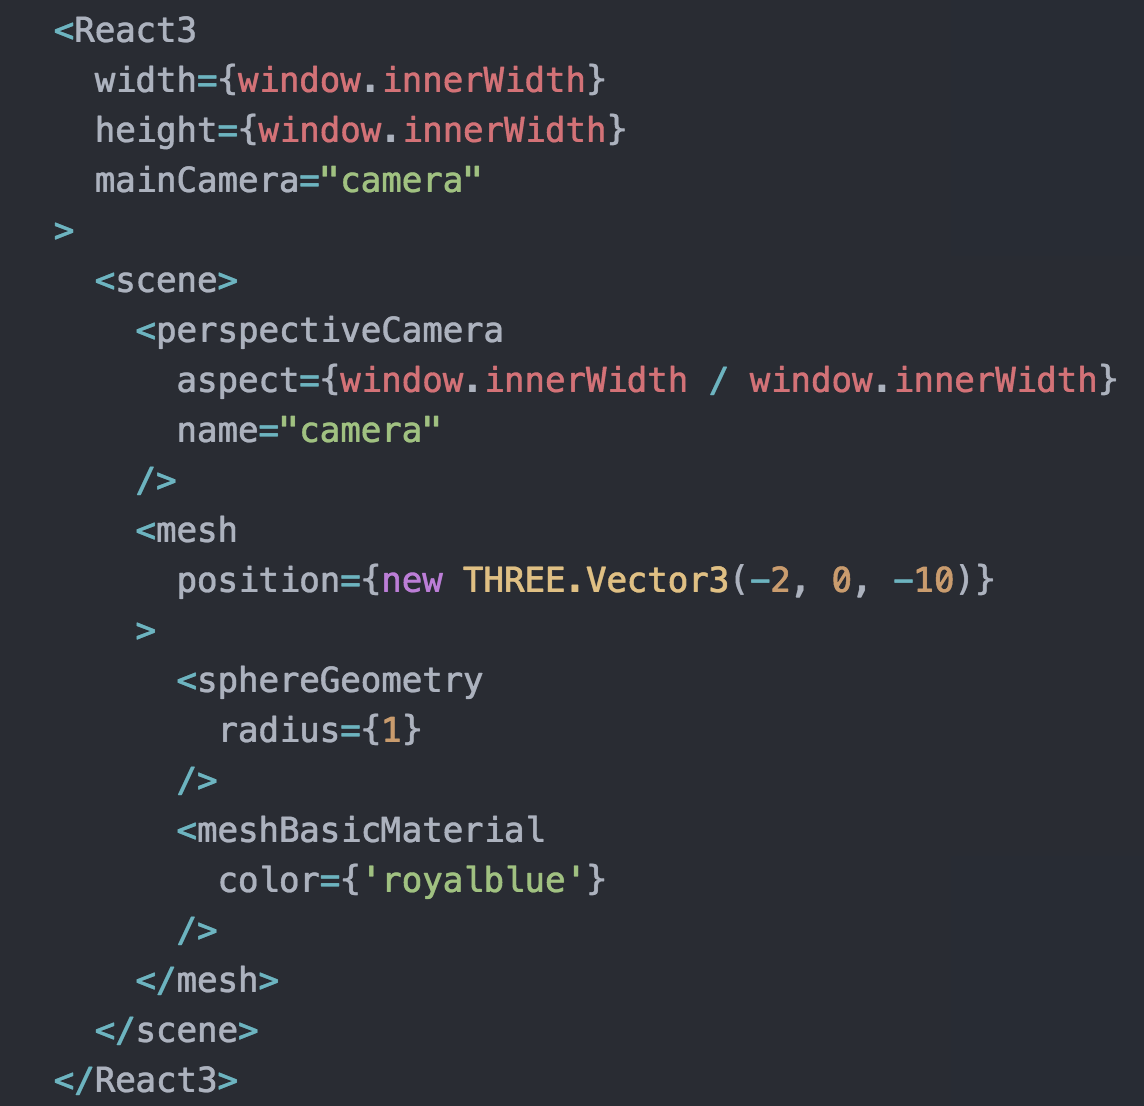
In place of our test div, add a React3 renderer to the app. This is our canvas for the 3D rendering. We're going to set it to take up the full width and height of the window.
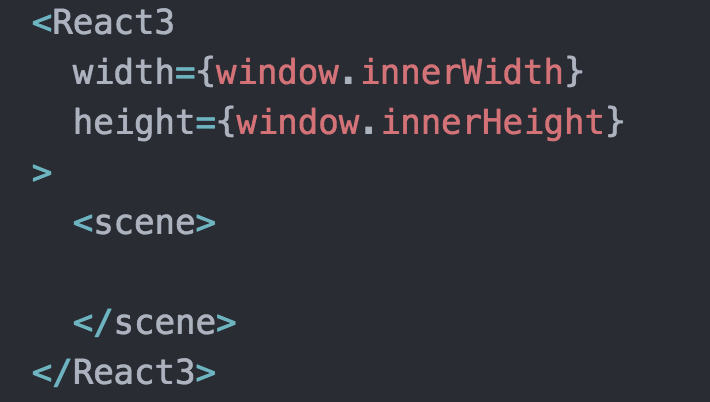
Then, add an empty scene component inside the React3 canvas.
Let's add a camera
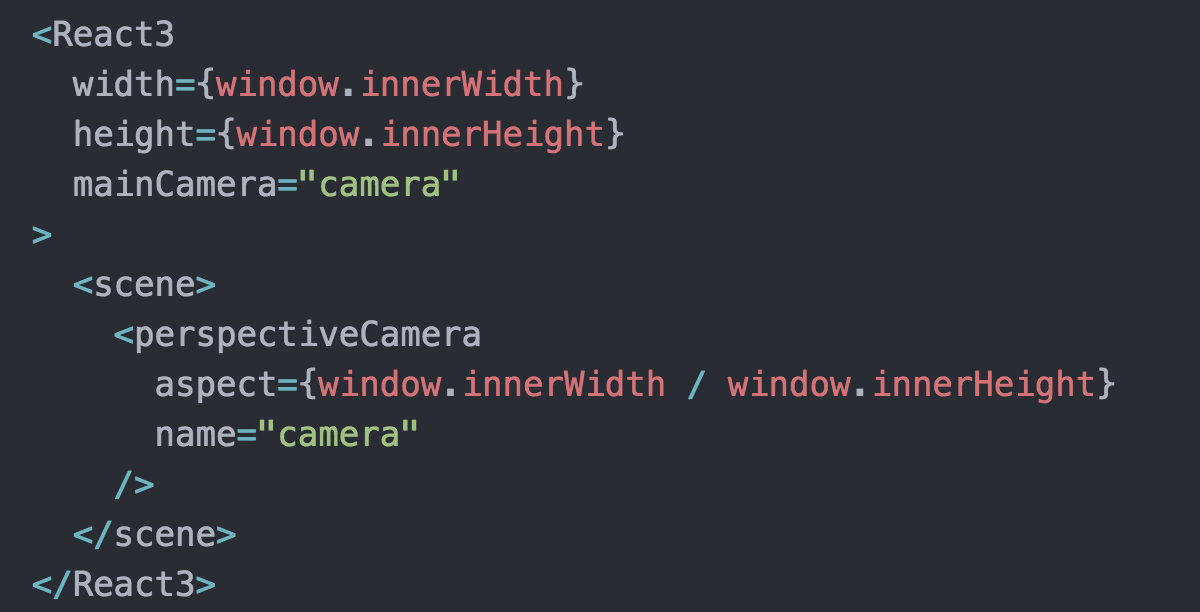
Because a camera is necessary to see what we’re doing, we’re going to by add perspectiveCamera to the scene
To use this camera to render the view displayed to us, set mainCamera prop in React3 canvas to the same name
Let's add a mesh
We need something to look at!
Meshes take location and other props, and contain a geometry and a material
We'll start by creating a mesh and giving it x, y, z coordinates
with the help of a three.js Vector object
This should put it to the "left" and "back" from our camera

Fun with colors and shapes
Our mesh has no shape!
Let’s add sphereGeometry with a radius={1}
It also needs to be made of something!
Add meshBasicMaterial which takes a color prop (we can talk color formats later, but for now let's use a web color like ‘royalblue’)
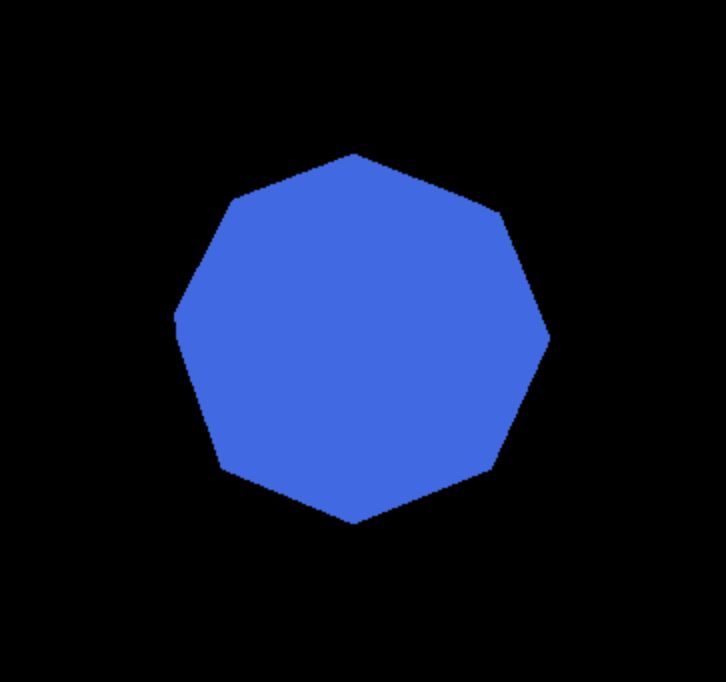
A blue circle appears!
So, why is this just a circle? Didn’t we make a sphere?
meshBasicMaterial renders flat, without accounting for light sources
If we want to render something that responds to light sources and looks 3D, we can (for example) switch from meshBasicMaterial to meshPhongMaterial
Where'd it go?
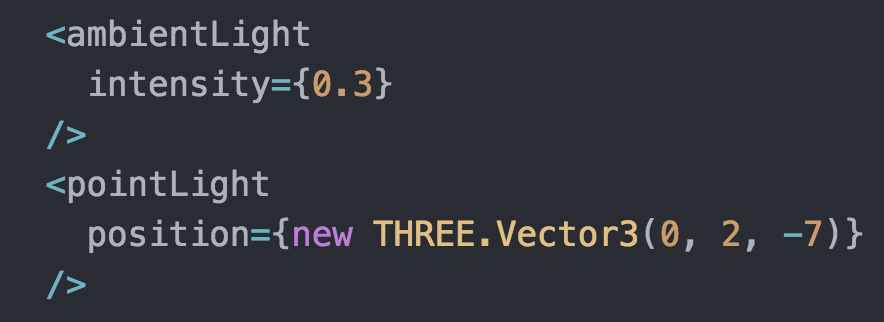
We need to turn on the light!
Adding an ambientLight to flatly illuminate all objects will immediately reveal it, but we can also add a pointLight at a set position to render directional light and shadows
Objects in space
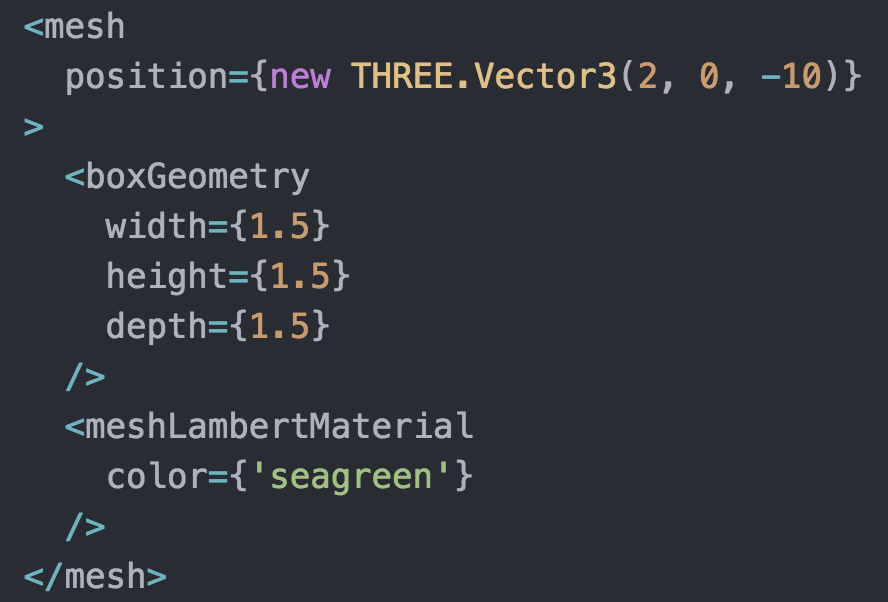
Let’s add another mesh to the scene for contrast,
using different coordinates, geometry, and material
I picked a box for more dramatic shadows and easy resizing
Let's get stateful
We're going to set ourselves up for some animation by storing the rotation values for these objects in state

The rotation prop for meshes can be set like their position

Like the vector for position, we'll use another fancy Three.js object to define rotation
For best effect, make sure both objects are using this new prop!
Ch-ch-changes
For animation purposes, r3r provides the ability to rapidly change the state and take advantage of React’s quick re-renders (~60 times/second!)
In order to do this, we define a callback function for the React3 component's onAnimate prop
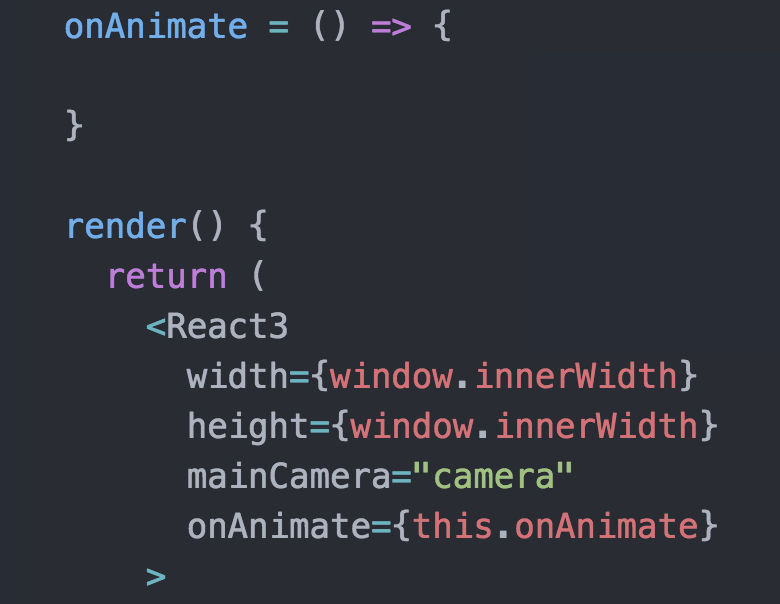
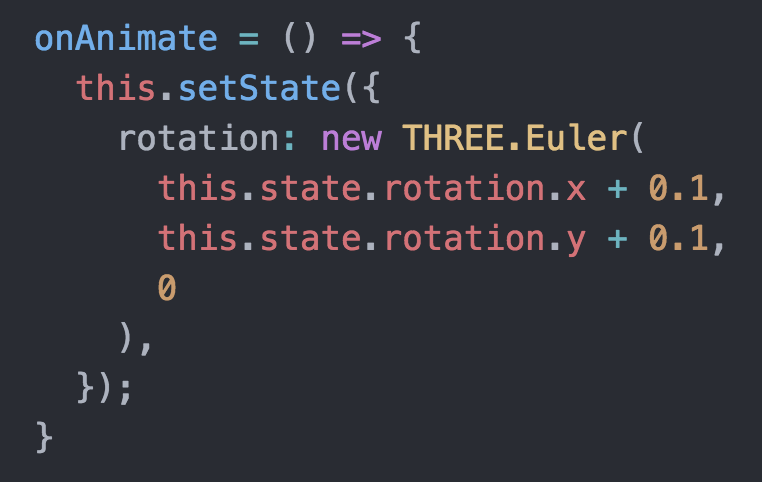
Rotate your objects
And now, in the onAnimate callback, we’ll overwrite the position with slightly different values each frame
This is just the beginning!
Move the camera! Swap out shapes! Wrap them in images!
The Three.js documentation has been my best resource for
handling meshes, scenes, lighting, and more. It's often more useful than the react-three-renderer docs!
That said, the react-three-renderer docs have some great example code, including scenes with collision and user input
http://toxicfork.github.io/react-three-renderer-example/
Have fun!