Getting Started to React Native

Syed Saad Qamar
Jr. Software Developer
at IOmechs
/SyedSaadQamar96
/in/syed-saad-qamar
/saadqamar01
/saadqamar96


React Native is a JavaScript framework for writing real, natively rendering mobile applications for iOS and Android. It’s based on React, Facebook’s JavaScript library for building user interfaces, but instead of targeting the browser, it targets mobile platforms. In other words: web developers can now write mobile applications that look and feel truly “native,” all from the comfort of a JavaScript library that we already know and love. Plus, because most of the code you write can be shared between platforms, React Native makes it easy to simultaneously develop for both Android and iOS.
What is React Native?
Two Way to Run React Native App
- React Native Expo
- React Native CLI
Expo
- Very interesting thing in expo that most develop is used expo that is it's installation is very easy as compare to CLI.
- The disadvantage is that you can't write custom native Modules, or integrate third-part libraries which depend on custom native code that isn't build into Expo.
CLI
- The disadvantage of expo comes over the cli.
- The downside of the approach is that you'll need to set up the native IOS and Android build chains on your computer, and it's significantly more cumbersome to get started developing and deloying your app.
Diff. b/w expo and cli
Quick start with Expo
1. First you need to installed node.js on your system it version must be 6 or newer.
2. npm install -g create-react-native-app
Run this command to install create native app globaly on your system.
3. Now create your app project using this below command here I'm creating hello world project.
create-react-native-app <your-project-name>
create-react-native-app HelloWorld
After create this command project will be installed in your folder directory then open cmd and type below commands
cd HelloWorld
npm start
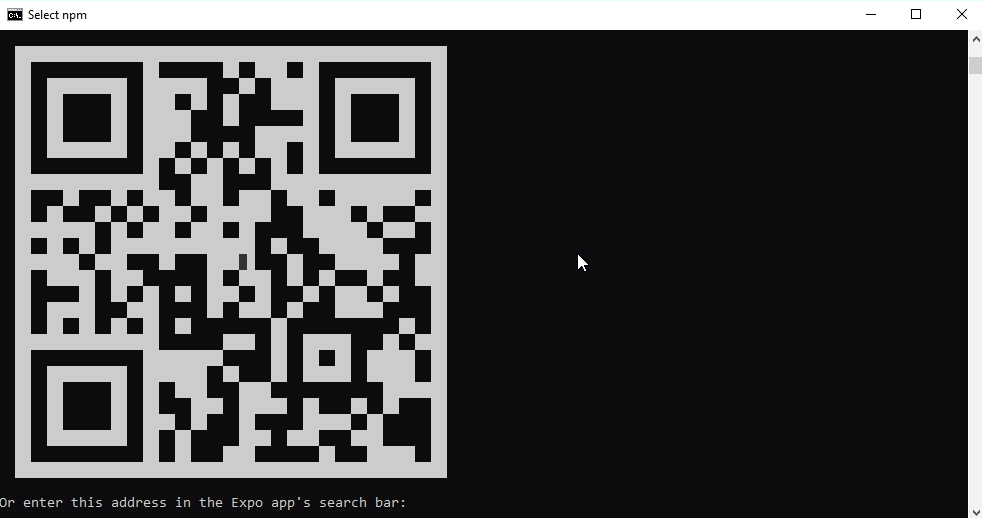
After your cmd give you a QR code it looks
like that then install expo app on your mobile
and scan this QR code. App will be run on your
mobile and also make sure that your android
version must be greater than 4 otherwise it will
give network error.

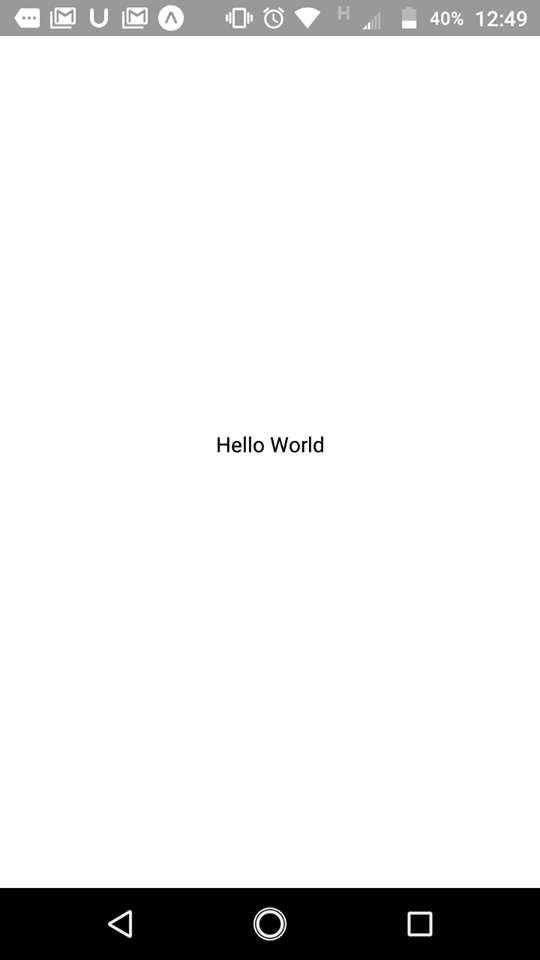
opne your project on your editor and do change on code then save code and shake your mobile and reload the app.
Congratulations! You've successfully run and modified your first React Native app.

React Native CLI
Very Complicated installation of RNC, many develop hate to use CLI but don't worry i'll guide you very easy to setup RNC enviroment on your system so keep calm and follow these step that I'll tell.
let's start, first of all node 6 or newer, Python2 or newer and java JDK 8 or newer should install in your system if it's not installed in your system don't worry we will install these through chocolatey, a popular package manager of windows.
1. setup of chocolatey, open cmd to administrator and paste below line and press enter it will install chocolatey in your system.
@"%SystemRoot%\System32\WindowsPowerShell\v1.0\powershell.exe" -NoProfile -InputFormat None -ExecutionPolicy Bypass -Command "iex ((New-Object System.Net.WebClient).DownloadString('https://chocolatey.org/install.ps1'))" && SET "PATH=%PATH%;%ALLUSERSPROFILE%\chocolatey\bin"
2. Paste below on cmd, it'll install node, python, java in your system
choco install -y nodejs.install python2 jdk8
if your already install node please remove nodejs.install from upper command.
3. After install all of those then download and install Android Studio in your system.
Download link https://developer.android.com/studio/
After download:
Choose a "Custom" setup when prompted to select an installation type. Make sure the boxes next to all of the following are checked:
1. Android SDK
2. Android SDK Platform
3. Performance (Intel ® HAXM)
4. Android Virtual Device
Then, click "Next" to install all of these components
Once setup has finalized and you're presented with the Welcome screen, proceed to the next step.
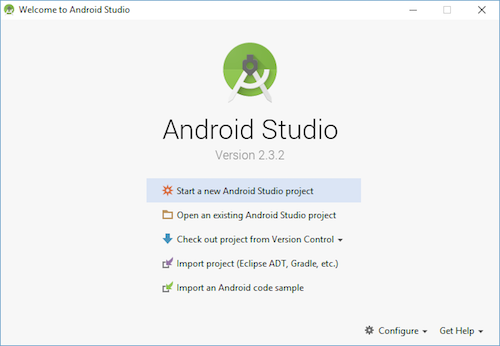
The SDK Manager can be accessed from the "Welcome to Android Studio" screen. Click on "Configure", then select "SDK Manager".
-
Click SDK platform and second step is checked show Package Details,
- Checked this packages
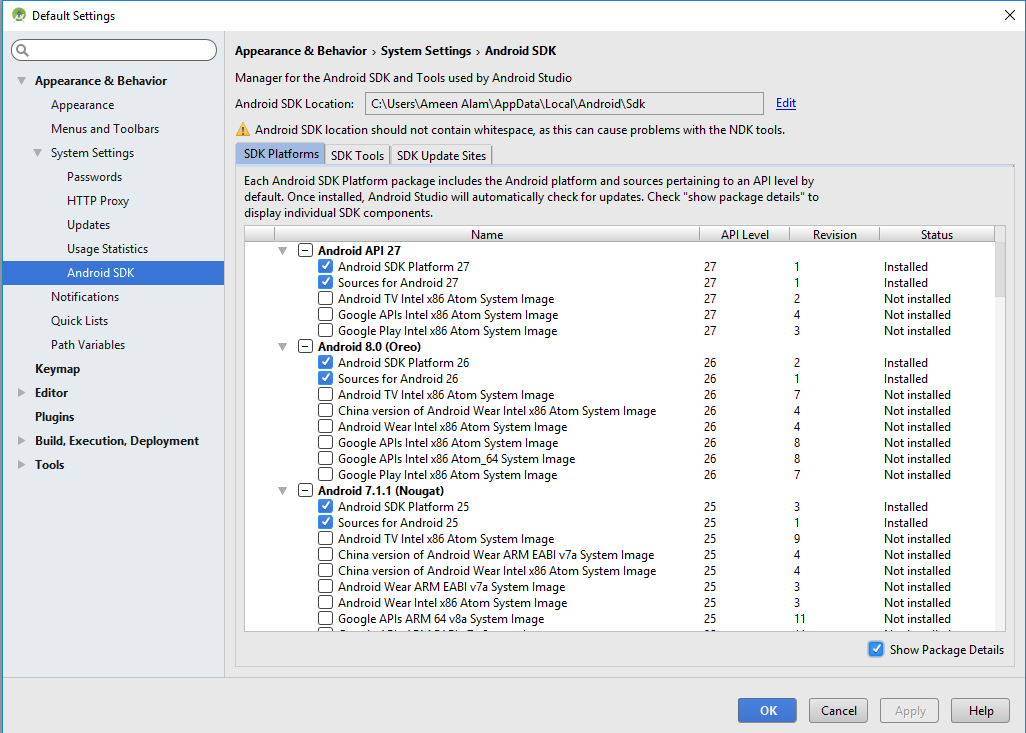
3. Checked these as shown in picture

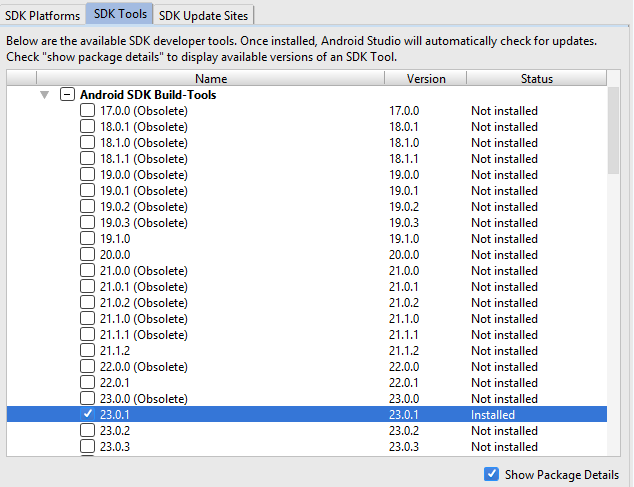
4. Next, select the "SDK Tools" tab and check the box next to "Show Package Details" here as well. Look for and expand the "Android SDK Build-Tools" entry, then make sure that 23.0.1 is selected.
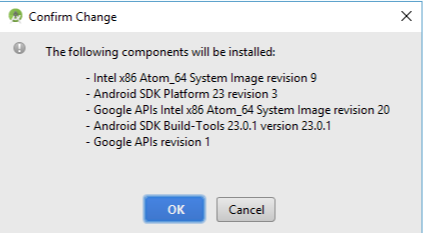
Finally, click "Apply" to download and install the Android SDK and related build tools.
After Installed, then Configure the ANDROID_HOME environment variable
The React Native tools require some environment variables to be set up in order to build apps with native code.
Open the System pane under System and Security in the Control Panel, then click on Change settings.... Open the Advanced tab and click on Environment Variables.... Click on New... to create a new ANDROID_HOME user variable that points to the path to your Android SDK:
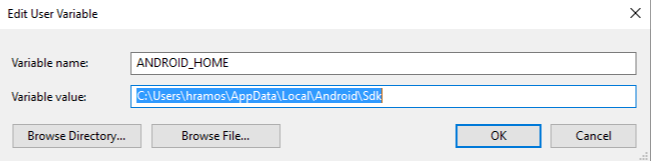
The SDK is installed, by default, at the following location:
c:\Users\YOUR_USERNAME\AppData\Local\Android\Sdk
Almost setup is done now Preparing the Android device:
You will need an Android device to run your React Native Android app. This can be either a physical Android device, or more commonly, you can use an Android Virtual Device which allows you to emulate an Android device on your computer.
In our case we will install genymotion to run virtual device.
First of all download the genymotion and oracle VM virtualbox from below link:
https://www.genymotion.com
first signup and go to free trial and download genymotion with oracle VM virtualbox.
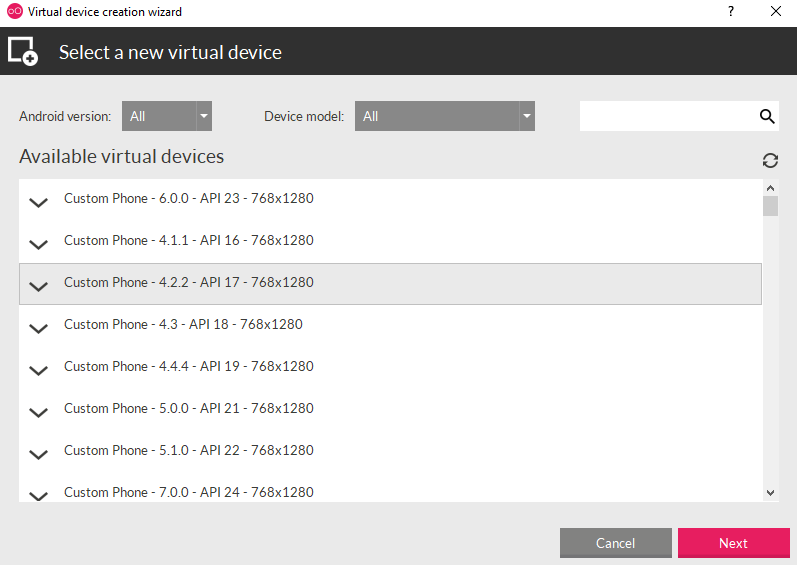
After download then installed it, open genymotion and select personal used then signin your genymotion account. click on top add button installed the virtual device. In our case we will installed 6.0.0-API 23.
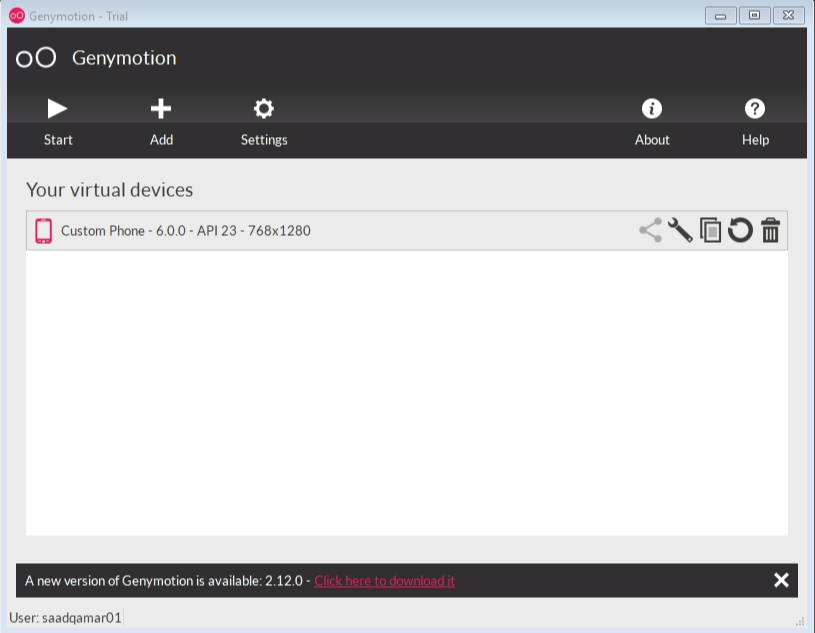
After installed it should look like that
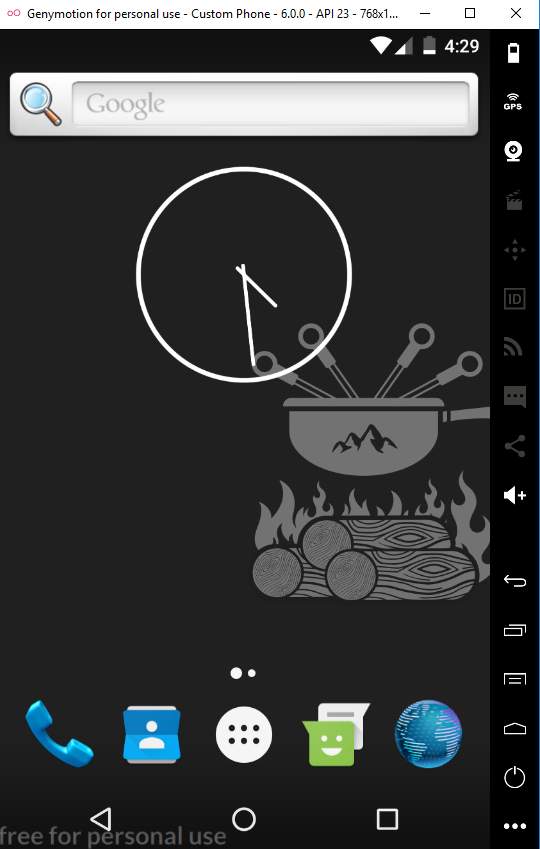
Click on start and now your first virtual will appear it should look like that
Now create your first app using this command
npm install -g react-native-cli
react-native init AwesomeProject
After create a first project go to project folder and open cmd then type below command
react-native run-android

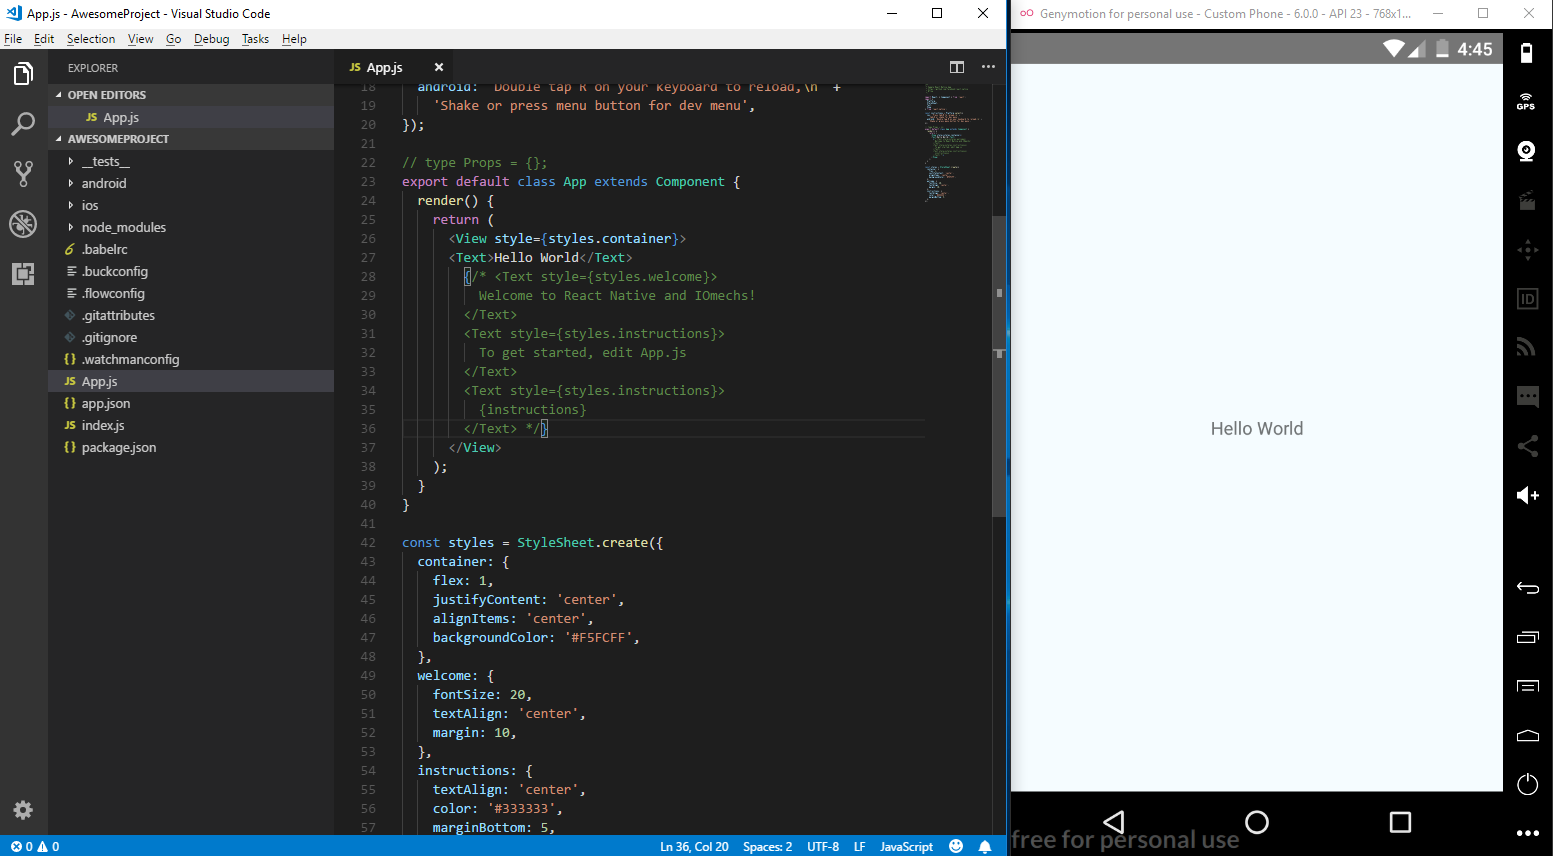
First time it will take some time and your virtual device should look like.
Make Changes and reload your genymotion
Congratulation!!! you have run your first react native cli app