動画/音声共有ツールを作った話
自己紹介
- TeYmmt (Teruhisa Yamamoto)
- Javascript, nodejs歴1年ちょい
- Meteor歴2週間ないぐらい
- C, C++, (C#)を学生時代では使用(研究用)
- 特にwebアプリケーション系は素人
発表内容
- 作った(作ろうとした)物の概要説明
- 必要となる機能と実装方法の紹介
- まとめ
目指す物(動画/音声共有ツール)
- ユーザーが持っているファイルやその場で撮影/録音したファイルを投稿し、閲覧できるものを作る(ゆるく)
- 画像共有はやってる人も多そうだし、動画と音声ファイルを扱ってみよう
- 一応ブラウザだけで完結できるように、録画/録音もブラウザで出来るようにしよう
- 必要そうな機能のみをとりあえず実装出来るように頑張ろう
必要となりそうな機能
- 大容量ファイルのアップロード機能
- ブラウザでの撮影/録音機能
- データが重くなるのでリアクティブに見せる方法
手を付けられず・・・orz
ファイルのアップロードについて
- https://github.com/CollectionFS/Meteor-CollectionFS
- https://github.com/CollectionFS/DEPRECATING-cfs-gridfs/tree/master/packages/gridfs
パッケージ
・CollectionFS
サポートしてる保存場所
・filesystem(アプリケーションサーバー)
・mongodb(gridfs)
・クラウドストレージ(AWS-s3, dropbox)
・CollectionFS(ファイルマネージャー)
CollectionFSの使い方
$ meteor add cfs:standard-packages
$ meteor add cfs:gridfs
var imageStore = new FS.Store.GridFS("images", {
  mongoUrl: 'mongodb://127.0.0.1:27017/test/', // optional, defaults to Meteor's local MongoDB
  mongoOptions: {...},  // optional, see note below
  transformWrite: myTransformWriteFunction, //optional
  transformRead: myTransformReadFunction, //optional
  maxTries: 1, // optional, default 5
  chunkSize: 1024*1024  // optional, default GridFS chunk size in bytes (can be overridden per file).
                        // Default: 2MB. Reasonable range: 512KB - 4MB
});

Images = new FS.Collection("images", {
  stores: [imageStore]
});CollectionFSの使い方
// Add file reference of the event photo to the event
var file = $('#file').get(0).files[0];
var fileObj = eventPhotos.insert(file);
events.insert({
  name: 'My Event',
  photo: fileObj
});
———————————————————————————
// Later: Retrieve the event with the photo
var event = events.findOne({name: 'My Event'});
// This loads the data of the photo into event.photo
// You can include it in your collection transform function.
event.photo.getFileRecord();
保存したファイルの参照をするために、
・ファイルの_idを保存してあげる
・ファイルオブジェクトごと保存してあげる
追記)ファイルオブジェクトごと保存は注意!
必要となる情報を.url()や.name()などで分けて保存を推奨
もし入れる場合は、meteor add cfs:ejson-file を実行すること
CollectionFSの使い方
var storeFiles = new FS.Store.GridFS("files");
var Files = new FS.Collection("files", {
  stores: [
    storeFiles
  ]
});
storeFiles.on('stored', function(storeName, fileObj){
    // do something
});
ファイルアップロードの完了検知
File Manipulation
- transformWrite / transformRead
- beforeWrite
- image optimizing
- filtering
Manipulation Samples
$ brew install graphicsmagick
$ meteor add cfs:graphicsmagick
var createThumb = function(fileObj, readStream, writeStream) {
// Transform the image into a 10x10px thumbnail
gm(readStream, fileObj.name()).resize('10', '10').stream().pipe(writeStream);
};
Images = new FS.Collection("images", {
stores: [
//you should write it top of list if you want to show little size image first
new FS.Store.GridFS("thumbs", { transformWrite: createThumb }),
new FS.Store.GridFS("images"),
],
filter: {
allow: {
contentTypes: ['image/*'] //allow only images in this FS.Collection
}
}
});Usage for view
Template.imageView.helpers({
  images: function () {
    return Images.find(); // Where Images is an FS.Collection instance
  }
});
<template name="imageView">
<div class="imageView">
{{#each images}}
<div>
<a href="{{this.url}}" target="_blank">
<img src="{{this.url store='thumbs' uploading='/images/uploading.gif' storing='/images/storing.gif'}}"
alt="" class="thumbnail" />
</a>
</div>
{{/each}}
</div>
</template>Additional UI helpers for CollectionFS
$ meteor add cfs:ui{{#with FS.GetFile "images" selectedImageId}}
<img src="{{this.url store='thumbnails'}}" alt="">
{{/with}}{{#each images}}
Delete {{this.name}}: {{#FS.DeleteButton class="btn btn-danger btn-xs"}}Delete Me{{/FS.DeleteButton}}
{{/each}}{{#each images}}
{{#unless this.isUploaded}}
{{> FS.UploadProgressBar bootstrap=true
class='progress-bar-success progress-bar-striped active'
showPercent=true}}
{{/unless}}
{{/each}}Helpers
https://github.com/CollectionFS/Meteor-cfs-ui
Additional UI helpers for CollectionFS
Template.files.events({
    'dropped .imageArea': FS.EventHandlers.insertFiles(Images, {
      metadata: function (fileObj) {
        return {
          owner: Meteor.userId(),
          foo: "bar"
        };
      },
      after: function (error, fileObj) {
        console.log("Inserted", fileObj.name);
      }
    }),
    'change #imageInput': FS.EventHandlers.insertFiles(Images, {
      metadata: function (fileObj) {
        return {
          owner: Meteor.userId(),
          foo: "bar"
        };
      },
      after: function (error, fileObj) {
        console.log("Inserted", fileObj.name);
      }
    }),
});
Event Handler Creators
カメラ、マイクを使って
撮影/録音する方法
- http://www.html5rocks.com/ja/tutorials/getusermedia/intro/
- https://github.com/muaz-khan/RecordRTC
HTML5(webRTC)でAudio/Video capture
RecordRTCを使用
- 限られたモダンブラウザのみ対応
- エンコードは、Audio File : WAV, Video File : WebM
- 音声と動画は別ファイルで記録
- 各ファイルのマージはサーバー側でやる必要あり
- 詳細は割愛
簡単に使い方を紹介
navigator.getUserMedia({
    audio: setAudio, //true or false
    video: setVideo //true or false
}, function(stream) {
    mediaStream = stream;
    if(setAudio) {
      recordAudio = RecordRTC(stream, {
        bufferSize: 16384
      });
      recordAudio.startRecording();
    }
    if(setVideo) {
      if (!isFirefox) {
        recordVideo = RecordRTC(stream, {
            type: 'video'
        });
        recordVideo.startRecording();
      }
    }
}, function(error) {
    alert(JSON.stringify(error));
});

// blob, DataURL, etc.
recordVideo.stopRecording(function() {
  videoFile = new File([recordVideo.getBlob()], tmpFileName + '.webm', {type:'video/webm'});
});
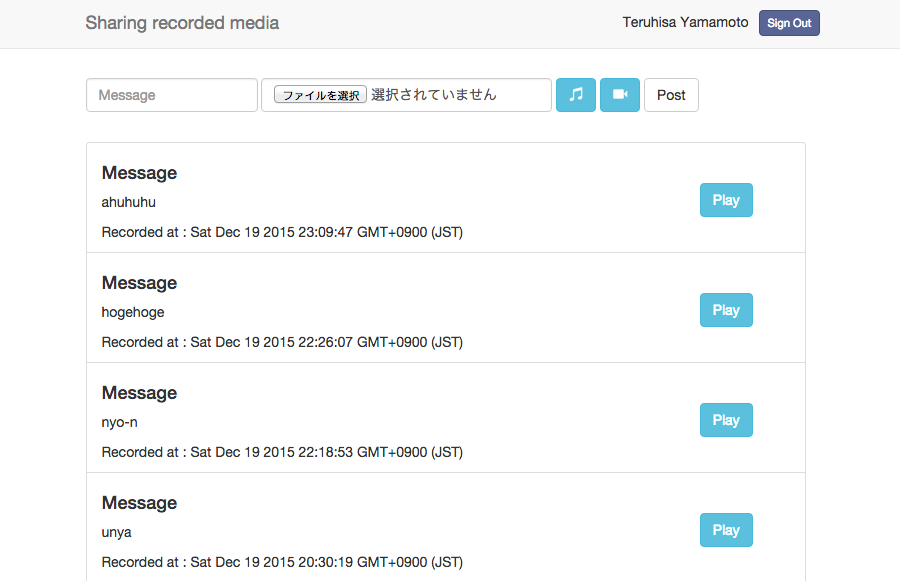
Let's Meteor
・・・Ta-Dah!!

ハマった所を紹介
サーバ側でのvideo, audioファイルのマージ部分でドハマリ
- recordRTCによって保存できるのは別々のvideo(.webm)とaudio(.wav) (音声と動画は別々)
- サーバ側でマージして一つのファイルにしてあげる必要がある(もしかしたら別に方法はあるかも・・・)
- ffmpegを使用(ライブラリを別途インストール)
別プロセスで実行させる・・・非同期・・・嫌な予感
怒られた
-
Error: Meteor code must always run within a Fiber. Try wrapping callbacks that you pass to non-Meteor libraries with Meteor.bindEnvironment.
Fiber?
Meteor.bindEnvironment?
非同期処理に注意
- Meteorはfibersライブラリを使用している
- 非同期処理をさせようとすると、その中でFiberを使えと怒られる
- Meteor.bindEnvironment()は、非同期部分を新しいFiber()で実行してくれるようにする関数(公式には使い方載ってない)
- Meteor.wrapAsync(func, [context])を使用(公式参照)
var boundFunction = Meteor.bindEnvironment(function(){
    log('hello');
}, function(e) {
    throw e;
});

setTimeout(boundFunction, 5000);
Demo
まとめ
- 制作日数1週間〜10日ぐらい?
- 公式、CollectionFSともにドキュメントに書いてない所でハマる
- Meteor.bindEnvironment()、(FS.Store).on('stored', func)
- 作るのに必死で説明不足多々・・・orz
- アップローディング表示でユーザーフレンドリーに